
7. Navigation
When you think of the Global Positioning System (GPS), you may think of handheld or in-car devices. But the technology has fallen in price to the point at which GPS receivers are becoming ubiquitous in electronic devices such as cell phones (especially smartphones). Heck, even some wristwatches have GPS receivers built in. For this reason, it shouldn’t be a surprise to you that the Motorola Xoom has a built-in GPS receiver—one that’s capable of making your Xoom much more useful and powerful.
Whether you’re using the Xoom as an in-vehicle navigation device or keeping it in your backpack as you walk the streets of downtown San Francisco so that your friends can see exactly where you are via Google’s Latitude software, the Xoom’s GPS feature is powerful enough and useful enough that it merits a chapter all its own.
Using the Maps App
Maps is the Xoom’s built-in navigation app, ready to spring into action whenever you need directional advice. Maps is a very powerful tool that can behave just like an automotive GPS, but because of its large screen and vast map database (when the Xoom is connected to the Internet), it can also serve as a sort of virtual guide.
This section shows you how to open Maps, how to get Maps to take you to a specific address, and how to find and get to a particular attraction. It even shows you how to get transit information for the bus ride home.
At this writing, Maps is still in beta form, so some changes may occur by the time you read this book.
To open the Maps app
- Touch and hold an open area of the home screen, and swing the screen to the right, as shown in
 .
.
 Swing to the screen that’s to the right of the home screen.
 - Touch the Maps icon
 .
.
 Touch Maps.
The Maps app opens
 .
. Note the various icons in Maps.
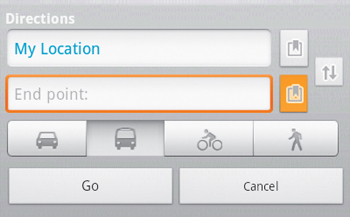
To navigate to an address
- In the Maps main screen
 , touch the Directions icon
  .
.
 Touch Directions.
The Directions dialog box opens
 .
. The Directions dialog box has a lot of little buttons in it.
 - Type the address in the end-point field
 .
. - Touch the Go button.
Maps displays directions to that address.
To find directions from your current location
- In the Maps main screen , touch the Directions icon
 .
.
The Directions dialog box opens
. - Do one of the following:
• If the start-point field has the phrase My Location in it, as shown in
, skip to step 3.• If the start-point field is empty, touch the start-point bookmarks icon
and choose My Current Location in the menu that pops up  .
. Choose My Current Location as the start point.
Next, you must choose the end point of your trip.
- Touch the end-point bookmarks icon
 .
.
 Touch the icon to the right of the end-point field.
The Choose End Point menu pops up
 .
. Choose End Point menu.
 - Choose Contacts to find the end point in your contacts list, or choose Point on Map to point to a location on the map.
For this exercise, choose Point on Map.
- Select the point on the map for which you want to get directions
 .
.
 Choose the end point by touching the destination on a map.
The second time you touch the end point on the map, the Directions dialog box
opens. - In the dialog box, touch the Go button
 , which is now orange.
 Touch Go.
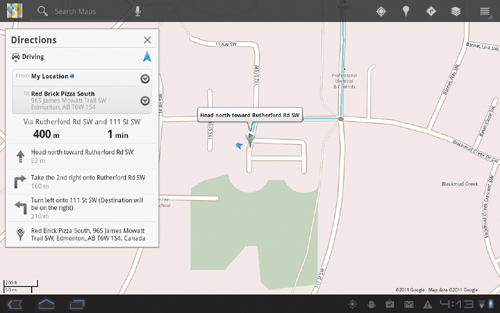
The Maps app takes a moment to calculate the directions, as shown in
 .
. The directions are being calculated.
When the calculation is done, Maps displays step-by-step directions to your destination
 .
. Directions to the specified location.
To navigate to an attraction
- In the Maps main screen , touch the Places icon
 .
.
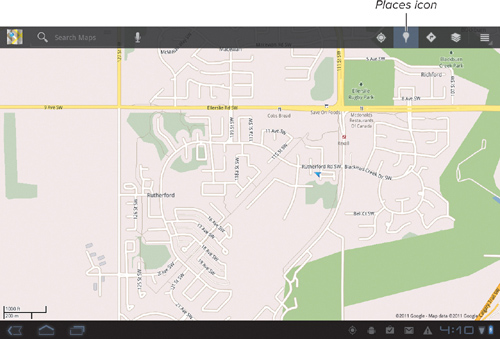 Touch Places.
The Places window pops up
 .
. Places window.
 - Select an attraction.
For this exercise, select Restaurants. Maps searches for nearby restaurants
 .
. Wait for Maps to find the local restaurants.
When the search is complete, a list of restaurants appears on the left side of the screen
 .
. A list of restaurants comes up.
 - Select a restaurant.
Maps gives you an amazing amount of detail about the restaurant you selected
 , from its address and distance from your current location to the menu and local reviews.
 Maps provides a large amount of information about your choice.
 - Touch the Directions icon to get directions.
A pop-up menu asks whether you want driving navigation, walking navigation, or directions.
- For this exercise, choose Get Directions
 .
.
 Choose Get Directions.
Maps displays directions to the restaurant
 .
. Your directions appear.
Configuring Maps
Maps is a very easy-to-use and intuitive program, but a few features are worth pointing out for first-time users or for users who haven’t had time to explore the app’s full capabilities.
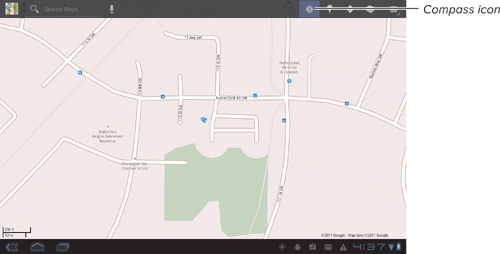
To change the map view
• To change the default view ![]() , touch the Compass icon
, touch the Compass icon ![]() .
.
![]() The default view is flat 2D.
The default view is flat 2D.
![]() Touch Compass.
Touch Compass.
The map changes to a chase-style 3D view ![]() .
.
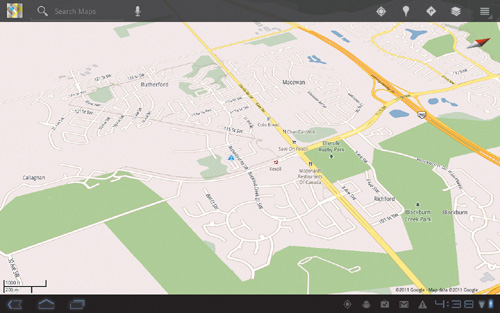
![]() A chase-style view.
A chase-style view.
A chase-style view (also called an isometric view) is best described by the analogy of flying behind a car in a helicopter 1,000 feet off the ground. Whereas a 2D map provides a straight-down viewpoint, a 3D chase view shows you a perspective looking in one direction from a point above the terrain.
To change to satellite view
- In the Maps main screen (refer to in “To open the Maps app” earlier in this chapter), touch the Layers icon .
 Touch Layers.
The Layers window appears.
- Select Satellite .
 Choose the Satellite option.
Maps overlays a satellite image of the area on the map
. Satellite view.
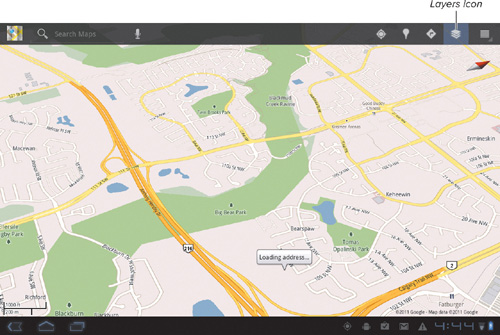
To see more layers
- In the Maps main screen (refer to in “To open the Maps app” earlier in this chapter), touch the Layers icon to open the Layers window .
- Touch the More Layers button .
 Select More Layers.
The More Layers menu pops up
. This menu gives you even more layers to choose among.
 - Touch the layer you want to see.
Using Google Latitude
The Google Latitude app lets specific people in your contact list see exactly where you are at any given time. Plenty of folks aren’t crazy about the idea of letting their friends knowing where they are 24/7, but for many people, Google Latitude has utility. If you’re traveling in a foreign country, for example, you can use Latitude to broadcast your location to friends and family abroad. If you’re a social butterfly, it can be handy to let friends know where you are so that they can catch up with you in a bar or at a restaurant.
On the Xoom, Latitude is tied in with the Maps app and can even be used as a layer in Maps so that you can see where your friends are anywhere in the world.
To activate Latitude in Maps
- Complete steps 1 and 2 of “To open the Maps app” earlier in this chapter.
- In the Maps main screen, touch the Layers icon to open the Layers window.
 Touch Layers.
 - Select Latitude .
 Touch Latitude.
Latitude opens
. You should see your own picture on the map, as well as a bar in the top-left corner labeled Latitude. Latitude shows your location.
 - Touch the Latitude bar to open the Latitude window.
- Select a friend you want to add to Latitude by touching the icon next to his or her name .
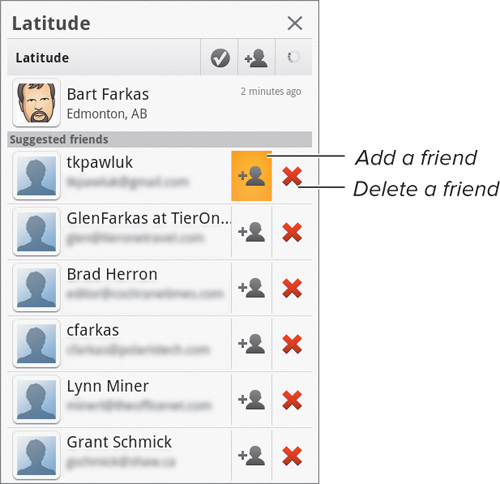 Add a friend here.
 - In the pop-up dialog box , touch the Yes button to send a Latitude friend request.
 Send a friend request.
 - Repeat steps 5 and 6 to invite all the people you want to see in Latitude.
When your friends have accepted your Latitude requests, their locations will appear on your maps.
To turn Latitude off
- Complete steps 1 and 2 of “To activate Latitude in Maps” earlier in this chapter.
- In the Layers window, touch Latitude to deselect it (remove the green check).
Beyond navigation, the Xoom’s GPS feature comes in handy for hundreds of teeny-tiny reasons, which tie into individual apps that are interested in knowing your exact position. One such app is Google Sky Map
, which lets you use the Xoom’s camera and screen to search for planets and stars in the night sky. Google Sky Map uses the Xoom’s location to do its job.