
7 Processing Equipment

Contents
Automatic Temperature Regulation
Chemical Storage and Waste Disposal
Sinks
Most beginning photographers start by putting trays of chemicals on the kitchen table or counters. They soon learn that spills are impossible to avoid and temperatures in the trays difficult to hold at a constant level. In addition, the cleanup time is longer than need be because of the care with which the counters and tables have to be cleaned. The solution is a sink large enough to hold all of the processing trays. Photographic sinks should have a large area and a shallow depth. They can be equipped with temperature control faucets, standpipes, and duck-boards to make them even more efficient. You can build your own of wood, as shown in Chapter 6, but commercial models are available that are perfect for the home darkroom.
Commercial sinks come in either plastic or stainless steel models. Stainless is extremely long-lasting but much more expensive. Stainless sinks also tend to be a little noisy with trays and tongs banging against them, but their durability and ease of cleaning make them a dream to use. Plastic sinks are equally efficient at keeping the spills contained, are easy to clean, and, given reasonable care, should outlast even the youngest photographer. Sinks can be ordered from suppliers either with or without stands. The stands make them portable if you are moving. They can also be built in without using the stand, but in doing so you are making it much more difficult to remove and install in another location. Be sure the stand is made of a corrosion-proof material or is well painted; the chemicals used in photography will badly corrode most steel stands, and rust scaling will detract from the cleanliness and appearance of the room.
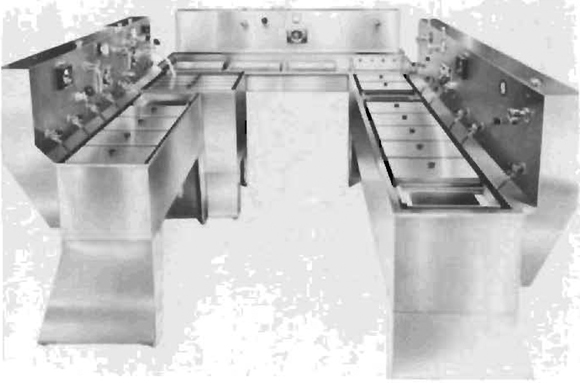
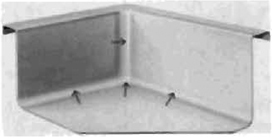
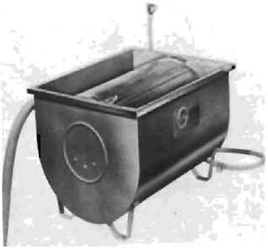
Stainless Steel Darkroom. This Calumet darkroom setup illustrates equipment for a high-volume operation. The sinks provide for bulk-processing of film and prints and have all of the best possible features, including temperature regulation, gaseous burst agitation, stainless steel construction, and daylight tanks.
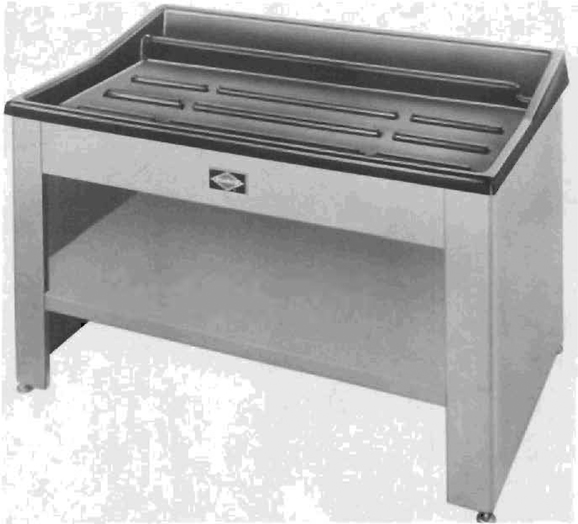
Sink with Ribbed Bottom. This NuArc plastic sink features the dump trough in the back and a ribbed bottom making duckboards unnecessary. A simple straightforward design.
Plastic Sinks. This ABS plastic sink by NuArc has a unique design that allows you to dump chemicals without affecting the temperature bath for processing trays. The trough running along the back of the sink is connected to a fast-emptying drain. The sink also features a ribbed bottom that allows water to circulate freely under the tray for more efficient temperature control. It comes equipped with a built-in viewing area that doubles as a light table and squeegee board—ideal for those working with large negatives or graphic arts materials.
Note the sink sprayer that makes cleaning up easy. This device can be installed on any sink, including one you build yourself.
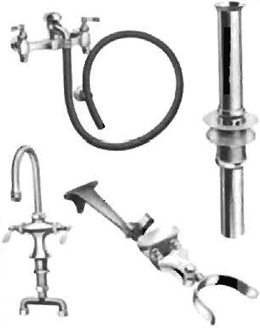
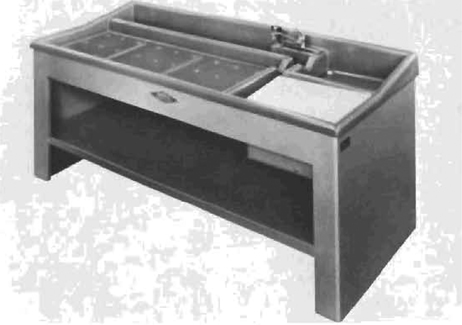
Sink Accessories. When building or buying a sink, there are several accessory items that can be considered. The illustration here shows a knee-operated mixing valve from Eljer that allows you to mix the water at any temperature you desire using your knee, which leaves your hands free to hold the processing trays, film, or whatever. The high faucet is ideal, because it allows for the placement of large graduates and bottles under it for filling. The faucet with the rubber hose attached does the same thing and also eliminates noisy drips, since it lies on the bottom of the sink when not in use, and any water coming out slips quietly onto the sink bottom. The illustration of the drain and standpipe shows how it is assembled.
Courtesy Eljer Plumbingware
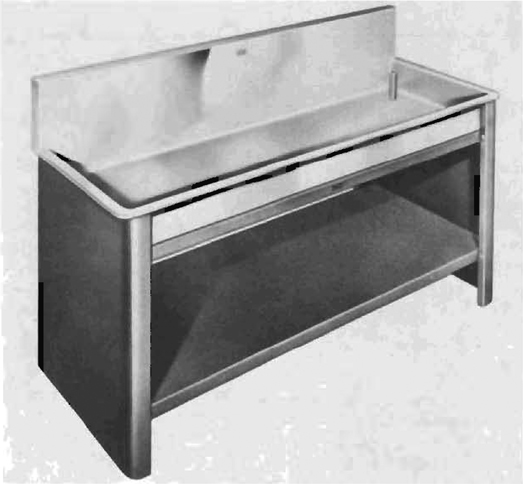
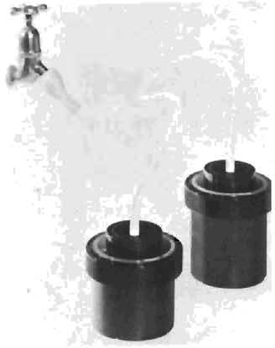
Arkay Sink. This Arkay sink is representative of the many well-designed stainless steel sinks available commercially. The key features are the high splashboard and the rounded corners in the sink that make for fast and easy cleaning. This illustration also shows a standpipe inserted. When the sink is filled, the water rises only to the top of the standpipe and then overflows into it and down the drain. A number of standpipes of different heights allow you to fill the sink to different levels, depending on what is in the water bath. Trays would need a low level of water to keep them regulated, but developing tanks could use a higher level.
Foot-Operated Valve. Kohler makes a foot-operated control valve that allows you to vary the temperature of the water flow while keeping your hands free. Designed for hospital work, it can also be used in the darkroom.
Water Quality
Water quality in this section refers to everything but its temperature, which is discussed in the next section on temperature regulation. There are several basic components that affect the quality of water used in photography.
Suspended Solids
These small, solid particles exist in all water systems. They originate at the source, or enter into the water at some point in the distribution system, and can be removed by using water filters. Their removal becomes increasingly important if you are using a temperature-regulating valve that can be damaged by solid particles in the water.
Although these particles have relatively little effect on prints, they have a tendency to adhere to negatives, and once they have dried to the surface, it is impossible to remove them.
Hard and Soft Water
Hard water can make chemical mixing difficult, and soft water can soften the gelatin on film and paper after long washing cycles. The range of allowable hardness of water is from 40 to 150 parts of calcium carbonate (CaCO3) per million. To find out the range of your own supply, call the local water authority.
Purity
Only a very expensive filtration system can remove anything but suspended particles. For badly polluted sources, one solution is to use distilled water, at least for washing the negatives. You can store water that runs off of the air conditioner or dehumidifier cooling coils. Because of concern with water quality, it is possible to buy very inexpensive distilled water at your local market. This water is sometimes labeled infant or baby water. However, if there is plain distilled water, it is the same thing and a bit less expensive.
Air in the Water
Air in water and solutions causes bubbles to build up on film and paper surfaces, preventing developers and other chemicals from coming in contact. This should be prevented if uniform development, fixing, toning, and washing is to be achieved. Either boil the water to drive off the air, or add an aerator to the incoming line. The aerator forces large bubbles into the water, and these combine with and remove the smaller ones before rising to the surface.
When stirring chemicals, it also helps to use a stirring paddle with a wide blade and narrow handle. The narrow handle disturbs the surface of the solution less than a larger object would and prevents additional air from entering. Some chemical mixers are designed to go one step further and are magnetically operated paddles without handles so very little surface disturbance occurs.
Water Impurities
If you are using water from a source other than a municipal water supply, you should have it analyzed by a lab to determine its contents. The following table gives some of the maximum allowable limits for commonly encountered chemicals.
Practical Limits for Common Impurities in Water Used for Photographic Processing
| Impurity | Maximum or Range or Content (ppm*) |
| Color and suspended matter | None |
| Dissolved solids | 250 |
| Silica | 20 |
| PH | 7.0 to 8.5 |
| Hardness, as calcium carbonate | 40 (preferable) to 150 |
| Copper, iron, manganese (each) | 0.1 |
| Chlorine, as free hypochlorous acid | 2 |
| Chloride (for black-and-white reversal) | 25 |
| Chloride (for color processing) | 100 |
| Bicarbonate | 150 |
| Sulfate | 200 |
| Sulfide | 0.1 |
| *parts per million | © Eastman Kodak Company 1967, 1974 |
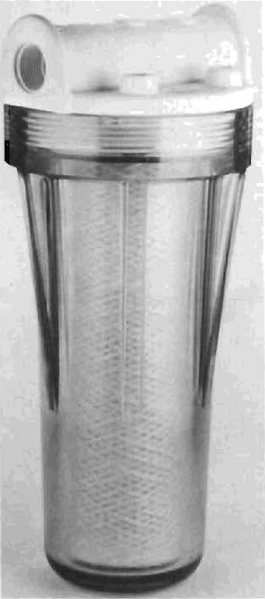
Water Filter. Filters are rated by the size of the particles that they remove from the water. The largest filter you should use for photographic processing is 50 micrometers. A smaller filter will make the water cleaner and the filter dirtier, requiring more filter changes without noticeable effect on your negatives or prints.
Water filters come in cold or hot models. The basic difference is their respective ability to resist temperature damage. The hot-line filter is usually designed to withstand high temperature and pressure over a sustained period of time. The cold filters are not subjected to this stress, so their quality (and price) is not as high.
This illustration shows a Leedal model and the filter element inside.
Temperature Regulation
The more heat you have in photographic processes, the faster things happen. It is easy to understand the importance of temperature regulation in controlling the rates of chemical reactions found in developing, fixing, toning, and washing. As a rule of thumb, a 10°F change in temperature will double or halve the rate of a chemical reaction. Solution temperatures can be regulated in several ways to ensure that processes occur at expected rates and can be repeated.
Controlling Ambient Conditions
Having the room temperature close to the temperature at which chemicals are used helps reduce the need for more exotic controls. It is not necessary to make conditions perfect, but perfect conditions can save a great deal of time, because if stored chemicals are at the correct temperature, they can then be used without additional heating or cooling.
Controlling the Temperature of Incoming Water
When mixing chemicals, washing prints, or trying to maintain a constant temperature in a water bath, it helps to have a thermostatically controlled water valve. These can be preset to maintain a temperature within a given design range (usually 1/2°), despite changes in line temperature or pressure. They are a good investment and significantly reduce the problems involved with working in a darkroom.
Controlling the Temperature of Water Baths
Chemicals can be maintained at the proper working temperature by immersing the container in which they are held in a water bath that is maintained at the correct temperature. The larger volume of the water bath makes the temperature more stable and will keep the smaller volume of chemical solutions from changing temperature. A water bath can be made by immersing a tray or tank in a larger one into which water at the correct temperature has been poured. The larger the amount of water in the bath, the easier it is to obtain and control a stable temperature. If you have a sink, it can be plugged with a standpipe that you can buy or make out of a plastic graduate. The standpipe will allow the water in the sink to rise only to the top of the pipe, at which point it overflows into it and down the drain. The large volume of water in the sink will maintain a stable temperature for a longer period of time.
In the absence of a temperature-regulating valve and standpipe, the water bath temperature can be maintained with either an immersion heater or recirculating unit. The temperature can also be controlled by adding hot or cold water occasionally to raise or lower the temperature.
It helps to have a stainless steel graduate to use for changing the temperature of small volumes of chemicals. Stainless steel is an excellent conductor of heat, and immersing it, full of the chemical, into a hot or cold bath will quickly change the temperature of the solution it contains. The same effect can be obtained with a plastic graduate, but it takes much longer to obtain the same degree of change.
Temperature regulation of the water in most darkrooms will depend to a large degree on the amount of hot water available to your house or apartment. You may well find after spending $300 on a temperature-regulating valve that your hot water capacity is sufficient for only half an hour or so of water at the desired temperature. It’s better to know beforehand what the capacity of your heater is, what your consumption is expected to be, and how the two relate. If you have to install a larger hot water heater for the darkroom, you can derive a side benefit (the whole family can take long, hot baths one after the other).
Ice Cubes in a Plastic Bag
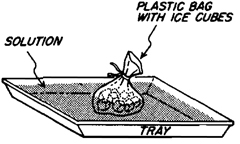
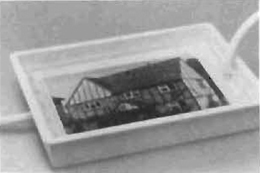
Ice Cubes in a Plastic Bag. If you overshoot and your temperature climbs too high, it can be lowered without diluting the mixture by placing ice cubes in a plastic bag into the solution. The melted water is retained in the bag.
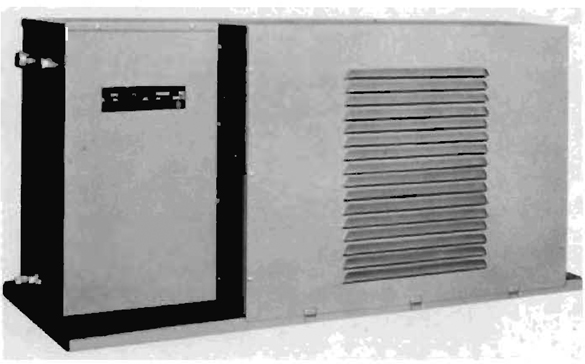
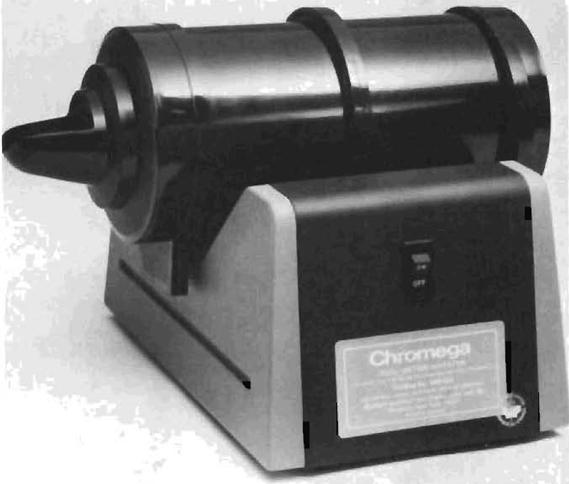
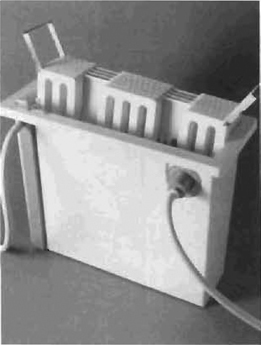
Recirculating Heater. The basic application of a recirculator is to keep the water at a constant temperature without adding any new water to the system. This conserves water (however, it consumes electricity), because the temperature of the water in a water bath can be raised without adding new hot water. The recirculator pumps the water out of the sink or bath, heats it, and then returns it at the preselected temperature. Look for the rated capacity of the recirculator in terms of both flow rate (gallons per minute) and temperature range. It’s also helpful to know what its range is in relation to the ambient temperature of the room. Can it hold 68° on a minus 32° day in your northern Maine darkroom?
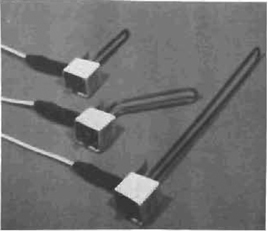
Immersion Heaters. The least expensive way to control temperature in a fixed body of solution is with an immersion heater. They work on the same principle as electric probes used to heat a cup of coffee. The electricity raises the temperature of the heating element and that heats the water. Some immersion heaters are quite sophisticated, with thermostatic controls and circulating pumps, so the temperature is maintained uniformly throughout the solution. Without adequate circulation, the temperature would be uneven.
Stainless Steel Graduates. Stainless steel graduates are great conductors of heat and can be used for raising or lowering the temperature of solutions placed in them. Immerse the graduate in a water bath at the desired temperature, or do what Neal Slavin does and use a hot plate to bring the temperature up quickly.
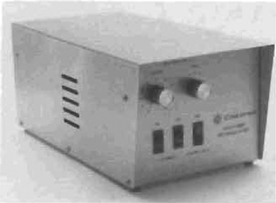
Water Bath. One way to maintain a water bath requires a heating element, a temperature-control device, and a circulating pump. The pump is necessary to ensure evenness of temperature throughout the solution. This model has all of these elements combined into one and can maintain the water within one-tenth of a degree of the preset temperature.
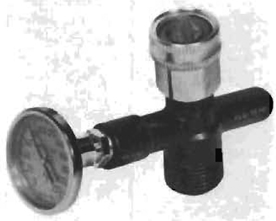
Thermometer in Fitting. If you don’t go all the way with temperature regulation, it’s at least helpful not to have to hold the thermometer in the stream of water with one hand while trying to adjust two faucets with the other. The solution is a fitting into which a thermometer is permanently mounted. You still have to regulate the temperature manually, but at least you can check the temperature without standing there holding the thermometer. This model is by Pfefer.
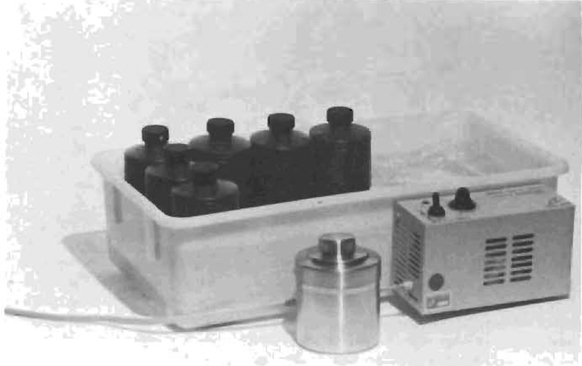
Automatic Temperature Regulation.
For photographers who spend a great deal of time in the darkroom, one of the main problems is regulating the temperature of the water flow into water baths and print and negative washers. It is a great luxury to be able to avoid constantly monitoring and adjusting the temperature of the incoming water. Manufacturers have developed a number of units that reduce or remove this onerous chore; this section illustrates and describes some of the most popular ones.
Measuring Your Outlet’s Flow Rate
When it comes time to order the temperature regulator for your sink you will have to specify the flow rate at which the temperature-regulating valve will normally operate. This allows the supplier to install a collar that will allow you to use the temperature-regulating valve without having the water on full force. Measuring the flow rate is a simple matter.
Find a five-gallon can and connect it to a sink outlet with a rubber hose. Turn the water on at the flow rate you intend to use. Time how long it takes for the five-gallon can to fill. Divide that time by 5 and you will have the gallons-per-minute flow rate you will be using.
The flow rate will vary seasonally, with the lowest rate likely to occur in the hot summer months when neighbors are watering their lawns and filling their pools. This should be taken into consideration when measuring the rate of flow.

Thermostatic Valve. Thermostatic mixing valves work by the same basic principle on which the thermostat in a home heating system works. When the water temperature in the outflow drops, the supply of hot water is increased and vice versa. Most valves work best at or near their highest rated flow capacity. Be sure that you do not buy one that is always operating at the lower limit for which it was designed. The convenience of these devices comes from setting the required temperature only once and then having the valve hold it automatically, freeing your hands and mind for other things.
Most well-made units have a vacuum breaker that prevents the siphonage of water back into the water supply system. In many areas this is required by building codes.
Because most units operate best at their maximum rated capacity, it’s important that you determine the flow rates you will be dealing with and notify the company from which you are buying what range you expect from their valve. For most home darkrooms, a flow rate from 1/2 to 2 gallons per minute will suffice for all operations, including washing.
Water Chiller. In some areas of the country, at certain times of the year, the incoming cold water is at a higher temperature than the darkroom requires. Most photographers grin and bear it, but the more affluent consider the installation of a water-chilling unit.
A thermostatic mixing valve requires a sufficient difference between hot and cold supply lines to operate accurately. So if you are considering installing one of these valves in areas of the country where the cold water is above 60°, you may find that the mixing valve will not work without the installation of a water chiller. Check this with both your water department (they can tell you the highest temperature to expect) and the manufacturer of the valve and chilling unit This unit is from California Stainless.
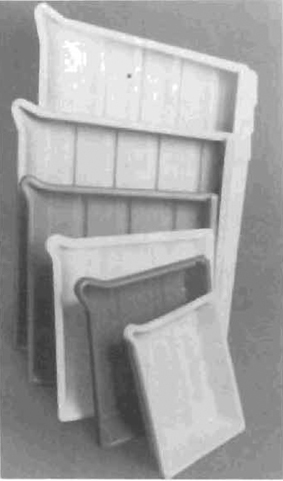
Processing Trays and Tongs
Trays
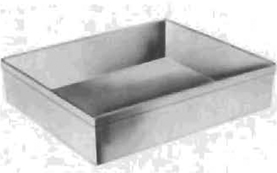
It’s been said that all Edward Weston had in his darkroom were a light-bulb, a printing frame, and three wooden developing trays. This indicates either the importance of trays or the lack of importance of everything else. The primary function of trays is to hold chemicals, but variations in design, materials, and purpose do affect, slightly, the usefulness of the various models.
The trays should be deep enough to prevent unwanted overflow when agitating the tray full of chemicals. And they should be large enough to handle a print easily, either by hand or by tongs, without trapping the print between sides that are too close together. Ribs on the bottom reinforce the tray and also make picking up prints easier.
Inexpensive trays can be too small to hold the sized prints for which they are marked. Rather than buy a more expensive tray, however, you can buy the larger size of the less expensive one and save some money.
A tray should be rigid enough so that you can lift it when full of chemicals without it bending under the weight and spilling chemicals. Try flexing the tray by holding the corners and twisting. If there is too much flex, buy another model.
To reduce the possibility of tray contamination, label the trays for developer, stop bath, and fixer and then use the same tray for each chemical every time. Use entirely separate trays for such things as toning solutions.

Leedal Tray Rack. A great deal of space can be saved by using a tray rack that holds trays one on top of the other. If you are concerned about possible contamination from chemicals splashing from one tray to another as a result of this arrangement, use the tray rack to hold two fixing trays and the water holding tray. This way contamination, should it occur, will have no effect on the prints. The prints should always progress from the top down to reduce the danger of contamination. If you have to use developer, stop bath, and fixer in the rack, put the developer on top, then stop bath, with the fixer on the bottom level. This Leedal model is made of stainless steel. A somewhat less expensive, but well designed, model is available from Richard.
Deep Hypo Tray. There is a tendency for prints to back up in the hypo tray, and the added agitation required makes it desirable to have a deeper tray than is needed for development or stopping. This problem has been solved by trays such as the Arkay deep hypo tray.
Plastic Print Trays. These Paterson trays are typical of high-quality plastic trays that are perfectly suitable for darkroom purposes. The pouring lip makes pouring the chemicals back into the bottle or down the sink much easier.
Print Drums. Print drums were initially designed to allow development of color prints in a well-lit room. They also have the advantage of requiring a smaller quantity of chemicals to get the job done. Drum agitators are available to keep the solutions moving, making the entire development process easier. These drums are also available in larger sizes for mural processing. They are often used for color printing, because safelights generally cannot be used and it’s easier to develop the print in a drum than in the dark. With black and white printing, however, drums remove the excitement of seeing the print emerging from the white paper.
Print Tongs. Print tongs are giant tweezers that allow you to agitate and remove prints from processing trays without using your fingers. They reduce contamination and keep your fingers clean, so that the next time you change a negative in the enlarger you don’t ruin it with fixer. A good print tong should hold the print securely but not at the expense of damaging the emulsion. Plastic tongs are usually the best: they combine cleanability and holding power. If you buy tongs with rubber tips that are subject to contamination, mark them to indicate which is for developer, stop bath, and fixer.
Wet-Side Accessories
Just as the kitchen of a good French chef is made more enjoyable and more productive as a result of high-quality and useful accessories, so is the darkroom. Not having a graduate large enough to mix a solution, or a stirring rod long enough to keep your hands out of the solution when mixing, are frustrations that can and should be avoided. These pages describe some of the accessories that are available and what questions to consider when buying them.
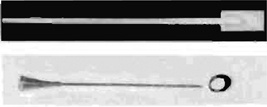
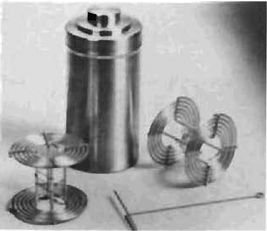
Stirring Rods. Stirring rods are useful when mixing powdered or liquid chemicals. They are usually designed with narrow handles and larger blades on the bottom. The narrow handles reduce the amount of disturbance at the surface, preventing air from entering the solution. The blades increase the agitation below the surface and are available in a wide range of styles, including ones with holes and others with heads that can be used for crushing powdered chemicals.
When buying a paddle, make sure that the handle is long enough to provide you with a grip when fully immersed in the largest mixing container you use.

Funnel. A funnel is almost a necessity if you want to pour chemicals from a large graduate into a bottle with a narrow neck. Two funnels are handy to have because you can mix your chemicals right in the storage bottle using one funnel to pour in the dry powder and the other to pour in the water. Funnels are usually cheaper in the hardware store than in the camera store and serve the same function.
Illustration courtesy of Nalge Company, Division of Sybron Corporation
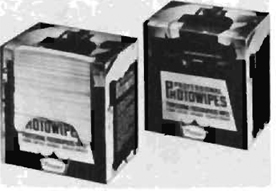
Towels. It helps to have towels to wipe your hands and to clean up spilled chemicals. The least expensive method is to use paper towels, but occasionally it helps to have some that are lint-free. Photowipes, made by the Photo Materials Co., are handy to have around. They are too expensive to clean the floor with, but are very convenient for equipment.
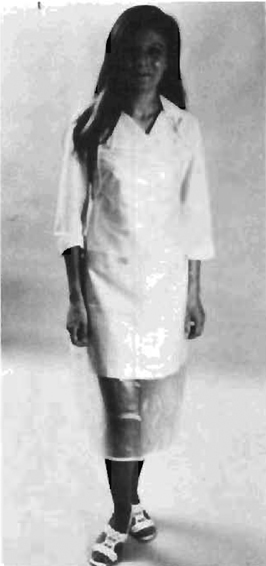
Aprons. When mixing chemicals it doesn’t take much of a slip to spill them on your clothes. To be on the safe side, it might be worthwhile to have a vinyl apron handy. They only cost a few dollars and can save their purchase price in ruined clothes. This apron is from BelArt; EPOI and Kodak have similar models.
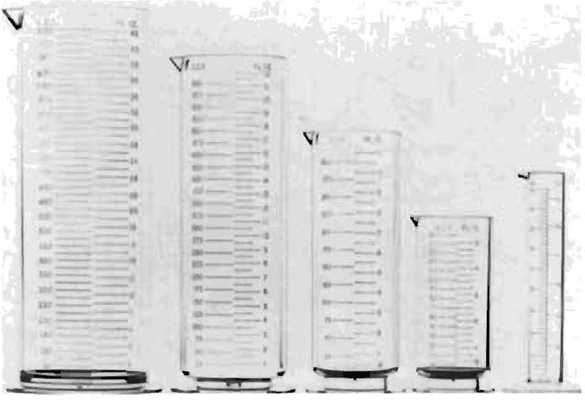
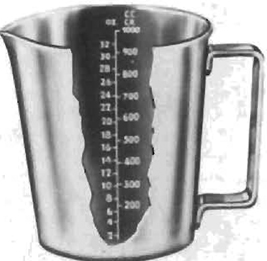
Graduates. Graduates are containers with scales marked on their side, used for mixing, holding, and measuring chemicals. Every well-equipped darkroom should have a variety available. The basic graduate comes in either plastic or stainless steel. The stainless is much more expensive, but it is useful for temperature regulation. Because stainless steel is a greater conductor of heat, you can raise or lower the temperature of chemicals quickly by pouring them into the graduate and immersing the graduate in either hot or cold water as the situation requires. The same effect can be achieved with a plastic graduate, although it takes longer.
A tall, thin graduate is also useful for measuring small quantities of chemicals. Trying to measure I ounce of stop bath concentrate to mix with I gallon of water is very difficult with a large, wide graduate.
Thermometers
Thermometers can be divided into classes based on the principles by which they operate. Your selection should be based on accuracy, cost, and durability.
Liquid in Glass. This type is identical in principle to the thermometers that we take our own temperatures with. It consists of a bulb full of a fluid, usually alcohol, and a long narrow tube marked in degrees. As the fluid heats or cools, it either expands or contracts.
These thermometers are extremely accurate, relatively fast-acting and long-lasting—if you don’t break them. If the thermometer overheats, you may break the tube. To work accurately, the entire column of liquid that indicates the temperature should be immersed in the liquid you are measuring.

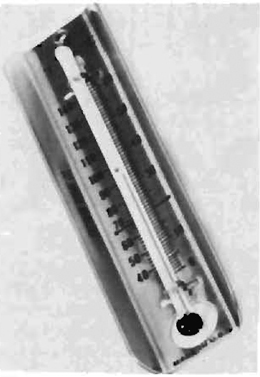
Glass Thermometer. This glass tube Kodak thermometer is fast-acting and reliable. It is a little slippery to grip with wet hands, so handle it carefully. As a safety precaution, wrap a rubber band around the end to provide you with a better grip. It will also help prevent it from rolling off the counter. If you jar a glass thermometer, you will sometimes find that an air bubble has entered the column of alcohol. If this happens, you can heat the thermometer gradually until the column is filled entirely with alcohol. When it cools, the column will usually be rejoined. Overheating, even a little, will pop the top off the glass tube. This model has a range from 30° to 120°F.
Courtesy Eastman Kodak Company
Liquid in Glass with Metal Backing. Some thermometers are reinforced with a metal backing to prevent them from rolling or breaking as easily. These are ideal for tray thermometers, but if the scale is on the backing and not on the tube itself, the thermometer can get out of register and indicate the incorrect temperature.
Dial Thermometer. These thermometers have large dial faces that are very easy to read. The needle moves because of the expansion or contraction of a bi-metallic strip. These thermometers are also quite accurate and durable but, because of their mechanical nature, are more sensitive to physical abuse. If a glass thermometer breaks you will know it, but if one of these does you may not. The dial face is also prone to leaking, because the seal between the glass and metal case will not last forever. Occasionally calibrate them by comparing with a thermometer that is known to be accurate.
Electronic Thermometers. These thermometers are available with digital readouts and even audible ones. It is sometimes difficult to read the temperature on a glass or dial thermometer because of parallax and the small numbering on the thermometer itself. This problem is eliminated with the digital thermometer that gives you a direct numerical readout of the temperature. However, they are sensitive to mechanical damage and moisture because of their electronic nature.
Kodak Glass with Metal Backing Thermometer. This glass thermometer is longer lasting because it is attached to a metal backing that provides support for the glass tube.
Courtesy Eastman Kodak Company
Tray Thermometer. This Kodak tray thermometer is typical of those made to be left immersed in developer trays for quick and easy monitoring of the solution’s temperature. Be gentle with thermometers such as this, because the scale is not on the glass tube itself. If the tube is slid up or down in the metal case, it will read an incorrect temperature.
Courtesy Eastman Kodak Company
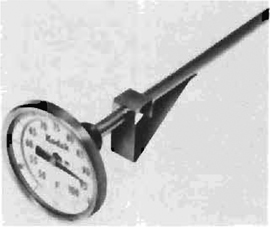
Dial Thermometer. The advantage of a dial thermometer such as this Kodak model is that it is extremely easy to read. The light will not be defracted, as it can be with a glass thermometer. In some models a mirror is used to reflect the needle, and when the needle and its image are seen in perfect alignment, viewing parallax has been eliminated. This ensures that you read the correct temperature by showing you the correct viewing angle.
Courtesy Eastman Kodak Company
Roll Film Tanks and Reels
Photographers using 35mm or 2 1/4 format film are confronted with the difficulties of developing a long strip of film. The most common solution is to coil it on a reel so that there is sufficient space between the surfaces to allow for the circulation of chemicals, but not so much that the coil occupies a large space. This basic principle is packaged today in three variations: stainless steel tanks and reels, plastic tanks and reels, and a combination of stainless steel tanks with plastic tops. Traditionally, most pros have used the all-stainless-steel tanks and reels because they perform extremely well and last almost forever. However, one problem is that they may leak around the top if the tank is inverted during agitation. This difficulty has been solved by marrying a plastic top to the stainless steel tank. The seal is tighter and less susceptible to leaks. Many photographers use the all-plastic tank and reel, which has the advantage of a reel that can be widened or narrowed depending on the film format you happen to be using. With the stainless steel reels, you will need a set for each format you shoot.
Stainless steel tanks will lose or gain heat more quickly because of the conductivity of stainless steel, so if the room is a good deal hotter or colder than the chemical solution, use either a water bath or change to plastic tanks that will act as an insulator.
Film-Developing Tanks. Paterson Super System 4 is representative of the many film-developing tanks on the market. It is unbreakable, fast-filling, and comes in a variety of sizes.
Stainless Steel Tanks. These stainless steel tanks from Burleigh Brooks are representative of what most photographers tend to use. They are well-made and durable. Some reels by other manufacturers have different catches for the end of the film, and some of these designs work better than others. It’s best to take a piece of film with you when you buy to see how easy it is to insert and how well It is held.
The long rod is used to raise and lower the reels. Always buy enough reels to fill the tank and use them all if you are developing one roll of film and you agitate by inverting the tank. If one reel slides up and down the tank, development will be affected because of the increased agitation.
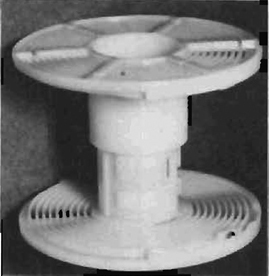
Plastic Reels. This Paterson plastic reel shows the mechanism by which it can be widened or narrowed to accommodate different film formats. The small bearing on the right is part of the self-loading device that makes these reels extremely easy to load just by turning the sides back and forth.

72-Exposure Reels. The introduction of 72-exposure film cassettes has led to the manufacture of developing reels capable of handling these longer lengths of film. liford makes a reel for these film lengths that fits into a standard development tank.
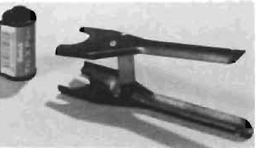
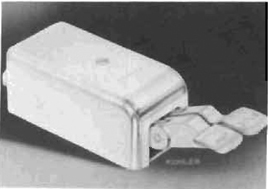
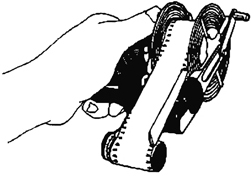
Film Cartridge Openers. If you have a 1954 Ford convertible, you might be able to find a “church key” in the trunk or under the back seat. It will work fine for opening 35mm cassettes. If you want to step up, you can buy something like this Nikor cassette opener. Kodak also supplies openers for 110 and 126 cartridges.
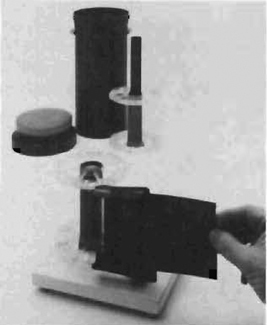
Daylight Tank for Sheet Film. Jobo sheet film reels and film loaders provide a daylight tank system for large format work. The film loader holds the sheet film reel on a flat base. The film guide permits easy insertion of each sheet into a separate groove—without crimping, binding, or scratching. As the reel rotates, each groove clicks into position for positive film loading.
Each reel holds 6 sheets of 4 × 5 film. Two reels can be used with the tank to make roomlight processing of up to 12 sheets of film as convenient as processing roll film. Also, this economical daylight system uses only half of the chemistry required for processing in hard-rubber tanks.
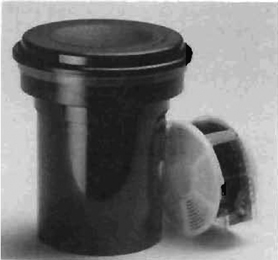
Daylight Developing Tank. There’s nothing new about using a daylight developing tank Any tank, once loaded, can be used in normal room lighting. But the Jobo #2400 tank does more. It allows you not only to develop your film in daylight, but to load it in daylight, too. You can also load and develop partly exposed film in this tank; you simply load and develop the exposed part in full daylight, then cut the film and put the unexposed portion back into the camera.
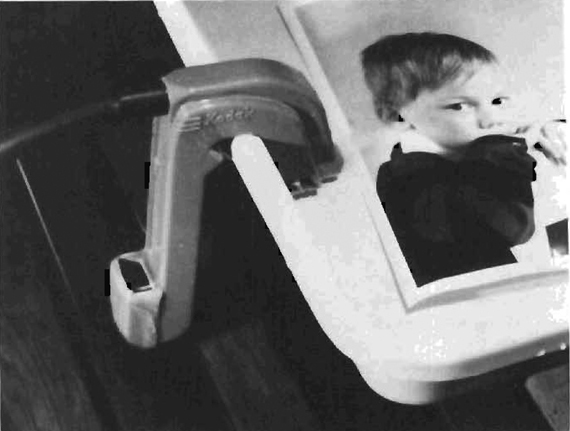
Automatic Film Loader
Automatic Film Loader. Loading stainless steel reels requires the development of a “feel” for when the film is reeled up correctly. This takes practice, and you cannot let the first few attempts discourage you. If you want to try a more mechanical (but not necessarily more effective) method, you can buy automatic film loaders.
Washers
The washing of prints and negatives is absolutely essential if they are expected to last. Many photographers are careless with this step, not fully realizing that the effects of poor washing may arise days or years after the processing. Prints and negatives that are not fully washed of chemicals deteriorate and, unfortunately, contaminate other prints and negatives with which they come into contact. If a poorly washed print is placed on a drying screen or run through an electric dryer, that screen or dryer is contaminated and will affect the prints that follow. There is no excuse for not washing well—it is the one unforgivable sin of photography.
The quality of the washing depends on the number of complete water changes in a water cycle.
To be effective, wash water must circulate on all sides of a negative or print. Its failure to do so will leave spots that continue to be contaminated even when the rest of the print or negative is safe. Just laying prints in a tray with a hose circulating water over them is not enough. The flow must be enough to change all of the water in the washer at least five times.
Negative Washers
Leaving the reels in the developing tank and running water in the top does not provide for even washing of the negatives. The water tends to wash those at the top faster than it washes the ones at the bottom, and because the film is in a coil, the water flow will not be evenly distributed along the film but will tend to wash better in the direct stream from the faucet. To compensate for this, several new washers have been developed to ensure that the water is evenly distributed throughout the tank, and that heavy chemicals do not rest on the bottom of the tank as they would if water were poured in from the top.
Print Washers
The key ingredients in good print washing are to keep the prints separated so that wash water can freely circulate around them, and to follow the paper manufacturer’s directions regarding the time they should be washed. To shorten washing times, you can use Hypo Clearing Agent made by Kodak or PermaWash manufactured by Heico.
Washing prints for archival purposes is not an easy task. Maintaining an adequate rate of flow and keeping the photographs separated are not enough to ensure complete washing. The dynamics of fluid flow (that is, the wash water) depend on several factors; the placement and orientation of prints in a washer can affect the flow. If all of the prints are horizontal, they can have air pockets or pockets of low water flow regardless of how high the water flow is elsewhere in the washer. To be absolutely safe, buy a washer designed for archival purposes and follow instructions.
High-speed Print Washer.
Auto Print Washer. Paterson Auto Print Washers for RC, fiber-based prints.
Built-in Washer. The Paterson film developing tanks are designed with a built-in washer. The hose is connected at one end to the top of the washer and at the other to the faucet. The water enters from the bottom of the tank and leaves from the top, taking the chemicals with it.
Revolving Drum. This Arkay Loadmaster washer is typical of washers using a revolving drum. A gate in the drum is opened and the prints are placed inside. The jet of water entering the washer acts like a millrace and the drum revolves like a water wheel. The level of water never completely covers the drum, so as the drum revolves, the prints tend to become dislodged when they reach the surface of the water, ensuring that they do not stick to the drum and wash unevenly. These washers are effective but can cause mechanical damage to prints, such as bent corners, and so on. A similar design is available from Pako.
Tray Siphon. Kodak makes a very efficient tray washer that also contains a siphon. The design assures that the heavier chemicals that tend to accumulate on the bottom of the tray are removed by the siphoning effect. If you were to place a hose in a tray and expect the water flow to lift the chemicals over the rim, the washing times should be greatly increased. This siphon lifts the water from the bottom of the tray, reducing the time needed for washing well.
To be washed effectively, prints should be placed in a tray twice their size. This allows the water coming from the siphon to spin the prints and gives them much needed agitation.
Courtesy Eastman Kodak Company
Timing Systems
Electronic sophistication is affecting traditional darkroom equipment primarily in the design of exposure meters and timers. In most cases, the absolute accuracy of many of the newer units is not necessary; what is necessary is that your timer repeat each timing cycle exactly the same as every other. If the timer takes 65 seconds to indicate a minute, that’s okay, as long as it does it every time. The only exception to this rule is when you are working with color materials that are much more sensitive to the absolute timing of processes.
Timers can be broken down into two main classes, mechanical and electric. Mechanical timers are operated by winding a spring; electrical timers require a source of energy from either a wall outlet or a battery. Electric timers can use either motors or transistors. Electronic timers will often have a digital readout.
The old standby in most darkrooms is the Gralab timer, which is used for timing everything from development, to printing, to making coffee. Its timing range from 1 second to 1 hour makes it useful for timing many activities. Many of the newer timers now on the market are designed for specific purposes and should be used only for those for which they are designed.
General Timers
For a timer to be useful for all darkroom activities, it must accurately measure short intervals in printing exposures and longer intervals in film development. It is also helpful if the dial is large and glows in the dark. If it is to be used as a general timer, it should also have some of the best features of enlarging timers, such as electrical switching capability and repeatability.
Enlarging Timers
When making enlargements, you need a timer that is extremely accurate in the range of approximately 5 seconds to 1 minute (or longer for color printing). The timer should also have the capability of turning off the enlarger at the end of the preselected timing cycle. It is also convenient to have a reset device that allows you to repeat a preset period of time. This is especially helpful when making a large number of identical exposures, such as proof-sheets. A luxury is to have the timer programmable so that it stops and starts at different intervals during its cycle, allowing you to time a variety of continuous activities without having to reset the clock for each step
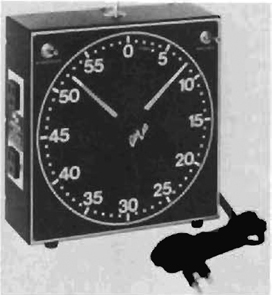
Gralab Timer. For practical timing of both development and enlarging, there isn’t anything quite like the Gralab timer. This timer is probably the most used timer in the field, and although it isn’t digital or electronic, it’s proven and it works well.
It has a large dial, it glows in the dark, and it has a timing range from I second to 60 minutes. It also has a circuit to turn off the enlarger at the end of the preset cycle.
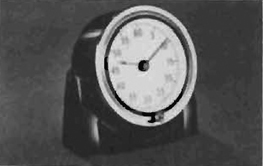
Mechanical Timer. Humble? Yes, but you can still develop your film when the electricity is out. Kodak still makes this versatile mechanical clock with a timing range of I second to 60 minutes. It has both minute and second hands and a switch allows you to stop the timer and reset without resetting the hands.
Courtesy Eastman Kodak Company
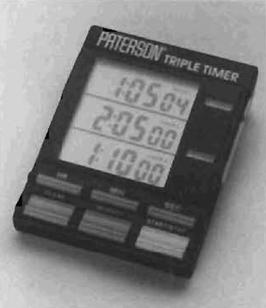
Multi Timer. This unit allows the timing of several operations at once— ideal for those who need to keep track of more than one thing at a time. The memory feature allows you to store times that are used repeatedly.
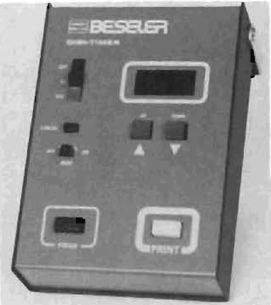
Digital Timer. The advantage of a digital timer is the ability to have short enlarger times that are accurate and repeatable. This timer shows the amount of time that has elapsed, a feature that is handy when burning or dodging.
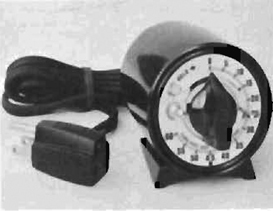
Mechanical Enlarging Timer. This Omega 60-second timer is an excellent example of a relatively inexpensive mechanical timer. The electric cord provides power to the enlarger when the clock is switched into its timing interval.
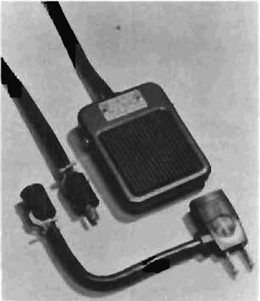
Footswitch. A footswitch to turn the enlarger on and off is handy when, for example, you’re confronted with a 10-second exposure in which you have to dodge or burn for 8 seconds. By pressing the switch with your foot, it will turn on the enlarger and leave your hands free to do other things.
Chemical Storage and Waste Disposal
Chemical Storage
Storing chemicals is really a two-part problem. The simpler problem is where to store unmixed chemicals such as developer or fixer. An easy solution is to keep them in a storage cabinet somewhere outside of the darkroom, which will protect boxed or half-used containers from the high humidity. The more difficult problem involves storing mixed chemicals. If you are a prodigious photographer and process through developer, stop bath, fixer #1, fixer #2, hypo-clearing agent, and toning, as well as negative developers, wetting agents, and possibly color-photography chemicals, storage of mixed chemicals can be a troublesome matter. The basic rules that should be considered when planning for mixed chemical storage are:
1. The chemicals should be stored in containers that do not react with their contents.
2. The chemicals should be stored conveniently near where they are used, such as a shelf over the sink.
3. They should be accessible. If you mix in large quantities for economy or because you use a lot, it’s easier to plan on containers with spigots than it is to lift 5-gallon containers every half hour.
4. Containers should be airtight and preferably have a system to keep all air away from the surface of the chemicals. When air interacts with chemicals, it oxidizes them—an undesirable effect—so the less surface exposed to the air the longer your chemicals will last. The two best techniques for accomplishing this are containers that collapse as solution is removed, which keeps the air out, or floating lids for rigid storage containers.
5. The bottles for the chemicals should be opaque or amber colored, because light speeds the degradation of the chemicals.
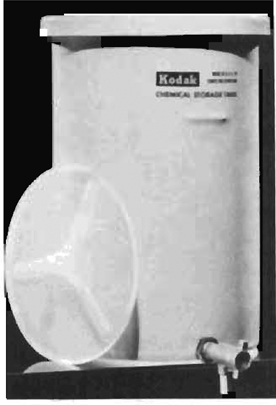
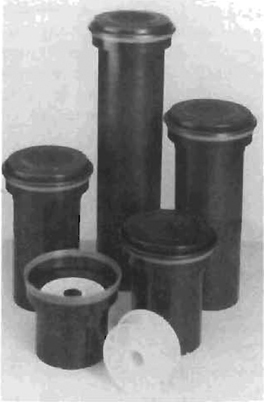
Bulk Storage. Large quantities of mixed chemicals can be stored in plastic storage tanks. To make sure they are stored properly, use a tank with a floating lid. This lid prevents air from coming in contact with the stored chemical and weakening it. If the tank is more than I gallon, it is almost a necessity to have a spigot with which to draw off chemicals. These tanks are good examples of bulk chemical storage tanks. Kodak makes bulk storage tanks with floating lids in 7-, 14-, 30-, and 55-gallon sizes.
Courtesy Eastman Kodak Company
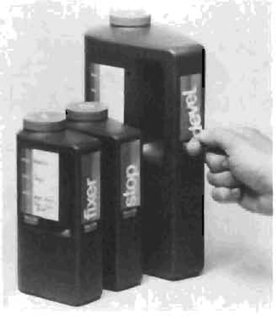
Storage Containers. These Falcon chemical containers have become the standard in the field. They are well made, durable, and have a convenient labeling system that allows you to identity the chemical, the date it was mixed, and any other pertinent information.
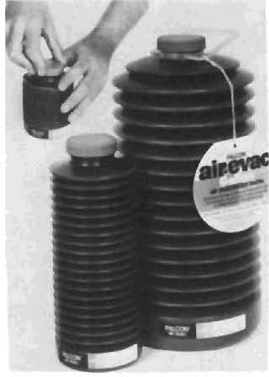
Air Evacuation Bottle. Falcon has also developed a way to keep chemicals at top form longer. These bottles allow you to squeeze the air out, thus prolonging the life of the chemicals by keeping air from contacting the surface.
Waste Disposal
Because darkroom work by its very nature produces waste products, the photographer should be aware of the nature of these products and what can be done to minimize their impact on the environment.
The factors affecting waste management are volume of effluent (the waste flowing out of the darkroom), temperature of effluent, types of chemicals used, and the ratio of chemical waste to wash water. The effluent from personal darkrooms is within most established sewer codes. The pH (measure of relative acidity or alkalinity of a liquid) is between 6.5 and 9, the temperature is less than 90°, and there are very few suspended solids. Most commercially available processing solutions contain no grease or oils, nothing flammable or explosive, and they do not have much color or odor. Photographic chemicals are generally biodegradable and will not harm municipally run biological treatment systems. It is not advisable to discharge photographic wastes directly into a septic tank and/or leach field, unless the amount is small in comparison to domestic discharge volumes or has been greatly diluted.
Many states require the installation of a back-flow prevention valve in the inlet water supply of the darkroom. The valve prevents chemicals from being sucked back into the domestic water supply if a vacuum is accidentally created in the municipal system.
The silver in the waste water is in the form of soluble silver thiosulfate from the fixing bath. It is not in the form of toxic, free-ion silver. The thiosulfate is converted by municipal processing plants into insoluble silver sulfide and some metallic silver. These are removed with other solids during clarification.
Recycling
Since the earth and its resources are finite, photographic chemicals should be conserved whenever possible. The use of replenishers instead of one-shot chemistry is advised where feasible. The main darkroom chemical that is recycled is silver. It can be removed from fixing baths by several methods— metallic replacement, electrolytic recovery, and ion exchange. For larger, commercial darkrooms with high flow rates, electrolytic or ion exchange are economically reasonable. For personal darkrooms with much lower flow rates, metallic exchange makes the most sense.
Metallic exchange is a very simple process in which a more active metal than silver (usually iron) replaces the silver and goes into solution. The insoluble silver metal settles out as a solid. There are several commercially available systems on the market. Photographers can make their own by placing steel wool in a drum and pouring the fixing bath into it. The silver will form a sludge in the bottom. This sludge is sold or given to a recycling company that recovers the silver. The silver content of the sludge is hard to determine, so most companies will not pay for it. They pick it up for free and make what profit they can. Even though the photographer receives no monetary compensation, the feeling of having made an effort to help the environment is payment enough.