
10 Print Finishing
Contents
Dryers
There is something terrifying about the irreversibility of processing negatives. Most photographers don’t mind ruining a print because it’s done all the time and it’s relatively easy to make another, but a ruined negative is gone forever. This mortality tends to keep experimentation to a minimum. Drying is the stage where negatives are most susceptible to damage, especially from streaking, dust, and scratching. Because of the softness of the negative emulsion at this stage, there is a great deal of controversy over how to dry them without damage. Many photographers use a wetting agent to assist the water to run off so it will not build up in drops that leave a residue when dried. After using the wetting agent, some photographers squeegee their negatives with a small viscous sponge specially manufactured for photo use (kitchen sponges scratch).
The negatives should always be hung in a dust-free area to dry. The ideal place is either an unused shower (run the shower for a few minutes first to settle any dust), or a sealed negative drying cabinet. Never use unfiltered hot air to speed drying, because there is a good chance that all you will do is imbed dust in the negative emulsion. All negatives, when hung to dry, should be weighted at the bottom to eliminate curling.
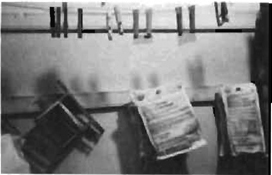
Clothespins. There is no substitute for the humble clothespin as a negative dryer. You can clip one to the top of the film to hold it to a string strung across your shower, drying cabinet, or the darkroom. At the bottom of the film, clip another clothespin to keep the film strip taut, otherwise it will curl as it dries and stick to itself where it curls. A hook can be attached to one end of the clothespin to make it easier to hang on the string. Be sure to buy the spring-loaded clothespins, and not the ones that are a simple notch in a piece of wood.
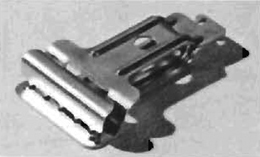
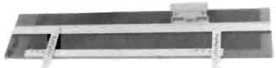
Stainless Steel Film Clips. If you think clothespins make your darkroom look tacky, buy yourself a complete set of stainless steel clips such as these made by the Photo Materials Co. They come in two versions. The one illustrated is to attach the film to the string from which it hangs. The other version is weighted and when attached to the bottom of the film holds it straight while drying.
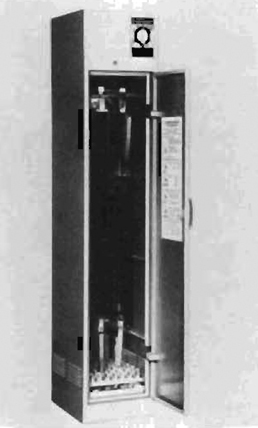
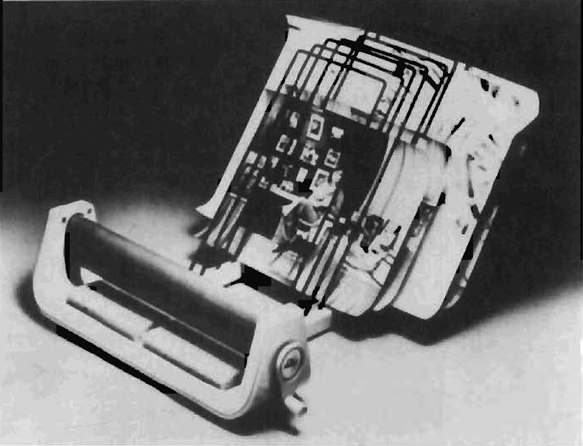
Drying Cabinet. Kindermann makes a series of negative drying cabinets similar to the one illustrated. They all feature filtered, forced air ventilation for drying almost any size of roll or sheet film. The temperature of the warm air can be adjusted, and the fan and heater are connected to a timer that will shut the unit off at the end of a preselected period. Kindermann also makes a “Porta-Dri” model that has flexible plastic sides so the entire unit can be easily stored in a small space when not in use. The combination of rapid drying and a dust-proof environment for the film makes these units extremely useful.
Print Dryers
Drying prints can be accomplished naturally, or it can be accelerated through the use of either increased heat or increased air flow. The concerns in drying prints are their tendency to curl when drying, the archival quality of the print, the protection of the print surface, and the effect of heat or other drying methods on the image.
The safest way to dry prints is to squeegee the excess water from the surface using a smooth squeegee so the surface of the print is not scratched. Lay the squeegeed print on a fiberglass screen to have it dry evenly and with minimal damage (see “Building a Print-Drying Rack” in Chapter 6).
If you have a high output that would overload a natural drying system, consider a dryer that uses air flow, temperature, or a combination of both to accelerate the drying process. RC papers are very sensitive to heat, as are color prints, and air impingement dryers are best for those materials. RC papers dry flat. The curl in regular papers can be minimized by using an electric or double-screen dryer that holds the print flat while drying. Curl can be removed, when it does occur, by heating the print briefly in a dry-mount press, or by stacking prints in piles under a weight of books.

Squeegee. Squeegeeing excess water off of the print prevents it from gathering in pools or drops and leaving spots on the print when it dries. Get a well-made squeegee and keep it clean; it can easily scratch the surface of the print if mistreated. This Paterson model is well-designed, with a handle large enough to give good leverage.
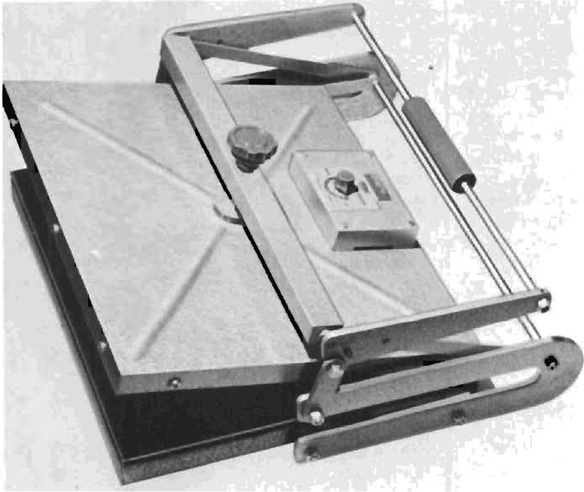
Roller Squeege and Drying Rack. A handy, compact table-top unit that removes excess water from a print with a roller system and has a built-in rack for drying the prints.
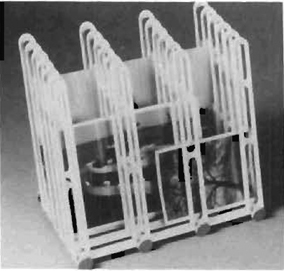
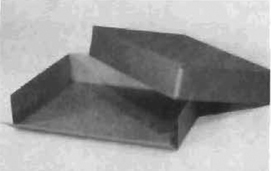
Print-Drying Rack. This RC print-drying rack dries up to 20 prints of varying sizes. It is efficient and compact and prevents the prints from sticking together.
Mounting
Many photographers mount their work to keep it flat for viewing. However, chemicals or impurities in adhesives can damage photographs, and once mounted, the photographs are very difficult to remove from the backing. So mounting is recommended only for photographs that do not need to be preserved for a number of years. Valuable artwork should be flattened and attached to a mat with acid-free hinges instead.
Several mounting processes are described below. From a conservator’s point of view, dry mounting is the preferred process, because the pH of the adhesive is within the accepted range. Whichever method you use, it is important to mount on 100 percent rag, acid-free board; chemicals in other boards will affect both the photograph and the board.
Dry-Mount Press. The binding agent in dry-mounting is a tissue that, with heat and evenly applied pressure, permanently adheres the print to the backing.
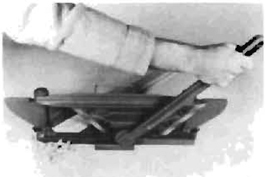
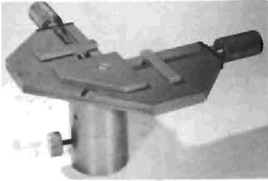
Dry-mounting requires the use of a dry-mount press like the one shown here made by Technal. Presses come in several sizes, from 8 × 10 to 40 × 60. You will need a press at least as big as the board on which you are mounting the print. You will also need dry-mount tissue (there are different kinds for black and white, color, and resin-coated prints). Dry-mounting is a quick process and doesn’t involve messy adhesives that might accidentally get on the face of the print. However, it is not foolproof. It is possible to ruin a print by trapping a bubble of air under it or by setting the temperature too high.
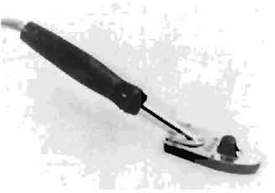
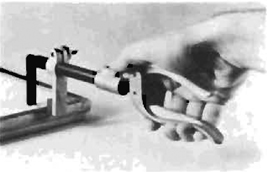
Tacking Iron. The tacking iron is an auxiliary dry-mounting tool. It is used to mount the photograph to the backing in one spot so it won’t slip out of place when you put it in the press.
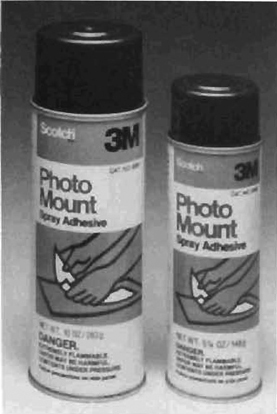
Spray Adhesive. 3M’s Photo-Mount forms a permanent bond after pressure is applied with a rubber roller.
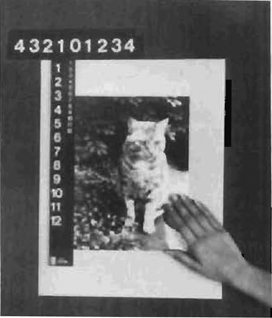
Print Positioner. The print-mounting positioner made by Falcon is a timesaving device that helps you position the print in the optical center of the board without measuring or drawing lines.
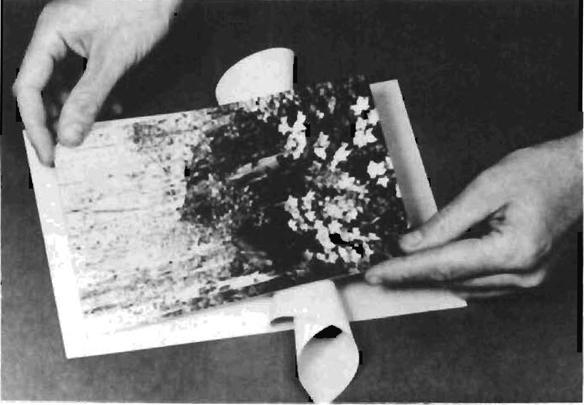
Perma/Mount. Perma/Mount is a sheet with adhesive on both sides. The process is simple: stick the print to one side of the card; trim off the extra card; peel off the protective covering on the back of the card exposing the adhesive; and apply pressure to mount the print to the backing. It is available for 8 × 10, 11 × 14, and 16 × 20 prints.
Matting and Storing Prints
Because the surface of a photographic print is so easily damaged by fingerprints, dirt, or scratches, a good storage system for finished prints is an essential part of preserving them. The major considerations when you’re choosing a system should be whether you need to transport your prints, or simply keep them in your studio; whether you will be matting them to make them presentable for viewing, or storing them without mats; and whether you want to use archival methods to preserve them.
For storage in the darkroom, the best idea is to put each print in an envelope to protect the surface, and then place them all in a storage box for further protection.
The most common envelopes made for storing prints are glassine envelopes. These protect the surface of the print from damage, and they’re fine for prints that aren’t valuable. However, they are not archival, because the acidic content of both the paper and the glue can damage the print over a long period of time.
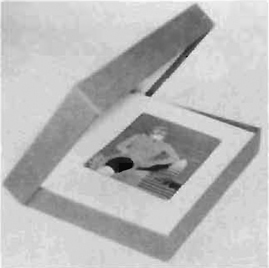
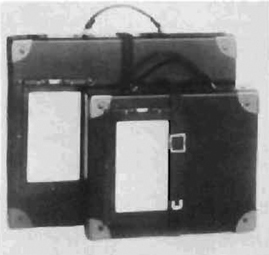
Portfolio Box. The portfolio box shown here folds together in a clamshell design. Made of high-quality neutral pH materials, it is excellent for archival storage and display of matted or unmatted prints. It is deep enough for eighteen matted prints and comes in three sizes to accommodate 11 × 14, 14 × 18, and 16 × 20 prints or mats. The advantage of this kind of box is its flexibility for carrying or folding out to provide a very attractive display. Available from Light Impressions.
For archival protection, Light Impressions supplies white storage envelopes of Perma-Life paper in two sizes, 8 1/2 × 10 1/2 and 11 1/2 × 14 1/2.
If you will be showing your prints to people from time to time, you will probably want to place each print in a mat and backing, protecting the print surface with a sheet of tissue that can be lifted for viewing.
Interleaving tissue is an acid-free tissue used for this purpose. It is placed under the mat and over the surface of the print. It can also be used instead of envelopes between unmatted prints in a storage box. Light Impressions supplies it in sizes from 11 × 14 to 16 × 20.
Drop-Front Storage Box. The dropfront storage box is made of archivalquality materials with metal corners to strengthen the construction and eliminate the need for adhesives, which might damage the paper. Light Impressions has them in two sizes: 15 × 11 × 3 and 16 1/2 × 20 112 × 3. The larger can be divided into four 8 × 10 sections for storing large numbers of unmatted prints. This box is the least expensive of those illustrated here and is used more often for utility storage than for display.
Wooden Boxes. The redwood and brass portfolio box shown here is designed for transporting and viewing mounted work. The top and one side detach for viewing prints, and the inside is sealed against wood vapors, which are harmful to photographs. The strong construction, attractive materials, and easy conversion from carrying case to display box are the important features of this storage system available from Depth of Field. All boxes are custommade in any size you want.
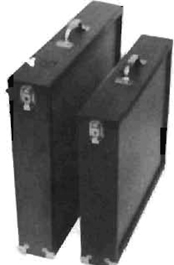
Shipping Case. This one is not just a storage box, but a shipping case. It’s made of tough Vulcan fiber with heavygauge steel corners and a cardholder for addressing the unit in transit. It comes in three sizes—11 × 14, 14 × 17, 16 × 20, all 3 inches deep-from Light Impressions.
Mat Boards
There are two kinds of mat board, wood-pulp board and museumquality board. Wood-pulp board comes in a variety of colors, but it is highly acidic. The acid content will, over a period of years, cause both the print and the mat board itself to discolor and become brittle. The alternative is non-acidic museum board, usually of 100 percent rag content. Because it contains no acid, it will not have any adverse effects on the print. However, it is more expensive than ordinary wood pulp board, and it comes in a very limited selection of whites, neutral colors, and black. If you want archival protection for your prints, you must use acid-free board for the overmat as well as for the backing immediately behind the print. Many photographers use 4ply board for the overmat and 2-ply board for the backing. In a frame, an additional backing, such as corrugated cardboard or Fome-Cor, is needed for stiffness.
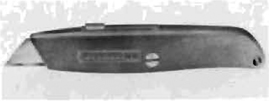
Mat Knife. A mat knife is the most basic mat-cutting tool. It’s a good idea to get one with a retractable blade for safety’s sake. You can also purchase a metal straight edge with a no-slip rubber backing from Light Impressions.
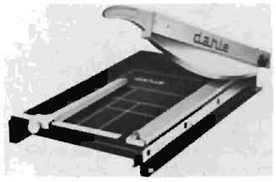
Paper Cutter. The guillotine-type cutter shown here is one of several models designed to cut mat board as well as paper. It’s also available with a safety guard.
Mat-Cutting Tools
Cutting the outside of a mat is not difficult. You can use a simple mat knife and straight edge, or a paper cutter designed to take mat board, or the mat and glass cutter described in the framing section of this book.
Cutting mat window openings is a little more tricky, and because a poorly cut mat will detract from the overall effect of the picture, it is important to find a mat-cutting tool with which you are comfortable. Tools range from the inexpensive Dexter cutter to the rather expensive, but much more efficient, Keeton Kutter.
It’s very difficult to cut professional looking circular or elliptical mat openings with a simple hand cutter. A sophisticated machine such as the Keeton Oval Kutter is generally required.
Dexter Mat Cutter. Of the simple hand-cutters, the Dexter is the least expensive and the most widely used. Use a straight edge with a no-slip backing as a cutting guide. The blade can be clamped in place at any angle to allow straight or bevelled cuts. Available from Brookstone.
Mat Cutter. The cutter shown here operates on the same principle as the Dexter, but it comes with its own straight edge, mat guide, and measuring system. You can order it from Saunders.
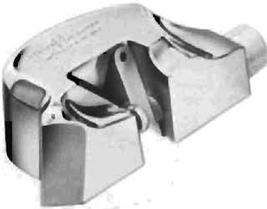
Keeton Kutter. The most efficient and most accurate machine for cutting mats is the Keeton Kutter. The bar clamps the mat board tightly in place while you cut, and the cutting blade is actually mounted on the straight edge to ensure a straight cut. It’s quite expensive, but probably worth the investment if you cut a lot of mats.
Attaching the Photograph
Photographs may be held in place in the mat with archivalquality photo corners, or with an archival-quality tape-never with masking tape or cellophane tape. The most suitable mounting tape is white linen tape, a cloth tape with a water-activated acid-free adhesive on one side. You can get the photo corners or rolls of tape from Light Impressions.
When using tape, attach the photograph to the backing with only two small squares of tape placed along the top edge of the photo near the corners. If it is taped along the sides and bottom as well, it will buckle with changes in humidity.
Framing
When choosing a frame, the first thing to remember is that the frame should not call attention to itself but should focus the viewers’ attention on the picture. With photographs, simple frames with white or neutral color mats are generally most successful. There are several choices. Clip frames, metal frames, and Dax plastic frames are all quite contemporary looking and are available in kits that are easily and quickly assembled at home. Wood frames come in an infinite variety of profiles, colors, and finishes, so you can choose a frame that exactly suits the mood and period of your photographs. However, wood frames do take more time to assemble, and require some special tools if you plan to build them yourself.
Whenever you are putting a photograph in a frame with glass, you should also use a mat. Moisture can condense easily on the inside of a sheet of glass, and if the photograph is in contact with the glass when this happens, it can be ruined. The mat provides a space between the surface of the glass and the surface of the photograph so that the photo won’t be affected. Acrylic is less likely to condense moisture, and therefore is often used instead of glass when framing unmatted pictures, but this is not considered archival framing.
If you must frame without a mat to get the visual effect you want, the only archival solution is to use spacers between the glass and the photograph. A spacer is a thin strip of wood or mat board attached to the inside surface of the frame after the glass is in place. The edges of the photograph then rest against the spacers instead of the glass. Nielsen makes a metal frame with a spacer to separate the glass from the photograph.
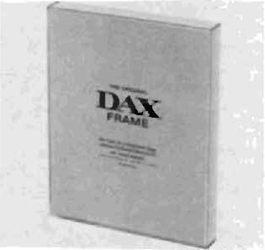
Dax Frame. Of the ready-made frames, the Dax frame is the simplest and quickest to use. It is a clear acrylic box with an open back and a slightly smaller cardboard box that slips in to hold the picture in place. All you have to do is mat your photograph, or attach it to the inner cardboard box. If you choose not to mat it, then slip it into the frame. Dax frames come in several standard sizes, from 5 × 7 to 24 × 30, which can be hung horizontally or vertically. They come with clear plastic sides and an assortment of color finishes. All have a contemporary look. The Dax frame is especially convenient if you want to change pictures often.

Eubank Frame. Clip frames are another simple, easy-to-assemble framing alternative. The Eubank frame shown here, and the plastic version, the Uniframe, are sturdy and quite attractive. Clips hold the glass and backing together in eight places, and a string or wire on the back holds the clips securely in place and provides a means for hanging the completed frame. Kits that clip the glass to the backing in two or four places, such as Braquettes, Fast Frame, and Gallery Clips, are suitable for small pictures. But since the glass and backing tend to separate over long, unsupported distances, larger pictures need to be clipped in eight places. Clip frames are adjustable and can be re-used on pictures of different sizes and shapes.
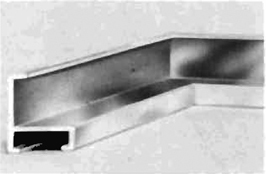
Metal Frames. Metal frames are quite contemporary and easy to assemble. The only tool you need is a screwdriver. The Nielsen frame, shown here, is held together by metal angles that slip into the slot at the back of the frame. Glass, mat, and backing are held securely against the lip of the frame by metal springs inserted after the frame is assembled. Pre-cut lengths are sold, two to a package, along with instructions and assembly hardware, and you buy two packages to make a frame the size you want. Only a few styles and colors are available in kit form; however, you will find a much wider selection if you go to a store that carries the complete line, and you can have them cut to exactly the size you need.
Do-It-Yourself Framing
Custom framing can be quite expensive, but there are cheaper alternatives for anyone who is willing to spend some time framing. Do-it-yourself frame shops will cut materials to size for you and show you how to assemble them yourself. If you’ve never built a frame before, this is the best way to begin, because you’ll have professional help. Or you can invest in a few tools and set up your own work space for cutting and assembling frames.
You can cut framing materials with fancy equipment or relatively inexpensive tools and get good results either way. The main difference with the more specialized tools is that they make the job easier and save you a lot of time.
The simplest and least expensive tool to use for cutting wood molding is a miter box. Because the angle of the cut is crucial when you’re building a frame, it’s best to purchase one with some kind of clamping device for holding the saw. Some miter boxes cut only 45° or 90° angles. So if you might at some point want to make six- or eight-sided frames, buy one that will adjust to the appropriate angles. You’ll also need a good sharp back saw, fourteen teeth per inch or finer.
Most professional framers use choppers instead of miter boxes, because the chopper is quicker and more accurate and makes a smoother cut than does a back saw. However, the chopper cuts only wood, so many people who deal in metal or plastic frames do all their cutting with a power saw such as the Keeton Kut-All Saw.
Frame assembly requires several tools and supplies that you can pick up in a hardware store if you don’t already have them: tack hammer, nail set, wood glue, wire brads, hand drill, and pliers. The only special tool you need is a corner clamp. A fitting tool, while not absolutely necessary, will make the job easier.
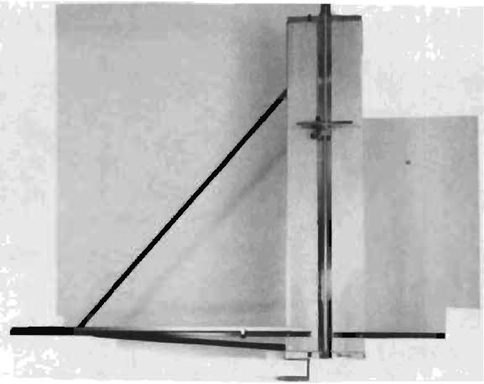
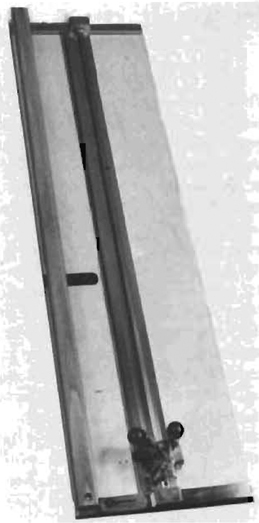
Keeton Kutter. The ultimate device for cutting glass, mat board, and backings is the Keeton Cardboard and Glass Kutter. The piece to be cut sits on the horizontal bar at the bottom, which also has a measuring guide on it. The blade or glass cutter moves along a vertical track. A straight cut is guaranteed, and the time taken to measure is practically eliminated. It’s expensive but worth it if you do a lot of framing.
Square-Head Hammer. Wire brads are used in the back of frames to hold the contents in place. The framing hammer shown here is designed specifically for tapping those brads gently into place. Available from Brookstone.
Miter Trimmer. This miter trimmer, available from Brookstone, is one of the simplest choppers available. You must first rough-cut the molding a little longer than you want it, then trim it exactly to size with the trimmer. It cuts any angle, from 45° to 90°.
Keeton makes a larger chopper that is similar to this one and quite a bit more expensive.
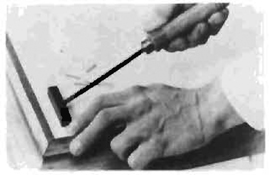
Fitting Tool. The fitting tool, also available from Brookstone, is used to squeeze brads into the back of the frame. Because it doesn’t jostle the frame, you don’t run the risk of breaking the glass or weakening the glued corners.
Corner Clamp. A corner clamp is essential for holding the corners of the frame tightly in place while the glue sets up. The simple, inexpensive corner clamps available in most hardware stores are fine for most frames but are limited in the size of the moldings they can accept.