
CHAPTER 4 LEARNING TO SEE IN 2D
Drawing in two dimensions can be an easier, more efficient way to think about the general geometry or shape of an object. Two-dimensional (2D) drawing simplifies the potential complexity of having to think about the overall three-dimensional (3D) perspective of an object while at the same time thinking about the visualization of that object. Working quickly is paramount for designers and starting in 2D is the quickest way to ideate.
Imagine drawing a simple box. In our 3D world, the box has six sides to look at, and each side has a profile or shape that together make up the object. Drawing each side of the box would present six views of that box and effectively describe what the object is without your having to draw the entire object in a perspective view.
Now, the sides of a box may not be all that interesting to contemplate, but they can help you think about which sides of a more complex object to observe and subsequently draw in two dimensions. You don’t need to see all six sides to know a box is a box; a front, top, and side view effectively communicate its box-ness. Likewise, drawing these same three views is generally enough to describe any object you are visualizing and communicate relevant details about it in your 2D rendering.
Drawing in two dimensions is also a great way to make sure that the dimensions related to the object being visualized are consistent between views. By projecting or drawing lines from one view to another, you can carry dimensions across the drawing. Drawing in this fashion matters, because to correctly show enough information about an object in a proportional and measured manner, accurate and consistent dimensioning is necessary.
Two-Dimension Sketch Demonstration
Sometimes the easiest way to understand a process is to try it.
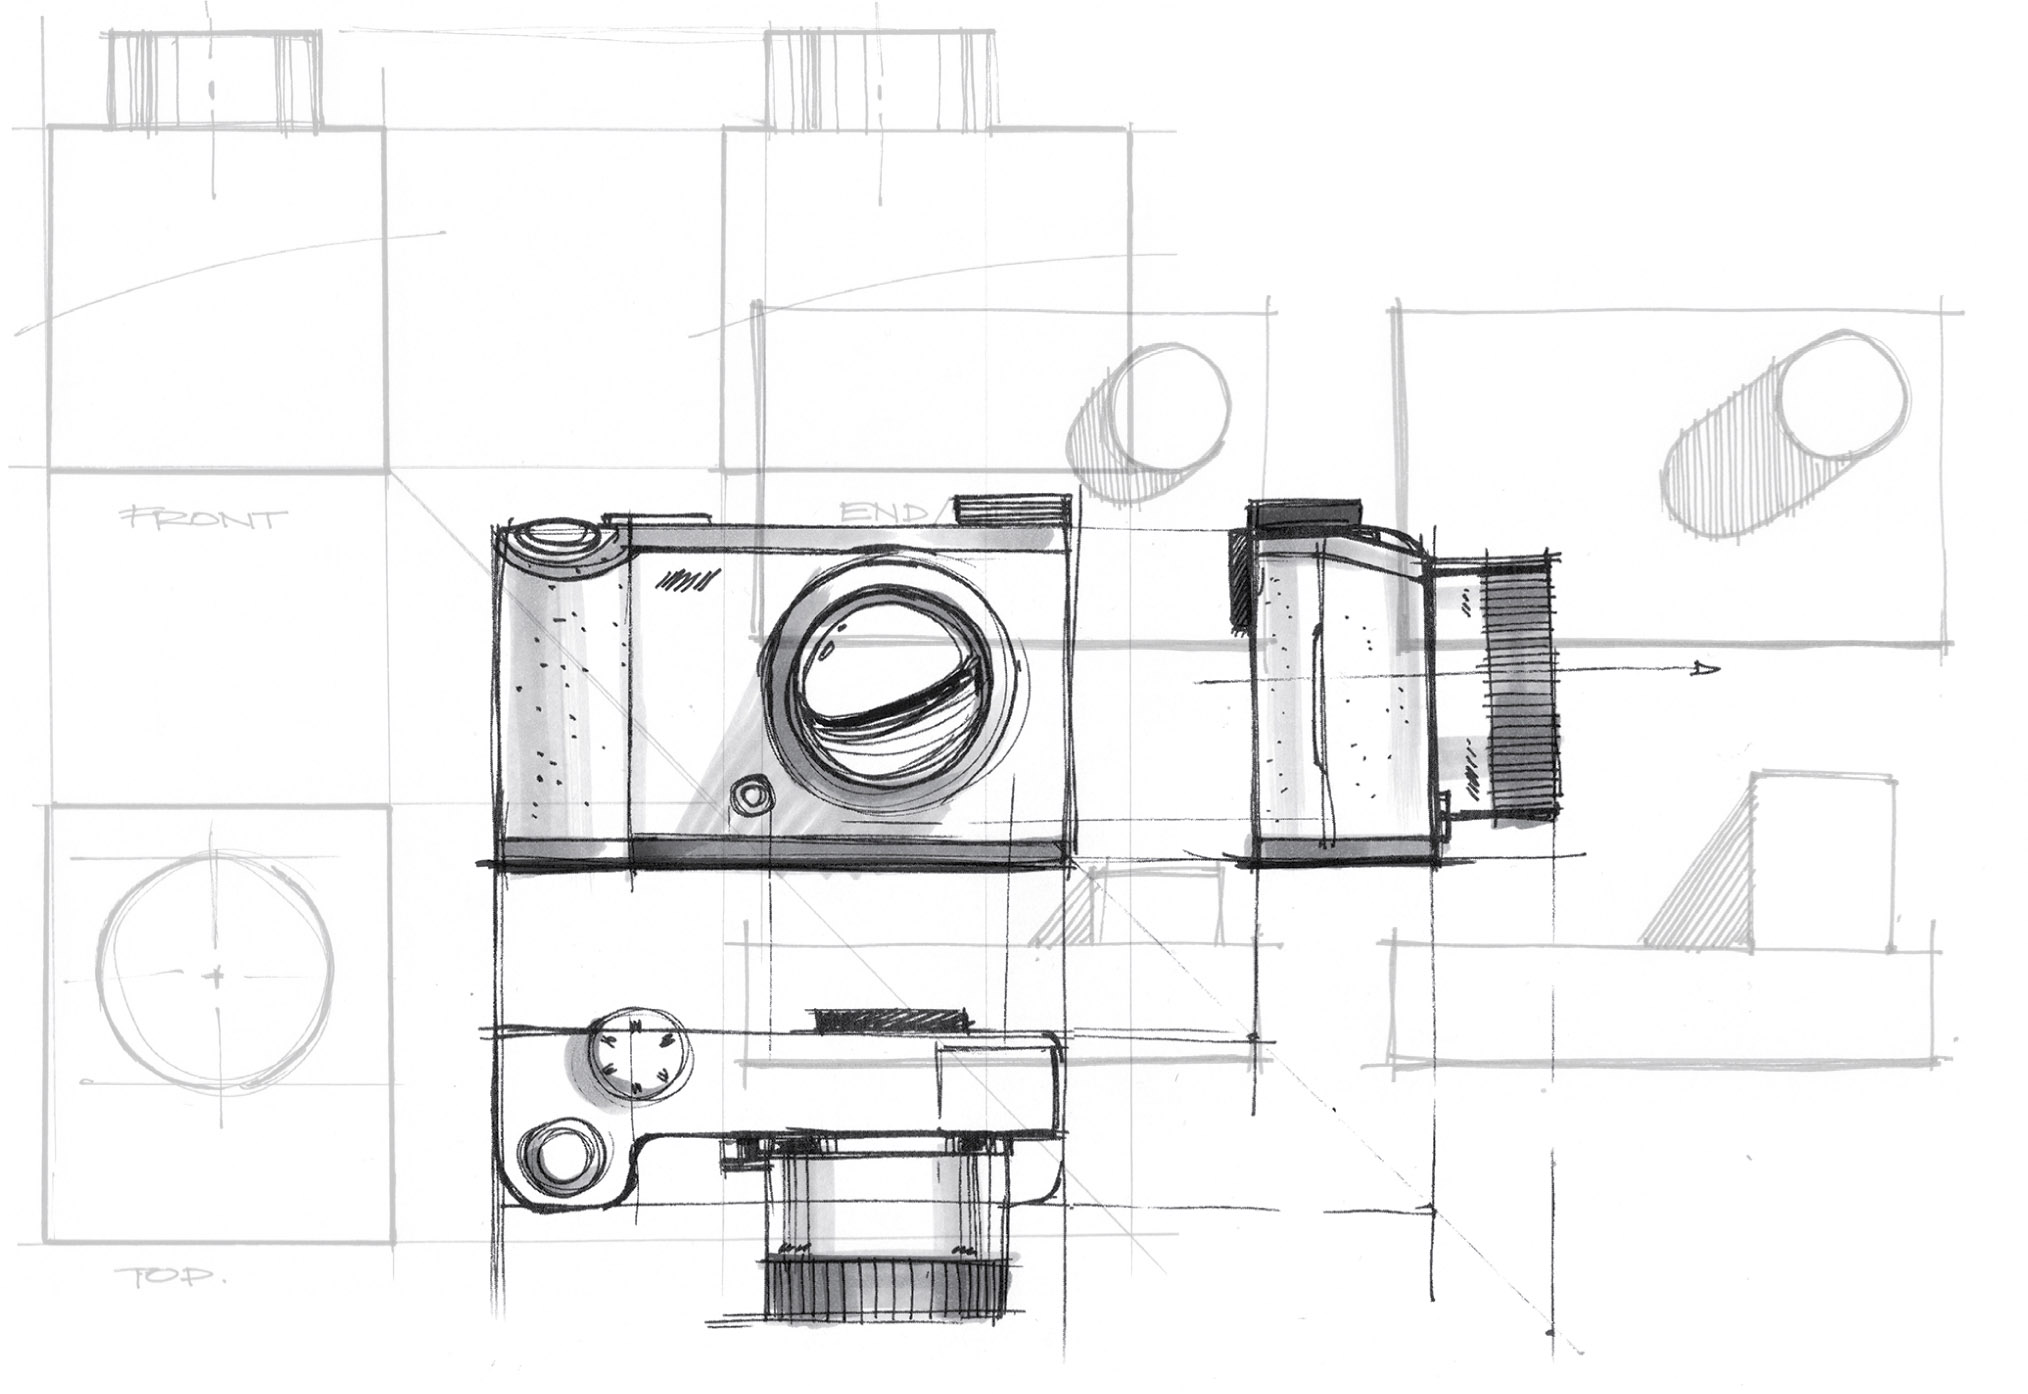
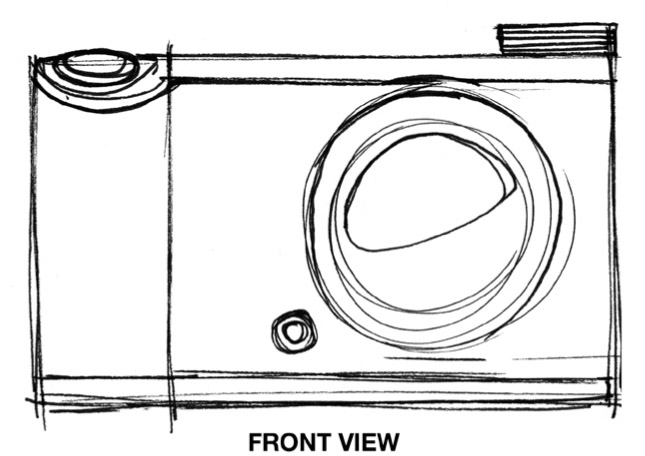
- In your mind, visualize a camera with a lens, and draw a simple outline of one view. Alternatively, you may use a camera as reference for drawing each view. You can start with the front, top, or side view, but for this demonstration I will start by drawing the front view.
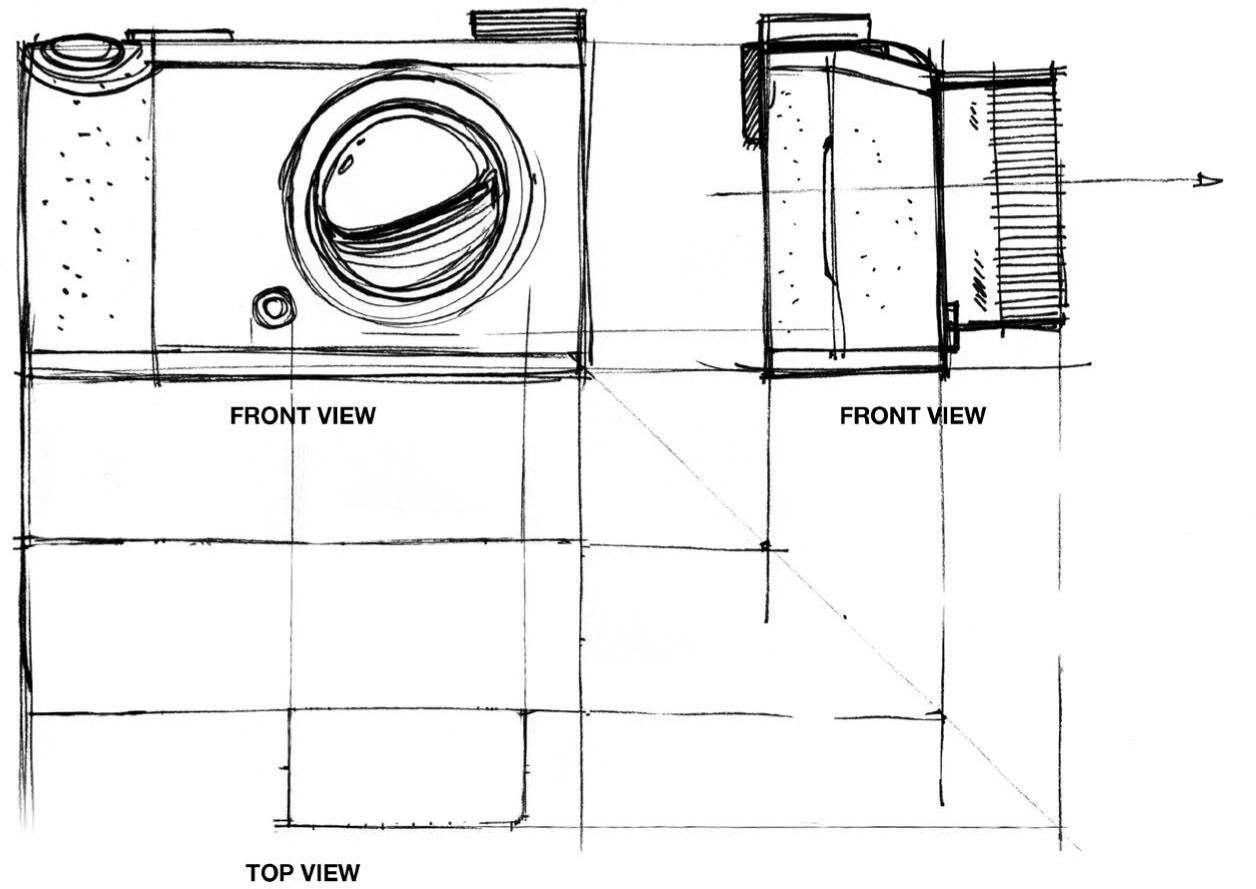
- From the silhouette and details of the camera, project lines to the right of the front view to create an end view. Note the location of details on your first view, and make sure that you carry the details across to the right in the end view. Estimate the depth of the camera, lens, and grip and draw those in. If needed, a very light rough sketch in pencil or marker may be completed first as a guide.

- Add details to the end view to mirror the details from the front view. Here, you can see the grip, battery door, viewfinder, lens, and flash have been shown in the end view.

- Starting at the lower right corner of the front view sketch, project a line downward at approximately a 45° angle and extend far enough to be directly below the end view. From the endview, project lines downward vertically to intersect this new diagonal line. These lines will be your measurements for the top view, which you will place below your front view.

- To complete the transfer of dimensions, project lines to the left from the intersection points along the diagonal line drawn in step 4. Be sure to extend the lines far enough to be placed below the front view.
Next, project lines downward from the front view to intersect the lines underneath the front view. At this point you should have a measured representation of the outline of the area for your top view as represented by your box.
- Carry over any additional details from each view using a similar technique and flow. Remember to capture details along the way as you project lines and draw in shaped.
At this point, I have sketched in and proportionally measured details such as the adjustment knobs, lens, flash and viewfinder as they would appear from the top view.
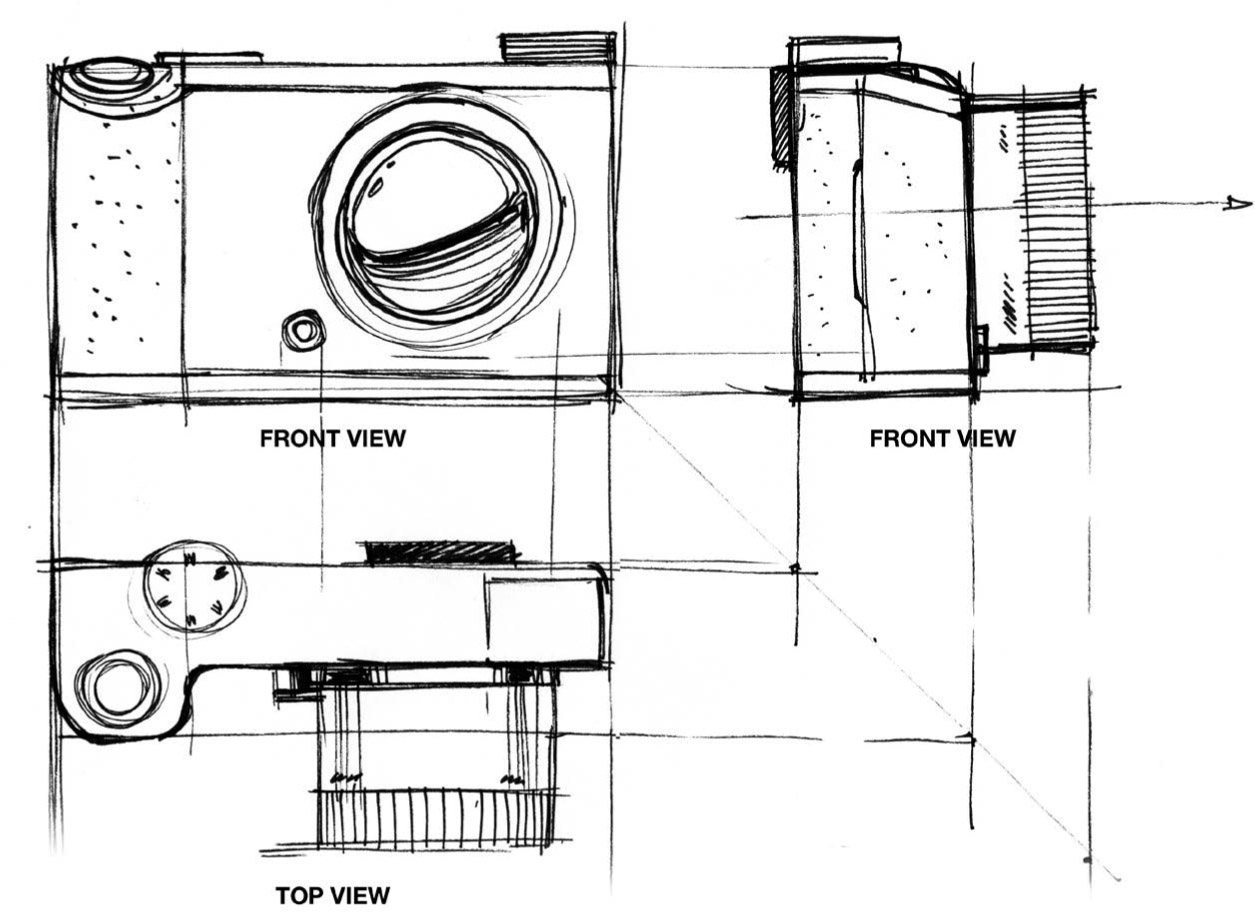
- I finish up by cleaning up line-work with a repeated pen stroke on outlines of shapes and adding a bit of gray marker for a subtle hint of depth. More on this technique ahead in the next section, “Drawing with Depth in 2D.”

Eventually, with enough practice, you’ll be able to rotate the object in your mind and visualize each view as you draw. Mastering this skill is key to being able to draw any object you want in perspective, whether simple or complex.
Drawing with Depth in 2D
While 2D drawings may contain lots of visual information about a concept, they also tend to be a bit flat sometimes. The illusion of depth, shadows, and color can enhance the appearance of your drawing, and they’re easier to add than you might expect.
To add depth, think of each element in your drawing as having some volume and depth, then maintain that idea of depth and lighting as you sketch. The simplest way to do this is using scale. If, for example, you’re drawing two of the same object, you can scale one object dimensionally and proportionally to be larger than the other to create the illusion of depth without having to go through the trouble of setting up a full perspective drawing scene. Remember, an object that is closer to you and has depth will cast a shadow on the surface or area nearby, so include one in your work.

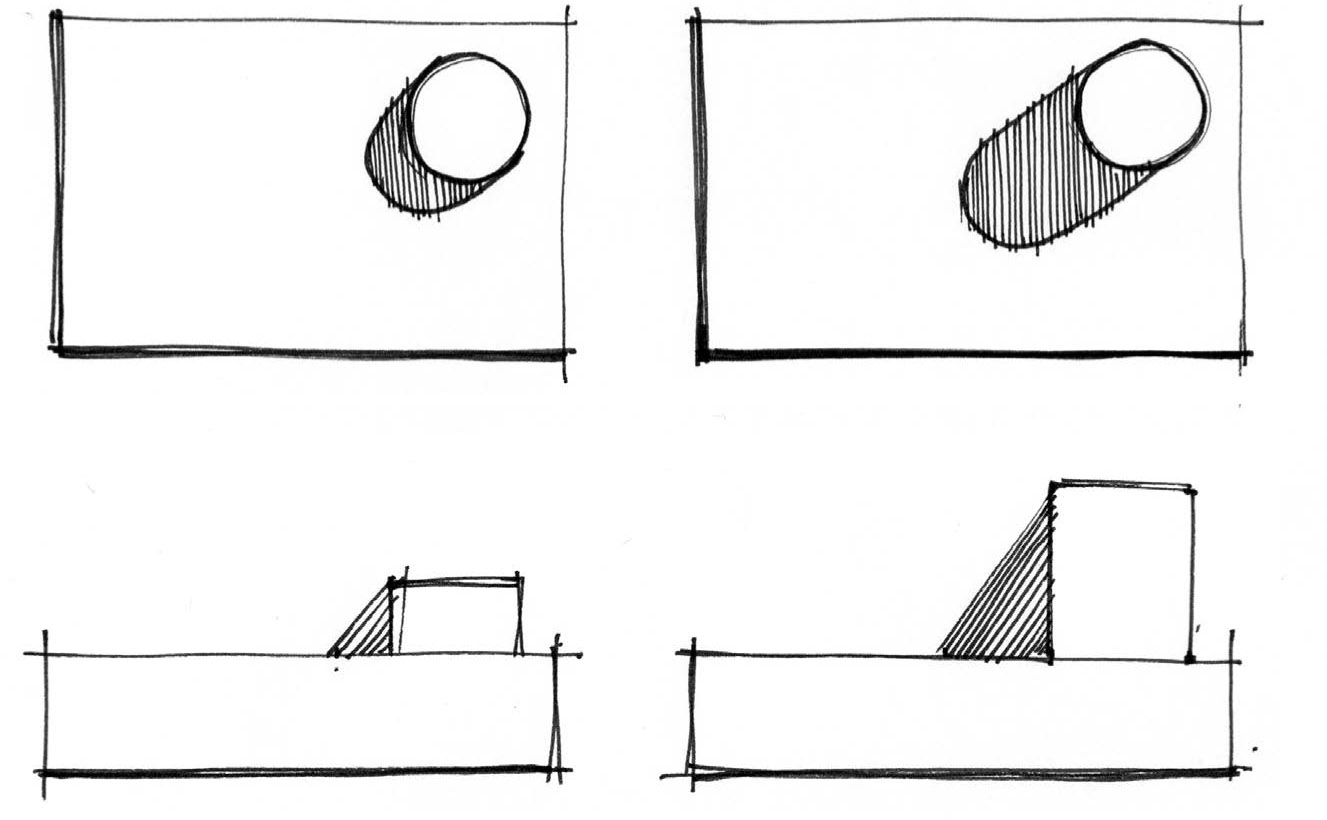
Let’s look at a simple example: a three-view setup of a simple cylinder that is mated (intersected) with a cuboid. In 2D views it might look something like this illustration.
Because the cylinder protrudes from the cuboid and the 2D view is from a point of view above the object, you could add a shadow to show that the cylinder has depth, even though it appears as just a circle from above. Drawing this cast shadow in the top-down 2D view adds information in a way that gives the view more dimension. Someone viewing your drawing can even infer how tall the object is from the length or direction of its shadow.
When simulating depth in a scene with multiple objects, consider their positioning. For example, if two objects overlap and are drawn in a 2D view, line weight and a cast shadow work well to communicate a sense of depth. When one object is above the other and lit from the front, a cast shadow creates a sense of depth and placement. As with the cylinder example, the size or intensity of the shadow in your 2D drawing can communicate relative placement in a 3D space.
Color is another way to communicate perspective when drawing in 2D. Try an experiment: Look outside and compare the saturation of the colors you see close to you with those in the distance. The more distant colors will appear less saturated. This effect is called atmospheric perspective, and you can mimic it in 2D drawing by placing more saturated colors on the object you wish to bring to the foreground. The viewer’s brain will connect conceptually what is observed in real life with the symbolic placement of color in your drawing and infer depth in your scene. We will discuss this concept further later in Chapter 9, “Color.”
