5
An Introduction to the Develop Module
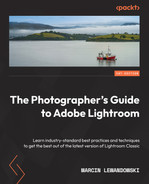
Here we are, in the area of Lightroom that is its very core, almost the defining part of it. Before Lightroom was developed by Adobe's software engineers, we photographers had to separately open each photograph and develop it, very often in Bridge or Photoshop. Many of us used other pieces of software, from free to open source, but they were often hard to use and quite unintuitive. I remember attending a photography trade show where someone from Adobe was introducing Lightroom to the gathered photographers. We all were in awe of the idea that we wouldn't need to open and save each photograph. Once we develop a photo, we can simply move on to the next one and then export the final results in multiple formats, even watermarked. What was a revolution in working with photography almost 15 years ago became a standard and is now used across the whole spectrum of photography software. I can't imagine working with photographs without the availability of Lightroom anymore. The following screenshot shows what a photograph in the Develop area might look like:
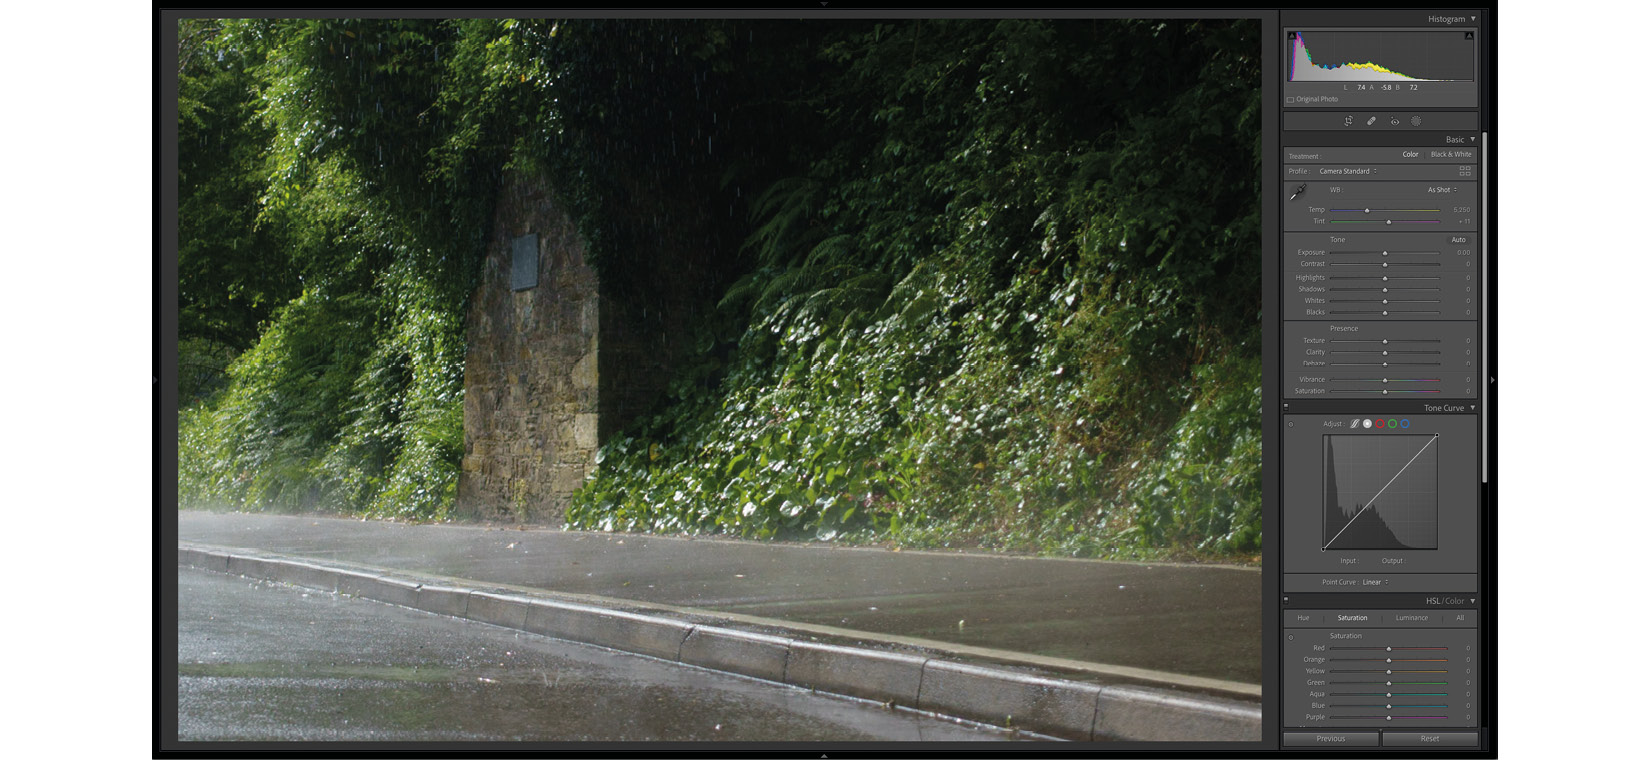
Figure 5.1 – Quick glance at an unedited photo in the Develop module
In previous chapters, we learned how to make getting our photographs into Lightroom and choosing our favorites as easy as possible. Now we will dive head-first into making our work shine. However proficient we are with the camera, getting the best possible image in the camera is still the key to excellent final results. Current industry standards and most clients' expectations require us to apply a certain level of post-production before photographs are delivered to our clients, friends, or family. From simple tweaks, such as straightening and cropping, through retouching basics, such as Exposure or Saturation adjustments, to complete overhauls of the look with Profile and Color Grading – Lightroom is a one-stop shop. As long as we don't need to "photoshop someone in," we can do it; it will often be possible to even "photoshop someone out." This can be seen in the following screenshot. We have removed the building shown in Figure 5.01:

Figure 5.2 – A few tweaks and a minute of work to remove the building from the previous figure
This chapter will cover the following topics:
- Looking at the Develop module options
- Tools available within the Develop module's right-side panel
- Tools available within the Develop module's left-side panel
Let's get started!
Looking at the Develop module options
This section will explain what functions are available to us within the Develop module and briefly look at how they work without delving into details.

Figure 5.3 – Develop module's right-side panel tools
Practically all of the tools we need to work on photographs are located on the right side of the Develop module. However, the left side (Figure 5.04) has a few new tools we haven't yet discussed as well. They will become more relevant once we learn more about the actual Develop panel tools on the right. Therefore, we will come back to the left-panel tools toward the end of this chapter:

Figure 5.4 – Develop module's left-side panel tools
Let's start with the tools on the right-side panel of Lightroom in the next section.
Tools on the right-side panel
The right-side panel is where all the tools affecting the look of our photographs are, and in the following subsections, we will learn what each of them can do.
Histogram
Just like with the Library module, our default view starts with Histogram, but this time, it is one of the tools to change the look of our photo, not just a window with information. If we hover our mouse cursor over the histogram, we will notice that from left to right, Histogram is split into five distinct areas, as follows:
- Blacks
- Shadows
- Exposure
- Highlights
- Whites
This can be seen in the following screenshot:

Figure 5.5 A

Figure 5.5 B

Figure 5.5 C – Adjustable Blacks, Shadows, Whites, Exposure, and Highlights
The mouse cursor changes to "left/right" arrows with a bar in the middle when we hover over the histogram. We can now adjust five major areas directly in the histogram by clicking and moving our cursor left and right. This tool is powerful enough to do all of the preliminary development that we will be doing with the tools available in the next section. All changes done within the Histogram tool will be reflected in the automatic movement of the Basic tab sliders.
Local adjustment tools
A crucial toolbar with local adjustment tools is located just between the histogram and the Basic toolbar. It contains all available local adjustment and correction brushes plus the Crop tool. A set of four local adjustment tools following the histogram includes the following:
- Crop Overlay ("R")
- Spot Removal ("Q")
- Red Eye Correction
- Masking
You can see this in the following screenshot:

Figure 5.6 – Local adjustment tools
Crop Overlay should be familiar to all photographers. When using it, we can also change the picture's aspect ratio or just straighten it. Next in line is Spot Removal. We can use it for simple tasks, such as cleaning up a few spots made by dirt on our sensor or removing distracting bits on the photographs that lurk behind our main subject. The third is Red Eye Removal, which is caused by some cameras' flash.
With the Masking brushes, we can paint with the tools available in the Basic tab. We can also make localized color and sharpness tweaks, fix local fringing, and even paint with color. Masking includes a graduated filter that works by applying settings, gradually transitioning from 100% to 0% in the line and direction of our choice. Radial Filter does so in a circular form, inside or outside of the circle we drew. AI masks will choose the sky or subject. Lastly, we have the most powerful of all, Brush, which we can use to "paint in" any available Lightroom settings to gently retouch or completely change the photograph.
Basic
This tab provides a set of tools we will use to do the majority of our work when developing photographs within Lightroom. The first option we can choose is whether we want to work with color or in black and white. It might seem a little bit unintuitive to get this choice straight away but think about it in terms of how global this tool is, and we can't get more global than changing from color to black and white. Treatment is followed by a choice of profile, which is an option that can completely change the look of our photographs before we go near adjustments sliders and change anything. Finally, before we get into some serious tweaking, we can adjust the white balance of our photos, mainly if we shoot RAW. White Balance changes will dramatically alter any photograph. Whether you want to fix or change the photograph, you will appreciate its clear positioning at the very top of the first module.

Figure 5.7 – Treatment, Profile, and White Balance tools
White Balance is followed by Tone adjustments, all of which, excluding Contrast, can be worked on within the histogram. Whenever we change anything with the Tone sliders, it's always reflected in the histogram, and the other way around. All changes we apply by adjusting the image directly in the Histogram area will change the positioning of the Tone sliders:

Figure 5.8 – Tone tools
Presence is a set of tools that will help us in defining and refining edges in our photographs. I look at these as a group of more elegant contrasting tools, ranging from the crude Clarity to the more intricate Texture tool and Dehaze, which lies somewhere between them but in a parallel universe. We will cover these options in detail, in the next chapter. Vibrance and Saturation are responsible for color intensity, and they vary in terms of how and which colors they affect.

Figure 5.9 – Presence tools
With Tone Curve, we can affect the overall brightness and contrast of the image. However, it is much more targeted and precise than the Presence collection mentioned earlier. We can control the image in a similar way as we do with the tools in Tone, and they work great together, complimenting each other. Tone Curve can also be used to colorize images and work on split toning. Overall, it's a much easier tool to understand than it seems at first glance. As a result, it can be very beneficial to our workflow, even if used only sporadically.
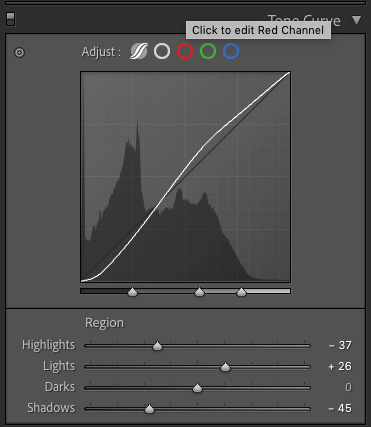
Figure 5.10 – Tone Curve tool
HSL/Color
HSL stands for hue, saturation, and luminance, and as you can imagine, it will help control colors in our photographs. With the set of available sliders, we can affect any color range on the picture separately. From simple tasks, such as darkening the sky or changing the hue of grass, to more elaborate changes that can help fix or exaggerate mixed light color conditions, this is our primary color mixing toolbox.

Figure 5.11 – Hue, Saturation, Luminance, and Color tools
Color Grading
Have you ever wondered how to create a signature look or tonality resembling old film photographs? This is the place. Toward the end of 2020, Adobe replaced a few simple sliders with a comprehensive set of controls provided by color wheels, enabling us to precisely apply the desired look to midtones, shadows, and highlights separately or globally to the whole photograph.

Figure 5.12 – Color Grading tools
Detail
I rarely let my images leave Lightroom without applying at least a bit of sharpness to them. We can control how sharpness is used in our photographs and work on noise reduction with six dedicated sliders in the Detail tab.

Figure 5.13 – Detail tools
Lens Corrections
One of the benefits of working with digital photography is fixing some of our lens's deficiencies after the photographs are already taken. Each lens has a specific build that can cause some distortion, chromatic aberrations, and unwanted vignetting. With Lightroom's built-in, quite-comprehensive set of lens profiles, we can get rid of these problems automatically. If the lens we are using is not listed, we can still fix fringing and other aspects I just mentioned manually.
Figure 5.14 A

Figure 5.14 B – Lens Corrections tools – Profile and Manual views
Transform
This is the single tool that initially made me switch from the stand-alone version of Lightroom to the subscription model. Transform is a compelling set of tools that helps us in fixing crooked perspectives in our images, from very light tweaks straightening our rushed shot to all-powerful, guided, manual control over vertical and horizontal lines, all within our crop's boundaries.

Figure 5.15 – Transform tool
Effects
As much as all of the preceding tools allow us to create a unique look, sometimes a bit of gentle vignetting is simply a must to compliment the image. As for the Grain tool, I mostly use it to sharpen some older images… yes, you read that right, and you'll learn all about this trick too.
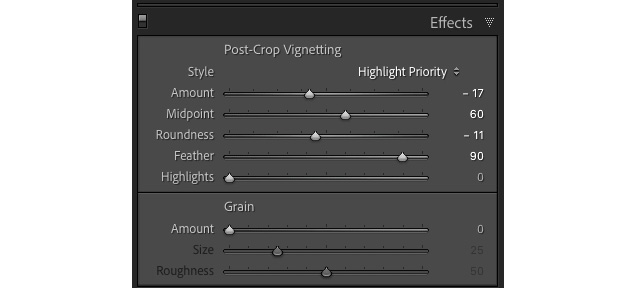
Figure 5.16 – Effects tool
Calibration
This is probably one of the most underrated, overlooked features and, simultaneously, the most potent color-altering tool in Lightroom. Changes made with Calibration affect every pixel of our photograph, changing the balance of the RGB mixture for each pixel. As a result, it is a very powerful coloring and grading tool. It is less intimidating than it might look.

Figure 5.17 – Calibration tool
Previous and Reset
The last two available tools are the Previous and Reset buttons. The Previous button copies all settings from the most recently viewed photograph and applies them to the currently developed photo. The Reset button reverts a photograph to its original state directly after import.
Figure 5.18 – Previous and Reset buttons
Now that we have learned about what options are available to us in the right-side panel of the Develop module, it's time to start looking at the options present in the left-side panel as well.
Tools on the left-side panel
The left panel works in a very similar way as it did in the Library module. It's still responsible for asset access but offers it on a more in-depth level for singular photographs.

Figure 5.19 – Closed set of left-side panel tabs
The following is a list of the left-side panel tools:
- Navigator: This is a familiar tool that accompanies us throughout Lightroom. The Develop module is no different; it also has the same functionality across all the panels.
- Presets: Presets are the various settings we choose from the right-side panel saved as templates to be applied to photographs. We can create simple presets to quickly use something such as multiple levels of sharpness or elaborate with settings encompassing multiple changes across many tools within several tabs. Lightroom comes with an excellent selection of presets split thematically into a few different groups.
- Snapshots: At any stage of the developing process, we can create a snapshot; this will save all current settings and a history of changes as a new starting point to which we can come back. There is no limit to how many snapshots we can create. It's a valuable tool to track different ideas we might have along the way without the need to make virtual copies.
- History: As long as we don't delete it, Lightroom will make a note of and store each change we make indefinitely in every photograph in Library. Think about it for a moment; every saturation nudge, aspect ratio change, export, produced print, brushstroke, spot removal, and camera profile: we can access any of these points and start from there.
We already discussed Collections in the previous chapter; it is available across all Lightroom modules. The same rule applies to the filmstrip at the bottom of our screens.
- Copy… and Paste: The left panel ends with two buttons: Copy… and Paste. These can be used to copy and paste any settings that we choose across photographs.
Figure 5.20 – Copy… and Paste buttons
Summary
We just had a quick glance at all the tools in the Develop module.
In the next chapter, we will explain each of the sliders and buttons within each of these tools and learn how they affect our photographs, from pixel level to a gut feeling. We will also look at tool combinations and see how different or similar to each other some of them are. Finally, we will work our way through multiple examples and understand the development process in detail.