8
Get them All Out – Using the Print and Book Modules
Prints are one of the most rewarding ways to look at photography. Lightroom offers a very streamlined way to get our pictures from the screen into the physical world with a printer between these two states. This chapter explains how to achieve the best results in preparing files for printing at home and gives you tips on preparation work when sending photographs to be printed by a service. In addition, we will look at how to work on designing a photo book layout and preparing it for print. As a bonus, we will also look at using the Print module to give you an edge in posting to social media such as Instagram.
In the second part of this chapter, we will learn about using the Book module, which will make designing our first photo book or album not only easy but also enjoyable and fun.
In this chapter, we will cover the following topics:
- A Print module overview
- Page settings
- Image settings
- Layout
- Printable information
- Branding via watermarks
- Printing to printer
- Printing to files
- A Book module overview
- Blurb and other types of books
- Book layout and layout automation
- Export for print
Exploring the Print module
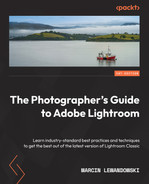
Here's a quick overview of the Print module:
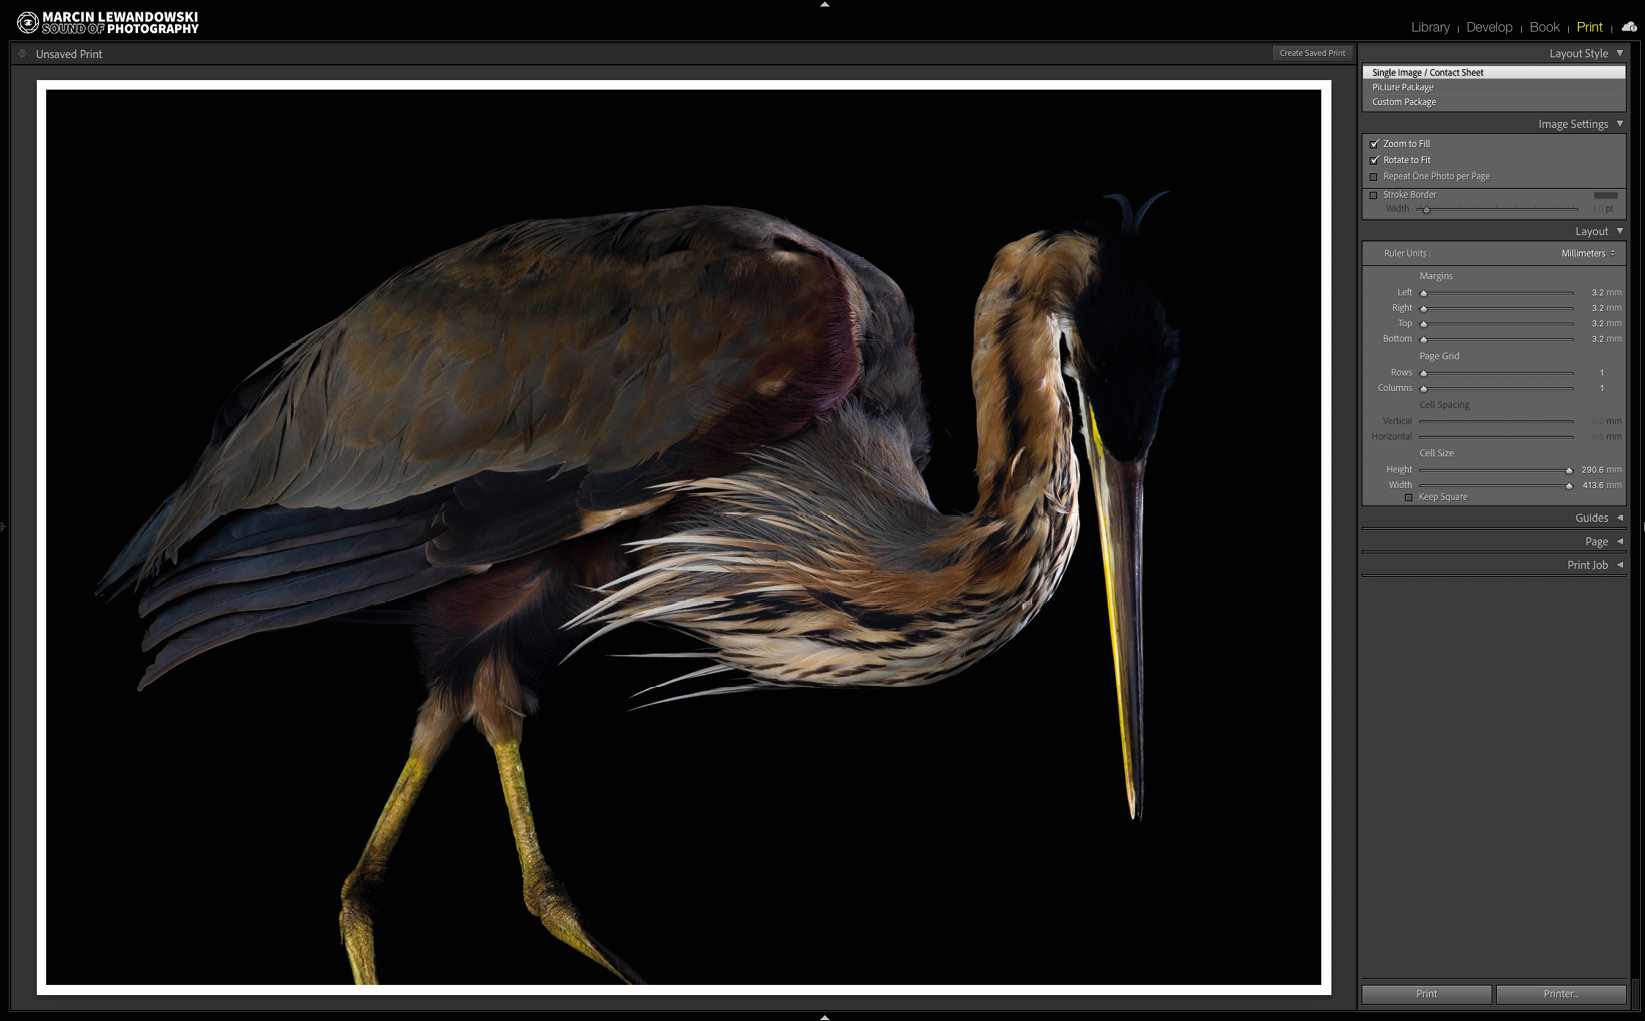
Figure 8.1 – The Print module
Let's have a look at the menus on the right side and left side of the Print module.
The right-side panel of the Print module
The right-side panel is where we will set all significant parameters of our print – from the settings managing the size and placement of our images within a sheet of paper to color management and output modes.
On the right side of the Print module, there are six tabs to work with:
- Layout Style
- Image Settings
- Layout
- Guides
- Page
- Print Job
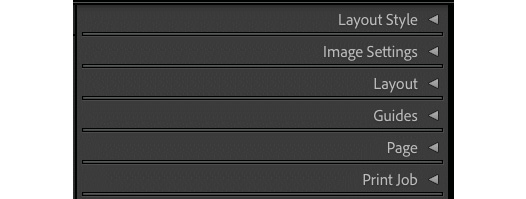
Figure 8.2 – The right-side panel of the Print module
They are relatively uncomplicated and easy to work with, making printing as enjoyable as possible. Once you learn the principles of the Print module and know your desired outcome, it will be a module that's as easy to work with as it is enjoyable to play with.
Layout Style
There are three different modes to choose from, each designed for a specific type of work:
Figure 8.3 – Layout Style
- Single Image / Contact Sheet: In this mode, we will design a page layout for one or multiple photographs per page, all of the same size. We will choose the number of rows and columns, the space between them, and their margins. This is the "go-to" option whenever you want or need to print a photo or a series of photographs, all in the same specification. By the same specification, I mean using the same paper, matching margins, and so on.
- Picture Package: This mode will allow us to print the same photograph in various sizes and cropped to different aspect ratios on one or multiple pages.
- Custom Package: Here, we will be able to design multiple page layouts for multiple photographs in varying sizes and aspect ratios.
Once you are done with Layout Style and have set the Page Setup orientation to suit, it's time to play with all the remaining settings.
Image Settings
Let's look at the options in the Image Settings tab:
- Zoom to Fill: This setting will fill the whole image area, from margin to margin, ignoring the original aspect ratio. We can later adjust a photograph's position by dragging it up and down or left and right. This is a convenient setting if we want a uniform white border around our photograph without the need to cut anything after the image is printed.
- Rotate to Fit: This is a convenient option when the printed batch of images includes vertical and horizontal photos. It will rotate photographs to fill the space, so we don't end up with a vertical picture placed in the middle of a horizontal page with empty space on both sides.
- Repeat One Photo per Page: When we print multiple images and set our page to contain a grid of multiple image cells per page, Lightroom will fill these cells with our selected images so that each photo appears once, filling one cell. Ticking this box will fill all cells within one page with the same photograph – that is, if we want to print 10 photographs and the grid on the page contains 4 cells, we will get 4 copies of each of the selected photographs printed on each page.
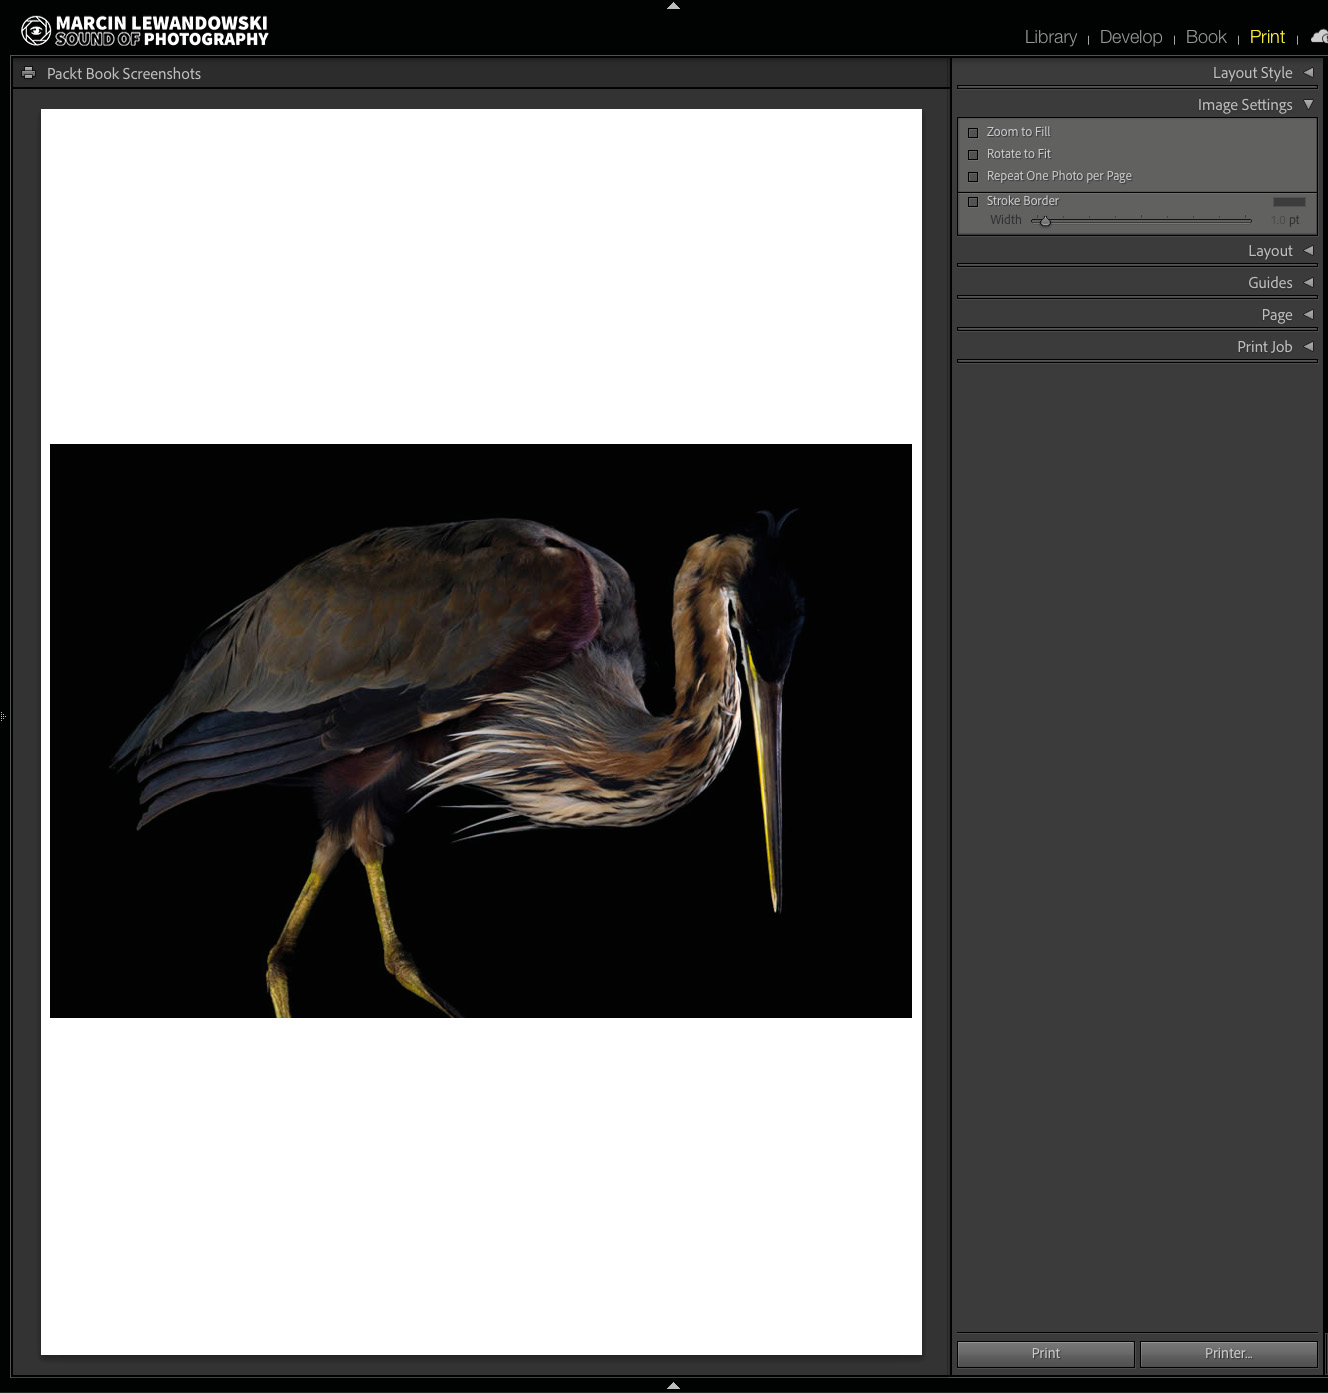
Figure 8.4 – A horizontal picture on a vertical page

Figure 8.5 – A horizontal picture on a vertical page with Rotate to Fit selected
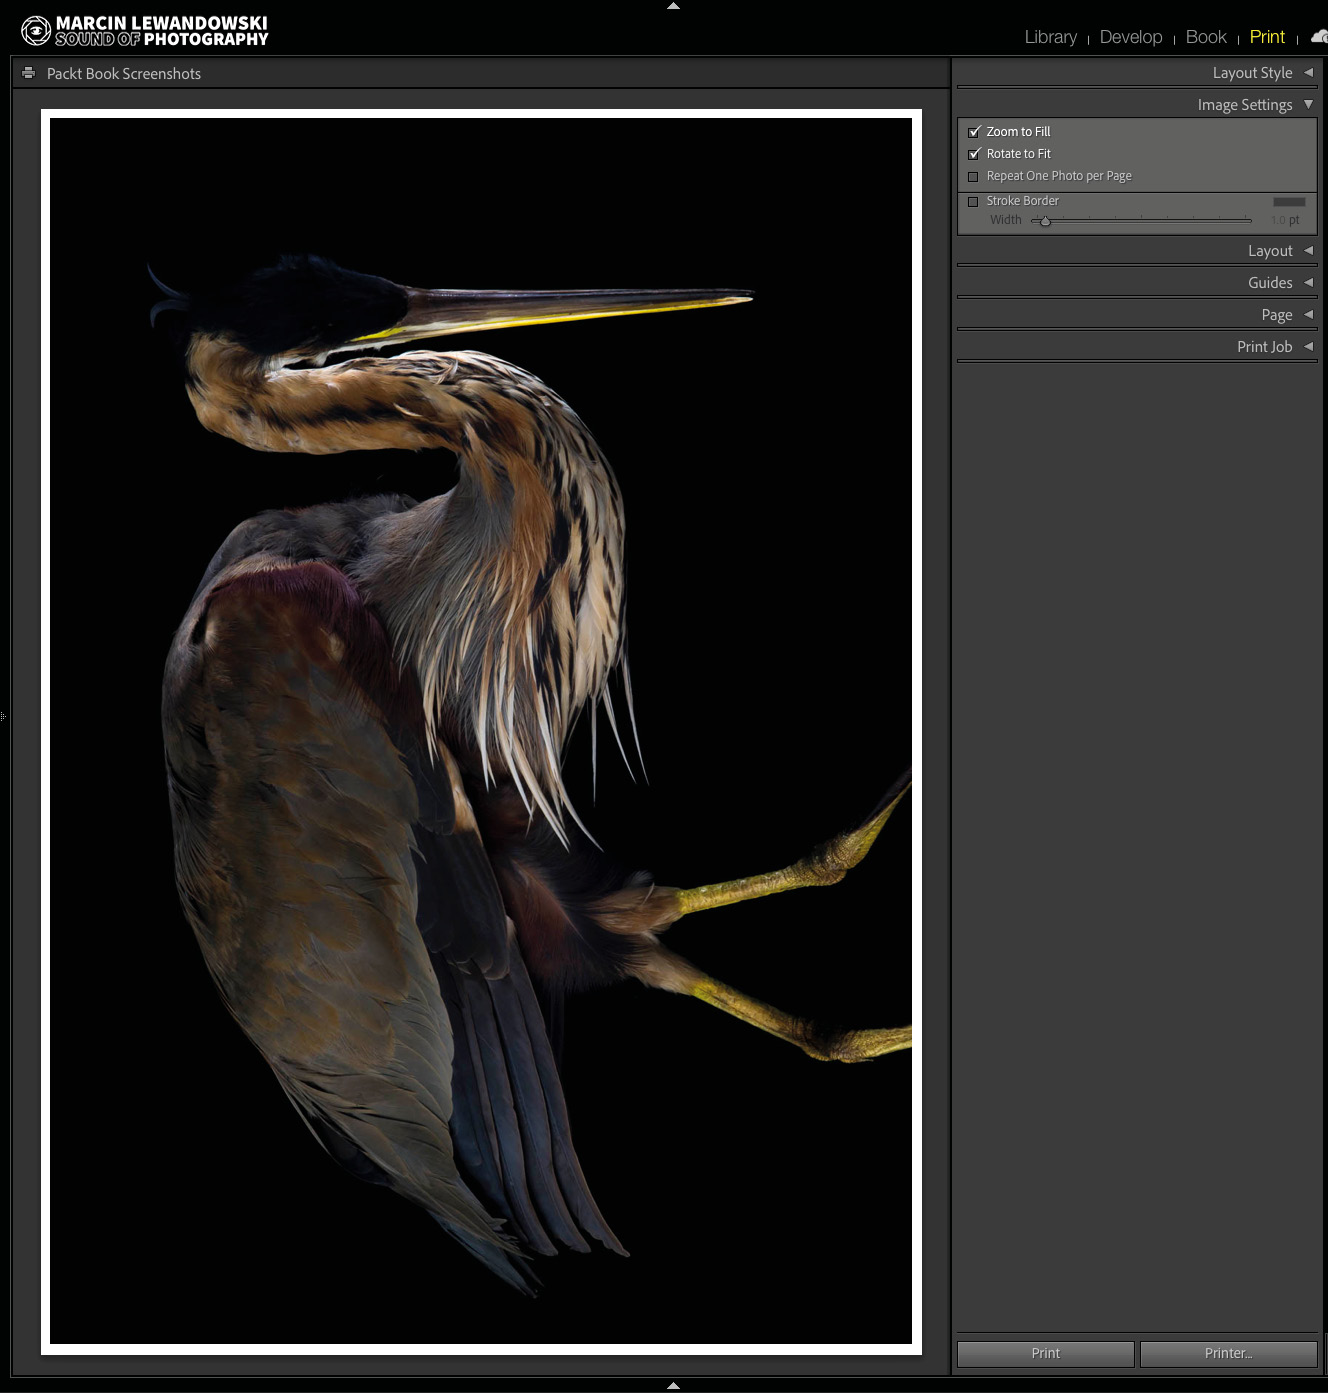
Figure 8.6 – A horizontal picture on a vertical page with Rotate to Fit and Zoom to Fill selected
- Stroke Border: If you would like to have a border in any color to surround your photograph, here is an easy way to do it. Once we check the Stroke Border box, the slider below becomes active – the Width slider. We can set any color border to surround our photograph. The border will be printed inside the set cell dimensions, so it will not change the size of the printed area or set margins.
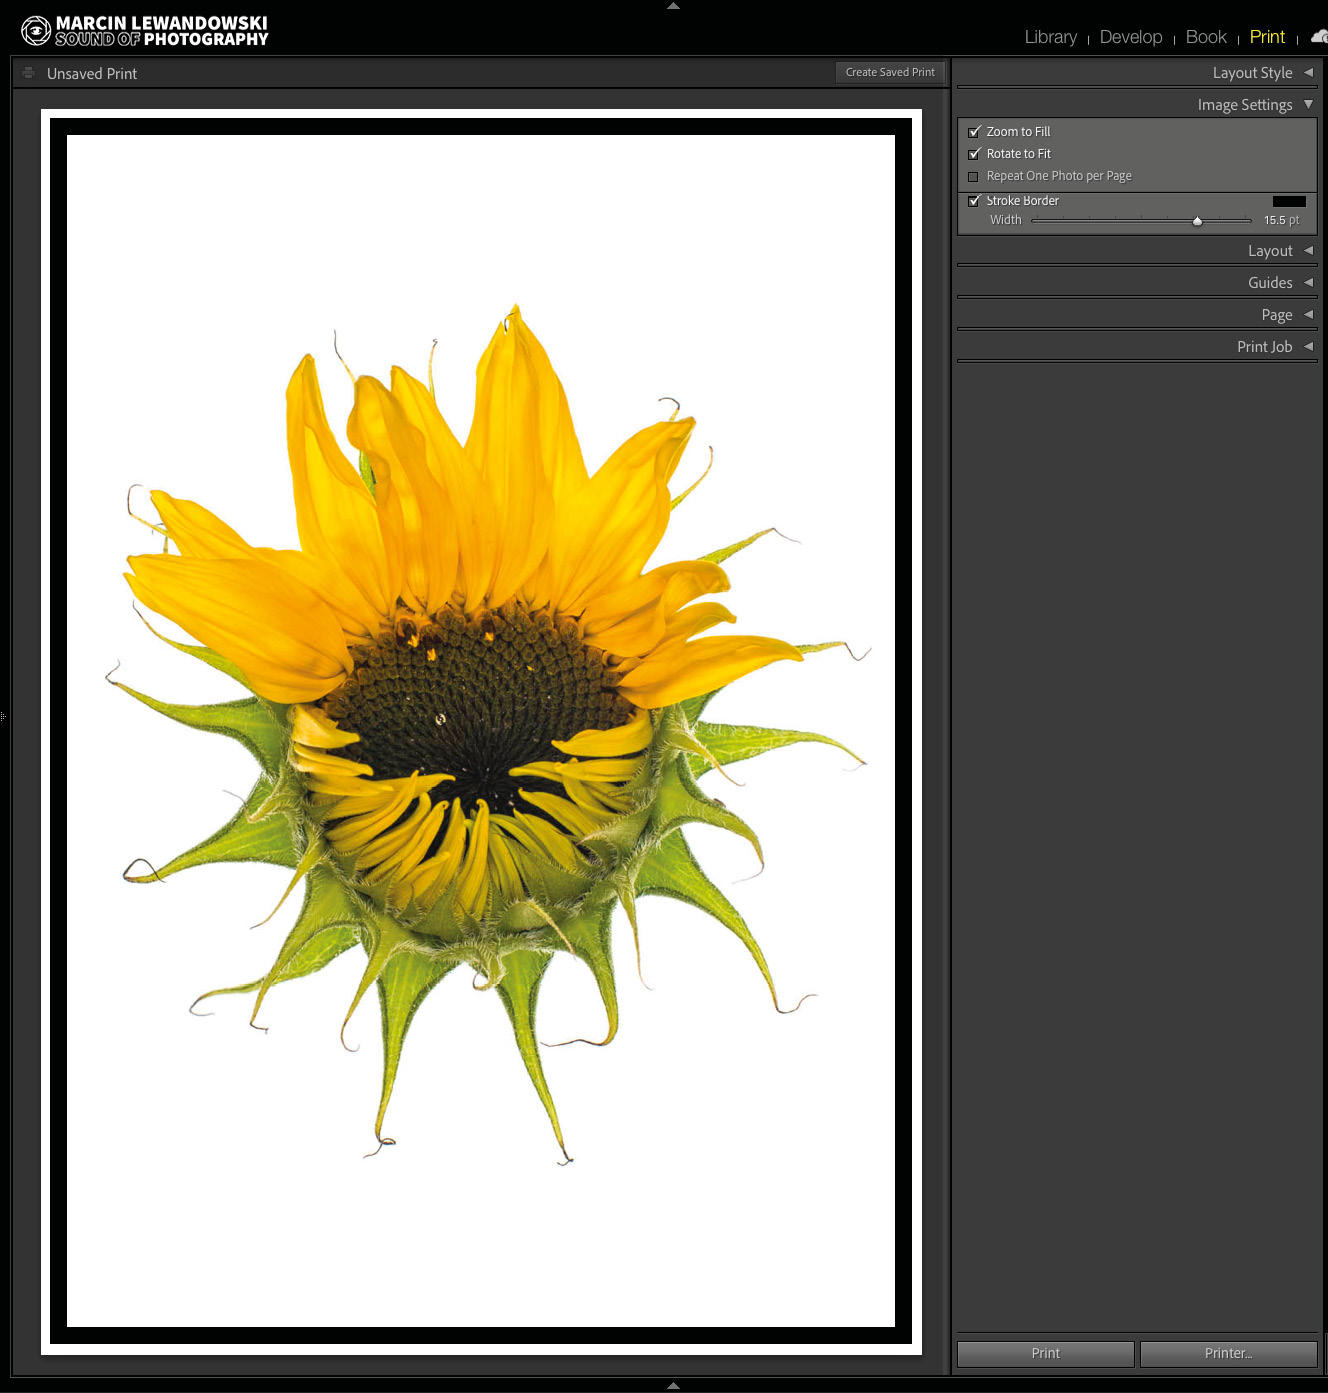
Figure 8.7 – A picture on a vertical page with Rotate to Fit, Zoom to Fill, and Stroke Border selected
Layout
Ruler Units allows us to change units to whatever we feel most comfortable with.

Figure 8.8 – The Layout tab
I like to work with Millimeters, as it's easiest to translate into print in its physical form and imagine how it will look. I can also just grab a ruler and quickly measure the distance in millimeters to better visualize it.
Margins
Here, we can set the white border surrounding our printed photograph. If we choose Zoom to Fill in Image Settings, the width of the margins will have the exact size of the frame surrounding our image. If we don't tick Zoom to Fill, the margins' width on the printed page will match on the short edges, with the longer edges adjusted to the inside of the set margins. Note that different printer settings for different papers fed into the printer differently might have a default value for margins that can't be reduced to 0. If you want to print borderless, and your printer supports it, you must choose or create appropriate paper settings in the Page Setup menu.
Page Grid
Page Grid is a great tool if we want to print multiple images on one page. We simply specify the number of rows and columns, which will give us rows x columns = number of pictures per page. Once we change the value for Rows or Columns, we will be able to adjust Vertical and/or Horizontal cell spacing. For example, suppose I print multiple images per page and set them to print with the Zoom to Fill setting. In that case, I'll usually set Cell Spacing to a value that's double the value of margins. I can later cut my page, keeping the same margins around each image. We can control whether it's the same photo printed or a different photo in each grid cell with the Repeat One Photo per Page setting.

Figure 8.9 A

Figure 8.9 B – The first screenshot shows a three rows x two columns grid for six images. The second screenshot shows the same grid with Repeat One Photo per Page selected
Cell Size
Changing Margins, Page Grid, and Cell Spacing will affect the Cell Size setting for the photographs to be printed in. If we have actual dimensions to fit, we will be able to adjust it here. One more handy setting is Keep Square – checking this box will keep the cells square across the grid.
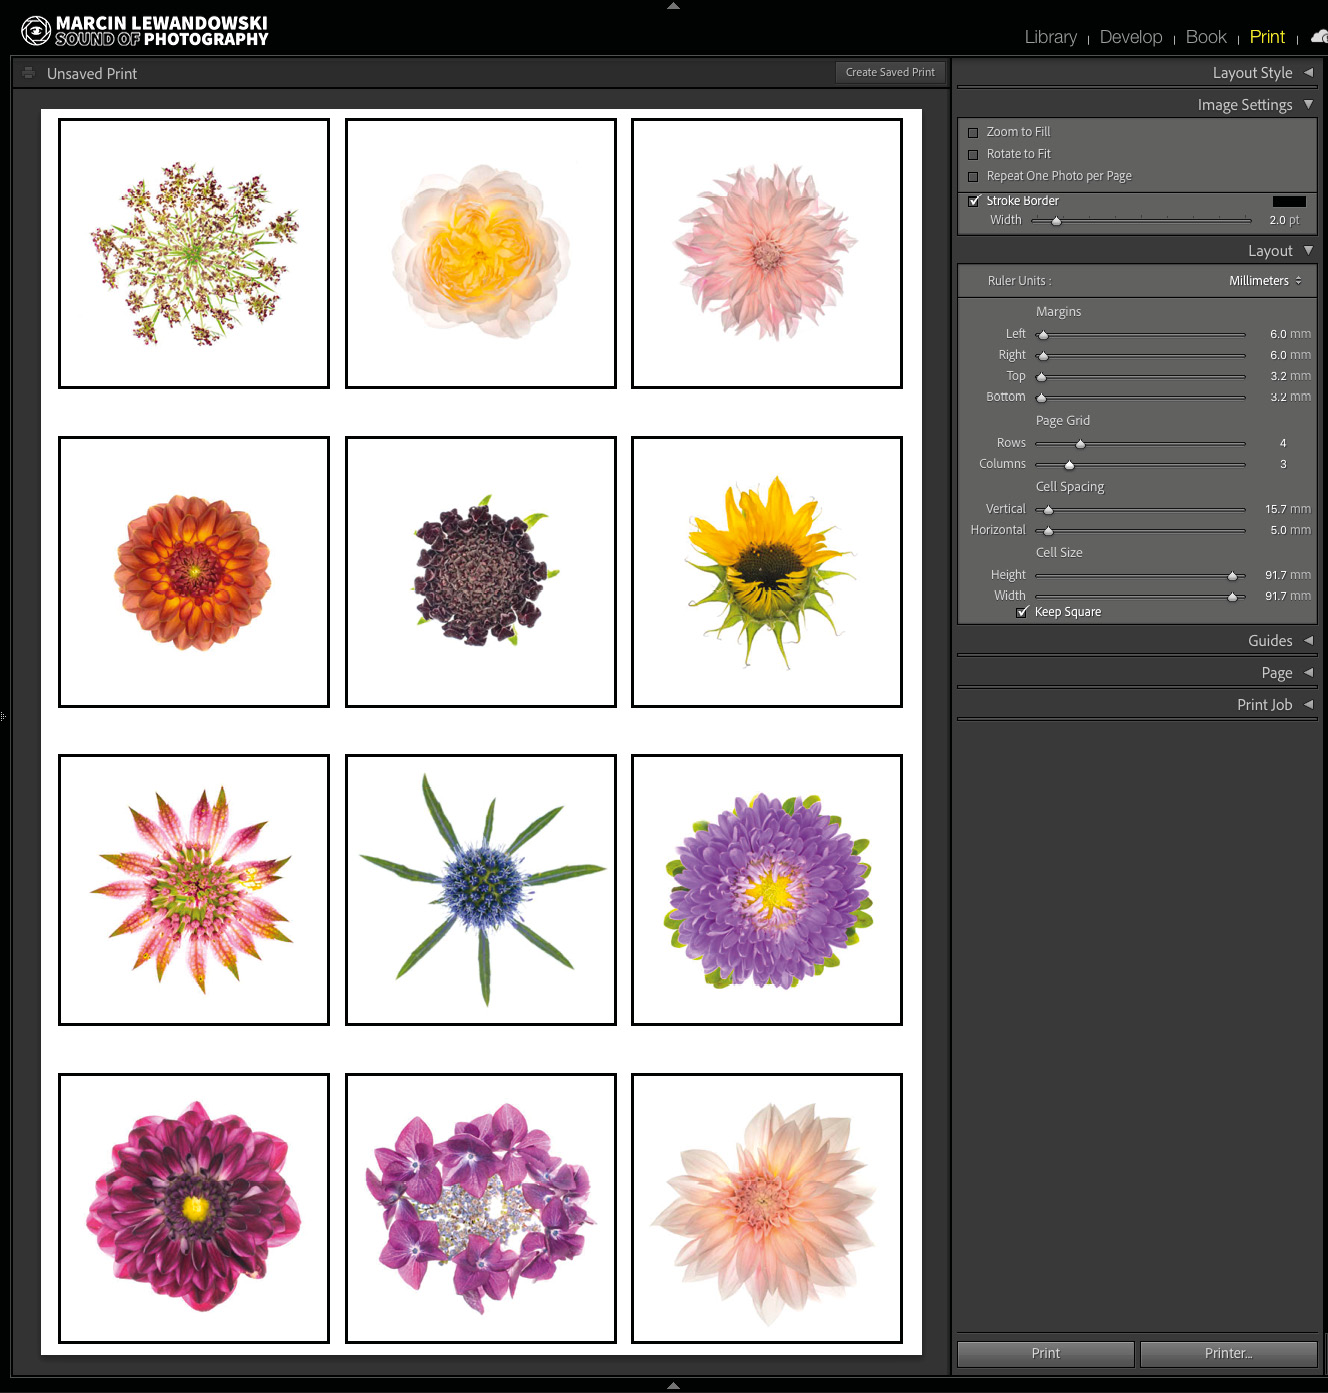
Figure 8.10 – A 4x3 grid with Keep Square and Stroke Border selected
Guides
We can turn on and off any visual guides with the Show Guides checkbox. Once it's enabled, we can choose which of the guides we would like to enable. Whether enabled or not, none of the guides will ever print; these are just visual aids to help us precisely lay out the page by adjusting the following options:
- Rulers: This appears on the top and side of the main window, showing us values in the units we chose as our Ruler Units in the Layout section.
- Page Bleed: This will paint in gray the unprintable border, which will depend on the paper settings.
- Margins and Gutters: This will visualize the grid we created with thin gray lines.
- Image Cells: This option will outline each image cell with a black hairline.
- Dimensions: Once we pick at least one image to be printed, enabling Dimensions will add the exact measurements of the printed area in the top-left corner of each cell containing a photograph.
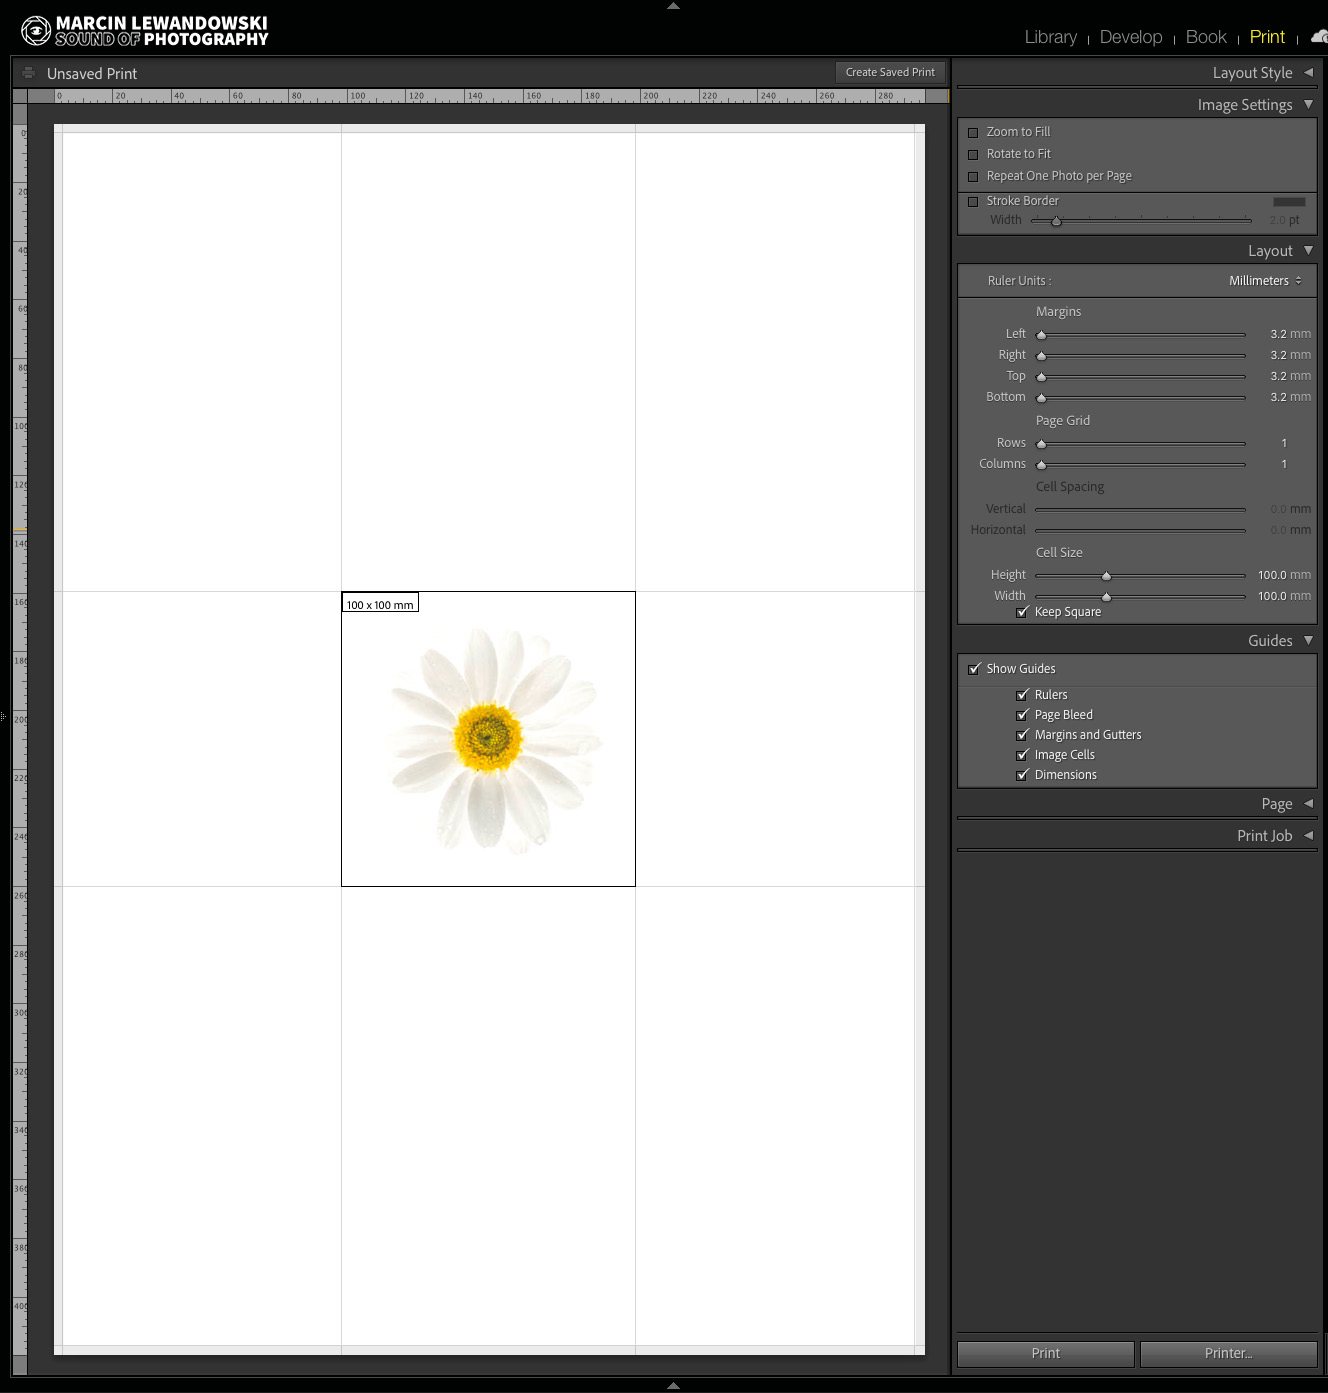
Figure 8.11 – A view with all guides enabled
Page
Here, we can add background color, a watermark, page numbers, and other information.
Page Background Color
Page Background Color will fill the entire space between the image and margins with any chosen color. We need to click on the color box on the right and select anything from the full printable color palette.
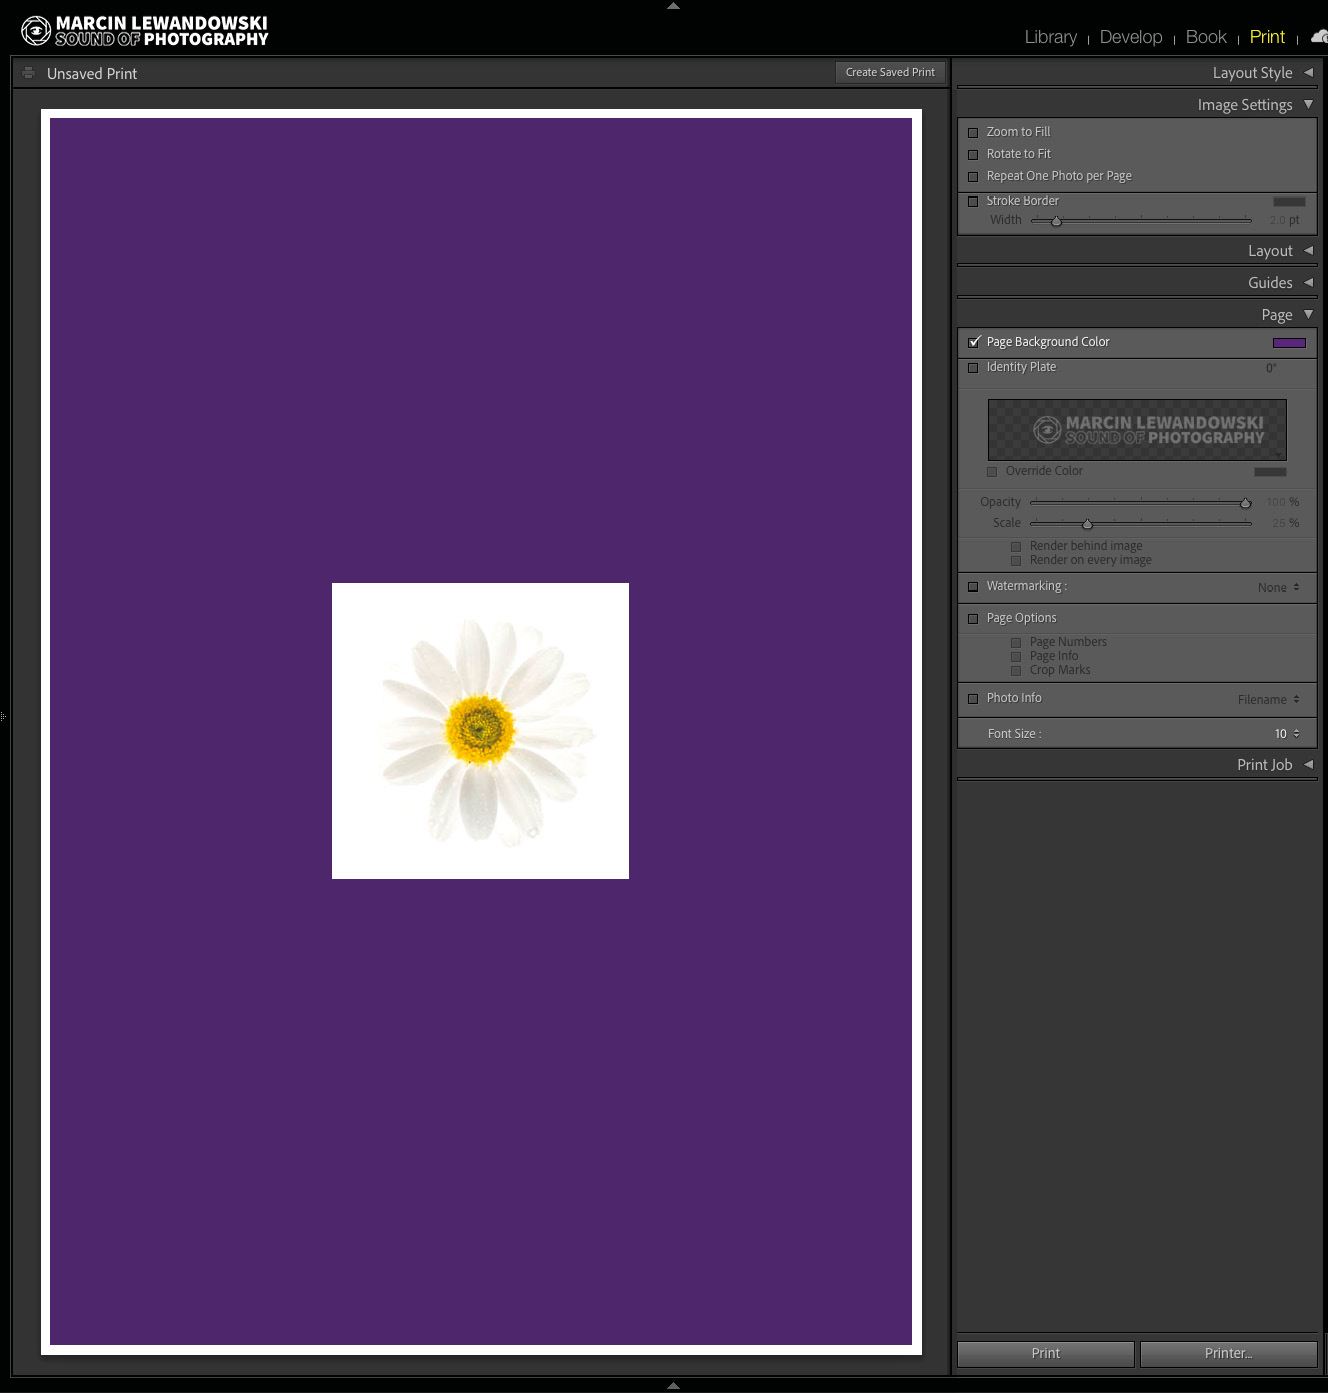
Figure 8.12 – Page Background Color enabled
Identity Plate
With this, we can add a graphic watermark to our printer page:
- Clicking on the small gray arrow in the bottom-right corner of the blank checkerboard under the Identity Plate checkbox will open a list of available watermarks. The watermarks list will be empty if we are using it for the first time.
- Clicking on Edit will open Identity Plate Editor, where we can choose a watermark we would like to use or create one. To select a readymade watermark, we must choose the Use a graphical identity plate option on the right, click on Locate file, and pick one from our drive. It's best to use files that support transparency, such as .png, but in the end, it will be a personal, aesthetically driven decision.
- If we want to create a quick watermark from scratch, we can choose the Use a styled text identity plate option on the left and play with the available settings until we like what we see. We can choose the font, type, size, and color in the text input window.
- Once we are happy with the changes, we need to either save this as a preset in the bottom-left corner menu or just press OK to use it without saving it as a preset.

Figure 8.13 – Identity Plate Editor
With the identity plate set, we can now change its Opacity and Scale settings with two available sliders. As with most numerical values in Lightroom, we can also double-click on the value and manually input the number of our choice.
With the Render behind image setting, our newly created identity plate (or uploaded one) will be visible behind the photographs. (Imagine watermarked paper with prints glued on top.)
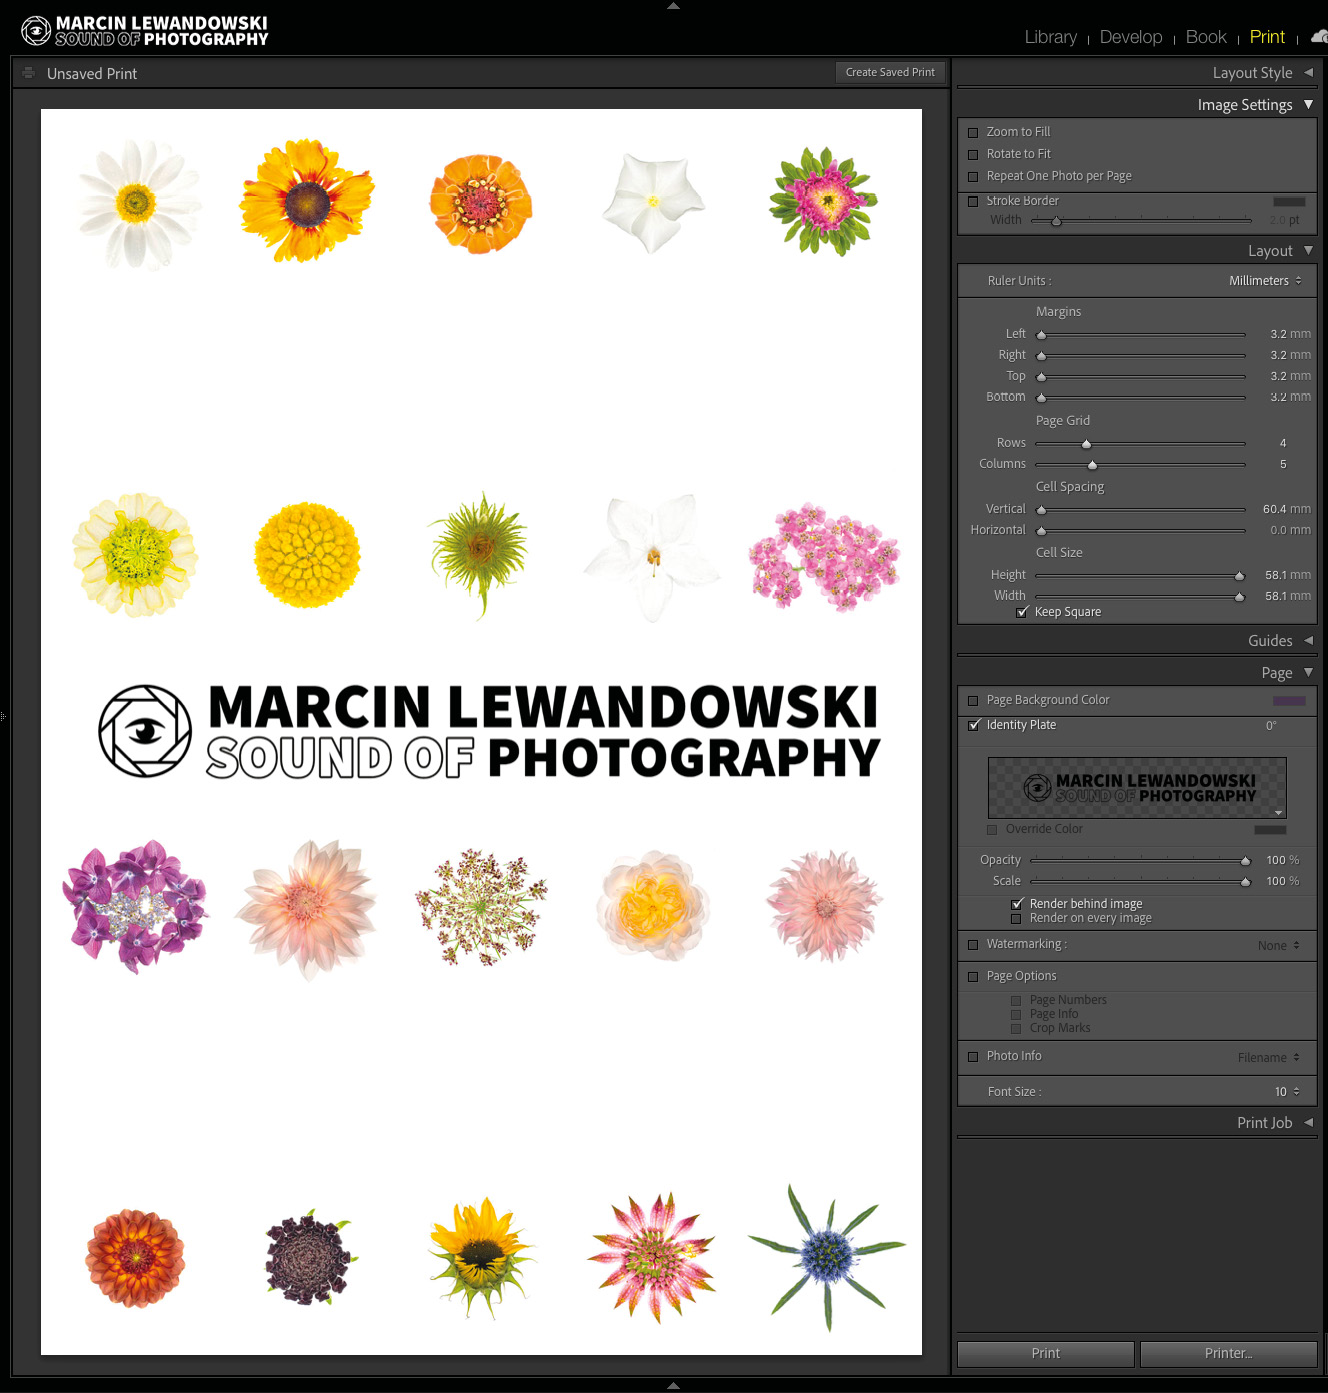
Figure 8.14 – Render behind image selected
With the Render on every image box unchecked, the identity plate will be placed in the middle of our print page. If we decide to check this option, it will be placed over each printed image.

Figure 8.15 – Render on every image selected
Watermarking
Whether we choose to use an identity plate or not, we can always add a watermark. We have access to all the watermarks we created and saved as presets within the Export module. We can also create new ones by following the Edit Watermarks… link at the bottom of the pull-down menu located in the bottom right corner of currently selected Identity Plate. It's the same process that's used with the Export menu, which we learned about in the previous chapter.
Page Options
Page Options enables you to add a few potentially important pieces of information:
- Page Numbers: If we have numerous pages to print and would like to add numbering, we must select this option.
- Page Info: This info contains print settings, including the profile and printer we used.
- Crop Marks: Tiny hairlines helping to trim the paper to the set cell size.
Photo Info
Photo Info gives us the same capabilities as the renaming tool in the Export module, and we also learned about it in the previous chapter. We can change the contents of this information by clicking on Edit… in the Photo Info submenu or choosing one of the default settings. We can also select the Font Size setting for this information, choosing one of the values between 6 and 16 in increments of 2.
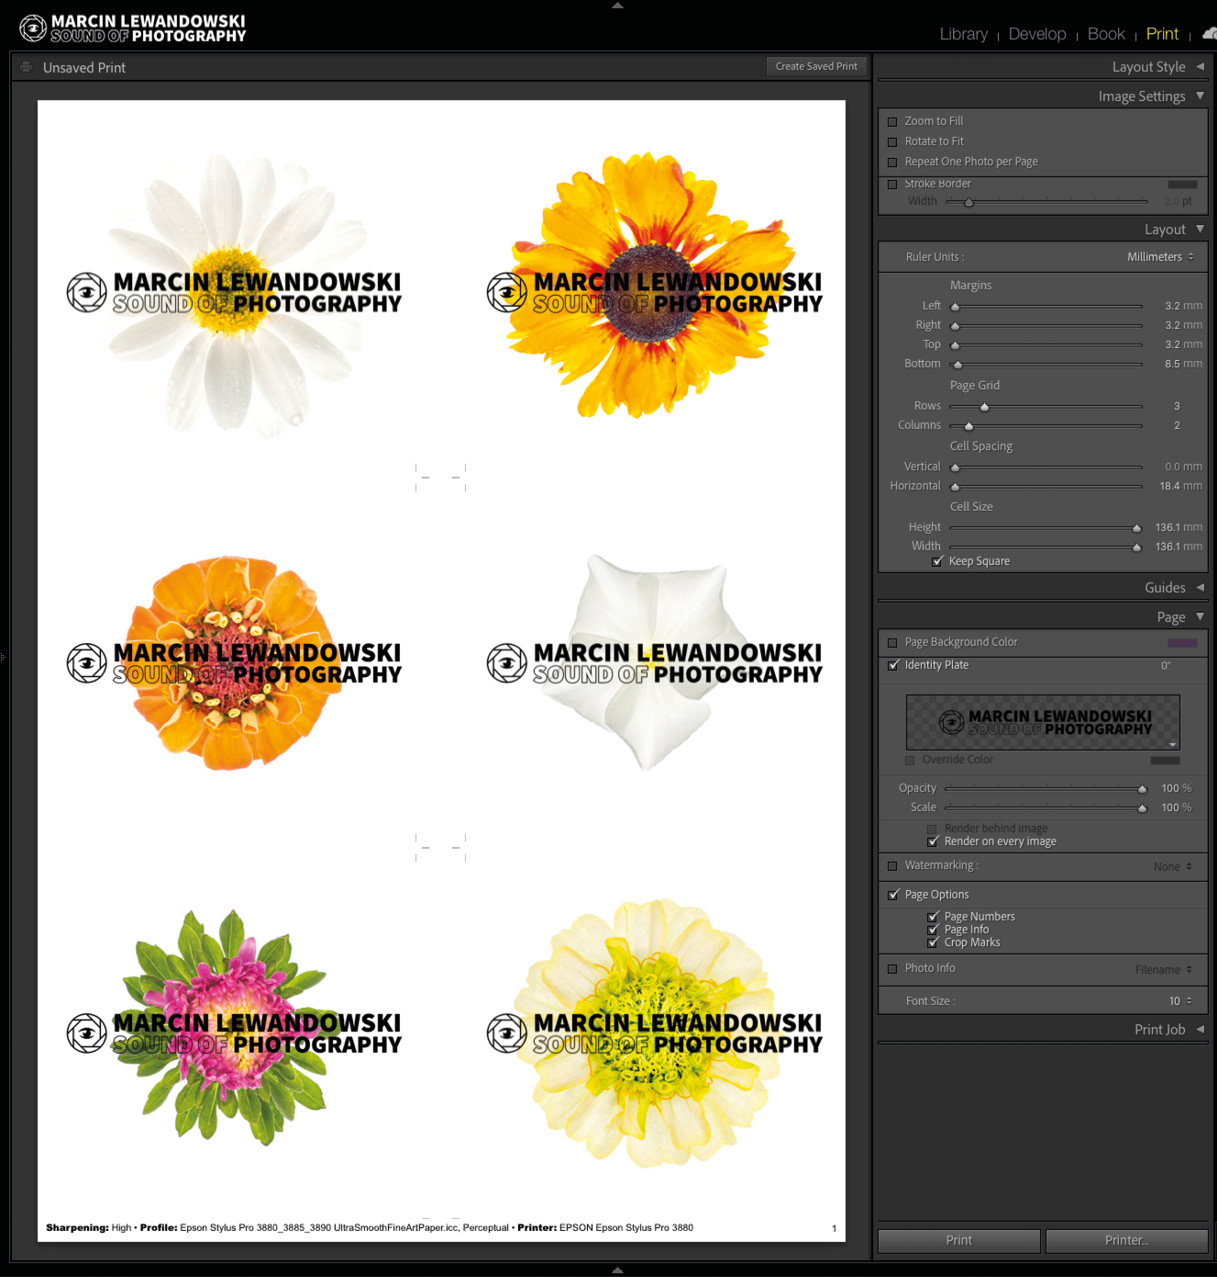
Figure 8.16 – All the page options enabled
Print Job
Last but not least, we have the menu responsible for color management and a few other bits concerning physical output.

Figure 8.17 – The Print Job tab
Print to
By changing the settings of this option from Printer to JPEG File, we can export print-ready files in the required specification. This is not only great for sending to external print services but also can be used creatively – as an example, I used a set of presets to make a unified-looking Instagram feed.

Figure 8.18 A

Figure 8.18 B – An Instagram feed with images printed to the file and a view of their sample Lightroom setup
But before we look into the Print to > JPEG File settings, let's go through the physical printing process.
Draft Mode Printing
First, we can choose whether we want to do draft mode printing.
This is an excellent option if the quality is not essential; instead of originals, Lightroom will send previews to the printer, which will shorten the waiting time for the prints. I suggest using it mainly for printing contact sheets and avoiding it when printing single photographs, especially when quality matters. We will not see much difference when looking at small images, where we just want to get a feel for them, but on a larger, single photo, the quality difference will be noticeable. Using Draft Mode Printing will blank any other options in the Print Job panel, which means that it disables all the other options in the Print Job panel.
Print Resolution
Using this field will depend on your printer, and I suggest referring to your printer manufacturer for the optimal PPI (short for points per inch) settings. To check the actual maximum PPI of your photograph in the size you want to print in, go to Guides > Dimensions. The Dimensions field will show the maximum PPI output at our chosen settings. You can set this to 360 for Epson and 300 for Canon as a rule of thumb. You will only see fundamental differences in print quality by a few inches. The difference will be most prevalent on pin-sharp photographs and when using the best-quality high-gloss paper. Even if Guides > Dimensions shows a PPI lower than Print Job > Print Resolution, Lightroom will upsample the image to print with the selected PPI resolution. The gist of this setting is that unless we print photos from a medium-format camera on the highest-resolution papers, intended for viewing under high-quality gallery lighting, leaving this field blank will give us more than satisfying results. Again, I suggest using the closest-matching PPI value to your printer's manufacturers. For example, when I print on my Epson Stylus 3880 Pro, I set this value to 360 and leave the math to Lightroom.
Print Sharpening
This sharpening option is applied regardless of any sharpening settings we applied in the Develop module. As it is with sharpening, you need to experiment with different settings to choose what you like. An additional selection of sharpening for the medium we are printing on will help in achieving satisfying results. I usually don't use this setting above the low level, applying any sharpening in the Develop module to the point that I'm happy with.
16 Bit Output
As you already know, 16 bits contain much more color information than 8 bits. Therefore, if your printer supports printing in 16 bits, make sure you tick this box. If you select this option for a printer that doesn't support 16-bit printing, the printing process will take much more time, but the results will remain unchanged.
Color Management
There are two main fields under this tab:
- Profile is where we can choose the appropriate profile for our printer/paper combination. If you have the profile on your computer but can't see it in this shortlist, click on Other…, which will open a complete list of all profiles installed on our computer. If the profile you are looking for is not on this list, make sure you installed the profile correctly. Paper manufacturers who provide ICC profiles will usually supply instructions on how to do that; on a Mac, it's simply a case of copying them to the ColorSync folder.
- Intent – Perceptual versus Relative: We already learned about the difference between Perceptual and Relative in Chapter 6, A Detailed View of the Develop Module's Functions. As a quick reminder, Perceptual converts colors in a way that will look as natural as possible for human eyes, while Relative will convert all of the gamut colors into the closest values that can be reproduced within the chosen destination's color space. I suggest working with Perceptual conversions, especially when we want all our gamut colors to look as natural as possible.
Print Adjustments
This can come in handy if we are using paper that wasn't well simulated in Soft Proofing mode. I find inaccurate soft proofing to be most often the case with matt papers or papers that are heavily textured, but I don't use Print Adjustments within the Print module. I prefer to create virtual copies of the photographs in question and then adjust them to achieve better prints. At the same time, I understand that you might want to use this function with hundreds of prints to make quickly. As with a few other options, it's good to be aware of it; even if we use it only once in a very long while, there will be a time when we really need it. I remember many years ago photographing a Brazilian jiu-jitsu competition and bumping contrast and brightness this way for out-of-camera JPGs to quickly produce crispier prints. It was there when I needed it and saved the day.
The two options at the bottom of the right-side panel
On the bottom of the right-side panel, we can find two additional buttons:
- Printer…

Figure 8.19 – The Print and Printer... buttons
Clicking on the Print button will print with the last-used settings. Unless you print image after image with the same specification, I advise never to "just hit the Print button." On the one hand, it's "just one page," but if that page happens to be of an expensive A2-sized paper, you might quickly regret losing time and resources. Hence the Printer… button offers the same functionality as Print Settings…, which we will discuss as one of two topics in the next part of this chapter. The main difference between these buttons is that Printer… offers a Print button at the end, and Print Settings… says Save.
Let's now have a look at the left-side panel of the Print module.
The left-side panel of the Print module
Even though the layout of the Print module is more or less the same as all other modules in Lightroom, its left side is home to a Template Browser and two buttons that will directly affect how our print will look – Page Setup… and Print Settings…. The Print Settings… contents will depend on the printer brand and operating system you are using, so please treat Print Settings… like an overview more than anything else.
Template Browser
Template Browser contains a number of default print settings that are worth browsing, even if just for inspiration.

Figure 8.20 – Template Browser
Now, let's have a look at Page Setup… and Print Settings… in the next subsections!

Figure 8.21 – The Page Setup… and Print Settings... buttons at the bottom of the left-side panel
Page Setup…
Page Setup… is where we will choose the paper size we want to work with.
Format For
We will choose which printer we would like to use; this is the list of all printers installed on our computer. If you can't see your printer on this list, you can follow the bottom-most option in the menu, which leads to the system menu, where you can add any missing printers. A printer being missing from this menu might also be caused by outdated drivers, firmware, and so on. Check with your computer and printer manufacturer for details. Once your operating system can see the printer, it will also be available to choose from this list, even if it's turned off and detached from the computer. Finally, we can select the Any Printer option. This will allow us to choose a printer at a later stage and adjust the following settings that will be default for all printers.
Paper Size
Choices on this list will depend on the size capabilities of your printer. In my setup, I use two printers – an all-in-one HP printer for office and "work-in-progress" stuff and an A2 Epson for more serious work, such as exhibition-quality prints or handmade wedding albums and books. Most of the paper sizes in the default list will have their own submenu (the ones with an arrow on the right). Depending on the printer, this submenu will offer us a choice of how we want to feed the paper into our printer. Unfortunately, some papers must be fed manually, especially really heavy or super smooth ones. Lightroom will not allow us to work with them until we specify that – this will come up when we learn about the Print Settings… menu. Hovering over each of the choices in this submenu will reveal a small note, showing the set print size and minimum size of the margins.
Under the selection of papers available as a default for our chosen printer, we will find an option to create custom paper sizes. We can create them in the last item in this menu, named Manage Custom Sizes….

Figure 8.22
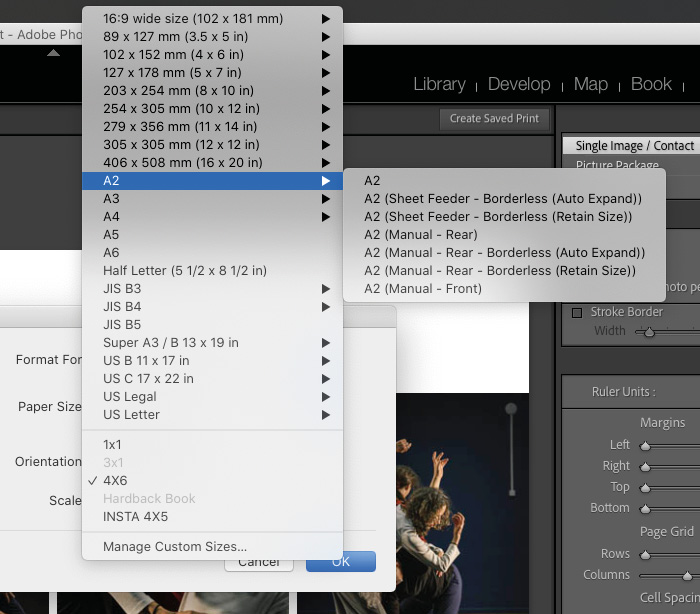
Figure 8.22 – The Page Setup… > Manage Custom Sizes… menus and an example of paper submenus
Clicking on Manage Custom Sizes… will open a small window where we can define custom paper size, including its non-printable margins area. To create custom settings for any paper, we need to change the width and height to the desired values and choose whether we want this to be available just for one of our printers or User Defined, which will make it available regardless of the printer we choose. Lastly, we can set unprintable margins for our newly set up page. Once we are happy with the dimensions, we need to click on the little plus (+) sign, and a new Untitled paper size will appear in the left-side list. Now, we can double-click on it to rename it. Under this list, we have two more options – the – (minus) icon, which will delete the selected paper size, and Duplicate, which will duplicate the currently selected paper size. Again, we will be able to change any dimensions on it and rename it.
With this done, we can finally accept (by clicking on OK) or cancel the current selection.
Orientation
The OK or Cancel options will lead us back to the Page Setup menu, where we are left with one more choice – Orientation > Portrait or Landscape.
Scale
Lastly, we can choose to reduce or enlarge the printout using the Scale option. Since we have much better control over the look of our print from within the tool tabs with the Print module, I suggest simply leaving it at 100% and clicking OK.
Print Settings…
Once we have set the properties of the paper we want to print on, we need to specify how our photograph will be printed.
Disclaimer
This section is just an overview of how the print settings work. Depending on the printer and operating system you are using, it will look different, giving you other options. Treat this as an outline and sketch of what you might encounter when working with Print.

Figure 8.23 – A layout settings example
First of all, we need to choose the printer we want to use, and if we have saved any presets that apply to the job, we can choose the right one using the Presets dropdown. This is followed by the number of copies we want to print and the choice of pages to print, which is another standard function of any printing software.
Layout is the first in a series of menus where we can specify many additional print settings:
- Layout: If we wish to print more than one image onto each sheet of paper, we have the opportunity to specify it here. In addition, we can choose in what order these multiple images will be printed onto the sheet of paper, which is also represented graphically on the left side of this menu.
- Border: In this menu, we can add a variety of thin lines around the printed photograph, which will run around the print area we set within Lightroom. This might come in handy as cut marks if we cut for a specific frame size.
- Two-Sided: Lastly, if our printer can do so, we can print two-sided.
Reverse page orientation and Flip horizontally: With the last two checkboxes, we can tell Lightroom to print pages in reverse order or to print a mirror image. Flip horizontally might come in handy for applications such as iron-on transfers.
Now, let's take a sneak-peak at the Color Matching menu. If we choose Lightroom to manage color within the Print module (which we will cover in detail later in the chapter), this menu will be unavailable. However, if we choose a printer to manage colors, we will be able to pick the color profile of our choice. To do that, we need to select ColorSync and choose the desired profile from the available menu. When you decide that you want your printer to manage colors instead of using profiles, you need to check your printer's color controls. This will open a few additional options within the Printer Settings section:
- Paper Handling: Firstly, we can choose whether we want to collate pages. This is especially handy when we are printing multiple copies of photographs and want them to be arranged in sets.
- Pages to Print: This has three options – All, Odd, or Even. This is self-explanatory, and it might have an application if you want to, for example, print multiple photographs, in order, on double-sided paper.
- Page Order: Depending on our preference, we can choose whether photographs are printed in the same order as they appear on screen or in reverse order. This will have a reverse effect on the order of physical copies coming out of our printer.
- Scale to fit paper size and Destination Paper Size: These are settings that will resize the printed image to fit the paper size we choose here, regardless of the used paper size. Suppose, for example, we print to A3 paper but tick Scale to fit paper size and choose A4. In that case, it will print an A4-sized image (with the borders we set, and so on) onto an A3 page, resulting in a potentially unexpected size and borders. It's one of those settings I never choose to use, but it's essential to know where to find it to troubleshoot a potential mismatch between our screen and the printed page. Lastly, we can choose to only scale the image down, but if we don't select the Scale to fit paper size option, it will remain unavailable.
- Print Cover Page: Here, we can choose for Lightroom to print an additional page as the first or last printed page. We can choose between various texts, ranging from Unclassified to Top Secret. If you are a private investigator preparing a report, it might be just the function you need.
- Printer Settings: This is one of the most important pages within the Print menu. Here, we will set important parameters that will be instrumental in getting a predictably stunning print. Starting from the top, the page setup will be set to values we saved in the Page Setup menu. This will influence what paper types might be available to choose from in the Media Type drop-down menu, available just below it. Note that certain types of paper can't be selected. In this case, it's best to refer to the paper manufacturer's info sheet, which should provide advice on what settings should be used for the paper you are using. For example, on my Epson 3880 Pro, fine art paper options will be unavailable for paper that is set to be fed through the sheet feeder. All fine art paper options will be available once we change the paper source in Page Setup to manual feed. Whether we need the fine art papers or not, this menu is where we will choose the paper we will be printing on. Most good digital photographic paper manufacturers will advise suggested settings, either in the purchased box of paper or via their website. If the manufacturer of paper you want to use doesn't provide them, I recommend choosing a setting that you think best describes the paper you are about to use. I discourage using matt inks on gloss papers, but that's a discussion that's entirely outside of the Lightroom realm. Other than that, if you have the time and resources, experiment. As much as I find both paper-specific and custom profiles accurate and easy to work with, picking something seemingly "incorrect" for a job can give us very satisfying results.
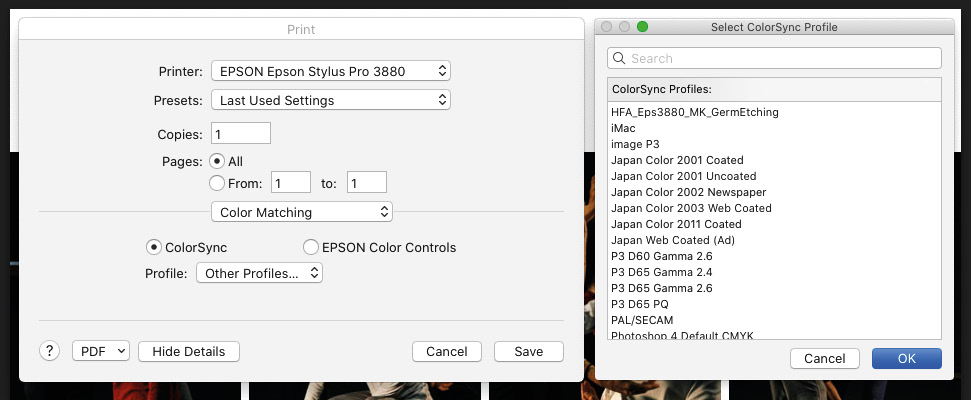
Figure 8.24 – A Color Matching menu example
You might have additional options below the media type list if you manually manage colors without using profiles. Most printers will support various output resolutions. Other menus under this tab might allow us to choose the required resolution, measured in DPI.
I want to stress again that options available within Print Settings… are not Lightroom settings, but I thought it might be good to include a short overview and explain what are they responsible for.
With all the information we just discussed, you should have enough confidence to make your first prints and experiment with some of the aforementioned settings. Remember that printing is like a link between the digital and physical worlds. Fine-tuning details that allow a predictable print will require more patience and double-checking before hitting that Print button. Once it's printed, we can't interfere with the print; we can only print the image once more. I encourage you to print photographs, even if just occasionally. There is an excellent reward in holding tactile proof of all the work we have put into creating and polishing our photographs.
The next module we will look at is the Book module, where we will be designing our own photo books.
The Book module
It's usually hard to design a book, but Lightroom makes it easy, effortless, and fun. So, let's explore the Book module.

Figure 8.25 – The Book module
The left-side panel of the Book module
The left-side panel of the Book module contains Preview and Collections.

Figure 8.26 – The left-side panel
The only difference between Preview in the Book module, in comparison to other modules, is that instead of a single photograph, it will display the currently selected page. In addition, a delicate shadow will help us differentiate between the left- and right-side pages. Collections remains unchanged in comparison to the other modules.
Looking at the top, above the current page/book window, note that it says Unsaved Book. Opposite this notification, we have two options, Clear Book and Create Saved Book:
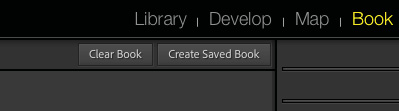
Figure 8.27 – The Clear Book and Create Saved Book buttons
- Clear Book does what it says – clears any images from the edited book and returns the layout to its default state.
- Create Saved Book will create a collection containing images we selected to work with and autosave any layout changes. I advise you do this every time you start working on a new book project, even if you are just playing around. I learned the hard way what happens when you don't save a book collection.
Once we click on Create Saved Book, Lightroom opens the Create Book menu, where we can choose the book's name, location, and a few other options:
- Include only used photos will save our book layout only with the photos we used in the book. I suggest creating a saved book at the beginning of any work in the Book module, which makes choosing this option pointless, but you might choose to work differently.
- Make new virtual copies: Choosing this option will create new virtual copies of all photographs we currently have in the filmstrip, unless we select the Include only used photos option, in which case Lightroom will create new virtual copies of the used photos only.
- Set as target collection and Sync with Lightroom: These options work precisely the same way as with other Lightroom modules.

Figure 8.28 – The Create Book menu
Once we click Create, a new collection will appear in the Collections panel. What differentiates this collection from others is a small book-like icon on the left side of its name. When we view this collection in any other module than the Book module, it will have a small arrow on the right side of the name. This arrow will open our saved book directly in the Book module.
Before we dive into actual book design, it's worth noticing the navigation aids present on the bottom toolbar. On the left side, we can choose between three types of views:
- Multi-page view ("Cmd + E")
- Spread view ("Cmd + R")
- Single-page view ("Cmd + T")
I find the single-page view option most comfortable for designing page layouts. Once I have a few pages ready, I'll switch to spread view and see whether they flow nicely from one spread to another and whether neighboring pages look good next to each other.
Multi-page view also gives us control over the size of displayed thumbnails – a slider to control their size is present on the opposite side of the toolbar.

Figure 8.29 – Views
We also have access to the navigation tool in the middle of the toolbar. Arrows on the left and right will advance the book in the chosen direction by one page. Clicking in the middle will allow us to manually type in the number of the page we want to navigate to.
The functionality of the Filmstrip remains the same as throughout Lightroom.

Figure 8.30 A

Figure 8.30 B

Figure 8.30 C – Multi-page view ("Cmd + E"), spread view ("Cmd + R"), and single-page view ("Cmd + T")
The right-side panel of the Book module
There are eight tabs with settings within the right-side panel of the Book module:
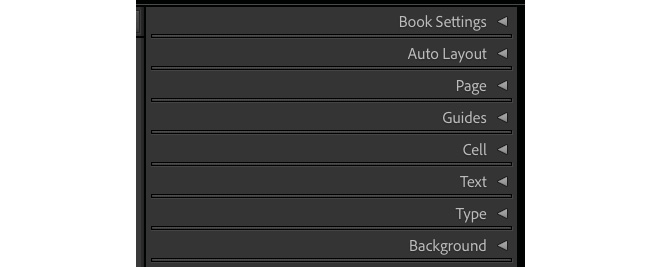
Figure 8.31 – The right-side panel's tabs
- Book Settings
- Auto Layout
- Page
- Guides
- Cell
- Text
- Type
- Background
In the remainder of this chapter, we will look at each of these tabs, but before that, I would like to give you a quick and simplified overview of how the Book module works. First of all, we will choose the size for our book, add some blank pages (or pages with a predefined layout), and drag and drop images from the Filmstrip into our pages. If we want to change the order of pages, we just drag the page (or selection of them) into a different location within a book. Once we finish the design, we either send it to print directly from Lightroom or export it as graphic files. Sound easy? Well, it is. The user interface is as friendly as other tools in Lightroom, and as long as we have an eye for sequencing, it is a great joy to even play around with it.
Now, back to the right-side panel of the Book module!
Book Settings
The first choice we need to make is what size we would like our book to have. Of course, it's possible to change the size later, but because different sizes have different aspect ratios, changing the size will interfere with the layout and composition of images on the pages.
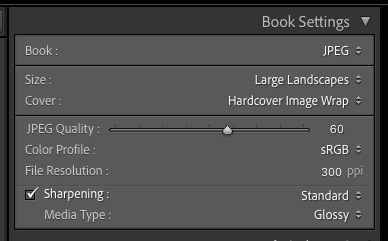
Figure 8.32 – Book Settings
To Blurb or not to Blurb
Blurb is a self-publishing platform where we can print our photo book in as few copies as one. It offers other services, such as design, promotion, and selling. For the purpose of our book, we will focus on the self-publishing aspect. Through seamless integration of Blurb and Lightroom, we can order the photo book we designed directly from the Book module. To do that, we must design our book in one of the three available formats:
- Blurb Photo Book
- Blurb Magazine
- Blurb Tradebook

Figure 8.33 – The book options
Both of the Blurb books offer a variety of sizes and aspect ratios and a selection of different covers and papers. The most significant combination of different settings is available within the Blurb photo book. You can also choose to have a Blurb logo page included in the book, slightly decreasing the price. If you have never ordered from Blurb, I would strongly encourage you to order a small format book with a minimal number of pages in a few different variants. The more expensive papers will have a better color reproduction, but the paper choice is a matter of aesthetic preference, as your project might work best on B&W trade paper in softcover.

Figure 8.34 – Sample settings for Blurb Photo Book
Even if we don't plan to send a final image to Blurb, it might be handy to design the layout in one of their default sizes. They match the sizes usually found on the shelves in bookstores and news stands. These Blurb-formatted books can be exported as PDFs at the end of our design process. We will come back to that toward the end of this chapter.
Outside of the Blurb settings, we can choose to design for PDF or JPG output, with the same selection of available sizes for both of these formats. Most of the sizes can be designed in several different cover designs:
- No Cover: Choosing No Cover is quite apparent, and in this example, we will design only the book pages, ignoring the cover.
- Hardcover Image Wrap: This allows us to design a hardcover book.
- Hardcover Dust Jacket: This adds additional internal flaps on both sides, which can be filled with a combination of pictures and text.
- Softcover: This gives us the same design flexibility as a hardcover.

Figure 8.35 – Sample settings for a PDF book – Large Landscapes
Once we select the Book, Size, and Cover options, it's useful to specify the remaining technical aspects of the book in the Book Settings tab:
- JPEG Quality
- Color Profile
- File Resolution
- Sharpening
- Media Type
JPEG Quality
As with any export, setting JPEG Quality to 100% is a no-brainer if the quality is of the utmost priority. However, this will significantly increase the size of our final exported files. If space and size are of no issue, I suggest setting this to maximum and not looking back. This will apply the least possible amount of compression, assuring the best possible quality. If, on the other hand, we are, for example, designing this to be an e-book, then even at about 50%, we will struggle to notice significant differences. Some images might be less "crisp," losing a little bit of contrast and sharpness, but between 100% and 50% quality, we will cut the file size by up to 80%. Of course, if we don't want images to be easily reproduced, lower quality will make it harder.

Figure 8.36 – A file size comparison at different quality (Q) and PPI settings
Color Profile
Choosing the correct settings in this tab will largely depend on the final destination for our book. If we are printing ourselves, here we can select the profile of the paper we intend to use or play it safe and choose sRGB, taking care of the correct profile later at the printing stage. However, if we plan to use an external service to print our book, I suggest checking with them what would be the optimal choice for our book. The nice thing about designing for printing with Blurb is that we don't need to worry about this part once we select our book format and paper.
File Resolution
You might think that "the bigger, the better," but that's not the case. Many commercial printers will not print books above 150 PPI, and we would be just wasting time and space. The Blurb settings don't ask us for this detail, so it's one less thing to worry about, but I suggest always checking requirements with the book printing service. Setting it to the maximum resolution that our printer can support is a good habit too.
Sharpening
Just as is the case with the similar setting in the Print module, we can apply varying, additional sharpening on top of any sharpening we set in the Develop module. This setting is separate for glossy and matt paper. Personally, I don't set this to higher than Standard, as it can produce halos in some scenarios.
These are all the book settings. Next is Auto Layout.
Auto Layout
As you can imagine, clicking on Auto Layout will take care of designing the book for us, and we can quite extensively customize this process.
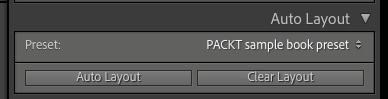
Figure 8.37 A

Figure 8.37 B – The Auto Layout tab and Auto Layout Preset Editor
When we click to open the Preset menu for the first time, we can choose from three available presets or Edit Auto Layout Preset. Auto Layout Preset Editor consists of two panels, left and right, representing each of the book's pages. We can set the layout for both pages separately by clicking on the pull-down menu and choosing a layout we like. We can also tell Lightroom to choose layouts from our favorites. (We will get to this later in the chapter when we look at manually creating the layout of each page.) Page by page is definitely my preferred way of designing a photo book. The Auto Layout option is here, but to be perfectly honest, I have never used it, always preferring to create pages one by one. You might like it; it might be beneficial when creating books with a set layout across any number of pages. We can always add additional pages in any place within the book, which we will look at in the next section.
Page
This is where we can add pages and choose whether they are numbered or not.

Figure 8.38 – The Page tab
The numbering menu will become available once we tick the Page Numbers option. We can set up where we want the page number to appear and whether we'd like it on both sides of each spread, or just on one of the pages.
When adding a page, we have two ways to do so – Add Page and Add Blank. Add Page will add a page with the design visible just above the buttons. We can change this layout by clicking on the small arrowhead visible on the right side of the page layout. Once we click on that small arrowhead, a list of all available arrangements will open. Here, we can choose any configuration from the quite comprehensive collection available for layouts, ranging from just 1 full-bleed photo to well over 30. We can also add any layouts to our favorites by either clicking on the small circle in the top-right corner of each layout or right-clicking and confirming our selection. Whatever we add to our favorites will be later available in the Auto Layout settings. Add Blank adds a blank page, without any layout designs.
Guides
In this tab, we can choose which guides, if any, we would like Lightroom to display on the page.

Figure 8.39 – The Guides tab
I prefer to use only Photo Cells, as I find everything else quite distracting, but you will have to find your own preference and best way to work. I find these especially helpful when working with text. I might come back to this tab from time to time when I change the size and layout of the photo cells, which we will learn more about in the following section.
Cell
As with most things within Lightroom, the size, shape, and positioning of the photo cells on the pages of our book are highly customizable, and the Cell tab is just one way to work with them.

Figure 8.40 – The Cell tab
When we click on any photo cell on the book's page, it will become highlighted, and sliders in the Cell tab will become active. Note that each slider has a small, gray, square box next to it. These are responsible for linking settings – that is, if we have all sides linked, changing the Padding value of one of them will change the padding to the same value for each linked site. Padding means margins created inside the cell that we are currently editing, so for maximum flexibility and adjustability, we should start with full-bleed layouts. In the second part of this menu, we can also add a photo border, modifying its color and width.
The next two tabs, Text and Type, are responsible for working with text fields in the book, and I'm not sure why Adobe decided to split these settings into separate tabs.
Text
Photo Text must be enabled for each photo cell and page separately.
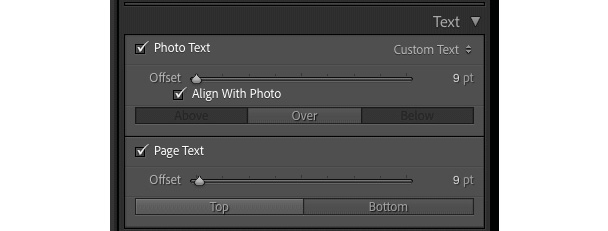
Figure 8.41 – The Text tab
Once we enable the text field, we will be able to choose whether it's positioned above, over, or under the photograph and whether we want to apply an offset to its positioning. Offsetting of the text will be limited by the text safe area, so we don't need to worry about going too far with it. We can simply adjust Offset to our liking without the fear of losing the text. The same rule applies to Page Text, but here, we can only choose whether it will appear at the top or bottom of a page.
Type
Once we have any text in our book, we can set the font type, size, and alignment within the text box.
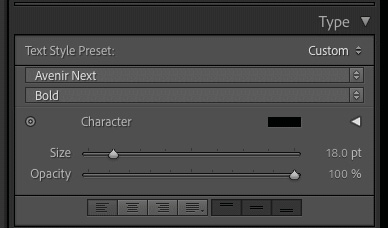
Figure 8.42 – Type tab
These are the most basic options that any text editor offers. Once we have chosen settings we like, we can save them as a preset for later use by clicking on the Text Style Preset menu and choosing Save Current Settings as a New Preset. When we change the font settings, we need to select the text we want to change, but we can also use "Cmd" + click on multiple text boxes and adjust settings for all of them at once. Then, every subsequent text box we have in the book will use our latest Type settings.
With all of the preceding tabs explained, we are left with the last one, titled Background.
Background
This tab allows us to change the background in our book by using one of the graphics under the Graphic menu.
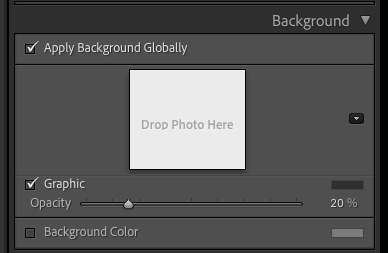
Figure 8.43 – The Background tab
It's hiding under the small arrow, which we can find next to the currently selected graphic. We can also upload our own photograph or graphic to use instead. When we check the Apply Background Globally box, the same graphics will appear on each book page, but we can choose a different background for each page if we don't.
A few tips and tricks not mentioned earlier in the chapter
Even though it might seem that we are limited by the templates, there are few ways to create our own layouts. First of all, we can move all picture cells around the page and adjust their size by dragging the corners of the picture cell. This is when Page Grid will come in handy, as we will be able to easily adjust cells to the same positions or sizes. Then, by right-clicking anywhere within the page, we can open a submenu that will allow us to save this newly created layout as a custom page. This new custom page will now be available for addition to favorites and usage throughout the book. If you would like a bit more precise control, especially for pages with multiple images, then you can use the full-bleed templates and adjust the padding, picture by picture. Let's look at an example of building a custom, symmetrical page with matching distances between photographs. First, we choose the layout for four pictures and then adjust the padding in each cell so that the padding of the external edges equals precisely half of the padding of the internal borders. In this example, the outer edges have a padding of 12 points and the inner edges have a padding of 6 points. When two cells with external padding of 6 points meet, they match the external padding of 12 points, and we have a new custom template. You can also use this trick for one, two, or three cells. I work on pages this way because Lightroom templates have much too wide padding for my liking.
When we want to move pages around, the most straightforward way is to enter a multi-page view, select the page we want to move, and drag it by the yellow border. For example, if we click and drag a picture, we will move just the photograph within its cell or even remove it off to a neighboring page.
When we want to switch the position of two images in a multi-picture grid, we can just drag one onto the other, and they will automatically swap places. To get rid of a photo from the cell, we can use "backspace" or right-click on it and choose to remove the picture.
Once the book is designed and ready for the world to see, all that's left is to either send it to Blurb or select Export Book to export as a PDF or JPEG. The export format will depend on the settings we picked in the Book Settings tab.
I hope you will find playing around with the Book module enjoyable. When it finally comes to designing someone's wedding album or a layout for your own portfolio, you will enjoy the creative process and ease of use that Adobe has built into Lightroom.
Summary
Few things feel better as a photographer than holding tactile proof of your completed work. Making prints at home and having full control over what comes out of a printer is probably the closest we can get to looking at an image slowly appearing among the darkroom chemicals. What makes a huge difference is the level of control over the outcome. The guessing game when developing and making prints from negatives could be unbearable, not to mention the "close-to-impossible" trickery involved when working with color. With the help of Lightroom's Print module, we can have reliably predictable effects that produce rewarding results each time we press the Print button. As for the Book module, self-publishing anything beyond a black and white "zine" was never as attainable as it is through Lightroom. Even for those who feel repulsed by actually "designing" anything, Lightroom's Book module allows them to focus on photographs themselves and play around with how they flow from page to page. The Print and Book modules are an integral part of my photography process, and even though I might use them sporadically, each time I have a chance to work with them, they always bring a broad smile to my face. I hope you will enjoy working with them as well.