11
Innovating, with a Human-Centered Design Process
The Design Innovation process can be used to create relevant and socially conscious wearables that can highlight gaps in our thinking. Through a human-centered design process, we seek depth and meaning through the interactions we create. Using insights from listening to people, we can appreciate the benefits of human-centered design practice. This chapter explains some Design Innovation processes we can take and repeat in our own projects and designs. The chapter provides frameworks and guidance on how to conduct research for wearable projects so that humans are respected and considered.
In this chapter, you will explore Design Innovation to work toward creating an informed wearable. We will learn about scoping a project, getting to know the problem, stakeholder mapping, engagement, gaps in the field, human-centered design, co-design (or codesign) and participatory design, sense-making, prototyping, testing, and iterating. That looks like a lot of content, but once you recognize the information you need to make your wearable valuable, it will come naturally to you. Hopefully, this will stimulate innovative thinking.
By the end of this chapter, you will have the knowledge to plan an informed wearable and understand how to create your own steps as part of a Design Innovation process. You will have the skills to understand the context of social, economic, environmental, or technological impacts and how there is potential to enhance experiences or improve daily life for those concerned.
In this chapter, we’re going to cover the following main topics:
- Getting to know the problem
- Engagement—Stakeholder mapping and speaking with people
- Gap—What’s in the field and context research
- Human-centered design
- Sense-making
- Prototype, test, and iterate
Technical requirements
This chapter is all about learning the theory that will take your wearable projects to a deeper, more meaningful, and more engaged level. We won’t be directly building any projects, but you’ll be exploring the process you can take to develop meaningful wearables. Remember—designing with empathy and purpose will lead to a wearable that will be needed and used.
Getting to know the problem
Our journey starts with getting to know the problem. Although this is written as the start of this chapter, it might not be the start of your project. The next few sections that describe a Design Innovation process are interchangeable and are rarely done in isolation. So, dip in, move around, and learn in a way that suits you.
When creating wearables that have a purpose, a need, or satisfy some desire, it is important to know the scope of the area you are designing for. This is where researching the problem area is significant.
What is your topic choice? This is where a scoping phase happens.
Scoping
Understanding what the current situation is in the area of your choice provides a good base for when you engage with people, experts, or stakeholders. When I was researching forgetfulness, it was important that I understood why it was important, what research was done already, and some understanding of memory. This type of research, because it already exists, is called secondary research. We are using resources that aren’t ours.
Part of scoping should involve reading journal articles, newspapers and magazines, and books. Fortunately, some resources can help with this process. Using credible resources or being critical of sources that might not be evidenced or contain only personal opinions is important. Using evidence-based insights and informed opinions will add credibility and can help you to avoid designing something that there is no need for. If you come across an article or paper that is behind a paywall, you can try searching on https://sci-hub.se/.
Google Scholar is a great search tool to find sources https://scholar.google.com/. You can filter articles published anytime or select a specific range of years. You can see an illustration of this in the following screenshot. Saving articles to different library lists is done by clicking the Start icon under the listing, which launches the saving dialog:

Figure 11.1 – Using Google Scholar: library feature
Using this dialog, you can save and organize your finds. Another tool I find useful is Mendeley (Figure 11.2). There is an online version or an app for devices or computers. You can access Mendeley at https://www.mendeley.com/. Mendeley is a tool to organize the papers you download. It’s helpful for organizing, and you can annotate the papers or write notes about what you’re reading.
There is also Paperpile (Figure 11.3), which has similar features to Mendeley. You can save papers and organize and annotate them. Paperpile is accessible online. See https://paperpile.com/app.
Here’s an overview of Mendeley:
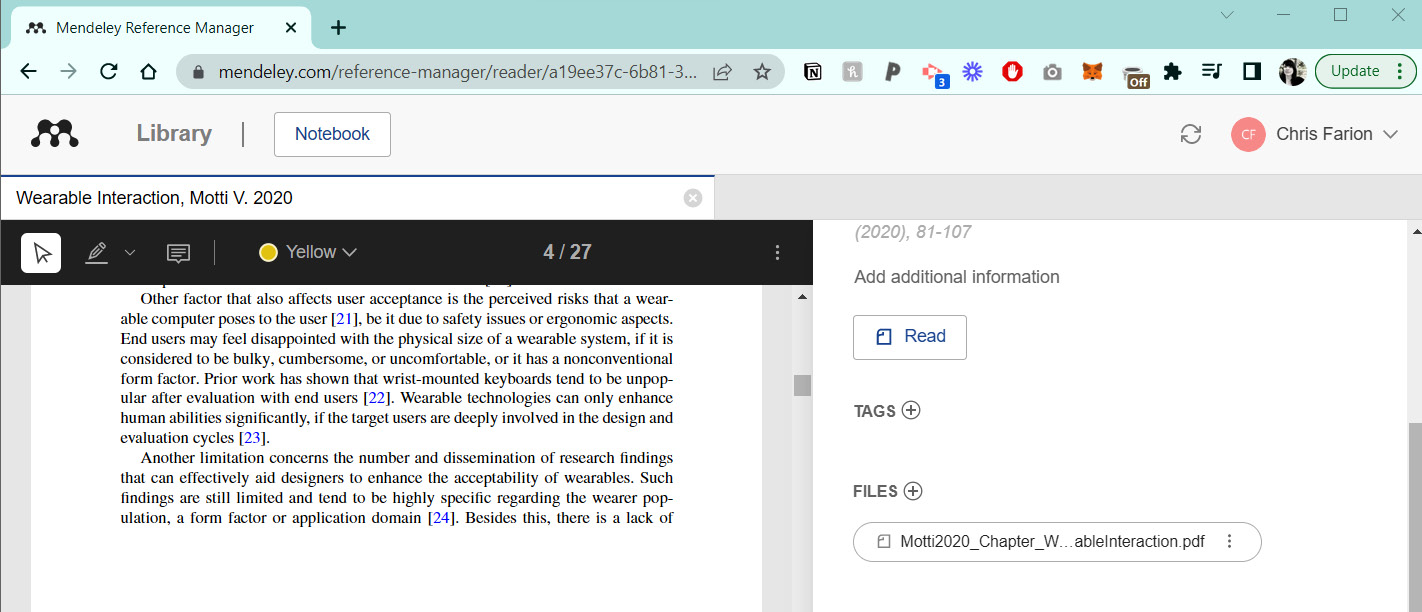
Figure 11.2 – Mendeley online to organize papers and more
Paperpile and Mendeley have Chrome extensions that you can add to your Chrome browser. This will add an icon that you can click to add a paper directly to the application. Reading a paper or book and looking at their references is a great way to find other references that you might want to read.
You can see an overview of Paperpile here:

Figure 11.3 – Paperpile reference manager system
There are other ways to learn about a topic. We can find other sources of information such as online videos, blogs, newsletters, and podcasts too. Be sure to think about the different ways you can collect information. Finding many sources in different formats can be an effective way to build your knowledge on a particular topic. Don’t forget to keep notes about what you discover. This is an exploring phase, and the goal is to learn about a topic so that you can confidently speak to people about it. You can also ask better questions if you have a base knowledge. For our first activity, we will do some desk research.
Activity 11.1 – Let’s do desk research!
Don’t bother having a conversation until you know what you need to know!
Spend some time learning about a chosen topic area. Document your findings. Compare and contrast. What are similar researchers, scientists, and artists exploring in this field? Choosing a topic you’re invested in or concerned about will always make it more interesting for you. If you’re looking for motivation, there could be an interesting article in the news that you’d like to explore further. Why is it like this? Use more than one source stream. This includes seeing which ideas are moving to start-up or commercialization phases.
After you have made your notes and learned more about your topic from several sources, you’ll know more about who you should talk to for collecting primary research.
Engagement – Stakeholder mapping and speaking with people
Speaking with people is the most important part of a wearable interactive project. Looking at the human experience through listening and understanding someone’s personal experiences is what provides the stories that will bring your wearables to life.
“When stakeholders and their interests shape and contribute to the design process, the quality of the design increases” (Fletcher, 2013).
Part of this process involves the following:
- Gaining an understanding of local context. Give attention to your geographic context and the specific technological, cultural, and economical needs and habits.
- Talk with local experts to enhance your knowledge.
- Delve into the problem through the eyes of the people it affects.
- Looking at the problem you are trying to solve, what impact could solving the issue or reducing some of the pain points have?
It is through engaging with people that we make engaging wearables!
Important when engaging with people
Always remember that you are asking for people’s most valuable assets: their time and their knowledge. It is important to be respectful, and you should be reaching out to people you are really interested in talking to. Keep initial communication short and to the point—until you build a rapport.
Revisiting ethics
Beginning this process requires an understanding of ethics. We looked at ethics briefly in Chapter 1, Introduction to the World of Wearables, and you should revisit it when starting a wearable project. You should have informed participant consent and voluntary participants should understand if there is any potential for harm. Also, you must assure confidentiality and anonymity, and communicate your outcomes with participants. It is essential we speak with people to find out the current state of play of a topic, and to also find out what are the real issues—the issues that affect people about this topic. Be mindful of cultural identities such as age, race, ethnicity, disability, family status, occupation, and education. Some topics may be more sensitive than others.
Another thing concerning ethics is to honor someone’s time. What if the person we are speaking with doesn’t directly benefit from our design? Be aware that time is a valuable commodity and be appreciative of the time people give you. Also, before you speak with people, check your assumptions of the topic and your potential biases. How does your background or experience affect the topic or how you interpret their answers? Give the person you are speaking with space to speak. Don’t interrogate someone—let their stories flow naturally; pauses are OK. Ethics should be integral to a wearable project and throughout all phases of development for it.
Asking better questions
Knowing how to speak with people is a skill that will help to get useful and interesting information. For example, if you are doing a project with a theme of recycling or waste, and you want to find out how often people donate to charity shops, you might ask someone: How often do you donate to a charity shop? They may answer: Pretty often. That might seem like the obvious question to ask, and a reasonable answer. However, if you were to ask someone: When was the last time you donated to a charity shop? their answer suddenly gets real, and you have a clearer picture of the truth about their donations—or not, as may be the case. People don’t want to look bad, so admitting you don’t donate often to charity—for example—might make someone believe that you think they are a bad person. They aren’t, but we can’t help how they might feel. We can ask better questions to get answers that are useful to our projects. We’ll have a clearer context for our projects if we have collected useful information.
Understanding how to ask better questions is essentially the focus of The Mom Test, by Rob Fitzpatrick. This book can help you to understand how you can structure questions so that even your mom can’t lie to you. He illustrates this process with useful examples. Talk about their life instead of your idea, and you will be rewarded with meaningful stories that will contribute to you creating a wearable that is truly useful. You don’t want to focus on any questions that discuss generic opinions about the future, and you want to dig for specifics in the past. The Mom Test is a short book and a useful tool that I use with my students to help them to ask better questions. It’s worth a read if you can pick one up. I heard a student the other day saying they were only getting terrible answers to their questions. I couldn’t help but think: terrible answers come from terrible questions. Asking a boring series of yes/no questions is the quickest way to get someone to lose interest and want to stop talking to you. It’s easy to fix!
Lastly, it isn’t only about what people say. What are they doing? Observations can answer many questions. If you are curious about how they use their mobile phone, for example, rather than asking them: How do you use your phone? ask them to do a task and observe. Watching where they stumble or where they excel can answer a thousand questions! Now, we need to find people to speak with.
Finding experts, stakeholders, and people
Speaking to a variety of people will offer a balanced picture of the topic. They may have a direct interest in what you are working on or are affected by it; they may have privileged information; they may be opposed to it. They could be a policymaker, a researcher, or a patient’s family member. So, we need to find people to have conversations with. It can be good practice to make a mapping of possible areas of interest for your topic.
Using paper and pencil, or an online tool such as Miro (https://miro.com/), Bubbl.us (https://bubbl.us/), or MURAL (https://www.mural.co/), create your stakeholder map.
Activity 11.2 – Stakeholder mapping
This involves identifying who has a stake in the outcome. If you start a project and identify these people early, it can make a project have a well-rounded view. You should consider who is involved in the project and invested in the outcome, as well as who are the decision-makers, researchers, creatives, opposed, and similar.
First, start by gathering stakeholders. Using post-it notes on a wall can be an involved way of doing this exercise. Write a potential stakeholder on a sticky note. You might want to consider people from different perspectives, including the following:
- Educational, research organizations, and researchers
- Government or policymakers
- Employers/workers/patrons
- Professional associations/advocacy organizations
- Standard setting and technological assistance organizations
- Companies/commerce/charities
- Directly involved/affected by/age groups
Secondly, create an organizational structure to place the stakeholders in. It could be that they are clustered by their group affiliations, or you could use a bullseye-style diagram where the people with the most vested interest in the topic are central and concentric circles go out, depending on the importance of the topic, as illustrated here:

Figure 11.4 – An example stakeholder map I made using Miro
How you organize your stakeholder map is for you to decide. Figure 11.4 illustrates an example; you will have different categories from me. In each of the sections, for example, you might add more categories. This was created using https://miro.com/. For Government, you could add international governments, federal governments, local governments, and so on. Each of those headings has potential stakeholders. Identify anyone involved with or impacted by the project. Use actual and not imaginary people. Include their title, name, organization, and contact details if you have them. As you identify them, use connecting lines to describe their relationship—how do they depend on each other and how do they interact? Cluster and label groupings. As your project progresses, you will now have a variety of people to contact and speak to, adding richness and balance to your wearable design.
How many people do I need to speak to?
Generally, you should keep having conversations with people about your project until you stop hearing new information.
I’m asked a lot by my students: How many people do I need to speak to? Or, I’m asked: How many people should I test it with? Often when testing, you can usually get away with six or seven people, and they will generally find the things that can obviously go wrong with it—meaning, after two or three people have said they can’t find the on/off switch or they thought the sound was too loud, you can make amendments to your design. You don’t need to hear this from 25 people. You’ll already have enough information to start to iterate your wearable designs. For more information about speaking with five-seven people initially, and how it will catch 80% of errors, you can read the research from the Nielsen Norman Group (NN), as it did the research that established this: https://www.nngroup.com/articles/why-you-only-need-to-test-with-5-users/.
Inclusive intention – Universal design and accessibility
By carefully considering the people we design for—their norms, conventions, cultural backgrounds, and personality aspects—we can create wearables that have an inclusive intention. An inclusive design recognizes that we are all different. Designs should be usable, flexible, and customizable. Create wearables that can accommodate and include everyone.
Accessibility and inclusivity should consider impairment that is the following:
- Sensory
- Physical
- Cognitive
Sensory impairment is a loss of vision or hearing. Physical impairment affects one or more parts of the body that have a loss of function. Cognitive impairment could be a learning impairment, or loss of memory or cognitive function. This can be from old age but can also be from brain injury or trauma. The general rule is to make wearables as accessible as possible for as many people as possible! Keep in mind that impairment has three possibilities too. This can be a permanent or long-term impairment—for example, in a wheelchair due to physical impairment. However, impairment can also be temporary. This can happen after an accident or illness—if you’ve ever had a body part in a cast, for example. Lastly, the impairment could be situational. You might be in a noisy environment; maybe the wearable you’re making is for people working in a machinery factory and they cannot hear above the noise of the machinery.
Fewer than 20% of people are born with a disability, and 80% of people have a disability after 85 years old.
Additional to the accessibility mentioned, new technologies are highlighting cultural and ethnic considerations. Here are some examples of this:
- Face recognition that cannot see faces of a darker complexion
- Auto faces/photo selections that cannot detect dark skin
- People from different socioeconomic backgrounds affect what is a priority
- Postcode/ZIP code dictates your access
It is important to remember that not everyone has an equal voice. This often creates imbalances in discussions you may have when creating wearable technology; it may result in oversimplification of a problem or skewed perspectives about what accessible and inclusive design really means. This section only offers a sliver of considerations, and I highly recommend researching more into this essential topic. A starting read could be https://uxdesign.cc/why-can-inequalities-appear-in-digital-accessibility-c66fbe414a7b or https://www.un.org/en/.
Engagement tools
It can be difficult to speak with people. A lot of people aren’t sure how to approach someone, and an engagement tool can help this process. A good engagement results in you having qualitative data to inform the wearable. It’s OK to collect quantitative data too—for example, How many people have a mobile phone? gives very different answers from What did you use your mobile phone to do yesterday? Quantitative is a numerical indicator, but qualitative offers the stories behind the data—it gives you the why. These tools can be categorized as a boundary object (Star, S. L. & Griesemer, J. R. (1989)) or a bridging concept. The classifications shown in the following diagram help to elicit different responses:
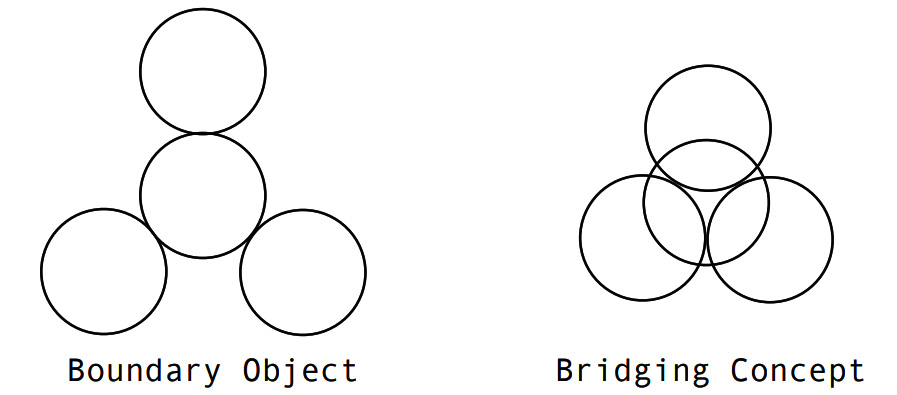
Figure 11.5 – Engagement tool categories
The boundary object engagement tool helps the meaning to be found and expressed by people around a central question or a theme. The bridging concept tool takes the information discovered and it is a way to confirm the information and understanding of a topic. Creating these objects offers an opportunity for many people from different stakeholder groups to interact with them, build on them, and speak about their thoughts, experiences, and memories. The engagement tools will all look and work differently because they are made for your topic. I won’t be able to describe your engagement tool. It comes from the needs of the research you are doing and the questions you need answering. Some examples of tools that my students have made for their projects are illustrated in the following photos. These tools allow for collaborative work and engagement with stakeholders:

Figure 11.6 – Sample engagement tools
In Figure 11.6, frame 1 shows a tool that was used to find out which social media platforms were used during certain types of activities. Activities were sectioned out, and small icon pieces for social media were created. These were then placed in the sections of the activities. Frame 2 shows an object created offering respondents the chance to rate on a scale, while frame 3 shows small tokens and sections used so people could offer their thoughts on the topic. Lastly, frame 4 shows several boards with locations and activities in these locations. The respondent is given string pieces of different colors, and they wrap the string according to the activities they do and the frequency of these activities.
Another interesting engagement tool designed, shown in the following photo, was a tool that had different travel methods and destinations, and people were asked to show how far they would travel with each transport method. What was interesting about this tool was that after using it, they realized that bicycle travel was predominantly used, when their assumption was that using a car would have been the most frequent travel method. Their project had been about encouraging cycle usage, but they discovered this was not a problem in the city they were researching:

Figure 11.7 – Engagement tool for generating conversations
One tool that uses color as a primary way to communicate, and was a successful tool for recording time allocation in a person’s day, is the tool shown here, made by Leixi Chen:

Figure 11.8 – Engagement tool showing the use of a person’s daily time
On the left is a box that has time, with color paper, designed to fan out when opened. These fans of color are then slotted into place during the day so that we can quickly build up an accurate view of the activities someone is doing, or how much time is allocated for the activities. It is a very simple yet effective tool.
Throughout the use of all these tools, the goal is to have meaningful conversations. They allow a respondent to speak about their experiences. Another way to offer an engaging tool experience is to gamify it, adding fun elements such as rules, timings, turns, goals, and end can make for a fun experience for the people using it.
A generative tool can be a unique way to offer more conversational opportunities. This is a tool with several stages. The responses from the participant in one section provide the elements in the next section. For example, you might be interested in food, so in one section the participant draws their favorite food items, and these drawings are used in the next section to break down food content from some of the foods they drew. You can see an example of output from a generative tool here:

Figure 11.9 – Generative tool, using content from a previous section
This new drawing can be used again to discuss just the sugar content or similar, opening up conversations regarding lifestyle or nutrition (Figure 11.9).
An engagement tool does the following:
- Helps us to have conversations in an engaging way
- Encourages conversations
- Is typically fun for the participants
- Allows us to record data
Be a good listener, and record what people are saying. Take photos of the tools in use and after use. Tools can help with time management and focus. You can read more about bridging concepts and engagement tools through the work of Dalsgaard, P. & Dindler, C. (2014) and the research of Islind, A. S., Lindroth, T., et al. (2019), and Groot, B., & Abma, T. (2021). References including the 1989 work on boundary objects and reflections on the origin of that concept are provided at the end of the chapter. Don’t forget to get informed consent before documenting participants. Lastly, when interviewing people with physical or cognitive impairments, or other accessibility needs, the interviewer (you) may need to adapt their tools to engage with people. Tools with different colors, sounds, raised areas, other touch abilities, or context-aware wording are all ways that can help make your tools more accessible.
Activity 11.3 – Engagement tools
Think about what type of engagement tool you can design to help get the stories you need for creating your wearable. Typically, a boundary object is created first, to explore a theme in a wider context, and then a bridging concept looks closer to confirm the information you’ve obtained.
Plan the following:
- What information you want to collect
- How to record and process that information
- What this information can teach you
Decide on the conversation you want to have and how can you extract themes and symbols to help people understand what your topic is about. Often, using nostalgia can be a good idea—do you have images of old-style ice cream carts to start conversations? Or, do you use crayons to allow more freedom for drawing as people aren’t worried about creating a perfect drawing that they will be judged for? Do you allow a more temporary feeling—creating their comments with chalk so that they can be rubbed out? Build a tool that can interact to help people through the process of understanding and contributing to your topic. Use paper, sticky notes, cardboard, physical objects, wood, fabrics, and any other materials you have to hand.
Spend time on the planning and goals, and then the creation. Once your tool is made and you’ve taken photos, test it by speaking with people! You will use the data collected to help picture the insights that are important. These ultimately can lead to your designs. Part of these insights may also go toward the requirements planning—there may be certain necessities that have been highlighted. For example, does someone have the dexterity to use certain clips or fasteners?
Now that we’ve learned more about speaking with people, it would be a good idea to find what gaps, pain points, or opportunities exist in our topic.
Gaps – What’s in the field and context research
Finding gaps happens when we research what has been done in the field. Researching with a variety of sources will help you to identify current solutions. What has worked in this field and what has not been as successful? Make notes of the technologies that have been used, and how you might integrate these into your work. Are there techniques or ways of working that have been explored in this problem space that you want to adapt for your topic?
Finding gaps can create opportunities. You might want to understand a range of products that have been created, but that people aren’t using. Explore the reasons behind this. Is it an overly complicated design? Are there too many features? Once you have done additional desk research on what exists in your chosen field, it is important to start creating a list of requirements. This planning can help shape the work you do.
Activity 11.4 – Requirements planning
Requirements can drive your wearable project, so it’s important to work through these at the start of a project and revisit it as you progress. You might want to create an initial list of requirements as mentioned by people you’ve spoken with. Or, you may want to list requirements that you’ve learned about from your first round of desk research when you were exploring the topic area. Create a list of the important issues that people are affected by. This might be as small as two or three items. You might want to set up a document with your planning mapped out similarly to what’s shown here, where I have separated some information:

Figure 11.10 – Planning for your wearable requirements
I added tags to organize the information—for example, what was part of the scoping desk research and what was the field survey. This is a document that you should update as the project progresses and as you speak to people. It can help you keep focus.
Remember to include the needs of the people using your design too. This may vary from: easy to charge washable, how easy is it to put on, and similar. Now that we’ve looked at our requirements, let’s explore human-centered design.
Human-centered design
This is an important approach to empower you to design a wearable that will address the needs of the people and stakeholders we’ve identified in our stakeholder mapping session. On a basic level, this process involves observing people, then ideation, and finally implementation. The overarching theme is that we can help people to live better, easier lives through our designs and design improvements. These phases involve what we’ve been discussing so far in the chapter, speaking to people to better understand them and their needs. Then, ideation, or making sense of what people are saying, which we will examine in the Sense-making section. This involves identifying opportunities for design and generating ideas, followed by the implementation, bringing the wearable to life.
Observing people and keeping notes on these observations provides valuable information that can help inform the design. Often when observing, we think we will remember, so we rely on memory. Observations might be of people in a general context, going about their daily lives, or this might be in the context of using the wearable that you have made. This is part of usability testing that you can do when you have made and given your wearable to someone to use in their own environment. I would highly suggest taking photographs, videos, and writing notes—an example of which is shown here; that may include drawings too:

Figure 11.11 – Journal keeping: written observations
This is an example from my observation journals. It isn’t important to read what the notes describe for this purpose—it is just to show you that note keeping doesn’t need to be super tidy; it can be a quick format with the use of multiple colors and symbols. Notes provide you with an accurate picture compared to what we think we saw. Include comments on the environment in which the observation took place, the weather conditions, time of day, key incidents, and what your impressions are. I would note the tip that notes from observation should be reviewed and tagged, highlighted within 24 hours as memory fades quickly.
All of this is part of ethnographic research, and it is a great way to uncover the insights you need. Some example research that you may want to read includes the following: Prototyping wearables for supporting cognitive mapping by the blind, Ugulino, W. C. & Fuks, H. (2015); Empathetic iteration of a SnuggleTime garment system for kangaroo care of mothers and babies in a neonatal intensive care unit, Cobb, K. A. & Clarke-Sather, A. R. (2020); Spheres of practice for the co-design of wearables, Fairburn, S., Steed, J. & Coulter, J. (2016); and Imagining future technologies: eTextile weaving workshops with blind and visually impaired people, Giles, E. & Van Der Linden, J. (2015).
Allowing meaningful engagement begins with a co-design or participatory design process, so let’s have a look at that next.
Co-design and participatory design
Co-design and participatory design are often used at the same time or one in place of the other, but they aren’t the same. Though they are both user-centered design processes, there are differences. For both, users are consulted not only at the start and end of a project but are also spoken with as the process develops. In a co-design process, the wearer is directly involved in the wearables design, with the designer. This allows a deeper understanding of the problem area and helps guarantee that there is a result that is useful to this group of people. With co-design, the participants are active throughout the entire project at each step, and the researchers, designers, and participants all contribute equally. All involved should not have any ideas at the start of this process or be able to foresee the outcome. Typically, it is the same participants throughout this process. With participatory design, participants join in at certain steps of the process. It may be different participants who are involved. When these processes are done successfully, all involved are valued and treated as equals, and it usually produces mutual learning and transformative outcomes.
If these methods are not done correctly or with sensitivity, they can lead to undesirable outcomes, as noted here:
After speaking with people and collecting large amounts of data, we need to do something to it so that we can establish what are the useful aspects and insights and what will help form our wearable designs. In addition to that, it’s important to remember that the point is not to be harvesting people for their data, but in some way, we are providing value and leaving the community better or offering them a way to continue the work on their own. The next activity is about sense-making, and this is where we turn our data into useful information.
Sense-making
Sense-making gives meaning to the information and stories that we have collected. It allows us to come up with an understanding of the situation and—possibly—the reasons why there are pain points. We analyze the data by looking for patterns and themes. Were there any challenges that you observed, and can this help to inform your designs? You can add hierarchy to this so that the most pressing or important problems become clearer. Let the data tell you the story—which themes are emerging, and which keywords or codes show themselves? We want to cluster similar information, and the quotes and stories provide evidence for these codes. One example from my own projects is shown here:

Figure 11.12 – Creating codes to group the data you collected
If you use sticky notes again, you might want to color-code them—maybe yellow for a theme, and blue for direct quotes for evidence. Add a color for the insights that emerge. What you are trying to establish is what you found out, what information is missing, how effective it was, and what flaws there were. You might want to use Miro again or similar to cluster sticky notes on a board and arrange them according to themes. While doing this process, ask yourself the following:
- What surprised you?
- How might what you learned affect what you design?
- What ideas might these learnings inspire?
When you have collected your answers and understand the problem space, you should prototype some solutions for testing. This could be a co-design process, where the people you are speaking with design with you, or it could be ideas you’ve generated from the information you’ve gathered. Typically, we can create an affinity diagram to highlight commonalities, any themes, and what scope exists for this problem. There are templates for online affinity diagrams, such as this free version from InVision that has sections noted (https://www.invisionapp.com/freehand/templates/detail/affinity-diagram-template):

Figure 11.13 – Creating an affinity diagram can help you
You might want to create an empathy map based on your discoveries about the people you spoke with. An empathy map has four areas defined where you can get an overall image of a person at a glance. It includes the following:
- Says
- Thinks
- Does
- Feels
The person is at the center of this. The information in says would be direct quotes from the person, while thinks captures thoughts such as what matters to them or whether they are unsure about something. The does section has actions that they do physically—how they use something or interact with it, and how that might ultimately inform your design. Lastly, feels is their emotional state. This could be something that the person finds worrying or confusing. Creating an empathy map might be something you do at the start and later in the design process. You might start with a quick one based on a persona, and then fill in an actual one representing someone you have spoken to.
You can add to your empathy map additional sections, such as goals, or pains and gains. Design it to suit your wearable-design needs. There are also examples of alternative areas, such as in this worksheet from Game Storming: https://gamestorming.com/wp-content/uploads/2017/07/Empathy-Map-Canvas-006.pdf.
Remember—this chapter should be used as a reference. Reading through and working on the activities gives options and considerations for your projects, but you don’t have to do everything. It is likely that if you do an affinity diagram or an empathy map, you will want to follow up with scoping again. This will be continuing desk research following on from the insights these processes discovered.
Prototype, test, iterate
The prototyping process has been well documented in Chapter 8, Learning How to Prototype and Make Electronics Wearable. The prototype you make will be designed with the analysis of the interviews and engagements you carried out with stakeholders. The prototype you make will be tested with the stakeholders you identified earlier in the Design Innovation process. Ideally, you want to decide how well the prototype responds to stakeholder needs. They will tell you very quickly if it is too confusing to use or not fit for purpose! Remember earlier in the chapter, we looked at how observations can be valuable in discovering issues with your prototypes. Keep detailed notes of your observations.
It’s extremely important to get the prototype to the wearer and create a feedback loop —a way for them to offer you feedback on what you are prototyping. It could be you give them a journal to write their thoughts as they use it, or you make a mini-website of a page or two for them to fill in responses as they use it. A Google form can capture basic information from them, but be sure to try to interview them again or have a workshop or forum where several people trying your wearable can chat about how it worked (or didn’t!) for them.
Now that we’ve come to the end of this chapter, it’s time to do it all again! That’s a process of Design Innovation, to do these slices of a process in the order that suits your projects. It isn’t a step-by-step process that becomes immovable. Be iterative, follow the research, and enjoy finding out where the research takes you!
Summary
This chapter focused on learning parts of a Design Innovation process so that we can create an informed wearable of value. Remember—these are not done in isolation but are overlapping and often repeated stages. We looked at several elements, including desk research, which we started with. This was about finding secondary information to help us learn about the topic. We followed up with speaking with people, which involved a revisit of ethics, learning how to ask better questions, and finding stakeholders and people to have conversations with. You did this by designing a stakeholder map. An inclusive intention was highlighted as an essential part of today’s design. Considering accessibility and inclusivity should happen throughout all phases of a project. Gaps were identified through researching what is currently done in the field. This helps us to identify opportunities for design. Following on from that was a look at human-centered design. This included understanding co-design and participatory design so that we could include them in our own practice. Creating wearables with the people who will wear them can create a far richer experience for all involved. It’s also a valuable learning experience and improves our skillset.
Lastly, we analyzed the data that was produced from speaking to people in our design process. This is an essential step to understand not only the stories but to also provide substance to our wearables. We know what our wearers want because they told us, and we listened.
Having meaningful engagements will always improve the wearables we create. We should set our goals of creating an experience that will enhance or augment our ways of working, communicating, and living.
Now that we’ve learned more about the Design Innovation process and wearable interaction, we will create the first iteration of an informed wearable in the next chapter. So, grab your sewing supplies and your soldering tools, and let’s get making!
References
Fletcher, K. (2013). Sustainable fashion and textiles: design journeys. Routledge.
Fitzpatrick, R. (2013). The Mom Test: How to talk to customers & learn if your business is a good idea when everyone is lying to you. Robfitz Ltd.
Star, S. L. & Griesemer, J. R. (1989). Institutional ecology, ‘translations’ and boundary objects: Amateurs and professionals in Berkeley’s Museum of Vertebrate Zoology, 1907-39. Social studies of science, 19(3), 387-420.
Leigh Star, S. (2010). This is not a boundary object: Reflections on the origin of a concept. Science, Technology, & Human Values, 35(5), 601-617.
Dalsgaard, P. & Dindler, C. (2014, April). Between theory and practice: bridging concepts in HCI research. In Proceedings of the SIGCHI conference on Human Factors in Computing Systems (pp. 1635-1644).
Islind, A. S., Lindroth, T., Lundin, J. & Steineck, G. (2019). Co-designing a digital platform with boundary objects: bringing together heterogeneous users in healthcare. Health and Technology, 9(4), 425-438.
Groot, B. & Abma, T. (2021). Boundary objects: Engaging and bridging needs of people in participatory research by arts-based methods. International Journal of Environmental Research and Public Health, 18(15), 7903.
Ugulino, W. C. & Fuks, H. (2015, May). Prototyping wearables for supporting cognitive mapping by the blind: Lessons from co-creation workshops. In Proceedings of the 2015 workshop on Wearable Systems and Applications (pp. 39-44).
Cobb, K. A. & Clarke-Sather, A. R. (2020). Empathetic iteration of a snuggletime garment system for kangaroo care of mothers and babies in the neonatal intensive care unit. Journal of Textile and Apparel, Technology and Management.
Fairburn, S., Steed, J. & Coulter, J. (2016). Spheres of Practice for the Co-design of Wearables. Journal of Textile Design Research and Practice, 4(1), 85-109.
Wright, P. & McCarthy, J. (2015). The politics and aesthetics of participatory HCI. Interactions, 22(6), 26-31.
Giles, E. & Van Der Linden, J. (2015, June). Imagining future technologies: eTextile weaving workshops with blind and visually impaired people. In Proceedings of the 2015 ACM SIGCHI Conference on Creativity and Cognition (pp. 3-12).
Review questions
This is a chapter for reflection and action. See if you can answer the following questions:
- What can scoping out a project allow us to accomplish and why is it important?
- Why should we speak to people in the context of creating our wearables?
- When creating a stakeholder map, what are some of the broad categories that we can consider?
- What are the three categories of impairment?
- Regarding accessibility, what three aspects are important to consider?
- What is the difference between a co-design project and a participatory design project?
- What is an important part of the prototyping process?