
11. Be Secure
Most of the best qualities of the iPad can also be liabilities. It’s portable, so you’re more likely to take it with you to a coffee shop or to class where there’s greater chance of losing it or having it stolen. Being out “in the wild” also increases the chance that the wireless network you connect to—or even someone at the next table—is scanning for sensitive data like credit card numbers. The iPad stores your personal digital information, so a thief would have access to your contact information.
Security isn’t all cloak-and-dagger stuff, though. If you’re sharing an iPad among your family, you may not want the kids to get online and download all of their favorite albums from the iTunes Store—on your credit card. With some reasonable precautions, you can make your iPad experience more secure.
Set a Passcode to Unlock
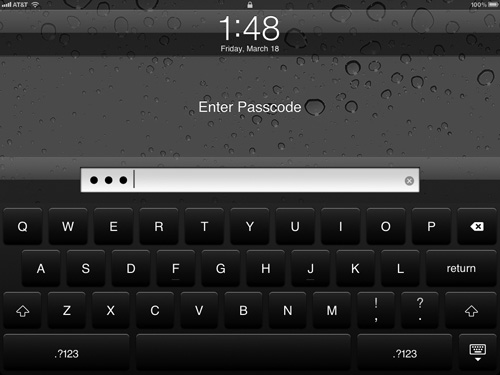
The easiest front-line measure you can take to improve the iPad’s security is to set a passcode lock that must be entered when the iPad is woken from sleep. The passcode can be a four-digit number or a longer, more secure, phrase (Figure 11.1).
Figure 11.1. Unlocking the iPad using a phrase
1. Go to Settings > General and tap the Passcode Lock button.
2. To require an alphanumeric passcode, turn the Simple Passcode switch to Off. Otherwise, proceed to the next step to use a four-digit number.
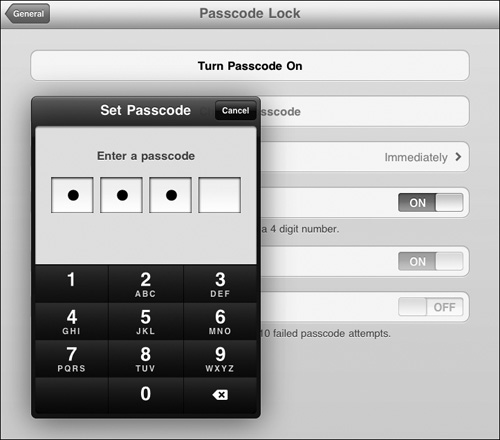
3. Tap the Turn Passcode On button, which brings up the Set Passcode dialog (Figure 11.2).
4. Enter a four-digit code, then re-enter it to confirm.
5. The passcode dialog is initially set to appear whenever you wake the iPad. If that’s too aggressive, tap the Require Passcode button and choose a timing during which the passcode isn’t needed after entering it successfully once.
Figure 11.2. Setting a passcode
6. If you don’t want anyone seeing your photos in the Picture Frame mode, turn the Picture Frame mode to Off. The Picture Frame button no longer appears on the lock screen.
7. To give the passcode lock some more teeth, enable the Erase Data option. If an incorrect password is attempted 10 times, the iPad wipes its memory.
After you set a passcode lock, you need to enter it whenever you want to make changes to the passcode settings.
Although a Smart Cover will wake the iPad from sleep automatically when opened, it doesn’t bypass the passcode lock. You still need to enter your code before using the iPad.
The passcode lock also works with the iPad’s hardware encryption. However, if you upgraded from an original iPad, the encryption may not be active. See www.tidbits.com/article/12049 for more information.
Use a VPN
When you connect to a public Wi-Fi hotspot, there’s a real chance that someone could be analyzing traffic on the network. The way to protect against it (other than to choose not to use public Wi-Fi networks, but that’s not a good option) is to set up a Virtual Private Network. A VPN establishes a secure connection to the Internet and protects your traffic from prying eyes.
Your employer may have provided you with VPN connection information, or you might prefer to pay for a service such as PublicVPN (publicvpn.com) or WiTopia (www.witopia.net). With the account information, configure the VPN settings so you can switch on the VPN when you need it.
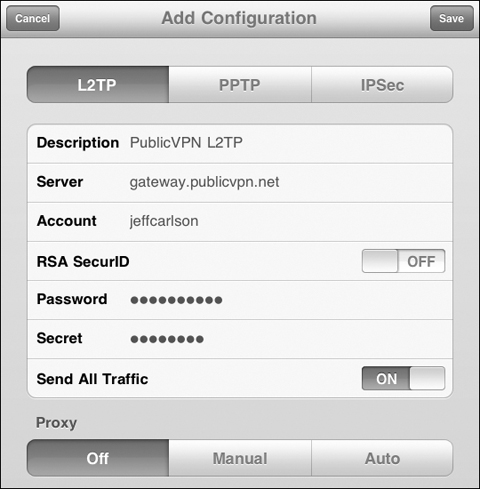
1. Go to Settings > General > Network, and tap the Add VPN Configuration button.
2. Enter the server and settings provided to you (Figure 11.3).
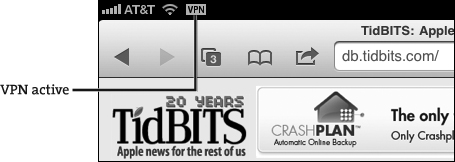
When you want to activate the VPN, return to Settings, where VPN now appears in the main Settings list; tap the VPN On button. After the connection is made and authenticated, a VPN icon appears in the status bar (Figure 11.4).
The VPN settings screen keeps tabs on how long you’ve been connected; tapping the Status button also reveals more information such as the VPN server name and the IP address assigned to your iPad.
When you no longer need the connection, tap the VPN switch to Off.
The VPN connection is closed when the iPad goes to sleep, so be sure to reestablish a link the next time you wake it up to maintain secure communications.
Set Up Usage Restrictions
One unsurprising trend I’ve seen since the iPad was released is that it’s a device that gets shared—whether you intend it to be shared or not. A good friend bought an iPad just before leaving on vacation, and he quickly discovered that it makes a great traveling companion. His young son used it on the plane to play educational games and watch videos, and then his wife used it to read ebooks in the evenings. He was lucky to get his hands on the iPad late at night after everyone else went to bed.
The problem is that the iPad isn’t set up like a Mac or PC, which have the capability to host multiple separate accounts. So, for example, my friend’s email messages were exposed to anyone who wanted to go looking (or accidentally deleting), and he wouldn’t have been able to prevent the boy from stumbling onto Web sites inappropriate for a three-year-old.
That’s where the iPad’s Restrictions settings come in. They don’t cover all possibilities—I’d like to see a future version of the operating system have a guest mode optimized for handing the iPad over to someone—but they do help prevent unwanted access.
1. Go to Settings > General > Restrictions to access the settings.
2. Tap the Enable Restrictions button.
3. Enter a Restrictions passcode in the keypad that appears, then enter it again for verification. This passcode is separate from the one you may have set up to lock the iPad.
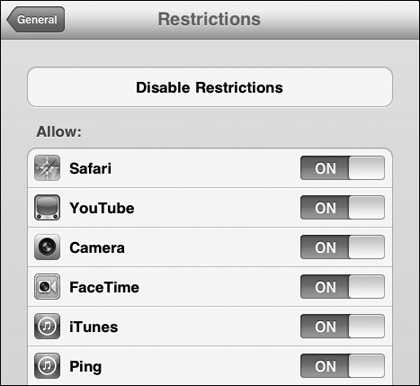
4. In the first block of settings, determine which apps and services are allowed to run (Figure 11.5). When you switch an option to Off, the app disappears from the Home screen. When Location is disabled, the iPad doesn’t share its location with apps that request it.
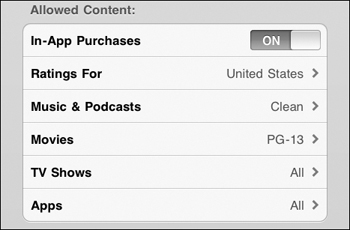
5. In the Allowed Content block of settings, choose which media can be viewed (Figure 11.6). For example, you may wish to limit videos to movies rated no higher than PG when the kids are awake, and then change the rating or disable restrictions when you want to watch something rated R after the kids have gone to bed.
Figure 11.6. Media restrictions
Find My iPad
Find My iPad can locate your iPad on a map (even the Wi-Fi–only model, provided it’s connected to a hotspot), send sounds or messages to it, or remotely erase its data if you think you’ll never see it again.
Set Up Find My iPad
Do the following to make sure Find My iPad is active; you don’t want to discover too late that you may not have set up the feature.
1. On the iPad, go to Settings > Mail, Contacts, Calendars and tap your MobileMe (me.com) account.
You don’t need a paid MobileMe account to use Find My iPad, just a free Apple ID. If you haven’t created one yet, tap Add Account, tap MobileMe, and enter your account information.
2. Set the Find My iPad option to On.
3. Tap Allow in the dialog that appears to grant the feature access to location data.
For Find My iPad to work, the Location Services option (in the General pane) must be turned on.
Take Action on a Lost iPad
Whether your iPad has fallen behind the back cushion on the couch or fallen into the wrong hands, you can take several actions using Find My iPad to help locate it.
If you own another iOS device, like an iPhone, download the free Find My iPhone app to locate your devices.
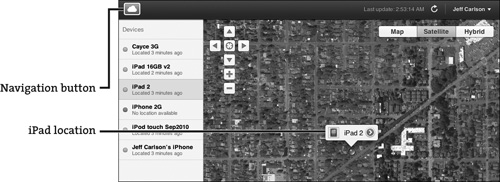
• Find: In a Web browser, go to www.me.com and sign in. If necessary, click the navigation button at the upper-left corner of the screen to choose a MobileMe feature, and click the Find My iPad icon. After a minute or so, your iPad should appear on a map noting its location (Figure 11.7).
Unless there’s a solid fix on the iPad’s signal, the location may not be accurate. After a few minutes, a better location is resolved. You can also click the Refresh Location (![]() ) button to refresh the view, which is useful if the iPad seems to be on the move.
) button to refresh the view, which is useful if the iPad seems to be on the move.
Figure 11.7. Find My iPad, found
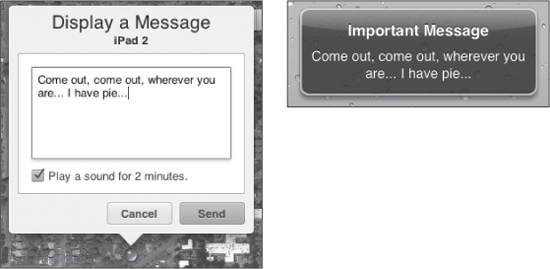
• Display a Message or Play Sound: If you suspect you’ve simply misplaced the iPad in your home (where the top-down map wouldn’t provide enough resolution), click the Details (![]() ) button and then click the Display a Message or Play Sound button. Enter a message and optionally mark the option to “Play a sound for 2 minutes” with the message (Figure 11.8). (The sound resembles a submarine’s sonar ping and plays loud, despite the iPad’s volume setting.)
) button and then click the Display a Message or Play Sound button. Enter a message and optionally mark the option to “Play a sound for 2 minutes” with the message (Figure 11.8). (The sound resembles a submarine’s sonar ping and plays loud, despite the iPad’s volume setting.)
Figure 11.8. Find My iPad message being sent and received
I was trying to be cute in the figure above, but if you think someone might have picked up the iPad, you could use the message feature to alert that the iPad is lost, offer a reward for its return, or just include a contact email or phone number.
• Remote Lock: Click the Details (![]() ) button and then click Lock to access this feature, which locks the iPad immediately (even if someone is in the middle of using the device) with a four-digit passcode of your choosing. Pick a code that’s different from the screen unlock code in case whoever has the iPad might know your code. The new passcode replaces the one you set in the Passcode Lock settings on the iPad.
) button and then click Lock to access this feature, which locks the iPad immediately (even if someone is in the middle of using the device) with a four-digit passcode of your choosing. Pick a code that’s different from the screen unlock code in case whoever has the iPad might know your code. The new passcode replaces the one you set in the Passcode Lock settings on the iPad.
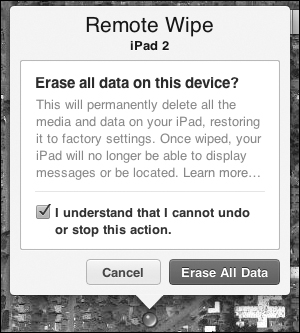
• Remote Wipe: Click the Details (![]() ) button and then click Wipe if you think the iPad is gone for good, or you don’t want to risk that someone may get past the passcode and access sensitive information. You’re asked to confirm your choice and then click the Erase All Data button (Figure 11.9).
) button and then click Wipe if you think the iPad is gone for good, or you don’t want to risk that someone may get past the passcode and access sensitive information. You’re asked to confirm your choice and then click the Erase All Data button (Figure 11.9).
All data on the iPad is automatically hardware-encrypted, so performing a remote wipe doesn’t actually remove any data; it changes the encryption key, leaving the encrypted data useless. As a result, wiping is fast, taking only a minute and a half.
If the iPad does turn up after a remote wipe, connect it to your computer and restore everything from the last backup.
Encrypt iPad Backup
Speaking of the iPad’s backup, you can perform remote wipes all day and it won’t matter if the computer you sync with was stolen along with the iPad. You can get some measure of relief if you also encrypt the iPad data backup that’s stored on the computer’s hard disk.
In iTunes with the iPad selected in the sidebar, go to the Summary pane and enable the Encrypt iPad backup option.