2. Get and Use Apps
The iPad is sleek and shiny, a fantastic example of industrial design that packs a host of cutting-edge technologies into a thin, responsive tablet. Aside from holding it in your hand, however, your time spent using the iPad will be focused almost entirely on its software.
The core apps that ship with the iPad are useful, but those are just the beginning. More than 585,000 (at this writing) programs are available from the App Store, 200,000 of them made specifically for the iPad—so many that Apple’s marketing tagline, “There’s an app for that,” has become part of current popular culture.
With a few taps (and often just a few dollars), you can locate, purchase, and download apps that do nearly anything you can think of. In this chapter, I tell you how to find and install apps, and also how you can share them with friends.
Find and Install Apps
Quick, jump in the car, let’s go app shopping!
Or don’t. In the case of most software, buying a new program means going to a store in the mall, or buying a box from an online retailer, or even downloading it from the developer directly. But that’s not the case with iPad apps.
The only outlet to get apps is Apple’s App Store, available on the iPad itself or from within iTunes. Pricing varies among apps, naturally, but most cost less than $15—in many cases, far less, with many apps available for free.
Note
The App Store does not offer demo or shareware versions of apps, so it’s difficult to evaluate an app before purchasing it. It’s not impossible, though: Many vendors offer free “light” versions of their apps, which are limited in scope but give you a sense of what the paid version can do. Other apps may cost as little as $0.99 and offer just a handful of features, with the option to unlock others if you pony up some more cash.
The App Store on the iPad
Tap the App Store icon on the Home screen to launch the App Store. Since it’s a storefront, you’ll see many new and featured titles (Figure 2.1). Tap the What’s Hot button at the top of the screen to view more featured apps, or tap the Release Date button to see what has been added recently. To view more apps in boxed sections, such as New and Noteworthy, swipe left or right.
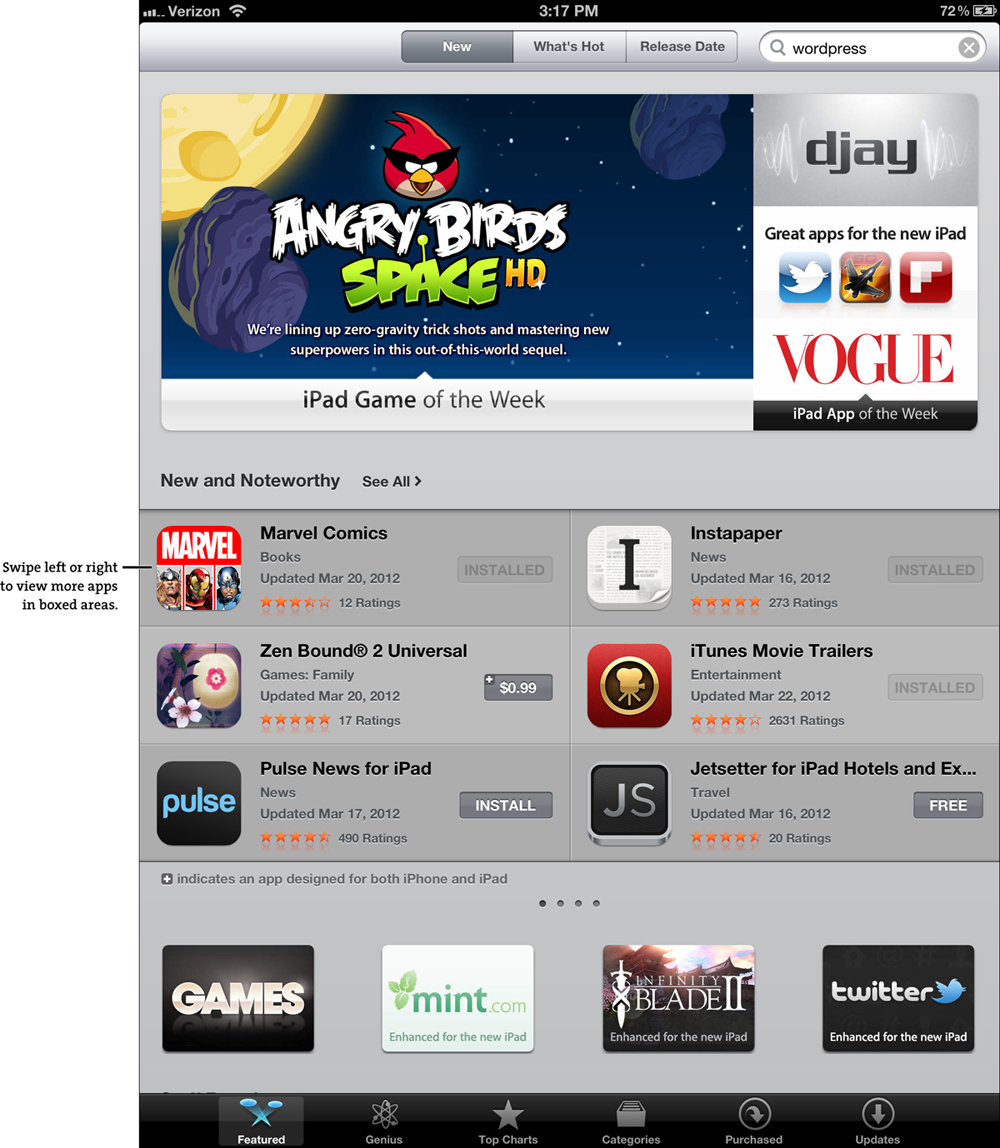
Figure 2.1. The App Store on the iPad
Tip
It’s sometimes difficult to get a sense of what an app offers by looking solely at screenshots, so be sure to tap the link that takes you to a developer’s Web site for more information. Often companies will include a video of how the app operates.
At the bottom of the screen, the buttons let you view featured apps; see Genius recommendations of other apps, based on apps you already own; consult lists of the most popular paid and free apps in Top Charts; or browse by category. (See “Update Apps,” later in this chapter, for more about the Updates button.) If you already know what you’re looking for, enter its name into the Search field in the upper-right corner of the screen.
To view more information about an app, including screenshots and customer reviews, tap its icon.
If you decide your life isn’t complete without the app, tap the button that displays the price. The button changes to read “Buy App”; if the app is free, you’ll see “Install App” (Figure 2.2). Tap it again to purchase, or tap anywhere outside the button to switch back to the price.

Figure 2.2. Purchasing an app
After you enter your iTunes Store account password, the app downloads and is installed in the first open space on the Home screen (Figure 2.3).

Figure 2.3. The app appears on the Home screen and is automatically installed.
Note
If you’re connected to the Internet using cellular networking, large apps—over 50 MB—won’t be downloaded. Connect to a Wi-Fi network or use iTunes on your computer and try the purchase again. Waiting for Wi-Fi also means you won’t chew up your monthly cellular data allotment with app update downloads.
Tip
The iTunes Store knows which apps you’ve purchased in the past (for the Apple ID you’re signed in with). Those appear with an Install button; no need to re-buy them.
The App Store within iTunes on a computer
It may be more convenient to browse and purchase apps on your computer and then sync them to the iPad later. However, an extra step is required when buying apps in iTunes. Fire up iTunes, click the iTunes Store item in the sidebar, and then click the App Store heading at the top. After clicking the Buy App button, the app is downloaded and added to iTunes. When you next perform a sync, the app is automatically transferred to the iPad and appears on the Home screen.
Automatically install purchased apps
If you already own another iOS device, such as an iPhone, it’s likely you want new apps to appear on the iPad as well. Normally you’d have to download a purchased app again on the iPad or sync with iTunes (provided you’ve synced the iPhone first). Instead, you can opt to automatically download new apps, music, and books.
Go to Settings > Store and turn on the Automatic Downloads option for apps. A similar preference exists in the settings for iTunes, categorized under the Store heading.
Run iPhone apps on the iPad
You’ll find apps that are written specifically for the iPad, but your iPad can also run apps written for both the iPhone and iPod touch. In some cases, a single app can run on all three devices—the app contains resources that take advantage of the iPad when run there, but that are ignored when run on an iPhone or iPod touch.
Apps not adapted to the iPad work in one of two ways: either at their actual size centered in the screen, or enlarged to fill the screen. Tap the 2x button in the lower-right corner to scale the app to fill the screen, or tap the 1x button to return to the original size.
Update Apps
When developers update their software, they submit a changed version to the App Store, where Apple approves the update and makes it available. Because everything goes through the App Store, your iPad can check for updates so you don’t have to go searching for them online.
A numbered badge appears on the App Store icon in the Home screen indicating how many updates are ready to be downloaded. In iTunes, the badge appears on the Apps item in the sidebar (Figure 2.4).
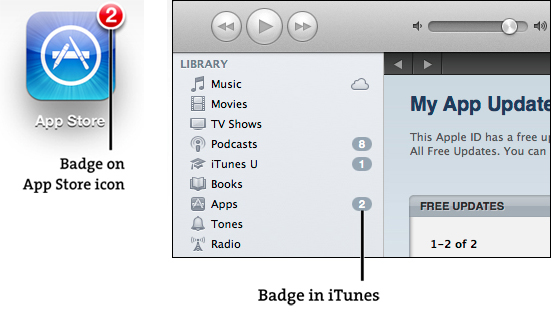
Figure 2.4. App updates are available.
Note
You don’t have to wait for the iPad or iTunes to communicate with the Apple mothership. In the App Store app, tap the Updates button to trigger a check for new versions. In iTunes, select the Apps item in the sidebar and then click the Check for Updates button.
To install the updates on the iPad, do the following:
1. Tap the App Store app to launch it.
2. Tap the Updates button in the bottom toolbar. A list of updated apps appears.
3. To learn more about the update, tap its name in the list. Otherwise, skip to the next step.
4. Tap the Free button next to any single app you want to download. When it changes to Install, tap it again.
Or, tap the Update All button at the top of the screen to download and install all updates at once.
Tip
A scary-looking dialog may appear before the download begins, warning you that an app may contain material inappropriate for children. Apple is strict about the type of content that’s accepted into the App Store, so you shouldn’t find anything too suggestive, and certainly nothing explicit. However, Apple can’t control all content, especially for apps that fetch data from the Web, so the company throws up this disclaimer.
What if you want to re-download an app you purchased, but you can’t remember its exact name? In the App Store app, tap the Purchased button to view your purchase history and download any apps that aren’t currently installed on the iPad.
Remove Apps
As you download more apps—and I predict you will—you’re going to find that some don’t hold the allure they once did, or you’ll discover a new app that does something better than the first one you downloaded. You can remove the app on the iPad itself or disable it from syncing within iTunes.
Note
The original apps that ship with the iPad cannot be removed. If they’re in your way, consider moving them to another Home screen (described in “Customize the Home Screen,” coming up).
On the iPad
1. Locate the app you want to remove on the Home screen, and then touch and hold its icon for a second. All of the apps begin to shake, and an X button appears on the app’s icon.
2. Tap the X button.
3. Tap the Delete button in the confirmation dialog that appears (Figure 2.5).

Figure 2.5. Remove an app from the iPad.
4. You can optionally rate the app, which will be reflected in its description at the App Store. Tap a star to give a rating from 1 to 5 and then tap the Rate button. Or, tap No Thanks to delete the app without rating it.
In iTunes
1. Connect the iPad to your computer and select its name in the iTunes sidebar.
2. Click the Applications tab in the main section of the screen.
3. Locate the app you wish to remove, either in the list of applications or in the preview area of the different Home screens (Figure 2.6).

Figure 2.6. Remove an app in iTunes.
4. Position your mouse pointer over the app you wish to remove and click the X button. Or, in the list, click the checkbox to the left so that it is not marked.
5. Click the Apply button to pass the changes along to the iPad. iTunes asks you to confirm that you want to remove the app, and if you click Yes, the iPad is synced.
Share Apps
Apps you’ve downloaded can be loaded onto any other iPad, iPhone, or iPod touch that you sync with your computer. But what you may not know is that you can share apps with up to five other computers (including friends’ computers) using the Home Sharing feature of iTunes.
For example, let’s say I want to play a game of Scrabble for iPad with my wife. I’ve purchased the app, but she doesn’t want to buy a new copy because she may not want to play it often. Here’s how to get the app onto another device.
1. Make sure your friend’s computer is on the same local network as your computer.
2. Enable Home Sharing in both computers by choosing Advanced > Turn On Home Sharing (if it’s not already active).
3. Enter your iTunes account name (the email address you use for purchasing things from the iTunes Store) and password, and then click the Create Home Share button. Be sure to use the same account (yours, since you are sending the app) on both computers.
4. If iTunes asks to authorize the computer, click Yes. On your friend’s computer, the name of your iTunes library appears in the sidebar.
5. Choose your library, click the disclosure triangle to the left of the name, and then click the Apps item.
6. Locate the app you want to transfer, and drag it to the Library heading in the sidebar (Figure 2.7). The app file copies to your friend’s iTunes library. He or she can then sync the iPad to install the app.

Figure 2.7. Share apps to a friend’s computer.
Note
Because your friend didn’t purchase the app originally, she needs to enter your iTunes password to update the app. If you trust your friend enough to give her your password, that’s not a problem, but it also means she can buy anything from the iTunes Store on your dime.
Set App Preferences
Every app has its own settings, but finding them can be scattershot. Many apps include preferences within the app itself, so you can do everything in one place. Apple’s recommended (and awkward, in my opinion) method is to put preferences within the Settings app (Figure 2.8). Scroll to the bottom of the Settings screen to view apps, then tap an app’s name to access its preferences.

Figure 2.8. App-specific preferences in the Settings app
Customize the Home Screen
I introduced the Home screen in Chapter 1 and mentioned how you can swipe each screenful of apps to find what you’re looking for. What I didn’t mention was that you can move the apps between screens and organize apps into folders, so you don’t have to swipe several times to get a frequently used app that appears on the last screen. It’s also possible to change the background image to personalize your iPad.
On the iPad
1. Touch and hold any app for a second until the apps begin to shake.
2. Drag an app you want to move to a different position on the screen. Or, to move an app to another screen, drag it to the left or right edge of the screen and hold it there.
After a moment, the screen advances and you still have control over positioning the app.
3. Lift your finger to drop the app in place.
4. Press the Home button to return to the Home screen’s normal mode.
Tip
The apps in the Dock at the bottom of each Home screen remain the same, no matter which screen you’re viewing. Put your most frequently used apps there.
Organize apps into folders
On the original iPad, my apps were strewn across nine Home screens. I moved my most frequently used apps to the first two or three screens, but even then I got sick of swiping to access apps. Now, my iPad is down to three Home screens, thanks to the ability to put related apps into groups that Apple calls folders.
1. Tap and hold an app you want to move, until all of the app icons are shaking.
2. Drag an app onto the top of another app. After a moment, a folder icon appears as a box that contains small thumbnail images of each app, along with an exposed area that displays every app in the folder (Figure 2.9).

Figure 2.9. App added to a folder group
3. A name for the folder is automatically assigned based on the categories of the apps, but you can change it. Select the text field and type your own title.
4. Drag other apps onto a folder icon to add them to the folder.
5. Press the Home button to finish rearranging the icons.
When you want to access an app within a folder, tap the folder to expose its contents and then tap the app you wish to open.
Tip
Maybe you don’t want to swipe between Home screens at all. You can just as easily create a folder of apps and then put the folder in the Dock at the bottom of the screen. That approach lets you access 120 apps from the Dock alone, plus 20 more on the first Home screen!
In iTunes
1. Connect the iPad to your computer, select it in the sidebar, and go to the Apps tab.
2. Drag an app to a new location, including to other screens, which are displayed in the right-hand column (Figure 2.10). (If the iPad is in its wide orientation, the screen thumbnails appear below the main screen.)

Figure 2.10. Drag an app to a new Home screen.
To create a folder, drag an app onto another app; or drag an app to an existing folder.
You can also drag an entire Home screen in that column to a different location. This is great if, for example, you keep games on one screen and business apps on another and want to change their order.
Tip
Press Shift and click more than one app in the Apps tab to select several, and then drag them to a new Home screen all at once.
3. Click the Apply button to sync the changes to the iPad.
Change the Home screen image
The iPad includes many alternate Home screen images, or you can use one of your own photos as the background. You can also set the image that comes up when you unlock the iPad.
1. Go to Settings > Brightness & Wallpaper.
2. Tap the Wallpaper button, which displays the current Lock and Home screen images.
3. Tap the next Wallpaper button to view images that Apple includes with the iPad. Or, tap the Photo Library button or the name of one of your photo albums to view your images (Figure 2.11).
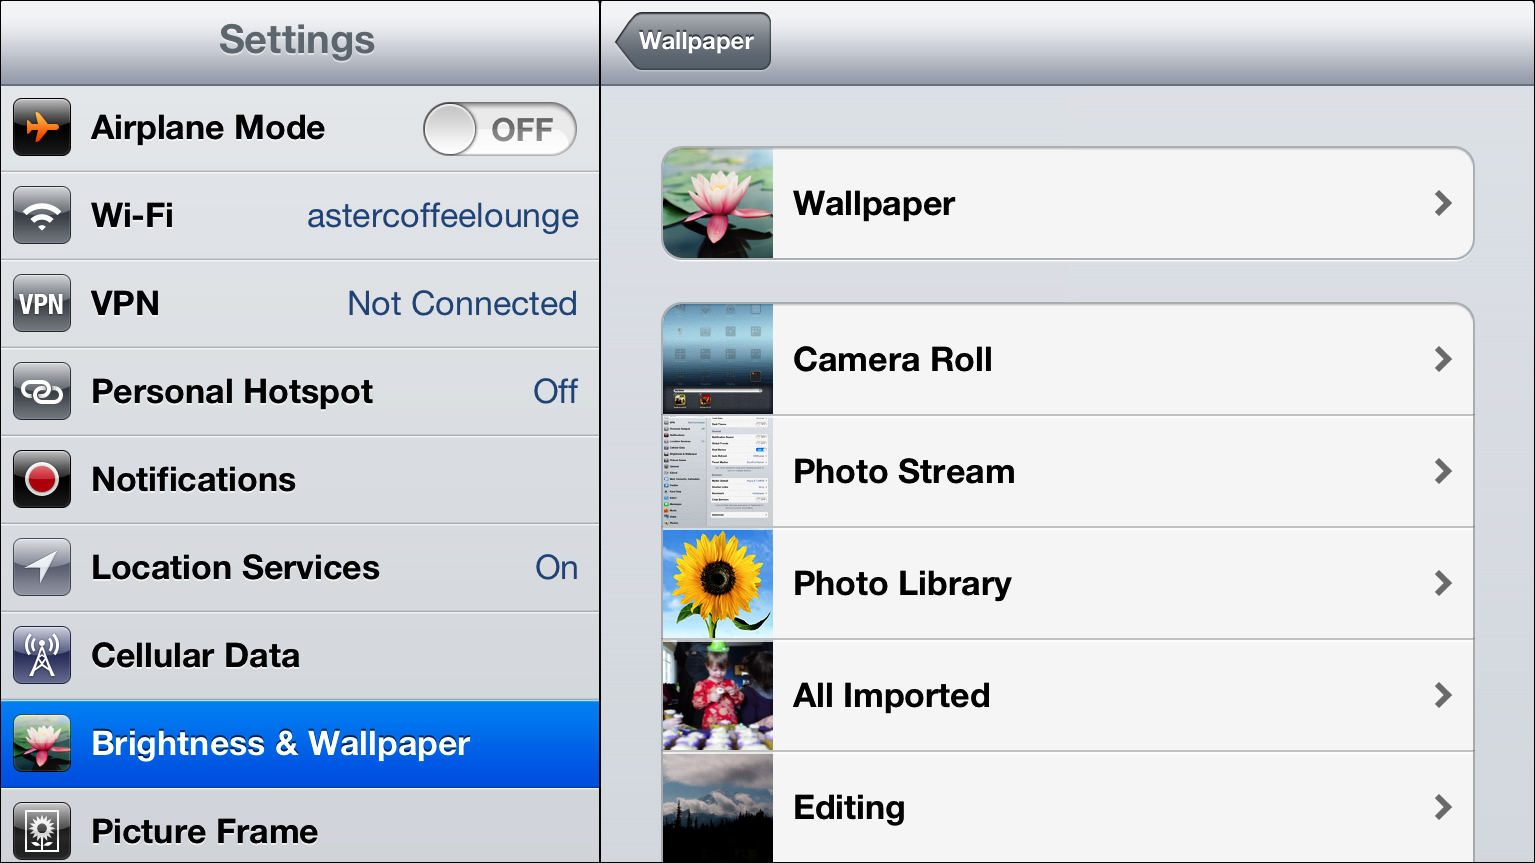
Figure 2.11. Choose an album of wallpaper images.
4. Tap an image to select it and to see a preview of how it will appear.
5. If the image is larger than the iPad’s screen resolution (which includes most digital photos), you can refine its appearance. Resize it by using pinch and expand gestures, and reposition it by dragging with one finger.
6. Tap the Set Lock Screen, Set Home Screen, or Set Both button to make the change (Figure 2.12). Or, tap Cancel to choose a different image.
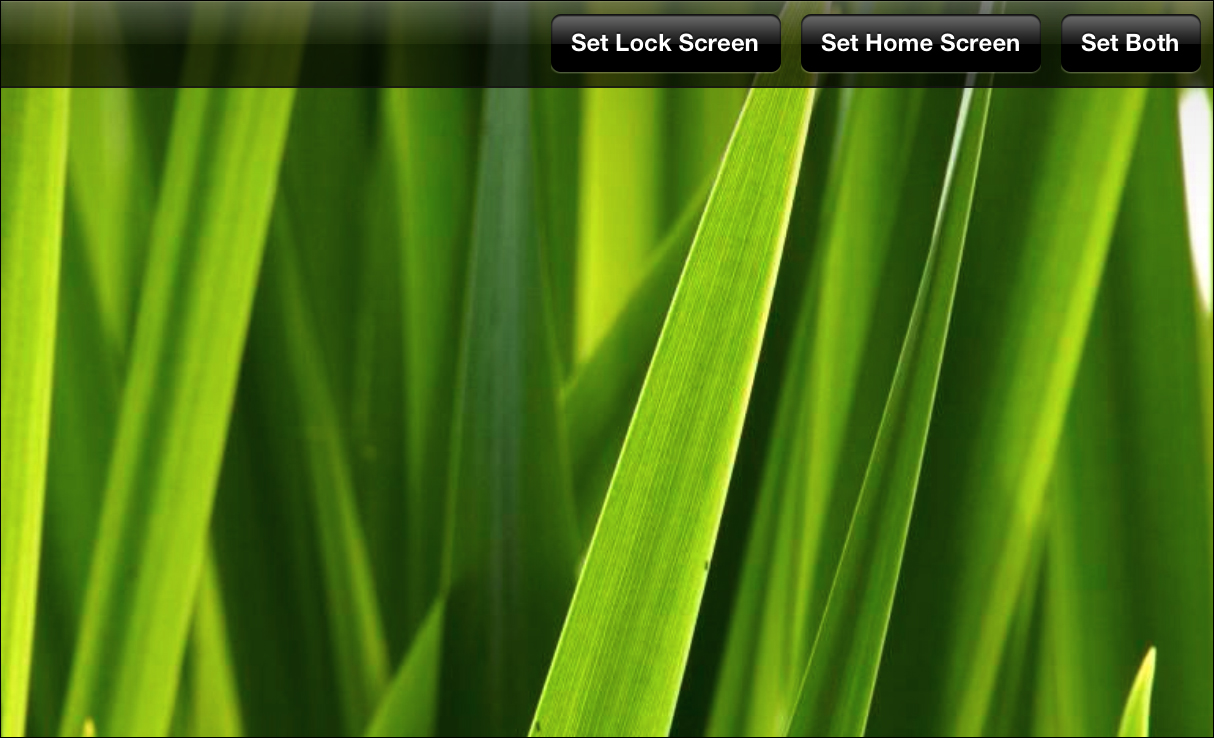
Figure 2.12. Set the wallpaper.