10. Be Productive
The iPad isn’t Apple’s first foray into producing a PDA, or “personal digital assistant.” The company created the category—and coined the term, even—with the Newton handheld. But the Newton wasn’t adopted as broadly as its upstart competitor the PalmPilot, and when Steve Jobs returned to Apple in 1997, he killed the Newton. As Palm ascended and Windows Mobile devices appeared (and disappeared), people wondered when Apple would get back into the game. I think rumors of a new Apple PDA started floating around the day the Newton died.
A decade later, Apple finally created its modern PDA: the iPhone. Yes, it was a phone, but the phone aspect was just a way to put it into a familiar category. The iPhone, and now the iPad on a grander scale, is capable of storing and making accessible all of your personal information: your schedule, list of contacts, notes, snippets, ideas, and doodles.
Sync Personal Information
Although it’s possible to create new events, contacts, and notes on the iPad (detailed in this chapter), most of that information probably already exists on your computer. There are two ways of transferring it to the iPad and keeping it updated: syncing wirelessly using iCloud, Google, Yahoo, or Microsoft Exchange; or through iTunes over the dock connector cable.
iCloud, Google, or Yahoo wireless sync
The ability to synchronize personal information wirelessly is one of my favorite features of iCloud (formerly MobileMe). If I edit an event on my computer, the change is propagated to my iPad, iPhone, and other computers within a minute or so. Wireless syncing with iCloud, Google, or Yahoo must be set up on the iPad, not in iTunes.
1. Go to Settings > Mail, Contacts, Calendars and tap the Add Account button.
2. Tap the button for your provider.
3. Enter your name, email address, and password. Tap Next.
4. Enable the services you want to sync (Figure 10.1), and tap the Save button. After a few minutes, your data transfers to the iPad. (These options are also available in the iCloud settings for your primary iCloud account.)

Figure 10.1. Setting up iCloud on the iPad
It’s possible to sync via iCloud and via iTunes. For example, you may want to sync your calendars via iCloud but store only business contacts on the iPad. In that case you’d turn off the Contacts sync option for iCloud and enable specific contact groups in the Info pane in iTunes.
Tip
Regardless of your sync method, you probably don’t want every event in the past to appear on your calendar. Go to Settings > Mail, Contacts, Calendars, scroll down to the Calendars section, tap the Sync button, and specify a time period (such as Events 3 Months Back) of events to include during a sync.
Exchange sync
If your company manages its email, contacts, and calendars using Microsoft Exchange, you can tie the iPad into the system with little fuss.
1. Go to Settings > Mail, Contacts, Calendars and tap Add Account.
2. Tap the Microsoft Exchange button.
3. Enter your email address, username, and password. Tap Next.
4. After the information is verified, tap Next again.
5. Enable the services you want to sync (mail, contacts, and calendars), and tap the Save button. After a few minutes, the data transfers.
iTunes sync
iTunes is the gateway between your data and the iPad, whether the data happens to be your music library or your schedule. With the iPad connected, do the following:
1. Select the iPad in the sidebar and click the Info button. You’ll find categories for contacts, calendars, “other” (notes and bookmarks), and mail accounts. (For details on mail accounts, see Chapter 4.)
2. Click the category checkboxes to enable syncing those items (Figure 10.2). Under Mac OS X, contacts and calendars are synced with Address Book and iCal (or, more specifically, with the underlying databases that those applications access). Under Windows, choose the data source from the pop-up menu in the category name; contacts, for example, can sync with Windows Contacts, Google Contacts, or Yahoo Address Book by default.

Figure 10.2. Syncing info in iTunes
3. Within each category, choose to sync all items or selected ones.
4. Click the Apply button to make the changes and sync the iPad.
Manage Your Schedule
Some people live and die by their calendars, while others refer to their schedules only occasionally. The Calendar app fits both personalities.
View your calendar
When you open the Calendar app, your schedule appears in one of four views, all evoking the look of a paper-and-leather desk calendar. Tap a view button at the top of the screen.
Each view has its own focus—the Day view, for example, shows a schedule of the day on the right-hand page, with a small red pin indicating the current time. The day’s events are listed at left (Figure 10.3).

Figure 10.3. Calendar Day view
Choose from a variety of ways to switch between dates:
• Swipe left or right to view next or previous dates.
• Tap the Today button to jump to today’s date in any view.
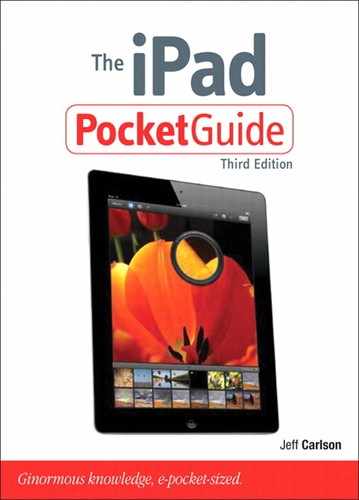
• Tap the triangular buttons on either side of the timeline below the calendar to switch to the previous or next item. Tapping in the Week view, for instance, shifts to the next week.
• Tap a block of time on the timeline to jump directly to it (Figure 10.4).
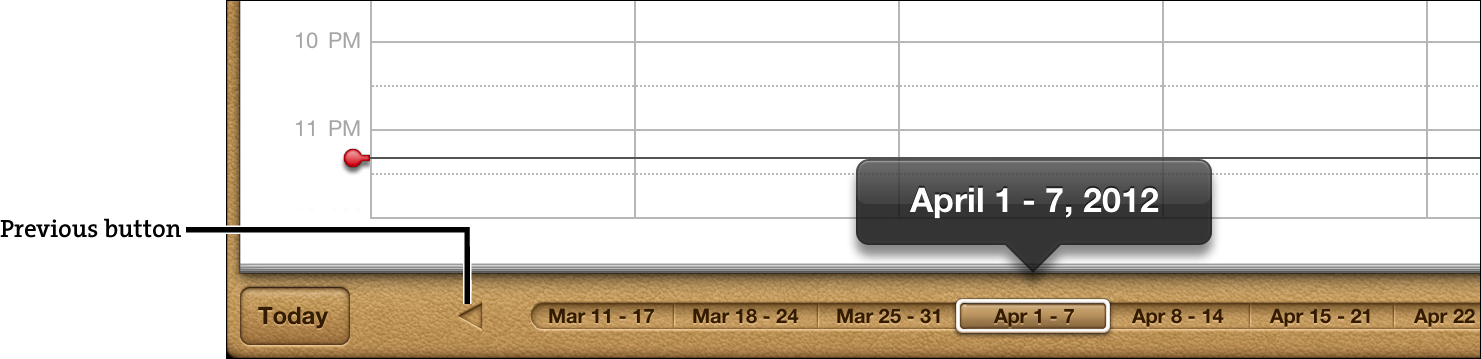
Figure 10.4. Navigation bar
Touch and drag on the timeline to rapidly skim forward or backward in time. If you hold at the edge, the pop-up display indicates how far you’re traveling. Lift your finger to then display that date. This trick has some subtlety to it, too: After you’ve reached the edge, drag past it to make the dates fly by faster; drag your finger back to the edge to slow it down.
• In the Day view, tap a date in the calendar grid to jump to it.
• In the Month view, double-tap a date to switch to the Day view.
• Type a term into the Search box and tap the Search key on the onscreen keyboard. Touch any event in the Results popover to jump to it.
Tip
The Results popover that appears begins to find matches as you type, but I’ve found that it doesn’t catch everything; you need to tap the Search key to perform a thorough search.
Create or edit an event
A common scenario in my kitchen: While we’re making dinner, my wife and I talk about what’s happening during the week, specifically events our daughter attends. I often reach for the iPad to view the week, add new events, or edit current ones that have changed. I don’t need to go upstairs to my computer to do that. And when I do get to my desk later, the changes are already applied, thanks to wireless syncing.
The following steps illustrate how to create a new event, but the steps are almost identical for editing existing events.
1. To create a new event, do one of the following:
• Tap the + button in the lower-right corner. The Add Event popover appears.
• Touch and hold at the day or time you want the event to occur. Without lifting your finger, you can drag the event to a specific time.
2. Type a name for the event in the Title field. You can also optionally add a location (Figure 10.5).

Figure 10.5. Adding a title and location
3. Tap the Starts/Ends field and, using the dials below, set a starting date and time and then an ending date and time (Figure 10.6). If the event doesn’t have a specific time, enable the All-day option. Tap Done.

Figure 10.6. The slot-machine scheduler
You can also grab the top and bottom handles of the event to adjust the start and end times, or you can drag the event to a new time.
4. If the event is recurring, tap the Repeat button and specify how often: Every Day, Every Week, Every 2 Weeks, Every Month, or Every Year. Tap Done to return to the previous screen.
5. Tap the Alert button if you want an alarm to go off before the event, and then specify a time. Tap Done.
6. Choose which of your synced calendars the event will appear in. (You can specify a default calendar in Settings > Mail, Contacts, Calendars.)
7. Enter any miscellaneous details in the Notes field.
8. Tap Done.
Editing an existing event initially depends on which view you’re in. Do one of the following, then use the previous steps to alter the information:
• In the Day view, tap it once.
• To edit in the Week and Month views, tap an event once and then tap the Edit button that appears (Figure 10.7).
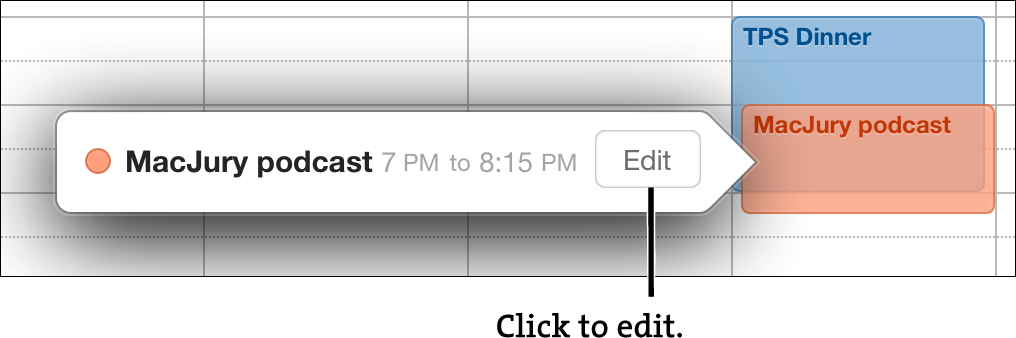
Figure 10.7. Editing in Week view
• For the List view, tap an event to select it, then tap it again to bring up the editing popover.
Reply to an event invitation
When someone invites you to an event using a calendar service that supports the feature (such as Exchange or iCloud), the event appears in the Calendar app as a new invitation.
1. Open the Calendar app and tap the event, which appears with a dotted outline (Figure 10.8). You can also tap the Invitations button at the top of the screen to view a list of invitations.

Figure 10.8. Incoming invitation
2. Tap Accept, Decline, or Maybe to reply to the invitation.
You can change your reply later by viewing details about the event and tapping one of the reply buttons.
Hide or show calendars
The Calendar app tries hard to appear like a paper desk calendar, but here’s one area where paper just wouldn’t cut it. To juggle several kinds of events—business, personal, kids’ schedules, and so on—you’d need separate physical calendars (or a handful of colored pens). Here you can include digital calendars for each category, color-code them, and show or hide them as you please.
New calendars must be created in your desktop software and synced to the iPad. Once there, in the Calendar app, tap the Calendars button and tap the ones you wish to hide (the checkmark disappears) (Figure 10.9). The events are still there, but they aren’t cluttering up your calendar views.

Figure 10.9. Choosing calendars to show
Manage Your Contacts
Over the years, my list of contacts has grown in size to the point where I know some of the information is out of date, but I don’t have the time or desire to clean it all up. And really, I don’t need to. The Contacts app stores it all for me so I can easily find a person’s essential information.
Contacts also ties in to many other areas of the iPad, feeding email addresses for Mail and physical addresses for Maps. When you start typing someone’s name in an outgoing email message, you’re matching a record in the Contacts app—so you don’t have to remember that your cousin Jeremy’s address is actually [email protected].
Find a contact
The Contacts app maintains the same spirit of the Calendar app, presenting your contacts in an address book (Figure 10.10). Flick through the list to browse for a contact, or use the tabs to advance through the alphabet.

Figure 10.10. The Contacts address book
Contacts are listed in order of their last names, but you can change this preference. Go to Settings > Mail, Contacts, Calendars, tap Sort Order in the Contacts section, and change the option to “First, Last.” The Display Order option in the same section dictates how each line appears (for example, changing that option to “Last, First” would make my name appear as Carlson Jeff). In either case, the last name appears in bold for easier identification.
If you know the name of the person or company you’re trying to find (or even part of the name, or a detail that might be in their information), tap the Search field and begin typing. Results appear immediately, with the first one displayed at right (Figure 10.11).

Figure 10.11. Find a contact.
Normally, all contacts are listed, but if you’ve organized your contacts in groups on your computer, you can display just the contacts from a group.
1. Tap the Groups button at upper left, which looks like a red bookmark.
2. In the list of groups, tap the one you want to focus on. The page turns back to the contacts list, showing only that group’s members.
Note
Although you can view groups on the iPad, the Contacts app offers no way to create new groups or move a person to a new group. You’ll need to do that in your desktop software and then sync the changes to the iPad.
Create or edit a contact
I’ve learned the hard way that I possess a superhuman ability to repel important scraps of paper. Rather than jot down someone’s contact information on the edge of an envelope, I prefer to add their details to the Contacts app so I know it won’t get lost.
Tip
Before you begin: If you want a new contact to belong to one of your groups, first make sure that group is the one selected.
1. Tap the New Contact button (+) to create a new record, or tap the Edit button to change details of an existing record.
2. Tap each relevant field and type the person’s contact information (Figure 10.12).
Figure 10.12. Entering information for a new contact
3. A contact can contain multiple similar items, such as phone numbers. As soon as you start entering information in one field, the Contacts app automatically adds another one below it, anticipating that you may want to add, for instance, a work number and then a home number. To remove any fields already made, tap the red Delete button.
If you don’t see a field you’re looking for, such as Job Title, scroll to the bottom of the list, tap Add Field, and choose from the options.
4. For fields with labels (such as Home, Work, or Mobile), tap the current label to view a popover containing alternates. If the one you want isn’t listed, choose Add Custom Label and type your own.
5. To add a photo to the contact, tap the Add Photo box, which presents two options:
• Take Photo. The camera interface opens, allowing you to take a picture either of yourself or of someone on the other side of the rear-facing camera. Tap the shutter button to capture the shot, move and scale it to fit, and tap the Use button.
• Choose Photo. Locate and tap an image in your photo albums. Position it in the frame as you’d like it to appear, and then tap the Use button (Figure 10.13).
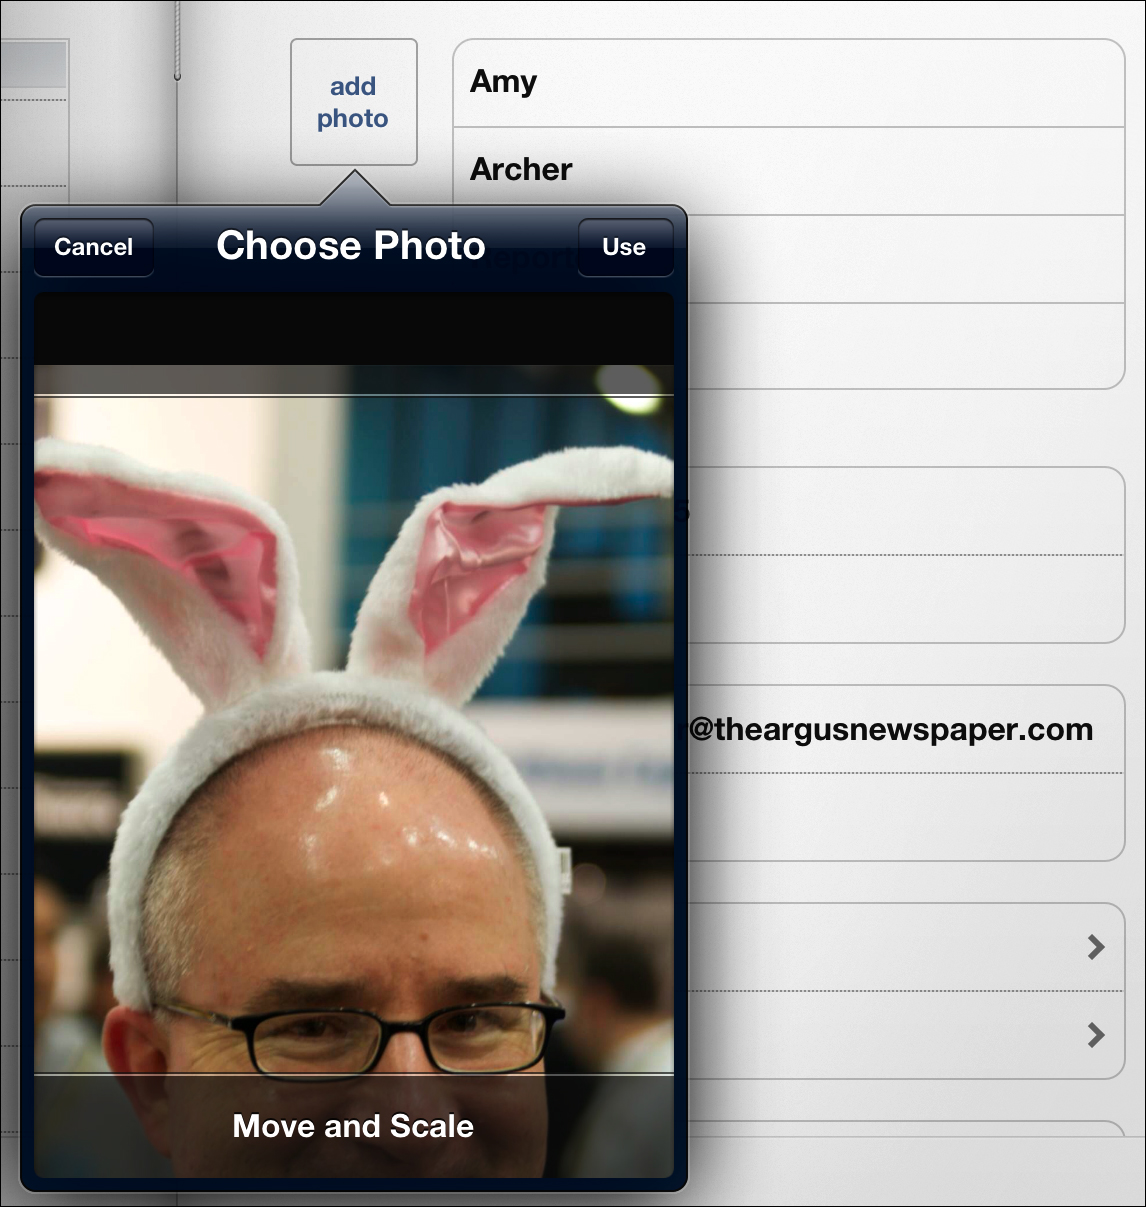
Figure 10.13. Grab an image from your Photos library.
6. Tap Done when you’re finished creating the contact. You can change details later by tapping the Edit button.
Tip
If you haven’t done so yet, be sure to create a record for yourself. Safari uses that information for its AutoFill feature (go to Settings > Safari > AutoFill, tap My Info, and specify your entry). It’s also good for sharing your details with someone else.
Share a contact
Early handhelds from Palm included an infrared receiver that would let two Palm-wielding people “beam” contact information to each other. Not only was it incredibly geeky, it was extremely useful. In just a few seconds, one person’s full contact information was in the other’s contacts list. That was before devices were networked; now, we just bounce the same information out to the Internet and into someone’s email inbox. To share a record from your Contacts list, do the following:
1. Locate the contact within the list and open it.
2. Tap the Share Contact button, and choose whether to send an email or a text message. A new outgoing email or text message appears, containing a vCard file attachment that can be imported into most contact software.
3. Enter the address of the person who will receive the contact.
4. Tap the Send button.
Receive a shared contact
If you’re on the receiving end of a shared contact, you can easily add someone’s vCard to the Contacts list.
1. In the Mail app, locate the email message that includes the .vcf file attachment.
2. Tap the attachment to view the contact information (Figure 10.14).

Figure 10.14. Adding a contact from email
3. Tap either the Create New Content button or the Add to Existing Contact button to transfer the information to the Contacts app.
Delete a contact
If you find yourself standing in line somewhere with nothing to do and suddenly feel the urge to purge old records from your Contacts list, do the following:
1. Tap a contact name to view it.
2. Tap the Edit button.
3. Scroll to the bottom of the information and tap the Delete Contact button.
4. In the confirmation dialog that appears, tap the Delete button. That contact is removed from the list. (Unfortunately, Contacts does not support the near-universal shortcut of swiping across a record to delete it.)
Take Notes
Let’s see, the iPad is roughly the size of a pad of paper, easy to hold in the hand, and capable of storing a lot of information. When you need to jot down some ideas, the Notes app is ready with a familiar yellow legal pad (mounted in a virtual leather holder, even, when viewed in landscape orientation).
Create a note
Here comes the hard part. Tap the New Note button (![]() ) and start typing. (Actually, not so hard.)
) and start typing. (Actually, not so hard.)
The first line of the note becomes the title, which appears in the toolbar and in the Notes list. In landscape orientation, that list sits off to the side (Figure 10.15); in portrait mode, tap the Notes button to bring up a popover containing all the notes you’ve stored.

Figure 10.15. The Notes app, viewed wide
If you’re looking for something in particular, enter a term in the Search field at the top of the Notes list (Figure 10.16).

Figure 10.16. Searching notes, viewed tall
Edit a note
Tap a note in the list to view it. You can also tap the Previous and Next buttons at the bottom of the page to switch between notes (Figure 10.17).

Figure 10.17. Notes controls, with my own homemade labels
To edit, tap somewhere on the note to place the cursor, and start typing.
Delete a note
There are two ways to delete a note:
• With the note visible, tap the Trash button, then tap the Delete Note button.
• In the Notes list, swipe one finger across a note’s title and tap the Delete button that appears.
Tip
If the handwriting-style font in Notes isn’t your style, go to Settings > Notes and choose Helvetica as the typeface.
Sync notes
We’ve already covered the mechanics of setting up the iPad to sync notes—it’s a checkbox in the Info pane in iTunes, or, for wireless sync, a setting under Mail, Contacts, Calendars. But where do the notes go on your computer? On the Mac, they show up in the Mail application. Under Windows, you need Microsoft Outlook 2003, 2007, or later.
Share notes
Tap the Mail icon at the bottom of the note to send its contents in an outgoing email message or to print the note.
Tip
A lot of alternative note-taking apps for the iPad are available at the App Store. I bounce between Simplenote (simple-note.appspot.com) and PlainText (www.hogbaysoftware.com), which feature clean interfaces for writing notes and the ability to sync to Dropbox. For more bells and whistles, check out Evernote (www.evernote.com), a catch-all app and Web service that can store text, images, and audio for later. If you prefer writing notes by hand, try Paper (www.fiftythree.com) or other drawing apps, and consider buying a stylus such as the Cosmonaut (www.studioneat.com).
Tip
If you find yourself doing a lot of typing on the iPad—or if you’re taking it along on a trip instead of a laptop—I highly recommend the Apple Wireless Keyboard. Other Bluetooth keyboards also work; although I haven’t used it, colleagues rave about the ZAGGfolio (www.zagg.com), which is a Bluetooth keyboard integrated with a case. Another possibility, if you want to use a physical keyboard, is to purchase the iPad Camera Connection Kit and use the USB adapter to connect a USB keyboard. (Some keyboards require more power than the iPad can provide, in which case you need to connect the keyboard through a powered USB hub.)
Set Up Reminders
Until iOS 5, the iPad, iPhone, and iPod touch didn’t offer a to-do list app. It was a curious omission, filled quickly by many developers with apps such as OmniFocus (www.omnigroup.com) and Wunderlist (www.wunderlist.com). Apple finally joined the party with Reminders, a simple to-do app that syncs to iCloud.
To create a new reminder, do the following:
1. In the Reminders app, tap the New button (+).
2. Type the title of the reminder and then tap Return on the keyboard.
3. Tap the task name to edit or add details, such as its priority and notes (Figure 10.18). You can also tap Remind Me to display a notification at a certain date and time or assign the task to another Reminders list. (Some options are available after tapping the Show More button.)

Figure 10.18. Editing a reminder
4. Tap Done to finish.
Tip
Tap the Edit button at the top of the screen to create new lists, delete existing ones, or rearrange the list order. Unfortunately, you can’t reorder the reminders themselves.
If you also use Reminders on an iPhone, you’ll find some options missing on the iPad, such as displaying a reminder when you arrive at a geographic location or being able to dictate a new reminder by voice (which requires Siri).
Move Data Files to and from the iPad
The iPad envisions a future where people don’t need to worry about file management. Using the Finder under Mac OS X, or Windows Explorer on a PC, leads to all sorts of gunk under the hood: Where are my documents? If the desktop is right there behind my windows, why is it also a folder? Why can’t I find the file I just saved? We’ve coped with it for years because that was just the way it was. According to Apple’s view of the world, an iPad owner shouldn’t be exposed to all that. You create something. It’s just there. End of story.
But we’re not quite there yet. Like it or not, we still have to deal with files, and right now the process of getting them on and off the iPad is a bit of a mess.
There are currently three ways of transferring files that can be opened by applications on the iPad: send them via email, use iTunes as the gateway, or use a network service such as iCloud, Dropbox, or SugarSync.
Use email
Because the Mail app recognizes many common file types, you can send an email to yourself, receive the message on the iPad, and view the attachment. See Chapter 4 for more details.
Copy to the Apps pane
Apps that can accept outside files appear at the bottom of the Apps pane in iTunes (Figure 10.19).

Figure 10.19. Sharing files in iTunes
1. Click the iPad app that you want to use to open your file.
2. Click the Add button and locate the file you want to transfer. Or, drag the file from the desktop to the Documents pane. The file is transferred immediately; you don’t have to sync the iPad.
3. On the iPad, launch the app and use it to open the file.
To get documents back out, reverse the process: Connect to iTunes, and in the Apps pane, select an app, select the file you want, and either drag it to the desktop or click the Save To button and specify a destination.
Tip
Wait, you thought it would be that easy? Depending on the app, you may need to take an extra step. In Apple’s iWork apps, you must export the file first to place it in a directory that is accessible to iTunes. Other apps may have a better option; be sure to check their documentation.
Sync with iCloud or another network service
The other way to transfer files is via the Internet, using a service such as iCloud, Dropbox (www.dropbox.com), or SugarSync (www.sugarsync.com). Files stored on the iPad are synchronized with a network server, which you can then access using your computer without needing to plug in a cable.
Alas, that route is also still somewhat muddled, despite the obvious advantage it would present. iCloud has a noble goal: that your file just be available from wherever you connect to iCloud. Currently, as you work on a document in Pages on the iPad, for example, all changes are automatically saved to iCloud. Open Pages on an iPhone and pick up where you left off.
On the Mac, though, it’s still not so smooth as I write this. You can send files to iWork.com, but it’s not a direct process. First you must share the file to iWork.com, which sends the file via email instead of transferring it directly. To get the file onto your computer, you visit iWork.com, download the file, and then open it in an iWork app. I anticipate that direct iCloud support will arrive in the next version of iWork on the Mac, but it hasn’t happened yet.
A better solution for now is synchronization to services like Dropbox and SugarSync. They sync the contents of folders on your computer and make them available on the iPad, where you can preview them or open them in supported apps. Some apps, such as PlainText, save files directly to Dropbox, making them available on other devices and computers immediately.