
7. Working with Images
On the iPhone, images and views play two distinct roles. Unlike views, images have no onscreen presence. Although views can use and display images, they are not themselves images, not even UIImageView objects. This chapter introduces images, specifically the UIImage class, and teaches you all the basic know-how you need for working with iPhone images. You learn how to load, store, and modify image data in your applications. You see how to add images to views and how to convert views into images. You discover how to process image data to create special effects, how to access images on a byte-by-byte basis, and how to take photos with your iPhone’s built-in camera.
Recipe: Finding and Loading Images
iPhone images are generally stored in one of four places. These four sources allow you to access image data and display that data in your programs. These sources include the photo album, the application bundle, the sandbox, and the Internet:
• Photo album—The iPhone’s photo album contains both a camera roll (for camera-able units) and photos synced from the user’s computer. Users can request images from this album using the interactive dialog supplied by the UIImagePickerController class. The dialog lets users browse through stored photos and select the image they want to work with.
• Application bundle—Your application bundle may store images along with your application executable, Info.plist file, and other resources. You can read these bundle-based images using their local file paths and display them in your application.
• Sandbox—Your application can also write image files into your sandbox and read them back as needed. The sandbox lets you store files to the Documents, Library, and tmp folders. Each of these folders is readable by your application, and you can create new images by supplying a file path. Although parts of the iPhone outside the sandbox are technically readable, Apple has made it clear that these areas are off-limits for App Store applications.
• Internet—Your application can download images from the Net using URL resources to point to web-based files. To make this work, the iPhone needs an active web connection, but once connected the data from a remote image is just as accessible as data stored locally.
Reading Image Data
An image’s file location controls how you can read its data. You’d imagine that you could just use a method like UIImage’s imageWithContentsOfFile: to load all four types. In reality, you cannot. Photo album pictures and their paths are (at least officially) hidden from direct application access. Only end users are allowed to browse and choose images, making the chosen image available to the application. Images also cannot be directly initialized with URLs, although this is easy to work around. Here’s a roundup that discusses how to read data from each source type with details on doing so.
Loading Images from the Application Bundle
The UIImage class offers a simple method that loads any image stored in the application bundle. Call imageNamed: with a filename, including its extension, for example:
myImage = [UIImage imageNamed:@"icon.png"];
This method looks for an image with the supplied name in the top-level folder of the application bundle. If found, the image loads and is cached by the iPhone system. That means the image is (theoretically) memory managed by that cache.
In reality, the imageNamed: method cannot be used as freely as that. The image cache does not, in fact, respond properly to memory warnings and release its objects. This isn’t a problem for simple applications. It’s not a problem for small images that get reused over and over within an application. It is a huge problem, however, for large apps that must carefully allocate and release memory with little room to spare. In response to the built-in cache issues, many developers have chosen to design their own image caches as demonstrated in the sample code in Chapter 2, “Building Your First Project.”
Substitute imageWithContentsOfFile: for imageNamed: This method returns an image loaded from the path supplied as an argument. To retrieve an image path from the bundle, query the NSBundle class to find the path for a given resource. This snippet loads icon.png from the top level of the application bundle. Notice how the filename and file extension are supplied as separate arguments.

Note
The iPhone supports the following image types: PNG, JPG, THM, JPEG, TIF, TIFF, GIF, BMP, BMPF, ICO, CUR, XBM, and PDF.
Loading Images from the Sandbox
By default, each sandbox contains three folders: Documents, Library, and tmp. Application-generated data such as images normally reside in the Documents folder. This folder does exactly what the name suggests. You store documents to and access them from this directory. Apple recommends you keep file data here that is created by or browsed from your program.
The Library folder stores user defaults and other state information for your program. The tmp folder provides a place to create transient files on-the-fly. Unlike tmp, files in Documents and Library are not transient. iTunes backs up all Documents and Library files whenever the iPhone syncs. In contrast the iPhone discards any tmp files when it reboots.
These directories demonstrate one of the key differences between Macintosh and iPhone programming. You’re free to use both standard and nonstandard file locations on the Macintosh. The iPhone with its sandbox is far more structured—rigidly so by Apple’s dictates; its files appear in better-defined locations. On the Macintosh, locating the Documents folder usually means searching the user domain. This is the standard way to locate Documents folders:

The iPhone is more constrained. You can reliably locate the top sandbox folder by calling a utility home directory function. The result of NSHomeDirectory() lets you navigate down one level to Documents with full assurance of reaching the proper destination. The following function provides a handy way to return a path to the Documents folder.
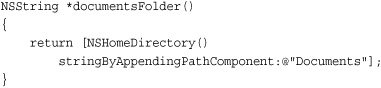
To load your image, append its filename to the returned path and tell UIImage to create a new image with those contents. This code loads a file named image.png from the top level of the documents folder and returns a UIImage instance initialized with that data.
path = [documentsFolder() stringByAppendingPathComponent:@"image.png"];
return [UIImage imageWithContentsOfFile:path];
Loading Images from URLs
The UIImage class can load images from NSData instances, but it cannot do so directly from URL strings or NSURL objects. So supply UIImage with data already downloaded from a URL. This snippet downloads the latest United States weather map from weather.com and then creates a new image using the weather data. First, it constructs an NSURL object, and then creates an NSData instance initialized with the contents of that URL. The data returned helps build the UIImage instance.

It’s easy enough to write a method that handles this process for you, letting you supply a URL string to retrieve a UIImage. This method takes one argument, a URL string, and returns a UIImage built from that resource.

This is a synchronous method, with certain drawbacks. It may fail without feedback and doesn’t have a built-in time-out. See Chapter 13, “Networking,” for an in-depth discussion about retrieving resources from URLs.
Loading Data from the Photo Album
The UIImagePickerController class helps users select images from the iPhone photo album. It provides a stand-alone view controller that you present modally. The controller sends back delegate messages reflecting the image choice made by the user.
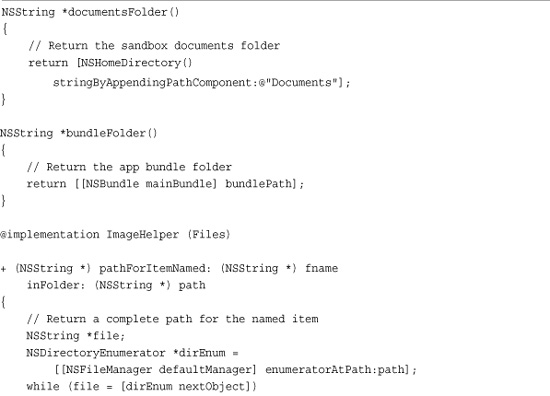
Loading Image Files
Recipe 7-1 introduces a class that will be used throughout this chapter, namely ImageHelper. This helper class provides handy image routines. All routines are implemented as class methods, letting you avoid allocating an actual ImageHelper object. Just query the class to retrieve the results you need.
Recipe 7-1 Loading Image Files Using ImageHelper
Get This Recipe’s Code
To get the code used for this recipe, go to http://github.com/erica/iphone-3.0-cookbook-, or if you’ve downloaded the disk image containing all of the sample code from the book, go to the folder for Chapter 7 and open the project for this recipe.
ImageHelper’s version of imageNamed: loads files using UIImage’s imageWithContentsOfFile: method, avoiding the caching hazards of the native imageNamed: method. The method searches through the application bundle first, and then if the file is not found, performs a second search in the sandbox documents folder. Both searches are deep. They exhaustively descend through all subfolders. The search ends upon finding the first match or when the completed search is unsuccessful.
Recipe 7-1’s imageFromURLString: method implements an image retrieval request from a URL as discussed earlier in this section. No checks are done here to test whether the unit is currently connected to the Internet. If you need to add such checks, use a persistent Wi-Fi flag in Info.plist (see Appendix A, “Info.plist Keys”) or perform a connection test (see Chapter 13, “Networking”).
Recipe: Accessing Photos from the iPhone Photo Album
The UIImagePickerController class offers a highly specialized interface with relatively few public methods and some modest quirks. It’s designed to operate solely as a modal dialog, and it has its own navigation controller built in. If you push it onto an existing navigation controller-based view scheme, it adds a second navigation bar below the first. That means that although you can use it with a tab bar and as an independent view system, you can’t really push it onto an existing navigation stack and have it look right.
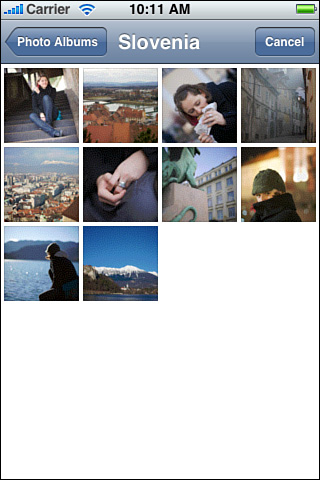
Recipe 7-2 shows the picker in its simplest mode. It enables users to select an image from any of the onboard albums; this operation is seen in Figure 7-1. Set the picker to use any of the legal source types. The three kinds of sources follow.
Recipe 7-2 Simple UIImagePickerController Image Selection
Get This Recipe’s Code
To get the code used for this recipe, go to http://github.com/erica/iphone-3.0-cookbook-, or if you’ve downloaded the disk image containing all of the sample code from the book, go to the folder for Chapter 7 and open the project for this recipe.
Figure 7-1 Apple supplies several prebuilt albums, including this trip to Slovenia, for in-simulator testing.
• UIImagePickerControllerSourceTypePhotoLibrary—All images synced to the iPhone plus any camera roll including pictures snapped by the user
• UIImagePickerControllerSourceTypeSavedPhotosAlbum—Also called the camera roll
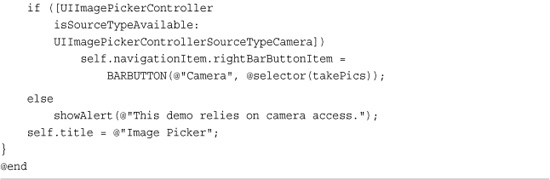
• UIImagePickerControllerSourceTypeCamera—Allows users to shoot pictures with the built-in iPhone camera
Working with the Image Picker
Recipe 7-2 follows a basic work path. Select an album, select an image, display the selected image, and then repeat. This simple flow works because there’s no image editing involved. That’s because the picker’s image editing property defaults to NO. This property, which is allowsImageEditing for SDKs prior to 3.1, and allowsEditing for the 3.1 SDK and later, tells the image picker whether to allow users to frame and stretch an image. When disabled, any selection (basically any image tap) redirects control to the UIImagePickerControllerDelegate object via the finished picking image method.
The delegate for an image picker must conform to two protocols, namely UINavigationControllerDelegate and UIImagePickerControllerDelegate. Be sure to declare these in the interface for the object you set as the picker delegate.
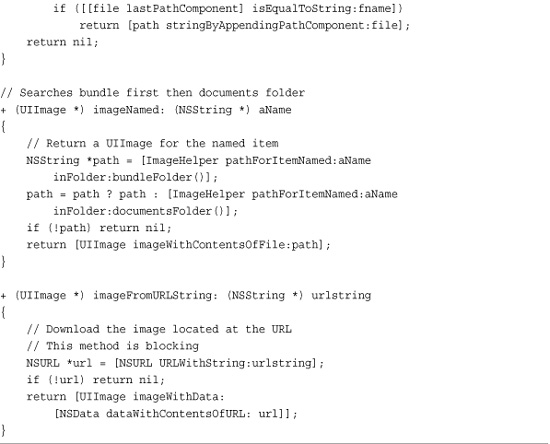
This recipe includes not one but two callbacks, a 3.x version and a 2.x version. If you intend to deploy your software to both 2.x and 3.x systems, increasing your user base to the highest audience possible, your code must respond to callbacks for both OS versions. That’s because the 2.x callback has been deprecated in 3.0.
Adding 2.x Support
For simple image selection, 2.x support proves trivial. The 2.x callback redirects to the 3.x one, passing a constructed dictionary with the selected image. As you see in Recipe 7-3, that callback redirection becomes a little more complicated when the image picker returns editing information.
Recipe 7-3 Allowing Users to Edit Selected Images

Get This Recipe’s Code
To get the code used for this recipe, go to http://github.com/erica/iphone-3.0-cookbook-, or if you’ve downloaded the disk image containing all of the sample code from the book, go to the folder for Chapter 7 and open the project for this recipe.
The image sent by the delegate method is basically guaranteed to be non-nil, although you can add a check in the 2.x method before attempting to construct a dictionary. Should the user cancel, the delegate receives an imagePickerControllerDidCancel: callback. When users cancel, the picker automatically dismisses and is released.
You can see this, along with the general memory consuming behavior of the image picker, by running Instruments; the memory levels return down after cancelling. When you choose to implement this callback (Apple describes it as optional but “expected”), make sure to dismiss and release the controller manually.
For nontrivial applications, make sure you’ve implemented memory management in your program and can respond to memory warnings when using the image picker. It’s a memory hog in any of its basic forms: image picking or camera use.
Adding 3.1 Support
The allowsImageEditing property was deprecated in the 3.1 SDK. At the time of writing this book, it remains available for use in your applications. It will likely remain so for a while but not forever. Deprecated methods may disappear without warning in future SDKs.
If you plan to deploy to a mix of firmware, both earlier than 3.1 as well as 3.1 and later, make sure to check whether your image picker instances respond to setAllowsImageEditing: and/or setAllowsEditing:. Use the NSObject respondsToSelector: method to test.
Note
The NSObject utility category at http://github.com/erica addresses this issue by scanning through a list of selectors until it finds one that an object can respond to. See the sample code that accompanies the category for examples of use.
Picking Video
Despite its name, the UIImagePickerController is not limited to picking images. You can configure it to select both images and videos from your onboard media library. See Chapter 15, “Audio, Video, and MediaKit,” for details on configuring the picker’s media types. You’ll also read about selecting, recording, and editing video resources.
Recipe: Selecting and Customizing Images from the Camera Roll
Recipe 7-3 extends image picker interaction to add user-controlled edits. To enable image editing in a UIImagePickerController, set the allowsImageEditing (3.0 and earlier) or allowsEditing (3.1 and later) property to YES. This allows users to scale and position images after selection, or in the case of camera shots, after snapping a photo. You can see this editor in action on the iPhone when using the Set Wallpaper feature of Settings. Figure 7-2 shows the post-selection editor for the 3.x and 2.x firmware.
Figure 7-2 The interactive image editor allows users to move, scale, and choose their final presentation. The 3.x editor appears on the left, the 2.x editor on the right. As the left image shows, the words “Move and Scale” do not always appear, even when the iPhone is in edit mode.
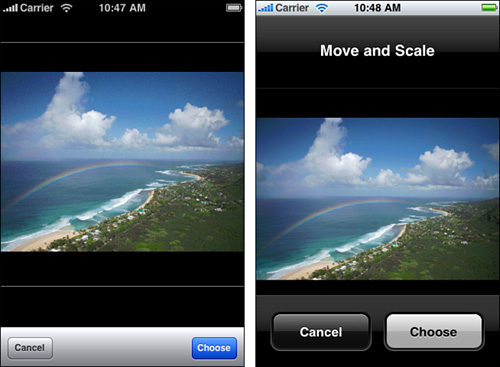
This window allows users to move and scale the image as desired. Pinching and unpinching changes the image scale. Dragging resets the image origin.
When the user taps Choose, control moves to the picker delegate, and your program picks up from there. Something different happens when users tap Cancel. Control returns to the album view, allowing the user to select another image and start over.
Recovering Image Edit Information
The 3.x callback returns a dictionary containing information about the selected image. The info dictionary returned by the 3.x firmware contains four keys that provide access to important dictionary data:
• UIImagePickerControllerMediaType—Defines the kind of media selected by the user, normally public.image. Media types are defined in the UTCoreTypes.h header file, which is part of the Mobile Core Services framework and is new to 3.0. Media types are primarily used for adding items to the system pasteboard.
• UIImagePickerControllerCropRect—Returns the section of the image selected by the user. Oddly enough, this returns as an NSRect, a data type equivalent to CGRect but more normally used on the Macintosh rather than the iPhone.
• UIImagePickerControllerOriginalImage—Stores a UIImage instance with the original (nonedited) image contents.
• UIImagePickerControllerEditedImage—Provides the edited version of the image, containing the portion of the picture selected by the user. The UIImage returned is small, sized to fit the iPhone screen.
When working with 2.x firmware, the delegate method imagePickerController: didFinishPickingImage: editingInfo: returns the edited version of the image as its second argument. This image reflects the scaling and translation specified by the user. The third argument, the editingInfo dictionary, contains the copy of the original image and the rectangle that represents the image cropping. Recipe 7-3 provides 2.x compliance by adding the edited image into the info dictionary and passing that to the 3.x delegate method.
Note
To populate the camera roll on the iPhone simulator, locate the mobile user file system in ~/Library/Application Support/iPhone Simulator/User. Navigate down to Media/DCIM and copy a 100APPLE folder from a real iPhone to that folder. Make sure to copy both the JPG images and the small THM thumbnail files.
Recipe: Snapping Photos and Writing Them to the Photo Album
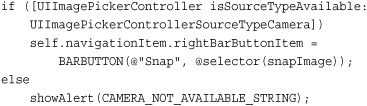
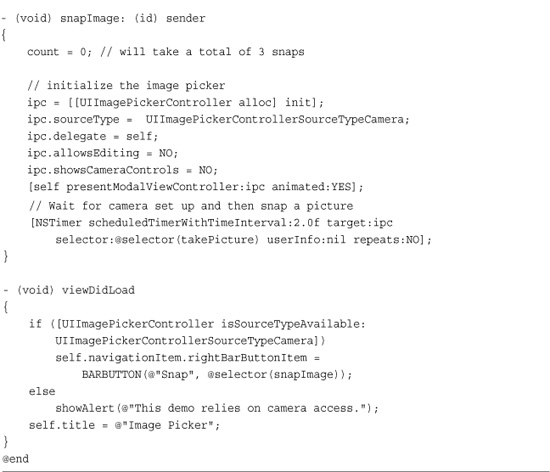
Recipes 7-2 and 7-3 showed how to select and edit images using the image picker controller. Recipe 7-4 introduces a different mode, snapping photos with the iPhone’s built-in camera. The image picker lets users shoot a picture and decide whether to use that image. Because cameras are not available on all iPhone units (specifically, the first generations of the iPod touch), begin by checking whether the system running the application supports camera usage. This snippet checks for a camera, limiting access to the “Snap” button.
Recipe 7-4 Snapping Images with the Onboard Camera
Get This Recipe’s Code
To get the code used for this recipe, go to http://github.com/erica/iphone-3.0-cookbook-, or if you’ve downloaded the disk image containing all of the sample code from the book, go to the folder for Chapter 7 and open the project for this recipe.
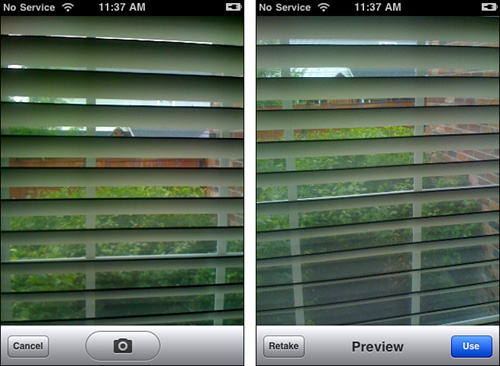
As with other modes, you can allow or disallow image editing as part of the photo-capture process. One feature the camera interaction brings that has no parallel is the Preview screen. This displays after the user taps the camera icon, which is shown in Figure 7-3. The Preview screen lets users retake the photo or use the photo as is. On tapping Use (or Use Photo under 2.x), control passes to the next phase. If you’ve enabled image editing, the user can do so next. If not, control moves to the standard “did finish picking” method.
Figure 7-3 After pressing the snap button (Camera icon, left), the Preview screen lets users chose whether to use or retake the image.
The sample code that accompanies this recipe assigns the returned image to the UIImageView that forms the application background. Notice that just a part of the image is shown. That’s because the captured picture is much larger than the iPhone screen. Recipes for resizing a large image follow later in this chapter.
This code also saves the snapped image to the photo album by calling UIImageWriteToSavedPhotosAlbum(). This function can save any image, not just those from the onboard camera. Its second and third arguments specify a callback target and selector. The selector must take three arguments itself, as shown in Recipe 7-4; these are an image, an error, and a pointer to context information. Photos snapped from applications do not contain geotagging information.
Recipe: Saving Pictures to the Documents Folder
Each UIImage can convert itself into JPEG or PNG data. Two built-in UIKit functions produce the necessary NSData from UIImage instances. These functions are UIImageJPEGRepresentation() and UIImagePNGRepresentation(). The JPEG version takes two arguments—the image and a compression quality that ranges from 0.0 (lowest quality, maximum compression) to 1.0 (highest quality, minimum compression). The PNG version takes one argument—the image.
To write the image to file, use the NSData object that is returned by either function and call the writeToFile: atomically: method. This stores the image data to a path that you specify. Setting the second argument to YES ensures that the entire file gets written before being placed into that path. This guarantees that you won’t have to handle the consequences of partial writes.
Recipe 7-5 uses an image picker controller to select items already in the iPhone library. The code stores whatever item was selected to the application’s Documents folder in the sandbox. The findUniqueSavePath method defined in the recipe returns a unique name. It searches until it generates a name that does not match an existing file. The picker delegate method uses that name to save the image.
Recipe 7-5 Saving Images to File
Get This Recipe’s Code
To get the code used for this recipe, go to http://github.com/erica/iphone-3.0-cookbook-, or if you’ve downloaded the disk image containing all of the sample code from the book, go to the folder for Chapter 7 and open the project for this recipe.
At the end of the callback, a list of files is printed to the debugging console. This allows you to see which items have been created, which is handy when you’re running this recipe on an iPhone device rather than in the simulator.
File-writing speed varies. On the simulator, it runs very fast. On older, first generation iPhones, it may proceed far more slowly especially for full-size photos that have been snapped by the camera. Saving a photo may take up to 5 or 10 seconds, which is a good time to display an ongoing activity alert like the one used in Recipe 7-11 later in this chapter.
Recipe: E-Mailing Pictures
New to the 3.0 SDK, the Message UI framework allows users to compose e-mail directly within applications. Add this to your applications by setting up and initializing instances of MFMailComposeViewController. Recipe 7-6 shows you how to set up a composition view and initialize its contents.
Recipe 7-6 Sending Images by E-Mail
Get This Recipe’s Code
To get the code used for this recipe, go to http://github.com/erica/iphone-3.0-cookbook-, or if you’ve downloaded the disk image containing all of the sample code from the book, go to the folder for Chapter 7 and open the project for this recipe.
The mail composition controller operates in a similar fashion to the image picker controller. Your primary view controller presents it as a modal controller and waits for results via a delegate callback. Make sure to declare the MFMailComposeViewControllerDelegate protocol and implement the single callback that is responsible for dismissing the controller. Be sure to give the image picker time to finish shutting down before presenting the composition controller.
Set the composition controller’s mostly optional properties to build the message. The subject and bodies are defined via setSubject: and setMessageBody:. These methods take strings as their arguments. Creating the attachment requires slightly more work.
To add an attachment, you need to provide all the file components expected by the mail client. Supply data (via an NSData object), a MIME type (a string), and a filename (another string). Retrieve the image data using the same UIImageJPEGRepresentation() function discussed in Recipe 7-5. Like that recipe, this function takes some time, often several seconds, to work. So expect a delay before the message view appears.
This example uses a MIME type of image/jpeg. If you want to send other data types, search on the Internet for the proper MIME representations. The receiving e-mail uses the file name you specify to store the data you send. Use any arbitrary name you like.
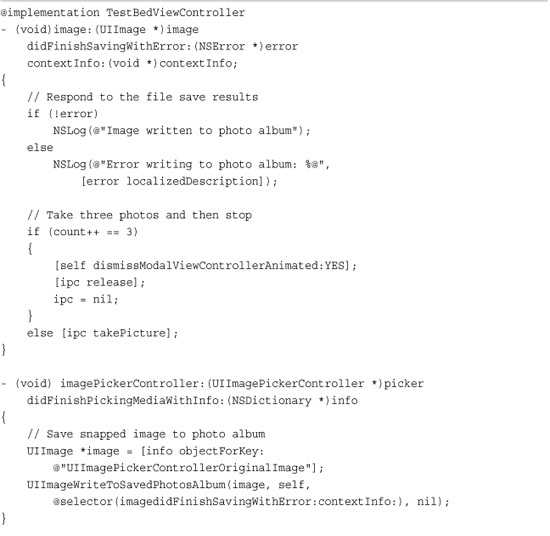
Recipe: Capturing Time Lapse Photos
There are times that you just want to use the camera to take a quick shot without user interaction. For example, you might write a utility that does time lapse photography as you’re biking, or you may want to build an application that builds stop motion animation. Recipe 7-7 demonstrates how to achieve this by using new 3.1 SDK features with the camera from the UIImagePickerController.
Get This Recipe’s Code
To get the code used for this recipe, go to http://github.com/erica/iphone-3.0-cookbook-, or if you’ve downloaded the disk image containing all of the sample code from the book, go to the folder for Chapter 7 and open the project for this recipe.
Two 3.1 API changes enable this kind of capture. The showsCameraControls property allows you to hide the normal camera GUI, presenting a full-screen camera preview instead. Set this property to NO.
ipc.showsCameraControls = NO;
To programmatically capture an image rather than depend on user input, call the takePicture method. This begins the photo acquisition process, just as if a user had pressed the snap button. When the photo is ready, the picker sends the imagePickerController:didFinishPickingMediaWithInfo: callback to its delegate. You cannot capture another picture until after this method is called.
Recipe 7-7 takes a series of three pictures, one after another. It saves each image to the photo album and then snaps the next shot. Each image is a full-resolution photo, taking up 2 or 3 megabytes of memory each. You could easily add a timer to space out the photos for longer delays.
When using the iPhone in a dock to snap photos over a long period of time, make sure to disable the UIApplication’s idle timer as follows. This code ensures that the device will not sleep even though a user has not interacted with it for a while.
[UIApplication sharedApplication].idleTimerDisabled = YES;
Note
Consider combining Recipe 7-7’s time-lapse photography with Recipe 13-11’s Twitpic uploader to create a security camera system with a spare iPhone.
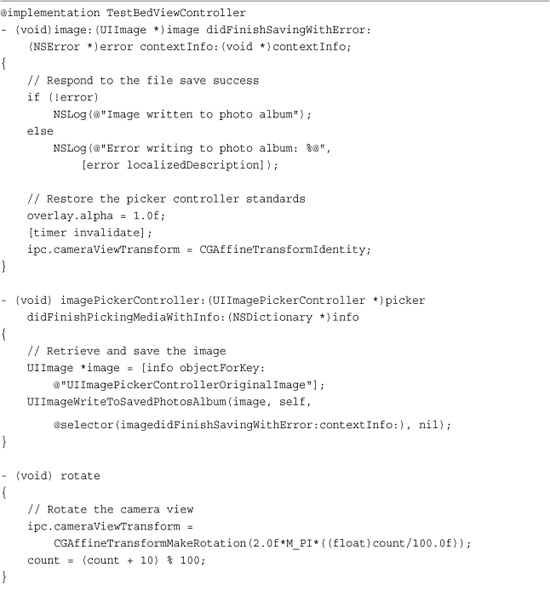
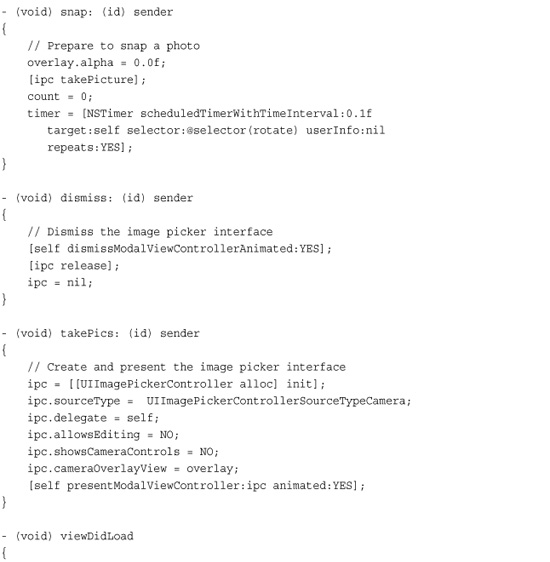
Recipe: Using a Custom Camera Overlay
With the 3.1 firmware, you can now add custom overlays to the camera interface. Use this feature to create a GUI that floats over the live camera preview. You can add buttons and other user interface controls to snap photographs and dismiss the controller. Figure 7-4 shows a rudimentary overlay with two buttons: one for snapping a photo, the other (the small circled “X”) for dismissing the image picker controller.
Figure 7-4 Snapping photos with a custom image picker overlay.

The light gray bar behind the Snap button was added in Interface Builder when laying out the overlay. In Figure 7-4, this bar sits partway in the image area and partway in the black control area, which is left blank for your use.
Set the overlay by assigning a view to the picker’s cameraOverlayView property and hide the normal controls. When you present the picker, the custom overlay, not the built-in one, appears.
Another 3.1 feature, the cameraViewTransform property, provides a way to change how the camera view is shown. Recipe 7-8 uses this property to spin the preview while an image is being saved. In normal use, this property comes in handy for videoconferencing should Apple ever release a front-mounted iPhone or (more likely) iPod camera.
Recipe 7-8 Custom Camera Overlays and Transforms
Get This Recipe’s Code
To get the code used for this recipe, go to http://github.com/erica/iphone-3.0-cookbook-, or if you’ve downloaded the disk image containing all of the sample code from the book, go to the folder for Chapter 7 and open the project for this recipe.
Recipe 7-8 highlights these two features and demonstrates how to use them in your iPhone applications.
Recipe: Displaying Images in a Scrollable View
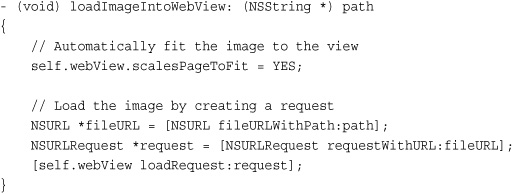
Image display is all about memory. Treat large and small image display as separate problems. The UIWebView class easily handles memory-intense data. You might load a larger image into a web view using a method like this. This approach works well with bulky PDF images. UIWebViews offer a complete package of image presentation including built-in scrolling and resizing.
With smaller images, say less than half a megabyte in size when compressed, you can load them directly to UIImageViews and add them to your interface. Apple recommends that UIImage images never exceed 1024-by-1024 pixels due to memory concerns.
The problem with basic image views is that they are static. Unlike web views, they do not respond to user scrolls and pinches. Embedding into a UIScrollView solves this problem. Scroll views provide those user interactions, allowing users to manipulate any image placed on the scroll view surface.
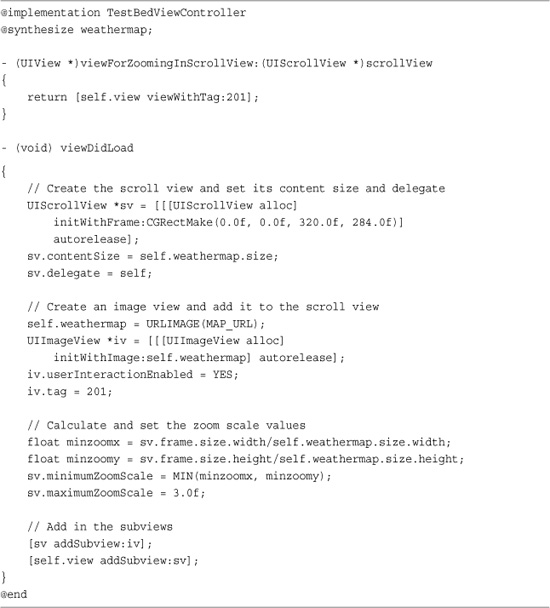
Recipe 7-9 demonstrates how to do this. It adds a scroll view to the interface and a weather map to the scroll view, as shown in Figure 7-5. Then it calculates a pair of minimum values based on the core size of the image, namely the least degree of zoom that allows the image to be fully seen in the scroll view. It assigns this value to the scroll view’s minimumZoomScale. The maximum scale is set, arbitrarily to three times the image size. These settings allow full user interaction with the image while limiting that interaction to a reasonable scope.
Recipe 7-9 Embedding an Image onto a Scroller
Get This Recipe’s Code
To get the code used for this recipe, go to http://github.com/erica/iphone-3.0-cookbook-, or if you’ve downloaded the disk image containing all of the sample code from the book, go to the folder for Chapter 7 and open the project for this recipe.
Figure 7-5 This live weather map is downloaded from a World Wide Web URL and layered onto a scroll view that allows users to scale and pan through the image.

The delegate method shown in the recipe identifies which view responds to zooming. For this recipe, that corresponds to the single image view placed onto the scroll view. Scroll views do not automatically know anything about any subviews you add to them. Defining this delegate method binds the zoom to your image.
Note
As with other views, you can set a UIImageView’s properties in Interface Builder. IB’s inspectors enable you to change the view’s alpha setting, size, location, and so forth. There’s one quirk though. When you use an image view as your primary view, IB balks at adding subviews. If you run into this problem, create another view as your main view, and edit your image view as needed. After, delete the main view. Control-drag from your application delegate and assign the edited image view to the view outlet.
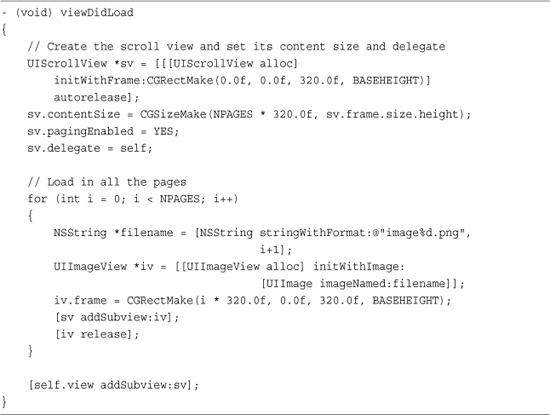
Recipe: Creating a Multiimage Paged Scroll
Scroll views aren’t just about zooming. The UIScrollView’s paging property allows you to place images (or other views, for that matter) in a scroll view and move through them one view-width at a time. The key lies in ensuring that each image loaded exactly matches the width of the scroll view frame for horizontal presentations or its height for vertical ones.
Set the pagingEnabled property to YES. This allows users to flick their way from one image to another. Recipe 7-10 demonstrates how to do this. What this recipe offers is a page-by-page presentation of several image views. You can use this same approach to present views that aren’t just images.
Recipe 7-10 Creating a Paged Image Presentation
Get This Recipe’s Code
To get the code used for this recipe, go to http://github.com/erica/iphone-3.0-cookbook-, or if you’ve downloaded the disk image containing all of the sample code from the book, go to the folder for Chapter 7 and open the project for this recipe.
Note
Adding zooming to a paged view presents a more difficult problem than the simple scrolling shown here. It’s a problem that has been solved ably and extensively by Joe Hewitt, developer of the iPhone Facebook application. His open source three20 project (http://github.com/joehewitt/three20) offers photo-album style interactions including image zooming from within a paged scroller. The repository provides a wide range of useful and beautiful view utility classes.
Recipe: Creating New Images from Scratch
In addition to loading images from files and from the Web, Cocoa Touch allows you to create new images on-the-fly. This blends UIKit functions with standard Quartz 2D graphics to build new UIImage instances.
So why would build new images from scratch? The answers are many. You might create a thumbnail by shrinking a full-size picture into a new image. You could programmatically lay out a labeled game piece. You might generate a semitransparent backsplash for custom alert views. You can also add effects to existing images like the reflection discussed in Chapter 6, “Assembling Views and Animations,” or you might just want to customize an image in some other way. Each of these examples builds a new image in code, whether that image is based on another or built entirely from new elements.
Cocoa Touch provides a simple way to build new images. As this code shows, you just create a new image context, draw to it, and then transform the context into a UIImage object.
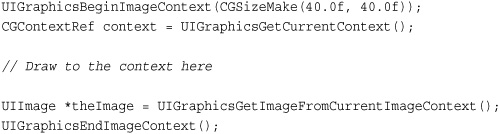
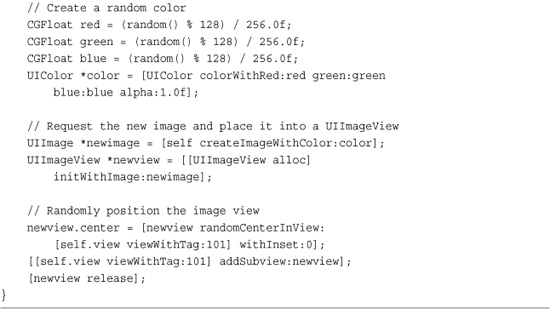
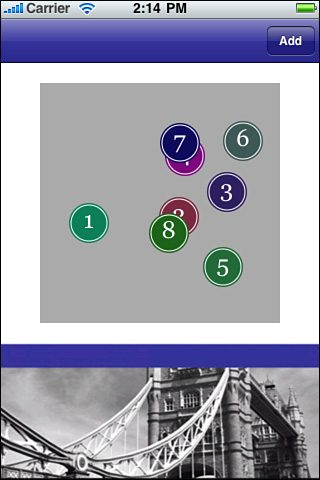
The drawing commands you use may consist of a combination of UIKit calls (like drawAtPoint: and drawInRect:) and Core Graphics Quartz calls like the ones used in Recipe 7-11. Recipe 7-11 builds new image views and populates them with images drawn from scratch. As Figure 7-6 shows, these images are circles with random colors, labeled with a number. These numbers are drawn directly into the image; they are not added with a separate UILabel.
Recipe 7-11 Creating UIImage Instances from Scratch


Get This Recipe’s Code
To get the code used for this recipe, go to http://github.com/erica/iphone-3.0-cookbook-, or if you’ve downloaded the disk image containing all of the sample code from the book, go to the folder for Chapter 7 and open the project for this recipe.
Figure 7-6 Each circle represents an image created entirely with Core Graphics/Quartz calls.
Recipe: Building Thumbnails from Images
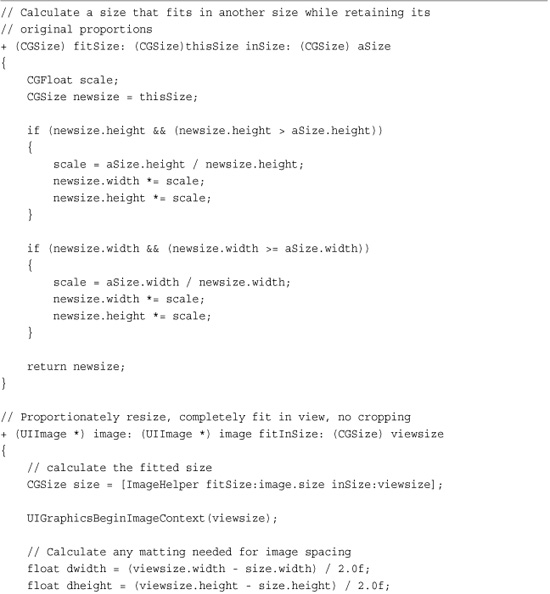
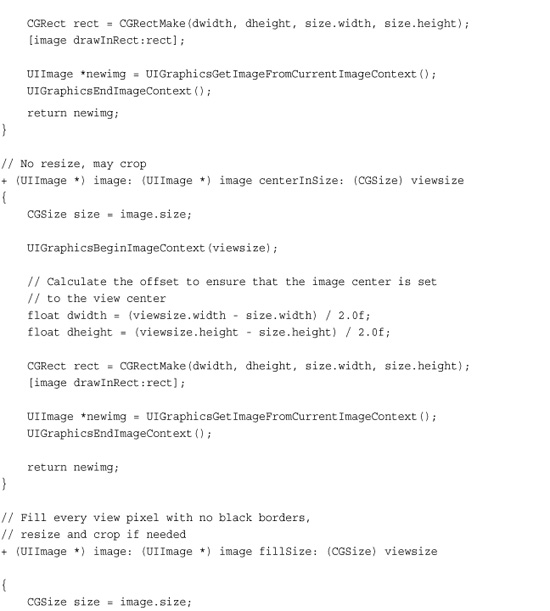
Thumbnails play an important role in any application that uses images. Often you need to resize an image to fit into a smaller space. Sure, you can load up a UIImageView with the fully leaded original and resize its frame, but you can save a lot of memory by redrawing that image into fewer bytes Thumbnails can use one of three approaches, which are demonstrated in Figure 7-7. You can
• Resize the image while retaining its proportions. Depending on the image’s aspect ratio, you’ll need to either letterbox or pillarbox some extra area, matting the image with transparent pixels.
• Punch out part of the image to match the available space. The example in Figure 7-7 chooses a centered subimage and crops any elements that fall outside the pixel area.
• Fill the image by matching the height and width to the available space. Every pixel gets used, but the image will get cropped, either horizontally or vertically. This corresponds to the full-screen film presentation shown on nonwidescreen TVs, which tend to lose details at either side of the movie.
Figure 7-7 These screenshots represent three ways to create image thumbnails. Fitting (left) preserves original aspect ratios, padding the image as needed with extra space. Centering (center) uses the original image pixels, cropping from the center out. Filling (right) ensures that every available pixel is filled, cropping only those portions that fall outside the frame.
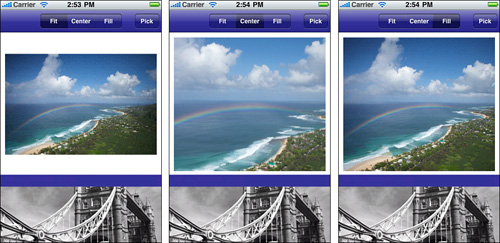
Recipe 7-12 shows how to create these three thumbnail effects. The methods in this code allow you to pass an image and a size. They return a new thumbnail respectively using the fit, center, or fill technique.
Recipe 7-12 Creating Thumbnails
Get This Recipe’s Code
To get the code used for this recipe, go to http://github.com/erica/iphone-3.0-cookbook-, or if you’ve downloaded the disk image containing all of the sample code from the book, go to the folder for Chapter 7 and open the project for this recipe.
Fixing Photo Orientation
Any photo snapped with a digital camera may be tagged with an intrinsic orientation; this orientation reflects how the camera was held during shooting. For example, if the user positioned the camera to the left or right to snap a landscape picture, the EXIF metadata stored with that image may contain an orientation property. The UIImage class reads in this metadata along with the image and uses it to set its imageOrientation property.
Cocoa Touch handles eight kinds of UIImageOrientation values. These correspond to up, down, left, right plus four more values that provide mirrored versions of the same orientation. These orientations are
• UIImageOrientationUp
• UIImageOrientationLeft
• UIImageOrientationRight
• UIImageOrientationDown
• UIImageOrientationUpMirrored
• UIImageOrientationLeftMirrored
• UIImageOrientationRightMirrored
• UIImageOrientationDownMirrored
Mirrored images are typically captured when using webcams. The webcam software reverses the image automatically; mirrored images feel more natural when looking at a live webcam feed of yourself.
This issue can be important when loading images from files in byte order, without regard to orientation. That means a picture snapped with some alternate orientation may load sideways, upside down, or mirrored into a bitmap. Fixing image orientation allows you to ensure that the displayed image matches the photographer’s perception.
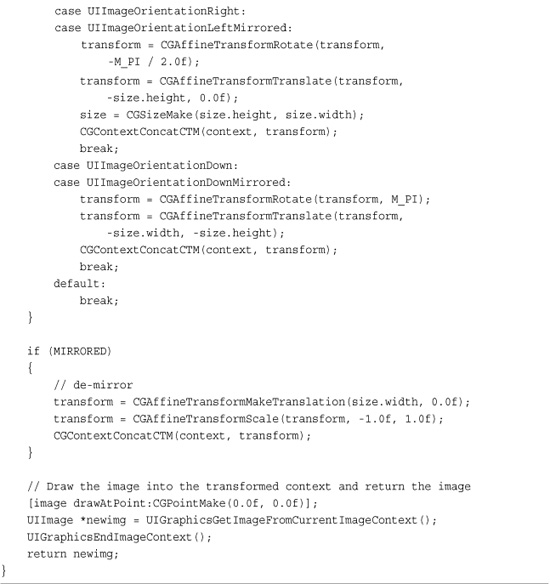
Listing 7-1 demonstrates how to return an unrotated version of any UIImage. It works by recovering the imageOrientation property and drawing the image into a graphics context that has been transformed to match the original camera properties. For the most part you won’t need to use this approach unless you’re dealing directly with bits. The UIImageView class automatically handles most image orientation issues for you.
Listing 7-1 Unrotating UIImage Instances
Adding Test Images
It’s simple enough to a snap a set of test pictures using the four main orientations (left, right, up, down) using your built-in iPhone camera. Add them to the simulator by copying them to your home Library/Application Support/iPhone Simulator/User/Media/DCIM/100APPLE/ folder. You’ll need to create the DCIM/100APPLE subfolder.
Taking Screenshots
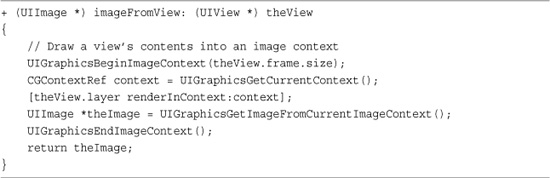
As Listing 7-2 demonstrates, you can draw views into image contexts and transform those contexts into UIImage instances. This code works by using Core Graphic’s renderInContext call for CALayer instances. It produces a screenshot not only of the view but all the views that view owns.
Listing 7-2 Screenshotting a View
There are, of course, limits. You cannot screenshot the entire window (the status bar will be missing in action) and you cannot screenshot videos or the camera previews. OpenGLES views may also not be captured.
Recipe: Working Directly with Bitmaps
Although Cocoa Touch provides excellent resolution-independence tools for working with many images, there are times you need to reach down to the bits that underlie a picture and access data on a bit-by-bit basis. For example, you might apply edge detection or blurring routines. These functions calculate their results by convolving matrices against actual byte values.
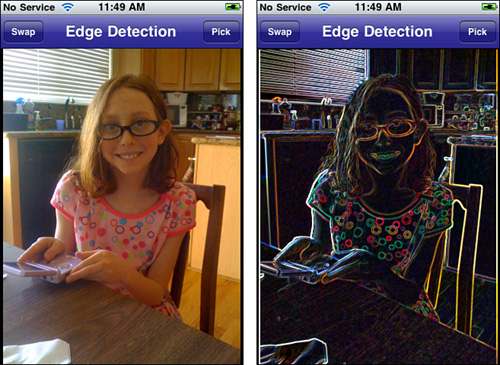
Figure 7-8 shows the result of Canny Edge Detection on an iPhone image. The Canny operator in its most basic form is one of the first algorithms taught in image processing classes. The version used to produce the image shown here uses a hardwired 3×3 mask.
Figure 7-8 Applying edge detection to an image produces a result that outlines areas where byte values experience the greatest changes.
Drawing into a Bitmap Context
To get started with image processing, draw an image into a bitmap context and then retrieve bytes as a char * buffer. This code does exactly that, retrieving the bits from the context once the image has been drawn.
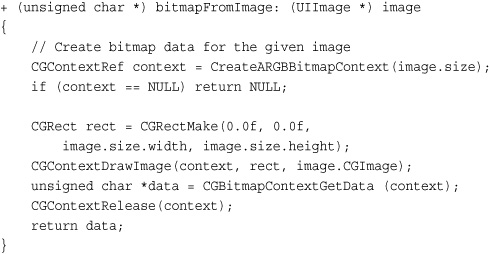
This routine relies on a special bitmap context that allocates memory for the bitmap data. Here is the function that creates that context. It produces an ARGB bitmap context using an Alpha-Red-Green-Blue representation, one byte per channel, 256 levels per unsigned byte.
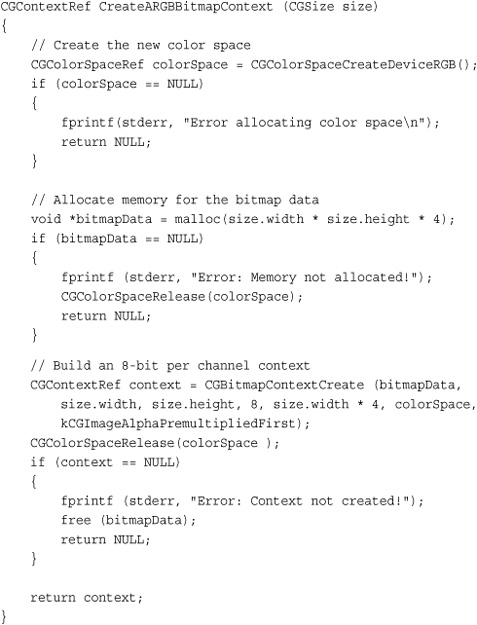
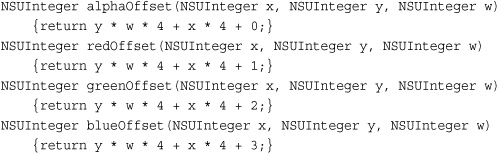
Once the image bytes are available, you can access them directly. The following functions return offsets for any point (x,y) inside an ARGB bitmap using width w. The height is not needed for these calculations; the width of each row allows you to determine a two-dimensional point in what is really a one-dimensional buffer. Notice how the data is interleaved. Each 4-byte sequence contains a level for alpha, red, green, and then blue. Each byte ranges from 0 (0%) to 255 (100%). Convert to a float and divide by 255.0 to retrieve the ARGB value.
Applying Image Processing
It’s relatively easy then to convolve an image by recovering its bytes and applying some image-processing algorithm. This routine uses the basic Canny edge detection mentioned earlier. It calculates both the vertical and horizontal edge results for each color channel, and then scales the sum of those two results into a single value that falls within [0, 255]. The output alpha value preserves the original level.
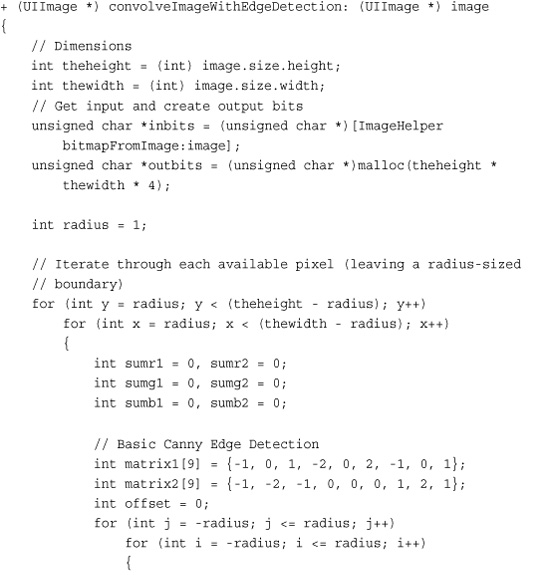
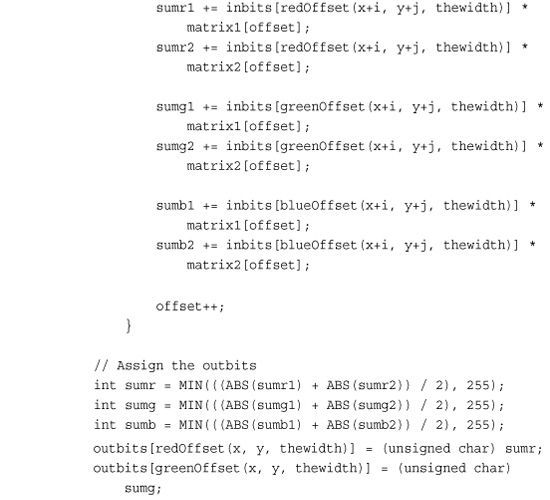
Image Processing Realities
The iPhone is not a number-crunching powerhouse. Routines like these may slow down applications significantly. Use them judiciously. Recipe 7-13 demonstrates how to balance image-processing demands with iPhone limitations. It follows three main rules of iPhone implementation:
• Provide meaningful feedback to the user when dealing with unavoidable delays.
• Perform processor-heavy functionality on a secondary thread.
• Only ever perform GUI updates on the main thread.
Recipe 7-13 Providing an iPhone-Friendly GUI for Image Processing

Get This Recipe’s Code
To get the code used for this recipe, go to http://github.com/erica/iphone-3.0-cookbook-, or if you’ve downloaded the disk image containing all of the sample code from the book, go to the folder for Chapter 7 and open the project for this recipe.
The flow for this solution is shown in Figure 7-9. A “Please Wait” Heads Up Display (HUD) appears with a spinning activity indicator. It remains in view until a separate processing thread finishes:
Figure 7-9 Using two threads allows a “Please Wait” Heads Up Display (HUD) to block user input until the image processing finishes.
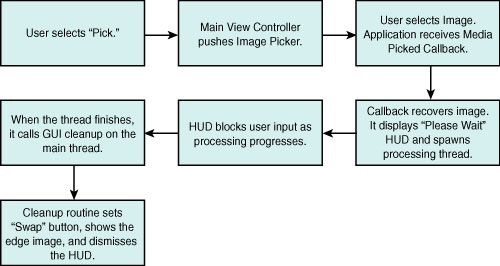
This indicator cannot display properly when all the processing happens in the main thread. Heavy processing blocks GUI updates, causing the UIAlertView that the HUD is based on to delay its appearance until after the processing finishes. That counters the “provide meaningful feedback” directive so important to iPhone application development. That’s why a two-thread approach is so important.
The process routine was designed to run on its own thread. It provides a separate NSAutorelease pool and is spawned by the did-finish-picking method. Although it works with image contexts, nothing in the method actually changes any GUI elements. Its job is to redraw an image into a 320-by-416-pixel space and then perform Canny edge detection on that image.
When the thread finishes its heavy lifting, it calls a finish method on the main thread. That method cleans up the GUI by dismissing the HUD, adding a Swap button, and setting the displayed image.
One More Thing: Going Grayscale
As Recipe 7-12 suggests, you can easily create a grayscale version of any image, not just black and white masks. Listing 7-3 provides a general utility method that produces an image drawn into a grayscale color space. Unlike the CreateMaskImage() function you just saw, this method does not need to match the UIImage coordinate system with the Quartz one, so it does not flip the context. It simply draws the image into the context and returns the grayscale version.
Listing 7-3 Returning the Grayscale Version of an Image
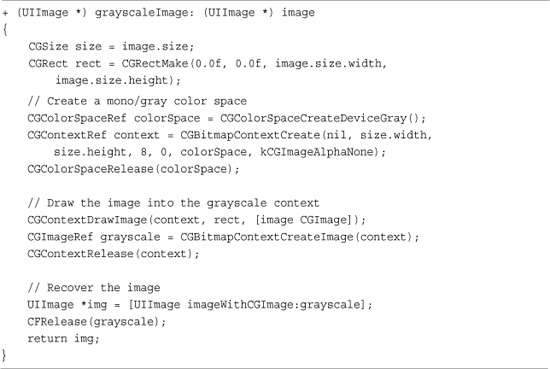
Combine this function with the screenshot renderInContext: functionality described earlier in this chapter and you can create an “inactive” backsplash that copies the current GUI. Use this to provide a visual context that moves a user’s focus onto an ongoing operation such as a file download. This provides a creative alternative to the normal screen-darkening overlay.
Summary
This chapter introduced many ways to handle images, including picking, reading, modifying, and saving. You saw recipes that showed you how to use the iPhone’s built-in editor selection process and how to snap images with the camera. You also read about adding images to the UIScrollView class and how to send pictures as e-mail attachments. Before moving on from this chapter, here are some thoughts about the recipes you saw here:
• The built-in image picker is a memory hog. Develop your code around that basic fact of life.
• Always provide user feedback when working with long processing delays. Most image manipulation is slow. The simulator always outperforms the iPhone so test your applications on the device as well as the simulator and provide a mechanism like the HUD display used in this chapter that lets users know that ongoing operations may take some time.
• Sending image e-mail attachments from in-program is a great new 3.0 feature. Make sure that you check that e-mail is available on your device before attempting to use the controller and be aware that sending images can be very, very slow.
• Paged scrollers offer a handy GUI foundation. Use them for showing multiple images or for presenting multiscreened, scrollable interfaces.
• Thumbnails use far less memory than loading all images at once. Consider precomputing icon versions of your pictures in addition to using the thumbnail-sizing routines shown in this chapter.