In the recipes so far, we've added animations and detection collisions to the scene manually. In this recipe, we'll show you how to use an external physics engine to add gravity, collision detection, and other physics effects to your scene.
For this recipe, we need to use a couple of external libraries. At the top of your HTML page, you have to add the following:
<script src="../libs/physi.js"></script>
This library contains the main implementation of the physics engine. This library in itself uses two additional libraries that need to be provided. You first need to make sure the ammo.js library is stored in the same location as the physi.js library, and at the beginning of your JavaScript code, you should add this:
Physijs.scripts.worker = "../libs/physijs_worker.js";
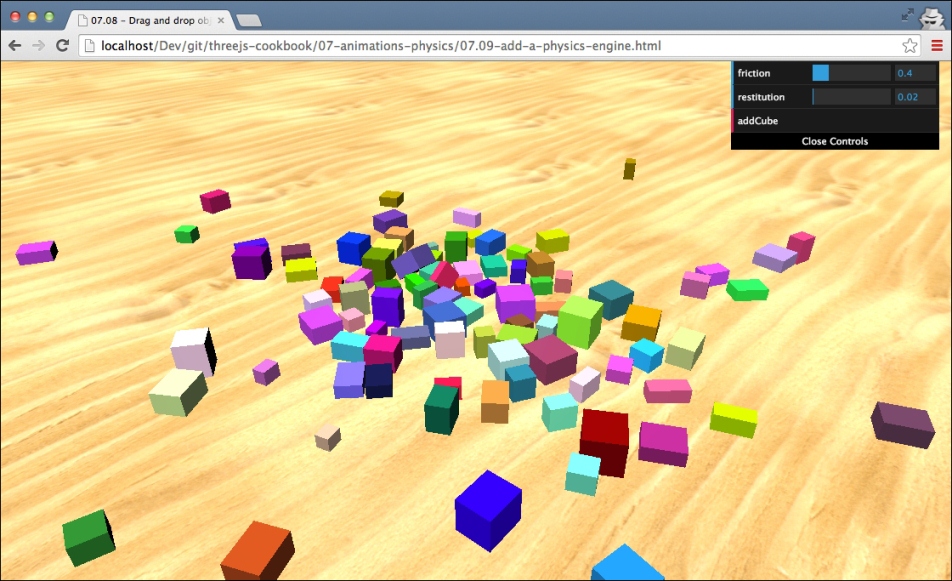
This points to a web worker (http://www.w3.org/TR/workers/) that handles the physics calculations in a separate thread. There is, of course, a ready-to-use example of this recipe that you can use as a reference or to experiment with. The example for this recipe is called 07.09-add-a-physics-engine.html, and when this is opened in the browser you will see something similar to what is shown in the following screenshot:

In this example, you can use the addCube button to add cubes to the scene. This cube will be added high above the ground plane and will drop down. The physics engine will determine how the falling cube interacts with its environment.
In this recipe, we only set up a basic physics-enabled scene. Refer to the There's more… section of this recipe for additional functionality provided by the Physijs library. To create a basic scene, you need to take the following steps:
- The first thing to do is that instead of creating
THREE.Scene, we'll createPhysics.Scene:scene = new Physijs.Scene; scene.setGravity(new THREE.Vector3( 0, -30, 0 ));
On this newly created scene, we also need to set the
gravityproperty. In this case, we set a gravity of-30on the y axis, which means a scene where objects fall down. - Next, let's create
THREE.GeometryandTHREE.MeshLambertMaterial, which we'll use for the cubes:var cubeGeometry = new THREE.BoxGeometry( 4 * Math.random() + 2, 4 * Math.random() + 2, 4 * Math.random() + 2); var cubeMaterial = new THREE.MeshLambertMaterial( { color: 0xffffff * Math.random() } );There is nothing special to do in this step for
Physijs. - The next step is to create a mesh object. For objects to work with
Physijs, we need to create aPhysijslibrary specific mesh and aPhysijslibrary specific material:var box_material = Physijs.createMaterial( cubeMaterial, control.friction, control.restitution); var cube = new Physijs.BoxMesh( cubeGeometry, box_material, 10 ); scene.add(cube);For the material, we use the
Physijs.createMaterialfunction. This wraps our material created in step 2 and allows us to define the friction and restitution properties. The friction defines the roughness of the object and affects how far it can slide over another object. Therestitutionobject is used for the bounciness of an object. To create a mesh, we use thePhysijs.BoxMeshobject, provide the geometry and the material we just created, and also add the weight of the object.Physijsprovides differently shaped meshes; for more information on them, refer to the There's more… section of this recipe. - The final step we need to take is to update the
renderloop:function render() { renderer.render(scene, camera); requestAnimationFrame(render); scene.simulate(); }Here, we add the
scene.simulatefunction. This is used to calculate the new positions of all the objects that have been wrapped in aPhysijslibrary specific mesh.
With these basic steps, you've got a fully working physics-enabled Three.js scene. An important aspect to take into account when using this engine is that there is a hit on performance. For each object of the scene, Physijs will need to calculate its next position and rotation. This works great for tens of objects, but you'll see a severe hit when working with hundreds of Physijs-managed objects.
We call scene.simulate(), which we added to the render loop in step 4, for each frame that is rendered. When this function is called, Physijs will look at all the objects it knows about, and it also looks at the gravity configured on the scene and will use that information to calculate new positions and rotations for each object if collisions between objects occur. it will use the friction and restitution properties of the Physijs material and the weight function of an object to determine how that object and the one it collides with should react. This is repeated in each render loop and gives the simulation of real physics in the scene.
What we've done in this recipe is only a very small part of what is possible with this physics engine. You can find more information on the Physijs website at http://chandlerprall.github.io/Physijs/. Interesting subjects from that site are:
- Support for different object shapes: https://github.com/chandlerprall/Physijs/wiki/Basic-Shapes.
- How to add constraints to your object. This makes it possible to constrain the movement of an object around an axis (like a slider), a joint, or even another object. More information on this feature can be found at https://github.com/chandlerprall/Physijs/wiki/Constraints.
Physijs uses an external physics library for all the calculations. For more information on that engine, look at the ammo.js website (https://github.com/kripken/ammo.js/). Note that ammo.js itself is a JavaScript port of the Bullet physics engine. So, if you really want to dive into the details, you should look at the Bullet documentation that can be found at http://bulletphysics.org/wordpress/.
