
Three.js provides two cameras: a camera that renders the scene with a perspective projection (as we see images in the real world) and a camera that renders the scene with an orthogonal projection (fake 3D often used in games; for more information on this type of camera, check out the upcoming Using an orthographic camera recipe). In this recipe, we'll look at the first of these two cameras and explain how you can use the perspective camera in your own scene.
Working with the properties of a camera can be a bit confusing at times. To help you better understand the steps or this recipe, we've created a simple page that shows you the effect each of the camera properties has. Open up 03.03-use-an-perspective-camera.html in the browser, and you'll see something like this:
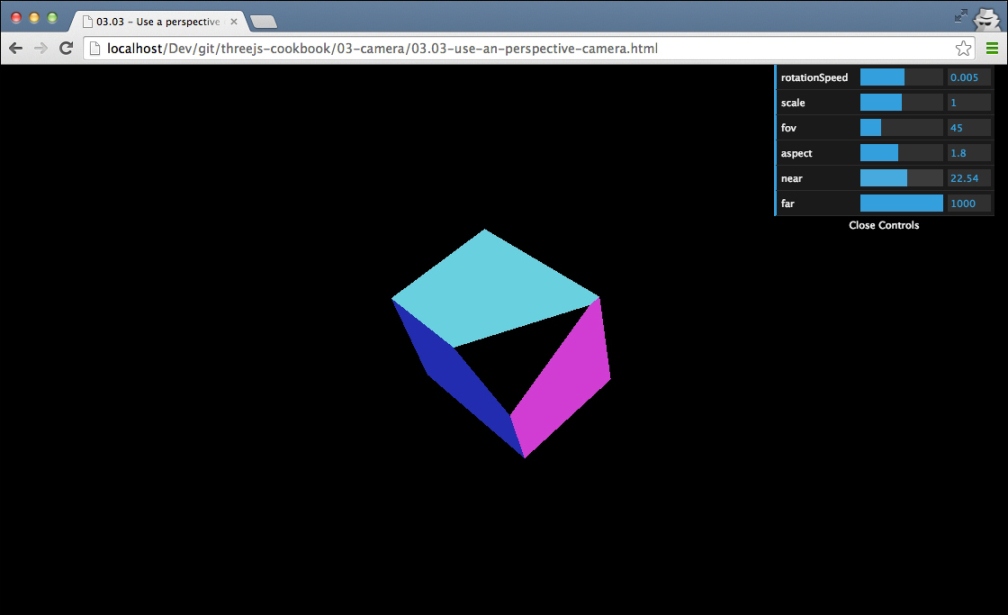
With the last four properties available in the menu in the top-right section, you can set the properties of THREE.PerspectiveCamera, which is used to render this scene, and see the effect of each property immediately.
In this recipe, we set up each of the camera properties separately. These properties can also be passed in with the constructor of THREE.PerspectiveCamera. In the There's more… section of this recipe, we'll show you how to do this.
To set up THREE.PerspectiveCamera completely, we need to perform a couple of steps:
- The first thing we need to do is instantiate the camera:
camera = new THREE.PerspectiveCamera();
This creates the camera instance, which we configure in the upcoming steps.
- Now that we've got a camera, we first need to define the aspect ratio between the width of the viewport and the height:
camera.aspect = window.innerWidth / window.innerHeight;
In our recipe, we use the full width and height of the browser, so we specify the aspect ratio for the camera based on the
window.innerWidthandwindow.innerHeightproperties. If we use adivelement with a fixed width and height, you should use the ratio between these values as theaspectfunction for the camera. - The next two properties we need to define are the
nearandfarproperties:camera.near = 0.1; camera.far = 1000;
These two properties define the area of the scene that this camera will render. With these two values, the camera will render the scene starting from a distance of
0.1to a distance of1000from the position of the camera. - The last of the properties that can be defined is the (vertical) field of view:
camera.fov = 45;
This property defines, in degrees, the area that the camera sees. For instance, humans have a horizontal field of view of 120 degrees, while in video games, often a field of view of around 90 or 100 degrees is used.
- Whenever you update one of these four properties of the camera, you have to inform Three.js about such a change. You do this by adding the following line:
camera.updateProjectionMatrix();
- Now, all that is left to do is position the camera and add it to the scene:
  camera.position.x = 15;
  camera.position.y = 16;
  camera.position.z = 13;
  scene.add(camera);
At this point, we can use this camera with any of the available renderers to render a scene like this: renderer.render(scene, camera).
The best way to understand how these properties affect what is rendered on screen is by looking at the following figure, which shows you these properties:
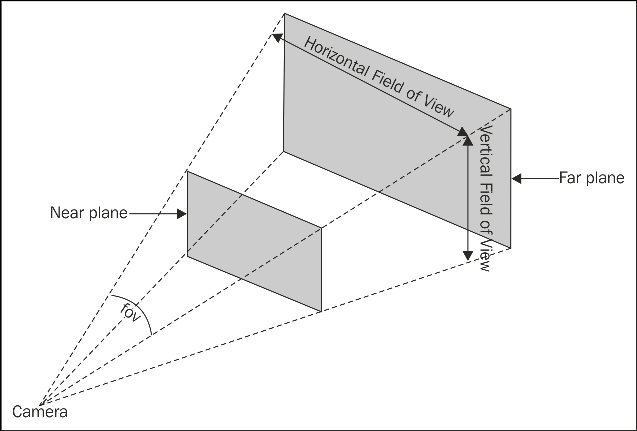
The position of Near plane in this figure is based on the near property of the camera. Far plane is based on the far property and the fov shown in the figure corresponds to the fov property. With the fov property, you define the vertical field of view. The horizontal field of view is based on the aspect ratio, which you define with the aspect property on the camera.
In this recipe, we set each of the properties separately. THREE.PerspectiveCamera also provides a constructor that you can use to set all these properties in one statement:
camera = new THREE.PerspectiveCamera(45, window.innerWidth / window.innerHeight, 0.1, 1000);
Also remember that THREE.PerspectiveCamera extends from the standard Three.js THREE.Object3D object. This means that this camera can be rotated and moved around just like any other object.