2. Tools and Panels
Chapter Overview
In the previous chapter, you read a brief overview of the features that make Illustrator a great tool for UI design. In this chapter, we’ll take a look at the tools that actually help you get work done. The following topics will be covered:
• How to navigate the Tools panel and find the tools that are useful for UI design tasks
• How to configure and use Illustrator’s many panels
• How to use custom workspaces to tailor Illustrator’s user interface to the way you work
By the end of the chapter, you should have a basic working knowledge of the main features that Illustrator provides for UI design. Let’s begin by jumping right in to the tools.
Choosing Your Tools
Every good design application has a toolbox and, in that department, Illustrator is no slouch. I counted about 85 tools in the Tools panel. For a novice Illustrator user, that seems to be a pretty overwhelming amount of functionality to learn. This is the very reason why professional-grade applications like Illustrator have a relatively steep learning curve.
Thankfully, a UI designer will rarely, if ever, need to use all the tools in the Illustrator Tools panel (2.1).

2.1. The Illustrator Tools panel.
Let’s cut this huge number of tools down a bit by focusing on the ones that are optimal for UI design. The Tools panel is separated into groups, presumably by functionality or type. Within each of those groups, some tools with similar functions are grouped together under one button. These tool groups are signified with a small arrow in the lower-right corner of the button (2.2).

2.2. Click and hold buttons with this icon to reveal the other tools in their respective groups.
1. Click and hold any button with a small arrow in the lower-right corner. The tool flyout menu appears (2.3).
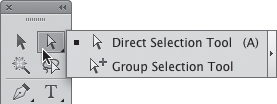
2.3. An example of a tool flyout menu
2. To “tear off” the flyout from the main Tools panel, keep the mouse button held down and drag the pointer over the arrow to the right of the flyout and release the mouse button to detach these tools and create a floating tool panel (2.4).

2.4. Click the edge of the flyout to detach it from the Tools panel.
This is convenient if you are focusing on a certain area of your design and don’t want to take trips back and forth to the Tools panel. It’s also great if you’re using one of the hidden tools exclusively.
3. These extra tool panels stay open until you close them. Click the Close button to put the flyout away (2.5).

2.5. Click the Close button to put the tool flyout away.
Once you’ve mastered the basics, take some time to play and experiment with the other tools that aren’t covered in this book. Noodling around helps make a beginning user into an intermediate one, and I expect that you’ll even find a way to use a tool for a purpose that it wasn’t designed. That’s ingenuity right there.
Selection Tools
Right at the top of the Tools panel are five tools for selecting objects. One might say you need only one way to select something, but once you see the flexibility that having multiple options provides, you’ll see the reason why there are so many. The selection tool group is made up of the Selection, Direct Selection, Group Selection, Magic Wand, and Lasso tools.
Selection Tool (V)
The Selection tool ![]() allows you to pick whole objects with a single click. The Selection tool has the following options:
allows you to pick whole objects with a single click. The Selection tool has the following options:
• Click anywhere on an object to select it. If the object doesn’t have a fill, click its edge to select it. You’ll know that an entire object is selected when all its points are solid.
• Select multiple objects by holding down the Shift key as you select.
As you select an object with the Selection tool, you’ll see eight little boxes that surround it (2.6), called the bounding box. You can click and drag any of the boxes to resize the object, and hovering the cursor just off a corner will allow you to rotate it. You can choose to show or hide the bounding box from the View menu. The keyboard shortcut is ![]()
![]() B/Ctrl+Shift+B.
B/Ctrl+Shift+B.
2.6. The bounding box
• Press the ![]() /Ctrl key as you click to select objects behind the topmost object in a stack. As you click, the selection moves down in succession until you reach the bottom.
/Ctrl key as you click to select objects behind the topmost object in a stack. As you click, the selection moves down in succession until you reach the bottom.
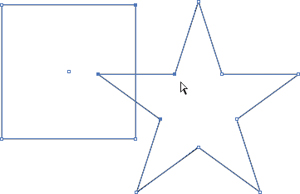
• Click and drag the Selection tool around an area to select multiple objects. If any part of the object is within the selection box (also known as the selection marquee), that whole object becomes part of the selection (2.7).
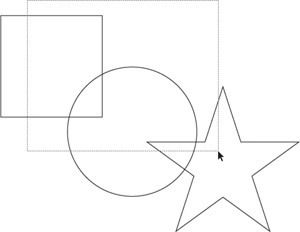
2.7. Drag your cursor over multiple objects to select them all at once.
Direct Selection Tool (A)
The Direct Selection tool ![]() will select an entire object if you click its fill. But the tool goes a step further: It allows you to also select individual points or line segments of an object, which is helpful for reshaping or resizing parts of an object. Select points and segments in the following ways:
will select an entire object if you click its fill. But the tool goes a step further: It allows you to also select individual points or line segments of an object, which is helpful for reshaping or resizing parts of an object. Select points and segments in the following ways:
• If you can see a point, click it to select it. If you can’t see the points, click any line segment on the object to make the points visible. Selected points are solid; unselected points are hollow (2.8).
2.8. Selected points are solid; unselected points are hollow.
• Add to or remove points from the selection by holding the Shift key as you click.
• Click and drag over multiple points or segments to select them.
• Click a line segment to select it. Unfortunately, you don’t get any visual feedback signaling that you have only a segment of the line selected. You have to drag the segment and hope that it’s the right one. However, Illustrator is pretty accurate, and it’s rare that you’ll make an incorrect selection.
Group Selection Tool
Objects in groups are locked together as one. (To group several objects, select the objects and then right-click and choose Group.) Using the regular Selection tool on a group will select the whole group. The Direct Selection tool will still select points and line segments. The Group Selection tool ![]() , however, picks individual objects inside the group. To use the Group Selection tool:
, however, picks individual objects inside the group. To use the Group Selection tool:
• Click an object inside the group to select it. You can then edit the object however you’d like.
• Click again to select the entire group.
Magic Wand Tool (Y)
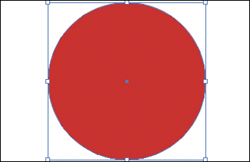
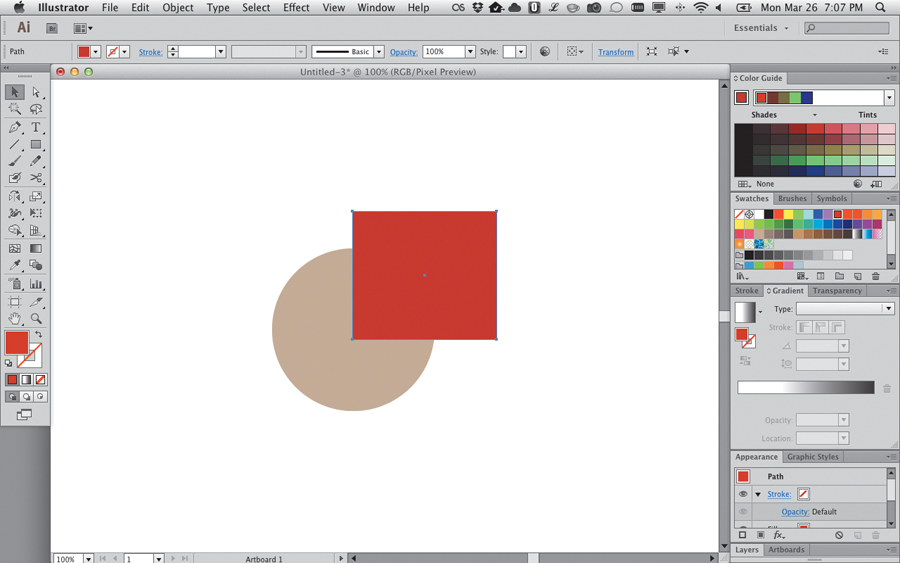
The Magic Wand tool ![]() will grab all objects with a specified attribute. For example, if you have a screen full of different colored objects, clicking a red object with the Magic Wand will select all the objects with a red fill. Before you use the Magic Wand tool, though, you can configure how sensitive or tolerant its selection is:
will grab all objects with a specified attribute. For example, if you have a screen full of different colored objects, clicking a red object with the Magic Wand will select all the objects with a red fill. Before you use the Magic Wand tool, though, you can configure how sensitive or tolerant its selection is:
1. In the Tools panel, double-click the Magic Wand tool.
A panel of options specific to the tool appears (2.9).
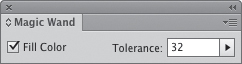
2.9. Access the Magic Wand panel by double-clicking the Magic Wand tool.
2. Set the sensitivity of the selection with the Tolerance option. Click the box and type in a value between 0 and 255, or click the arrow to use the slider. A higher number selects a wider range of the chosen attributes.
Several of the tools in the Tools panel have configurable settings. Take some time to double-click each of the tools and see what you can find.
Lasso Tool (Q)
The Lasso tool ![]() works a little like the Direct Selection tool in that it allows you to select individual points and segments. The difference is that the Lasso allows you to draw a freeform selection marquee. It also doesn’t select the whole object if you click its fill.
works a little like the Direct Selection tool in that it allows you to select individual points and segments. The difference is that the Lasso allows you to draw a freeform selection marquee. It also doesn’t select the whole object if you click its fill.
To use the Lasso tool, do the following:
1. Click and drag around a point or line segment to select it (2.10).
2.10. Selecting a point or line segment
2. Add to the selection by holding the Shift key as you drag around unselected points. You can even select individual points and segments on different objects.
3. Remove points or segments from the selection by holding the Option/Alt key as you drag around selected points.
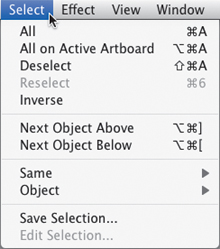
2.11. The Select menu offers powerful selection capabilities.
• Objects with the same appearance or specific appearance attributes
• All instances of a symbol
• All objects with the same graphic style
Drawing
Over the years, Illustrator has become a jack-of-all-trades tool, adept at page layout, illustration, and now website and UI design. In the beginning, however, Illustrator was created for drawing (2.12). That’s how it got its name. Really, the most useful tools in the Tools panel are probably the drawing tools. These tools provide the means of getting content on the page. There are quite a few drawing tools here; you’ll use some more than others.

2.12. Illustrator was built to create illustrations like this. (The MP3 Effect; © Rick Moore)
This is not a book about learning how to use Illustrator’s drawing tools to create illustrations, so it covers only the basics of their use for illustration. For an extensive guide on how to become awesome with Illustrator’s drawing tools, I recommend Von Glitschka’s excellent book, Vector Basic Training (New Riders Press).
Pen Tool (P)
The Pen tool ![]() is probably the tool that most defines Adobe Illustrator. It’s a simple tool but a difficult one to master. You use the Pen tool to draw freeform objects in your document point by point. It creates line segments and smooth curves (known formally as Bézier curves). Each curve handle has a control point that allows you to alter the shape of the curve. It’s not essential to master the Pen tool to use Illustrator as a UI design tool, but if you want to create anything more than generic shapes, you’ll want to take some time to learn how to use it.
is probably the tool that most defines Adobe Illustrator. It’s a simple tool but a difficult one to master. You use the Pen tool to draw freeform objects in your document point by point. It creates line segments and smooth curves (known formally as Bézier curves). Each curve handle has a control point that allows you to alter the shape of the curve. It’s not essential to master the Pen tool to use Illustrator as a UI design tool, but if you want to create anything more than generic shapes, you’ll want to take some time to learn how to use it.
First, you’ll draw a simple rectangle with the Pen tool.
1. Select the Pen tool and click to set a point.
2. Click to the right of the first point to set another point. The two points are now connected with a line segment (2.13).
2.13. Using the Pen tool to set another point
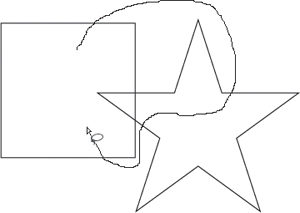
3. Click to create the third side of the rectangle, and then hover the cursor over the first point you created.
As you draw, Illustrator’s cursor changes to give you helpful feedback. The little circle that appears here means that when you click the starting point, the path will be closed (2.14).
2.14. Click to close the path.
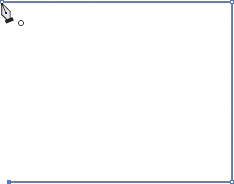
Next, you’ll draw an ellipse.
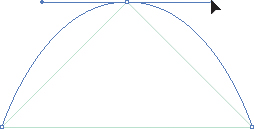
1. Click and drag horizontally to set the first curve.
Illustrator creates a Bézier curve point. Each point in a Bézier curve has one or two control handles that extend from the point itself. You can move these handles to alter the shape of the curve.
2. Click and drag to set three more points (2.15). As in the previous exercise, be sure to click the starting point to close the path.
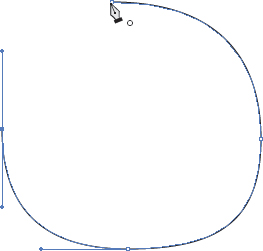
2.15. Click and drag the mouse to create Bézier curves.
Click and hold the Pen tool to reveal the tools grouped with it (2.16). These are the Add Anchor Point tool (+), Delete Anchor Point tool (−), and the Convert Anchor Point tool (Shift-C).
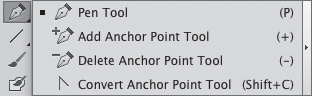
2.16. The Pen tool group
The funny thing about these tools is that, although they are available in the Tools panel, you will never really need to access them there. They are most easily accessed by using keyboard shortcuts while drawing paths with the Pen tool.
Here’s how to access these Point tools while the Pen tool is the active tool:
• Add an anchor point to a path by hovering the cursor over any part of a line segment and clicking. The cursor will change to the Add Anchor Point tool to let you know when you can add a new point (2.17).
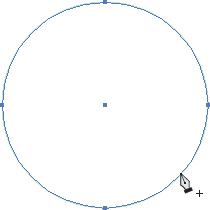
2.17. Adding an anchor point
• Delete an anchor point by hovering the cursor over any point on a path and clicking the point. Again, to provide helpful feedback, the cursor changes to the Delete Anchor Point tool (2.18).
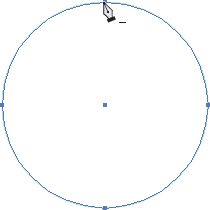
2.18. Deleting an anchor point
• Convert a smooth point to a corner point by holding the Option/Alt key and clicking the point (2.19).
2.19. Converting a smooth point to a corner point
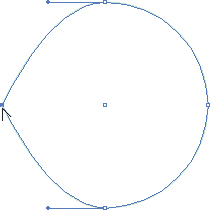
• Convert a corner point to a smooth point by holding the Option/Alt key while clicking and dragging Bézier handles out of the point (2.20).
2.20. Converting a corner point to a smooth point
Lines and Shapes
Illustrator has several useful tools for creating basic shapes (also known as primitives). These types of shapes will probably be the most useful for UI design. They come in handy as you begin to create icons, buttons, toolbars, menus, and the like.
Line Segment Tool ()
To create a line segment with the Line Segment tool ![]() do the following:
do the following:
1. Click to set the starting point.
2. Drag the mouse to draw the segment.
3. Hold the Shift key to constrain the line to the vertical, horizontal, or 45-degree angle axes.
Use this as an alternative to the Pen tool for creating single lines (also known as rules) in your design.
Rectangle Tool (M)
The Rectangle tool ![]() creates—you guessed it—rectangles. You can click and drag to create a rectangle, or click once to get a dialog box for setting specific parameters.
creates—you guessed it—rectangles. You can click and drag to create a rectangle, or click once to get a dialog box for setting specific parameters.
Ellipse Tool (L)
Click and hold the Rectangle tool to reveal the Ellipse tool ![]() . As with the Rectangle tool, when the Ellipse tool is selected, you can click and drag to create an ellipse or click once to get a dialog box for setting specific parameters.
. As with the Rectangle tool, when the Ellipse tool is selected, you can click and drag to create an ellipse or click once to get a dialog box for setting specific parameters.
• Use the Shift key while drawing to constrain each shape to a square or circle.
• Hold down the Option/Alt key to draw the shape from the center.
• Hold down the spacebar while drawing to reposition the shape on the artboard.
• Use the Shift key to lock the rotation angle to 0 degrees as you draw.
• Press the spacebar to move the shape to a different location on the artboard.
• Press the Up or Down arrows on the keyboard to add or remove points from a star and sides from a polygon.
• Press ![]() /Ctrl to change the inner radius of a star.
/Ctrl to change the inner radius of a star.
Polygon and Star Tools
The Polygon and Star tools both reside with the Rectangle tool as well. While these tools are similar to the Rectangle and Ellipse tools in that you can click to set the shape parameters, they have really useful keyboard shortcuts to aid in the creation of interesting shapes. The Star tool is especially useful for creating badges:
1. Click and drag to create a star (2.21). The star is always drawn from the center point.

2.21. Creating the star
2. Continue to hold the mouse button down and press the Up Arrow key several times. This will add points to the star (2.22).
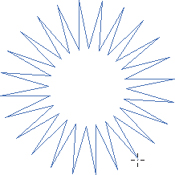
2.22. Adding points to the star
3. When you are satisfied with the number of points, hold down the ![]() /Ctrl key and drag the mouse up to increase the inner radius of the star (2.23).
/Ctrl key and drag the mouse up to increase the inner radius of the star (2.23).
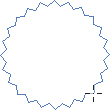
2.23. Changing the inner radius
4. Release the mouse button to complete the shape.
Typography
Besides being known as a drawing tool, Illustrator also has several tools in its arsenal to help you create professional-level typography. If you’re familiar with Adobe InDesign, many of the typographical features in Illustrator work the same way.
Type Tool (T)
The Type tool ![]() is another very important tool in the Tools panel. It’s actually much simpler to use than the Pen tool. Two built-in modes help make this tool really versatile when setting type.
is another very important tool in the Tools panel. It’s actually much simpler to use than the Pen tool. Two built-in modes help make this tool really versatile when setting type.
Clicking once in the artboard with the Type tool creates point type (2.24). This mode is best for single lines of type or decorative headlines. It has no container, so its length is unconstrained and will stay on one line until you press Enter/Return.
2.24. Point type is free of any boxes or borders.
Clicking and drawing a box with the Type tool creates area type (2.25). This mode is best for creating long passages. It’s also useful when type needs to be constrained to a fixed width without having to rely on hard returns.
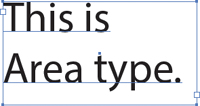
2.25. Area type stays within a user-specified boundary.
The Type tool also has some tools hidden underneath it (2.26).
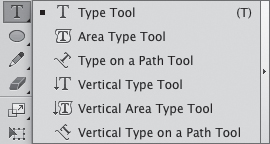
2.26. The Type tool group
Transformation Tools
Illustrator’s transformation tools provide easy ways to stretch, resize, rotate, or mirror your design elements.
Reflect Tool (O)
The Reflect tool ![]() lives under the Rotate tool in the Tools panel. It’s used to flip an object on either its vertical or horizontal axis.
lives under the Rotate tool in the Tools panel. It’s used to flip an object on either its vertical or horizontal axis.
1. Option/Alt-click the object to open the Reflect dialog box (2.27).
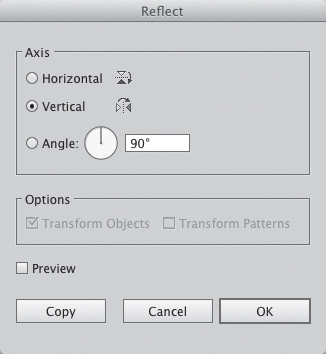
2.27. The Reflect dialog box
2. Choose Horizontal or Vertical for the axis of reflection. Enter a degree of rotation if desired.
3. Click OK to perform the reflection or click Copy to reflect a copy of the original object.
Free Transform Tool (E)
If you have the bounding box turned on (which it is by default), you won’t see much of a difference when you select the Free Transform tool ![]() from the Tools panel. But while dragging the handles of the bounding box will scale or rotate an object, the Free Transform tool does much more.
from the Tools panel. But while dragging the handles of the bounding box will scale or rotate an object, the Free Transform tool does much more.
It’s an extremely versatile tool, and if you’re like me, it’s probably the one you’ll use most often to transform objects. It combines much of the functionality of all the other transformation tools.
If you prefer working with the bounding box turned off, you can use the Free Transform tool (instead of the Scale or Shear tools) to transform an object.
Color
We can’t leave color out of the equation, can we? For both the color-loving and the color-challenged, Illustrator has a few powerful color tools in its Tools panel.
Gradient Tool (G)
The Gradient tool ![]() lets you apply multiple colors to a shape or stroke in either a linear or radial fashion. Each gradient has two or more color stops that accept color and opacity. More color stops can be added to create special effects. Gradients can be edited with the Gradient panel (
lets you apply multiple colors to a shape or stroke in either a linear or radial fashion. Each gradient has two or more color stops that accept color and opacity. More color stops can be added to create special effects. Gradients can be edited with the Gradient panel (![]() F9/Ctrl+F9) or directly on the object with the gradient annotator.
F9/Ctrl+F9) or directly on the object with the gradient annotator.
To create and edit a gradient:
1. Select an object and give it a gradient fill by clicking the Gradient button (>) ![]() in the Tools panel.
in the Tools panel.
Illustrator fills in the object with the default gradient, and a bar, called the gradient annotator, appears on top of the object.
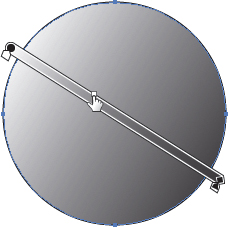
2. Adjust the angle and length of the gradient by clicking and dragging across the object.
3. Change the length only by clicking and dragging the square icon on the gradient annotator (2.28).
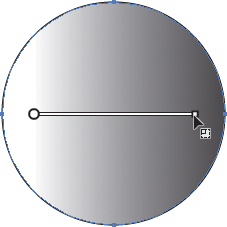
2.28. Changing the length of the gradient
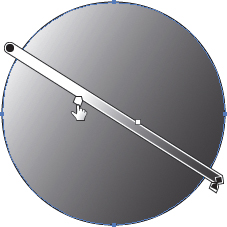
4. Move the gradient around in the object by clicking and dragging the circle end (2.29).
2.29. Adjusting the gradient location
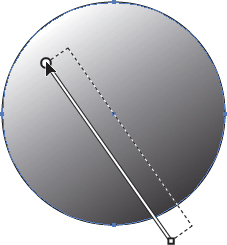
5. To rotate the gradient, hover the cursor near the diamond end of the gradient bar. When the cursor changes to the rotation icon, click and drag to rotate (2.30).

2.30. Rotating the gradient
6. Adjust the center point of the gradient by clicking and dragging the center point handle (2.31).
2.31. Adjusting the center point of a gradient
7. Adjust color stops by clicking and dragging them across the gradient bar (2.32).
2.32. Dragging color stops across the gradient annotator
8. Each color point on the gradient is called a color stop. Add a new color stop by hovering your cursor just below the gradient bar and then clicking to add the new stop. The cursor will show a plus next to it when you are in the right spot (2.33).

2.33. Adding a new color stop
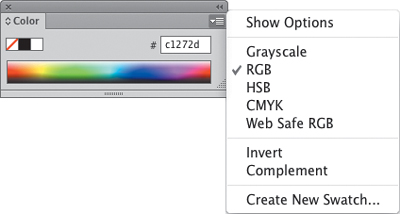
9. Change the color stop’s value by first double-clicking it.
The Color panel appears. You’ll be able to change the color there (2.34).
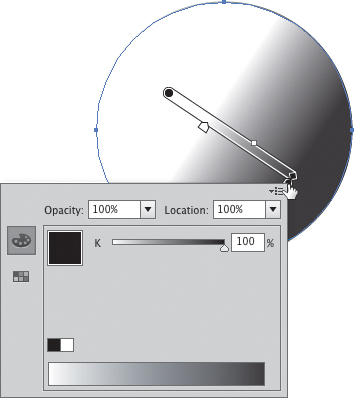
2.34. Using the gradient annotator to change a color stop
10. To delete a color stop, click on it and drag it off the gradient bar.
Eyedropper Tool (I)
The Eyedropper tool ![]() is used to sample and copy color, type, and effect attributes from one object to another. You can double-click the tool to set selection preferences.
is used to sample and copy color, type, and effect attributes from one object to another. You can double-click the tool to set selection preferences.
To use the Eyedropper tool:
1. Select the object whose attributes you’d like to change.
2. With the Eyedropper tool, click the object whose attributes you want to copy.
This will make the selected object look identical by copying all appearance attributes, including any effects.
3. Hold the Shift key to pull (or sample) a color from a portion of a gradient, mesh, or placed image.
Fill and Stroke
The Fill and Stroke tools display the fill and stroke of the currently selected object. You can click to activate either the fill or stroke by clicking it or toggle between them by pressing X. The active attribute sits on top (2.35).

2.35. Click the fill or stroke to activate the attribute.
You can swap the fill and stroke of an object by clicking the Swap Fill and Stroke icon (Shift-X) (2.36) or reset the object to its default appearance by clicking the Default Fill and Stroke icon (D) (2.37). This gives any selected object a white fill and a black stroke. That could come in handy if you’ve created a mess and want to start from scratch.

2.36. Clicking this icon will swap the fill and stroke of a selected object.

2.37. Clicking this icon will reset the selected object to the default appearance.
Directly below the Fill and Stroke indicators are icons for Color (<), Gradient (>), and None (/) ![]() . These tools give you a quick way to apply the active color or gradient, or remove the fill from a selected object. The icon previews are dynamic for the Color and Gradient options to allow you to see what you will get when you click.
. These tools give you a quick way to apply the active color or gradient, or remove the fill from a selected object. The icon previews are dynamic for the Color and Gradient options to allow you to see what you will get when you click.
Workspace Tools
The last section of tools contains the Artboard tool ![]() (Shift-O), the Slice tool
(Shift-O), the Slice tool ![]() (Shift-K), the Hand tool
(Shift-K), the Hand tool ![]() (H), and the Zoom tool
(H), and the Zoom tool ![]() (Z). These tools are useful for interacting with the workspace itself, and in the case of the Slice tool, for creating areas for exporting artwork. The Slice and Artboard tools aren’t covered in detail in this chapter. The functionality they provide warrants much more than a blurb. Instead, look for entire sections devoted to their use in later chapters.
(Z). These tools are useful for interacting with the workspace itself, and in the case of the Slice tool, for creating areas for exporting artwork. The Slice and Artboard tools aren’t covered in detail in this chapter. The functionality they provide warrants much more than a blurb. Instead, look for entire sections devoted to their use in later chapters.
The Hand tool is used to pan and scroll the workspace and can be accessed at any time by pressing the spacebar. Double-clicking the tool in the Tools panel will adjust the view to fit all objects on the selected artboard.
The Zoom tool allows you to zoom in or out of the view (2.38). You can either click to adjust the view by 100% increments, or click and drag to specify a spot to magnify. You can access the tool at any time and zoom in by pressing the spacebar and then ![]() /Ctrl. Adding the Option/Alt key will zoom out. Double-clicking the tool will reset the selected artboard to 100%.
/Ctrl. Adding the Option/Alt key will zoom out. Double-clicking the tool will reset the selected artboard to 100%.
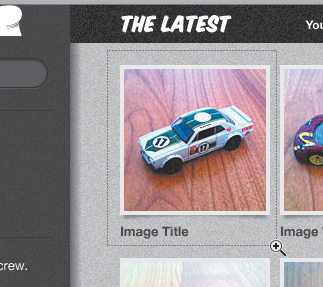
2.38 Zooming in with the Zoom tool for close-up work
Modes
The last two sections in the Tools panel control different modes of drawing and viewing artwork.
Drawing Modes
You can use drawing modes to determine how artwork is stacked on the artboard as you draw. Illustrator provides three modes for this purpose. The selected drawing mode stays active until you explicitly turn it off. You can press Shift-D to toggle between modes.
Draw Normal
Draw Normal ![]() is the default mode and places objects on top of the stack in ascending order as you draw.
is the default mode and places objects on top of the stack in ascending order as you draw.
Draw Behind
Draw Behind ![]() places objects at the bottom of the stack in descending order.
places objects at the bottom of the stack in descending order.
Draw Inside
Draw Inside ![]() provides a quick way to create a mask as it places objects inside of a selected object as you draw. You must select an object to act as the mask before this mode is enabled. Dashed lines on the corners indicate the mask (2.39).
provides a quick way to create a mask as it places objects inside of a selected object as you draw. You must select an object to act as the mask before this mode is enabled. Dashed lines on the corners indicate the mask (2.39).
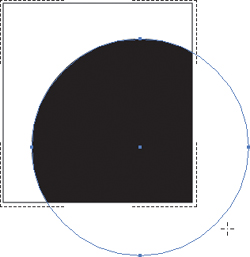
2.39. Draw Inside mode places new objects inside a user-specified shape as you create them.
Screen Modes
The final tool in the Tools panel is the Change Screen Mode tool ![]() . Screen modes determine how Illustrator’s user interface is configured.
. Screen modes determine how Illustrator’s user interface is configured.
To change the screen mode:
1. Click the button to reveal a menu to select the desired screen mode.
2. You can also toggle through screen modes by pressing F.
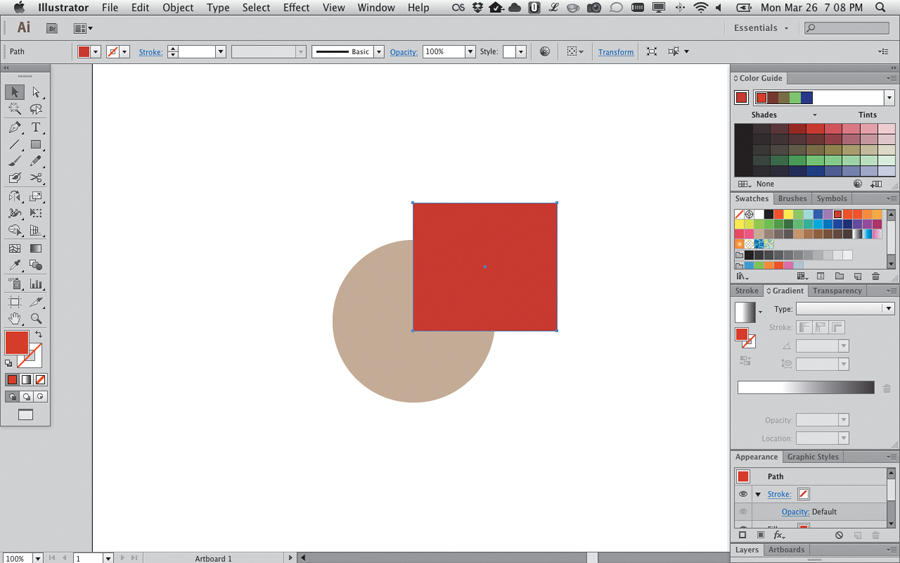
In Normal Screen mode (2.40), your artwork is displayed in a standard window with the menu bar, scroll bars, and panels.
2.40. Normal Screen mode
In Full Screen with Menu Bar mode (2.41), your artwork window displays full screen.
2.41. Full Screen with Menu Bar mode
In Full Screen mode (2.42), your artwork displays full screen, and the menu bar, title bar, and all panels are hidden. You can temporarily access the panels by hovering the cursor over the left or right edge of the screen. In any of these modes, pressing Tab will toggle the display of the tools and panels.
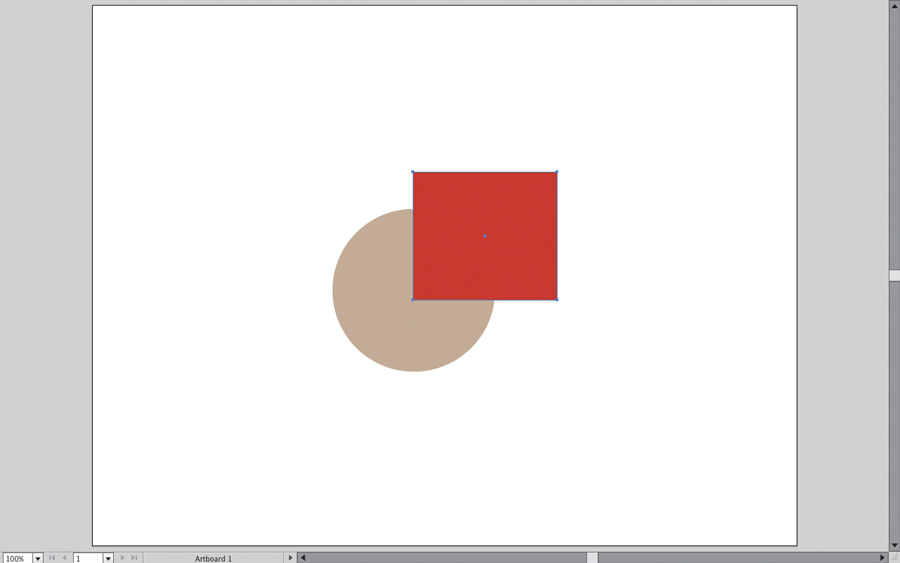
2.42. Full Screen mode
Panels
Illustrator’s power lies in the use of onscreen panels. Panels are used to perform tasks like transforming objects, creating and applying colors, organizing artwork, and working with type. They provide an easy way to access this functionality without having to use the menus. Panels also allow you to configure your workspace to suit the task at hand by giving you the option to open or close, dock or float, and expand or collapse functionality on an as-needed basis. Personally, I find that it makes Illustrator easier to use because it enables you to get everything you don’t need out of the way and focus on being creative.
Each panel has functionality that is visible in the form of controls, text inputs, and icon buttons. They also have a panel menu at the top right that contains additional functions or options (2.43).
2.43. An example of a panel menu
The Control Panel
The Control panel (2.44) is the long bar docked to the top of the screen by default. You can dock it to the bottom or just let it float freely as well. I prefer it at the top—it’s easier to get the cursor up there. The panel is contextual, which means it displays information based on the currently selected object. You can use the panel menu on the right side of the control panel to choose what information to show.
2.44. The Control panel
Illustrator displays this information a couple of different ways, depending on your screen resolution or workspace size. By default, options and preferences are spelled out in detail with input boxes and icons in full view.
If you’re using a smaller display, options that take up the most space are reduced to a link, which pulls down the respective panel when clicked (2.45).
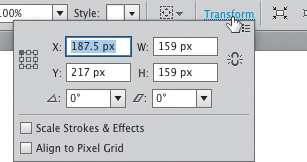
2.45. On smaller screens, some Control panel functionality can be accessed via a link.
Having a lot of panels open takes up precious screen real estate; the Control panel aims to free up some of that space for your artwork by including the functionality of other panels inside of it.
Expanding and Collapsing Panels
Panels can be expanded or collapsed to save space in the UI for your artwork. Collapsed panels display as icons (2.46). After you click a panel icon, the panel opens and stays open until you close it by clicking its icon again. The downside to using collapsed panels is that you can view only one collapsed panel at a time.
2.46. A collapsed panel group
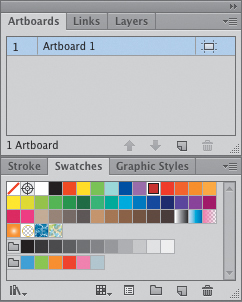
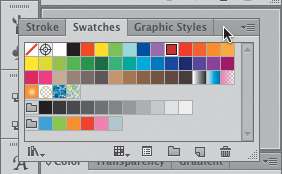
Panels can be grouped together to form panel groups. Each group has a drag handle at the top and is separated by a line. Clicking and dragging the left edge of the panels reveals the label for each (2.47). When you click an icon in a panel group, the panels appear together in tabs with the one you clicked visible. You can switch between tabs by clicking the tab header.
2.47. Collapsed panels with labels
You can move a panel by clicking the drag handle and dragging it to the desired location. As you move a panel, the drop zone is indicated by a blue box. It shows whether the panel will be dropped in between or inside the panel group.
• Drag to a dividing line to place the group between two other groups. Dragging anywhere else will combine the two groups.
• Click and drag the panel icon to move a single panel to another group or to undock it.
• Undock a panel group by clicking the drag handle and pulling it off the edge of the screen. To dock it, drag it back to a dividing line or panel group as in the previous step.
Clicking the double arrow at the top right expands or collapses a panel or panel group (2.48). Expanding a panel allows you to view more at once without having to click the icon to open it. Expanded panels take up quite a bit more screen real estate, but the ability to view info at a glance makes the tradeoff worth it.
2.48. An expanded panel group
Expanded panels can be moved and docked as well, but the process works a little differently from that of collapsed panels.
• Move a panel group by clicking in the space to the right of the tabs and dragging to the desired location (2.49).
2.49. Moving a panel group
• Move a single panel by dragging its tab. To drop it into a different group, drag it to the tab bar of the desired group.
• Change the order of tabs in a group by clicking the tab and dragging it left or right.
• Undock a single panel by dragging its tab off the edge of the screen. Undock a panel group by clicking in the space to the right of the tabs and dragging the edge off the screen. To dock, click and drag the panel bar back to a dividing line or a tab group.
Expanded panels can be collapsed to tabs to allow more space for bigger panels. Collapse to a tab by double-clicking the desired panel’s tab. Double-click the tab again to open it. Many panels can be resized by dragging the bottom of the panel.
Workspaces
We’ve only scratched the surface of the functionality that Illustrator offers. One of the awesome features it provides for managing this complexity is the ability to create workspaces that can be customized for a particular task. A workspace is a saved view of the location and position of panels. You can hide or show, dock or free-float, and expand or collapse certain panels and then save them in that state. Illustrator ships with several of these workspaces by default. You can access these workspaces from the workspace switcher at the right of the Application bar, which lives at the top of the screen just above the Control panel (2.50).
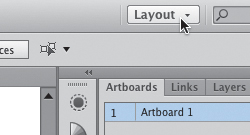
2.50. The workspace switcher
Using a Custom Workspace
Custom workspaces can be handy when you switch tasks or contexts often. I still do some print work from time to time, so I created a customized print workspace. I also use a laptop hooked to an external display as my primary machine, so I have also created two workspaces that I use depending on whether I am using the large display or the laptop display.
I stated earlier that panels take up a lot of real estate in the interface, so it’s important to show only the panels that are completely necessary for the task. I use a mixture of expanded and collapsed panels in my workspace, expanding those I use most often and collapsing those that are “set and forget” panels. Many panels can be left out of the workspace because their functions can be accessed from within other panels.
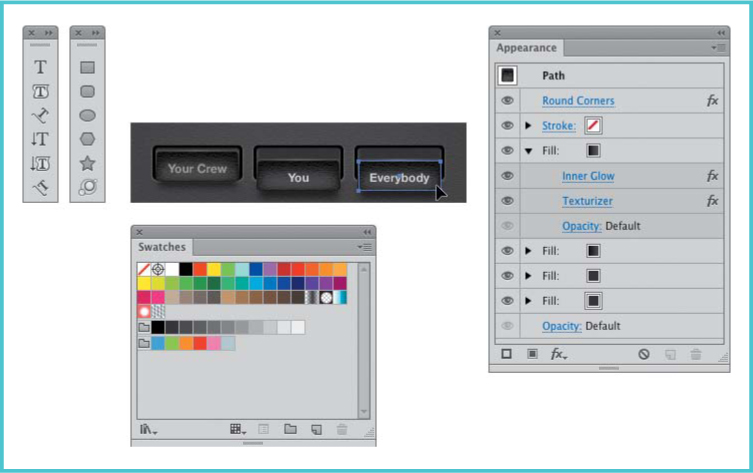
I set up a custom workspace that I find optimum for UI design (2.51).

2.51. My personal workspace for UI design
Here is how it’s set up:
The Application frame (covered in Chapter 3, “The Illustrator Workspace”) is enabled. This keeps me from accidentally clicking windows in the background.
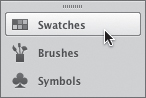
On the right, I have a group of collapsed panels that represent functionality I use often, but not enough to need to see them all the time. From top to bottom they are:
• Symbols
• Graphic Styles
• Align
• Pathfinder
• Character Styles
• Paragraph Styles
• Glyphs
• Color Guide
• Color
• Swatches
• Gradient
To the right of the collapsed panel group is a group of expanded panels that I rely on for constant information and interaction. Again, from top to bottom they are as follows:
• Info
• Artboards
• Appearance
• Layers
As you learn to use Illustrator, you’ll find a workspace configuration that works for you. That’s one of the great things about Illustrator: It gives you the flexibility to work the way you need it to, rather than the other way around. As you create your own workspaces, it’s best to restart Illustrator to ensure that your layout is saved. If you don’t perform this step, you’ll lose this workspace if Illustrator ever crashes.
Creating a new workspace may seem like a lot of work, but thankfully you’ll have to do it only once for each context. You can easily change your workspaces as the task or context changes. This is one of the keystones to efficiency that I cover throughout the book.
If you need to rename or delete a custom workspace, you can do that by choosing Manage Workspaces from the workspace switcher.
Conclusion
We’ve covered a lot of ground in this chapter, and I hope you’ve gained a basic working knowledge of the tools and functions needed to start creating great designs. In the next chapter, you’ll learn how to set up Illustrator for working with pixels instead of print documents and how to use artboards to maximize efficiency in the creation of UI screens.
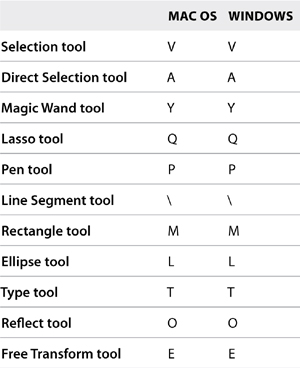
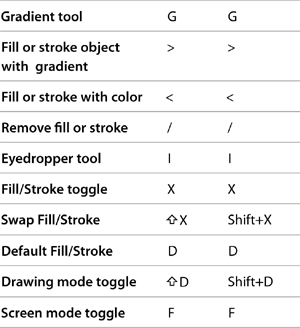
Table 2.1. Keyboard Shortcuts in This Chapter