3. The Illustrator Workspace

Chapter Overview
In this chapter, you’ll learn about the following:
• Choosing the right measurement units
• Selecting the optimal color space
• Creating artboards and organizing your work
The Adobe Illustrator workspace is designed to allow you to be as creative as you want without a lot of distractions. It has a generous area for creating your designs and minimal user interface chrome. The workspace is very flexible and can be customized to your liking.
Go from Print to Pixels
As you already know, this is a book about designing for the screen, whether your target user platform is a laptop or desktop screen, tablet screen, smartphone screen, or TV screen. But out of the box, Illustrator is set up for working with print documents. You’ll need to make some adjustments so that it’s more appropriate for screen graphics.
Choosing the Right Units
The first option to modify is Illustrator’s unit of measure. In the print world, measurements are usually picas and points, inches, millimeters, or a combination of those. However, in UI design, pixel measurements should be the standard. Illustrator can be adjusted so that you can view everything, including type, with pixel measurements. This setting will help your documents more accurately reflect what end users will view on their devices. Fortunately, this is simple to change.
1. Choose Illustrator > Preferences > Units (Mac) or Edit > Preferences > Units (Windows).
The Preferences dialog box appears (3.1).
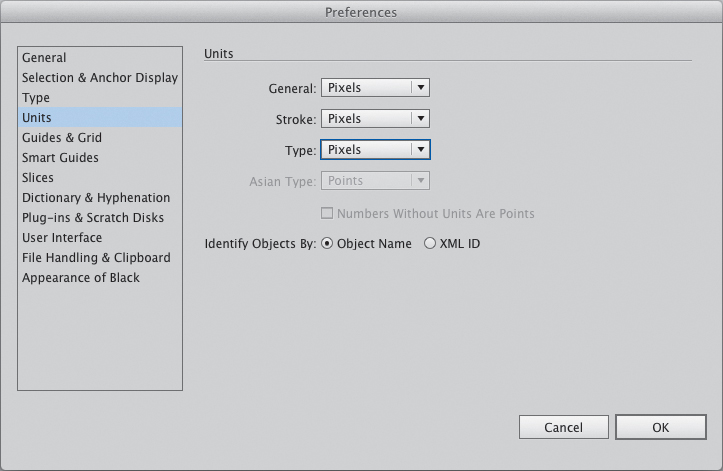
3.1. Setting the General, Stroke, and Type units to pixels
2. Change the unit definitions for General, Stroke, and Type to Pixels.
Optimizing the Color Space
The second thing to take care of is changing Illustrator’s color profile. Again, by default, this is set up with a profile that works best in a printing environment. You might easily justify leaving this setting alone, since no two screens are alike in how they show color, but you’ll change it in case you ever want to edit your design in Photoshop or incorporate images from Photoshop.
1. Choose Edit > Color Settings (![]()
![]() K/Ctrl+Shift+K) to access the Color Settings dialog box (3.2).
K/Ctrl+Shift+K) to access the Color Settings dialog box (3.2).
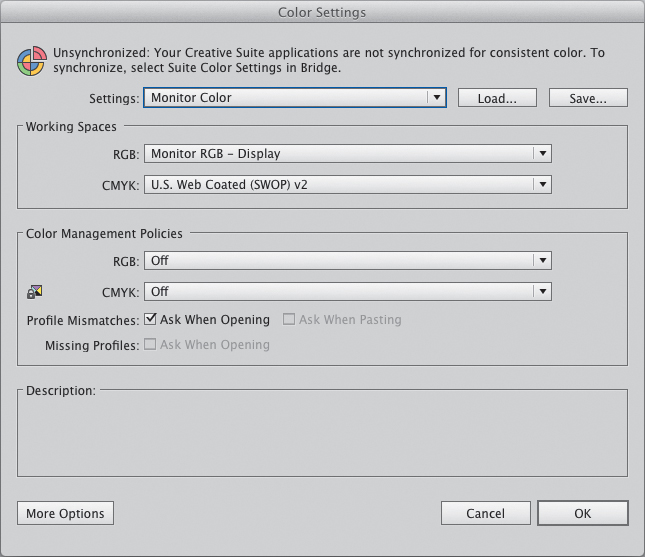
3.2. The Color Settings dialog box
2. In the Settings pop-up menu, choose Monitor Color.
If you plan to shuttle graphics back and forth to Photoshop, you’ll want to make the same change there so the two apps are in sync. By doing so, you eliminate surprise color changes.
Application Frame
The Illustrator workspace may look a little different depending on which platform you are running. If you’re using a Windows PC, you will see the tools and default panel configuration running in a window. On a Mac, however, the tools and panels float freely on the screen. Some Mac users prefer this behavior—it’s what we’re used to with all the other apps we use. However, I’ve actually come to like the Application frame (shown in 3.3 and 3.4) because it reduces distractions from underlying windows. I’ve found myself clicking a window in the background far too often to count. If you want to give the Application frame a try, simply turn it on by choosing Window > Application Frame.
3.3. If you run a lot of applications in the background on a regular basis, the standard Mac configuration has the potential to get messy.
3.4. With the Application frame enabled, you can more easily focus on your task.
Working with Artboards
Artboards are a unique and powerful feature of Illustrator. The artboard works just like a piece of paper would on a physical desk. For example, if you were creating a collage, you could put elements you are not currently using on your desk outside of the bounds of the paper. They are still close for easy access, but they don’t interfere with the artwork taking shape on the document. Illustrator works in a similar way.
When you create a new document, you have an artboard in the middle of a large workspace. Any graphics you place on the artboard itself will appear in the final design. Anything outside its bounds will not appear when you print, export, or save as a PDF. It’s a great way to keep all of your assets in one file rather than scattered across separate files on your hard disk, or in hidden layers that become hard to manage.
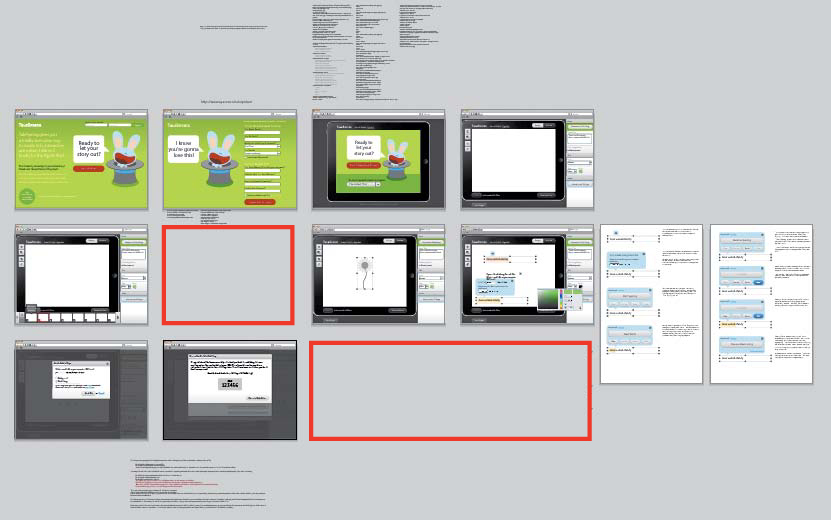
What’s even better is that you can have multiple artboards in one Illustrator document. Illustrator allows you to create up to 100 artboards in a file, depending on the size of the artboards used. You can use these extra artboards to create a site map, show different states of an interaction, or test several design options for a particular screen (3.5). Additionally, it makes it a lot easier to create multi-page PDFs for client reviews and presentations.
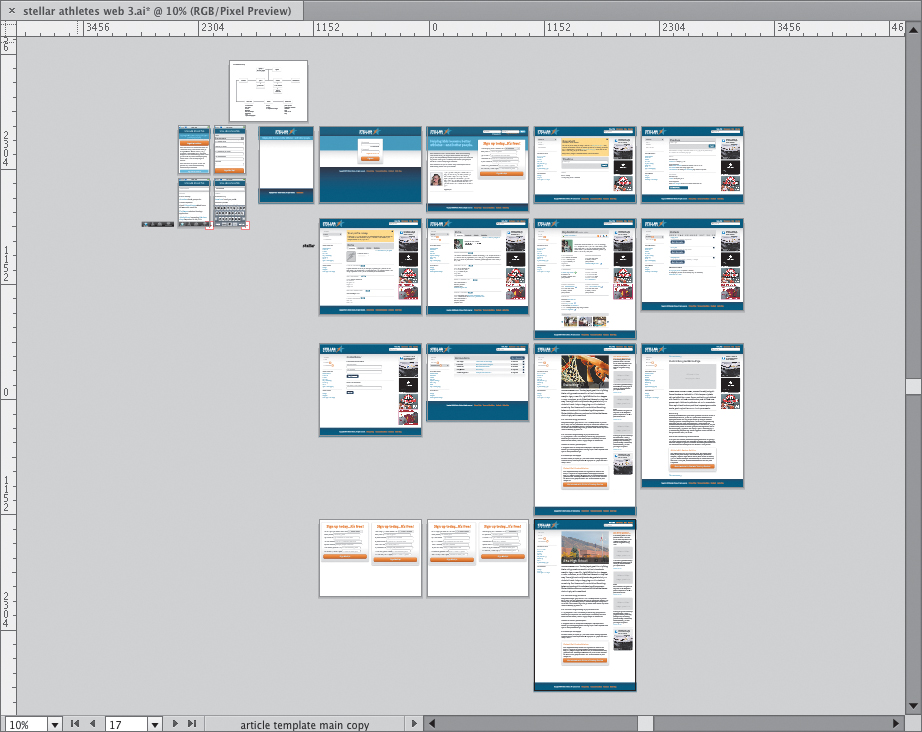
3.5. An example of an entire app mockup, including alternate layouts and test graphics, in one file.
However you end up using artboards, I’m sure you’ll find them very powerful when creating user interfaces. You can keep an entire site in one file and make managing all your design assets so much easier.
Opening a New Document
Let’s create a new document to check out all that the workspace has to offer.
1. Choose File > New (![]() N/Ctrl+N).
N/Ctrl+N).
You’ll see a dialog box that has options for your new document (3.6). Here you’ll have the opportunity to name your file and choose a profile. Illustrator has several built-in profiles for you to use as a starting point.
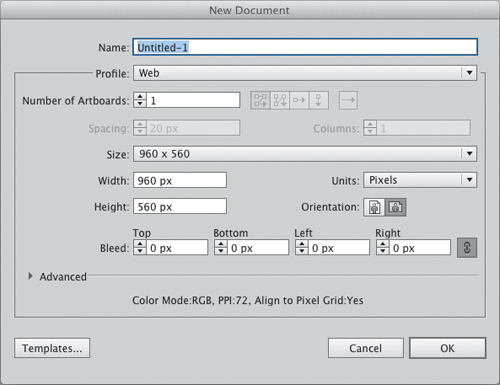
3.6. The New Document dialog box
2. Select the Web profile.
Notice several differences between the Web and Print profiles: The document units are pixels instead of points, and the preset artboard dimensions are 960 px by 560 px, a common viewable area for a browser window. You can use one of the presets or type your own dimensions in the width and height fields.
3. Click the triangle to the left of the Advanced section to open it (3.7).
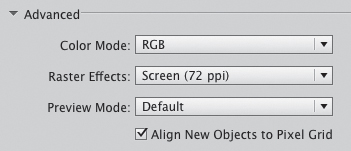
3.7. Advanced artboard options
This section of the dialog box is where you can set the color mode (CMYK or RGB), screen resolution for raster effects (we’ll look at how to use these effects in a later chapter), and preview mode for the document.
The next two settings are ones that I have found to be very useful for UI design.
4. Change Preview Mode to Pixel.
Pixel preview displays your art as if it was created with pixels rather than vector objects. It shows how your artwork will be anti-aliased when viewed at 72 ppi, which is the resolution graphics will be when exported from the program. You’ll feel really comfortable in this mode if you’re used to working in Photoshop.
5. Leave “Align New Objects to Pixel grid” checked and click OK.
This feature keeps your artwork aligned to the pixel grid as you draw. That way, your art stays crisp when saving your graphics for the web or devices.
Creating Artboards
Behold the white rectangle in the middle of the screen (3.8). This, my friend, is the artboard. Illustrator uses this metaphor as its working space. As I stated previously, the artboard is really just like a piece of paper sitting on your desk. You can draw on it, paint it, erase stuff from it, and move it around. At times I think Adobe should add the ability to crumple it up and toss it into the wastebasket, but I digress...
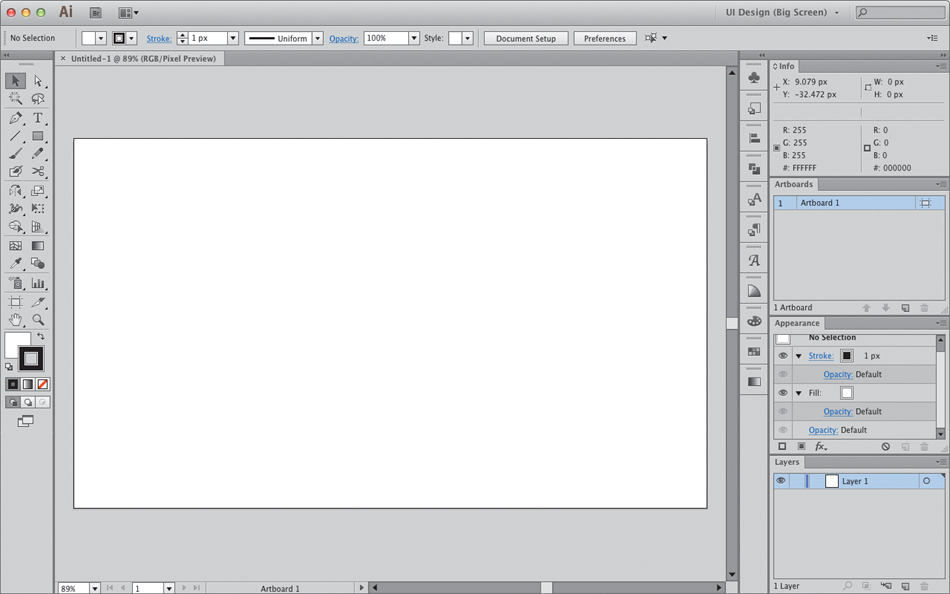
3.8. Hello, artboard!
For those of you coming from Photoshop, the artboard is fundamentally different from Photoshop’s canvas. First of all, it’s another vector object on the screen you can edit without affecting the artwork itself. You can resize it, change its orientation, duplicate it, and remove it. It’s pretty versatile.
Second, the artboard acts a container for your design, allowing you to place unneeded elements outside its bounds without having to delete them or toss them into hidden layers. Anything outside the artboard bounds stays out of your printed or exported files. This enables you to experiment with different ideas outside the artboard before you decide to include them in the final artwork.
As for multiple artboards, I think it’s one of the best features Illustrator has to offer. It makes mocking up entire sites very easy and keeping your entire project in one place really helps with efficiency. When working on enterprise sites that have multiple layers of functionality, I tend to break up modules into different files. I’ve created upwards of 50 screens in one file with no discernible hit on performance and a relatively small file size.
There are several ways to create a new artboard that go beyond opening a new document. Let’s take a look at how you can do this in the next few sections.
The Artboard Tool (Shift-O)
In the Tools panel is a dedicated tool called the Artboard tool (Shift-O) ![]() . Activating the Artboard tool puts Illustrator into artboard editing mode. Once activated, the artboard has a bounding box, grab handles, crop marks, and a nameplate appearing with it in the workspace (3.9). You have a couple of options in this mode:
. Activating the Artboard tool puts Illustrator into artboard editing mode. Once activated, the artboard has a bounding box, grab handles, crop marks, and a nameplate appearing with it in the workspace (3.9). You have a couple of options in this mode:
• Add a new artboard by clicking and dragging the cursor anywhere outside the current artboard. This allows you to create an artboard of any size. If you need to change the size, just click and drag any of the grab handles to adjust. This works for any artboard in the workspace.
• Delete an artboard by selecting it and pressing Delete. If you have multiple artboards to eradicate, pressing Delete multiple times will remove them in descending order until you have only one left.
One thing to note is that Illustrator requires at least one artboard at all times. Additionally, deleting the artboard does not delete the art on it. You have to do that manually.
3.9. Crop marks, bounding box handles, and a nameplate are all visible in artboard editing mode.
To make the artboard larger than the current window while resizing, drag the cursor to the edge of the screen and it will automatically scroll to reveal more space.
Using the Control Panel
The Control panel has several tools within it for dealing with artboards. Because the panel is contextual, you’ll need to be in artboard editing mode to view these tools. You can perform the following actions from the Control panel:
• Set the selected artboard to a preset size
• Change the orientation to portrait or landscape
• Add a new artboard
• Delete a selected artboard
• Name a selected artboard
• Choose whether to have artwork move with the artboard when it is rearranged
• Show extras like crosshairs, video-safe rulers, and a center mark
• Show the Artboard Options dialog box
• Place or resize an artboard with numerical precision
To use the Control panel to create a new artboard, do the following:
1. Click the Artboard tool (Shift-O) to enter artboard editing mode.
2. Create a new artboard by clicking the New Artboard icon ![]() in the Control panel.
in the Control panel.
This allows you to place a new artboard in the workspace that’s the same size and orientation as the currently selected artboard. After clicking the New Artboard icon, you’ll notice that you have a box that follows the cursor (3.10).
3.10. Click to place a new artboard.
3. Click anywhere in the workspace to place the new artboard in that spot.
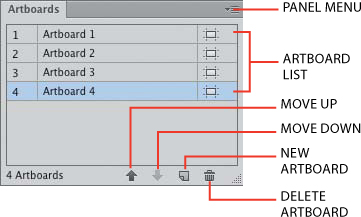
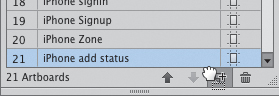
Using the Artboards Panel
The Artboards panel (3.11) shows you a list of all artboards in your document. Unlike the Control panel, it is available at any time. Create a new artboard with the Artboard panel by clicking the New Artboard icon ![]() at the bottom of the panel.
at the bottom of the panel.
3.11. The Artboards panel
Illustrator will put new artboards created this way to the right of the current artboard. If you have several rows of artboards, it will always place the new artboard to the far right of the top row. This gets tricky as you start to create a lot of artboards, as Illustrator won’t let you place artboards outside the workspace.
You can also perform the following actions from the Artboards panel:
• Select an artboard as the active artboard
• Double-click an artboard in the list to view it in the window
• Move an artboard up or down in the page flow by dragging in the list or using the arrows at the bottom of the panel
• Delete an active artboard
• Rename an artboard
The panel menu also allows you to duplicate or rearrange artboards, convert objects to artboards, and delete empty ones.
Duplicating an Artboard
Duplicating an artboard can save you time by giving you a quick start on a new screen where most of the elements are the same. This is useful if you are trying to show different interaction states for an element or just want to try a different color scheme for the same design. There are a couple of easy ways to accomplish this:
1. Select the Artboard tool (Shift-O).
2. In the Control panel, make sure that the “Move/Copy Artwork with Artboard” option is selected. If this is option is deselected, you will only duplicate the artboard itself.
3. Click the artboard you’d like to clone and hold the Option/Alt key as you drag it to a new location. To constrain the artboard to the horizontal or vertical axis, hold the Shift key, too.
You can also use the Artboards panel to duplicate an artboard by selecting the one you want to clone and dragging it to the New Artboard icon (3.12). It will place the duplicated artboard using the same rules outlined in the previous section.
3.12. Drag an artboard in the list to the New Artboard icon to create a duplicate.
Using Existing Objects
In addition to creating new, blank artboards, you can use an existing object as the basis for a new artboard. This is useful in several common scenarios:
• You have design elements outside of a current artboard that you want to move to a new artboard.
• You want to move a part of your design to a new artboard and create the new artboard at the same time.
• You want to quickly export or create a PDF of part of your design.
To create a new artboard from an existing object, perform the following steps:
1. Select the Artboard tool (Shift-O).
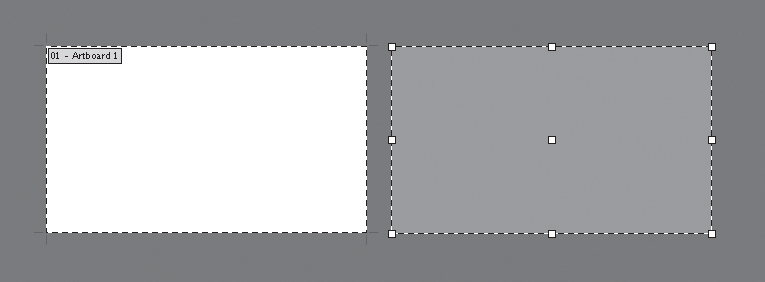
2. Click the object you want to use as the basis for the new artboard (3.13).
3.13. Click an existing object with the Artboard tool to create a new artboard based on its boundaries.
Once you’ve done this, you can resize or rearrange the new artboard like you would any other.
Organizing Artboards
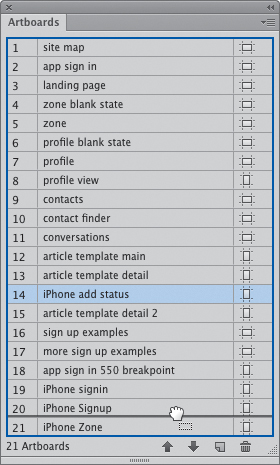
Once you get several artboards in your document, things might have a tendency to get a little messy. Missing artboard names, disorganized screens, and holes in the screen flow drive me crazy. If that bothers you like it does me, it’s pretty easy to get everything back in shape.
Give Them Names
You might have noticed that as you add new artboards to your document, each one gets a generic name, such as Artboard 1, Artboard 2, and so on. As convenient as this is, it isn’t really helpful as your project grows. It’s akin to a Photoshop document with a plethora of unnamed layers. To deal with this problem, Illustrator allows you to name your artboards (3.14).

3.14. Name your artboards for maximum efficiency.
1. Select the Artboard tool (Shift-O) and select the artboard you want to name.
2. Type a new name in the Name field in the Control panel. Making the name relevant to the content on the artboard will help immensely as you add more artboards to your project.
You can also use the Artboards panel to name your artboards.
• Select the artboard you want to name in the panel list and then click its Artboard icon ![]() once. The Artboard Options dialog box appears, where you can type the new name as well as access various other options.
once. The Artboard Options dialog box appears, where you can type the new name as well as access various other options.
Move Them Around
When I work on a large project, I typically start with a set number of artboards. As I work through the design process, I organize the artboards into a flow or site map. As features and functionality gets added or removed, the number of screens needed in the mockup may grow or shrink. When this happens, I end up with screens that are out of order or have holes in the flow (3.15 and 3.16). To fix this problem, Illustrator allows the ability to rearrange artboards in the workspace.

3.15. During the course of designing a UI...
3.16. ...pages sometimes get removed, leaving holes in the page flow.
To move artboards manually, do the following:
1. With the Artboard tool (Shift-O), click the artboard you wish to move and drag it around the workspace until you have it in the desired position.
2. If you want to leave the art where it is and move just the artboard, make sure to deselect the “Move/Copy Artwork with Artboard” icon ![]() .
.
To rearrange artboards using the Artboards panel:
1. Make sure that your artboards are in the order you’d like them to flow in the workspace by dragging them into position in the panel (3.17). The number next to the artboard in the panel corresponds to its position in the workspace.
3.17. Drag artboards to order them the way you’d like them to appear in the workspace.
2. From the Artboards panel menu, choose Rearrange Artboards.
3. Choose the layout you prefer, how many columns to use, and the desired space between each artboard (3.18). If you don’t have “Move Artwork with Artboard” selected in the Control panel, don’t worry. You can select it here so that all of your art gets rearranged as well. Click OK.
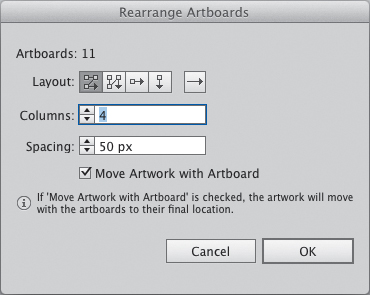
3.18. The Rearrange Artboards dialog box
After a second or so, you’ll see the workspace zoom to fit all the artboards and you’ll see them in their new positions.
Navigating Multiple Artboards
Once you have a few artboards in the workspace, you’ll need an easy way to move between them. You could use the scrollbars or the Hand tool to scroll the workspace, but that’s slow and imprecise. Instead, you can use the Artboards panel or the artboard navigator to quickly and easily find the right artboard.
To switch artboards through the Artboards panel:
• Double-click the desired artboard in the panel. It jumps into view on the screen at whatever zoom percentage it needs to fit the whole artboard in the window. To reset the zoom level to 100%, double-click the Zoom tool or press ![]() 1/Ctrl+1.
1/Ctrl+1.
The artboard navigator (3.19) is found at the bottom-left corner of the document window. To use the artboard navigator:
3.19. The artboard navigator
• Choose the desired artboard from the pop-up menu (3.20). This is so much easier if you named your artboards.
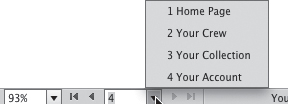
3.20. Your artboard list
• Use the Next and Previous buttons to click through a series of screens in succession. This succession is determined by the order of the artboards in the Artboards panel. Clicking the Next and Previous arrows moves one screen at a time, while clicking the First and Last arrows jumps to the first and last artboards.
If you just need to move around a particular area in the workspace or artboard (for example, if you are zoomed in doing close-up work), you can use the Hand tool (H) ![]() :
:
1. Select the Hand tool (H). You can click and drag around the workspace until you choose another tool.
2. To quickly access the Hand tool while using another tool, press and hold the spacebar. You’ll be able to pan around the workspace as long as you have the spacebar pressed. When you let go, you will return to the tool you had previously been using.
Conclusion
Artboards are one of my favorite features in Illustrator. They allow for convenience in creating and organizing your artwork. Being able to keep multiple screens in one document, visualize interaction flows, or mock up a workflow process is invaluable and will help you work efficiently.
The next chapter looks at using the pixel grid to preview how changes in anti-aliasing affect your design. Even when creating UIs for high-resolution devices like the iPhone and iPad, having pixel-precise measurements will make your developers love you as they work to match your design.
The next chapter also looks at how to use Illustrator for basic UI design tasks like setting up grids and working with typography.
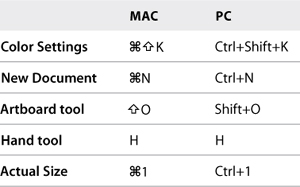
Table 3.1. Keyboard Shortcuts in This Chapter