
3. The Motion Capture Session
Chapter Outline
Summary133
This chapter covers everything that pertains to the motion capture session, starting with the decision whether to use motion capture or not. It is important to learn how to make that choice in an intelligent manner so that it doesn't backfire later during production.
Deciding to Use Motion Capture
A client has sent storyboards and character designs for your review. You are supposed to come up with a budget for a digital character performing certain actions. The project does not need to be rendered in real time. The client has a very small budget and there is no way you'll be able to compete with other studios if you use keyframe animation. You don't have a lot of experience using captured motion data. Do you suggest performance animation immediately?
If you said “no,” you're right. This scenario has been proven to result in chaos time after time. It is safe to assume that in most cases performance animation will not save time, except when used to create a product with expected quality trade-offs, such as a motion library for an interactive video game, a virtual reality experience, or a live television show. Similarly, it is safer to believe that it won't save you money. I'm not saying that it is impossible to save time and money using motion capture, but that you should never assume it will unless you have demonstrated this by testing. Testing, of course, will cost time and money. What you should do in a case such as the one outlined in the previous paragraph is propose exploring the possibility of using performance animation and then proceed cautiously.
I believe that a decision to use motion capture has to be initially based on look alone. If the realistic look of human motion is not what you want, do not even consider motion capture. This is the first bridge that you should cross. Once you have determined that this is the look you are aiming for, you need to start worrying about the second consideration: How can you capture reliable motion data for your project?
Stage 1: Do You Want Realistic Motion?
It is sometimes difficult to visualize what your character will look like after realistic motion has been applied to it. If the character is not shaped like a human, the motion might look strange and even disturbing. It is impossible to predict if this will happen because it depends on the character and the performance. Even if the character is human shaped and the data is clean, the animation might look weird if the context is not right. For example, my first tests using optical motion capture were done with sample data of a dancer's performance captured with an optical system, which I imported into Side Effects' Prisms. I applied the data to a human skeleton that I had from a previous job. I didn't want to acknowledge it then, but the skeleton motion looked strange. I wasn't used to seeing that kind of motion associated with a make-believe character. Nevertheless, I was still awed by the result and decided to look further into the technology.
On one occasion, we did a test for the now-defunct Boss Film Studios in which a chimpanzee had to move along a branch of a tree, holding on to it with its hands and swinging its legs. The purpose was to create a demo for a feature film client. During that process, we would find out if a human could perform the animal's motion in a convincing way, and also if we could collect motion from a chimpanzee.
In preparation for the test, we found an animal trainer who had two well-behaved chimpanzees with acting experience, and a very flexible human gymnast. Our motion capture stage supervisor spent time with the monkeys at the suggestion of the trainer, helping them familiarize themselves with the markers that they would have to wear during the session. At some point, he had problems with the monkeys putting the markers in their mouth. This could have been dangerous because the markers are covered with tiny crystals that, if swallowed, could cause internal bleeding, but after a couple of days the trainer was able to control this behavior and we thought we were ready for our session.
The day of the session, Boss brought to our studio a structure that would represent the branch. Before starting the capture, we had the chimpanzees rehearse the motion without the markers; this rehearsal was without major problems. The chimps were very friendly and even allowed all of us to take photos with them. Then, the gymnast performed the motion and we collected her data. It looked very convincing as we saw it at the studio.
After a few takes with the gymnast, it was time to put markers on the first chimpanzee. We wanted to use the bigger chimp because the markers could be placed farther away from each other. We had made Velcro belts that would strap around his arms, legs, neck, and chest, plus a little cap with markers for the head. Our stage supervisor tried time after time to put the markers on the monkey with the help of the trainer, but the chimpanzee wouldn't allow it and broke several markers in the process. We decided to try using the small chimpanzee. He was more docile and accepted the markers without problems. He came to the stage and performed the motions several times, following exact directions from the trainer. He was better than many of the humans we had captured over the years.
The data postprocessing was no walk in the park. We had minimum problems with the human data, but the animal data wasn't totally clean. The markers were very close to each other in some areas and the software couldn't follow them very well, so a lot of operator-assisted tracking was required. When all the data was clean, we noticed that the Velcro strap in the chimpanzee's belly had been sliding around. Fortunately, it had two markers, and it didn't really matter in what part of the perimeter of his belly the two markers were because we could always calculate the center based on their diameter. We managed to stabilize this data as well, and it worked.
We converted all the data to every available format and delivered it to Boss. They in turn gave us a chimpanzee mesh they had created. From this point on, we would do our own tests and they would do theirs. I used Prisms and Softimage software to do our tests, and I found that although the human motion looked convincing when I saw it performed, it didn't when it was applied to the monkey mesh. However, the monkey data looked perfect. The monkey with the human data looked like a chimpanzee in a human suit.
The problem with animal performance is the same as with human performance: The talent has to be able to perform in a convincing way. If a particular motion is not feasible for an animal to do, then you cannot capture it. You can do small enhancements after the fact, like increasing the distance of a jump, but not much more. Animals cannot perform a part other than their own, and humans cannot perform convincing animal motion in most cases. Recall the use of motion capture in Godzilla, discussed in Chapter 2. The production of the digital character was initially based almost totally on performance animation, but later in production it was reworked to mostly keyframe animation because the final character looked “like a guy in a Godzilla suit.” The special effects producers of Mighty Joe Young also considered performance animation, but did the right thing by testing before production actually started. They had a better excuse for considering it, because their character actually was a guy in an ape suit for most of the film. They decided to drop the motion capture idea because there was no easy way of modifying the captured data. Because this decision was made before production started, they managed to avoid a costly mistake.
As a rule of thumb, you should not use motion capture to animate characters that should have cartoon-style motion. To be more specific, take Disney's 12 basic principles of animation as outlined by Frank Thomas and Ollie Johnston. These principles are standard learning material for character animators and should be taken into consideration when deciding whether to use motion capture. Some of them cannot be achieved by a performer no matter how talented, and others can be easily accomplished realistically with motion capture. The principles are as follows.
– Squash and stretch. The character goes through extreme shape changes but maintains its volume. This is the first principle that cannot be achieved by a performer. Some people have attempted to add this property to captured motion data either by hand or procedurally, but the results have not been promising.
– Timing. The performance, whether animated or acted, has to have the right timing to convey the necessary perception.
– Anticipation. Anticipation is an indication of an action to come. This is typical of cartoon characters and not necessarily of human performance, but in some cases it is consistent with realistic actions, such as bending your knees before jumping. A good performer can show anticipation to a certain degree, but is limited by the laws of physics.
– Staging. A principle of filmmaking in general, the layout of the scene and positioning of the camera and characters are equally important in animation and live-action performance.
– Follow-through and overlapping action. Follow-through is the opposite of anticipation. The reaction happens after the action, such as bending the knees as one reaches the floor after a high jump. Again, a live performer can accomplish physically feasible follow-through. Overlapping action is inherent to live performance, but in animation, it is easier to start an action after another one is finished, resulting in either paused or rigid motion.
– Straight-ahead action and pose-to-pose action. These are two animation methods. Straight-ahead action calls for the animation of a scene on a frame-by-frame basis, whereas pose-to-pose action entails the creation of key poses scattered over time periods. The frames in between these key poses are drawn later. In computer animation, most of the character work is done using a variation of the pose-to-pose action method, creating key poses for different parts instead of posing the whole character at a particular frame. This is done by creating keyframes and letting the software produce the in-between frames by some kind of interpolation defined by the animator. This method is easier to manage because there is less data to deal with. Motion capture is completely straight-ahead action; as such, it generates keyframes at every frame. This makes it very difficult to modify. Pose-to-pose action can be achieved through motion capture by selecting significant keyframes, deleting the rest, and allowing the computer to do the in-betweening as before.
– Ease-in and ease-out. It is very rare for an object to become active without a period of acceleration, or to become static without a stage of deceleration. Ease-in and ease-out are principles based on real-world physics, so they can easily be achieved by capturing the motion of a live performance.
– Arcs. Most actions are not linear. When animating, you almost never want to use linear interpolation between keyframes. This is another principle aimed at emulating realistic movement, which can be represented as a set of different types of arcs. When using keyframe animation, these curves are usually smooth between keyframes. With motion data, however, they are coarse and noisy, representing the natural nuances of realistic motion.
– Secondary motion. When animating, you first create the primary motion of the character, which is usually the motion of limbs and face. You then create the motion of other parts or objects that react to the primary motion, such as hair and clothing. Secondary motion represents a lot of extra work with hand animation, whereas with motion capture it is a part of the performance. One has to be able to collect it, however, which may not be possible with some systems. For example, clothing motion can be captured by an optical system if markers are added to the clothes, but an electromagnetic tracker or electromechanical suit would not be able to collect that kind of data easily.
– Exaggeration. The principle of exaggeration implies approaching or crossing the boundaries of physical reality in order to enhance or dramatize the character's performance. You must decide if capturing a live performance would be acceptable, or even feasible, for the level of exaggeration needed.
– Appeal. The audience must find the characters interesting and appealing. This principle applies for both live action and animation.
– Personality. Two identical characters can appear totally different by conveying different personalities. This is a principle of acting in general that should be applied to animation. When using motion capture, this is the number one reason to use a talented performer, as opposed to just anybody who can move.
The following principles of animation cannot be accomplished with motion capture:
– Squash and stretch
– Anticipation beyond physical boundaries
– Follow-through action beyond physical boundaries
– Exaggeration beyond physical boundaries
The following principles of animation are natural to live performances:
– Overlapping action
– Straight-ahead action
– Ease-in and ease-out
– Arcs
– Secondary motion
Finally, the following principles of animation require work whether a character is animated or performed:
– Timing
– Appeal
– Personality
Procedural and manual methods exist for adding some of the principles to motion data after the fact, such as squash and stretch, anticipation, follow-through, and exaggeration. The question is, Why would you want to capture realistic data if you want a cartoony look? Modifying captured motion data by hand can be more expensive than keyframe animation, and a procedural solution usually doesn't yield an interesting performance. Of course, there are exceptions, but you shouldn't rely on them.
I'm not saying that you should never capture human motion and apply it to a cartoony character, but it is safer to go through this process as a test to find out if it will yield the result you want before you commit to a high expense.
Some examples of high-end performance capture used to animate nonhuman characters in feature films are Monster House and Happy Feet. Monster House's characters are humanoid and in my opinion they were successful in achieving the look that was intended, although it isn't the same style as hand-animated characters in a film like Shrek. Happy Feet's characters are penguins and normally I would think that motion capture wouldn't be the right methodology to use for such a project; however, the performances weren't overacted as it happens with most performance capture characters and the penguin characters weren't based on realistic looking penguins. Also, the main focus of the film was in the musical performances, which were very compelling. That and an excellent story helped a lot in the project's success, so much that it won an Academy Award for Best Animated Feature.
Many TV cartoon characters have been animated through performance over the years, mostly with real-time feedback systems in combination with other controls. An example of such a TV show is Jay Jay the Jet Plane. These kinds of projects are usually created by studios that specialize in that kind of medium and have experience with real-time character puppeteering. Companies such as Jim Henson, Modern Cartoons, and the erstwhile Medialab and Protozoa created a business from the real-time rendering of characters and established it as a medium separate from the rest of character animation; it is not accurate to call this medium motion capture or even performance animation, because it involves many kinds of manipulations other than performance. This type of animation is called digital puppetry, and it involves a different decision-making process from what I describe here.
A good example of a project in which human motion data was applied to a cartoony character was the 1996 set of spots that TSi did for the Pillsbury Doughboy, which are explained in more detail in Chapter 2. We decided to use captured motion data on the Doughboy because (1) we determined that his motion didn't require any squash and stretch or extreme exaggeration or anticipation, and (2) we supplied our client with a test of the Doughboy performing extreme motions mapped from a human, so they knew what to expect. Some of the shots were not well suited to the subject, but we knew we could collect the data anyway and use it as timing reference. As long as the client did not change the timing of the motion we would be fine, and they agreed not to do that.
Stage 2: Can You Successfully Capture the Data?
I will start by separating the two kinds of projects that you are likely to deal with. Film or video productions and game cinematic sequences follow a predetermined continuity, so I refer to them as linear projects. On the other hand, user-controlled video games are nonlinear projects, since the player's actions determine the sequence of events that, in real time, shape the character's motions in different patterns. These two types of projects are handled differently in some aspects when it comes to performance animation. There is a third type of project that I do not cover specifically: real-time digital performance applications, such as live television and trade-show performances. These kinds of projects have to be based totally on performance animation. I do feel, however, that the concepts I outline here can be used at the planning stage of such a project.
If a character design is already available, and it has been determined that realistic motion is the way to go, it is time to evaluate if it is possible to capture the data you are looking for. For this purpose, I like to use a divide-and-conquer approach, breaking the project into small, similar groups of shots and using these categories to evaluate strategy and plan the sessions. A shot is an uninterrupted camera take that is later combined with other shots to form a scene. It will fit our purpose to define a shot as an uninterrupted piece of character motion, because this definition applies to all media, including linear and nonlinear projects. A step-by-step explanation of how to perform the evaluation follows.
Create a Candidate Table
I'm assuming that if you are planning a motion capture session, you already have a script, production boards, or a game design from which you are supposed to determine which characters to animate via performance. For the characters you are considering, you have already concluded that realistic data is the way to go.
The candidate table is a preliminary step that is designed to save you time, helping you avoid creating storyboards for shots that are not even in consideration. As you create the table, define if a digital character is supposed to be visible and decide how it is supposed to be animated, if at all. For example, if a character is talking, it is possible that it isn't facing the camera. Similarly, a character may be so tiny in the camera viewpoint that you may not have to animate it at all, or maybe you only see the character's foot in the shot, so animating the rest would be irrelevant.
If all you have is a shooting script, you should be able to extract and list those shots that appear to be candidates for performance animation. You will be lacking valuable information, as no visual reference is yet available, but you must assume that if the digital character is present in the shot, it is visible. If possible, talk to the director to find out what he has in mind for each shot. Later in the production, shot breakdowns and production boards are created; as you get hold of them, you will have to revise the candidate table based on this new information. If the project is a nonlinear video game, the design must already include a list or a flow chart of motions for each character. Such a list is required before starting to create the table, because no script is available for a nonlinear project.
The table should include at a minimum a shot name (which will be used to designate the data file as well), a list of the character(s) involved, and a description of each shot. You can also include a client reference name, which could be the board number or a page number in the script. You don't need to include other information such as timing just yet, since it is not the purpose of this list to calculate costs and schedules. A Categories column is also necessary, but it should be left blank for now. I will get to that later.
Table 3.1 is a fictitious example of what an actual candidate table would look like. The candidate table is not supposed to be a final table, so don't be afraid to include shots that are questionable. Be careful not to exclude any shots that have any possibility of qualifying.
I didn't have the luxury of knowing about this method when I was starting, and I often ended up capturing a lot of data that was discarded for a variety of reasons, from not being able to track the desired motion to not being able to use the data in the shots. As you become more experienced, more of the shots cataloged in the candidate table will actually make it to the motion capture session because you will be able to tell which ones are not feasible without going through the whole evaluation process.
Prepare Motion Capture Blueprints
Storyboards are commonly used for representing and understanding live-action and animation shots, but performance animation requires more information than storyboards alone provide. You need a certain kind of blueprint that includes storyboards and much more. You need to know what your subject is interacting with, starting from the ground itself to other characters and props. You also need to know the placement of each of these interactors. If the floor is uneven or sloped, you need to know. If the character leans on the wall or touches anything, that is also important information. So are measurements of all props and the volume that will envelop all the action. All these variables may seem unimportant at the stage of planning a shot, but at the time of capturing and importing data into a character they become big issues that one ends up wishing had been dealt with at the beginning.
For nonlinear applications, you most likely don't need some of the information I describe in this section, especially the camera orientation, because the camera will be controlled by the user. You do need other items, however, such as a list of shots that will be tied with the shot in question, because you will want to make sure that the attachment point is similar for all of them.
The blueprints can be created in a database, spreadsheet, or project management software and should include the following items:
Shot Description
A small description of what happens in the shot.
Client Reference Name
A name by which your client refers to this shot (if it applies).
Character Names
This is a listing of all the characters that will be captured simultaneously or separately in this particular shot.
Storyboards
It is imperative to know exactly what has to happen for each shot that you are evaluating. The best way of doing this is actually videotaping the shot using live actors, but this is quite expensive and in some cases impossible; thus, the most common way is to use storyboards. Whether you create them or your client supplies them, they should be detailed enough that you should be able to visualize the shot perfectly.
Some of the things that depend on good understanding of the performance are the sample rate at which it is best to collect, the placement of the markers or sensors on the performer's body, the character setup, and the topology of the 3D model. In addition, if you will be using an optical system, this information will affect the number of cameras to use and the placement of cameras according to the area of capture.
A typical storyboard is a drawn representation of a scene, which is a combination of shots that take place in a particular setting. A shot is represented in a storyboard by one or more drawings that are commonly used to block character movements and camera work in relationship with dialogue and timing. The storyboards needed for motion capture pertain only to a particular shot and not to a whole scene, and they need to be more specific for complicated motions, sometimes showing various views of the action.
Shot Timing, Including Handles
Motion data can be expensive, so you don't want to capture more data than you need. Make sure that your timings include handles, that is, a few frames at the beginning and a few at the end. The number is up to you, but it should be anywhere from a third of a second to a couple of seconds. I measure it in seconds because the number of samples per second will vary according to the type of project or motion capture system used. To obtain the frame count, you can always multiply the timing by the sampling rate. If you use a motion capture service provider, this number can be key to avoiding cost surprises.
It is very common when designing video games to create a list of motions and just capture them without going through this step. In many cases, I would receive a motion list without timings or handles and be asked to quote the cost of capturing the data. I would calculate the cost, making sure to try to time the shots with reasonable handles, but the difficulty of envisioning what the client had in mind occasionally resulted in very different final costs from what was estimated.
It is also common to slap timing on a shot without even thinking about it. For example, I once had a client who wanted to collect data for an ice hockey game. I asked him to provide in advance a list of motions with timings, but all the timings he provided were inaccurate because most actions on skates require a certain degree of build-up, which translates into long handles. You cannot start a skating cycle like a walk cycle: You have to slowly pick up the right speed until you have the speed and rhythm you need. This was one of my earliest motion capture jobs, my first video game job, and perhaps the first motion capture session ever done on a skating arena, so I couldn't detect the problem immediately. I figured we could cut the files to the right length after the session, but this became impossible because we couldn't decide what segment of each shot to delete without consulting with the client, who happened to be based out of the country, and we were afraid of deleting the point where motions would tie into each other. Also, we had close to 500 files, so it would have been impossible for the client to help remotely. We decided to track most of the data, removing only parts in which the skater left the capture volume. The resulting cost was about triple what I had originally estimated, and although we had only provided an estimate, the client refused to pay the extra amount.
The Measured Boundaries of the Performance
Make sure you know the volume and area limitations of the motion capture stage. Most systems have a maximum volume that cannot be breached, so you need to ensure that each shot will comply with it. With some systems, you can sometimes play with the volume to add area in a certain plane while decreasing the area in another plane, maintaining the volume constraint. For example, the capture of a slam dunk will require much more height than the capture of a baseball batter, so you may want to trade some stage area for more altitude.
When using an optical system, there is always an optimal camera placement for each motion, and sometimes it becomes necessary to switch configurations in the middle of a job in order to obtain better and less expensive motion data. Similarly, with a magnetic tracker, you need to make sure the action will happen within the electromagnetic field, so the placement of the transmitter needs to be planned in advance. It is important to limit your setups to a minimum as it takes a long time to calibrate and relocate equipment. There is always a balance that will achieve the best efficiency and data quality.
Including all the performance's measurements in the storyboard will ensure that you can divide your shots into groups based on stage volume and configuration. This makes the tracking postprocess more efficient. If you don't include the measurements, the stage will usually be set up for the maximum possible capture volume. It could be very time consuming to reconfigure a setup, especially if it is optically based. Nevertheless, if you are well prepared, a long session can be divided into two or three different configurations.
The ice hockey game discussed earlier is a good example of how one can benefit from good planning. The scenes had very low and tight motions and very wide and high motions. Most of the goalkeeper actions could be collected with a very tight camera setup, which made the postprocessing stage easier. Other motions (such as skate cycles) required a huge volume because the cycle itself used up a long distance. The height had to cover a tall skater, his skates, and sometimes even his arm raised with the hockey stick in it. Of course, we didn't have to collect the whole stick since it was a rigid object, so we used three markers close to the handle that would represent the whole thing. However, it still was very challenging to collect all the necessary data. We certainly had a hard time cleaning up those motions. Had the client provided us with the critical timing information, we could have optimized our volume. A corridor-like configuration (a narrow, but long and tall, volume) would have been appropriate for this situation. It would have saved a lot of time and money in the postprocessing of the data.
There are cases where you would want to have different setups all installed and ready to go. For example, during The Polar Express we had three motion capture stages. The first stage was only a small cube with 10 ft per side. It was meant for all the close-ups and facial performance shots. Around the volume we had 70 cameras with long lenses to cover all the facial markers and about 10 more with wider lenses to cover the body motions. The second stage was a larger (30 × 60 × 10 ft) volume that was used to capture wide shots and performances that occurred in a large area, like a long walk or many characters interacting in a wide space. The third volume was a taller volume (30 × 30 × 30 ft) that was used almost exclusively for stunts that required rigs and other props. The second and third volumes had about 100 cameras each.
Since we were shooting only in one stage at a time, why would we want to have three available setups? Well, it had to do with cost. Surprisingly, it was less expensive to have three stages ready to go than having one stage and having to reconfigure it several times and have the hyperexpensive cast and crew waiting.
Character Setup
Character setup and marker setup are two different things. Marker setup pertains to the locations of markers, sensors, or tags that are used to collect data. Character setup deals with the locations of joints or bones in the body of a character that will provide the final motion and deformations. This is usually done using the 3D animation software, such as Maya or 3d Studio Max. The character setup depends on the marker setup, because the data collected must be enough to calculate all the information needed by the joints. For example, if you have a knee joint in your character setup, you will have to add the necessary markers at collection time to calculate the rotations of the knee.
You don't need to determine a marker setup at this time, but you must prepare a character setup design that will later allow you to come up with a marker configuration for your character. Only a design is necessary since in a perfect world you will not actually model your character until after the motion capture session. Even if you already have a character, it shouldn't be set up for motion until the captured base position is available.
If your system can only handle one marker configuration, then your character setup will have to be designed based on this setup constraint. However, if you can design different marker setups, then you can work the opposite way, which is much better. With an optical system, you can define where you put the markers and you can use combinations that will allow you to determine the motion of any location on the subject that you may want.
World Axis
It is important to maintain a common world axis throughout the project, especially if you are capturing data from several characters that must interact in some way. Always use the same orientation and position of the world axis as in your target animation software or game engine. Looking at the front viewport in most off-the-shelf animation programs, the positive Y-axis is oriented toward the top of the screen, and the positive X-axis is directed toward the right side of the screen. The positive Z-axis is sometimes facing the outside of the screen; other times, it points toward the inside of the screen. These two variations represent right-handed and left-handed space, respectively.
If your software uses right-handed space, you would want your talent looking toward the positive Z-axis as you collect the base position (a file in which the talent is standing in a pose similar to the 3D character's neutral pose). For left-handed space, the performer should be oriented toward the negative Z-axis.
Some off-the-shelf animation programs use left-handed or right-handed space with variations in world axis orientation. A good example is Maya, in which you can specify either X, Y, or Z as the up axis.
Try to assume you will place the axis at the origin and use it as the root of your character's setup. If necessary, you can add a translation offset in case you need to place the character elsewhere in a set.
Measurement Units
You can add a scale offset to the world axis in order to size the character proportionally with other elements in your project, but proper planning calls for uniform units across the project. It is best to base digital models on real-world units, especially when using captured motion data. Make sure to specify the measurement units you'd like your data to conform to and use those units when modeling characters, sets, props, and any other elements in your shots, especially if they will interact with the digital character. For example, if the character has to avoid certain digital obstacles, you could conceivably mark the position of the obstacles in the capture area. This is not guaranteed to work exactly as planned because you still have to deal with character versus data proportions, but it will definitely be close.
Obviously, having the right units doesn't mean that your captured data will match perfectly for a specific character. You may have to manipulate it before and after applying it to the character, but at least you will have a common starting point for your whole project.
Main Camera Angle and Framing
Unless your data is to be used for a nonlinear application, chances are you will have a camera angle that will be used for the final rendering of the shot. This is important for two reasons. First, when you capture the performance, you always want to have a taped reference. This applies to both linear and nonlinear projects. If the project is linear, it is always best to have at least one camera placed with the angle and framing of the final camera to be used. Of course, this rule probably won't apply if the camera of the final shot is moving, but the camera should be at least placed in the general direction. The taped reference will be used in some cases to decide between takes, or as a placeholder for editing purposes, and definitely as reference when applying the data to the final character.
Second, the performer needs to know where the camera is. When acting, you perform to the camera, which is where the audience is. If you don't know where the audience is, you cannot establish contact with it through body language, and the performance becomes flat. If it isn't possible to place the video camera in the general direction of the final camera, you need to let the performer know where that final position is.
The camera position should not be confused with the world axis of the motion. Camera placement can change from shot to shot, but all shots have to maintain a common world axis. Thus, when you capture a base position that will be used for character setup, it must always face your preferred front axis (see Figure 3.1).
 |
| Figure 3.1 World axis versus camera placement. |
All Interactions Explained with a High Level of Detail
Anything that the character touches or reacts to has to be accounted for in advance in order to decide if it is possible or feasible to use motion capture on that particular shot. Some shots will require more human involvement than others at the time of applying data to a character; that time is usually based on the number of interactions.
Let's imagine we are capturing a baseball batter waiting for a pitch. The first capture is the batter walking with the bat in one hand. In this case, the only interaction is the bat in one hand and the floor, but the floor is flat, so we don't worry about it. We put markers on the batter, including his hand, and two markers on the bat (except for the base, because we know it is in his hand). This type of object is called a constant interactor, because it remains for the length of the shot. These kinds of interactions are solved mostly by character setup only and can be occasionally simplified by using fewer markers during the capture session. Applying this data to a character is not plug and play, but it is fairly uninvolved, assuming the size of the character is proportional to the size of the performer.
The second capture is the batter putting the bat under his arm as he rubs powder in his hands. This situation is more difficult because there are two interactions to worry about: the bat under the arm and the two hands. In addition, none of them is constant, since the bat is first in the hand, then under the arm, and the hands are first apart and then together. These are called variable interactors, and we cannot use shared markers with them. For example, we cannot use the hand marker to capture the position of the bat anymore because the bat is not in the hand for the length of the shot. Therefore, we end up using three markers on the bat. At the time of applying the data, the bat most likely will not end up under the arm of the batter, so we'll need to either animate the motion by hand or add a parent joint to the bat that we can use to add variation to the original motion. We never want to modify the captured motion data directly. We'd also use markers on each hand. At the time of application, if the hands don't end up together due to size problems, we'll have to discard the elbow data and use the wrist positional data as a constraint for inverse kinematics goals.
The third capture is the following scenario: As the batter waits, he hits his shoe twice with the bat, holding it with both hands. Then he holds it with the left hand and passes it to the right one, starting to swing it into the ready position. He finally swings, hitting the ball. He drops the bat as he starts running. If we don't care about the bat after it leaves his hand, the interactors are as follows:
1. The bat in both hands
2. The bat in both hands and the shoe
3. The bat in both hands
4. The bat in both hands and the shoe
5. The bat in both hands
6. The bat in the left hand
7. The bat in both hands
8. The bat in the right hand
9. The bat in both hands
10. The bat in both hands and the back of his neck
11. The bat in both hands
12. The bat in both hands and the ball
13. The bat in both hands
14. The bat in one hand
You may think I'm being repetitive, but there really are 14 variable interactors in this shot, without counting the floor. Initially the batter has the bat in both hands, then he hits his shoe, then the bat is again in both hands, and then it hits his shoe again. It is back in both hands before it goes to the left hand, and as it goes to the right hand, it passes in between both hands again. Then it goes to both hands. Later it touches the back of the neck. As he swings, the bat is in both hands, then it hits the ball, and then it is in both hands again. As the bat is tossed, it leaves one hand first and then the other one.
Interactions need to be listed in this manner: cataloged as either constant or variable, and, if variable, in order of occurrence. You need to be very thorough in determining that all the interactions are listed, including the ones that are in-betweens. If you do this, it will be easy to estimate the operator time that will be used, and no money will be lost by miscalculating the actual cost of a difficult shot. It is even possible to come up with a cost-and-time formula based on the number of constant and variable interactors combined with the shot length.
All Props, with Size and Location
If your character must interact with any props, you have to specify the prop's exact size and position, based on the units and world axis provided. This is an area in which common sense needs to be used because there are many factors at play. Assuming you have a well-organized project in which all units are the same and in which the character's proportions match closely the ones of the performer, the correct placement of these items should result in a very close resemblance of reality once you translate the action into the digital realm.
When using a real-time capture device such as an electromagnetic tracker, you can usually place the digital prop along with the digital character for real-time feedback. The performer can interact with it by watching a screen. This technique avoids the need for creating a live version of the object for the performer to interact with.
In the case of non-real-time capture devices, such as most optical systems, there is no way of looking at the digital prop at the time of the performance. Therefore, a live stand-in object must be placed in the stage area that will represent the digital prop. This object could be anything from a replica of the digital prop to a painted area that represents where the object is located.
Depending on the complexity of the interaction, you must decide what level of detail is needed for representing the object. If the prop is a column that the performer needs to avoid without touching, perhaps a painted profile on the floor will be enough. Maybe a few ropes or thin pipes from the floor to the ceiling indicating the corners of the column are needed, depending on how close the interaction will be. Keep in mind that these objects could hinder the actual collection process by occluding markers or introducing interference.
Rigs
Some motions cannot be achieved by the performer alone, so special contraptions need to be created to help. These are not really props, because they will not form part of the digital scene. For example, a wire rig for flying requires the performer to wear a type of harness that will affect the marker configuration. Some rigs can even interfere with the data collection, so it is very important to be aware of this as you evaluate the project. If any of the shots to be evaluated require a special rig, you must figure out what that will be as you create the motion capture blueprint.
File-Naming Convention
When you're dealing with lots of motion files, you can't afford to be disorganized. Each shot that you capture requires a predetermined name and number that will give you exact information as to what character the file belongs to, what setup was used, the calibration file to be used when tracking, what base position the file is compatible with, and other specific items defined by the grouping that you will come up with afterward.
Since this is a preliminary evaluation stage and you probably still don't know most of the information, you can start designing the file names using the character or characters' names, a sequence number, and a description of the motion. The name will grow as you find out more information, and at the time of collecting the data, the full name will be listed here and used for saving the file.
If the data is for a client, you must find out their naming convention because you will have to establish a cross-reference table to be synchronized with them. Also, one shot in a production could represent more than one shot in the motion capture list, and vice versa; that relationship will have to be kept organized as well. Finally, if file name length is limited, a detailed index must be kept to correlate file names to their contents.
Dialogue
When capturing a facial performance, it is obvious that the entire dialogue is needed beforehand, but the dialogue also has importance when collecting full body data. In real life, body language enhances communication when one speaks. Thus, if a shot has dialogue, it is important to consider it when collecting full body data because it affects timing and performance.
The nuances that you are able to capture are so realistic that if you omit a simple item like this, the final performance will not look believable. The eye is so well trained for the real thing that a little deviation will nullify the whole effect.
Shots to Be Blended
When capturing data for a nonlinear project, each shot will most likely have to blend with many others. For example, in a video game, a player controls what the characters do, and the game engine plays back the motion corresponding to the player's action in almost real time, blending it with the preceding motion. If these two motions don't fuse well, the game loses fluidity.
A list of shots to be blended and a flow chart should already be included in a good game design, and this material should be transferred to the blueprint, making sure to specify if it should match from the head or tail. Whether a shot is a cycle or a loop must also be specified, because the shot's head must blend with the tail. The start and end positions must be specified in these kinds of shots, preferably by drawings or photos.
A shot in a linear project doesn't usually have to blend with any other motion, but there are special cases. If the motion has to occur in a volume greater than the one available for collection, it is possible to break the motion into two and blend it together later. On the other hand, if a production storyboard lists two or more shots that represent the same motion from different camera angles, they should be performed and captured in one step, splitting it later into different shots.
Number of Files
To be used later, this is the number of files in which this shot will be divided. It could be more than one file if there are multiple characters to be captured separately or if a particular motion needs to be collected in two or more passes.
Sampling Rate
Sampling rate is also referred to as frames per second. There are two kinds of sampling rates that you need to worry about: the capture sampling rate and the delivery sampling rate. Capture sampling rate is the frequency at which you collect the data, and delivery sampling rate is the frequency at which you apply the data to a character. At least the delivery sampling rate should be included in the blueprint. The capture sampling rate is possibly not known yet, but it will become important later.
If the project will be rendered at NTSC video resolution, the delivery sampling rate will probably be 30 frames per second. For film, it is likely 24 frames per second. The sampling rate for video games is defined by the engine capabilities and should be included in the game design. You may need the final data delivered at a higher sampling rate than the final medium requires in order to do certain operations, such as motion blur, field rendering, or time distortion effects. This data should be delivered at a rate divisible by the final product's rate. That is, if film is the final medium, the delivery sampling rate could be 24, 48, or any similar number divisible by 24, because it is easy to down-sample data when the divisor is an integer number. Converting film to NTSC video or vice versa always presents a problem because every 24 frames of film correspond to 30 frames of video. Add to that the fact that NTSC frame rate is really not 30 but 29.97. High definition can be broadcast in any of various different frame rates, some nice round numbers and some not. This is why having the motion capture system synchronized to time code is a must for most film or television projects.
Configuration Name
This field is for future use and will list the name of the marker configuration to be used. In large projects, it is common to have several different configurations, each of which will include a marker setup map and a base position file. You must keep track of what configuration matches each shot because you will need the information later in the process, especially during character setup and data application.
Calibration Name
When you collect data that will be tracked as a postprocess, such as with an optical system, you must take note of what calibration name pertains to each shot. At the time of data analysis, the operator will have to associate the calibration with the actual shot raw data file in order for the software to start tracking.
The calibration of an optical system is kept in a file and is used by the software to calculate the exact position of each camera in space. Without this information, it is impossible to calculate anything else's position in space. Several times during a daily session, a calibration file must be recorded by capturing data from a known object, such as a large cube with markers.
For systems in which the data is tracked in real time, it isn't necessary to save the calibration information because once the motion data is tracked, the calibration parameters are no longer needed for a particular shot. The exception in this case is when the real-time data is not captured at full quality and may need to be processed further.
This field will be left blank at this stage, as it will only be used at the time of data collection.
Talent Used
It is important to always use the same performer when you capture data for a character within a particular project. Otherwise, it would be like switching actors in the middle of a film. Later in the process, you will have a casting session, where you will determine the name or names to put in this field.
Special Instructions
Based on the number of interactors, camera framing, props, and other special considerations, here you will write notes that pertain to the collection, character setup, and data application. You don't need to—and cannot—write all your notes at this point, but you will use this field throughout the project.
Among other things, this field's objective is to pass on pertinent information to the next levels of the project. For example, if you have a motion file in which, for session economy, you collected data for markers that are not supposed to be used in that particular shot, the technical director in charge of applying the data must be informed. Another scenario would be to pass specific instructions to the data collection and analysis team to follow at collection or tracking time.
It sounds like a lot of work, and realistically, you probably will not have all the information available in advance, but knowing the items that could be an issue later is important in order to finish a project on time and budget. If the project is large enough, it will make sense to prepare a user interface with a database to handle all the data. Figure 3.2 shows an example of a motion capture blueprint.
 |
| Figure 3.2 Sample motion capture blueprint. |
Catalog Your Shots
Once your motion capture blueprints are complete and you are sure that you have all the pertinent information about each shot, it is time to organize them in different categories. You can forget about the chronology of the shots, because you have already assigned shot and file names to each of them, so everything should come together nicely when you are done.
The object in this step is to group the shots into categories based on motion capture parameters that will allow you to organize your session, postprocessing, and data application, and to reject shots that don't meet your requirements. This is the final bridge to cross; any shot that survives will be captured.
First, you have to come up with categories based on the differences of the particular shots in your project. I cannot tell you exactly what categories these will be, but I can show you the general areas that are significant in order to help you come up with them. Second, you need to be able to sort your data based on these new categories. If you use a spreadsheet or a database program, you should be able to do this without a problem.
The listing of significant areas that follows is not in any particular order, as each project has different variables and priorities.
Volume
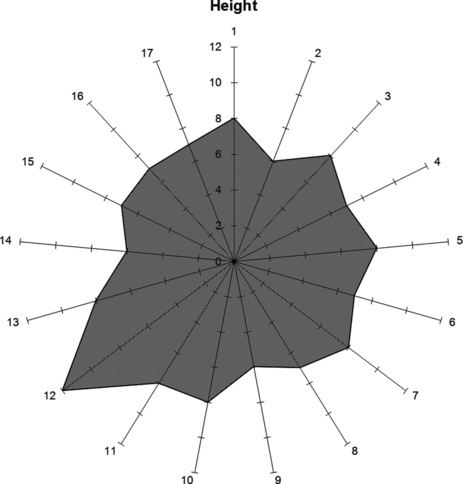
With any software you use it should be easy to produce charts that will visually help you identify the shots that either fall outside of the maximum volume or have deviations that would cause them to become special cases of stage configuration. Let's look at the group of shots shown in Table 3.2. For simplicity's sake, Table 3.2 has only 17 shots, but the example can be applied to any project size. In addition, we will assume that the system in question can handle a maximum volume of 2000 cubic feet. You can reject shots that fall outside the range of capture of your particular system by charting the total volume per shot. The bar chart in Figure 3.3 shows that shot 9 surpasses the maximum volume; therefore, it must be discarded from the list.
| Shot | Width ft | Length ft | Height ft |
|---|---|---|---|
| 1 | 12 | 8 | 8 |
| 2 | 4 | 5 | 7 |
| 3 | 7 | 11 | 9 |
| 4 | 7 | 7 | 7 |
| 5 | 9 | 11 | 9 |
| 6 | 12 | 21 | 7 |
| 7 | 15 | 4 | 8 |
| 8 | 20 | 17 | 7 |
| 9 | 18 | 12 | 7 |
| 10 | 12 | 12 | 8 |
| 11 | 5 | 3 | 9 |
| 12 | 3 | 4 | 12 |
| 13 | 13 | 12 | 9 |
| 14 | 8 | 12 | 7 |
| 15 | 6 | 12 | 7 |
| 16 | 4 | 6 | 7 |
| 17 | 9 | 6 | 7 |
 |
| Figure 3.3 Volume chart. |
For optical systems, with which the capture volume can be reconfigured, you can divide the remaining shots into volume groups. If all shots fall into a narrow volume range, this may not be necessary. Depending on the spread between the minimum and maximum area, you may have to divide your shots into two or three basic groups, adding special groups to encompass special cases such as corridors or tall setups.
A project with 500-plus shots could easily end up with three rectangular volume groups, plus several special groups. An easy way to see if you have any special cases that require additional configurations is to plot the width/length ratio and the height per shot. The chart in Figure 3.4 shows the proportions of the floor area of the stage. The perimeter values represent the shots, and the aligned numbers represent the ratio between width and length. The higher the value, the less square the stage needs to be. This value is given by the following code:
if (width/length < 1) {
ratio = length / width;
else
ratio = width / length;
}
 |
| Figure 3.4 Width/length ratio chart. |
Out of 17 shots, notice how 16 fall within the 1:2 ratio value. Shot 7, however, is noticeably different from the rest and will have to be cataloged as a special case, requiring its own stage configuration.
Figure 3.5 shows a similar scenario based on the height requirements of each shot. In this case, 16 shots fall within the 6–8 ft range, whereas shot 12 requires 12 ft. It is possible that this shot will require another special configuration.
 |
| Figure 3.5 Height chart. |
Characters
A listing of all shots by character is always a good idea, especially for talent scheduling and rehearsing purposes. When scheduling your capture session, it may also help to calculate a certain performer's cost, or to calculate the character's total screen time.
Three very important categories that pertain to characters are multiple, split shot, and split multiple. A split shot is the type of shot in which more than one character is present, but which can be split into two different subshots in order to collect the data of each character individually. When this is done, a postfix needs to be added to the shot name to represent the fact that it is divided. A shot with multiple characters can only be split in this manner if there are minimal or no interactions between characters. If there are minimal interactions, the timing between the performances might need to match perfectly, a match that will only be achieved by extensive rehearsing and maybe multiple data captures. Never assume that you can modify the timing of a performance after the fact.
Multiple refers to a shot in which more than one character's motion has to be collected simultaneously. There are shots in which characters interact with each other in ways that would make it impossible to split the shot into several parts. Think about it in terms of video. If you could shoot each character separately performing this action and then merge them, being able to reconstruct the action perfectly, then you should split the shot; otherwise, it falls into the multiple category. If you have an electromagnetic or an electromechanical system that can only handle one performer at a time and you don't have access to a second setup, you must now reject all the shots that fall into this category. With an optical system you have a lot more leeway, since you can add markers to more subjects; however, depending on the interaction, you will have to design creative ways of positioning markers so that they don't get occluded for lengthy periods of time. Most state-of-the-art optical systems should be able to handle various performers and props at a time.
Split-multiple shots are performed by multiple performers, not all of whom have markers. This is a good idea when timing is a consideration, and it helps the talent achieve a certain movement. This is done all the time, especially during sports games projects. A good example is capturing the motions of a soccer goalkeeper, because there has to be somebody shooting the ball. For a martial arts game, a martial artist performed certain moves, such as air kicks and flying turns, with the help of another artist without markers, who also served as the target of punches and kicks. We later captured the action of receiving these punches and kicks, again with both martial artists on the stage but with only the receiver wearing the markers.
Interactions, Props, and Rigs
You must have a category for each type of shot based on interactions. For example, all shots in which there are variable interactions involving one arm should be grouped together, as should all the shots that have constant interactions with a certain prop. You need to define what is the maximum number of interactions that you will have to handle manually and decide if it is worthwhile or even possible to capture that performance.
For example, suppose you have a shot in which a character has variable interactions with both his arms and legs. It is likely that you will have to eliminate the captured data on all those limbs and animate them manually. You still have the body left. It may be worthwhile for you to capture the data just to have the body motions, but if the arm and leg interactions will affect the body in any way, such as in timing, it is best to reject that particular shot. In most cases, the legs' motion affects the body motions, unless the character is swimming or sitting without his feet touching the ground.
Another example would be the baseball player mentioned previously, who moves the bat back and forth between his hands several times. This kind of shot should be captured, as the bat interactions do not affect the body data in any way. It will require human involvement to finalize this shot, but you can still retain a good amount of the data without modification.
Constant interaction with a prop can also be tricky. Suppose a character is climbing a rock of ambiguous shape. Unless you have a replica of the actual rock on stage and your character is proportionally equal to your talent, you are most likely looking at problems. You will have to turn off the legs' data and perhaps change the body's timing, and that makes that shot a reject.
Props and rigs can also be problematic without interactions if they prevent the collection device from capturing the data. This includes anything that would introduce noise or occlude cameras in a way that would make it impossible to collect the data. In any case, all props and rigs that interact, occlude, or even exist in a shot must be in a separate category.
Blending
Two categories need to be created based on blending, namely, head and tail blending. A particular shot could belong to either of these categories or both. This list will be used to make sure during the capture session that the shots have similar starting and/or ending points, keeping in mind that as the sampling resolution of a shot increases, blending will be more difficult and will require extra work after character application.
Character Setup
This category is particularly important, as it will be key to designing the marker setup. You may have one particular setup for each character or even a few different ones per character. If you will do facial and body captures for a particular character, you need two separate setups. You must define one category per character setup. This will most likely yield a similar number of marker setups, but it may also result in more or less, so it has to be independent.
Imagine you have already designed one particular character setup in Softimage that is used in all your character's shots, but one shot calls for the character to sit on a couch. If an optical system is used, the couch will obviously occlude all the markers placed on the back of the performer, so they need to be moved to the front. The marker setup for this shot will be different, but in the end, the same character setup can be used in Softimage if the motion capture data analysis and conversion was done correctly. This book includes a practical example of this particular case.
If you have any kind of control over the placement of the markers, I advise continuing only if the character setup design is ready, because then the marker setup will be dependent on the character setup and not vice versa. Try to use this benefit to your advantage.
Priority
Some shots have a priority for reasons not related to the motion capture technical process. Most of the time these priorities concern delivery restrictions. In the past, my clients have divided shots into different delivery categories with different due dates. This would dictate the order of postprocessing that we'd follow.
Depending on the size of the project, you may have many categories to consider. Use a database or spreadsheet program to help. It will help you get organized and you will save money in the process. Make sure you have candidate tables sorted by every one of these categories. Doing so will help you come up with your final motion capture schedule. Also, make a single list with all the categories you defined. Table 3.3 shows the same candidate table as in Table 3.1, but with categories added.
You are now finished with the evaluation process, and much of the work you've done will prove very valuable at the collection and character-mapping stages. I'm sure you've also managed to reject some shots that you didn't consider as problematic to begin with. You should have rejected all shots that didn't meet the system's maximum capture volume, shots that had more characters than is possible to collect per shot and that were not feasible for splitting, shots with many interactions that affect limbs and body, and other shots that would have required too much human manipulation later. Now you can start planning your motion capture session.
Preparing for the Session
You have successfully prepared a list of shots that will be performed at the motion capture stage and are getting ready to schedule your session. Whether you have an in-house system or are hiring a service provider, some preparations are still needed. You need to find a good performer, organize all your props and rigs, order all your shots as efficiently as possible and, if necessary, come up with marker configurations that will fit your character's setup.
Using an External Motion Capture Service Provider
There are several service companies in the field of data collection. Some specialize in the entertainment business and others in areas such as sports analysis, forensic science, or biomechanics. Obviously, you would prefer to deal with a studio that has some experience in the field that will correspond to your project, whether it is a video game or a film effect shot. Also, you want them to have the kind of system that you think is best suited for your application, plus a capture volume greater than or equal to your maximum required volume. You would like them to be as close as possible to these criteria. In Appendix B, I have listed the primary service providers, the type of equipment they use, their specialty, the value-added services offered, and their supported animation and motion capture data formats. Most studios will provide you with sample data in the format you need. Some will even capture a free test if your project is large enough.
Find out if the studio can provide the data already mapped to your character model using your preferred software package, and if so, figure out to what level. Simply applying data to a character is very different from applying data plus solving all interactions and size problems. Applying data takes just a second once the character setup is in place, but all the extra tweaking that will be needed can take a long time. Make sure they have the qualified technical directors required to do this job. If you decide to have the service bureau do this work for you, you will need to provide them with all your models and character rigs, including props.
A state-of-the-art motion capture studio should have the ability to deliver time code along with your motion data, all synchronized with any reference video and movie files.
Depending on who your talent is, you may want to choose a studio that can provide services such as catering, green room, and other on-set amenities. If this is not important, you shouldn't have to pay for it, but you may want the studio to help with casting. Most studios have a good list of performers who are familiar with motion capture. Also, some studios will provide props and different kinds of rigs that you may need, such as a boxing ring, harnesses, and weapon props. Some even have the capability to build set pieces for you.
If your intention is to record audio during the shoot, the service bureau will be required to either have a sound proof stage, or be able to relocate their equipment to one. Most studios don't have soundstages but are able to bring their equipment anywhere you may want to shoot as long as it is a proper environment for their equipment, and, of course, at an extra cost.
When you negotiate a price with the service bureau, make sure you show them as much information as possible to avoid misunderstandings. Have them sign a nondisclosure agreement if necessary, but make sure they know what they're talking about when giving you a quote, especially if it is only an estimate. It is very common for a client to call a motion capture studio and say, “Give me a ballpark figure for 200 moves for a 3D shooter.” Based on their experience with these kinds of game projects, the studio may give you an estimate that could be close but could also be totally off. After doing dozens of these types of games, I've learned that there's nothing standard about doing game character's motions. They no longer involve just walk and shoot cycles, but very complex movements that designers introduce to make their games different from the rest. Sports games are no exception, and some get extremely complicated.
If your capture project is for a linear animation, you will probably require more services from the studio because these types of projects tend to have more time, and revisions are very usual. In addition to your main studio session, try to allow your budget to cover an extra maintenance date, because you will probably have to modify your animation. It is always better to collect the performance again than to modify captured motion data.
When the data collected is to be used on a nonlinear project with a long development schedule, it is wise to break the capture schedule into two separate sessions. That way, you can correct errors from the first session that will become known only after data was applied to the character models.
Different service bureaus have different billing practices. Some studios charge for the day and the price includes studio and data. Others charge a bulk rate per project; still others charge a fee for stage time plus postprocess operator hours, but give you an estimate before the session. I prefer the method of charging an hourly fee for the stage, plus a fixed rate by the finished second of data. As a client, you thus know exactly what you will pay, and it is fair to the studio because they will set the fee per second based on the type and complexity of the project. Paying a bulk rate is also fine, but because it can be risky for the studio, it usually is higher than other billing plans. The daily charge is usually reserved for real-time systems, where you can walk out with your data when the session is over.
The worst type of billing, in my opinion, is by operator postprocess hour. Even if you get an estimate at the beginning, it doesn't mean the studio is obligated to charge that amount, and, believe me, it will almost never be less than the estimate. Try to avoid this system at all cost if you don't want to be horrified at invoice time. This type of billing puts you at the mercy of the studio, and, even assuming that everybody is honest in this world, you want to know in advance what you will be paying for a service. In addition, the studio may give you a low estimate to ensure you will come there for business.
You don't want to do business with a motion capture service bureau that doesn't deliver the quality of data you expect. A demo session is always recommended, but if you couldn't arrange for one, you should, at a minimum, arrange for the studio to provide you with sample data files in the format(s) that you will be using for your project. Unless your final animation solution is proprietary, the service bureau should be responsible for delivering data compatible with your off-the-shelf animation software. When you inspect the data, make sure it has no imperfections, such as sudden pops and snaps, and that it isn't noisy, but fluid and realistic. Remember, if this is a sample file that the service bureau is distributing to clients, it probably represents the best quality that the studio has ever achieved, not necessarily its average quality, which is why a custom test is always better.
The inspection of the data should first be carried out visually, using a simple object such as a stick figure or just a skeleton within your animation program, making sure when you set it up that the data is not being scaled or modified in any way. You should also look at the data itself with the aid of a curve visualization tool, such as the one included with any off-the-shelf animation program. In rotational data files, look for sudden multiple of 90° jumps in rotation angles for any axis. You may think a 360° jump from one frame to the next will not cause any problems because the axis's orientation remains the same, but when you start tweaking the data—especially if you want to blend between motions or reduce the number of keyframes—you will find that it does cause major problems. It also causes problems when assigning vertices to joints for deformations. Some of these jumps are due to a problem called parametric singularity, commonly known as gimbal lock, in which a rotational degree of freedom is lost due to the alignment of the axes. Other jumps are caused simply by the tracking software as it converts transformation matrices to Euler angles (x, y, z). Any motion capture service bureau should be able to deliver data without these kinds of defects. Finally, make sure there is a keyframe in every frame. If the data has many gaps of data without keyframes, it is likely that it has been heavily massaged to achieve the final result.
Another important item to consider when capturing data that requires postprocessing is capacity. Whether or not the studio is able to deliver the data you need in a reasonable time frame has to do with the number of data analysts it employs and the number of other jobs that will be processed during the same period. If this becomes a problem, try to work out a schedule whereby you will receive partial deliveries. Also, arrange to receive your data in all its stages: from the global translation file to the hierarchical rotations file to the file compatible with your animation software. You never know when you will need these files, and it probably doesn't cost the studio any extra money to provide them to you.
Before closing a deal with the service bureau, make sure to reserve the dates needed, and put the agreement on paper. Also, find out about liability insurance. If the studio is not covered for any accidents that may occur at the stage, you will have to arrange coverage for your session.
In summary, these are some of the items you should require from a motion capture service bureau:
– Experience in your particular field
– Desired motion capture equipment
– A capture volume as large as your needs require
– Motion data without noise and other defects such as gimbal locks and continuity of keyframes
– Support for your animation format
– Ability to deliver data synchronized with video and audio in both tape and digital movie files
– Ability to apply data to characters, including interactions and other improvements
– Other value-added services
– Enough capacity to fit your deadline
– Insurance
Props and Rigs
If your session requires any special prop, now is the time to put it together. When a certain item has a digital counterpart, it can be critical that both match perfectly. In other cases, only a small representation of the actual prop is needed. You should follow the guidelines concerning units of measurement that I discussed previously.
It is always a good idea to capture data from props. In an optical stage, this should always be done no matter what. If an item is to remain stationary during the capture session, there is no need to collect its data at the same time as the actual performance; the more markers there are, the more postprocessing is needed for a shot. A single capture of only the stationary props can be layered with the performance after the fact. You can do this before the actual session in order to make sure everything will match afterward. Having this data will help the digital artists in charge of the scene layout to know exactly where everything is on the stage. All moving props, such as guns, swords, and footballs, should be captured during the performance, but prepared in advance.
Some rigs are simple, such as a rope and a harness, but others are very complex mechanical contraptions that can interfere with a motion capture session either by introducing unwanted interference or by occluding reflecting markers. Make sure this won't happen by testing the rig at the stage. Familiarize yourself with it before designing the marker setup, as you may have to place markers on the rig as opposed to the performer.
Talent
Performance animation is so named because the animation emanates from a performance, but the importance of the actual performance is often underestimated. If one has to produce a filmed project, you usually search for good acting talent. Likewise, if one puts together an animated cartoon, you'd want to have trained animators working on the characters. For some reason, when the two are combined, people just don't believe such experience is needed. This may be true if you are dealing with a video game that will play back at four frames per second, but for any other kind of performance animation project, talent is as important as any other artistic source, whether it is acting, animating, painting, singing, or sculpting.
This train of thought started because a few years ago, the final animation of a character created by performance animation was very different from the actual performance. Today this still happens in some cases, but we already have the tools to create exact replicas of the realistic motion, which makes the performer all the more important.
Take your time finding the right talent for your project. Do not simply decide to use your lead programmer just because you want to get some bang for your payroll buck, or your level designer because he had some martial arts training when he was a child. Performance is the source of the art in performance animation, and as such, it should not be the place to cut corners.
Match the right project with the right type of performer. If your project is a football video game, use football players; for a fighting game, use martial artists. If you have to collect the performance of a particular celebrity, try to use that celebrity. Stunt people are very good if you are doing rough motions, but you shouldn't use them as they do in film, only for dangerous shots. For each character, you must use the same performer throughout the project to avoid multiple character setups.
It is always best to modify the character model to approximate the proportions of the performer, but many times this is not possible, so you must try to find talent that matches as close as possible. Take all measurements from the people you are considering and compare their proportions to the model's. It will save time later in the process.
The best way to find talent is to prepare a test audition, where you will have a few applicants perform certain motions that will best represent the content of the project, perhaps involving the required props and rigging. Make a short list of the best ones and, if possible, schedule a second session in which you will capture their performance. The data by itself reveals more subtleties that are not obvious when looking at the live performance, like small idiosyncrasies particular to specific people that would not be acceptable for your digital character. Try looking at the data without knowing who the performer is, and you will probably make the best choice. If you are using a motion capture service bureau, this step may seem like overkill, but you could combine it with the test session and kill two birds with one stone. You may also think that it is a big waste of your time to put markers on each of the applicants, but the fact is that the performance will suffer if the talent doesn't feel comfortable dressed in black leotards or carrying a heavy tethered contraption, so a dress rehearsal is in order. When hiring a performer, make sure he or she will be available for follow-up sessions. Also keep in mind that one performer can play many parts if necessary.
Other issues that are important relate to insurance, union requirements, rights over the performance, and other contractual questions. I never had to deal with some of these, especially unions, because the medium was pretty new at the time, but today at least the Screen Actors Guild (SAG) has established guidelines for its members' participation in digital performances. The ownership of the captured data remains a gray area. The norm still in force today is that the owner of the data is whoever pays for the session; however, this assumption is bound to be questioned sooner rather than later, as performers acquire more practical understanding of the medium. In the near future, the use of a performance will probably be equated with the use of a person's likeness. Granted that a performance may not be as descriptive of a person as a photograph or a painting would, but when the performer's movements are widely known it could be, as is the case with world-renown celebrities such as Marcel Marceau or Michael Jackson.
A performer with motion capture experience is also very desirable. There are special issues that a performer must understand when at the motion capture stage. In any situation, the talent must look at the stage in terms of the animation space, knowing where the origin is and being able to move within the boundaries of the capture area. These restrictions are not common to other media and sometimes present difficulty to the inexperienced performer. Previous experience also helps in the capture of motions that are intended to be blended together. The performer must be good at starting and ending his or her performance in a predetermined pose.
If your talent happens to be a celebrity, spend some time explaining to him or her how things work at a motion capture shoot. The performer has to be willing to abide by the guidelines or no good data will be collected. Sometimes bringing in a director that the celebrity can trust is a lifesaving move. If the director is well educated in the motion capture process, everything should go smoothly, so invest some of your time to make sure that is the case. When working with a celebrity, you almost never get rehearsal time, but try to push for it.
Designing the Marker Positions
If you are using an optical system, chances are you can define the marker locations. You should take advantage of that, especially if you have a preliminary character setup design.
At TSi, we had a default human marker setup that basically covered all the main bone groups. Most of our clients' projects were covered by this configuration, especially the real-time video game projects. For those projects, we almost always captured more data than needed because the client usually did not have a preliminary character setup design. As far as clients are concerned, the service bureau is responsible for obtaining all the information that their particular project requires, so it is important to know as much as possible about the characters in advance. The marker configuration should be as efficient as possible for the capture session, but by the same token, it should enable you to collect all the data that your character setup will require. That is why I recommend a character setup design in advance.
A default marker setup is a great starting point because it will cover major joints, and you can add and remove from it as needed. Figure 3.6 shows a default marker setup for an optical system. As opposed to an external device that collects rotational values, such as an electromechanical suit, an optical system captures translational data for individual points. The advantage is that you can calculate internal joint rotations by grouping specific markers. The default optical marker setup should be able to capture all internal rotations of the major joints, including at least four sections of the spine (see Figure 3.7).
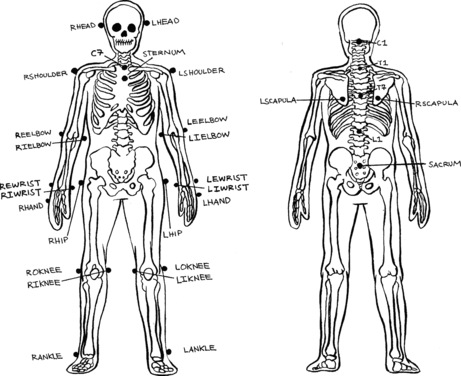 |
| Figure 3.6 Default optical marker setup. |
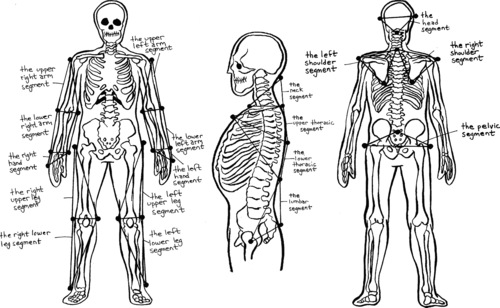 |
| Figure 3.7 Major bone groups covered by the default marker configuration. |
To collect all the needed information for each of these moving segments, you need to add enough markers to form a triangle. The markers need to be placed in locations where the skin is close to the bone, because the more tissue and fat between the marker and the bone, the more distortion of the initial triangle is induced. The size of the triangle can be unified for all frames as a postprocess, but the less modification is applied to the data, the better the result will look.
The default marker setup allows for the collection of all possible motions of the rigid segments composed of the pelvis, vertebral column (in four separate segments, including the neck), head, left and right shoulder, upper arm, lower arm, hand, upper and lower leg, and foot (in two segments). Although they share markers, I will cover each of these segments separately after describing the terminology of motion.
Terminology of Motion
There are up to six degrees of freedom, or possible movements, available in whole or in part to any given joint. In biomechanical terms, these movements are called flexion, extension, abduction, adduction, medial or internal rotation, and lateral or external rotation.
Flexion is the motion of bending between two adjacent segments that decreases the angle between them, whereas extension is the opposite or reverse bend, whereby the segments return to their initial position. Examples of flexion and extension are shown in Figure 3.8. In all the character setups that I describe, flexions and extensions are represented by the X-axis.
 |
| Figure 3.8 Examples of flexion and extension. |
The next pair of movements, abduction and adduction, pertain to the Z-axis of character setups. Abduction is the movement away from the center of the segment, such as a leg rotating toward the outside of the body; adduction is the returning motion. Figure 3.9 illustrates typical abductions and adductions.
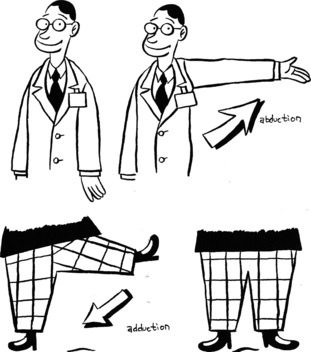 |
| Figure 3.9 Examples of abduction and adduction. |
The last group of motions are the rotations along the axis that travels through the segment (see Figure 3.10). These are normally called medial (or internal) and lateral (or external), depending on whether the rotation is taking the segment and its children closer or farther away from the body, respectively. They are also known as twists. The body and head rotations are called left and right rotations. The Y-axis represents these rotations in character setups.
 |
| Figure 3.10 Examples of rotations. |
Pelvis
If you trace a straight line from the center of the skull, passing through the center of the atlas down to the ankle joint, and you traverse it with a line going through the center of the sacrum, the intersection point will be close to the human body's center of gravity (Figure 3.11). This point is very important for any character setup, especially when using a hierarchical chain of nodes, because it will be the parent of the body-based node chain. As such, it will hold the global translational data for the body.
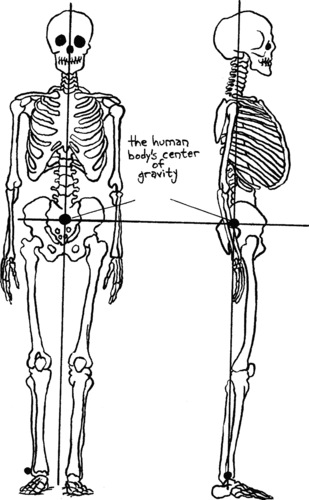 |
| Figure 3.11 Human body's center of gravity. |
Figure 3.12 shows the triangle that depicts the motion of the pelvis, which is formed by the markers LHIP, RHIP, and SACRUM. Both LHIP and RHIP are placed along the sides at the same height as the head of the femur. The SACRUM marker is located in the back around the middle of the sacrum.
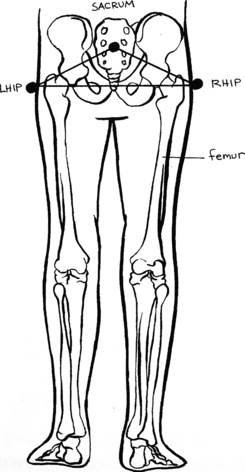 |
| Figure 3.12 The triangle that depicts the motion of the pelvis. |
Vertebral Column
The human vertebral column is formed by 24 vertebrae that comprise its three divisions: lumbar spine, thoracic spine, and cervical spine. The lumbar spine is the lowest segment, consisting of vertebrae L1 through L5, which are similar in shape and motion characteristics (Figure 3.13). Left or right rotation is not easy for the lumbar spine vertebrae, but all other movements are common. The whole lumbar segment can be labeled as one rigid motion segment defined by markers LHIP, SACRUM, and L1. The L1 marker, as its name indicates, should be placed in the back of the L1 vertebra. Other combinations of markers can be used, but the one I describe here will work fine.
 |
| Figure 3.13 Lumbar spine. |
The thoracic spine contains 12 vertebrae, T1 through T12. I divide this part of the column into two motion segments called the lower thorax and the upper thorax, based on their motion characteristics (see Figure 3.14). The vertebrae in the lower thorax (T8-T12) have much more mobility than the ones in the upper thorax (T1-T7), because the latter have the first seven ribs attached to them. These ribs are called true ribs and are connected directly to the sternum, which constrains their motion. The next three ribs are called false ribs and are attached to the front part of rib 7 instead of to the sternum. The last two ribs are called floating ribs and are not attached to the anterior or front side at all. Even though the thoracic spine could be divided into three motion groups based on its motion characteristics, I will only divide it into two segments. This division is based on the fact that only two vertebrae compose the smallest segment, so the lower thoracic segment will be formed by the vertebrae that hold the false and floating ribs.
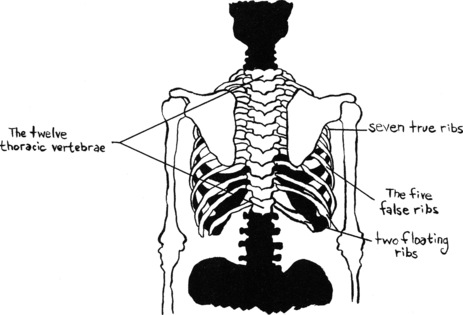 |
| Figure 3.14 Thoracic spine. |
The lower thoracic segment is calculated by the combination of markers L1, STERNUM, and T7; the upper thorax is determined by T7, STERNUM, and T1. The STERNUM marker should be placed at the bottom of the sternum, whereas T7 and L1 should be located behind their respective vertebrae.
The final segment pertaining to the vertebral column is the neck (Figure 3.15). It is formed by vertebrae C1 through C7, which have increased mobility over the lumbar and thoracic vertebrae, and will be represented by markers T1, C1, and C7. Marker C7 should be placed on the anterior side, at the height of the manubrium. C1 should be located at the bottom of the occipital. Figure 3.16 shows the entire vertebral column and its four motion segments.
 |
| Figure 3.15 The neck. |
 |
| Figure 3.16 The vertebral column and its four motion segments. |
Head
The motion of the skull is easy to collect because it is rigid and has almost no tissue. I use markers C1, RHEAD, and LHEAD. The two latter markers can be placed on a cap and, if preferred, can be located in front and back instead of side by side. Figure 3.17 shows the triangle that represents head motion.
 |
| Figure 3.17 The head motion triangle. |
Shoulder
The shoulder is one of the most difficult segments to capture accurately. It is formed by a combination of three joints: the glenohumeral joint between the humerus and the scapula, the acromioclavicular joint between the distal clavicle and the acromion, and the sternoclavicular joint between the medial clavicle and the manubrium (see Figure 3.18).
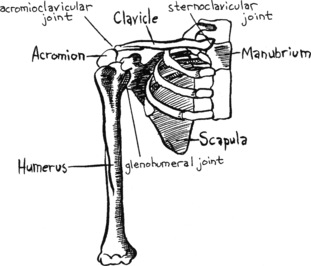 |
| Figure 3.18 The shoulder complex. |
The sternoclavicular and acromioclavicular joints are driven by the motion of the scapula, which adds range to the movements that the shoulder can do, along with the glenohumeral joint. The shoulder motions can be captured using the C7 marker along with the LSHOULDER and LSCAPULA or RSHOULDER and RSCAPULA markers, depending on the side. Each SHOULDER marker should be placed just above its respective acromion, trying to keep it unaffected by the glenohumeral joint's motion. Each SCAPULA marker should be positioned on the posterior side at the bottom of its respective scapula. Unfortunately, scapular motion is very difficult to collect because the scapula slides under the skin, so if this motion is really needed a procedural method based on biomechanical rules is required. Most motion capture software packages that are used in entertainment-related applications ignore the true mechanics of the shoulder complex. That works in many cases, but sometimes it results in nonrealistic shoulder motions. Figure 3.19 depicts the triangles that represent the shoulder segments.
 |
| Figure 3.19 The triangles representing the shoulder segments. |
Upper Arm
The humerus is the bone that supports the upper arm. It starts at the glenohumeral joint and has the capability of flexion, extension, abduction, adduction, and lateral and medial rotations. You need a triangle to define the motion of this important segment (see Figure 3.20). The first vertex is represented by the already known SHOULDER marker, while the other two are represented by IELBOW and EELBOW. These two markers should be placed at the elbow, over the medial and lateral epicondyle, respectively. The IELBOW marker in some cases may be occluded from the cameras. In such a case, it would be acceptable to place an additional marker somewhere else on the upper arm—perhaps along the lateral humerus, where muscle action is not too apparent, unlike over the biceps or triceps.
 |
| Figure 3.20 The upper arm segment. |
Lower Arm
The forearm is formed by the radius and ulna, and is linked to the humerus by the elbow joint, which is restricted to flexion and extension. It is easy to confuse the motion characteristics of this joint because as we see the rotation of the hand, we think we are rotating the elbow, or even the shoulder, but in reality we are crossing the radius over the ulna. This motion is called pronation, whereas the reverse motion in which the radius and ulna return to their parallel location is called supination (Figure 3.21).
 |
| Figure 3.21 Pronation and supination. |
Understanding the arm mechanics is key to the realistic setup of a humanoid character. Most marker setups that I've seen in the past do not take into account all of the arm's underlying structure, and they create data that assumes the whole arm to be formed by two segments that share lateral and medial rotations, while the wrist has its own. When the final character is set up for deformation, therefore, one usually sees horrible abnormalities along the shoulder and wrist areas that need to be dealt with.
The forearm's motion will not be represented by a triangle, because at least four points are needed to catalog its complexity. The lower arm quadrangle is defined by IELBOW, EELBOW, IWRIST, and EWRIST (see Figure 3.22). The IWRIST marker should be placed at the bottom of the ulna, and the EWRIST marker should be located at the bottom of the radius. It is also possible, if it suits the particular performance, to place these markers between the radius and ulna, at the anterior and posterior sides of the lower forearm. The idea is to place them as close to the hand as possible without affecting them by hand movements, so they should be located above the carpal bones.
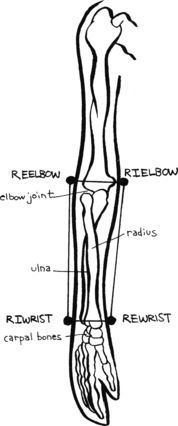 |
| Figure 3.22 The lower arm motion segment. |
Hand
The hand is usually captured as a whole segment when using a body capture system, but a bend-sensing glove, such as the Cyberglove, can be used simultaneously. If this is done, a parallel and synchronized stream of information will be collected and must be merged after the fact. For optical capture of the rigid hand segment, you can use both wrist markers (IWRIST and EWRIST) plus the HAND marker, located above the metacarpals. The use of both wrist markers will ensure that the elbow rotations stay where they belong.
Some state-of-the-art optical motion capture systems are able to capture finger motions when using small markers. Usually to achieve accurate and complete hand motions using such a system, a special camera setup focusing on hands is required. When capturing full body motions in a large stage, it may be possible to add a marker (FINGERS) on top of the last segment of the index finger that will allow to capture the finger rotations as a whole segment and that can be used to drive a procedural control to bend all the fingers. Figure 3.23 shows the hand motion segments.
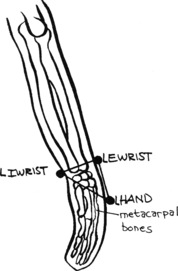 |
| Figure 3.23 The hand motion segments. |
Upper Leg
The hip joint is capable of flexion, extension, abduction, adduction, and both medial and lateral rotations, but it is not possible to capture its exact pivot point location because it is located internally. Its position can be adjusted in postprocessing. Use the HIP, EKNEE, and IKNEE markers to create the segment triangle, as shown in Figure 3.24. Both knee markers should be placed on the lower end of the femur, over the lateral and medial condyles. If the motion does not permit having two markers on each side of the knee joint, one of them can be moved to the midfemur area, but doing so will require more fine-tuning after the fact.
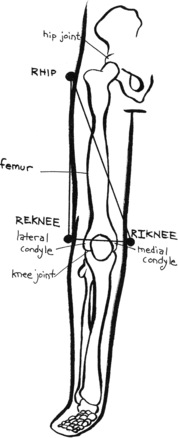 |
| Figure 3.24 The upper leg motion segment. |
Lower Leg
The lower leg segment is based on the movements of the knee, which is capable of flexion and extension primarily, but can also rotate a few degrees in lateral and medial directions. Most of the rotational movements, though, are based on the hip rotations and abduction and adduction of the foot. To capture the motion segment of the lower leg, use EKNEE, IKNEE, and ANKLE, which should be placed over the lateral malleolus (see Figure 3.25). If one of the knee markers is not present, you can place another marker in the midfrontal area of the lower leg, where the tibia is closest to the skin.
 |
| Figure 3.25 The lower leg motion segment. |
Foot
The foot has a very large number of joints: 31, to be precise. Most marker setups consider the foot as one single motion segment, but I believe that a minimum of two segments is acceptable for most projects. It is best to wear hard shoes if possible when capturing the foot, since its entire complicated mechanism is filtered into two segments that can be captured by an optical system.
We cannot break the foot in exactly two segments based on its mechanical structure, but I will assume that the first segment starts at the ankle joint and ends somewhere along the metatarsals. The reason for this division line is that the rotation of the second segment is a combination of many joints, including the tarsometatarsal, metatarsophalangeal, and interphalangeal. The first segment is defined by ANKLE, HEEL, and FOOT. HEEL should be placed in the back of the shoe, as low as possible, because this marker will be used to define where the floor is for this segment. FOOT should be located also at floor level where the shoe bends when the foot is in flexion.
The second segment is assumed to be strictly capable of flexion and extension, so only a line is required, formed by FOOT and TOE. TOE should be placed in the front of the shoe, as close to the floor as possible, because it will define the location of the floor for this segment. Figure 3.26 shows the foot segments.
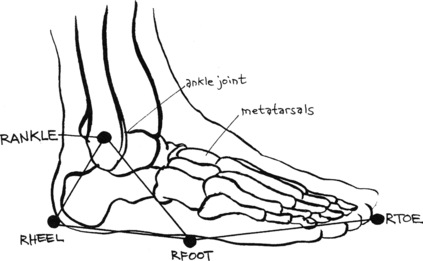 |
| Figure 3.26 The foot motion segments. |
Using the Optimal Number of Markers per Application
What we discussed previously is a generic marker layout that will generate enough data for a high-resolution performance, suitable for a film or other high-end entertainment application. In life sciences projects, the marker layouts are designed differently, as the results there mostly need to be as exact as possible without regard to esthetics. Depending on your particular application, you may want to use a different number of markers per performer.
There are applications where the object of the motion capture is to line up digital elements with live action elements. For example, a character that is half digital and half live action would require much more accuracy than a whole digital performance, as any sliding in the data would be very noticeable. For applications such as these, it is recommended to use redundant markers that can aid in the correction of data. Also, using the best camera setup is highly recommended.
Capturing props on set sounds like an easy task. Just slap three markers on the prop and that's it. Not exactly. The biggest problem with props is that they are not well documented and can be forgotten easily. I've had props' data lost even in projects with as many as two dozen shots. A way to avoid this from happening is to keep extremely good notes for each trial. If the project is big enough, these notes should be kept in a database that the crew should have access to. The best solution, and one that hasn't been enacted yet as far as I know, would be to develop a system where everything is tagged with RFID chips, and by everything I mean everyone, too. As performers and props move into the stage, the RFID is read by a sensor at the entry point and whatever is being captured on a specific trial is automatically logged.
Capture Schedule
You have prepared a candidate table, which you have sorted in different ways according to categories. You have hired the talent, built the props, looked at the rigs, and know how many different characters and configurations you have to deal with. Each shot has a detailed blueprint as well. It is time to put together the capture schedule.
You will now use some of those categories you created earlier, since you will build the schedule using the category constants and variables. A constant is something you cannot change in the time it has been scheduled, such as the availability of a performer. Variables are the categories you can schedule any time you want. The category types that are important for scheduling a session are the ones that have to do with volume, characters, interaction, props and rigs, and character setup. The latter category, character setup, is used indirectly, as each character setup will translate into one or more marker setups. The categories based on blending are used during the session and data application, and the ones based on delivery priority are used during postprocessing.
You can use different scheduling methods depending on the size of your project. In the early days at TSi, we generally used Microsoft Project. There are operations research methods such as Simplex or Network Flow Programming that can produce a mathematically optimal result, but unless the project is extremely complicated, such a solution would be overkill. Choosing a solution has more to do with the number of categories than with the number of shots, because each category creates either a new marker setup or a new stage configuration, and the idea is to minimize the number of times you reconfigure the stage and the marker setup. You could have a job for which you need to capture 500 shots, but if it involves no props, no interactions, no rigs, and only one character, it becomes a very simple scheduling problem.
If you have access to a system with enough cameras and a large enough stage you may not need to reconfigure the volume and camera locations at all, but we will assume otherwise for the example.
The best way to illustrate the scheduling task is by using a low-tech model established by film production, where the shooting calendar is created by using a production board such as the one shown in Figure 3.27. I like this approach because it helps visualize the overall production timetable. The talent, character name, and marker setup are listed horizontally on the right side of the board, whereas the shots with their stage configuration are shown vertically. You can rearrange the shots because they are listed on moveable strips and color coded by stage configuration. Gaps between shot groups indicate days or half-days. This method is better illustrated by a simple example.
 |
| Figure 3.27 Production board. |
Suppose you have scheduled 2 days of motion capture at an optical studio. The whole project calls for three different camera configurations based on volume, plus there are two different characters, Stan and Ollie, performed by different actors. Stan has two shots in which he's wearing a harness and two in which he's interacting with a surfboard, so you will have different marker configurations for those groups of shots. Also, there are two shots in which two characters appear together, and you have decided to have them perform simultaneously.
You already know that your shots have the following marker setups:
1. Stan shots with harness: 2
2. Stan shots without harness: 8
3. Stan holding surfboard: 2
4. Ollie shots: 4
5. Multiple shots: 2
6. Total shots: 18
Notice that you have five different marker configurations. A marker configuration is defined by every time there is even a minor difference in the marker setup, such as a different character, a character and an interactor or prop, multiple characters, and so forth.
You will fill out a moveable strip with each shot's information. The strips are color coded by stage configuration, so you'll have three colors to work with. An example of a production board with the information already transferred is shown in Figure 3.28; you can see the two capture sessions divided by a black gap. The strips have been placed in a way such that stage configuration takes precedence over other variables, such as talent availability, but if we had restrictions or constants, we could easily reorganize the board to reflect them. All shots with the volume 1 configuration and most with volume 2 will be captured on the first day, finishing with all shots requiring a rig and harness. The second day, the remaining shots with volume 2 configuration will be shot first. These happen to be the two multiple shots. Then, all volume 3 shots are captured, starting with Stan's shots (including his surfboard ones) and finishing with the last Ollie shot.
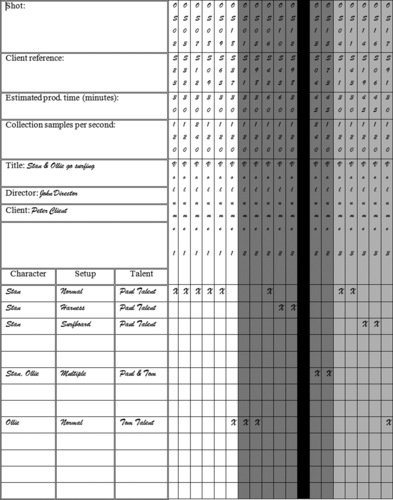 |
| Figure 3.28 Production board with values filled in. |
The drawback to this schedule is that both actors have to be available for both sessions, but in this case, it is more cost effective to configure the stage only three times and have the talent come back. If there had been any talent restrictions, we would have had to rearrange the stage a few more times to accommodate.
Rehearsals
The importance of rehearsing can be easily underestimated, because producers sometimes think that the cost of having a performer show up in advance to get familiarized with the motions is higher than the cost of the extra time at the stage. Even if the stage is in-house, this may not be true, as it takes at least two extra people to operate whatever motion capture device is being used, but this is not the only reason.
Provide the talent with the script and all the blueprints in advance and have a preproduction meeting at which you discuss the character and all the motions. Listen to all the performer's concerns and comments about every shot and make sure he or she understands exactly what is expected from the technical and esthetic standpoints. The talent must know all there is to know about the character.
You want the motions to be rehearsed and learned by the performer in a comfortable environment, that is, without the constricting markers, sensors, or potentiometers that are common to all systems. This practice is consistent with other media, such as theater, where a rehearsal in costume is not done until all the lines and scenes are well learned by everybody. The idea is to get the talent very familiar with the part first; once that is achieved, get him or her familiar with the costume.
Another reason why it is a good idea to rehearse in advance is that the talent may not be capable of performing the motions required. Even though you had casting sessions and the performer you chose looked extremely qualified, it is always possible that some of the motions might be too complex for that particular performer. If you rehearse, you will have time to recast your session.
Finally, make the performer rehearse wearing the motion capture gear, because it will add an extra level of discomfort that you must be sure the performer can handle. Even if the data is to be captured with an optical system, the talent could feel confined by the markers or the black tights.
During the Session
If everything was planned as previously described, the actual session should flow very smoothly. You will start with an efficient list of shots, a very clear understanding of each one, well-rehearsed performers, and predefined marker setups. If the preparation was done correctly, there's no need to have everybody involved in the project supervising the session, because they have already given their input as the project evolved. The session is not the right time for changes in the setups, script, or shots.
The people handling the session should consist of a director; a mocap stage director; a technical supervisor; the mocap staff; the talent; riggers, choreographers, or related motion experts; and additional support personnel. I don't mean to exclude other people associated with the project: They can be present as long as they are not involved, although a big crowd of onlookers is never appropriate. A clear chain of command, headed by the director, is necessary. The mocap stage director should act as the first assistant director on a movie set, being the one calling all the instructions to the crew and giving recording cues to the mocap staff. I've often seen chaos erupt because of lack of planning and excess of opinions, which usually results in unusable data—not because it is unreadable, but because it is either the wrong performance or the wrong setup. It is best to leave changes to the follow-up session, the one that I suggested be scheduled for any corrections and problems that may arise.
Bring at least one video camera to the stage in order to shoot each take from a favorable angle. If the project is linear, try to use an angle similar to the final rendering. A monitor should be hooked up to the camera to allow the director to look at the framing and help in the blending and looping of shots.
A clapper like the kind used for motion picture shooting is essential; otherwise, you won't be able to distinguish the data from the video reference. Make sure you write in the clapper all the pertinent information, such as shot name, take number, file name, project name, character name, director name, and date, even if the video is synchronized with the captured data.
When dealing with stationary props that need to match with digital props, make sure to capture at least one file of only the props with enough markers to make out all of their dimensions. After this data is captured, there is no need to place markers on these props again, provided they remain in the same position throughout the session.
Sometimes it is better to collect a motion at a very high sampling rate, especially if the motion is very fast, because it helps if you need to do post-tracking (as you would with an optical system). The markers are closer frame after frame, which helps the software to find the continuity a lot better. Many motion capture operators believe that a higher capture sampling rate increases the postprocess work, but that is not the case if the cameras operate at the same resolution at the high and low sampling rates.
Try to use a capture frame rate that is divisible by the final frame rate for the project. For example, if you will ultimately need 24 frames per second, don't collect data at 30 or 60; instead, use 48, 96, or any other multiple of 24 if possible. If your equipment is only capable of multiples of 30, then use a higher sampling rate so there will be more data available for a cleaner down-sampling.
The Base Position
When you model a character, you choose a neutral pose that is appropriate for the kinds of deformations the model will go through. When the character is humanoid, a good neutral pose is standing up with arms about 45° apart from the body, palms facing in, and legs apart about 30°, as shown in Figure 3.29. Only if the character's performance will be in a predetermined position throughout the project would you want to model it in a non-neutral pose. If your character will be sitting in all shots, for example, you might as well model a sitting character, since you can come up with good deformations while modeling.
 |
| Figure 3.29 Character in a neutral pose. |
The base position in motion capture serves a similar purpose. When setting up the character, you need a neutral pose with which to begin—a pose that will match your modeled character's neutral position. It is also a definition of the character's initial set of coordinate systems, which I describe later. The neutral pose in mocap terms is also called the t-pose.
If the t-pose is different from the typical pose described earlier, the modeling of the character should ideally happen after the base position has been captured, but this rarely happens. Also, it is preferable to model a character using the performer's proportions, but this is sometimes impossible as well. If you have modeled the character in advance, it is necessary to capture a matching base position by measuring the angle of rotation of limbs and helping the performer adopt that stance.
Since all you need is one frame of matching data, the capture of the t-pose can include motion. As you set up the digital character, you can pick the closest frame to the model. Pose the performer's legs at the right angle of separation, and make sure the back is straight. Have the performer rotate his or her arms from a position close to the body to a total extension pose, making sure the palms are pointing in the right direction and that the arms are aligned with the body. That will most likely yield a frame that matches the arm rotations. Also, make sure that the performer is facing the right axis, whether it is negative Z or anything else, so that the collected data is facing you when looking at the front orthogonal view of your animation software. Finally, make sure the performer is standing at the origin.
When capturing a base position, place an extra marker on the floor. It could be at the front, back, or any side, as long as you remember where it is and you always do it the same way. This marker will tell you where the front and back of the data are.
Depending on the file format you will use for your final product, the base position may or may not be a pose of your character's skeleton in which all the joints have a transformation value of zero. I cover this in the next chapter when I talk about file formats.
Directing the Motion Capture Session
Directing a motion capture session is very similar to directing live action. A film director runs the acted performance and the first assistant director controls the technical aspects of the shoot, such as the camera roll and sound. The director in a motion capture set controls the performance and the mocap stage director controls the video shooting and the collection of the data. In many cases, especially small mocap projects, the two roles are filled by the same person. Directing motion capture includes more technical elements that apply exclusively to this type of performance, such as interactions, blending, loops, and nonlinear action in general, plus all the constraints of the virtual space in which the action takes place. A director must have a very clear vision of the performer's motion as filtered into the final character and must enforce the character's limitations on the performer.
Capturing motion for crowds in the background of a scene is very different from capturing the lead character, so if the shots to be captured are very important to the project, it is advisable that the director of the project be the one directing the session. In feature film, a second-unit director is responsible for running certain less important shots that the director cannot or will not direct, but he or she needs to know exactly what the director is looking for. As the director of the motion capture session, you need to be totally involved and aware of what the project is about.
The first thing you must do as director is to brief the crew, talent, and visitors about what is about to happen and what is not acceptable for them to do while the session is going on. You don't want anybody leaning on a camera stand if you are using an optical system, since this will disturb the calibration and make all the data unusable. Also, people must know not to bring bright objects to an optical stage, or certain metallic objects to an electromagnetic capture session. Make sure people stay within certain boundaries that will not distract you or the talent from the actual performance.
Time should be spent making the talent comfortable and trying to convey what the shot calls for. A well-trained performer is not necessarily used to acting in black tights with white dots or outfitted with sensors and a mechanical suit, and self-consciousness will hurt the performance. You can avoid this by establishing a rapport with the talent, inducing trust while maintaining authority, especially if the talent is a celebrity.
The pace of the session should be as slow as required. Rushing through the moves often doesn't result in good takes. You should look at the taped reference after every good shot to make sure it is a potential final shot; take notes that will allow you to decide this during or after the session. For safety, always capture more than one potential hero shot, as the data could have technical problems.
The monitor attached to the camera can be used to make sure that the blending and looping start and end poses are met. An experienced film director is already familiar with the concept of continuity, which in the case of motion capture can be taken to the extreme. As in film, you should draw or tape marks on the floor and the monitor's screen that will allow the matching of moves. It is possible to use more than one camera/monitor combination if the blending is very complicated. The higher the frame rate of the final medium, the more exact the blending must be at capture time.
When directing a session as captured by optical equipment, you must use the motion capture blueprint to make sure all the interactions are performed with minimum occlusion of markers, and you must make sure no markers are missing during a shot. If the performer needs to interact with nonmarked people on stage, those persons must be careful not to occlude or disturb any markers; however, ultimate responsibility always lies with the director. The technical supervisor should act as an advisor to the director in these and other technical matters.
On one occasion, I was asked to provide motion capture services for the opening of a well-known television sitcom. The performer was to be a famous actor, the star of the show. I asked the client for storyboards, but they declined to provide them, saying that they had to be kept confidential. They did describe very roughly what the project would entail and said that it would consist of five or six shots, most of them very simple, except for one in which the actor would have to sit on a chair. They would bring their own director and I wouldn't meet him or the actor until the day of the shoot. You may be asking why I walked into this situation when I should have known better. Well, it wasn't a difficult decision, because we were dealing with a famous star and a high-profile show. Also, it was a paying job and we were looking for those. The risk seemed calculated. On many occasions I had to walk into projects as blindly as in this case, but that is the risk you take when dealing with clients.
A few things went wrong during that session. First, the motions turned out to be much more complicated than expected. The actor had to sit down in a chair, so we had prepared a special chair with a clear back in order to avoid occluding the markers placed on his back. During the shoot, the client decided that a chair would not do and asked for a couch. To accommodate this new development, we had to add more markers to the actor's front, resulting in a different configuration from the rest of the already collected data. When motion data is delivered, a base position file is included to be used for character setup, and the rest of the data is supposed to be compatible with that file. This change would force the client to have two different character setups, so I decided instead to recompute all the couch data to match the first base position. This was a difficult process and at that time we didn't have an easy way of testing the results, so it took extra work to make it match.
Second, the director was actually a character animator rather than a director, and he had very little knowledge of motion capture issues and wasn't open to many of our suggestions. The performer was a famous actor and had a big attitude about taking direction from an unknown person. We tried to persuade him to do more takes of certain shots, especially the one with the couch, but he declined. We customarily use those extra takes as insurance in case the preferred take is not clean. As expected, the couch shot wasn't very clean because we lost many of the markers for a long period of time. Even though we had placed markers in the front, only two cameras could see them when he was sitting, which wasn't enough with the archaic optical system that was the state of the art at the time. We had to work long hours reconstructing some of the motion.
To make a long story short, we managed to finish the job on time, but ended up losing money because of the extra time it took to clean up and recalculate the data. Changing the special chair for a couch is an inconsequential change in a film or a television production, but for a motion capture session it meant the difference between profit and loss.
Summary
When deciding whether to use motion capture, you should answer the following questions:
1. Do you want realistic-looking motion?
2. Is the character human shaped?
3. Is the context right?
4. If the character is an animal, can a real animal perform the part?
5. If enhancements need to be made to the performance, are they reasonably small?
6. Will the character require squashing or stretching?
7. Will the character require anticipation beyond physical boundaries?
8. Will the character require follow-through action beyond physical boundaries?
9. Will the character require exaggeration beyond physical boundaries?
10. Is it likely that the director will require substantial changes after the capture session?
11. Will the shot fit within the available capture volume?
12. Will it be possible to capture enough data to feed to an existing character setup?
13. Are the interactions affecting the root of the motion?
14. Is the number of interactions low enough to make it feasible to use motion capture?
15. Will the necessary props interfere with the capture process?
16. Will the necessary rigs interfere with the capture process?
17. Is it possible to blend the shots together, if necessary, after the capture?
18. Is it possible to capture at the necessary sample rate?
19. Is it possible to capture the necessary number of performers simultaneously?
20. Is it possible to comply with special instructions?
When deciding whether to use motion capture, do not make the following assumptions:
• Motion capture will save you money.
• Motion capture will save you time.
• A human can perform a nonhuman character.
• You can do all the shots for a project with motion capture.
• You can do all interactions with motion capture.
• You can fix a bad performance after the fact.
• You can modify timing after the fact.
• A director will accept the captured performance even if he or she directed it.
• You can produce performance animation without advance planning.
Remember these facts about motion capture:
1. Cartoon characters almost never look good if performed.
2. If your data is not good, don't fix it: Recapture it.
3. Always videotape all captured shots.
4. If a move can't be done physically, it can't be captured.
..................Content has been hidden....................
You can't read the all page of ebook, please click here login for view all page.