
The Emission property can be used to simulate a variety of self-illuminated objects, from the LEDs of mobile displays to futuristic Tron suits. Transparency, on the other hand, can make the diffuse color of a material more or less visible. In this recipe, you will learn how to configure these properties to produce a toy's cardboard packaging that features a plastic case and glow-in-the-dark text.
For this recipe, we have prepared a Unity package containing a prefab made of a 3D object, its material, and its respective diffused texture map (in PNG format). All files are in the 1362_04_04 folder.
To add transparency and color emissions to a material, follow these steps:
- Import
TransparencyEmission.unitypackageto your project. Select theDIFF_packagetexture from theAssetsfolder, in the Project view. Then, open it in your image editor. - First, we will add transparency to the image by deleting the white areas around the package (and the hang hole). Make a selection of those areas (in Photoshop, this can be done with the Magic Wand Tool).
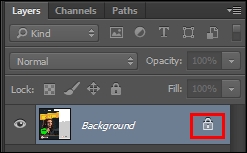
- Make sure you unlock the Background layer by clicking on the lock icon, to the left of the layer's name, as shown below:
- Delete the previously-made selection (this can be done in Photoshop by pressing the Delete key). The background of the image should be transparent, as shown below. Save the file:

- Back in Unity, in the Assets folder, expand the packagePrefab list and select the PackageCard object. Now, in the Inspector view, scroll down to the Material component and change its Rendering Mode to Cutout, and adjust its Alpha Cutoff to
0.9: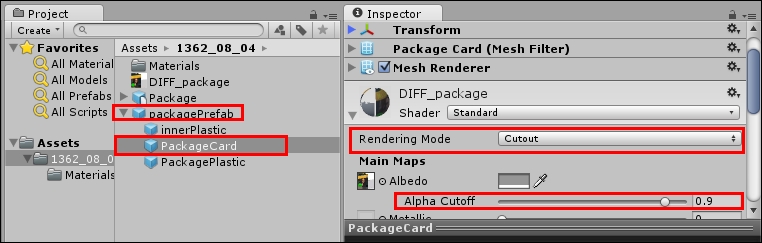
- From the expanded packagePrefab, select the PackagePlastic object. In the Inspector view, scroll down to the Material component and change its Rendering Mode to Transparent. Then, use the Diffuse color picker to change the color's RGB values to
56, and Alpha to25. Also, change the Smoothness level to0.9:
- Now that we have taken care of our transparency needs, we need to work on the Emission map. From the Assets folder, duplicate the
DIFF_packagetexture, rename itEMI_package, and open it in your image editor. - Select all the characters from the Ms. Laser inscription and the green star (in Photoshop, this can be done with the Magic Wand tool, keeping the Shift key pressed while selecting multiple areas).
- Copy and paste your selection into a new layer. Then, select it and apply a Noise filter to it (in Photoshop, this can be done by navigating to Filter | Noise | Add Noise...). Use 50% as the value.
- Create a new layer and, using a tool such as the Paint Bucket, fill it with black (R:
0, G:0, B:0). Place this black layer beneath the one with the colored elements. - Flatten your image (in Photoshop this can be done by navigating to Layer | Flatten Image) and save your file:

- Back in Unity, in the Assets folder, expand packagePrefab and select the PackageCard object. Now, in the Inspector view, scroll down to the Material component and assign the
EMI_packagetexture to its Emission slot. Then, change the Emission color slot to white (R:255; G:255; B:255), and turn down its intensity to0.25, as shown in the following screenshot. Also, change its GI option to None, so that its glow won't be added to the Lightmaps or influence the illumination in real time:
- Place an instance of the packagePrefab in your scene and check out the results. Your material is ready:

Unity is able to read four channels of a texture map: R (Red), G (Green), B (Blue) and A (Alpha). When set to Transparent or Cutout, the Alpha channel of the diffuse texture map sets the transparency of the material according to each pixel's brightness level (the Cutout mode will not render semi-transparency—only fully visible or invisible pixels). You might have noticed that we didn't add an Alpha channel—this is because Photoshop exports the PNG's Alpha map, based on its transparency. To help you visualize the Alpha map, the 1362_04_04 folder contains a DIFF_packageFinal.TIF file featuring an Alpha map that works exactly in the same way as the PNG file that we have generated:

Regarding the Emission texture map, Unity assigns its RGB colors to the material, combining them with the appropriate color selection slot, and also allowing adjustments to the intensity of that Emission.
Let look at a little more information on Transparency and Emission.
Please note that you can use a bitmap texture for the Diffuse map in the Transparent render mode. In this case, RGB values will be interpreted as the Diffuse color, while the Alpha will be used to determine that pixel's transparency (in this case, semi-transparent materials are allowed).
You might have noticed that the plastic case was made from two objects (PackagePlastic and innerPlastic). This was done to avoid z-sorting problems, where faces are rendered in front of other geometry when they should be behind it. Having multiple meshes instead of a single one allows these faces to be correctly sorted for rendering. Materials in the Cutout mode are not affected by this problem, though.