
Introducing Mavericks
Mac OS Mavericks is the tenth major release of Mac OS X, and at the time of writing is available from Apple free of charge. There are some new apps, such as iBooks and iMaps, plus better hardware and multiple-screen support.
The Desktop
A typical Mac desktop is shown in the following screen. The desktop is the basic working area on your Mac; it is the equivalent of your workbench or office desk.
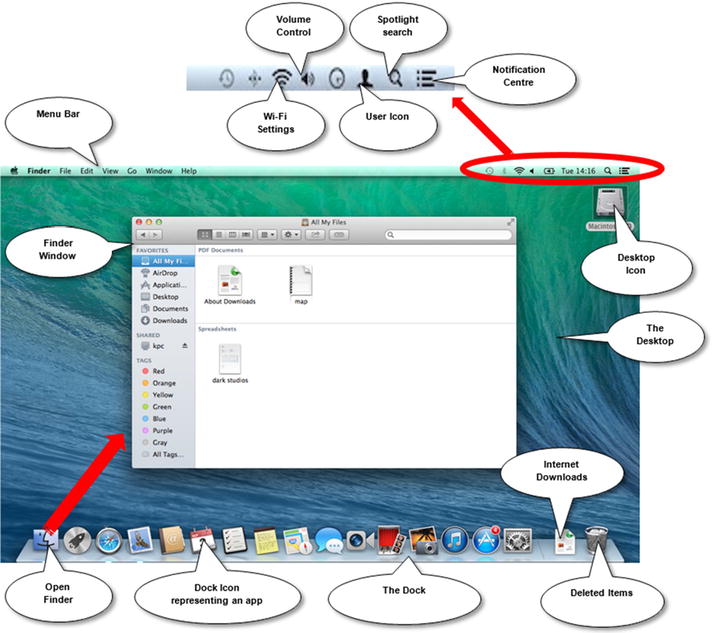
The Dock
The Dock has shortcuts to applications such as iTunes or iPhoto. If the app you are looking for isn’t here, it will be in either Launchpad or the Finder (both discussed later in this chapter).

There are a couple of icons to take note of on the edge of the dock, called stacks. These are "quick access lists" that allow you to find your most recently used documents and Internet downloads.
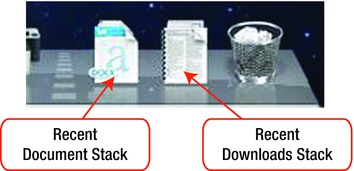
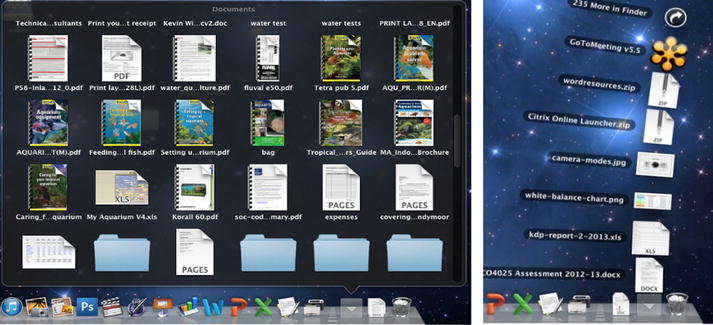
The following screen shows what they open up as. You can see a list of recently opened documents. Also available is a list of downloads, so if you have just downloaded something from the Internet you can find it in the Downloads Stack.
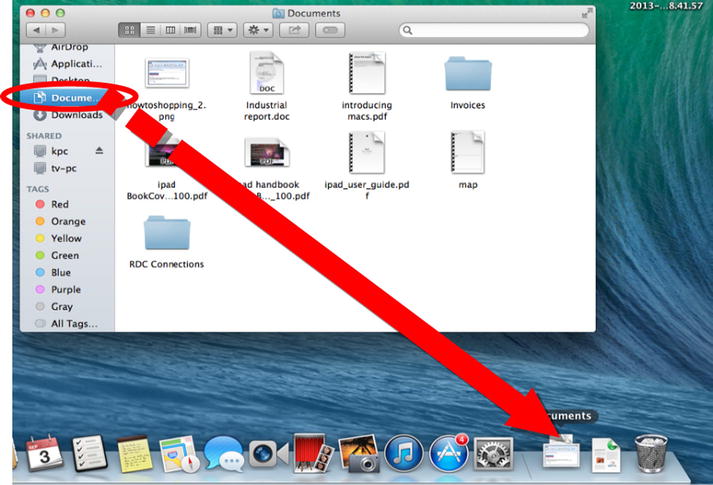
I find it useful to add my most-used icons to the dock. You can do this by dragging them to the part of the dock in which you want them to appear. I’m going to drag my Documents folder from the Finder window next to the downloads icon on the far right of the dock.
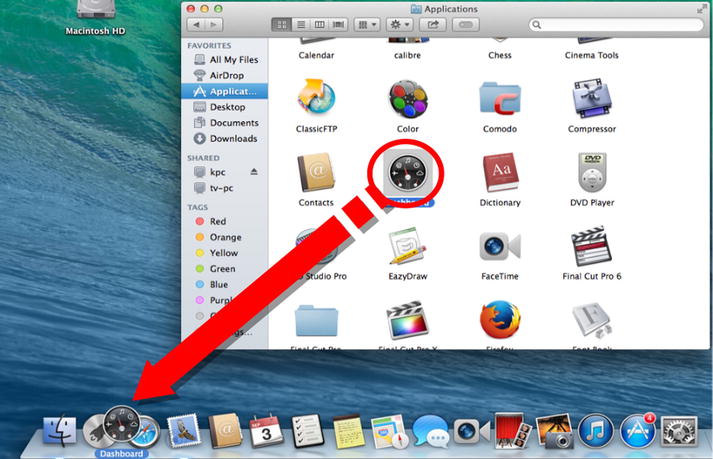
Or perhaps you want a program you use a lot to appear on the dock. A common example is Dashboard. You can drag the icon from the Apps folder in Finder. I’m going to place it in between my Launchpad icon and my Safari web browser icon. I just drag it to the dock.
Launchpad
Launchpad lets you see, organize, and easily open apps that are installed on your machine. The icons are organized into pages. To launch any application, just click on the corresponding icon.
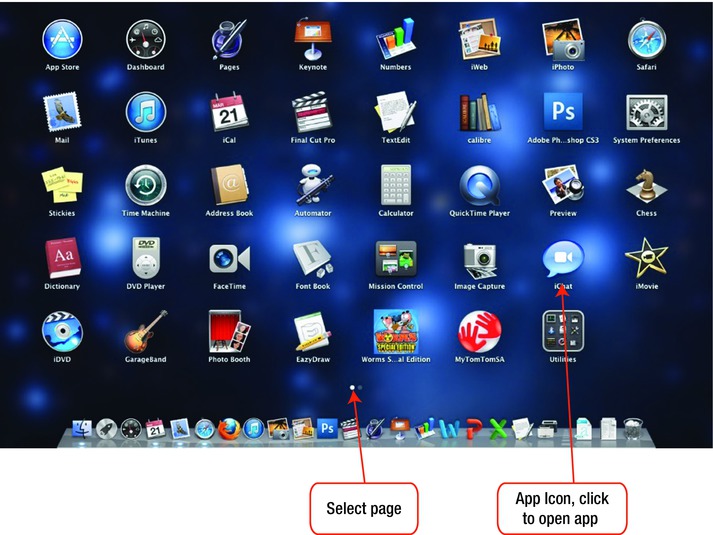
To access Launchpad, click the icon on your dock.

The Menu Bar
The Menu bar consists of two main categories: Apps and Status.
App Menus
The left-hand side of the menu bar contains the menu for the app you’re currently using.

The name of the app appears in bold next to the Apple menu. There are several other app menus, often with standard names such as File, Edit, Format, Window, and Help.
Many of the commands in these menus are standard in all apps. For example, the Open command is usually in the File menu and the Copy command is usually in the Edit menu.
Status Menus
The right-hand side of the menu bar contains the status menus.
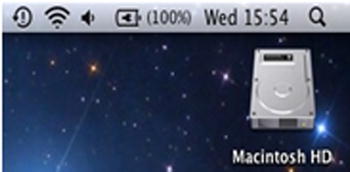
These menus give feedback on the status of your computer or give you quick access to certain features. For example, you can quickly turn on Wi-Fi, do a spotlight search, change your Mac’s volume, see date and time, and check messages in Notification Center.
Finder
This is where all your documents, letters, photographs, favorite music, and so on are stored. Click the circled icon on your dock to access Finder.

Once there, you'll see that Finder is like your filing cabinet.
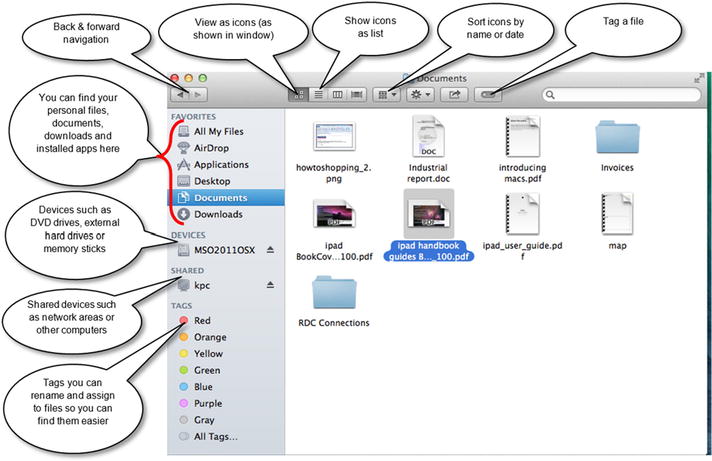
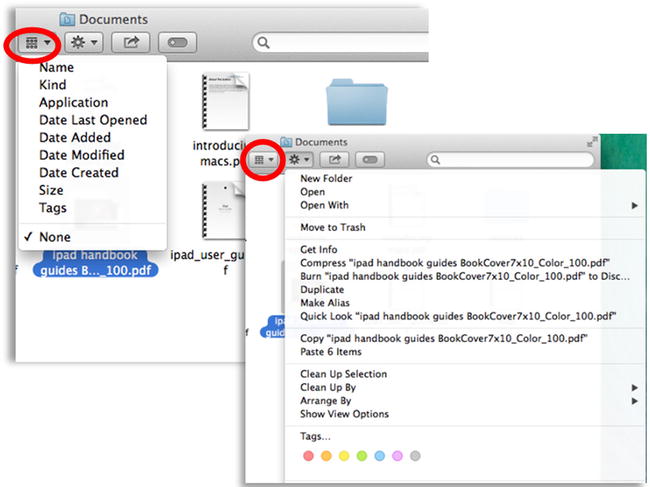
Two menus to take note of: Name and New Folder.
Name allows you to sort the icons according to their name (alphabetically) by date, or by other criteria . New Folder allows you to create new folders or perform operations on specific icons you have selected with the mouse.
Tabs and Tags
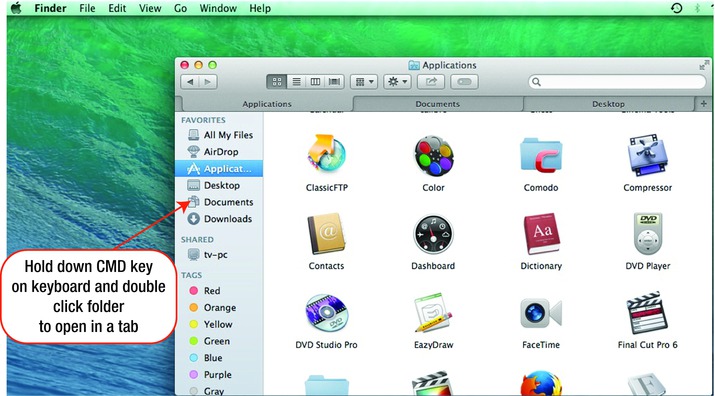
Tabs is a new feature added to Finder that allows you to open different folders in tabs for easy access.
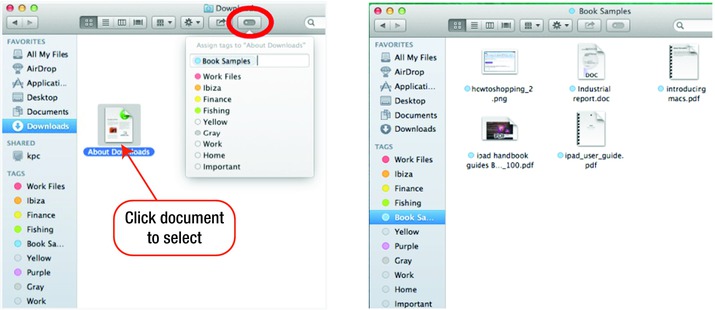
Tags allow you to place descriptive markers onto your documents to allow you to find them easier. Click the document you want to tag and select the Tags icon circled below left, and from the list select the tag that describes the category of your document, e.g., work, holiday, and so on.
To rename the tags to something more useful, click the Finder menu, click Preferences, then click the Tags tab. As shown in the following screen, there are a variety of tags to choose from.
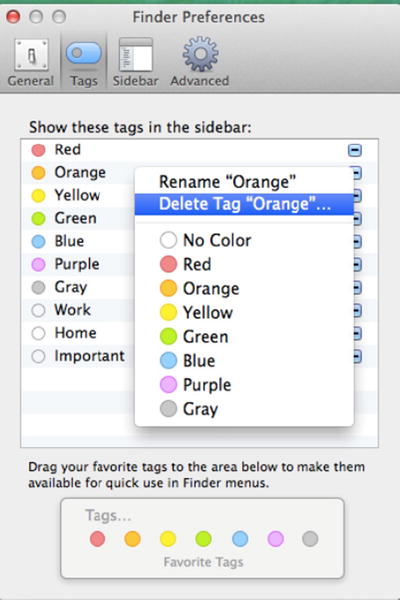
Click any of the bubbles to change the color or click the tag title to type a new name.
Highlight a tag in the sidebar and you will see all the folders that fall under that tag.
Accessing External Drives
When connected, USB flash drives and external hard disks are located in Finder under Devices.
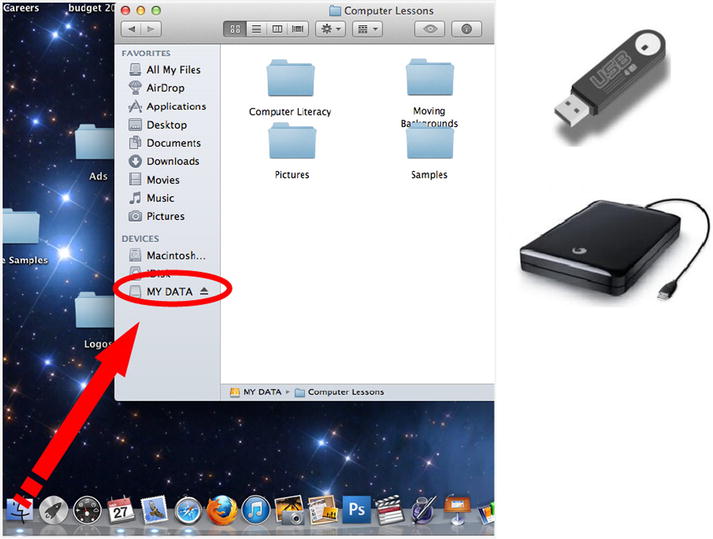
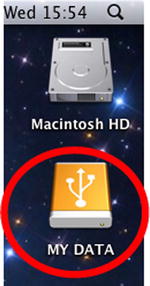
There will also be an icon representing the drive on the desktop, as shown circled here.
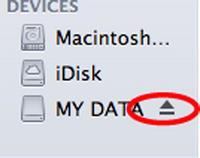
Note that before unplugging the device it is good practice to eject the drive by clicking on the eject icon in Finder.
Accessing CDs/DVDs
More often than not, Mac OS will automatically detect a CD or DVD you have inserted and load up the appropriate app (e.g., DVD player for DVDs, iTunes for music CDs, etc.).
If not, you can locate the disc in Finder.
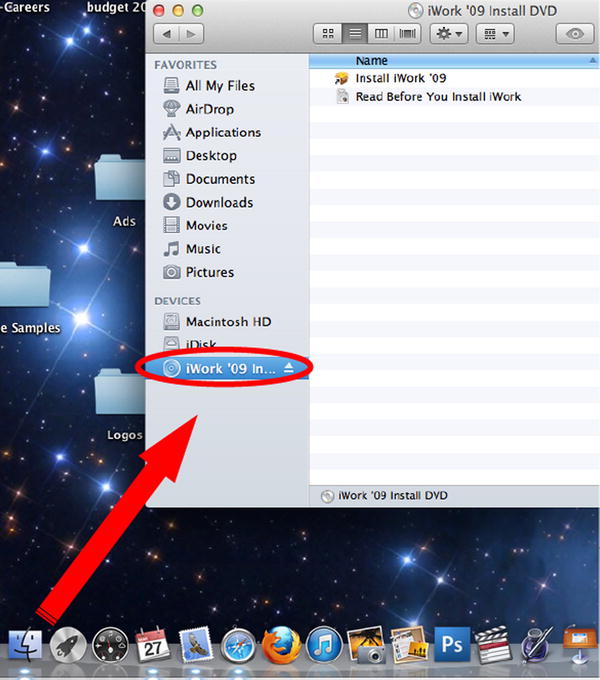
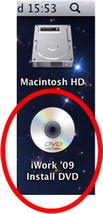
There will also be an icon on the desktop representing the CD/DVD.
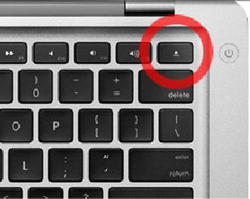
To eject the CD/DVD, there is an eject button on the top right of the Mac keyboard.
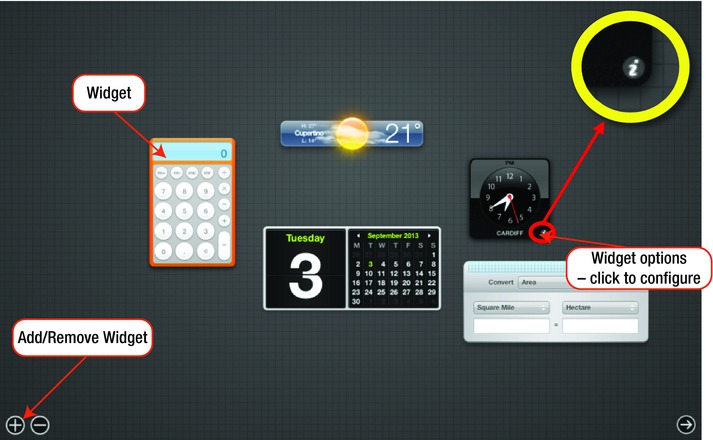
Dashboard
Dashboard is a useful utility that contains “widgets”—small applications designed to accomplish a single task, such as a calculator, dictionary, clock, translator, calendar, etc. There are hundreds of widgets available; to add more click the plus sign on the bottom left-hand side of Dashboard, as shown in the following screen.
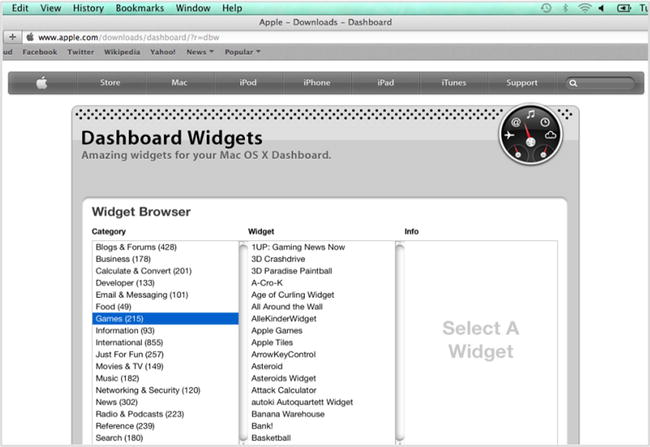
You can add widgets to your dashboard by clicking any of the icons in the following screen. You can download hundreds of different widgets for all sorts of things by clicking "More widgets…," shown at the bottom of the following screen.
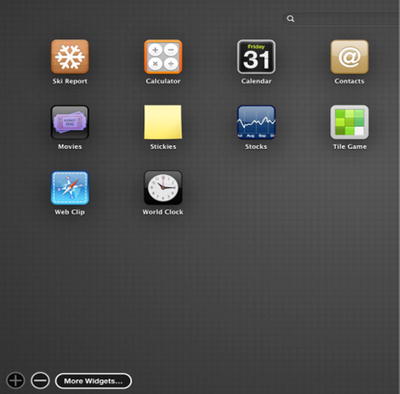
Browse through and select widgets you want to install, then click on them and follow the prompts.
Notification Center
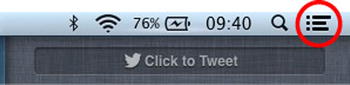
Notification Center is a tool that organizes alerts from applications. It displays those alerts until an associated action is completed. You can access Notification Center by clicking the icon on the right corner of the menu bar.
Once there, you can choose which applications you want to appear in Notification Center and how they are handled. For example, you can click a button to tweet, post status updates to Facebook, or view all notifications in the sidebar pane. Messages, such as new emails or Facebook messages, are displayed here.
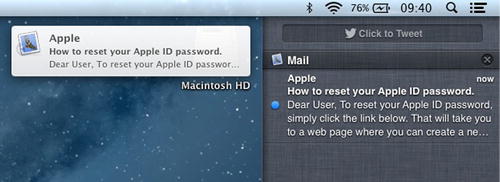
There are three types of notifications.
Banners: These are located in the upper right corner of the screen. They appear briefly and then slide off to the right. (Note that the associated application’s icon is displayed on the left side of the banner, while the message from the application will be displayed on the right side.)
Alerts: These are the same as banners, but will not disappear from the screen until the user takes action.
Badges: These are red notification symbols on an application’s icon that indicate the number of items available for the application.
Maps
Another great feature added to Mavericks is the Maps app. This allows you to find any location on the globe and is great for finding driving directions.
You can type the name of the city or venue you are looking for in the search field in the top right-hand corner. You can also enter postal/zip codes to find specific areas.
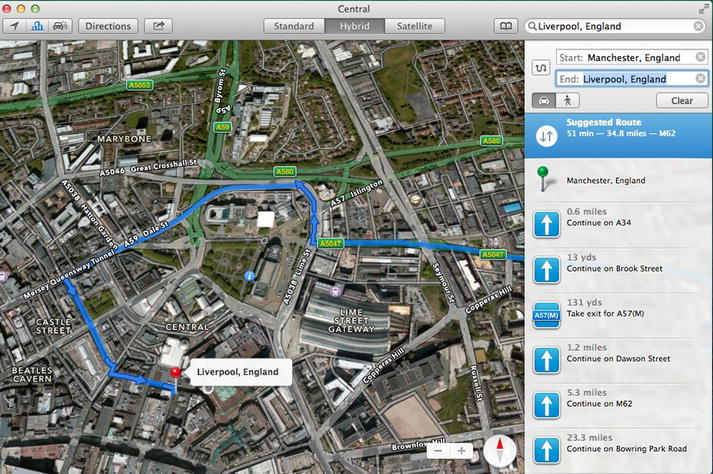
To use the directions feature all you need to do is type your location and your destination into the fields shown and Maps will come back with a route plus turn-by-turn directions for you to print or send to your iPhone.
iBooks
To open iBooks, click the iBooks icon on your Dock.
![]()
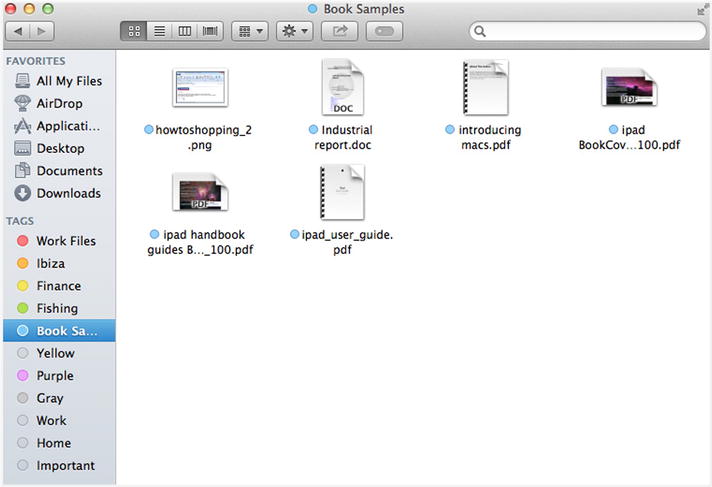
Once opened, you can search for a particular book by typing an author's name or a title into the search field on the top right of the screen.
Alternatively, you can search via the categories on the top bar. Once you have found a book you want, select it and then click Buy Book. This will download it and add it to your bookshelf in your library.
You can also click Get Sample if you want to see an excerpt before you buy. You can find all the books that you have purchased by clicking the Library button.
All your books are synchronized across all your Apple devices (iPhone, iPad and iBooks on your Mac) so you can switch between them and pick up right where you left off.
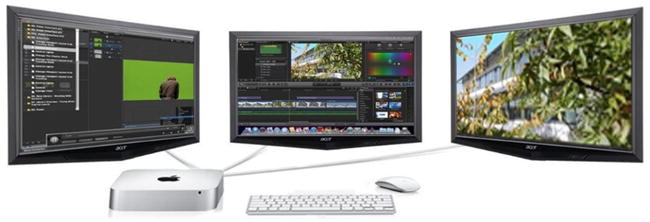
Multi-Monitor Support
Multiple displays in Mavericks work independently, so each monitor can have its own menu bar and application running at the same time. This is a big time saver.
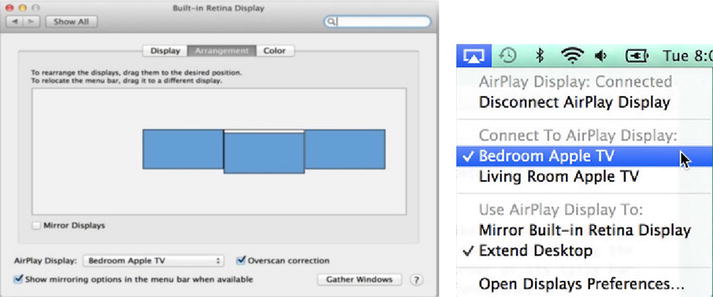
The Dock is also available on any screen. If you are on a local network containing Apple TVs, an AirPlay icon shows up in the menu bar. You can select an Apple TV from the menu and choose to mirror your current display or to extend the desktop.
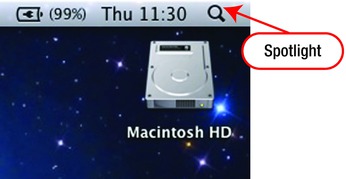
Spotlight
Spotlight is a search engine that allows you to locate anything on your Mac by typing a query. If you look in the top right-hand corner of the screen, you’ll see what looks like a magnifying glass. Click that icon and type in what you’re searching for.
Spotlight automatically sorts out the different types of files, such as documents, photographs, email messages, and so forth into different sections to make it easier to find.
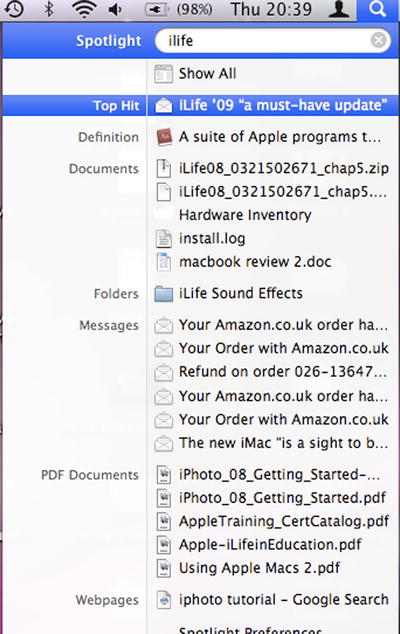
As a fun bonus, Spotlight can also give you definitions of words.