Apart from the basic application template, Yii 2 has an advanced application template. It's geared more towards medium-sized applications (such as applications that are really useful to businesses), and its main feature is two separate web interfaces: one dedicated to content management and the other to presenting this content to visitors. So, you get an almost complete CMS skeleton with this template.
The first steps are the same as for a basic template. You need to fetch the Composer executable and set up a new project using it:
$ curl -sS https://getcomposer.org/installer | php
$ php composer.phar create-project --prefer-dist --stability=dev
yiisoft/yii2-app-advanced advanced
You can see that the difference is just that instead of the word "basic", we use the word "advanced".
Now, let's make further changes. First, go to the newly created directory named advanced. After this, you need to generate the required local configuration by running the following command:
$ ./init
Yes, it's just the init script from the root of the code base. It'll ask you whether you want a development mode or a production mode and create all the necessary auxiliary configuration snippets and entry scripts. To be precise, it just copies the contents of the dev or prod folders from the environments subdirectory depending on whether you selected the development environment or the production one. Just open the environments subdirectory and you'll understand how it works.
Next, you need to create the database to be used by this application. By default, for configuration of a development environment, you have to set up a MySQL database named yii2advanced accessible from the localhost at the default MySQL port for user root without any password. You can see the details in the common/config/main-local.php file.
Given that you have the database set up, you need to run migrations. We'll talk about migration scripts in the next chapter (and we will even write several scripts ourselves), but if the very concept of database migrations is foreign to you, you can read about it in the official documentation at the Yii 2 website (at the time of writing this, there is no official documentation, but the framework has the docs included in the GitHub repository at https://github.com/yiisoft/yii2/blob/master/docs/guide/db-migrations.md).
Just run the following command anyway:
$ ./yii migrate
It'll present you with a list of exactly one migration and ask you for confirmation before doing its job.
Now, you are ready. Make both the sides of the application accessible for you by executing the following commands:
$ php -S localhost:8080 -t frontend/web
$ php -S localhost:8081 -t backend/web
As with the basic application template, we are using the built-in PHP web server just because it's a lot simpler to be demonstrated in the book than explain how to set up Apache or some other web server to serve from these folders.
Now you'll have the backend side of the application intended to be used by content managers and the frontend side of the application intended to be the website your visitors will see. Also, note that you have a completely controllable console runner launched by the yii script you used when doing migrations.
Advanced application has exactly the same frontend as basic application. Here is how its backend looks like:
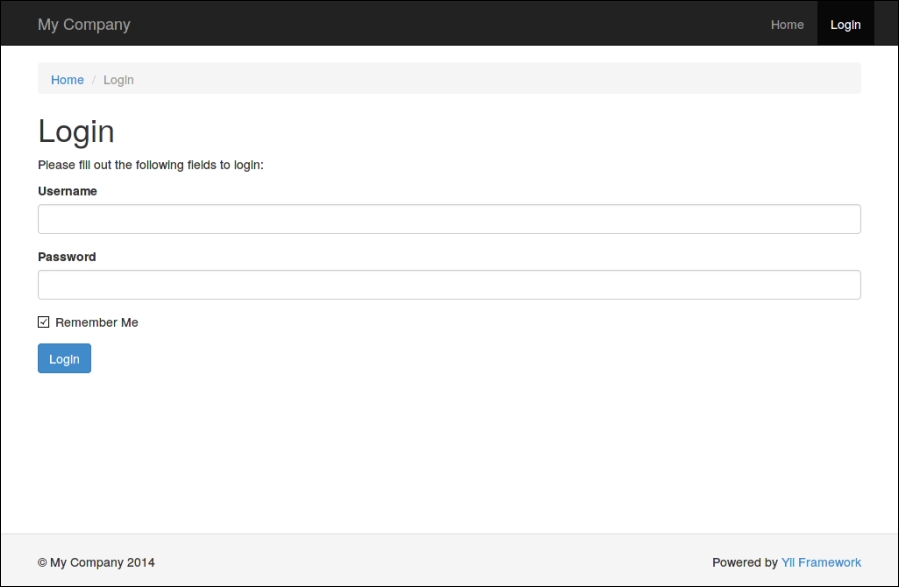
The advanced template backend is locked down initially. After logging in, you get the same page as the one from the basic template or the advanced template frontend, but with only the login feature in the menu.
The most important thing about the advanced application template is that it is three basic application templates wired together as one:
- Inside the
frontendfolder is the application structure for the public-facing side of your website. Real functionalities and the content of your website or web application is expected to be placed here. - The folder named
backendis for your CMS, protected from unauthorized access. You are expected to place all of your admin-accessible CRUD here. - The
consolefolder is mainly for your custom console commands, in hope you'll have any, and a lot more likely, for your migration scripts. - The
commonfolder contains code that will be used by all the entry points, since it's a single application after all.
Of course, nobody forces you to use the frontend and backend sides as described. You just have two web frontends sharing the same code base, so you are free to use them as you wish. However, the UI already prepared for the advanced template that has a password-protected backend right from the start.
You should know about the login feature for the freshly installed advanced application template. Initially, it had no users defined, and you had to create one by utilizing the signup feature at the frontend. After that, you'll be able to login to both backend and frontend using the created credentials. The frontend is identical to the basic application, and the backend is stripped of everything except the login feature and front page, so everything is up to you.
Note
A short overview of the installation of the advanced application:
$ curl -sS https://getcomposer.org/installer | php
$ php composer.phar create-project --prefer-dist
--stability=dev yiisoft/yii2-app-advanced advanced
$ cd advanced
$ ./init
$ mysql -u root -e 'create database yii2advanced'
$./yii migrate
$ php -S localhost:8080 -t frontend/web
$ php -S localhost:8081 -t backend/web