
For the example search web page, we were able to easily reverse engineer how it works. However, some websites will be very complex and difficult to understand, even with a tool like Firebug. For example, if the website has been built with Google Web Toolkit (GWT), the resulting JavaScript code will be machine-generated and minified. This generated JavaScript code can be cleaned with a tool such as JS beautifier, but the result will be verbose and the original variable names will be lost, so it is difficult to work with. With enough effort, any website can be reverse engineered. However, this effort can be avoided by instead using a browser rendering engine, which is the part of the web browser that parses HTML, applies the CSS formatting, and executes JavaScript to display a web page as we expect. In this section, the WebKit rendering engine will be used, which has a convenient Python interface through the Qt framework.
Note
What is WebKit?
The code for WebKit started life as the KHTML project in 1998, which was the rendering engine for the Konqueror web browser. It was then forked by Apple as WebKit in 2001 for use in their Safari web browser. Google used WebKit up to Chrome Version 27 before forking their version from WebKit called Blink in 2013. Opera originally used their internal rendering engine called Presto from 2003 to 2012 before briefly switching to WebKit, and then followed Chrome to Blink. Other popular browser rendering engines are Trident, used by Internet Explorer, and Gecko by Firefox.
There are two available Python bindings to the Qt framework, PyQt and PySide. PyQt was first released in 1998 but requires a license for commercial projects. Due to this licensing problem, the company developing Qt, then Nokia and now Digia, later developed Python bindings in 2009 called PySide and released it under the more permissive LGPL license.
There are minor differences between the two bindings but the examples developed here will work with either. The following snippet can be used to import whichever Qt binding is installed:
try:
    from PySide.QtGui import *
    from PySide.QtCore import *
    from PySide.QtWebKit import *
except ImportError:
    from PyQt4.QtGui import *
    from PyQt4.QtCore import *
    from PyQt4.QtWebKit import *
Here, if PySide is not available, an ImportError exception will be raised and PyQt will be imported. If PyQt is also unavailable, another ImportError will be raised and the script will exit.
Note
The instructions to download and install each Python binding are available at http://qt-project.org/wiki/Setting_up_PySide and http://pyqt.sourceforge.net/Docs/PyQt4/installation.html.
To confirm that WebKit can execute JavaScript, there is a simple example available at http://example.webscraping.com/dynamic.
This web page simply uses JavaScript to write Hello World to a div element. Here is the source code:
<html>
    <body>
        <div id="result"></div>
        <script>
        document.getElementById("result").innerText = 'Hello World';
        </script>
    </body>
</html>
With the traditional approach of downloading the original HTML and parsing the result, the div element will be empty, as follows:
>>> url = 'http://example.webscraping.com/dynamic'
>>> html = D(url)
>>> tree = lxml.html.fromstring(html)
>>> tree.cssselect('#result')[0].text_content()
''
Here is an initial example with WebKit, which needs to follow the PyQt or PySide imports shown in the preceding section:
>>> app = QApplication([])
>>> webview = QWebView()
>>> loop = QEventLoop()
>>> webview.loadFinished.connect(loop.quit)
>>> webview.load(QUrl(url))
>>> loop.exec_()
>>> html = webview.page().mainFrame().toHtml()
>>> tree = lxml.html.fromstring(html)
>>> tree.cssselect('#result')[0].text_content()
'Hello World'
There is quite a lot going on here, so we will step through the code line by line:
- The first line instantiates the
QApplicationobject that the Qt framework requires to be created before other Qt objects to perform various initializations. - Next, a
QWebViewobject is created, which is a container for the web documents. - A
QEventLoopobject is created, which will be used to create a local event loop. - The
loadFinishedcallback of theQwebViewobject is connected to thequitmethod ofQEventLoopso that when a web page finishes loading, the event loop will be stopped. The URL to load is then passed toQWebView.PyQtrequires that this URL string is wrapped by aQUrlobject, while forPySide, this is optional. - The
QWebViewload method is asynchronous, so execution will immediately pass to the next line while the web page is loading—however, we want to wait until this web page is loaded, soloop.exec_()is called to start the event loop. - When the web page completes loading, the event loop will exit and execution can move to the next line, where the resulting HTML of this loaded web page is extracted.
- The final line shows that JavaScript has been successfully executed and the
divelement containsHello World, as expected.
The classes and methods used here are all excellently documented in the C++ Qt framework website at http://qt-project.org/doc/qt-4.8/. PyQt and PySide have their own documentation, however, the descriptions and formatting for the original C++ version is superior, and, generally Python developers use it instead.
The search web page we have been examining requires the user to modify and submit a search form, and then click on the page links. However, so far, our browser renderer can only execute JavaScript and access the resulting HTML. To scrape the search page will require extending the browser renderer to support these interactions. Fortunately, Qt has an excellent API to select and manipulate the HTML elements, which makes this straightforward.
Here is an alternative version to the earlier AJAX search example, which also sets the search term to '.' and page size to '1000' to load all the results in a single query:
app = QApplication([])
webview = QWebView()
loop = QEventLoop()
webview.loadFinished.connect(loop.quit)
webview.load(QUrl('http://example.webscraping.com/search'))
loop.exec_()
webview.show()
frame = webview.page().mainFrame()
frame.findFirstElement('#search_term').
setAttribute('value', '.')
frame.findFirstElement('#page_size option:checked').
setPlainText('1000')
frame.findFirstElement('#search').
evaluateJavaScript('this.click()')
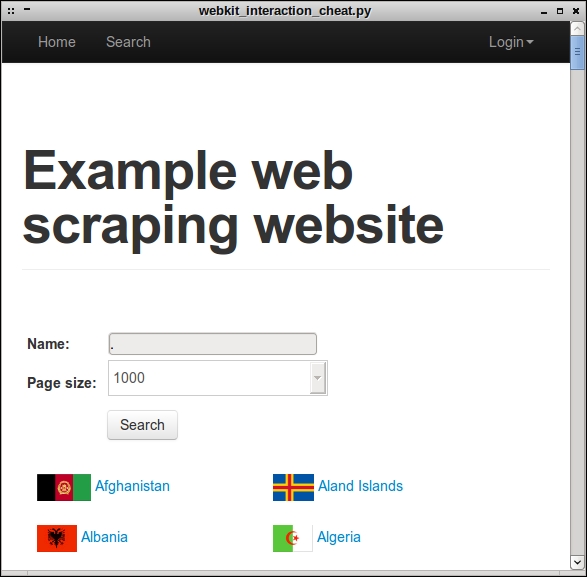
app.exec_()The first few lines instantiate the Qt objects required to render a web page, the same as in the previous Hello World example. Next, the QWebView GUI show() method is called so that the render window is displayed, which is useful for debugging. Then, a reference to the frame is created to make the following lines shorter. The QWebFrame class has many useful methods to interact with a web page. The following two lines use the CSS patterns to locate an element in the frame, and then set the search parameters. Then, the form is submitted with the evaluateJavaScript() method to simulate a click event. This method is very convenient because it allows for the insertion of any JavaScript code we want, including calling JavaScript methods defined in the web page directly. Then, the final line enters the application event loop so that we can review what has happened to the form. Without this, the script would end immediately.
This is what is displayed when this script is run:
The final part of implementing our WebKit crawler is scraping the search results, which turns out to be the most difficult part because it is not obvious when the AJAX event is complete and the country data is ready. There are three possible approaches to deal with this:
- Wait a set amount of time and hope that the AJAX event is complete by then
- Override Qt's network manager to track when the URL requests are complete
- Poll the web page for the expected content to appear
The first option is the simplest to implement but is inefficient, because if a safe timeout is set, then usually a lot more time is spent waiting than necessary. Also, when the network is slower than usual, a fixed timeout could fail. The second option is more efficient but cannot be applied when the delay is from the client side rather than server side—for example, if the download is complete, but a button needs to be pressed before the content is displayed. The third option is more reliable and straightforward to implement, though there is the minor drawback of wasting CPU cycles when checking whether the content has loaded yet. Here is an implementation for the third option:
>>> elements = None
>>> while not elements:
...     app.processEvents()
...     elements = frame.findAllElements('#results a')
...
>>> countries = [e.toPlainText().strip() for e in elements]
>>> print countries
[u'Afghanistan', u'Aland Islands', ... , u'Zambia', u'Zimbabwe']
Here, the code keeps looping until the country links are present in the results div. For each loop, app.processEvents() is called to give the Qt event loop time to perform tasks, such as responding to click events and updating the GUI.
To help make this functionality easier to use in future, here are the methods used and packaged into a class, whose source code is also available at https://bitbucket.org/wswp/code/src/tip/chapter05/browser_render.py:
import time

class BrowserRender(QWebView):
    def __init__(self, show=True):
        self.app = QApplication(sys.argv)
        QWebView.__init__(self)
        if show:
            self.show() # show the browser

    def download(self, url, timeout=60):
        """Wait for download to complete and return result"""
        loop = QEventLoop()
        timer = QTimer()
        timer.setSingleShot(True)
        timer.timeout.connect(loop.quit)
        self.loadFinished.connect(loop.quit)
        self.load(QUrl(url))
        timer.start(timeout * 1000)
        loop.exec_() # delay here until download finished
        if timer.isActive():
            # downloaded successfully
            timer.stop()
            return self.html()
        else:
            # timed out
            print 'Request timed out: ' + url

    def html(self):
        """Shortcut to return the current HTML"""
        return self.page().mainFrame().toHtml()

    def find(self, pattern):
        """Find all elements that match the pattern"""
        return self.page().mainFrame().findAllElements(pattern)

    def attr(self, pattern, name, value):
        """Set attribute for matching elements"""
        for e in self.find(pattern):
            e.setAttribute(name, value)

    def text(self, pattern, value):
        """Set attribute for matching elements"""
        for e in self.find(pattern):
            e.setPlainText(value)

    def click(self, pattern):
        """Click matching elements"""
        for e in self.find(pattern):
            e.evaluateJavaScript("this.click()")

    def wait_load(self, pattern, timeout=60):
        """Wait until pattern is found and return matches"""
        deadline = time.time() + timeout
        while time.time() < deadline:
            self.app.processEvents()
            matches = self.find(pattern)
            if matches:
                return matches
        print 'Wait load timed out'
You may have noticed the download() and wait_load() methods have some additional code involving a timer. This timer tracks how long has been spent waiting and cancels the event loop when the deadline is reached. Otherwise, when a network problem is encountered, the event loop would run indefinitely.
Here is how to scrape the search page using this new class:
>>> br = BrowserRender()
>>> br.download('http://example.webscraping.com/search')
>>> br.attr('#search_term', 'value', '.')
>>> br.text('#page_size option:checked', '1000')
>>> br.click('#search')
>>> elements = br.wait_load('#results a')
>>> countries = [e.toPlainText().strip() for e in elements]
>>> print countries
[u'Afghanistan', u'Aland Islands', ..., u'Zambia', u'Zimbabwe']With the WebKit library used in the preceding example, we have full control to customize the browser renderer to behave as we need it to. If this level of flexibility is not needed, a good alternative is Selenium, which provides an API to automate the web browser. Selenium can be installed using pip with the following command:
pip install selenium
To demonstrate how Selenium works, we will rewrite the previous search example in Selenium. The first step is to create a connection to the web browser:
>>> from selenium import webdriver
>>> driver = webdriver.Firefox()
When this command is run, an empty browser window will pop up:
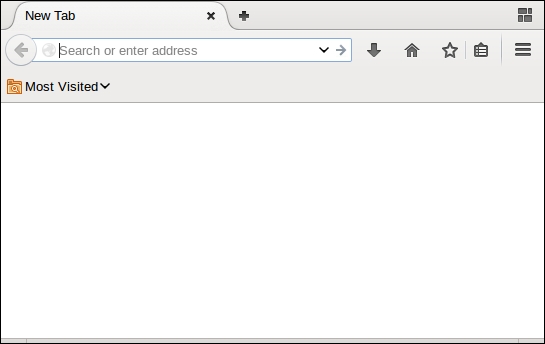
This is handy because with each command, the browser window can be checked to see if Selenium worked as expected. Here, Firefox was used, but Selenium also provides interfaces to other common web browsers, such as Chrome and Internet Explorer. Note that you can only use a Selenium interface for a web browser that is installed on your system.
To load a web page in the chosen web browser, the get() method is called:
>>> driver.get('http://example.webscraping.com/search')Then, to set which element to select, the ID of the search textbox can be used. Selenium also supports selecting elements with a CSS selector or XPath. When the search textbox is found, we can enter content with the send_keys() method, which simulates typing:
>>> driver.find_element_by_id('search_term').send_keys('.')To return all results in a single search, we want to set the page size to 1000. However, this is not straightforward because Selenium is designed to interact with the browser, rather than to modify the web page content. To get around this limitation, we can use JavaScript to set the select box content:
>>> js = "document.getElementById('page_size').options[1].text = '1000'"
>>> driver.execute_script(js);
Now the form inputs are all ready, so the search button can be clicked on to perform the search:
>>> driver.find_element_by_id('search').click()Now we need to wait for the AJAX request to complete before loading the results, which was the hardest part of the script in the previous WebKit implementation. Fortunately, Selenium provides a simple solution to this problem by setting a timeout with the implicitly_wait() method:
>>> driver.implicitly_wait(30)
Here, a delay of 30 seconds was used. Now, if we search for elements and they are not yet available, Selenium will wait up to 30 seconds before raising an exception. To select the country links, we can use the same CSS selector that we used in the WebKit example:
>>> links = driver.find_elements_by_css_selector('#results a')Then, the text of each link can be extracted to create a list of countries:
>>> countries = [link.text for link in links]
>>> print countries
[u'Afghanistan', u'Aland Islands', ..., u'Zambia', u'Zimbabwe']
Finally, the browser can be shut down by calling the close() method:
>>> driver.close()
The source code for this example is available at https://bitbucket.org/wswp/code/src/tip/chapter05/selenium_search.py. For further details about Selenium, the Python bindings are well documented at https://selenium-python.readthedocs.org/.