Exploring basic CSS and defining CSS properties and values
Setting a new background color, creating a header, and customizing navigation menus
Changing fonts
Chapter 11 shows how you can use free WordPress themes in your blog. Many people are quite happy to use these themes without making any adjustments to them at all. I can't tell you, however, how many times people have asked me how they can customize a theme that they've found. The answer to their questions is always, "Of course you can make changes on your own."
The practice of changing a few elements of an existing WordPress theme is tweaking. Thousands of WordPress blog owners tweak their existing themes on a regular basis. This chapter provides information on some of the most common tweaks you can make to your theme, such as changing the header image, changing the color of the background or the text links, and changing font styles — and these changes are pretty easy to make, too! You'll be tweaking your own theme in no time flat.
Note
Before you go too wild with tweaking templates, make a backup of your theme so that you have the original files, from which you can easily restore if you need to. You can back up your theme files by connecting to your Web server via FTP (see Chapter 6) and downloading your theme folder to your computer. When you have the original theme files safe and secure on your hard drive, feel free to tweak away, comfortable in the knowledge that you have a backup.
A Cascading Style Sheet (CSS) is a style sheet that controls the appearance of content on a Web site. Every single WordPress theme you use in your blog uses CSS. The CSS provides style and design flair to the template tags in your templates. (See Chapter 12 for information about WordPress template tags.) The CSS for your WordPress theme is pulled in through the Header template (header.php) and is named style.css.
In your Dashboard, click the Editor link on the Appearances menu, and look at the Header template for the Twenty Ten WordPress theme by clicking the Header link on the Edit Themes page. You find the following line of code, which pulls the CSS (style.css) into the page to provide the formatting of the elements of your blog:
<link rel="stylesheet" type="text/css" media="all" href="<?php bloginfo(
               'stylesheet_url' ); ?>" />
Warning
Don't tweak the line of code that pulls in the style.css file; otherwise, the CSS won't work for your blog.
Note
Chapter 12 covers the commonly used parameters for the bloginfo(); template tag used in WordPress themes.
With CSS, you can provide style (such as size, color, and placement) to the display of elements on your blog (such as text links, header images, font size and colors, paragraph margins, and line spacing). CSS selectors contain names, properties, and values to define which HTML elements in the templates you will style with CSS. Table 13-1 provides some examples of CSS selectors and their use.
Table 13-1. Basic CSS Selectors
CSS Selector | Description | HTML | CSS |
|---|---|---|---|
| Sets the style for the overall body of the site, such as background color and default fonts |
|
The background color on all pages is white. |
| Defines how paragraphs are formatted |
|
The color of the fonts used in all paragraphs is black. |
Provide bold headers for different sections of your site |
|
The fonts surrounded by the | |
| Defines how text links display in your site |
|
All text links appear in red. |
You can find the stylesheet (style.css) for the default Twenty Ten theme on the Edit Themes page in your Dashboard (see Figure 13-1). Everything in it may look foreign to you right now, but I want to bring your attention to two items you see when you scroll down through that template:
#container:One type of CSS selector. The hash mark (#) indicates that it's a CSS ID..onecolumn:Another type of CSS selector. The period (.) indicates that it's a CSS class.
IDs and classes define styling properties for different sections of your WordPress theme. Table 13-2 shows examples of IDs and classes from the header.php template in the Twenty Ten WordPress theme. Armed with this information, you'll know where to look in the stylesheet when you want to change the styling for a particular area of your theme.

Table 13-2. Connecting HTML with CSS Selectors
HTML | CSS Selector | Description |
|---|---|---|
In this case, the CSS selector name is |
| Styles the elements for the |
|
| Styles the elements for the |
|
| Styles the elements for the |
|
| Styles the elements for your |
| Styles the elements for your | |
|
| Styles the elements for your |
Note
If you find an element in the template code that says id (such as div id= or p id=), look for the hash symbol in the stylesheet. If you find an element in the template code that says class (such as div class= or p class=), look for the period in the stylesheet followed by the selector name.
CSS properties are assigned to the CSS selector name. You also need to provide values for the CSS properties to define the style elements for the particular CSS selector you're working with.
In the default Twenty Ten WordPress theme, for example, the first piece of markup in the Header template (header.php) is <div id="wrapper">. This ID, with the name wrapper, provides styling for the site page.
In the default Twenty Ten WordPress theme stylesheet, the CSS defined for the wrapper ID is as follows:
#wrapper {
margin: 0 auto;
width: 940px;
background: #fff;
padding: 0 20px;
}
Note
Every CSS property needs to be followed by a colon (:), and each CSS value needs to be followed by a semicolon (;).
The CSS selector is #page, which has three properties:
The first CSS property is
margin, which has the value of0 auto;.The second CSS property is
width, which has the value940px(absolute, fixed pixel width).The third CSS property is
background, which has the value#fff(which is the correct hex code for the color white.The fourth, and final, CSS property is
padding, which has the value:0 20px(no padding on the top and bottom, 20 pixels of padding on the right and left sides).
Table 13-3 provides some examples of commonly used CSS properties and values.
Table 13-3. Common CSS Properties and Values
CSS Property | CSS Value | Examples |
|---|---|---|
| Defines the color of the background (such as red, black, or white) | Markup: CSS: |
| Defines a background image | Markup: CSS: |
| Defines the fonts used for the selector | Markup: CSS: |
| Defines the color of the text | Markup: CSS: |
| Defines the size of the text | Markup: CSS: |
| Defines the alignment of the text (left, center, right, or justified) | Markup: CSS: |
[a] W3Schools has a good resource on the font-family property here: [b] W3Schools has a good resource on the font-size property here: | ||
In Chapter 12, I discuss the Header template (header.php) in detail. In this section, I show you how to tweak the background color in the default Twenty Ten theme. If you're not using the default Twenty Ten theme, you can also use the <body> tag in a Header template to change the background color of your Web site.
The Twenty Ten WordPress theme is packaged with an option that allows you to change the background to a different color or use an image for your background. To use the nifty, built-in custom background feature to change the Twenty Ten background for your blog, follow these steps:
Click the Background link under the Appearances menu.
The Custom Background page loads in the Dashboard.
To change the background color, type the hexadecimal color code in the Color text box.
If you don't know what hex code you want to use, click the Select a Color link and click on a color within the provided color wheel (see Figure 13-2).
Tip
A hexadecimal (or hex) code represents a certain color. Hex codes always start with a hash symbol (#) and have six letters and/or numbers to represent a particular color; in this case,
#d5d6d7. I talk more about hexadecimal values in the section "Changing the background using CSS," later in this chapter.To use an image file for the background, upload an image from your computer.
Click the Browse button under the Upload New Background Image and select a file from your computer. Then click the Upload button.
Change the display options for your new background image.
Position: Select Left, Center, or Right to set the screen position of the background image on your Web site.
Repeat: Select No Repeat, Tile, Tile Horizontally, or Tile Vertically in the drop-down menu to set the image repeat behavior of the background image on your Web site.
Attachment: Select Scroll to set the background image to scroll down the page or select Fixed to set the background image in a static position (so it doesn't scroll down the page).
Save your changes.
Be sure to click the Save Changes button before navigating away from the Custom Background page. Otherwise, your new settings won't be saved.

You can add the Custom Background option to any theme with just a few lines of code. Just follow these steps:
Browse to the Edit Themes page and click the Theme Functions (
functions.php) template.The Theme Functions template opens in the text editor on the left side of the page.
Add the following line of code to the Theme Functions template:
add_custom_background();
This line of code tells WordPress that your theme has added the Custom Background feature.
The Theme Functions template is saved, along with your changes. The Background link now displays below the Appearances menu.
View your Web site page to see your changes.
The <body> tag is simple HTML markup. Every theme has this tag, which defines the overall default content for each page of your Web site — the site's body.
In the stylesheet (style.css), the background for the body is defined like this:
body {
 background: #f1f1f1;
}
The background for the <body> tag uses a hexadecimal color code of #f1f1f1 that gives the background a light gray color. You can use a color or an image (or both) to style the background of your Web site:
Color: The W3Schools Web site has a great resource on hex codes at
http://w3schools.com/HTML/html_colornames.asp.Image: You can easily use an image as a background for your site by uploading the image to the images folder in your theme directory. That value looks like
background: url(images/yourimage.jpg). (Note: Theurlportion of this code automatically pulls in the URL of your blog, so you don't have to change theurlpart to your URL.)Tip
In the case of some basic colors, you don't have to use the hex code. For colors such as white, black, red, blue, and silver, you can just use their names —
background-color: white, for example.
If you want to change the background color of your theme, follow these steps:
In the WordPress Dashboard, click the Editor link on the Appearance menu.
The Edit Themes page opens.
From the Select Theme to Edit drop-down menu, choose the theme you want to change.
Click the Stylesheet template link.
The
style.csstemplate opens in the text editor on the left side of the Theme Editor page (refer to Figure 13-1).Scroll down in the text editor until you find the CSS selector body.
If you're tweaking the default theme, this section is what you're looking for:
body {
 background: #f1f1f1;
}
If you're tweaking a different template, the CSS selector body will look similar.
Edit the
backgroundproperty's values.For example, in the default template, if you want to change the background color to black, you can enter either
background: #000000;
or
background: black;
Click the Update File button in the bottom-left corner of the page.
Your changes are saved and applied to your theme.
Visit your site in your Web browser.
The background color of your theme has changed.
Most themes have a header image that displays at the top of the page. This image is generated by a graphic defined either in the CSS value for the property that represents the header area, or through the use of a feature in WordPress called a custom header. In the WordPress default Twenty Ten theme, all the hard work's been done for you. Including a custom header image on a blog that uses the Twenty Ten theme is pretty darn easy.
To use existing header images, follow these steps:
Click the Header link in the Appearances menu in your Dashboard.
The Your Header Image page appears.
Choose from one of seven header images.
Scroll down to the bottom of the page and select one of the cool header images that WordPress provides for you by clicking the circle to the left of your chosen image.
Click the Save Changes button.
The header image you've chosen is now saved. When you view your Web site, you should see it displayed at the top.
To upload a new header image, follow these steps:
Click the Browse button under the Upload New Header Image title. Select the image from your computer then click Open.
Click Upload.
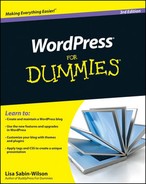
Your image uploads to your Web server. The Crop Header page appears, where you can crop the image and adjust which portion of the header image you would like displayed (see Figure 13-3).
The Header Image page appears, and your new header image is now displayed.
View your Web site.
Your new header image is now displayed at the top of your Web site.
In themes that do not have the custom header image feature, you can easily define a background image for the header image using CSS.
For purposes of this example, the HTML mark up for the header in the template is:
<div id="header"></div>
In the CSS (style.css) file, you can use a background image by defining it in the CSS properties for #header. Use this code:
#header {
background: url(/images/header-image.jpg) no-repeat;
width: 980px;
height: 100px;
}
The background value indicates an image called: header-image.jpg. In order for it to display on your site, you need to create the image and upload it to your Web server under /images/ directory.
A navigation menu is a listing of links displayed on your site. These links can be links to pages, posts, or categories within your site, or they can be links to other sites. Either way, you can define navigation menus on your site through the use of the built-in feature in WordPress called Custom Menus.
It's to your advantage to provide at least one navigation menu on your site so that readers can see everything your site has to offer. Providing visitors with a link — or several — to click is in keeping with the point-and-click spirit of the Web.
The Custom Menu feature is already built in to the default Twenty Ten WordPress theme, so you don't have to worry about preparing your theme for it. However, if you're using a different theme, adding this functionality is easy:
Click the Editor link under the Appearances menu. Then click the Theme Functions (
functions.php) template.The Theme Functions template opens in the text editor on the left side of the Edit Themes page.
Type the following function on a new line in the Theme Functions template file:
add_theme_support( 'nav-menus' );
Click the Update File button to save the changes to the template.
This template tag tells WordPress that your theme can use the Custom Menu feature, and a Menus link now displays under the Appearances menu in the Dashboard.
Open the Header template (
header.php)Click on the Header link on the Edit Themes page to open the Header template in the text editor on the left side of the Edit Themes page.
Add the following template tag by typing it on a new line in the Header template (
header.php):<?php wp_nav_menu(); ?>
This template tag is needed so the menu you build using the Custom Menu feature will display at the top of your Web site. Table 13-4 gives the details on the different parameters you are able to use with the
wp_nav_menu();template tag in order to further customize the display to suit your needs.Save the changes you've made to the Header template.
Click the Update File button at the bottom of the page.
Table 13-4. Common Tag Parameters for wp_nav_menu();
Parameter | Information | Default | Tag |
|---|---|---|---|
| The unique ID of the menu (because you can create several menus, each has a unique ID number) | Blank |
wp_nav_menu ( array( 'id' => '1' ) ); |
| The menu name in slug form (for example, | Blank |
wp_nav_menu ( array( 'slug' => 'nav-menu' ) ); |
| The menu name | Blank |
wp_nav_menu( array( 'menu' => 'Nav Menu' ) ); |
| The CSS class used to style the menu list | Menu |
wp_nav_menu ( array( 'menu_ class' => 'mymenu' ) ); |
| The HTML markup used to style the list (either an unordered list ( |
|
wp_nav_menu ( array( 'format' => 'ul' ) ); |
| The parameter that creates a fall back if a custom menu doesn't exist |
|
wp_nav_menu ( array( ' fallback_cb' => 'wp_page_menu') ); |
| The text thatdisplays before the link text | None |
wp_nav_menu ( array( 'before' => 'Click Here' ) ); |
| The text that displays after the link text | None |
wp_nav_menu ( array( 'after' => '»' ) ); |
After you add the menu feature to your theme (or if you're already using a theme that has it added), building menus is super easy — just follow these steps:
Click the Menus link in the Appearances menu on your Dashboard.
The Menus page opens on your WordPress Dashboard.
Type a name in the Menu Name box and click the Create Menu button.
The Menus page is reloaded with a message that tells you your new menu has been created.
Add new links to your newly created menu.
There are three ways that WordPress allows you to add new links to the new menu you just created:
Custom Links: In the URL field, type the URL of the Web site that you want to add (
http://www.google.com). Then type the name of the link that you want displayed in your menu in the Text field (Google). Then click the Add to Menu button.Pages: Click the View All link to display a list of all the page(s) you have currently published on your site. Place a checkmark in the box next to the page names you would like to add to your menu. Then click the Add to Menu button.
Categories: Click the View All link to display a list of all the categories you've created on your site. Place a checkmark in the box next to the category names you would like to add to the menu. Then click the Add to Menu button.
Review your menu choices on the right side of the page.
When you add new menu items, the column on the right side of the Menus page populates with your menu choices. In Figure 13-4, I've populated my menu with one custom link, one page link, and one category link (Home, About and Books, respectively).
Edit your menu choices, if needed.
Click the Edit link to the right of the menu link name () to edit the information of each individual link in your new menu.
Save your menu before leaving the Menus page.
Be sure to click the Save Menu button under Menu Settings on the right side, at the top of the Menus page. A message confirming that the new menu has been saved appears.
Tip
You can create as many menus as you need to for your Web site. Just follow the parameters for the menu template tag to make sure you're pulling in the correct menu in the correct spot on your theme. Pay attention to either the menu ID or menu name in the template tag.

Fonts come in all shapes and sizes, and you can use CSS to define the font styles that display in your blog. Changing the font can change the look and feel of your blog dramatically, as well as improve your readers' experience by making the text easy on the eyes. Table 13-5 displays some of the most commonly used CSS properties and values for applying font styling to your stylesheet.
The Web is actually kind of picky about how it displays fonts, as well as what kind of fonts you can use in the font-family property. Not all fonts display correctly on the Web. To be safe, here are some commonly used font families that display correctly in most browsers:
Serif fonts: Times New Roman, Georgia, Garamond, Bookman Old Style
Sans-serif fonts: Verdana, Arial, Tahoma, Trebuchet MS
Note
Serif fonts have little tails, or curlicues, at the edges of letters. (This text is in a serif font.) Sans-serif fonts have straight edges and are devoid of any fancy styling. (The heading in Table 13-5 uses a sans-serif font.)
When you want to change a font family in your CSS, open the stylesheet (style.css), search for property: font-family, change the values for that property, and save your changes.
In the default template CSS, the font is defined in the <body> tag like this:
font-family: 'Lucida Grande', Verdana, Arial, Sans-Serif
You can easily change the color of your font by changing the color property of the CSS selector you want to tweak. You can use hex codes to define the colors.
In the default template CSS, the font color is defined in the <body> tag like this:
color: #333;
To tweak the size of your font, change the font-size property of the CSS selector you want to change. Font sizes generally are determined by units of measurement, as in these examples:
px:pixel measurement. Increasing or decreasing the number of pixels increases or decreases the font size (12pxis larger than10px).pt:point measurement. As with pixels, increasing or decreasing the number of points affects the font size accordingly (12ptis larger than10pt).%: percentage measurement. Increasing or decreasing the percentage number affects the font size accordingly (50% is the equivalent to 7 pixels; 100% is the equivalent to 17 pixels).
In the default template CSS, the font size is defined in the body tag as a percentage, like this:
font-size: 62.5%;
Putting all three elements (font-family, color, and font-size) together in the <body> tag, they style the font for the overall body of your site. Here's how they work together in the <body> tag of the default template CSS:
body {
font-size: 62.5%; /* Resets 1em to 10px */
font-family: 'Lucida Grande', Verdana, Arial, Sans-Serif;
color: #333;
}