2
The X User Environment
Administrators need to configure X environments for their users. This chapter describes the issues involved in making an X environment work properly.
In This Chapter:
Components of the X Environment
The -geometry Command-line Option
Complications with Display Names
Setting the Search Path for OpenWindows Support
Setting the Search Path for Mixed Environments
xterm and the Login Shell (C Shell)
Starting a Remote Client with rsh
2
The X User Environment
2.1 The Configured X Session
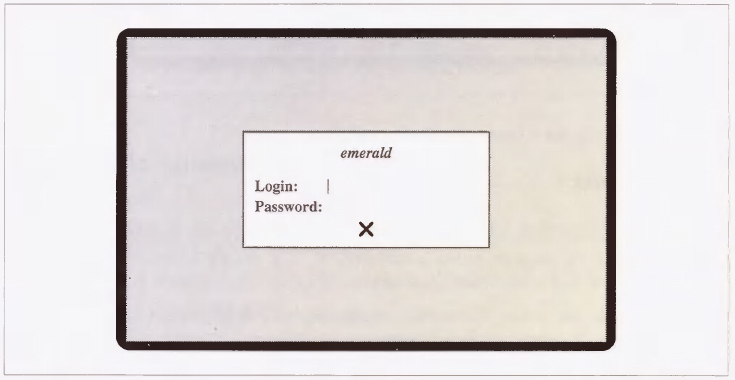
We set up an X environment for a new employee, Joan, whose job involves internal project management. Joan is new to both UNIX and X. We've set up her environment so that when she logs in via the X Display Manager, xdm, she gets an environment resembling that in Figure 2-1.*
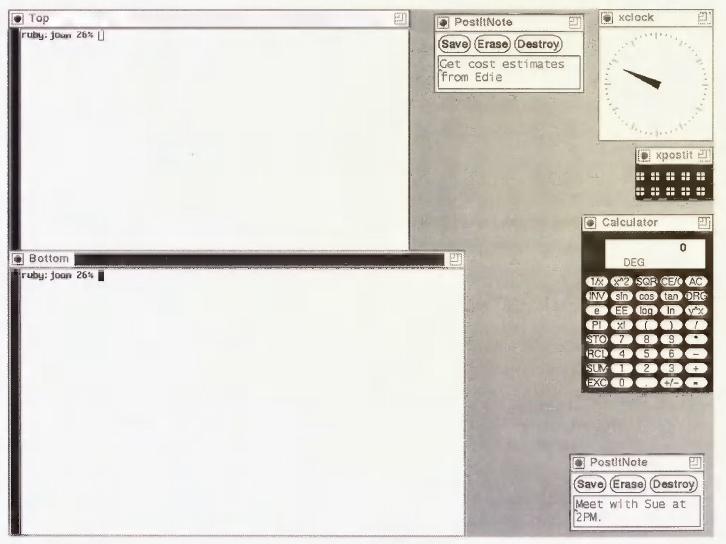
- Joan gets two terminal emulator windows. The top one is labeled “Top” and the bottom one is labeled “Bottom.”
- Joan has a clock in the upper-right corner of the screen.
- Joan wants to have a calculator available all the time, since her job involves juggling numbers.
- The rest of the windows are from a public domain application called xpostit, which Joan can use to keep notes and reminders on her desktop.
The root window is the screen background behind the X client windows. If Joan presses her first mouse button while the pointer is in the root window, she gets a root menu resembling that in Figure 2-2. We've configured her root menu so she can start new clients easily:
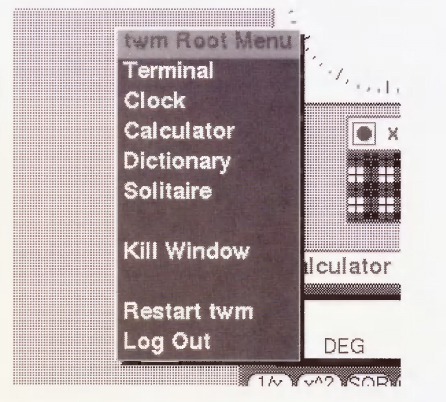
By pressing down her first mouse button and then selecting the “Dictionary” option, for example, Joan can bring up a dictionary application.
To create this environment, we needed to set up three X configuration files in Joan's home directory, in addition to the “standard” UNIX shell startup files. The X configuration files are:
.xsession
The .xsession file is the shell script that actually starts each of the applications in Joan's startup environment. The .xsession script reads:
#!/bin/sh

# Add /usr/local/bin to the path for this script:
PATH=$PATH:/usr/local/bin
export PATH

# Set up a pattern for the root window:
xsetroot -bitmap /usr/include/X11/bitmaps/dimple1

# Merge in user resources:
xrdb -merge $HOME/.Xresources

# Start some applications:
xterm -title Top -g 70x35+1+1 &
xterm -title Bottom -g +1-0 &
xclock -g -0+0 &
xcalc -g -0+298 &
xpostit -sv -g 110x50-0+200 &

# Start a window manager in the foreground:
twm
.Xresources
The .Xresources file contains resource definitions. These resources define Joan's client preferences. Currently, Joan's resources are used to set some preferences for her xterm terminal emulator windows. We set her up to use a font that we think she would prefer over the default, we turned on a scroll bar, and we set the number of lines to be saved for scrolling to be 200. The .Xresources file reads:
! Resource definition file.

! XTerm definitions:
XTerm*font:-misc-fixed-bold-r-normal--15-140-75-75-c-90-iso8859-1
XTerm*scrollBar:true
XTerm*savedlines:200
.twmrc
The .twmrc file is a configuration file for Joan's window manager, twm. A window manager is a special client that controls how windows are moved and resized. In addition, the window manager defines the root menu shown in Figure 2-2. The .twmrc file is long, but we can show you the part that defines the root menu:
menu “rootmenu”
{
“twm Root Menu” f.title
“Terminal”      f.exec “xterm &”
“Clock”         f.exec “xclock &”
“Calculator”    f.exec “xcalc &”
“Dictionary”    f.exec “xwebster &”
“Solitaire”     f.exec “spider &”
“”              f.nop
“Kill Window”   f.destroy
“”              f.nop
“Restart twm”   f.restart
“Log Out”       f.quit
}
Together, these files define Joan's X user environment. They are defined in addition to the shell startup files that she needs to define her UNIX shell environment.
Now, imagine that you're Joan, new to both UNIX and X, and you're faced with these startup files. Each file has its own peculiar syntax that she might be able to follow, but will probably have trouble duplicating. Where did we get that arcane font name? Why do some of the commands in .xsession end in ampersands (&) while others don't?
2.1.1 The Twilight Zone
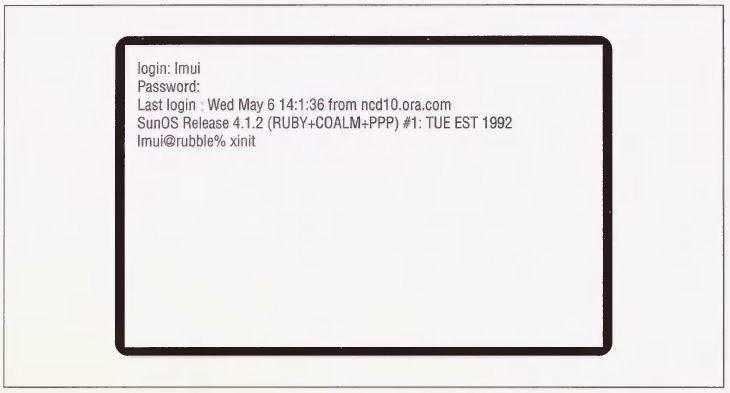
One day Joan logs in at a workstation. The X server isn't running on the workstation console, so Joan tries to start her X session by typing X. What she gets is a blank screen with an “x” representing her pointer. She is unable to start applications and after several minutes decides to start over.
After rebooting the machine, Joan learns that she should use the xinit command, not X. When she does this, she gets a single xterm terminal emulation window with a very small font, and no window manager, as shown in Figure 2-3.

(Unknown to Joan, this has happened because the .xsession file is the one primarily responsible for configuring Joan's user environment under xdm. Under xinit, she needs an .xinitrc file. See Section 2.4 for more information on starting the X session using xinit.)
Joan tries to start a clock using the xclock command, shown in Figure 2-4.
What happens is that the clock appears on top of the xterm window, obscuring her prompt, as shown in Figure 2-5.

Since there is no window manager running, Joan can't move the new xclock window from on top of the xterm window. She needs to place her pointer on the xterm window and type RETURN a few times before her prompt peeks out from underneath the clock window.
What Joan has stumbled onto is X in its unconfigured state.
Joan types “XYZZY”. Nothing happens.
2.2 Components of the X Environment
Joan's adventures are meant to show the world of difference between X in its raw state, and X when it has been configured. You might think of it as the difference between an unfurnished apartment and a home.
Like someone's home, the X user environment is made up of many components. You can't just bring in furniture and expect the house to look lived-in; similarly, you can't just start a window manager and expect the X environment to be complete.
Some users would prefer to configure their own environments. Other users won't have the slightest idea of where to begin. As an administrator, you have to decide whether you want to set up an environment with reasonable defaults for new users, or whether you'd rather just give users a bare-bones environment and let them figure it out on their own.
Our opinion is that it's always better to take the time to set up a decent environment for your users. “Power” users can always rip apart what you set up and start again from scratch; but users who are just interested in getting their jobs done will appreciate having something workable to begin with.
One approach to creating a useful default environment is to alter the system-wide files. For example, if a user has no .twmrc file, they will use the file /usr/lib/X11/twm/system.twmrc. If a user has no .xsession file, they will use commands specified in the /usr/lib/X11/xdm/Xsession file. As shipped in the MIT distribution, the defaults in these files are fairly basic. But you can configure these defaults system-wide to better accommodate your users.
The preferable approach is the “template” approach, as we set up earlier for the user named Joan. We gave Joan a set of configuration files that had been tried and tested and liked by other users. The advantage to using templates is that when users are ready to edit their environment, it's much easier if the configuration files are already set up locally.
Either way, the administrator needs to take a strong hand in setting up the user environment. The administrator is all that stands between a user and the abyss of the default X environment.
There are an endless number of factors that can influence a user's X environment, but the simplest user environment (like Joan's) consists of a window manager, a little client customization, and a startup script to bring it all together.
2.2.1 Window Managers
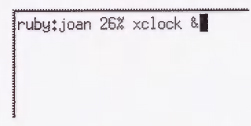
As we mentioned earlier, window managers are special clients that allow you to move, resize, and iconify windows. The window manager provided in the X source distribution is twm, the Tab Window Manager. Window managers are generally started in the user's startup script, but like other clients, they can be started on the command line as well, as shown in the following figure.

If a window manager were already running, the command would fail with a message resembling:
twm:  another window manager is already running on screen 0?
twm:  unable to find any unmanaged screens
The window manager gives each window its own borders and titlebar. By pressing the pointer on the titlebar (i.e., holding down the first mouse button while the pointer is on the titlebar), you can move the window. By pressing the icon at the upper right corner of the titlebar, you can resize the window. By pressing the icon at the upper left corner of the titlebar, the window is iconified.
Once the window manager is started, you can use it to move windows on the screen. You can also use it to start new applications on the root menu, as shown in Figure 2-2.
When a new window appears, twm allows you to place the window by displaying an outline of the window with the upper left corner at your current pointer position. When you press the first mouse button, the window will be placed at that position.
The behavior of twm can be configured by editing a file called .twmrc in your home directory. Alternatively, the default behavior of twm on a system can be changed by editing the system.twmrc file, usually in the /usr/lib/X11/twm directory. For information on how to configure twm, see either the twm manual page or The X Window System User's Guide, Standard Edition (O'Reilly & Associates, 1990).
twm is the only window manager supplied with the MIT X distribution, but there are many other window managers distributed by vendors. One of the most popular window managers is mwm, the Motif Window Manager. mwm is a window manager which implements the OSF/Motif “look and feel.” Another popular window manager is olwm, a window manager for OPEN LOOK. Other window managers are swm (the Solbourne window manager, which can simulate both olwm and mwm in separate “modes”); gwm (a public domain window manager that uses LISP-like syntax in its configuration, and can simulate mwm); and tvtwm and olvwm, which are versions of twm and olwm (respectively) that support a “virtual” root window. A virtual root window is a root window that is larger than the portion visible on your display. It can be scrolled around to move different sections into view. This simulates having a much larger display and gives more room to display clients.
See The X Window System User's Guide, Motif Edition (O'Reilly & Associates, 1992) for more information on mwm and Motif. For more information on olwm and OPEN LOOK, see the upcoming X Window System User's Guide, OPEN LOOK Edition (O'Reilly & Associates, 1993).
2.2.2 Customizing Clients
There are two ways to customize clients: with command-line options, and with resources.
The use of command-line options to modify the behavior of a program should be familiar to any UNIX user, but even so, it's worth reviewing a few of the most commonly-used X options—those for specifying fonts, window size and placement, and colors. This discussion will also serve to introduce the treatment of resources, which provide a convenient way to set “global” options.
2.2.2.1 The -fn Command-line Option
For specifying a font, the xterm client provides a -fn command line option. Font names in X are a bit unwieldy, but you can use the xlsfonts command to get a list of fonts available for your X server. For example:
% xlsfonts
-adobe-courier-bold-o-normal--10-100-75-75-m-60-iso8859-1
-adobe-courier-bold-o-normal--11-80-100-100-m-60-iso8859-1
-adobe-courier-bold-o-normal--12-120-75-75-m-70-iso8859-1
      ...
-misc-fixed-bold-r-normal--15-140-75-75-c-90-iso8859-1
      ...
(You might also try the xfontsel client, which can be used to display fonts available to your server.)
See Chapter 6 for a description of each of the fields in a font name. For now, let's use the fixed font that we showed in the output of xlsfonts. Use the -fn option:
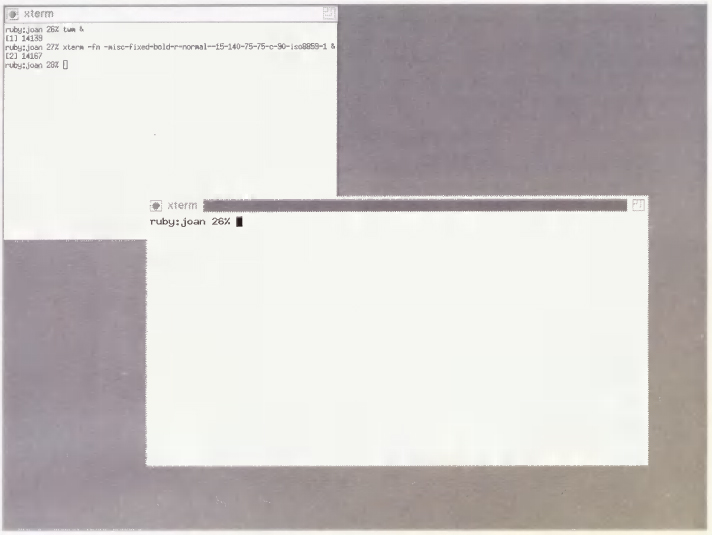
% xterm -fn -misc-fixed-bold-r-normal--15-140-75-75-c-90-iso8859-1 &
This command line gives you a window resembling that in Figure 2-7.
2.2.2.2 The -geometry Command-line Option
The -geometry or -g command-line option can be used to specify two things: where the client window initially appears and what size it should initially be. To have an xterm window that's 92 characters across and 40 lines long (instead of the default 80×24), enter:
ruby:joan % xterm -geometry 92x40 &
To have an xterm window appear at position (324,190) on the screen, enter:
ruby:joan % xterm -geometry +324+190 &
You can combine the two requests into one argument:
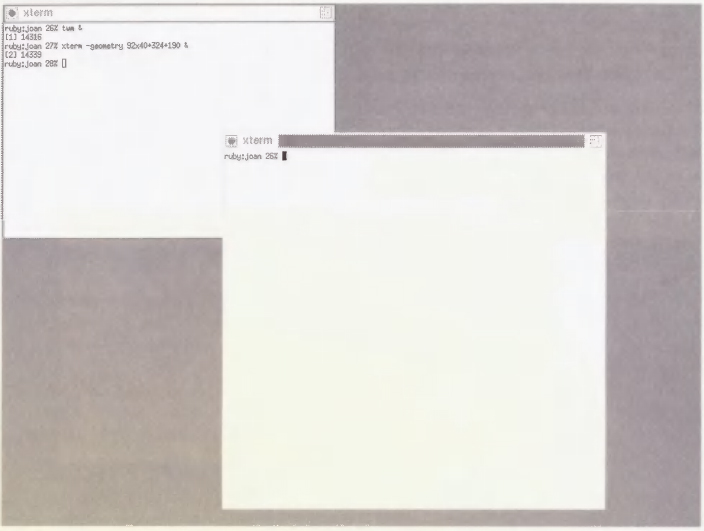
ruby:joan % xterm -geometry 92x40+324+190 &
You see a window resembling that in Figure 2-8.
The position (0,0) is the upper left corner of the root window. The numbers following the plus signs (+) signify the offset (in number of pixels) from (0,0). The top left corner of window is placed at these coordinates when the offset is positive. It is also possible to specify a negative offset using minus signs (-):
ruby:joan % xterm -geometry 85x40-50-150 &
The bottom right corner of the window is offset 50 pixels from the right border and 150 pixels up from the bottom of the screen. Since displays differ in the number of pixels, a window may be placed differently depending on the size and resolution of your display. Using a negative offset will guarantee that the window is always a certain distance from the right side and bottom, regardless of the size. This is handy if you often move from one type of display to another, as your windows will always remain within the screen borders. In the .xsession file we showed earlier, we had set up some windows to position themselves at particular positions, using the −g shorthand for −geometry:
xterm -title Top -g 70x35+1+1 &
xterm -title Bottom -g +1-0 &
xclock -g -0+0 &
xcalc -g -0+298 &
xpostit -sv -g 110x50−0+200 &
- The top xterm window appears at the upper left corner of the screen, and is resized to be 70x35.
- The bottom xterm appears flush to the bottom left corner of the screen.
- The xclock window appears flush to the upper right corner of the screen.
- The xcalc and xpostit windows appear flush to the right edge of the screen. The xpostit control box is also resized a little to look nice.
Without a specified geometry, the placement of windows is controlled by the window manager, appearing at (0,0) if no window manager is running.
The size of the xterm window is given in character widths and heights. For most other X clients, however, the unit of measurement used for window size is generally the number of pixels. See the client manpage for information on what units are used for size specification.
2.2.2.3 Specifying Colors
If you have a color monitor, you might want to use some colors in your display. You can specify a new foreground and background color using the -fg and -bg command-line options. For example, for a window with a powder blue background and hot pink foreground, enter:
ruby:joan % xterm -bg powderblue -fg hotpink &
Use the showrgb command for a list of colors available on your system for color displays.
On a monochrome display, you can get a black background and white foreground with:
ruby:joan % xterm -bg black -fg white &
Or get the same results by calling xterm with the special -rv option, for reverse video:
ruby:joan % xterm -rv &
Either command line will give you a window resembling that in Figure 2-9.

See Chapter 6 for a complete discussion of color.
2.2.2.4 Using Resources
Command-line options are the quick and dirty way of customizing a client. Before we go on, however, we should tell you a little about the alternative, using resources.
There are a few disadvantages to using command-line options. One is that you can end up with some awfully long command lines. For example, if you want to specify a different geometry, new font, and different background and foreground colors, your command line might look like this:
% xterm -fn -misc-fixed-bold-r-normal--15-140-75-75-c-90-iso8859-1
-geometry 90x40 -bg yellow -fg navyblue &
If you don't want to type this out every time you start up a new xterm window, you could set up your window manager to run the entire command from your root menu. But the better solution is to use resources to set up your client preferences.
Resources are variables that are used by X clients. They have the advantage of being definable at the system level, at the server level, and at the user level. By defining resources, you can change the default behavior of clients for your account or for a particular X server. For example, you can set the following resources in a file called .Xresources in your home directory:
XTerm*font: -misc-fixed-bold-r-normal--15-140-75-75-c-90-iso8859-1
XTerm*Background:       yellow
XTerm*Foreground:       navyblue
XTerm*VT100.geometry:   90x40
(The string VT100 used in the geometry specification is the name of a widget used within xterm.)
To load these resources into the server, where all clients can access them, type:
ruby:joan % xrdb -merge .Xresources
After these resources are loaded into the server, all subsequent xterm windows will appear the way you want them. You can just type:
ruby:joan % xterm &
We have described only a small subset of the things that can be set using resources. A client may provide resources to redefine almost any variable it uses. For example, in the .Xresources file we showed earlier, we set the scrollBar resource, and specified the number of lines to be saved for scrolling:
XTerm*font:         -misc-fixed-bold-r-normal--15-140-75-75-c-90-iso8859-1
XTerm*scrollBar:    true
XTerm*savedlines:   200
Resources might be used for anything that the program wants to leave configurable by the user or administrator. For example, an ftp client may use resources to set the default ftp server to connect to; the xcalc client uses resources to define all of its buttons and the functions they call; and the xdm client uses resources to point to its configuration files. For a listing of the resources used by a particular client, refer to the manpage provided with that client. For more information on resources, see Appendix D.
2.2.3 The Startup Script
The startup script is what brings a user's entire X environment together. If you use xdm to start your X sessions, this script is called $HOME/.xsession. If you use xinit, the script is called $HOME/.xinitrc.* We'll show the simple startup script that we used earlier:
#!/bin/sh

# Add /usr/local/bin to the path for this script:
PATH=$PATH:/usr/local/bin
export PATH

# Set up a pattern for the root window:
xsetroot -bitmap /usr/include/X11/bitmaps/dimple1

# Merge in user resources:
xrdb -merge $HOME/.Xresources

# Start some applications:
xterm -title Top -g 70x35+1+1 &
xterm -title Bottom -g +1-0 &
xclock -g -0+0 &
xcalc -g 0+298 &
xpostit -sv -g 110x50-0+200 &

# Start a window manager in the foreground:
twm
The first thing that this startup script does is set the path to be used for commands for that script. By default, :/bin:/usr/bin:/usr/bin/X11:/usr/ucb is used as the search path for the startup shell. Since the xpostit command resides in /usr/local/bin, it needs to be called with its full pathname, or /usr/local/bin needs to be appended to the search path. This path is then exported, so that it will also be used by other clients such as twm.
The startup script uses xsetroot to give the user a nicer background than the default root window background.
Next, the startup script calls the xrdb client. It is this command that reads the resources defined in the .Xresources file. The xrdb client loads resources directly into the X server. There are alternate ways of reading resources (as described in Section D.1.2), but if you load the resources directly into the server, you guarantee that all clients displaying to that server will be able to access them. xrdb should be run before any applications are run, since you want to make sure that the resources are loaded before you start any applications that use them; and it should be called in the foreground, to guarantee that the resources are fully loaded before the script continues.
The applications are then started. We described how the -g options are being used in Section 2.2.2.2. Note that each of these command lines are placed in the background.
Finally, the twm window manager is started. When twm starts up, it is configured by the .twmrc file.
2.2.3.1 The Foreground Process
As shown in the sample startup script, clients such as xrdb and xsetroot are not run in the background. xrdb and xsetroot are non-interactive clients that exit as soon as they are completed.
On the other hand, clients like xterm and xcalc need to be put in the background, or the script will hang until they are completed (or killed). What the user will see is that the top xterm window appears, but nothing else; after the user exits xterm, the bottom xterm window appears; the second xterm window has to be killed before the xclock window pops up; and so on.
There is one exception: the last interactive client is always left in the foreground. Otherwise (like any shell script), the startup script exits immediately, and the X server resets (killing all clients). What the user will see is that all windows appear and then instantly disappear.
The last interactive client therefore keeps the X session alive. When it is exited (or killed), the entire X session exits as well. For that reason, the last process is also frequently called the controlling process.
The sample script makes the twm window manager the foreground process. The root menu option to exit twm is labeled “Log Out” to make it clear that exiting twm will log you out of your X session. In real life, you can make any interactive client your foreground process.
In general, users make their foreground process either an xterm client or their window manager. If you use the window manager, exiting the window manager exits the entire X session, which is an intuitive way to exit but means that you can't change window managers without editing your startup file and restarting X. If you use an xterm window, you may want to run the window with the -iconic option, in the hope that if the window is iconified, then the user is less likely to exit accidentally. Users with console xterm -C or xconsole clients often use the console window as the controlling process.
Another possibility is to use the built-in shell command wait at the end of the startup script, in which case you will have to exit each X client individually before your X session exits.
If you use an xterm window for your controlling process, beware of the “autologout” feature available for some shells. With the “autologout” feature, you can set it up so that your shell is killed when it is idle for a certain amount of time, e.g., 60 minutes. You can be working frantically in another X window, but if you have autologout set for your controlling xterm shell, then your whole X session will be killed after 60 minutes of idle time in the controlling shell.
2.3 The Shell Environment
Now we've talked a little about the X environment, we have to discuss how it relates to the UNIX shell. Although the shell is external to the X environment, X clients running on UNIX systems necessarily depend on the shell being set up properly. This means making sure that environment variables are set up properly and that the search path is correct. For remote clients, you have to deal with the shell environment on the remote machine as well.
2.3.1 Setting the DISPLAY Variable
The most important shell environment variable for X clients is DISPLAY. When a user logs in at an X terminal, the DISPLAY environment variable in each xterm window is set to her X terminal's hostname followed by : 0.0.
ruby:joan % echo $DISPLAY
ncd15.ora.com:0.0
When the same user logs in at the console of the workstation named sapphire, the DISPLAY environment variable is defined as just : 0.0:
sapphire:joan % echo $DISPLAY
:0.0
(Before X11 Release 5, the DISPLAY variable might appear as unix: 0.0.)
The DISPLAY environment variable is used by all X clients to determine what X server to display on. Since any X client can connect to any X server that allows it, all X clients need to know what display to connect to upon startup. If DISPLAY is not properly set, the client cannot execute:
sapphire:joan % setenv DISPLAY foo:0
sapphire:joan % xterm
Error: Can't Open display
You can override the value of DISPLAY by using the -display command-line option. For example:
sapphire:joan % xterm -display sapphire: 0.0 &
The first part of the display name (up to and including the colon) identifies the type of connection to use and the host that the server is running on. The second part (in most cases, the string 0.0) identifies a server number and an optional screen number. In most cases, the server and screen numbers will both be 0. You can actually omit the screen number name if the default (screen 0) is correct.
Note that we used both “: 0.0” and “sapphire: 0.0” to access the local console display of the workstation named sapphire. Although both these names will work, they imply different ways of connecting to the X server.
- The “:” character without an initial hostname specifies that the client should connect using UNIX domain sockets (IPC).
Instead of specifying :0.0, you can also prepend the word “unix” for an IPC connection:
sapphire:joan % setenv DISPLAY unix:0.0
(This is used in pre-R5 releases of X11.)
Since processes can communicate via IPC only if they are running on the same host, you can use a leading colon or the unix keyword in a display name only if both the client and server are running on the same host—that is, for local clients displaying to the local console display of a workstation.
- Using the hostname followed by a colon (e.g., sapphire:) specifies that the client should connect using Internet domain sockets (TCP/IP). You can use TCP/IP connections for displaying clients on any X server on the TCP/IP network, as long as the client has permission to access that server (see Section 2.3.4 for information on running remote clients). You can also use the hostname form for displaying clients on the local server, although many people argue that it's preferable to use unix: 0.0 for any local clients. (It's faster, and there's no danger of a misconfigured name server getting in the way).
- There is one other way of connecting: on a DECnet network, the syntax is the same as for TCP/IP except that two colons are used instead of one. To connect to an X server running on a host named oravax on a DECnet network, you might use the string oravax: : 0.0.
2.3.1.1 Complications with Display Names
Occasionally, especially when testing a new server, you may find that you can't open a particular display. When confronted with such a situation, we recommend trying the following:
- Make sure that you are using the proper name of the display, especially if you are running a client from a foreign host. A common mistake is to use : 0 or unix:0, forgetting that different hosts have different ideas of what these display names refer to.
- Make sure that TCP/IP is properly configured by confirming that other connections work, using (for example) rlogin or telnet.
If you suspect the problem is with your name server, substitute the IP address of the display for the hostname:
ruby:joan % xterm -display 140.186.65.35:0
- Make sure that access control isn't the problem by temporarily allowing access to all hosts on the server machine. (Remember to undo this after the experiment!)
sapphire:joan % xhost +
If this turns out to be the problem, see Chapter 4 for more information on how to configure server access control more robustly.
- Some versions of TCP/IP, particularly on PCs, restrict the number of allowed connections. Find out whether the machine running the server program is restricted to a certain number of TCP/IP connections and increase it as needed. (How you actually do this is dependent on the TCP/IP vendor.)
Note that like all other environment variables set in your shell environment, the DISPLAY environment variable will propagate to all processes you start from that shell.
When you run clients from remote machines, some additional problems with the DISPLAY environment variable need to be addressed. See Section 2.3.4 for more information on running remote clients.
2.3.2 Redefining the Search Path
The command search path needs to include the directories containing X executables. This search path should live in the user's startup shell script (.cshrc or .profile). Assuming that the X executables are in /usr/bin/X11 and /usr/local/bin/X11. here's a simple adapted entry for a .profile file (Bourne shell):
PATH=/usr/ucb:/bin:/usr/bin:/usr/bin/X11:/usr/local/bin/X11:.
export PATH
And here's one for a .cshrc file (C shell):
set path = (/usr/ucb /bin /usr/bin /usr/bin/X11 /usr/local/bin/X11 .)
(For security reasons, you may want to omit the current directory (.) from your path.)
If the path is not set properly, you will get the notorious “Command not found.” error message for all X clients.
Unless specified otherwise, the .xsession startup script has the search path set to :/bin:/usr/bin:/usr/bin/X11:/usr/ucb. If you run clients in your startup script that reside in a different directory, you may need to reset the search path within the startup script. You may need to do this if you generally use the C shell, but your .xsession is a Bourne shell script. For example:
#!/bin/sh
PATH=$PATH:/usr/local/bin/X11:$HOME/bin
export PATH
     ...
Alternatively, you can write your .xsession as a C shell script, in which case it will automatically run your .cshrc file and inherit the search path set in that file.
2.3.2.1 Setting the Search Path for OpenWindows Support
If you are running OpenWindows, you need to add the following directories to your search path along with your vanilla X11 binary directories:
set path = ($path /usr/openwin/{bin, demo} )
(In OpenWindows 3.0, the /bin/xview directory is now linked to bin.)
In addition, you need to set the shared library path to /usr/openwin/lib:
setenv LD_LIBRARY_PATH /usr/openwin/lib:/usr/lib
If the OpenWindows distribution is elsewhere on your system, you can set the OPENWINHOME environment variable and use it in place of /usr/openwin. For example, if the OpenWindows distribution is in /usr/local/openwin, C shell users can enter in their .cshrc files:
setenv OPENWINHOME /usr/local/openwin
set path = ($path $OPENWINHOME/{bin, demo} )
setenv LD_LIBRARY_PATH $OPENWINHOME/lib:/usr/lib
In Bourne shell syntax, this might read:
OPENWINHOME=/usr/local/openwin
PATH=$PATH:$OPENWINHOME/bin:$OPENWINHOME/demo
LD_LIBRARY_PATH=$OPENWINHOME/lib:/usr/lib
export OPENWINHOME PATH LD_LIBRARY_PATH
2.3.2.2 Setting the Search Path for Mixed Environments
If you are running multiple releases of X11 on your system, you need to set your search path appropriately according to which executables you want to run. One situation in which you might want to run multiple releases is if you are testing a new release of X11 before setting it loose on your users. For example, suppose that you have X11R4 installed and running in /usr/lib/X11 and /usr/bin/X11, and have just compiled and installed X11R5 into /usr/X11R5/lib and /usr/X11R5/bin. For testing your new environment, enter the /usr/X11R5/bin directory into your command search path before /usr/bin/X11:
set path = ( /usr/X11R5/bin $path )
On SunOS, you also need to enter /usr/X11R5/lib into your LD_LIBRARY_PATH:
setenv LD_LIBRARY_PATH /usr/X11R5/lib
Another possibility is to set the LD_LIBRARY_PATH environment variable for each command:
% (setenv LD_LIBRARY_PATH /usr/X11R5/lib ; /usr/X11R5/bin/xterm)&
2.3.3 xterm Issues
The xterm client, which starts up a terminal shell, has its own particular issues. xterm has to have its termcap or terminfo entries installed, and since xterm windows can be resized, it needs to be able to adjust those entries dynamically for different dimensions.
2.3.3.1 xterm and Terminal Emulation
Among other common functions, shell startup scripts such as .login and .profile generally deal with setting the terminal type for that shell. This might be as simple as setting the TERM environment variable, or something more elaborate using tset.
Setting the terminal type, however, is not required for xterm terminal windows. The xterm client has its own way of dealing with terminal types. Several terminal entries work with standard-sized (80×24) xterm windows, including “xterm,” “vt102,” “vt1OO,” and “ansi.” The xterm client automatically searches the terminal database for these entries (in order) and sets the TERM environment variable according to which entry it finds first.
Since xterm takes care of setting terminal emulations by itself, you may want to remove any lines in startup files that set the terminal type, or have them default to “xterm.”
There are two types of terminal databases available on UNIX systems: termcap, usually associated with BSD-based systems, and terminfo, associated with System V-based systems. The xterm source directory contains files called termcap and terminfo that contain the termcap and terminfo definitions for xterm. The termcap file for xterm should be entered as one of the first entries in your /etc/termcap file. The terminfo file is meant to be compiled with tic, the TermInfo Compiler. For more information on termcap and terminfo, see the Nutshell Handbook, termcap and terminfo (O'Reilly & Associates, 1991).
Your vendor may supply its own version of xterm with its own terminal emulation and other enhancements (e.g., hpterm, aixterm, or scoterm). See your vendor's documentation for more details.
2.3.3.2 The resize Client
When the xterm client is called, it not only sets the TERM environment variable, but it also adjusts the terminal definition for the size of the window that is being created. The size of xterm windows, however, can be changed later on by using the window manager. If the window is resized, then the user's shell may need to be passed the new size information as well, or programs that use termcap and terminfo won't work correctly. The resize client is provided for redefining the number of lines and columns for the terminal database that is used in an xterm window. Note that resize cannot be used for terminal emulators other than xterm, since it depends on xterm's escape sequences.
Some systems can send a “window size changed” signal (SIGWINCH) to programs and do not require resize to be run for a resized xterm window. We recommend using resize only if terminal-based programs start to have problems with your window size. A typical terminal-based program that is having problems with the window size is shown in Figure 2-10.

The resize client is typically used immediately after the dimensions of an xterm window are changed. A peculiarity of the resize client is that it does not access the shell itself, but simply returns the shell commands that would be needed; to have those commands read by the shell, you have to either save its output in a file and source it in with the “.” command (Bourne shell) or source (C shell) commands, or call it using the shell command eval. For example, after resizing a window you would type in that shell:
% eval ‘resize’
When you call the resize command under a termcap system, it produces the commands for resetting the TERMCAP environment variable with the li# and co# capabilities reflecting the current dimensions. When you call the resize command under a terminfo system, it produces the commands for resetting the LINES and COLUMNS environment variables.
The resize command consults the value of your SHELL environment variable and generates the commands for setting variables within that shell. If you are using a non-standard shell, resize may still recognize your shell; as of R5, resize recognizes tcsh, jcsh, ksh, bash, and jsh. But if resize does not recognize your shell, try using the -c or -u options to force resize to use C Shell or Bourne Shell syntax (respectively), depending on which syntax is appropriate for your shell.
2.3.3.3 xterm and the Login Shell (C Shell)
Most people who use the C shell know that the .cshrc file is read for every csh command run, and the .login file is read only once, at the beginning of each “login shell.” One thing that X does is to effectively redefine the meaning of the “login shell.”
Before X, you could assume that a user had a single interactive shell per login. Since the .login file would therefore be read only once, at the beginning of the login session, you could use it as a “batch” file to run some daily commands. For example, you might have it show the “message of the day” and start mail for you first thing in the morning:
cat /etc/motd
mail
Since X gives you the ability to run multiple xterm windows, however, the usage of the .login file becomes more confused. You probably don't want to read your mail and see the “message of the day” every time you call up a new xterm window. It makes more sense for these functions to be taken up by your X startup script, and to run X clients rather than text-based applications. For example, if you log in via xdm, your .xsession might contain the lines:
# Show the message of the day:
xmessage -file /etc/motd &

# Start a mail application:
zmail -gui &
Here, we use the contrib client xmessage to show the message of the day, and we call up an X-based commercial mail application, zmail.
What does that leave for terminal emulator windows like xterm? Well, by default, xterm shells are not login shells—that is, xterm shells don't run .login, but just the shell startup file .cshrc. You can call up a login shell xterm by starting xterm clients with the -ls option. (Alternatively, you can set up all xterms to run login shells by setting the XTerm*login-Shell resource to true.)
Whether you want to set up xterm as login shells depends on what you use .login for. However, you might want to start thinking of the .login file as the startup file for ASCII-based user sessions only. Some of the functions of the .login script don't make sense for xterm shells (such as setting the terminal type, which xterm is smart enough to do on its own). But those functions are still useful for when you log in at an ASCII terminal, which you undoubtedly still do on occasion (for example, when dialing in on a modem line).
The .cshrc file therefore takes on a lot more responsibility for your shell environment, since it needs to make the xterm shell environment complete on its own. Since it's also used for C shell scripts, you can write it so it tests for a prompt and provides interactive-shell startup commands for interactive shells only:
# Make default file mode -rw-rw-r--.
umask 002

set path=(/usr/local/bin /usr/ucb /usr/bin /usr/bin/X11 .)

# Fix “dirs” and “$cwd” not to be fooled by symbolic links:
set hardpaths

# ALIASES AND OTHER INTERACTIVE COMMANDS GO BETWEEN HERE AND endif:
if ($?prompt) then
     set history=50 savehist=25
     set host=‘hostname’
     set mail=(300 /usr/spool/mail/$user)
     set prompt=“${host}:$user !% ”
     alias h history
     alias ls “ls -F”
     alias rm “rm -i”
     stty erase ‘^h’
     setenv PRINTER dodo_ps
endif
In this example, the part between “if ($?prompt)” and “endif” are only executed for the primary interactive shell.
Note that if you use xinit to start your X session, then your .login file is executed when you first log in prior to starting the X server. If you use xdm to start your X session, the .login file is never executed at all unless you run xterm with the -ls option.
2.3.4 Starting Remote Clients
One of the advantages of a window system like X is that you can run applications remotely and view them on the local display. You can try this easily enough by just doing a rlogin to the remote host, setting the DISPLAY environment variable, and starting up a client. In the following example, we start up a new xterm client running on the host ruby:
sapphire:joan % rlogin ruby
Password:
Last login: Tue May 12 16:27:23 from sapphire.ora.com
SunOS Release 4.1.2 (RUBY+COALM+PPP) #1: Tue Mar 3 23:29:52 EST 1992
You have mail.
TERM = (vt100) xterm

ruby:joan % setenv DISPLAY sapphire:0
ruby:joan % xterm &
(You must, of course, have an account on the remote system.)
The first thing that might go wrong is that you may run into server access control. If you see the following error:
Xlib:  connection to “sapphire:0” refused by server
Xlib:  Client is not authorized to connect to Server
Error: Can't open display: sapphire:0
you can probably fix it by typing “xhost +ruby” in a sapphire window, and running the command again on ruby.* Or, if you use user-based access control on the local host, use the xauth command to propagate the access code to the remote machine. See Chapter 4 for more information on server access control.
(Other possible problems may be with your host database, with Yellow Pages (NIS), or with the Domain Name Service. See Section 2.3.1.1 for more information on conflicts with display names.)
Once you have networking and access control issues solved, you should be able to display clients from the remote machine. The next issue is how to run remote clients easily.
2.3.4.1 Starting a Remote Client with rsh
The preferable way to start a remote client is the same way you'd start any remote command: using the rsh command:
sapphire:joan % rsh ruby -n xterm -display sapphire:0
There are a few issues to be ironed out first, though.
In order to run rsh successfully, you need to make sure that you have permission to run remote shells on the remote machine. This means that the local machine must be listed either in the remote machine's /etc/hosts.equiv file, or in your personal $HOME/.rhosts file on the remote machine. For example, an .rhosts file might read:
sapphire.ora.com
harry.ora.com
If the host is properly set up on the remote machine, then rsh will execute properly and rlogin will no longer ask for a password when you try to connect to the remote machine. If it is not set up properly, then rlogin will prompt for a password, and rsh will fail with the message “Permission denied.”
Using .rhosts or /etc/hosts.equiv for this purpose might be considered a breach of security, since it means if someone breaks into your account on one machine, they can break into your account on all other machines as well. Clearly, you want to be careful what hosts you list in .rhosts. For that reason, it's better to use the fully qualified domain name (i.e., harry.ora.com instead of just harry).
There are a few more rules:
- The .rhosts file will be ignored if it is publically writable, for security reasons. Make sure that the .rhosts file is writable only by you.
- Make sure you are running the correct rsh command. Some systems have a “restricted” shell, also named rsh. If you get the following error:
ruby: ruby: No such file or directory
ruby: ruby: cannot open
where ruby is the name of the system that you wanted to run the remote shell on, the problem is probably that are using the wrong rsh command. Use the which or whereis command to track down which rsh you are using:
sapphire:joan % which rsh
/bin/rsh
sapphire:joan % echo $path
/bin /usr/bin /usr/bin/X11 /usr/bsd
On some System V-derived systems such as IRIX, the restricted shell rsh might live in /bin, while the remote shell rsh (the one you want) resides in /usr/bsd. /bin often shows up in search paths earlier than /usr/bsd, so on those systems you need to explicitly redefine your path so that /usr/bsd is searched before /bin.
- You may need to use the -n option to rsh to avoid a “Stopped” error message on some machines.
- You need to be sure that the directory containing X binaries is defined in your search path in either .cshrc or .profile on the remote system.
- If you are using host-based access control, you need to execute the xhost client to extend access to the remote host before the rsh command is run. Otherwise, clients from the remote host will not have permission to access your display. If you are using user-based access control, you may need to run the xauth command to copy your access code to the remote machine. See Chapter 4 for more information on server access control.
- You have to use the -display option in calling a remote shell, or the “Can't Open display” error will be returned. (Alternatively, you can have your DISPLAY environment variable hard-coded into your .cshrc or .profile on the remote machine, but this is a Very Bad Idea.) See Section 2.3.1 for more information on setting your display.
- Be careful not to use unix:0.0 or : 0.0 as the display name! Otherwise, the client will display the window on the local display of the remote host. If this succeeds, the user on that display could either become very annoyed, or could take advantage of the sudden access to your account to read personal files and send nasty mail to your boss. You would have no warning; all you would know is that your window didn't appear. (See Section 2.3.1 for more information on the DISPLAY environment variable.)
A common situation is to start rsh commands as follows:
sapphire:joan % rsh ruby -n xterm -display $DISPLAY
This works great if your DISPLAY variable is set to something like sapphire:0.0, but if it's set to unix:0.0 or : 0.0 (as is the default for X sessions begun on the console display), then the wrong display name will be sent to the remote machine.
The X11R5 distribution contains a shell script called xrsh in the contrib/clients area. This script sets the DISPLAY variable for the remote client and handles authentication according to the value of an XRSH_AUTH_TYPE environment variable. See the manpage on xrsh for more information.
2.4 Startup Methods
The X Display Manager, xdm, is the method of choice for starting your X session. The main reason for this is that xdm is the only elegant way of starting an X session on an X terminal or other remote “passive” X server. However, for local X servers, you can use the xinit or startx command to start both the X server and your X session in a single step. If you are running a vendor-configured version of X, there might also be another command for starting the X server, such as openwin for Sun OpenWindows; see your vendor's documentation for details.
On an X server controlled by xdm, the X server is always running, and users start their individual X sessions by logging in via a login box window.
When you log in, your window manager and other X clients are automatically started, as specified in your .xsession startup script. Chapter 3 discusses xdm in detail.
On a local console display server that does not already have the X server running (i.e., is not controlled by xdm), you log in as usual on the console (using getty) and type xinit to start both the X server and the X clients specified in your .xinitrc script.
2.4.1 xinit and startx
The xinit program first starts up the X server for the local display. By default, it starts the X server by running the program called /usr/bin/X11/X. X is usually a link to another server program, for example, Xsun on a Sun workstation.
You can override the server command by entering another command in a file called $HOME/.xserverrc. For example, it could contain:
/usr/bin/X11/XsunMono
You may want to set up a new command in $HOME/.xserverrc if you are testing a new server for your display, or if you prefer to start up your server with particular command-line options.
If you want to test an option to the X server, follow the xinit command with two dash characters (- -) and it will pass any following command-line options onto the server. For example:
% xinit -- -dev /dev/cgthree0
After starting the server, xinit looks for a shell script called $HOME/.xinitrc. As we saw in Section 2.1.1, if $HOME/.xinitrc does not exist, a single xterm window is sent to the local display to get you started.
The startx script is a front end to xinit provided in X11R4 and X11R5. Like xinit, it looks for an .xinitrc file in your home directory; however, if you don't have an .xinitrc, it then uses a system-wide default file in /usr/lib/X11/xinit called xinitrc. This file can also be used as a template for .xinitrc files. startx also uses a file called xserverrc in the same directory for users who don't have an .xserverrc file in their home directory.
2.4.2 Differences Between .xinitrc and .xsession
All of the rules about configuring .xinitrc files also apply to .xsession files. For that reason, many users simply link their .xinitrc files to their .xsession files. However, there are three points to consider:
- The .xsession file is generally a shell script, but it can actually be any executable file, such as a session manager or desktop manager. .xinitrc must be a Bourne shell script.
- The .xsession file must be an executable file. If you get bounced back to your xdm login box, you might have to do the following:
% chmod +x .xsession
The .xinitrc file does not have to be executable.
- The .xsession script does not inherit the user's login shell environment. The .xinitrc script inherits the environment from the shell from which it was run.
2.5 Related Documentation
For more information, see the X Window System User's Guide, by Valerie Quercia and Tim O'Reilly, published by O'Reilly & Associates, Inc.
The following X manual pages may be of interest: X, xrdb, xinit, xset, xterm, twm, mwm, olwm, xlsfonts, showrgb, and resize.
The following UNIX manual pages may be of interest: rsh, csh, and sh.
*If you aren't already running xdm, see Section 3.3 for information on how to set it up the first time.
*See Section 2.4 for more information on using xinit. See Chapter 3 for more information on using xdm.
*The security-conscious may prefer to use the fully qualified domain name on the xhost command line (such as xhost +ruby.ora.com).