
IN THIS CHAPTER
In this chapter, we're going to take a look at using XPath with XPointer, XLink, and XQuery. This chapter is also going to help us make the transition between XPath 1.0 and XPath 2.0 because XPointer and XLink both use XPath 1.0, whereas XQuery is integral to XPath 2.0. We're going to see that the demands of data access are growing, and that'll give us a natural introduction to XPath 2.0 in the next chapter.
XLink and XPointer are two XML-related specifications that let you use XPath 1.0 to locate data in XML documents, and as such, we'll discuss them here. Then, as a transition into XPath 2.0—which starts in the next chapter—we'll take a look at one of the newer ways of accessing data in XML documents using XPath—XQuery 1.0. As we're going to see, XQuery is far more powerful than XLink or XPointer, which reflects the fact that handling data is becoming much more sophisticated. In fact, XLink and XPointer can't even be compared directly to XQuery; they're quite simple compared to XQuery's sophistication. And as we're going to see, XQuery 1.0 is actually an extension of XPath 2.0, not just an allied specification (which is true of XPath 1.0 and XLink/XPointer).
Over time, being able to address the particular data you're interested in in an XML document has become more and more important. XLink and XPointer give you a lot of capability, but the need is so great that even more power is needed, and we're seeing the results in XQuery in this chapter. As we're going to see starting in Chapter 7, “What's New in XPath 2.0,” XPath 2.0 and XQuery are integrally connected—in fact, the XQuery working group coleads the XPath 2.0 effort and is a coauthor of the XPath 2.0 specifications. XSLT 2.0 is also integrally connected to XPath 2.0, as we're going to see.
For us in this chapter, the idea of data access begins with simple linking. You already know that HTML supports hyperlinks—for example, if you had a review of the James Bond movie Goldfinger, you could create a hyperlink to that review like this:
<A HREF="http://www.XPathCorp.com/reviews.xml">Goldfinger</A>
So how would this look as an XLink that you could use in an XML document? You can create an XLink with the attribute xlink:type like this, where we're creating a simple XLink:
<review xmlns:xlink = "http://www.w3.org/1999/xlink"
    xlink:type = "simple"
    xlink:show = "new"
    xlink:href = "http://www.XPathCorp.com/reviews.xml">
    Goldfinger
</review>
This is a simple XLink, much like an HTML hyperlink. Here, we're setting the xlink:type attribute to “simple” and the xlink:show attribute to “new”, which means XLink-aware software should open the linked-to document in a new window. The xlink:href attribute holds the URI of the linked-to document. That's what a simple XLink looks like, but XLinks can become pretty involved, as we'll see in this chapter. Besides basic unidirectional links like the simple link in this example, you can also create bidirectional links, links between multiple documents and document sets, and much more, including storing your links in link databases called linkbases.
XLinks let you link to a particular document, but you often need to be more precise than that. XPointers let you point to specific locations inside a document—without having to modify that document by embedding special tags or markers.
To point to a specific location in a document, the XPointer specification builds on XPath. For example, you can use XPath expressions like /child::*[5]/child::*[1] in XPointers. In fact, XPointer 1.0 even extends XPath in ways that we'll see in this chapter.
You can add an XPointer to a document's URI to specify a specific location in a document. For example, you can append # (following the HTML usage for URLs that specify link targets) and then xpointer(), placing the XPath expression you want to use in the parentheses. Here's an example:
<review xmlns:xlink = "http://www.w3.org/1999/xlink"
    xlink:type = "simple"
    xlink:show = "new"
    xlink:href =
 "http://www.XPathCorp.com/reviews.xml#xpointer(/child::*[last()])">
    Goldfinger
</review>
That's what XLink and XPointer look like in overview—it's time to dig into the details.
The XLink specification is a W3C recommendation, released on June 27, 2001. You can find the most current version of this recommendation at www.w3.org/TR/xlink. Here's what W3C says in the W3C working draft:
“This specification defines the XML Linking Language (XLink), which allows elements to be inserted into XML documents in order to create and describe links between resources. It uses XML syntax to create structures that can describe links similar to the simple unidirectional hyperlinks of today's HTML, as well as more sophisticated links.”
XLinks are not restricted to any one element like the <A> element—you can make any XML element into an XLink. XLinks can be quite complex—for example, you might want a link to point to ten mirror sites of a main site and let the browser select the one that's closest, or you can link to an entire set of documents that the browser should search, or you can set up a series of paths that lets the user navigate between a set of documents in various directions but not in others, and so on.
As mentioned, you create an XLink with attributes, not with specific elements. In particular, you use the xlink:type attribute to create an XLink, setting it to one of the allowable types of XLinks: simple, extended, locator, arc, resource, title, or none. Here are the current XLink attributes:
xlink:arcroleholds the link's role in an arc (arcs can contain multiple resources and traversal paths), which may be different for different arcs. More on this later in this chapter.xlink:actuatedetermines when traversal operations occur. You can set this attribute to the official values ofonLoad,onRequest,other,none, or other values as required by the software you're using.xlink:hrefsupplies the data that allows an XLink application to find a remote resource.xlink:roledescribes the role, or function, of a link's remote resource in a machine-readable fashion. Search engines should be able to read this attribute.xlink:showindicates how you want to display the linked-to resource. XLink applications must recognize the following values:new(open a new display space, such as a window),replace(replace the currently displayed data),embed(embed the new resource in the current one),other(leaving theshowfunction up to the displaying software), ornone(don't show the resource).xlink:titledescribes the function of a link's remote resource for people to understand.xlink:typesets the type of the XLink; can be one ofsimple,extended,locator,arc,resource,title, ornone. More on these later in this chapter.
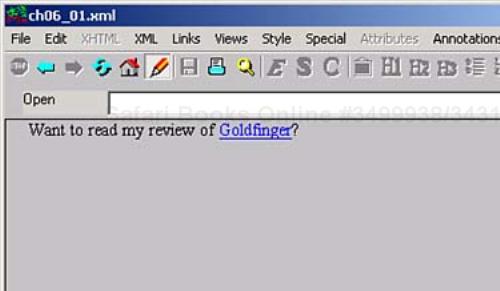
So what does an XLink at work look like? There isn't much software designed to display XLinks, not even simple XLinks, but we can create a mockup that will work in Internet Explorer. In fact, Internet Explorer even supports the onClick attribute if you use it with an XML element, so we can use a little JavaScript that will make the browser navigate to a new URI when the XLink is clicked. You can see how this looks in ch06_01.xml (Listing 6.1).
Example 6.1. A Simple XLink (ch06_01.xml)
<?xml version="1.0" encoding="UTF-8"?>
<?xml-stylesheet type="text/css" href="ch06_02.css"?>

<document>
    Want to read my review of
    <review xmlns:xlink = "http://www.w3.org/1999/xlink"
        xlink:type = "simple"
        xlink:show = "new"
        xlink:href = "http://www.w3c.org"
        onClick="location.href='http://www.w3c.org'">
        Goldfinger
    </review>?
</document>
You can even style this XLink to make it look something like a traditional hyperlink using cascading style sheets (CSS). The style sheet ch06_02.css, shown in Listing 6.2, makes this XLink appear in a blue, underlined font, and makes Internet Explorer's cursor change to a hand as the mouse passes over the XLink.
Example 6.2. Styling a Simple XLink (ch06_02.css)
review {color: #0000FF; text-decoration: underline; cursor: hand}
The result appears in Figure 6.1, where the simple XLink functions much like an HTML hyperlink. You can even click this link to make Internet Explorer navigate to a new document.

There is some software around that will let you work with XLink directly, such as W3C's test browser, Amaya, which you can get for free at http://www.w3.org/Amaya/. You can see our working simple XLink in Amaya in Figure 6.2.
To create an XLink, you use XLink attributes. So which attributes do you need to create what type of XLink? It all depends on the type of link you're creating, as given by the xlink:type attribute. Depending on link type, some of these attributes are required, and some are optional. You can find the complete rules in Table 6.1, where the rows correspond to the various XLink attributes, and the columns to the various XLink types.
Table 6.1. XLink Attributes by xlink:type
SIMPLE | EXTENDED | LOCATOR | ARC | RESOURCE | TITLE | |
|---|---|---|---|---|---|---|
| Optional | Omitted | Omitted | Optional | Omitted | Omitted |
| Optional | Omitted | Omitted | Optional | Omitted | Omitted |
| Omitted | Omitted | Omitted | Optional | Omitted | Omitted |
| Optional | Omitted | Required | Omitted | Omitted | Omitted |
| Omitted | Omitted | Optional | Omitted | Optional | Omitted |
| Optional | Optional | Optional | Optional | Optional | Omitted |
| Optional | Omitted | Omitted | Optional | Omitted | Omitted |
| Optional | Optional | Optional | Optional | Optional | Omitted |
| Omitted | Omitted | Omitted | Optional | Omitted | Omitted |
| Required | Required | Required | Required | Required | Required |
Each of the attributes in Table 6.1 uses the xlink namespace; this namespace always uses the value “http://www.w3.org/1999/xlink”, as we saw in our earlier simple link example:
<review xmlns:xlink = "http://www.w3.org/1999/xlink"
    xlink:type = "simple"
    xlink:show = "new"
    xlink:href = "http://www.XPathCorp.com/reviews.xml">
    Goldfinger
</review>
Because you use these attributes to create XLinks, we'll go over a few of them now.
The xlink:type attribute defines the type of XLink you want to create. You can set this attribute to one of these possible values:
arcmakes an arc with multiple resources and traversal paths.extendedmakes an extended link, which can involve multiple simple links.locatormakes a locator link that points to a resource. This kind of link holds a link to another link.resourcemakes a resource link, which indicates a specific resource.simplemakes a simple link, which is like a standard hyperlink.titlemakes a title link; such elements are useful, for example, for cases where human-readable label information needs further element markup, or where multiple titles are necessary for internationalization purposes.
The xlink:show attribute specifies how you want the linked-to resource displayed when the link is traversed. The xlink:show attribute has these predefined values:
embedcauses the software to embed the linked-to resource in the current resource, for example, by showing an image in a Web page.newcauses the software to open a new display area, such as a new window, to display the new resource.nonecauses the software to not show the resource. Although the resource is not specifically displayed, its data is still accessible to implementation-specific software with this kind of link.otherindicates some other setting that those that are predefined.replacecauses the software to replace the current resource, in the same window if there is one.
For example, the default behavior of HTML links is to navigate to a linked-to document, replacing the current document with the new one. You can change that behavior by assigning xlink:show a value of new, making the software open a new window for the linked-to document:
<review xmlns:xlink = "http://www.w3.org/1999/xlink"
    xlink:type = "simple"
    xlink:show = "new"
    xlink:href = "http://www.XPathCorp.com/reviews.xml">
    Goldfinger
</review>
The xlink:actuate attribute indicates when a link should be traversed. The xlink:actuate attribute has these predefined values:
In addition, you can set your own values for xlink:actuate.
If you set the value of xlink:actuate to onLoad, the link is traversed when the resource containing it is loaded. For example, here's how you'd activate a link only when the user requests it to be activated:
<review xmlns:xlink="http://www.w3.org/1999/xlink"
    xlink:type="simple"
    xlink:href="http://www.XPathCorp.com/reviews/goldfinger.xml"
    xlink:actuate="onRequest">
</review>
XPointers are designed to let you point to specific locations inside a document. There isn't much software that supports XPointers currently, although some does. For example, the Adobe Scalable Vector Graphics (SVG) browser plug-in (http://www.adobe.com/svg/viewer/install/main.html) does, as well as Amaya (http://www.w3.org/Amaya/) and an application named XLip by Fujitsu.
The XPointer specification was split into parts to make it easier to implement. The XPointer specification is now divided into three recommendations and a working draft:
http://www.w3.org/TR/xptr-framework/—. The XPointer framework, which gives a general overview and points you to the other three schemes
http://www.w3.org/TR/xptr-element/—. The element scheme
http://www.w3.org/TR/xptr-xmlns/—. The namespace scheme
http://www.w3.org/TR/xptr-xpointer/—. The general XPointer scheme
The XPointer framework specification introduces the idea of XPointers and indicates how you can use barenames (that is, simple element names) as XPointers. And it points to the other three parts of the specification that you can use in XPointers—the element scheme, the namespace scheme, and the general XPointer scheme. We'll take a look at four of these ways of creating XPointers here, starting with barenames.
The XPointer Framework specification (www.w3.org/TR/xptr-framework/) says that you can use barenames—that is, just the names of elements—as XPointers. You can append an XPointer to the end of a URI in an XLink by preceding it with a #, as here, where we're pointing at the <data> element in http://www.XPathCorp.com/jamesbond.xml:
<insurance xmlns:xlink = "http://www.w3.org/1999/xlink"
    xlink:type = "simple"
    xlink:show = "new"
    xlink:href = "http://www.XPathCorp.com/jamesbond.xml#data">
    Health Insurance
</insurance>
Besides using barenames like this, you can also use the element, namespace, and general XPointer schemes. They're coming up next.
The element scheme (www.w3.org/TR/xptr-element/) was split out of the general XPointer scheme to make XPointer easier to implement. Here, you use element() to identify elements by ID, not by name. For example, to find the element with the ID data, you could use this expression:
<insurance xmlns:xlink = "http://www.w3.org/1999/xlink"
    xlink:type = "simple"
    xlink:show = "new"
    xlink:href = "http://www.XPathCorp.com/jamesbond.xml#element(data)">
    Health Insurance
</insurance>
You can also specify child sequences by number; for example, to pick out the <data> element's third child element, and then to identify that element's first child element, you can use this XPath-like expression:
<insurance xmlns:xlink = "http://www.w3.org/1999/xlink"
    xlink:type = "simple"
    xlink:show = "new"
    xlink:href = "http://www.XPathCorp.com/jamesbond.xml#element(data/3/1)">
    Health Insurance
</insurance>
In other words, the element scheme lets you specify an element by ID, and you can also add location steps, using numbers, to access child elements.
You can use the namespace scheme (see www.w3.org/TR/xptr-xmlns/) to use namespaces when pointing to data. For example, if the <invoice> element you wanted to access was part of the job namespace, you could specify that element this way:
<insurance xmlns:xlink = "http://www.w3.org/1999/xlink"
    xlink:type = "simple"
    xlink:show = "new"
    xlink:href = "http://www.XPathCorp.com/adjunct.xml#xmlns(job=
        "http:/XPathCorp.com/job:invoice">
    Health Insurance
</insurance>
This XPointer accesses <job:invoice> in the document http://www.XPathCorp.com/adjunct.xml.
Besides using the element and namespace schemes, you can also use the general XPointer scheme. The element and namespace schemes were added to XPointer in an attempt to make XPointer easier to use, but you can still create general XPointers.
The original form of XPointers is still in working draft form as of this writing (see www.w3.org/TR/xptr-xpointer/). This is actually where the real core of XPointer lies, because you can use full XPath expressions to point to exactly what you want. (In fact, as we're going to see, the general XPointer scheme extends XPath.) Here's an example using a general XPointer—note that you use the xpointer() function to contain the XPath expression:
<insurance xmlns:xlink = "http://www.w3.org/1999/xlink"
    xlink:type = "simple"
    xlink:show = "new"
    xlink:href = "http://www.XPathCorp.com/invoices.xml#xpointer(
        /child::*[5]/child::*[last()])">
    Health Insurance
</insurance>
In this example, we're accessing the last child of the fifth element in www.XPathCorp.com/invoices.xml. That's the way you use full XPath expressions with general XPointers—you pass them to the xpointer function.
You can use the same axes as you use in XPath 1.0 in XPointers, but there are two new node tests. Here are the node tests you can use with XPointers:
Note the point and range node tests. A point represents one specific location in a document, and a range is made up of everything between two points. To support points and ranges, the general XPointer scheme extends the concept of nodes to locations. Locations are an XPath node, a point, or a range. Node sets become location sets in the XPointer specification. We'll take a look at working with points and ranges next.
You can create an XPointer point with two items—a node and an index, which can hold a positive integer or zero. The node sets an origin for the point, and the index specifies the distance between the point and that origin. What units are used for the index? There are two different ways of measuring the index: you can measure in terms of characters, or in terms of a number of nodes.
If the starting node can contain only text—not child nodes—the index is automatically measured in characters. The points you create this way are called character-points. Here, the index must be a positive integer or zero.
For example, you might treat <text> as a container node in this case:
<text>
Hello there!
</text>
Here, there are twelve character-points, one before every character. The character-point at index zero is right before the first character, “H”; the character-point at index 1 is just before the “e”, and so on.
On the other hand, when the start node has child nodes—that is, when it's an element node or the root node—the index of a point is measured in child nodes. For example, an index of zero means the point is just before any child nodes. An index of 5 specifies a point immediately after the fifth child node.
How do you actually create points? You can use the point() function with an XPath 1.0 predicate like this: point()[position()=9]. For example, if you wanted to locate a point right before the “l” in the text “Goldfinger”, where that text is in the <name> element of the first <review> element in the <reviews> element, you might do something like this:
xpointer(/reviews/review[1]/name/text()/point()[position() = 2])
To create a range, all you need is two points, a start point and an end point. They have to be in the same document, and, as you might expect, the start point must be before or the same as the end point.
COLLAPSED RANGES
If the start point and the end point are the same point, the range you create is a collapsed range.
There are a few functions that were added to XPointer to create ranges:
range(location-set)takes the locations you pass to it and returns a range that completely covers the locations.range-inside(location-set)returns a range or ranges covering each location inside the location set; if you pass an element, the result is a range that encloses all that is inside the element.range-to(location-set)returns a range for each location in the location set.string-range(location_set, string [index [, length]])returns a range for every match to a search string.
For example, here's how you would use the string-range function to return a location set of ranges for all matches to the word “Goldfinger” throughout a document:
string-range(/*, "Goldfinger")
XLink and XPointer are typical of the XPath 1.0 approach to accessing data—you can embed XPath 1.0 expressions directly in your XLink and XPointer expressions. However, data handling is becoming appreciably more sophisticated in XPath 2.0 and XQuery 1.0. To show how much more sophisticated, we'll take a look at XQuery 1.0. XQuery can't be directly compared to XLink and XPointer because it's an entire language (an extension to XPath 2.0), not just a way of using XPath expressions—and that's the whole point. These days, the relative simplicity of XLink and XPointer is not enough; now we need more power, and that's what a language like XQuery gives us. As you're going to see, XQuery goes far beyond XLink and XPointer, and putting it to work will give us an introduction to XPath 2.0, which starts in the next chapter.
XQuery 1.0 is designed to work with XPath 2.0, and it's designed to treat XML documents much as you'd treat databases. In fact, XQuery does function something like Structured Query Language (SQL) does with relational databases. Here's what W3C says about XQuery:
“XML is a versatile markup language, capable of labeling the information content of diverse data sources including structured and semi-structured documents, relational databases, and object repositories. A query language that uses the structure of XML intelligently can express queries across all these kinds of data, whether physically stored in XML or viewed as XML via middleware. This specification describes a query language called XQuery, which is designed to be broadly applicable across many types of XML data sources.”
XQuery 1.0 and XSLT 2.0 both work with XPath 2.0. In particular, XQuery 1.0 is an extension of XPath 2.0, and XPath 2.0 is an embedded language in XSLT 2.0. Although you could replace XPath 2.0 in XSLT 2.0 with another language and it would work as well, XPath 2.0 is completely integral to XQuery 1.0. Another big difference is that XQuery 1.0 and XPath 2.0 are much more strongly typed than XPointer/XLink and XPath 1.0, so we'll have to be more careful about the data types we're working with (strings, integers, and so on) than we were before. XQuery gives you not only a data model to let you interpret XML documents, but also a set of operators and functions to let you extract data from those documents.
The W3C XQuery specification is still subject to change at this time. This specification is divided into several working drafts—the main XQuery 1.0 working draft is at http://www.w3.org/TR/xquery/, but there are also working drafts for XQuery semantics, the data model, and serialization. Here's an overview of what's available online as of this writing:
The XQuery activity page gives an overview—. http://www.w3.org/XML/Query
The XQuery version 1.0 Working Draft—. http://www.w3.org/TR/xquery/
The XQuery 1.0 and XPath 2.0 Data Model—. http://www.w3.org/TR/xpath-datamodel/
The XQuery 1.0 and XPath 2.0 Formal Semantics—. http://www.w3.org/TR/xquery-semantics/
The XQuery 1.0 and XPath 2.0 Functions and Operators—. http://www.w3.org/TR/xquery-operators/
The XML Query Requirements, an overview of what's going to go into XQuery, in Working Draft form—. http://www.w3.org/TR/xquery-requirements/
XQuery is already very popular, and there are a number of implementations of XQuery 1.0 out there. Here's a starter list (check out the XQuery Working Group's Web page at http://www.w3.org/XML/Query for more implementations and to get new URLs if any of these no longer work) :
The XQuery 1.0 Grammar Test Page—. http://www.w3.org/2003/05/applets/xqueryApplet.html
The XPath 2.0 Grammar Test Page—. http://www.w3.org/2003/05/applets/xpathApplet.html
BEA's Liquid Data—. http://edocs.bea.com/liquiddata/docs10/prodover/concepts.html
Bluestream Database Software Corp.'s—. XStreamDBhttp://www.bluestream.com/dr/?page=Home/Products/XStreamDB/
Cerisent's XQE—. http://cerisent.com/cerisent-xqe.html
Cognetic Systems'—. XQuantumhttp://www.cogneticsystems.com/xquery/xquery.html
Enosys Software's XQuery—. Demohttp://xquerydemo.enosyssoftware.com
eXcelon's eXtensible Information Server (XIS 3.1—. SP2)http://www.exln.com/products/xis/
Stylus Studio 4.5, with XQuery and XML Schema support—. http://www.exln.com/products/stylusstudio
E-XMLMedia's XMLizer—. http://www.e-xmlmedia.com/prod/xmlizer.htm
Fatdog's XQEngine—. http://www.fatdog.com/
GAEL's Derby—. http://www.gael.fr/derby/
GNU's Qexo (Kawa-Query)—. http://www.qexo.org/
—Compiles XQuery on-the-fly to Java bytecodesIpedo's XML Database v3.0—. http://www.ipedo.com
IPSI's IPSI-XQ—. http://ipsi.fhg.de/oasys/projects/ipsi-xq/index_e.html
Lucent's Galax—. http://db.bell-labs.com/galax/. Open-source
Microsoft's XML Query Language Demo—. http://xqueryservices.com
Neocore's XML management system (XMS)—. http://www.neocore.com/products/products.htm
Nimble Technology's Nimble Integration Suite—. http://www.nimble.com/
OpenLink Software's Virtuoso Universal Server—. http://demo.openlinksw.com:8890/xqdemo
Oracle's XML DB—. http://otn.oracle.com/tech/xml/xmldb/htdocs/querying_xml.html
Politecnico di Milano's XQBE—. http://dbgroup.elet.polimi.it/xquery/xqbedownload.html
QuiLogic's SQL/XML-IMDB—. http://www.quilogic.cc/xml.htm
Software AG's Tamino XML Server—. http://www.softwareag.com/tamino/News/tamino_41.htm
Tamino XML Query Demo—. http://tamino.demozone.softwareag.com/demoXQuery/index.html
SourceForge's Saxon—. http://saxon.sourceforge.net/
SourceForge's XQuench—. http://xquench.sourceforge.net/. Open-source
XQuery Lite—. http://sourceforge.net/projects/phpxmlclasses/
X-Hive's XQuery demo—. http://www.x-hive.com/xquery
XML Global's GoXML DB—. http://www.xmlglobal.com/prod/xmlworkbench/
To see XQuery at work, we're going to use it with Lucent's Galax XQuery processor, one of the foremost XQuery implementations. You can download Galax for free at http://db.bell-labs.com/galax/. And you can see an online demo at http://db.bell-labs.com/galax/demo/galax_demo.html.
To use XQuery, we'll need an XML document, and we'll use the one you see in Listing 6.3 (ch06_03.xml). This XML document holds information about a number of meetings set up for two teams of employees. We'll use XQuery to extract information about the meetings and meeting locations from this document.
Example 6.3. A Sample XML Document (ch06_03.xml)
<?xml version="1.0" encoding="UTF-8"?>
<employees>
    <title>List of employees</title>
    <employee>John Thompson</employee>
    <employee>Edward Hastings</employee>
    <employee>Traci Franklin</employee>
    <employee>Frank Thomas</employee>
    <meeting ID="Introduction" time="evening" >
        <title>Introduction</title>
        <p>Welcome</p>
        <meeting>
            <title>Team 1</title>
            <p>Team 1 meeting</p>
        </meeting>
        <meeting>
            <title>Team 2</title>
            <p>Team 2 meeting</p>
            <location address="Auditorium">
                <title>Building 1</title>
                <phone number="555-2221"/>
            </location>
            <p>Getting Started</p>
        </meeting>
    </meeting>
    <meeting ID="Leadership" time="morning" >
        <title>Leadership</title>
        <p>Breakfast meeting</p>
        <location address="Meeting Room 5">
            <title>Building 2</title>
                <phone number="555-2222"/>
        </location>
        <p>Understanding the Issues</p>
        <meeting>
            <title>Team 1</title>
            <p>Team 1 meeting</p>
        </meeting>
        <meeting>
            <title>Team 2</title>
            <p>Team 2 meeting</p>
            <location address="Auditorium">
                <title>Building 3</title>
                <phone number="555-2223"/>
            </location>
        </meeting>
        <meeting>
            <title>Closing Statements</title>
            <p>Wrapping things up</p>
        </meeting>
    </meeting>
</employees>
We're going to use XQuery to extract data from ch06_03.xml using Galax, and we'll use two XQuery files to do it. The first file will hold XQuery context code, where we'll declare the XML elements in ch06_03.xml and the XQuery functions we'll use. The other XQuery file will hold the template we'll use to query our XML document. (Splitting our XQuery code into two parts is not necessary for working with XQuery in general; we're just doing it to work with Galax.)
The XQuery context file, ch06_04.xq, will start by defining all the XML elements in our sample XML document so that Galax can check the validity of that document. Defining the XML elements we'll be using can be done with this XML DTD-like syntax, which is specific to Galax:
define element employees
{
    element title,
    element employee+,
    element meeting+
}

define element title {xsd:string}
define element employee {xsd:string}

define element meeting
{
    attribute ID {xsd:string}?,
    attribute time {xsd:string}?,
    element title,
      (element p | element location | element meeting)*
}

define element p {xsd:string}

define element location
{
    attribute address { xsd:string },
    element title,
    element phone
}

define element phone
{
    attribute number {xsd:string}
}
Now we need to indicate to Galax what XML document our data can be found in, and that's ch06_03.xml here. In this case, we'll associate that document with an XQuery variable, $employeesList, making the data in that document available to our XQuery code. XQuery variable names begin with a $ sign, and the following example shows how we define our global variable named $employeesList to hold the data from ch06_03.xml. (The glx:document-validate function is specific to Galax that reads in a document and validates it because how a document is validated is implementation-specific; in XPath 2.0, you can read in a document without validating it with the fn:doc function, as we'll see in Chapter 12, “XPath 2.0 Node and Sequence Functions.”)
define global $employeesList {treat as document employees
(glx:document-validate("ch06_03.xml", "employees"))}
XQuery also lets you define your own functions. To see how this works, we'll create a function named summation here, which will return a summation of various different types of elements. Here's how we define summation, indicating that we want to pass an XML element to it:
define function summation($elem as element) as element*
{
    .
    .
    .
}
We begin our XQuery function by getting the name of the element we're working with using the XQuery local-name function, like this:
define function summation($elem as element) as element*
{
    let $name := local-name($elem)
        .
        .
        .
}
We can check if we've been passed a <meeting> element, and if so, return a summation of that element this way:
define function summation($elem as element) as element*
{
    let $name := local-name($elem)
    return
        if ($name = "meeting")
        then
            <meeting>
                {$elem/@*}
                {for $item in $elem/* return summation($item)}
             </meeting>
        .
        .
        .
}
As far as other elements go, we'll return only <title> elements, like this (this function, by the way, points out one of the differences between XSLT and XQuery—in XSLT, you'd need four templates to do this; in XQuery, you only need one function):
define function summation($elem as element) as element*
{
    let $name := local-name($elem)
    return
        if ($name = "meeting")
        then
            <meeting>
                {$elem/@*}
                {for $item in $elem/* return summation($item)}
             </meeting>
         else if ($name = "title")
         then $elem
         else ()
}
That's it; now our summation function will return summations for <meeting> and <title> elements. That completes our XQuery context file, ch06_04.xq, which you can see in Listing 6.4.
Example 6.4. Our Context XQuery Document (ch06_04.xq)
define element employees
{
    element title,
    element employee+,
    element meeting+
}

define element title {xsd:string}
define element employee {xsd:string}

define element meeting
{
    attribute ID {xsd:string}?,
    attribute time {xsd:string}?,
    element title,
      (element p | element location | element meeting)*
}

define element p {xsd:string}

define element location
{
    attribute address { xsd:string },
    element title,
    element phone
}

define element phone
{
    attribute number {xsd:string}
}

define element meetingSummary
{
    attribute ID {xsd:string}?,
    attribute time {xsd:string}?,
    element title,
    element locationCount {xsd:int},
    element meetingSummary*
}

define global $employeesList {treat as document employees
    (glx:document-validate("ch06_03.xml", "employees"))}


define function summation($elem as element) as element*
{
    let $name := local-name($elem)
    return
        if ($name = "meeting")
        then
            <meeting>
                {$elem/@*}
                {for $item in $elem/* return summation($item)}
             </meeting>
         else if ($name = "title")
         then $elem
         else ()
}
The next step is to create the template file, ch06_05.xq, which will use ch06_03.xml and ch06_04.xq to extract the data we want. In this case, we'll start by creating a <meetings> element that holds a summary of the <meeting> elements in our XML document. We'll use the summation function to create this summary. Note in particular the XPath syntax here to specify the <meeting> child elements of the <employees> document element—$employeesList/employees/meeting:
<meetings>
    {
        for $meeting in $employeesList/employees/meeting return summary($meeting)
    }
</meetings>
;
In this case, we're stripping out and displaying a summary of each <meeting> element—including all child <meeting> elements, while also preserving the <title> elements. Here's what the output of our XQuery query looks like so far:
<meetings>
  <meeting time="evening"
    ID="Introduction">
    <title>Introduction</title>
    <meeting><title>Team 1</title></meeting>
    <meeting><title>Team 2</title></meeting>
  </meeting>
  <meeting time="morning"
    ID="Leadership">
    <title>Leadership</title>
    <meeting><title>Team 1</title></meeting>
    <meeting><title>Team 2</title></meeting>
    <meeting><title>Closing Statements</title></meeting>
  </meeting>
</meetings>
We can also display the locations of the various meetings by selecting <location> elements in the XML document, preserving their attributes and titles, and displaying the results in a <locations> element like this:
<locations>
    {
        for $location in $employeesList//location
        return
            <location>
                {$location/@*}
                {$location/title}
            </location>
    }
</locations>
;
This code gives us these results in the output, where we're displaying the <location> elements and their attributes, as well as any contained <title> elements:
<locations>
  <location address="Auditorium"><title>Building 1</title></location>
  <location address="Meeting Room 5"><title>Building 2</title></location>
  <location address="Auditorium"><title>Building 3</title></location>
</locations>
We might also use the XQuery count function to count the number of <meeting> elements. To count all <meeting> elements, no matter where they are in the input XML document, we can use the expression $employeesList//meeting, using the XPath // syntax to indicate any descendant:
<numberMeetings>{count($employeesList//meeting)}</numberMeetings>
;
This gives us this result:
<numberMeetings>7</numberMeetings>
And we might count the total number of <location> elements this way:
<numberLocations>{count($employeesList//location)}</numberLocations>
;
Here is the result:
<numberLocations>3</numberLocations>
Finally, we'll count the number of <meeting> elements that themselves contain <meeting> elements like this:
<numberMainMeetings>
    {
        count($employeesList/employees/meeting)
    }
</numberMainMeetings>
;
This is what appears in the output:
<numberMainMeetings>2</numberMainMeetings>
And that's it—you can see the complete XQuery query file, ch06_05.xq, in Listing 6.5.
Example 6.5. Our XQuery Document (ch06_05.xq)
<meetings>
    {
        for $meeting in $employeesList/employees/meeting return summation($meeting)
    }
</meetings>
;

<locations>
    {
        for $location in $employeesList//location
        return
            <location>
                {$location/@*}
                {$location/title}
            </location>
    }
</locations>
;

<numberMeetings>{count($employeesList//meeting)}</numberMeetings>
;

<numberLocations>{count($employeesList//location)}</numberLocations>
;

<numberMainMeetings>
    {
        count($employeesList/employees/meeting)
    }
</numberMainMeetings>
;
Now we're ready to use Galax with our context and template XQuery files. Here's how you do that:
%galax -context ch06_04.xq ch06_05.xq
Here's what you see when you execute Galax—note that our XQuery results are displayed as XML:
%galax -context ch06_04.xq ch06_05.xq
<meetings>
  <meeting time="evening"
    ID="Introduction">
    <title>Introduction</title>
    <meeting><title>Team 1</title></meeting>
    <meeting><title>Team 2</title></meeting>
  </meeting>
  <meeting time="morning"
    ID="Leadership">
    <title>Leadership</title>
    <meeting><title>Team 1</title></meeting>
    <meeting><title>Team 2</title></meeting>
    <meeting><title>Closing Statements</title></meeting>
  </meeting>
</meetings>
<locations>
  <location address="Auditorium"><title>Building 1</title></location>
  <location address="Meeting Room 5"><title>Building 2</title></location>
  <location address="Auditorium"><title>Building 3</title></location>
</locations>
<numberMeetings>7</numberMeetings>
<numberLocations>3</numberLocations>
<numberMainMeetings>2</numberMainMeetings>
You can also write these results to an XML document like this, which creates the document summation.xml:
%galax -context ch06_04.xq ch06_05.xq -output-xml summation.xml
And that completes our XQuery example.
Variables? Do-it-yourself functions? You can already see in this example how much more detailed and powerful XQuery is than XLink and XPointer. In fact, XQuery is far more sophisticated and can't even be compared directly to XLink and XPointer. Instead, XQuery is better compared to XSLT, although it's even more sophisticated than XSLT is—in XSLT, you're restricted to templates, but in XQuery you can create your own functions and use a flexible programming language that is far more powerful than simple XSLT templates.
As you can see, the trend is towards more and more power and sophistication. And XPath 2.0 is a big part of that. It shouldn't surprise you to learn that XPath 2.0 is much larger than XPath 1.0, and supports many more advanced techniques. XPath 2.0 also supports very strong data typing, and after you've validated an XML document, lets you make use of that data typing information. We're going to see how all this works as we plunge into XPath 2.0, coming up in Chapter 7.
We're done with XPath 1.0 now, and it's time to turn to XPath 2.0. XPath 2.0 is at the heart of the development that's going on in its cospecifications, XSLT 2.0 and XQuery 1.0, and there is a lot of material coming up, as we're going to see.
You use XLinks to create links in XML, like HTML hyperlinks but considerably more extended. Any XML element can be an XLink—all you have to do is to use the correct attributes. The one required attribute,
xlink:type, sets the type of XLink, and the possible values aresimple,extended,locator,arc,resource,title, ornone.XPointers let you narrow down your searches even more, down to specific nodes or even specific characters in text. The XPointer specification is divided into three Recommendations—the XPointer framework, the element scheme, and the namespace scheme—along with the Working Draft for the general XPointer scheme. This division was made to make XPointers easier to implement.
The XPointer framework shows how you can use element names—referred to as barenames—as XPointers, the element scheme shows how you can identify elements by ID, and the namespace scheme shows how to use namespaces in XPointers.
The general XPointer scheme is where the full power of XPointers appears because you can use full XPath 1.0 expressions here. General XPointers are so powerful because they support full XPath expressions, as well as two more data types—points and ranges.
On the other hand, the other technique we looked at in this chapter—XQuery—is really where the future action is going to be when it comes to data access. Although still just in W3C Working Draft stage, XQuery is generating a lot of excitement, and we got a good introduction to it here. Using the Galax XQuery processor, we were able to create XQuery variables and functions, and used them to successfully query the data in an XML document and extract what we wanted.