Yii2 is a modern PHP framework provided as a Composer package. In this recipe, we will install the framework via the Composer package manager and configure the database connection for our application.
First of all, install the Composer package manager on your system.
In Mac or Linux download the installer from https://getcomposer.org/download/ and install it globally by using the following command:
sudo php composer-setup.php --install-dir=/usr/local/bin --filename=composer
In Windows without OpenServer download and run Composer-Setup.exe from the https://getcomposer.org/doc/00-intro.md page.
If you do not have administrative privileges on the system then as an alternative you can just download the https://getcomposer.org/composer.phar raw file and use the php composer.phar call instead of single the composer command.
After installation run in your terminal:
composer
Or (if you just download archive) its alternative:
php composer.phar
When the installation succeeds you will see the following response:
   ______
  / ____/___  ____ ___  ____  ____  ________  _____
 / /   / __ / __ '__ / __ / __ / ___/ _ / ___/
/ /___/ /_/ / / / / / / /_/ / /_/ (__  )  __/ /
\____/\____/_/ /_/ /_/ .___/\____/____/\___/_/
                    /_/
Composer version 1.2.0 2016-07-18 11:27:19
Right now you can install any package from the https://packagist.org repository.
You can install basic or advanced application templates. In order to learn about the differences between the templates see the Application templates recipe.
Note
Note that during installation the Composer package manager gets a lot of information from the GitHub site. GitHub may limit requests for anonymous users. In this case Composer asks you to input your access token. You should just register the https://github.com site and generate a new token via the https://github.com/blog/1509-personal-api-tokens guide.
Carry out the following steps for installing basic project template:
- As the first step open your terminal and install Bower-to-Composer adapter:
composer global require "fxp/composer-asset-plugin:^1.2.0"It provides a simple way to load related non-PHP packages (JavaScript and CSS) from the Bower repository.
- Create a new application in the new
basicdirectory:composer create-project --prefer-dist yiisoft/yii2-app-basic basic - Check that your PHP contains the required extensions:
cd basic
php requirements.php
- Create a new database (if it is needed for your project) and configure it in the
config/db.phpfile. - Try to run application via the following console command:
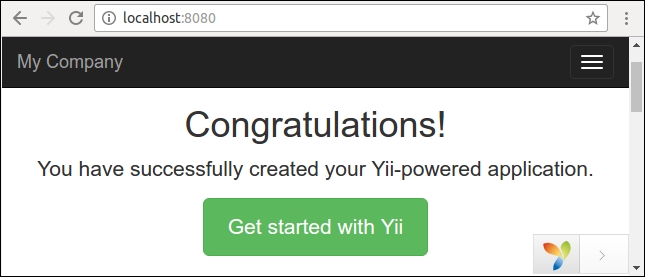
php yii serve - Check in your browser that the application works by the
http://localhost:8080address:
For permanent working create a new host in your server (Apache, Nginx, and so on) and set the web directory as a document root of the host.
Carry out the following steps for installing advanced project template:
- As the first step open your terminal install Bower-to-Composer adapter:
composer global require "fxp/composer-asset-plugin:^1.2.0"It provides a simple way to load related non-PHP packages (JavaScript and CSS) from the Bower repository.
- Create a new application in the new
basicdirectory:composer create-project --prefer-dist yiisoft/yii2-app-advanced advanced - The new application does not contains local configuration files and
index.phpentry scripts yet. To generate the files justinita working environment:cd advanced php init
During initialization select the Development environment.
- Check that your PHP contains the required extensions:
php requirements.php - Create a new database and configure it in the generated
common/config/main-local.phpfile. - Apply the application migrations:
php yii migrateThis command will automatically create a
usertable in your database. - Try to run a frontend application by the following console command:
php yii serve --docroot=@frontend/web --port=8080Then run the backend in an other terminal window:
php yii serve --docroot=@backend/web --port=8090 - Check in your browser that the application works via the
http://localhost:8080andhttp://localhost:8090addresses:
Create two new hosts for backend and frontend application in your server (Apache, Nginx, and so on) and set the backend/web and frontend/web directories as document roots of the hosts.
First of all, we installed the Composer package manager and the Bower asset plugin.
After we installed the application via the composer create-project command, the command creates a new empty directory, clones the source code of application template and loads all its inner dependencies (framework and other components) into the vendor subdirectory.
If needed, we will initialize application configuration and set up a new database.
We can check system requirements via running the requirements.php script in console or browser mode.
And after cloning of the code we can configure our own PHP server to work with the web directories as the server's document roots.
- For more information about installing
yii2-app-basicrefer to, http://www.yiiframework.com/doc-2.0/guide-start-installation.html. - Refer to, https://github.com/yiisoft/yii2-app-advanced/blob/master/docs/guide/start-installation.md for
yii2-app-advanced. - Refer to, https://getcomposer.org for the Composer package manager.
- For creating a GitHub access token for Composer refer to https://github.com/blog/1509-personal-api-tokens.
