
Role-Based Access Control (RBAC) provides simple yet powerful centralized access control. It is the most powerful access control method available in Yii. It is described in the guide, but since it is rather complex and powerful, it is not as easy to understand without getting under the hood a little.
In this recipe, we will take the roles hierarchy from the definitive guide, import it, and explain what is happening internally.
- Create a new application by using the Composer package manager, as described in the official guide at http://www.yiiframework.com/doc-2.0/guide-start-installation.html.
- Create a MySQL database and configure it.
- Configure the
authManagercomponent in yourconfig/main.phpandconfig/console.phpas follows:return [ // ... 'components' => [ 'authManager' => [ 'class' => 'yii bacDbManager', ], // ... ], ]; - Run the migration:
yii migrate --migrationPath=@yii/rbac/migrations
Carry out the following steps:
- Create the access rule
rbac/AuthorRule.php:<?php namespace app bac; use yii bacRule; /** * Class AuthorRule. * @package app bac */ class AuthorRule extends Rule { public $name = 'isAuthor'; /** * @param int|string $user * @param yii bacItem $item * @param array $params * * @return bool */ public function execute($user, $item, $params) { return isset($params['post']) ? $params['post']->createdBy == $user : false; } } - Create a console command,
command/RbacController.php, toinitthe RBAC rules command:<?php namespace appcommands; use appmodelsUser; use Yii; use yiiconsoleController; /** * Class RbacController. * @package appcommands */ class RbacController extends Controller { public function actionInit() { $auth = Yii::$app->authManager; $createPost = $auth->createPermission('createPost'); $createPost->description = 'Create a post'; $updatePost = $auth->createPermission('updatePost'); $updatePost->description = 'Update a post'; $updatePost = $auth->createPermission('updatePost'); $updatePost->description = 'Update a post'; $deletePost = $auth->createPermission('deletePost'); $deletePost->description = 'Delete a post'; $readPost = $auth->createPermission('readPost'); $readPost->description = 'Read a post'; $authorRule = new app bacAuthorRule(); // add permissions $auth->add($createPost); $auth->add($updatePost); $auth->add($deletePost); $auth->add($readPost); $auth->add($authorRule); // add the "updateOwnPost" permission and associate the rule with it. $updateOwnPost = $auth->createPermission('updateOwnPost'); $updateOwnPost->description = 'Update own post'; $updateOwnPost->ruleName = $authorRule->name; $auth->add($updateOwnPost); $auth->addChild($updateOwnPost, $updatePost); // create Author role $author = $auth->createRole('author'); $auth->add($author); $auth->addChild($author, $createPost); $auth->addChild($author, $updateOwnPost); $auth->addChild($author, $readPost); // create Admin role $admin = $auth->createRole('admin'); $auth->add($admin); $auth->addChild($admin, $updatePost); $auth->addChild($admin, $deletePost); $auth->addChild($admin, $author); // assign roles $auth->assign($admin, User::findByUsername('admin')->id); $auth->assign($author, User::findByUsername('demo')->id); echo "Done! "; } } - That's it. Run it in the console:
yii rbac/init - Create
controllers/RbacController.phpas follows:<?php namespace appcontrollers; use appmodelsUser; use stdClass; use Yii; use yiifiltersAccessControl; use yiihelpersHtml; use yiiwebController; /** * Class RbacController. */ class RbacController extends Controller { public function behaviors() { return [ 'access' => [ 'class' => AccessControl::className(), 'rules' => [ [ 'allow' => true, 'actions' => ['delete'], 'roles' => ['deletePost'], ], [ 'allow' => true, 'actions' => ['test'], ], ], ], ]; } public function actionDelete() { return $this->renderContent( Html::tag('h1', 'Post deleted.') ); } /** * @param $description * @param $rule * @param array $params * * @return string */ protected function renderAccess($description, $rule, $params = []) { $access = Yii::$app->user->can($rule, $params); return $description.': '.($access ? 'yes' : 'no'); } public function actionTest() { $post = new stdClass(); $post->createdBy = User::findByUsername('demo')->id; return $this->renderContent( Html::tag('h1', 'Current permissions'). Html::ul([ $this->renderAccess('Use can create post', 'createPost'), $this->renderAccess('Use can read post', 'readPost'), $this->renderAccess('Use can update post', 'updatePost'), $this->renderAccess('Use can own update post', 'updateOwnPost', [ 'post' => $post, ]), $this->renderAccess('Use can delete post', 'deletePost'), ]) ); } } - Now run
rbac/testonce to check access to all the created permissions of the RBAC hierarchy:
- Then, try to log in as
demo(the password isdemo) and runrbac/testagain:
- Then, try to log in as
admin(the password isadmin) and runrbac/testagain: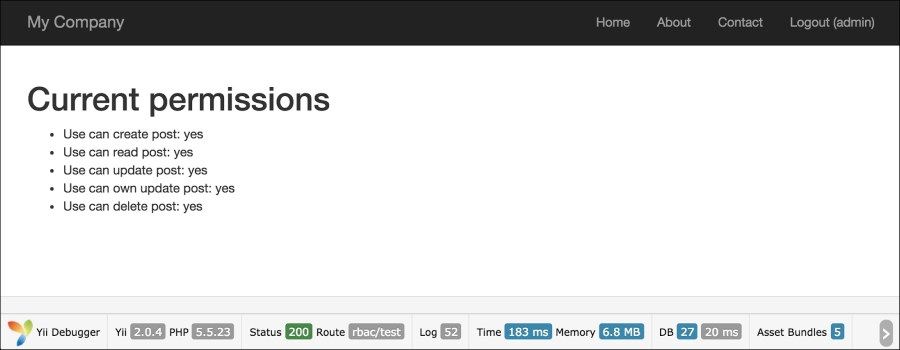
- Log in as
demouser and runrbac/delete:
- Log in as
adminand runrbac/delete:
Yii implements a general hierarchical RBAC following the NIST RBAC model. It provides RBAC functionality through the authManagerapplication component.
The RBAC hierarchy is a directed acyclic graph, that is, a set of nodes and their directed connections or edges. There are three types of node available: roles, permissions, and rules.
A role represents a collection of permissions (for example creating posts and updating posts). A role may be assigned to one or multiple users. To check if a user has a specified permission, we may check whether the user is assigned with a role that contains that permission.
Both roles and permissions can be organized in a hierarchy. In particular, a role may consist of other roles or permissions, and a permission may consist of other permissions. Yii implements a partial-order hierarchy, which includes the more special tree hierarchy. While a role can contain a permission, it is not true vice versa.
For testing permissions, we have created two actions. The first action, test, contains checkers for created permissions and roles. The second action is delete, which is limited through the access filter. The rule for the access filter contains the following code:
[
   'allow' => true,
   'actions' => ['delete'],
   'roles' => ['deletePost'],
],
This means that we are allowing all users who have the deletePost permission to run the deletePost action. Yii starts checking with the deletePost permission. Besides the fact that the access rule element is named as roles, you can specify an RBAC hierarchy node be it a role, rule, or permission. Checking for updatePost is complex:
Yii::$app->user->can('updatePost', ['post' => $post]);We use a second parameter to pass a post (in our case, we have simulated it with stdClass). If a user is logged in as demo, then to get access we need to go from updatePost to author. If you're lucky, you only have to go through updatePost, updateOwnPost, and author.
As updateOwnPost has a rule defined, it will be run with a parameter passed to checkAccess. If the result is true, then access will be granted. As Yii does not know what the shortest way is, it tries to check all possibilities until it is successful, or no alternatives are left.
There are some useful tricks that will help you to use RBAC efficiently, which are discussed in the following subsections.
Follow these recommendations where possible to maximize the performance and reduce hierarchy complexity:
A complex hierarchy becomes difficult to understand without using some kind of naming convention. One possible convention that helps to limit confusion is as follows:
[group_][own_]entity_action
Where own is used when the rule determines an ability to modify an element only if the current user is the owner of the element and the group is just a namespace. The entity is the name of the entity we are working with and action is the action that we are performing.
For example, if we need to create a rule that determines whether the user can delete a blog post, we will name it blog_post_delete. If the rule determines whether a user can edit his or her own blog comment, the name will be blog_own_comment_edit.