CHAPTER 7
Final Exercise: Multiplayer
Crazy Eights
The time has come to put everything together in one final example: a multiplayer card game for the Zune. All Zunes have wireless capability, which allows you to connect and send data to other nearby Zunes in an ad hoc fashion.
The Crazy Eights game incorporates many of the concepts we have covered thus far, including shared sprite batches, game state management, animation, components, game libraries, and sound effects. The final piece of the puzzle is network management, which we will dive into first, before writing this consummate example.
Wireless Networking with the Zune
Because all Zunes have a wireless antenna, you can connect to other nearby Zunes and send/receive data from them. This makes for some very interesting possibilities.
The wireless hardware in the Zune is meant to connect to one other device (to send music) or with a public network (to synchronize your library wirelessly or buy music online). It is theoretically possible to connect up to eight different Zunes in the same multiplayer network session, but you may notice some glitchy behavior when attempting to use more than three (or so) at a time.
Zune multiplayer games are peer-to-peer. This means that any Zune game must be able to act as either the client or the server. There is no centralized game server that serves data. In other words, all Zunes should be capable of acting as a host device and a client device, depending on their role in the game. A single Zune usually plays the role of the server (host), which can unfortunately degrade performance for that Zune if extensive processing is required for the host.
In addition, the work flow for testing multiplayer games is slightly different than with normal games. When you want to test connectivity or connected features, you always need to deploy or run without debugging on at least one device (since you can deploy to only one Zune at a time). Then you must plug in the other Zune, and deploy and run (or debug) the game. If you run one game with debugging on, any breakpoint or exception will cause the debugged device to exit the network session. However, you should still debug at least one device if you are looking for crashes. Just be aware that this Zune will be unable to reenter into the network session. These are just some things to keep in mind when developing multiplayer applications for the Zune.
With that out of the way, let's discuss the elements that compose a multiplayer game.
Elements of a Multiplayer Game
Most multiplayer games include a certain set of elements that make the game playable, and make discovery and synchronization between devices much easier. Zune games, of course, are included under this umbrella.
Think of any multiplayer game you've ever played where the connection scheme is peer-to-peer. The three stages of a peer-to-peer multiplayer game are as follows:
- Create (or join) a game
- Lobby (a holding area for players in the session)
- Playing (where data is being sent and the game is in session)
Much of the matchmaking and lobby functionality is built into the XNA Framework, so you don't need to worry about it. You can leverage this technology in your own game screens to provide a customized experience. You can even retrieve the gamer tag associated with the Zune (if the Zune has a linked gamer tag). When it comes to sending and receiving real data, however, the implementation is solely up to you.
How Data Is Transmitted in Wireless Zune Games
As with many other network games, data is transmitted using a reliable User Datagram Protocol (UDP). You don't need to worry about that, though, because everything is abstracted nicely for you in the XNA Framework.
You have essentially two options for sending data. One is by attaching data to a network gamer's Tag object. This is good for attaching some custom information to any given gamer. The Tag property is local only, which means that the network session does not take care of synchronizing this information for you (you still need to send it using a packet writer). The other option is to send all data explicitly in the form of packets, which is demonstrated in the next example.
With that in mind, let's explore the XNA network API made available to the Zune.
The Network API and Tags
Nearly everything you need to write network games can be found in the Microsoft.Xna.Framework.Net namespace. The Microsoft.Xna.Framework.GamerServices namespace provides some functionality that is mostly specific to the Xbox 360 or Games for Windows - LIVE, such as gamer profiles and sign-in related behavior. However, it also provides a Gamer class, which is used to hold data about a gamer on the network. You need this information to successfully implement networking between Zunes. At the helm of network games is this Gamer object.
Gamer is an abstract class, so you are actually dealing with a local gamer (someone playing in the session on the device in front of you) or a remote gamer (someone in the session located somewhere else). Of course, on the Zune, there is only one local gamer per device, but there can be any number of remote gamers, depending on the number of connected devices. These objects contain information about the gamers in the session, such as the gamer tag associated with them. These objects are enumerable in easily accessible collections, so it's quite easy to "loop through" all of the players in the session.
Any local network gamer object also has a property attached to it called Tag, which can be any object. This is different than the gamer tag, which is a string representing the player name. The Tag object can be cast at runtime to any object of your choosing, but be careful not to overload this object with a lot of unnecessary details, as you want to minimize network traffic.
The glue between the network players is the NetworkSession class. This object is responsible for sending and receiving data, as well as discovering and connecting players. This class has asynchronously implemented methods that allow players to create and join their own network sessions. Gamers are always connected using the SystemLink attribute, which is the same session type used to connect multiple Xbox 360 consoles and players on a local area network.
It is generally a good idea to wrap the functionality in the NetworkSession class to make life a little easier for you. You'll see how this works in the next example.
Robot Tag: A Two-Player Game
Before we move into the bulk of the chapter, which covers the creation of a multiplayer Crazy Eights game that supports up to five players, we will start with a simple two-player game that tracks player positions. The important thing to learn from this example is how to send and receive data with the packet writer and packet reader objects.
Robot Tag is a simple game involving two players who chase each other around as robots. If you are chasing, it is your job to hunt down the other player as quickly as possible. If you are being chased, the object is to avoid being caught. The player who evades for the longest time across all rounds is the winner.
As shown in Figure 7-1, Robot Tag is more conceptual, so there are no frills here. It has black backgrounds, a lot of text output at the top-left corner, and so on. Keep in mind that it is but a stepping-stone to more advanced activities later in the chapter.
Figure 7-1. The Robot Tag game
Note The foundation of the game is based on the Game State Management sample from the Creators Club web site, so I won't reprint a lot of that code here. The Game State Management sample can be found at http://creators.xna.com/en-US/samples/gamestatemanagement.
Here, I will guide you through the most important parts of this simple game and comment on what makes the network side of things tick. You will see how the game instances interface with one another on different client devices, from discovery and matchmaking to playing the game interactively. All of the networking in this sample uses the built-in functionality from the XNA Framework's Net and GamerServices namespaces, with the robot position transferred continuously via the gamer's Tag object.
Another thing you will notice is that this example doesn't use shared sprite batches or automatic properties, which I recommended in the previous chapter. Again, try not to focus too much on the coding style or implementation in this example. The idea is to understand how to set up a network session and transfer game data using the Tag property.
Let's get started checking out Robot Tag for the Zune.
Game Solution Structure
To begin, open RobotTag.sln from the Examples/Chapter 7/Exercise 1/RobotTag folder. Note the directory structure of the project, as shown in Figure 7-2. We have a game library project called ZuneScreenManager, which is only marginally different from what is in the Game State Management sample. It includes some abstract screen classes and menu classes, as well as a new class called NetworkSessionManager, which we use to wrap network functionality. Then there is the RobotTag Zune game project, which references the ZuneScreenManager project and is responsible for running the game.
Figure 7-2. The Solution Explorer view of Robot Tag
The RobotTag project also includes a concrete class called Robot, which exposes a few properties and has the ability to update and draw itself, similar to a game component. Instances of this Robot class are passed around via the Tag property of the network gamer objects. The RobotTag project also includes some game state screens, textures, and a font, as it is the main project that will handle all the drawing.
Network Session Management
Let's explore how the network session is managed. Open the NetworkSessionManager.cs file from the ZuneScreenManager project. The source code for this file is shown in Listing 7-1.
Listing 7-1. The NetworkSessionManager Class.
using System;

using System.Collections.Generic;

using System.Text;


using Microsoft.Xna.Framework;

using Microsoft.Xna.Framework.Net;


namespace ZuneScreenManager

{

    /// <summary>

    /// This class is responsible for managing network state in a game.

    /// </summary>

    public static class NetworkSessionManager

    {

        #region Fields


        private static NetworkSession networkSession;

        public static PacketReader PacketReader = new PacketReader();

        public static PacketWriter PacketWriter = new PacketWriter();


        #endregion


        #region Public Static Methods


        public static NetworkSession NetworkSession

        {

            get

            {

                return networkSession;

            }

        }


        public static void CreateSession(int maxNetworkPlayers)

        {

            networkSession = NetworkSession.Create(NetworkSessionType.SystemLink,


                1, maxNetworkPlayers);

        }


        public static void JoinFirstSession()

        {

            using (AvailableNetworkSessionCollection availableSessions =
                NetworkSession.Find(NetworkSessionType.SystemLink, 1, null))

            {

                if (availableSessions.Count > 0)

                {

                    networkSession = NetworkSession.Join(availableSessions[0]);

                }

            }

        }


        public static void StartGame()

        {

            if (networkSession != null)

                networkSession.StartGame();

        }


        public static void Update()

        {

            if (networkSession != null)

                networkSession.Update();

        }


        #endregion

    }

}
First, notice that the NetworkSessionManager class is static. This ensures that there is only one network session in use at any given time. This also gives other classes access to the network session by using the class name only, and allows you to avoid needing to instantiate and track multiple network sessions (which is a bad idea, anyway).
In the Fields region, there is a private, static field called networkSession, which is inaccessible by other classes. This protection defers all network session processing to the manager class. The two other fields are a packet reader and a packet writer, which are used to send and receive data via the underlying protocol.
In the Public Static Methods region, you see a few different methods that are used to handle the connection process. The CreateSession method creates the network session with a session type of SystemLink (the only acceptable session type for Zune games), the maximum local players (one on the Zune), and the maximum total number of network players. This is a blocking call, and if an exception is thrown, it is not caught here. You also see a JoinFirstSession method, which uses the synchronous version of NetworkSession.Find to locate an available session and join it immediately. Later, in the Crazy Eights game example, you will learn how to enumerate network sessions asynchronously.
The Update method is responsible for pumping (forcibly updating) the network session object, which must be done as often as possible to ensure maximum responsiveness. The StartGame method calls StartGame on the underlying session object, which causes the session's state to change to Playing. This also causes the session object to fire an event called GameStarted, which this class could subscribe to. These methods are all you need to get started. They are not necessarily error-proof, but this is a Keep It Simply Simple (KISS) example.
The Robot Object
Next, open Robot.cs from the RobotTag project. The Robot class would probably be better off as a drawable game component, so keep that in mind if you choose to refactor this code. The Robot class exposes two properties: Position and Bounds. These are used to track the robot's on-screen position and the boundary area that limits the robot's movement (so a player cannot move the robot off-screen). The constructor initializes these fields and assigns a tint hue to the robot: red if this Zune is the host; blue otherwise. The constructor code is shown in Listing 7-2.
Listing 7-2. The Robot Constructor.
/// <summary>

/// Creates and initializes a new Robot.

/// </summary>

/// <param name="host">Whether this robot is tied to the Host</param>

/// <param name="width">The screen width</param>

/// <param name="height">The screen height</param>

/// <param name="contentManager">Content Manager to use for loading

/// content</param>

public Robot(bool host, int width, int height, ContentManager contentManager)

{

    // Copy params to fields

    isHost = host;

    content = contentManager;

    screenWidth = width;

    screenHeight = height;


    // Load the robot texture

    texRobot = content.Load<Texture2D>("Textures/robot");


    // Set the movement limiting rectangle

    bounds = new Rectangle(0, 0,

        screenWidth - texRobot.Width, screenHeight - texRobot.Height);


    // Move the robot to its initial position

    ResetPosition();


    // Set the robot color

    if (isHost)

        robotColor = Color.Red;

    else

        robotColor = Color.Blue;

}
The ResetPosition method of the Robot class, shown in Listing 7-3, simply reinitializes the position depending on whether this Zune is the host.
Listing 7-3. The ResetPosition Method of the Robot Class.
/// <summary>

/// Resets the robot position to game starting position

/// </summary>

public void ResetPosition()

{

    int initialX, initialY;


    // Position the robot in the center (x)

    // This is half the screen minus half the robot texture.

    initialX = screenWidth / 2 - texRobot.Width / 2;


    if (isHost)

    {

        // The host will be at the top

        initialY = 0;

    }

    else

    {

        // Other player will be at the bottom

        initialY = screenHeight - texRobot.Height;

    }


    // Set position

    position.X = initialX;

    position.Y = initialY;

}
There are two more public methods in the Robot class: Move and Draw. Move takes two integers for X and Y, and updates the position accordingly. Draw just draws the robot texture at its position with the assigned tint hue. See Listing 7-4 for these two methods.
Listing 7-4. Move and Draw Methods of the Robot Class.
public void Move(int x, int y)

{

    position.X += x;

    position.Y += y;

}


public void Draw(SpriteBatch spriteBatch)

{

    spriteBatch.Draw(texRobot, position, robotColor);

}
Finally, a public static method on the Robot class determines if one robot collides with another. This method dynamically creates bounding rectangles for the robots and determines if they intersect, as shown in Listing 7-5.
Listing 7-5. The Static Collision Method of the Robot Class.
public static bool Collision(Robot r1, Robot r2)

{

    Rectangle rect1 = new Rectangle((int)r1.position.X, (int)r1.position.Y,

        r1.texRobot.Width, r1.texRobot.Height);

    Rectangle rect2 = new Rectangle((int)r2.position.X, (int)r2.position.Y,

        r2.texRobot.Width, r2.texRobot.Height);


    return rect1.Intersects(rect2);

}
That's everything in the Robot class. This is the object that will be passed around in the network session. The Position property is what is sent across the airwaves to update the other peer.
Game Screens
Game.cs has some custom code in it, but all it really does is assign two components to the game: an instance of the screen manager component and an instance of a gamer services component, which is required to grab player information from the network session. The following line of code actually starts the game:
screenManager.AddScreen(new MainMenuScreen());
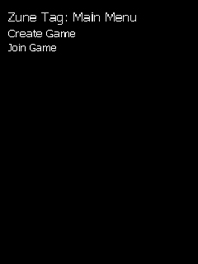
This line occurs in the constructor and adds the main menu screen to the screen manager. Now, let's take a look at some of these game screens, beginning with the main menu screen, shown in Figure 7-3.
Figure 7-3. The main menu screen
Open MainMenuScreen.cs from the RobotTag project's Screens folder. This class inherits from MenuScreen, a base class defined in the game state management project. This particular menu instantiates some menu items and loads a new screen based on what the user selects. The code for the main menu is shown in Listing 7-6.
Listing 7-6. The Main Menu Screen Code.
using System;

using System.Collections.Generic;

using System.Text;


using Microsoft.Xna.Framework;

using Microsoft.Xna.Framework.Graphics;


using ZuneScreenManager;


namespace RobotTag

{

    /// <summary>

    /// Displays the main menu, which only has two menu items.

    /// </summary>

    public class MainMenuScreen : MenuScreen

    {

        #region Constructor(s)


        public MainMenuScreen()

            : base("Zune Tag: Main Menu")

        {

            MenuEntry menuCreate = new MenuEntry("Create Game");

            MenuEntry menuJoin = new MenuEntry("Join Game");


            // Wire up event handlers for the Menu Item Selected events

            menuCreate.Selected += new

                EventHandler<EventArgs>(MenuCreateHandler);


            menuJoin.Selected += new EventHandler<EventArgs>(MenuJoinHandler);


            // Add the menu entries to the menu

            MenuEntries.Add(menuCreate);

            MenuEntries.Add(menuJoin);

        }


        #endregion


        #region Event Handlers


        void MenuJoinHandler(object sender, EventArgs e)

        {

            ScreenManager.AddScreen(new NetworkLobby(NetworkLobbyType.Join,

                ScreenManager.Game.Content));

        }


        void MenuCreateHandler(object sender, EventArgs e)

        {

            ScreenManager.AddScreen(new NetworkLobby(NetworkLobbyType.Create,

                ScreenManager.Game.Content));

        }


        #endregion

    }

}
Look at the event handlers in Listing 7-6. Both cases add a new NetworkLobby screen to the screen manager, although with a different first parameter (NetworkLobbyType.Create or NetworkLobbyType.Join).
The lobby screen, shown in Figure 7-4, is designed to be dual-purpose because it is so simple. From here, a player can create or join a game. The NetworkLobby screen has only three fields: status text, a content manager for loading content, and the lobby type. Note that when a NetworkNotAvailableException is caught, this means that wireless is not enabled on the Zune. These fields are initialized in the constructor, which also creates or joins the network session depending on the lobby type. Then network session events are subscribed to. The constructor and event handlers are shown in Listing 7-7.
Figure 7-4. The lobby screen for a joining peer
Listing 7-7. The NetworkLobby Screen Constructor.
public NetworkLobby(NetworkLobbyType type, ContentManager content)

{

    statusText = "";

    lobbyType = type;

    contentManager = content;


    // Try to create or join the session.

    try

    {

        switch (lobbyType)

        {

            case NetworkLobbyType.Create:

                NetworkSessionManager.CreateSession(2);

                break;

            case NetworkLobbyType.Join:

                NetworkSessionManager.JoinFirstSession();

                break;

        }

    }

    catch (NetworkNotAvailableException)

    {

        statusText = "Error: Wireless is not enabled.";

    }

    catch

    {

        statusText = "An unknown error occurred.";

    }


    // Wire network session events

    if (NetworkSessionManager.NetworkSession != null)

    {

        NetworkSessionManager.NetworkSession.GamerJoined +=

            new EventHandler<GamerJoinedEventArgs>(GamerJoined);


        NetworkSessionManager.NetworkSession.GameStarted +=

            new EventHandler<GameStartedEventArgs>(GameStarted);

    }

}


void GameStarted(object sender, GameStartedEventArgs e)

{

    ScreenManager.AddScreen(new PlayingScreen());

}


void GamerJoined(object sender, GamerJoinedEventArgs e)

{

    e.Gamer.Tag = new Robot(e.Gamer.IsHost, 240, 320, contentManager);

}
In the GamerJoined event handler, we instantiate a new Robot object and assign it to the locally stored gamer object. This is where the robot is first brought to life in a network sense. The GameStarted event handler causes both screens to transition to the playing screen.
The Update method of the lobby screen, shown in Listing 7-8, updates the network session, and also updates the status text with the names of the players in the session and any errors that may have occurred.
Listing 7-8. The Update Method of the NetworkLobby Screen, Responsible for Updating Status Text.
public override void Update(GameTime gameTime, bool otherScreenHasFocus,

    bool coveredByOtherScreen)

{

    // Update the network session

    NetworkSessionManager.Update();


    // Configure display

    switch (lobbyType)

    {

        case NetworkLobbyType.Create: // What the host sees

            statusText = "Session created.
Players in room: ";

            statusText += GetGamerListString(

                NetworkSessionManager.NetworkSession.AllGamers);


            if (NetworkSessionManager.NetworkSession.AllGamers.Count == 2)

            {

                statusText += "

Press the middle button to start.";

            }

            break;

        case NetworkLobbyType.Join: // What the other player sees

            if (NetworkSessionManager.NetworkSession == null)

                statusText = "No sessions found.";

            else

            {

                statusText = "Session joined.
Players in room: ";

                statusText += GetGamerListString(

                    NetworkSessionManager.NetworkSession.AllGamers);

            }

            break;

    }


    base.Update(gameTime, otherScreenHasFocus, coveredByOtherScreen);

}


private string GetGamerListString(GamerCollection<NetworkGamer> gamers)

{

    string gamerString = "";

    foreach (NetworkGamer gamer in gamers)

    {

        gamerString += "
" + gamer.Gamertag;

        if (gamer.IsHost)

            gamerString += " (host)";

    }

    return gamerString;

}
This Update method of NetworkLobby makes use of a private method called GetGamerListString, which returns a list of all the gamers in the session. The other method in this class, Draw (not shown), simply draws the status text on the screen at (0, 0).
Next, open the PlayingScreen.cs file from the Screens folder. This screen, shown in Figure 7-5, is responsible for the game play, text display, texture drawing, and so on. It also indirectly uses some network functionality. In the constructor, you will see a line that subscribes to the GamerLeft event of the network session:
// Subscribe to the GamerLeft event

NetworkSessionManager.NetworkSession.GamerLeft += new

      EventHandler<GamerLeftEventArgs>(PlayerLeft);
Figure 7-5. The playing screen
The PlayerLeft event handler looks like this:
/// <summary>

/// Fired when a gamer leaves. Transitions to the Game Over screen,

/// signaling that the game was prematurely finished.

/// </summary>

/// <param name="sender"></param>

/// <param name="e"></param>

void PlayerLeft(object sender, GamerLeftEventArgs e)

{

    GameOver(true);

}
When the other player leaves, the game will automatically transition to the game over screen, passing a value of true to indicate that the game ended prematurely.
Now, let's see how Tag is used further to send and receive position data. Look at the UpdateNetworkSession method in PlayingScreen.cs. This is a private method that handles the sending and receiving of the one parameter we care about (Position) via packet readers and writers. Since this method is called with every update of the screen, the position is constantly being sent out and read. First, we grab the local gamer, cast its tag to a new Robot object, and write its position vector over the wire using an in-order packet delivery scheme. Then we pump the underlying network session to ensure that data gets sent. The following code block handles the "send" portion of the synchronization process; it sends the position of this gamer's robot to all other gamers.
private void UpdateNetworkSession()

{

    // Grab a reference to the local gamer

    LocalNetworkGamer localGamer =

        NetworkSessionManager.NetworkSession.LocalGamers[0];


    // Write the local robot position into a network packet and send it

    Robot robot = localGamer.Tag as Robot;

    NetworkSessionManager.PacketWriter.Write(robot.Position);

    localGamer.SendData(NetworkSessionManager.PacketWriter,

       SendDataOptions.InOrder);


    // Pump the network session

    NetworkSessionManager.Update();

    /// Continued below ...
Next, we read and process any data sent by other players using the following pattern:
// Receive data from the network session

    while (localGamer.IsDataAvailable)

    {

        NetworkGamer sender;

        localGamer.ReceiveData(NetworkSessionManager.PacketReader, out sender);


        if (sender.IsLocal) // skip local gamers

            continue;


        // Get the sender's robot

        Robot remoteRobot = sender.Tag as Robot;

        remoteRobot.Position = NetworkSessionManager.PacketReader.ReadVector2();

    }

}
We use a while loop, checking whether data is available for the local gamer on the Zune. We receive the data and skip the processing if the gamer is the local gamer (because the local gamer will also receive any data it sends by default). The ReceiveData method gives us a reference to the network gamer that sent the data, which in turn lets us check to see if that gamer is local and access its Tag object. Then we assign the remote Robot object's Position property to whatever the packet reader reads (a Vector2).
Now let's look at the Update method of the screen, which is responsible for drawing the updated robots on the screen. First, this method calls the UpdateNetworkSession to ensure our robots are most current. The game-play elements (such as round time) are calculated and updated, and then the Robot objects are retrieved using this block of code from the Update method:
Robot localRobot, remoteRobot;

localRobot = NetworkSessionManager.NetworkSession.LocalGamers[0].Tag as Robot;

remoteRobot = NetworkSessionManager.NetworkSession.RemoteGamers[0].Tag as Robot;
Then the collision detection method is called to determine whether the game state should advance (and in the sample code, some status text is updated):
if (Robot.Collision(localRobot, remoteRobot))

{

    // Hang just a sec to account for network latency

    System.Threading.Thread.Sleep(100);

    UpdateWinner(gameTime);

}
Notice how we hang for a bit using a Thread.Sleep. This may not be a best practice, but it's not particularly noticeable, and it gives the other device time to arrive at the same conclusion: the two objects are colliding.
The UpdateWinner method just updates the current score and tells each robot to reset its position.
private void UpdateWinner(GameTime gameTime)

{

    if (currentRound >= MAX_ROUNDS)

    {

        GameOver(false);

    }

    else

    {

        if (isMyTurn)

        {

            localScore = localScore.Add(roundTime);

        }

        else

        {

            remoteScore = remoteScore.Add(roundTime);

        }


        // New round

        currentRound++;

        roundStartTime = gameTime.TotalGameTime;


        Robot localRobot =

            NetworkSessionManager.NetworkSession.LocalGamers[0].Tag as Robot;

        Robot remoteRobot =

            NetworkSessionManager.NetworkSession.RemoteGamers[0].Tag as Robot;


        localRobot.ResetPosition();

        remoteRobot.ResetPosition();


        isMyTurn = !isMyTurn;

    }

}
If all rounds have been played, the game over screen will be shown.
Robot Tag Review
The following are the important points to take away from the Robot Tag game:
- How to create and join network sessions
- How to send and receive data with a packet reader and a packet writer
- How to use the
Tag property to assign custom data to a local instance of a gamer object
Be sure to open the project for yourself from the Examples/Chapter 7/Exercise 1/ RobotTag folder and see how the game works in greater detail.
When you test the game, you will need two Zunes. Add both of them to XNA Game Studio Device Center and deploy each separately. The first deployment must be without debugging, so that you can unplug the Zune and plug in the other one. After plugging the next Zune in, change it to the default device in Device Center and deploy with or without debugging (your choice). Because it is the same game, it will behave the same on both devices, unless one device has a slower processor (as in the first-generation Zunes).
Multiplayer Crazy Eights for the Zune
The remainder of this chapter presents a guided tour of Crazy Eights for the Zune, from the ground up. You will learn how to build every aspect of this multiplayer game to the specifications we define, and we won't skip a single line of code.
The idea of building a game from the ground up naturally includes some game design. Rather than jump directly into code, we'll spend some time up-front on design work. Such work includes definition of the rules, some screen designs, definition of some networking principles, and a basic architecture for the project.
As with any software project that you can't just hack out in a night, it's important to lay the groundwork for successful implementation by gathering thoughts, brainstorming, and getting it all down on paper (or disk). The first step is to understand what Crazy Eights is in the first place.
Rules of Crazy Eights
In Crazy Eights, each player is dealt eight cards. One more card is dealt to start the discard pile, face up, and the remaining stack of cards is drawn from when a player is unable to discard. We will refer to the topmost card on the discard pile as the active card.
Play begins arbitrarily and moves in a defined order from player to player. When it is a player's turn, that player must select a card that matches the active card by any of the following criteria:
- The card has the same suit as the active card (clubs, spades, and so on)
- The card has the same face value as the active card (ace, five, jack, and so on)
- The card has a face value of eight (the wildcard)
The player can discard any card fitting these criteria, and the active card becomes the discarded card (so the next player must find a way to match the card discarded by the last player). Should the player discard an eight, that player must select any suit for the next player to match against. The next player can match any card of this suit.
If the player cannot match any of the cards in their hand to the active card, he must have cards dealt to him until he has a match. After discarding, play moves to the next player in the list.
The object of the game is to run out of cards. The first player to have zero cards is the winner. Should the stack of cards to deal become empty, the current pile of discarded cards is used to deal (though the topmost discarded card remains as the active card).
Game Requirements
Here, we'll explore some high-level requirements (in the software development sense) that will drive our creation of the game.
Core Functional Requirements
In order for our game to function, it must do the following:
- Display cards graphically to the user
- Support up to five network gamers (arbitrarily defined)
- Provide a matchmaking system to create a game session
- Abide by the rules of Crazy Eights
- Cycle through player turns consistently
- Allow players to select a new suit when an eight is played
- Display the local player's hand
- Display the active card
- Notify other players of the new suit when the active suit has changed (when a player plays an eight)
- Display the name of the winner when the game is over
Enhanced Functional Requirements
These requirements add something extra to the game:
- Play a sound effect when a menu selection is changed
- Play a sound effect when a menu item is selected
- Play a sound effect when a card is selected for play by the user
- Display cards in the hand in an organized manner
- Display the selected card in the hand above the other cards to highlight it
- Play a unique sound effect when a player has lost
- Play a unique sound effect when a player has won
- Support a screen management system
- Support player-specified readiness during matchmaking (a session cannot begin until all players are ready)
Nonfunctional Requirements
The following requirements pertain to the style and approach of building the game:
- Send and receive a minimal amount of network data
- Remain synchronized with other peers
- Store only the cards needed to display the player's hand (the game will not keep track of all players' hands)
- Utilize as much local processing as possible, cutting down on network round-trips, requests, and responses
- Allow only the host of the game to manage the deck of cards
These nonfunctional requirements have a direct effect on the architecture. They force us to think about the data we choose to send. When should we send data? How much should we send? Who should process that data, and who should not?
The rule of thumb here is that if a player's Zune can operate locally without needing additional information from the host, it should do so. A good example of this is when a player discards the card she has selected. The only data that should be sent back to the host is the card she discarded. The host doesn't need to know about the new state of the player's cards, because those cards belong to the player. Building in that functionality would give only some marginal benefits—specifically, being able to enumerate every card in every player's hand (which is cheating, by the way).
These nonfunctional requirements allow us to form a clearer picture of which Zunes have certain pieces of data available to them. We can then infer more about how we will operate over the network. We'll explore this piece next.
Network State Design
Here, we lay down some simple rules regarding network data and activity that will shape the construction of the game from a network perspective.
Network Data
The nonfunctional requirements state that we should store and send data only when absolutely necessary. However, the host (the Zune that creates the network session) must contain a superset of that data to maintain consistency across all the peers. For example, if a card is dealt, it should come from the host's collection of cards. If the peer deals its own card, every peer will get a different result, because each peer would need its own deck and that deck is shuffled randomly. You could burden every peer with a full deck of cards consistent with the one the host has, but that would add unnecessary overhead and network activity to the game, so we'll just let the host Zune take care of it.
Remember that this is only one game, not two. As a result, both games will have objects to hold the same piece of data, but on the peer, those objects may be empty. For example, both games contain a player list, but only the host will populate that list. The peer never needs to use it. This emphasizes the duality of peer-to-peer gaming; any instance of the game must be capable of running as the host or as a nonhost peer.
Table 7-1 shows the pieces of data the host and peers should have in their possession during play. Remember that the host is also a player, so the host will contain a superset of the peer data, but only what is necessary to facilitate consistent game play for all peers. This table is derived not from practice, or from some formula, but from sensible thought about what the host and peer require to properly operate.
Table 7-1. Host and Peer Data for Crazy Eights
| Data |
Host |
Nonhost Peers |
| Deck |
Yes |
No |
| Discarded cards |
Yes |
No |
| Current turn index |
Yes |
No |
| Flag indicating whether it is my turn |
Yes |
Yes |
| List of players |
Yes |
No |
| List of all players' cards |
No |
No |
| List of my cards |
Yes |
Yes |
| Active card |
Yes |
Yes |
| Active suit |
Yes |
Yes |
Implementation of this scheme will result in peers that are "dumb" (not to be disparaging to those peers). Peers will operate under the assumption that the host will send them whatever common data and messages they need, and they will play the game accordingly. For example, a peer will ask to be dealt a card if it cannot play from its hand. The host will send cards back as long as the peer requests a card from the host's deck.
Network Messages
Just as the host and nonhost peers have some different levels of data available to them, the messages sent between the Zunes can differ. There are several messages that only the host should be capable of sending (such as "Deal a card to a player"), and those that all players can send ("I played a card," "Please deal me a new card," and "I am out of cards"). There are also some network messages that require action by only the host and should be ignored by other peers. Again, remember that the host is also a player Zune itself, and it will receive any messages it sends out. The host should also be capable of doing everything the other peers can do, such as playing a card or selecting the suit.
Table 7-2 shows the outbound network messages involved in the game and whether the host and peer should be capable of sending them.
Table 7-2. Outbound Network Messages for Crazy Eights Host and Peers
| Message |
Host |
Peer |
| Send player data |
Yes |
No |
| Send a card |
Yes |
No |
| Deal active card |
Yes |
No |
| Send "Ready to Play" |
Yes |
No |
| Set the turn |
Yes |
No |
| My hand is complete |
Yes |
Yes |
| Play a card |
Yes |
Yes |
| Request a card |
Yes |
Yes |
| Select a suit |
Yes |
Yes |
| Game won (out of cards) |
Yes |
Yes |
When it comes to processing network messages, there are some that only the host should take action on (such as when a player requests a card). Table 7-3 shows whether the host and peer should act on these inbound messages. Again, the host is a player, so it will process a superset of the messages processed by peers. Some of these messages have intended recipients.
Table 7-3. Inbound Message Processing for Crazy Eights
| Message |
Host |
Intended Peer |
Other Peers |
| Card dealt |
No |
Yes |
No |
| All cards dealt |
Yes |
N/A |
Yes |
| Common card dealt |
Yes |
N/A |
Yes |
| Turn set |
Yes |
Yes |
No |
| Player created |
Yes |
Yes |
No |
| Card played |
Yes, with additional processing |
N/A |
Yes |
| Card requested |
Yes |
No |
No |
| Suit chosen |
Yes |
Yes |
Yes |
| Game won |
Yes |
Yes |
Yes |
Things get a bit more complicated here. For example, every peer should act the same when someone plays an eight and chooses a suit, or when someone wins the game. However, some messages have intended recipients. When the host sets the turn, the intended recipient will assume it is his turn, and all other recipients will assume it is not their turn.
In the Robot Tag game we reviewed earlier in the chapter, two Vector2 values were continuously synchronized between two Zunes. Here, you can see from the complexity of the data, outbound network messaging, and processing requirements that we will need to build a slightly more sophisticated system to handle most of this. This realization will affect how we will build the game.
Architectural Options (High Level)
Given that we have a complex network management subsystem, we cannot (sanely) move forward building a game that lives in Game1.cs with the five standard XNA methods. We need to expand and think more broadly to make life a little easier for ourselves in the long run.
The approach we'll use is to build a game state management library that defines some foundational logic for managing screens. This library contains abstract base classes for game screen and menu objects, and also provides a mechanism for sharing resources such as fonts. Any screen that inherits from the base screen can load its own content, update, and draw itself. Screens can also add or remove screens from the screen manager to transition between game states. This allows us to create screens that map to the various game states: main menu, create game, join game, lobby, playing, and game over.
Because we are using this specialized system, traditional game components don't work as well as we might want, because game components are added to the main game's collection of components. We will need to create our own type of component that can be added to a screen object—the screen will handle all of its own components. This gives us one library project so far: the screen manager library.
Because we are striving for a proper object-oriented Zen solution, it makes sense to create a library for all card operations to hold logic common to all card games. This would give us a Card object, a Deck object (that can shuffle, deal, and reset itself), and some helper methods that let us serialize a card for network transmission or compare a card to another card based on its suit and/or value. This project could be used and extended further in other card games.
The final project is the Zune game itself, which references the screen management library and the card game functionality library.
When it comes to the architecture of the Zune game itself, we will use components, screens, and more to tie everything together. Of course, when you build your own games, the object model and architecture are entirely up to you and what you think is prudent.
Screen Design
Are you an "art first" or "functionality first" programmer? Some people can't envision the final product without art in their hands. Others don't want to be constrained by having the art first, as it may cause them to overthink their implementation approach. In any case, having some mockups (at the very least) can help guide you. In the creation of this particular game, I got the foreground of the game (the cards, text, and most of the processing) working before I added pretty backgrounds for the screens.
Here, we will look at the screens used in the game so you can see what you will be up against in terms of implementation. We'll go over these screens in the order in which they would appear during a normal play session. Now, we are beginning to transition out of the "thinking" phase and into the "doing" phase, for you will also learn about the behavior of these screens. This provides more granular requirements-level detail for each screen, much like a functional specification. There are several embedded use cases for each of these screens, but we won't go into too much detail until we start building them.
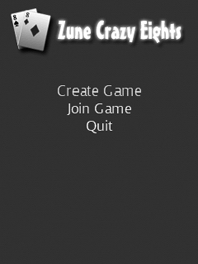
The Main Menu Screen
The main menu screen, shown in Figure 7-6, is the first one shown in the game. It displays three menu items: Create Game, Join Game, and Quit. The game will transition (or quit) depending on which menu item has been selected. If Create Game is selected, the new game screen will be shown. If Join Game is selected, the join game screen will be shown. If Quit is selected, the game should exit. The currently selected menu item is highlighted. The background color of the screen is green (like a card table), and the text is white. A sound effect is played when you select or choose a menu item.
Figure 7-6. The main menu screen for Crazy Eights
The Create Game Screen
The create game screen, shown in Figure 7-7, is responsible for creating the network session and displaying the list of players in the network session. When all players have signaled they are ready, the host can start the game manually. The background is green, and the text is white. This screen does not transition to the lobby screen; it doesn't need to because it already knows who all the players are and whether they are ready.
Figure 7-7. The create game screen with one other player who is not ready
The Join Game Screen
The join game screen, shown in Figure 7-8, enumerates all available network sessions and allows you to select from one of them. Joining a game brings you to the lobby screen. The network session has the same name as the Zune that is hosting it.
Figure 7-8. The join game screen with one available network session
The Lobby Screen
The lobby screen, shown in Figure 7-9, is where joining players are sent to wait for the host to start the game. It looks similar to the create game screen for the host, but it sits and waits for the game to start, while providing a status message.
Figure 7-9. The lobby screen
The Playing Screen
The playing screen, shown in Figure 7-10, is what players see during the game. It's a very simple design, with one card at the top (the active card to match) and the cards in your hand. This screen allows you to select from available cards, request new cards (when no playable cards are available), and play cards. If an eight is played, the game transitions to the suit selection screen before playing the eight. The actively selected card is shown above all the other cards. Dim (gray) cards cannot be played. If it is not your turn, or if you have no available cards to play, the status text will be different. A sound effect is played when a card is selected in the hand.
Figure 7-10. The main game play screen when it is your turn
The Suit Selection Screen
When you play an eight, you will be asked to choose a suit, as shown in Figure 7-11. A sound effect is played when the suit is selected or chosen. When you select the suit, game play will resume at the playing screen.
Figure 7-11. The suit selection screen
When another player changes the suit, you will see a graphic indicating that an eight was played and the player's selection for the new suit, as shown in Figure 7-12.
Figure 7-12. The playing screen with suit changed notification (and no matching cards to play)
The Game Over Screen
When a player plays his last card, all peers will transition to the game over screen. If the winner's name is the same as your name, you will receive a "You Win" type of message. Otherwise, you will be informed that you have lost, and the name of the winner will be displayed, as shown in Figure 7-13. An appropriate sound effect will also be played.
Figure 7-13. The game over screen
Now that you have a good idea what our game will look like, it's time to begin the uphill climb of putting together the code for the game. We will start with the card game library, CardLib.
Building the Card Library
First, we'll build a Zune game library that exposes a Card object and a Deck object. The Card object has a suit and a value, and is comparable to other cards. It can also be serialized into string format for network transmission. The Deck object contains a list of Card objects, and it exposes methods such as Shuffle and Deal to perform basic deck-related operations.
We'll begin by creating the overall solution for our game, and add a new game library to it. We will then add the objects in a bottom-up manner.
- Create a new Zune Game project called
CrazyEights.
- Add a new Zune Game Library project called
CardLib to the solution. Delete any class files that are automatically created.
Adding Suit and Card Value Types
A playing card has a value and a suit. Let's create an enumeration to specify the suit of the card first.
- In the
CardLib project, add a new class called Suit.cs. This file will contain one simple enumeration: Suit.
using System;


namespace CardLib

{

    public enum Suit : byte

    {

        Undefined   = 0,

        Clubs       = 1,

        Diamonds    = 2,

        Hearts      = 3,

        Spades      = 4

    }

}
At first glance, the ordering and assignment of these enumeration values may seem arbitrary. On further inspection, you notice that they are ordered alphabetically. Furthermore, you will see that the graphical representation of the deck we are using is ordered this way: Clubs, Diamonds, Hearts, and Spades. This is the real driver behind ordering and assigning these enumeration values as such: it makes it far easier to index a card from the image of cards this way. We'll cover this topic in more detail in the "Creating the Player View Component" section later in this chapter. For now, enjoy the fact that the first file we've created has only 13 lines of code—things will become more complex soon enough!
Now that we have the type for a card's suit, we should determine how to store a card's value. For some, a simple integer would do the trick. However, we want to perform some error-checking and provide some further functionality specific to card games. For example, a value of 1 means ace. A king is the same thing as the value 13. You could extend this class to modify the value of the ace to be the highest in a game like poker. This class also overrides the ToString method, which will give us a useful textual description of the card value, such as Ace, Two, Three, Four, Jack, King, and so on.
- In the
CardLib project, add a new class called CardValue.cs. You need only the System namespace here. The empty class definition in the file looks something like the following code. (The comment should be deleted when you start implementing the class in step 3).
using System;


namespace CardLib

{

    public class CardValue

    {

        // Implementation to follow...

    }

}
- Add a region for
Fields to the CardValue class. The important fields are the numeric value and the string value, both of which are initialized in the constructor.
#region Fields


public string ValueText

{

    get;

    private set;

}


public int Value

{

    get;

    private set;

}


#endregion
- Add a region for
Constants. These define card values for the ace, jack, queen, and king.
#region Constants


public const int ACE = 1;

public const int JACK = 11;

public const int QUEEN = 12;

public const int KING = 13;


#endregion
- Add a region for the
Constructor(s). The constructor takes in the value you want to assign, does some domain checking (the card value must be between low ace and high king), and assigns the textual representation of the card value based on the numeric one passed in via a large switch statement.
#region Constructor(s)


public CardValue(int value)

{

    // Check the card value's range

    if (value < 1 || value > KING)

    {

        throw new ArgumentException(

            "Card value must be between 1 and 13 inclusive.");

    }

    else

    {

        Value = value;

        switch (Value)

        {

            case ACE:

                ValueText = "Ace";

                break;

            case 2:

                ValueText = "Two";

                break;

            case 3:

                ValueText = "Three";

                break;

            case 4:

                ValueText = "Four";

                break;

            case 5:

                ValueText = "Five";

                break;

            case 6:

                ValueText = "Six";

                break;

            case 7:

                ValueText = "Seven";

                break;

            case 8:

                ValueText = "Eight";

                break;

            case 9:

                ValueText = "Nine";

                break;

            case 10:

                ValueText = "Ten";

                break;

            case JACK:

                ValueText = "Jack";


                break;

            case QUEEN:

                ValueText = "Queen";

                break;

            case KING:

                ValueText = "King";

                break;

        }

    }

}


#endregion
- Finally, add the
ToString override in a new Overrides region, which just returns the ValueText field. This makes it easier when concatenating strings.
#region Overrides


public override string ToString()

{

    return ValueText;

}


#endregion
Now, we have objects for Suit and CardValue. Next, we'll utilize both of these types in the creation of our Card class.
Creating the Card Class
A Card object is composed of a Suit object and a CardValue object. The Card class also exposes some other useful functionality, such as comparison, serialization, and an overload of ToString to produce a pretty result (such as Ace of Clubs).
Once again, we'll start with a shell of a class called Card and implement it step by step.
- In the
CardLib project, add a new class called Card.cs. Rearrange the code to look like the following stub. Note that the class implements the IComparable interface, allowing us to specify how to compare the card to other cards.
using System;


namespace CardLib

{

    public class Card : IComparable

    {

        // Implementation to follow...

    }

}
- Add a region to contain the four fields: suit, value, a flag specifying whether the card is properly defined, and a flag specifying whether the card is to be shown. The latter field is not used in the Crazy Eights game, but could be used in other card games that require face-down cards.
#region Fields


public Suit Suit

{

    get;

    private set;

}


public CardValue CardValue

{

    get;

    private set;

}


public bool IsDefined

{

    get;

    private set;

}


public bool IsShown // Not used in Crazy Eights

{

    get;

    private set;

}


#endregion
- Add a region for constructors. There are three ways to construct a
Card object: create a card with a known suit and value, create an undefined card, or identify a card sent over the network. The latter constructor receives an integer index from 1 to 52 and retrieves the card uniquely.
#region Constructor(s)


public Card(Suit suit, CardValue value)

{

    Suit = suit;

    CardValue = value;

    IsDefined = true;

    IsShown = false;

}


public Card()

{

    Suit = Suit.Undefined;

    CardValue = null;

    IsDefined = false;

}


public Card(int value)

{

    if (value < 1 || value > 52)

        throw new ArgumentException("Card value must be between 1 and 52.");


    Suit = (Suit)(value / 13);


    int cardValue = value % 13;

    if (cardValue == 0)

        cardValue = CardValue.KING;


    CardValue = new CardValue(cardValue);


    IsDefined = true;

}


#endregion
- Add a region for public methods. These methods are accessible from any
Card object instance. The first method, Serialize, converts the card to an integer from 1 to 52, representing its position in an unshuffled deck. The second method, GetSuitName, gets a proper string value for a suit.
#region Public Methods


public int Serialize()

{

    int row = (int)Suit;

    return (row * 13) + (CardValue.Value % 13);

}


public string GetSuitName()

{

    switch (Suit)

    {

        case Suit.Clubs:

            return "Clubs";

        case Suit.Diamonds:

            return "Diamonds";

        case Suit.Hearts:

            return "Hearts";


        case Suit.Spades:

            return "Spades";

        default:

            return "Undefined";

    }

}


#endregion
- Add a region for overridden methods and operators. Here, we will define the operators
> and <, which we can use to compare two cards by value. We will also define the ToString implementation for the card.
#region Overridden Methods and Operators


public override string ToString()

{

    return string.Concat(CardValue.ToString(), " of ", GetSuitName());}


public static bool operator >(Card x, Card y)

{

    return x.CardValue.Value > y.CardValue.Value;

}


public static bool operator <(Card x, Card y)

{

    return x.CardValue.Value < y.CardValue.Value;

}


#endregion
- Add a region called
IComparable, which implements the required functionality for the IComparable interface. This allows us to specify how to compare two cards. In this case, we compare by card value only using the operator overloads we defined in step 5.
#region IComparable


public int CompareTo(object value)

{

    Card card = value as Card;


    if (card == null)

    {

        throw new ArgumentException(

            "Can only compare Cards to other Cards.");

    }


    if (this < card)

        return −1;

    else if (this == card)

        return 0;

    else

        return 1;

}


#endregion
That wraps up our Card class. This class provides some useful methods that will come in handy later. Next, let's wrap this Card object into a manager class of sorts, called Deck.
Creating the Deck Class
The Deck class is very important, because it can instantiate a whole new list of properly valued cards, shuffle them, and deal from that collection. One unique thing about this particular implementation of the card deck is that it includes a separate collection for discarded cards, making this object more of a dealer than a deck. For our purposes, however, this will work well, because Crazy Eights requires that the deck keep track of discarded cards.
- In the
CardLib project, add a new class called Deck.cs with the following stub:
using System;

using System.Collections.Generic;


namespace CardLib

{

    public class Deck

    {

        // Implementation to follow...

    }

}
- Add a region for
Fields. This region contains the list of cards in the undealt deck, the list of discarded cards, and a private Random object used for shuffling.
#region Fields


private Random random;


public List<Card> Cards

{

    get;

    private set;

}


public List<Card> DiscardedCards

{

    get;

    private set;

}


#endregion
- Add a
Constants region, where we simply define that there are 52 cards in a deck.
#region Constants


public const int CARDS_IN_DECK = 52;


#endregion
- Add a region for
Constructor(s). In the sole constructor, we initialize our fields.
#region Constructor(s)


public Deck()

{

    Cards = new List<Card>(CARDS_IN_DECK);

    DiscardedCards = new List<Card>();

    random = new Random();

}


#endregion
- Add a region for
Private Methods. We have one method here that swaps a card with another card, used by the shuffling algorithm.
#region Private Methods


private void SwapCardsByIndex(int index1, int index2)

{

    // Get the two cards

    Card x, y;

    x = Cards[index1];

    y = Cards[index2];


    // Swap the cards

    Cards[index1] = y;

    Cards[index2] = x;

}


#endregion
- Add a region for
Public Methods, and begin it with the ResetDeck method. This method creates a properly ordered list of 52 cards and clears the discarded list.
public void ResetDeck()

{

    Cards.Clear();


    // For each of the four suits (which are alphabetically ordered

    // from 1 - 4)

    for (int suitIndex = (int)Suit.Clubs;

        suitIndex <= (int)Suit.Spades; suitIndex++)

    {

        // For each possible card index

        for (int cardIndex = 1; cardIndex <= CardValue.KING; cardIndex++)

        {

            // Add the card

            Cards.Add(new Card((Suit)suitIndex, new CardValue(cardIndex)));

        }

    }

}
- Add a method called
ReloadFromDiscarded to the Public Methods region. This method is responsible for copying the cards in the discarded pile to the main deck, while retaining the topmost discarded card in the discard pile. The effect of this method is that all the cards below the topmost discarded card are moved into the main deck, mimicking how you would pick up those cards, turn them over, and start dealing from them again during a Crazy Eights game.
public void ReloadFromDiscarded()

{

    if (DiscardedCards.Count == 0)

    {

        throw new Exception("No cards have been discarded; cannot reload.");

    }


    Cards.Clear();

    Cards.AddRange(DiscardedCards);


    // Get the last discarded card

    Card newCard = DiscardedCards[DiscardedCards.Count - 1];


    // Remove that discarded card from the deck

    Cards.Remove(newCard);


    // Clear the discarded card list and re-add the topmost card

    DiscardedCards.Clear();

    DiscardedCards.Add(newCard);

}
- Add a method called
Shuffle to the Public Methods region. This method follows the Knuth-Fisher-Yates card-shuffling algorithm, which is one of the most effective shuffling algorithms available. This algorithm randomly swaps every card in the deck with another random card in the deck. You can read more about the card-shuffling algorithm at http://www.codinghorror.com/blog/archives/001015.html.
public void Shuffle()

{

    for (int cardIndex = Cards.Count - 1; cardIndex > 0; cardIndex--)

    {

        int randomIndex = random.Next(cardIndex + 1);

        SwapCardsByIndex(cardIndex, randomIndex);

    }

}
- Add a new method called
Deal to the Public Methods region. This method attempts to deal a card from the current deck. If there are no cards left in the deck, it will reload the deck with the discarded pile. The topmost card is dealt, removed from the deck, and returned by the method.
public Card Deal()

{

    if (Cards.Count <= 0)

        ReloadFromDiscarded();


    Card card = Cards[Cards.Count - 1];

    Cards.Remove(card);

    return card;

}
- Finally, add a method called
Discard to the Public Methods region (and close the region). This method adds a card to the discarded pile.
public void Discard(Card card)

{

    DiscardedCards.Add(card);

}
With that, we have completed the Deck class and the CardLib project. You can compile this project and add unit tests if you wish. One of the major benefits of extracting independent logic to other projects is the high level of testability you get.
Consider doing this for other game objects as well. Complex calculations and logic benefit greatly from automated tests. If you were to write a game like Hold 'em poker, you would most certainly want automated tests in place to ensure that hypothetical methods like IsStraight and IsFlush are working perfectly!
With our CardLib project complete, it is time to address the other project: the screen manager project.
Building the Screen Manager Library
In many cases, you might take the code from the Game State Management sample on the Creators Club web site and port it to a Zune game library for use in your game. This is a perfectly acceptable approach. However, our game will require some customization. First, we want to be able to add components to individual screens, not to the main game object. To accomplish this, we'll need to create our own types of components and allow the screen manager to manage them as well on a per-screen basis.
The screen manager project presents considerable opportunity for us. Because this is an object that will be accessible to all of our game screens, we can embed certain resources here that are intended to be shared, such as a network manager, a shared sprite batch, general sound effects, fonts, menu functionality, and so on. As with the card library, we will build this library from the bottom up (starting with the most granular objects).
Creating the Project and Adding Content
First, we'll create the project and add some content that will be used for any screens that utilize this subsystem.
- Add a new Zune Game Library project to the solution. Name it
GameStateManager.
- Add two new folders to the
Content project of this game library: MenuSounds and Fonts.
- Right-click the
MenuSounds folder you just created and choose Add  Existing Item. Navigate to the
 Examples/Chapter 7/SoundFX folder and add two of the WAV files there: Selected.wav and SelectChanged.wav. These are the sound effects that will be played as the user cycles through menu options.
- Right-click the
Fonts folder you created. Add two new sprite fonts. The first should be called KootenayLarge.spritefont and should be 13-point Kootenay. The second should be KootenaySmall.spritefont, which is 10-point Kootenay. In both cases, the font will be Kootenay by default, but you can adjust the size of the font by opening the sprite font definition file and changing the Size element manually.
- Add the input state manager and shared sprite batch class to the project. To do this, right-click the
GameStateManager project, choose Add Existing Item, and navigate to the Examples/Chapter 7/Shared folder. Add InputState.cs and SharedSpriteBatch.cs to the project. The namespaces in these files have already been updated for this project.
Creating Custom Components
Next, let's work on creating our own brand of game components. The types of game components provided by the XNA Framework are always added to the main game's collection, which is not optimal for our case, because we want each screen to manage these components. We also want these components to go away when the associated screen goes out of scope.
We will follow the pattern of the XNA Framework, by having one updatable component type and one drawable component type that can do everything the updatable component can do.
- In the
GameStateManager project, add a new class, called LogicComponent.cs. This is the component that can be updated but not drawn. The stub for this class should look like this:
using Microsoft.Xna.Framework;


namespace GameStateManager

{

    public abstract class LogicComponent

    {

        // Implementation to follow...

    }

}
- Add a
Fields region to the LogicComponent class. The only field here is a reference back to the screen manager object managing all the screens.
#region Fields


public ScreenManager ScreenManager

{

    get;

    private set;

}


#endregion
- Add a region for
Constructor(s), and add the simple constructor that sets the screen manager object.
#region Constructor(s)


public LogicComponent(ScreenManager screenManager)

{

    ScreenManager = screenManager;

}


#endregion
- Add a region called
Overridable Methods. These are methods that any derived LogicComponent should override to specify the logic for that component. This component type can be only initialized and updated, as there is no content to load or draw.
#region Overridable Methods


public virtual void Initialize() { }


public virtual void Update(GameTime gameTime) { }


#endregion
- Add a new class to the project called
DrawableComponent.cs. This class defines a new type of component that can do everything a LogicComponent can do (thanks to inheritance), and can also load content and draw to the graphics device. The extended functionality is simple and short, as there are only two additional methods, so the entire class is shown in the following snippet.
using Microsoft.Xna.Framework;


namespace GameStateManager

{

    public class DrawableComponent : LogicComponent

    {

        public DrawableComponent(ScreenManager screenManager)

            : base(screenManager)

        {


        }


        public virtual void LoadContent() { }


        public virtual void Draw(GameTime gameTime) { }

    }

}
In case you were wondering, the reason that both types of components require a reference to the screen manager is so that these components can access the shared resources provided by the screen manager (fonts, network management, and so on). The other classes we build into this project will call the appropriate methods on these components automatically.
We have achieved the same effect as the XNA Framework's game component architecture, but we can attach these components to individual screens, rather than needing to attach them to the overarching Game object.
Next, we'll examine the ScreenManager game component, which manages a collection of BaseScreen objects. This class handles a lot of the plumbing for displaying and updating layered screens. The BaseScreen class is discussed afterward.
Creating the Screen Manager Component
The code for the ScreenManager class is borrowed heavily from the XNA Creators Club Game State Management sample, with a few modifications. You can find the Game State Management sample at http://creators.xna.com/en-US/samples/gamestatemanagement.
- In the
GameStateManager project, add a new class called ScreenManager.cs. Note that this is a true DrawableGameComponent, not one of our custom component types; this is because we want to attach this object to the main game's Components collection.
using System.Collections.Generic;

using Microsoft.Xna.Framework;

using Microsoft.Xna.Framework.Graphics;

using Microsoft.Xna.Framework.Content;


namespace GameStateManager

{

    public class ScreenManager : DrawableGameComponent

    {

        // Implementation to follow...

    }

}
- Add a new region to this class called
Fields. Add two private collections of BaseScreen objects. The first collection contains all the screens managed by the screen manager, and the second contains a list of the screens that need to be updated. Also, add a Boolean variable that will indicate whether the screen manager has been fully initialized.
#region Fields


private List<BaseScreen> allScreens = new List<BaseScreen>();

private List<BaseScreen> screensToUpdate = new List<BaseScreen>();


private bool isInitialized;


#endregion
- Add the following fields to the
Fields region. These objects give all screens access to important shared resources, including the NetworkManager object (which we have not added yet).
public InputState Input

{

    get;

    private set;

}


public SpriteFont LargeFont

{

    get;

    private set;

}


public SpriteFont SmallFont

{

    get;

    private set;

}


public ContentManager Content

{

    get;

    private set;

}


public GraphicsDevice Graphics

{

    get;

    private set;

}


public NetworkManager Network

{

    get;

    private set;

}
- Add a region called
Constructor(s) and add the default constructor, which initializes game components and adds them to the game's Components collection.
#region Constructor(s)


public ScreenManager(Game game)

    : base(game)

{

    this.Input = new InputState(game);

    this.Network = new NetworkManager(game);


    game.Components.Add(this.Input);

    game.Components.Add(this.Network);

}


#endregion
- Add a region for the overridden methods for the drawable game component, called
GameComponent Overrides. Add the Initialize, LoadContent, and UnloadContent override methods to this region.
#region GameComponent Overrides


public override void Initialize()

{

    base.Initialize();


    isInitialized = true;

}


protected override void LoadContent()

{

    // Load the default fonts

    Content = Game.Content;

    Graphics = Game.GraphicsDevice;

    LargeFont = Content.Load<SpriteFont>("Fonts/KootenayLarge");

    SmallFont = Content.Load<SpriteFont>("Fonts/KootenaySmall");


    // Tell each of the screens to load their content.

    foreach (BaseScreen screen in allScreens)

    {

        screen.LoadContent();

    }

}


protected override void UnloadContent()

{

    // Tell each of the screens to unload their content.

    foreach (BaseScreen screen in allScreens)

    {

        screen.UnloadContent();

    }

}


#endregion
- Add the
Update method to the GameComponent Overrides region. This method introduces two new concepts: whether a particular screen is active or covered by another screen. These values are used to determine whether or not to update this screen. Notice that these values are also passed to the BaseScreen object's Update method, which takes these values as parameters in addition to the GameTime.
public override void Update(GameTime gameTime)

{

    // Make a copy of the master screen list, to avoid confusion if

    // the process of updating one screen adds or removes others.

    screensToUpdate.Clear();

    screensToUpdate.AddRange(allScreens);


    bool otherScreenHasFocus = !Game.IsActive;

    bool coveredByOtherScreen = false;


    // Loop as long as there are screens waiting to be updated.

    while (screensToUpdate.Count > 0)

    {

        // Pop the topmost screen off the waiting list.

        BaseScreen screen = screensToUpdate[screensToUpdate.Count - 1];

        screensToUpdate.Remove(screen);


        // Update the screen.

        screen.Update(gameTime, otherScreenHasFocus, coveredByOtherScreen);


        if (screen.ScreenState == ScreenState.TransitionOn ||
            screen.ScreenState == ScreenState.Active)

        {

            // If this is the first active screen we came across,


            // give it a chance to handle input.

            if (!otherScreenHasFocus)

            {

                screen.HandleInput(Input);


                otherScreenHasFocus = true;

            }


            // If this is an active non-popup, inform any subsequent

            // screens that they are covered by it.

            if (!screen.IsPopup)

                coveredByOtherScreen = true;

        }

    }

}
- Add the
Draw method to the GameComponent Overrides region. This screen handles the drawing of all the individual screens in the screen manager. Hidden screens are not drawn.
public override void Draw(GameTime gameTime)

{

    foreach (BaseScreen screen in allScreens)

    {

        if (screen.ScreenState != ScreenState.Hidden)

            screen.Draw(gameTime);

    }

}
- Add a new region called
Public Methods. These methods allow your code to interface with the screen manager by adding, removing, and accessing screens. Add the following three methods to that region. Notice that the AddScreen method also causes the added screen to initialize and load content.
#region Public Methods


public void AddScreen(BaseScreen screen)

{

    screen.ScreenManager = this;

    screen.IsExiting = false;


    screen.Initialize();


    // If we have a graphics device, tell the screen to load content.

    if (isInitialized)

    {

        screen.LoadContent();

    }


    allScreens.Add(screen);

}


public void RemoveScreen(BaseScreen screen)

{

    // If we have a graphics device, tell the screen to unload content.

    if (isInitialized)

    {

        screen.UnloadContent();

    }


    allScreens.Remove(screen);

    screensToUpdate.Remove(screen);

}


#endregion
That concludes the code for the ScreenManager class. We still have some holes in the project, however. The ScreenManager class uses a class called BaseScreen as well as a NetworkManager class. We will look at BaseScreen next.
Creating the BaseScreen Class
The BaseScreen class is an abstract class that contains all the functionality common to all screens. Real screens inherit from this class and override the behavior defined here. This class also handles the screen-transition logic. As with the ScreenManager class, plenty of the code for BaseScreen is borrowed from the Game State Management sample.
- In the
GameStateManager project, add a new class called BaseScreen.cs. The stub for this file also includes an enumeration for the screen state.
using System;

using System.Collections.Generic;

using Microsoft.Xna.Framework;


namespace GameStateManager

{

    public enum ScreenState

    {

        TransitionOn,

        Active,

        TransitionOff,

        Hidden,

    }


    public abstract class BaseScreen

    {

        // Implementation to follow...

    }

}
- Add a region called
Fields to the BaseScreen class definition. Add the list of our custom component type.
#region Fields


public List<LogicComponent> Components

{

    get;

    private set;

}


#endregion
- Add the following fields that deal with the screen's transitions to the
Fields region. The TransitionAlpha value can be used to fade between screens or to fade text during transitions (such as in menus).
public TimeSpan TransitionOnTime

{

    get;

    protected set;

}


public TimeSpan TransitionOffTime

{

    get;

    protected set;

}


public float TransitionPosition

{

    get;

    protected set;

}


public byte TransitionAlpha

{

    get { return (byte)(255 - TransitionPosition * 255); }

}
- In the
Fields region, add the following fields, which track various aspects of the screen's status:
protected bool otherScreenHasFocus;


public bool IsInitialized

{

    get;

    private set;

}


public bool IsContentLoaded

{

    get;

    private set;

}


public ScreenState ScreenState

{

    get;

    protected set;

}


public bool IsExiting

{

    get;

    protected internal set;

}


public bool IsPopup

{

    get;

    protected set;

}


public bool IsActive

{

    get

    {

        return !otherScreenHasFocus &&

               (ScreenState == ScreenState.TransitionOn ||
                ScreenState == ScreenState.Active);

    }

}
- In the
Fields region, add a final field that will allow the screen to reference the screen manager to which it is attached.
public ScreenManager ScreenManager

{

    get;

    internal set;

}
- Create a new region for the constructor called
Constructor(s). Add the following constructor to that region. This constructor initializes some fields (including the component collection) and sets the initial screen state to TransitionOn, since any newly added screen should be transitioning on.
#region Constructor(s)


public BaseScreen()

{

    Components = new List<LogicComponent>();

    IsInitialized = false;

    IsContentLoaded = false;

    ScreenState = ScreenState.TransitionOn;

}


#endregion
- Add a new region called
Public Virtual Methods. These methods should be overridden by concrete screen classes to specify the logic for those screens. Add the Initialize and LoadContent methods, which are responsible for explicitly telling all of the screen's components to initialize and load content (if the component is drawable).
#region Public Virtual Methods


public virtual void Initialize()

{

    if (!IsInitialized)

    {

        foreach (LogicComponent component in Components)

        {

            component.Initialize();

        }

        IsInitialized = true;

    }

}


public virtual void LoadContent()

{

    if (!IsContentLoaded)

    {

        // Initialize all components

        foreach (LogicComponent component in Components)

        {


            DrawableComponent drawable = component as DrawableComponent;

            if (drawable != null)

                drawable.LoadContent();

        }

        IsContentLoaded = true;

    }

}


#endregion
- Add virtual stubs for
UnloadContent and HandleInput to the Public Virtual Methods region. There is nothing the base class should do here, so the concrete class must override these methods for there to be any effect.
public virtual void UnloadContent() { }


public virtual void HandleInput(InputState input) { }
- In the
Public Virtual Methods region, add the Update method, which checks and manipulates the various statuses of the screen to update transitions before explicitly updating all of the child components of the screen. This is mostly straight from the Game State Management sample, except that the last block in this function will explicitly update all of the game's child components.
public virtual void Update(GameTime gameTime, bool otherScreenHasFocus,

    bool coveredByOtherScreen)

{

    this.otherScreenHasFocus = otherScreenHasFocus;


    if (IsExiting)

    {

        // If the screen is going away to die, it should transition off.

        ScreenState = ScreenState.TransitionOff;


        if (!UpdateTransition(gameTime, TransitionOffTime, 1))

        {

            // When the transition finishes, remove the screen.

            ScreenManager.RemoveScreen(this);

        }

    }

    else if (coveredByOtherScreen)

    {

        // If the screen is covered by another, it should transition off.

        if (UpdateTransition(gameTime, TransitionOffTime, 1))

        {

            // Still busy transitioning.

            ScreenState = ScreenState.TransitionOff;

        }

        else

        {

            // Transition finished!

            ScreenState = ScreenState.Hidden;

        }

    }

    else

    {

        // Otherwise the screen should transition on and become active.

        if (UpdateTransition(gameTime, TransitionOnTime, −1))

        {


            // Still busy transitioning.

            ScreenState = ScreenState.TransitionOn;

        }

        else

        {

            // Transition finished!

            ScreenState = ScreenState.Active;


            // Update all components

            foreach (LogicComponent component in Components)

            {

                component.Update(gameTime);

            }

        }

    }

}
- Add the
Draw method to the Public Virtual Methods region. This method causes all of the drawable components to be drawn. Calling base.Draw from a concrete screen's overridden Draw method will cause all components to be drawn, mirroring the existing pattern for DrawableGameComponent in the XNA Framework.
public virtual void Draw(GameTime gameTime)

{

    foreach (LogicComponent component in Components)

    {

        DrawableComponent drawable = component as DrawableComponent;

        if (drawable != null)

            drawable.Draw(gameTime);

    }

}
- Add a region called
Public Methods. This region contains one method to explicitly exit the screen. This method utilizes the transition timings to allow a screen to gracefully disappear, rather than instantly disappearing when RemoveScreen is called on the screen manager.
#region Public Methods


public void ExitScreen()

{

    if (TransitionOffTime == TimeSpan.Zero)

    {

        // If the screen has a zero transition time, remove it immediately.

        ScreenManager.RemoveScreen(this);

    }

    else

    {

        // Otherwise flag that it should transition off and then exit.


        IsExiting = true;

    }

}


#endregion
- Finally, add a region called
Helper Methods, which contains one method called UpdateTransition. This method, included in the Game State Management sample, allows the screen to determine where it is in terms of transition.
#region Helper Methods


protected bool UpdateTransition(GameTime gameTime, TimeSpan time,

int direction)

{

    // How much should we move by?

    float transitionDelta;


    if (time == TimeSpan.Zero)

        transitionDelta = 1;

    else

        transitionDelta = (float)(gameTime.ElapsedGameTime.TotalMilliseconds /

                                  time.TotalMilliseconds);


    // Update the transition position.

    TransitionPosition += transitionDelta * direction;


    // Did we reach the end of the transition?

    if ((TransitionPosition <= 0) || (TransitionPosition >= 1))

    {

        TransitionPosition = MathHelper.Clamp(TransitionPosition, 0, 1);

        return false;

    }


    // Otherwise we are still busy transitioning.

    return true;

}


#endregion
That concludes the code for the BaseScreen object. We will utilize most of this functionality, although some of it may go untouched. It's useful to see, however, because you may want it in place when creating your own games.
Next, we'll look at a base menu screen that we can use to create single-selection menus.
Creating the MenuEntry Class
The base menu screen is composed of a list of MenuEntry objects, so we'll look at the MenuEntry class first. This class raises an event when the entry is selected, and updates itself with a pulsating effect when the menu item is active.
- In the
GameStateManager project, add a new class called MenuEntry.cs.
using System;

using Microsoft.Xna.Framework;

using Microsoft.Xna.Framework.Graphics;


namespace GameStateManager

{

    public class MenuEntry

    {

        // Implementation to follow...

    }

}
- Add a region called
Fields and add the following fields to that region. The font field allows us to specify a unique font per menu item. The selectionFade variable is used internally for the pulsating effect, and the Text property allows us to assign or retrieve the menu text displayed by the menu item.
#region Fields


private SpriteFont font;

private float selectionFade;


public string Text

{

    get;

    set;

}


#endregion
- Add a region called
Events and Triggers. In this region is an event, Selected, which the menu item fires when OnSelectEntry is called by the concrete menu class.
#region Events and Triggers


public event EventHandler<EventArgs> Selected;


protected internal virtual void OnSelectEntry()

{


    if (Selected != null)

        Selected(this, EventArgs.Empty);

}


#endregion
- Add a constructor in its own region, which sets the local fields to the arguments.
#region Constructor(s)


public MenuEntry(string text, SpriteFont font)

{

    Text = text;

    this.font = font;

}


#endregion
- Add a new region called
Public Virtual Methods, and start it off with an Update method that updates the pulsate effect for the menu item.
#region Public Virtual Methods


public virtual void Update(BaseMenuScreen screen, bool isSelected,

                                              GameTime gameTime)

{

    float fadeSpeed = (float)gameTime.ElapsedGameTime.TotalSeconds * 4;


    if (isSelected)

        selectionFade = Math.Min(selectionFade + fadeSpeed, 1);

    else

        selectionFade = Math.Max(selectionFade - fadeSpeed, 0);

}
- Add the virtual
Draw method to the Public Virtual Methods region. This method draws the menu item on screen with its pulsate effect.
public virtual void Draw(BaseMenuScreen screen, Vector2 position,

                         bool isSelected, GameTime gameTime)

{

    // Draw the selected entry in yellow, otherwise white.

    Color color = isSelected ? Color.Yellow : Color.White;


    // Pulsate the size of the selected menu entry.

    double time = gameTime.TotalGameTime.TotalSeconds;


    float pulsate = (float)Math.Sin(time * 6) + 1;


    float scale = 1 + pulsate * 0.05f * selectionFade;


    // Modify the alpha to fade text out during transitions.

    color = new Color(color.R, color.G, color.B, screen.TransitionAlpha);


    // Draw text, centered on the middle of each line.


    Vector2 origin = font.MeasureString(Text) / 2;


    SharedSpriteBatch.Instance.DrawString(font, Text, position, color, 0,

                           origin, scale, SpriteEffects.None, 0);

}
- Finally, add the virtual
GetHeight method, which is used to return the height (in pixels) of the menu item. This is used by the BaseMenuScreen class to determine how far apart to draw each menu item vertically, and is the same as the line spacing of the font.
public virtual int GetHeight(BaseMenuScreen screen)

{

    return font.LineSpacing;

}
That concludes the MenuEntry class. Next, we'll see how this is used in practice with the BaseMenuScreen class.
Creating a Base Class for Menus
The BaseMenuScreen class provides a way of delivering menus with a consistent look and feel throughout the game. The menu is very simple and allows us to make a single selection from a list, which is more than enough for our purposes. This screen contains a list of menu entries and handles the input and drawing for the menu.
- In the
GameStateManager project, add a new file called BaseMenuScreen.cs. Note that we are building on our previous work by making the base menu screen inherit from BaseScreen.
using System;

using System.Collections.Generic;

using Microsoft.Xna.Framework;

using Microsoft.Xna.Framework.Audio;


namespace GameStateManager

{

    public abstract class BaseMenuScreen : BaseScreen

    {

        // Implementation to follow...

    }

}
- Add a
Fields region to the class and add the following fields. These fields include sound effects that all menus will play. There is also a read-only collection of menu items exposed.
#region Fields


List<MenuEntry> menuEntries = new List<MenuEntry>();

int selectedEntry = 0;

string menuTitle;


// Sound Effects

SoundEffect selectionChangedSound;

SoundEffect selectedSound;


protected IList<MenuEntry> MenuEntries

{

    get;

    private set;

}


#endregion
- Add the constructor, which sets the text and default transition times.
#region Constructor(s)


public BaseMenuScreen(string menuTitle)

{

    this.menuTitle = menuTitle;


    TransitionOnTime = TimeSpan.FromSeconds(0.5);

    TransitionOffTime = TimeSpan.FromSeconds(0.5);

}


#endregion
- Add a region called
Virtual Methods, which contains OnSelectEntry. This method allows concrete menus to determine what happens when a menu entry is selected.
#region Virtual Methods


protected virtual void OnSelectEntry(int entryIndex)

{

    menuEntries[selectedEntry].OnSelectEntry();

}


#endregion
- Add a region called
BaseScreen Overrides. This contains the overridden base screen logic which all menus will derive automatically. Add the HandleInput method to this region, which handles which menu item is selected and causes sounds to be played.
#region BaseScreen Overrides


public override void HandleInput(InputState input)

{

    // Move to the previous menu entry?

    if (input.MenuUp)

    {

        selectedEntry--;


        if (selectedEntry < 0)

            selectedEntry = menuEntries.Count - 1;

        else

            selectionChangedSound.Play();

    }


    // Move to the next menu entry?

    if (input.MenuDown)

    {

        selectedEntry++;


        if (selectedEntry >= menuEntries.Count)

            selectedEntry = 0;

        else

            selectionChangedSound.Play();

    }


    // Accept or cancel the menu?

    if (input.MenuSelect)

    {

        selectedSound.Play();

        OnSelectEntry(selectedEntry);

    }

}


#endregion
- Add the
LoadContent override to the BaseScreen Overrides region. This method loads the sound effects.
public override void LoadContent()

{

    selectedSound =

        ScreenManager.Content.Load<SoundEffect>("MenuSounds/SelectChanged");

    selectionChangedSound =

        ScreenManager.Content.Load<SoundEffect>("MenuSounds/Selected");


    base.LoadContent();

}
- Add the
Update override to the BaseScreen Overrides region. This method updates each menu item and its status.
public override void Update(GameTime gameTime, bool otherScreenHasFocus,

    bool coveredByOtherScreen)

{

    base.Update(gameTime, otherScreenHasFocus, coveredByOtherScreen);


    // Update each nested MenuEntry object.

    for (int i = 0; i < menuEntries.Count; i++)

    {

        bool isSelected = IsActive && (i == selectedEntry);

        menuEntries[i].Update(this, isSelected, gameTime);

    }

}
- Finally, add the
Draw method to the BaseScreen Overrides region. This method handles the transition for the screen by sliding the menu items into place and drawing them.
public override void Draw(GameTime gameTime)

{

    Vector2 position = new Vector2(120, 110);


    // Make the menu slide into place during transitions, using a

    // power curve to make things look more interesting (this makes

    // the movement slow down as it nears the end).

    float transitionOffset = (float)Math.Pow(TransitionPosition, 2);


    if (ScreenState == ScreenState.TransitionOn)

        position.X -= transitionOffset * 256;

    else

        position.X += transitionOffset * 512;


    // Draw each menu entry in turn.

    for (int i = 0; i < menuEntries.Count; i++)

    {

        MenuEntry menuEntry = menuEntries[i];

        bool isSelected = IsActive && (i == selectedEntry);

        menuEntry.Draw(this, position, isSelected, gameTime);

        position.Y += menuEntry.GetHeight(this);

    }

}
Our library is nearly complete! The last shared object we want to expose via this library is a network manager object. You've already seen a lot of this code in the beginning of this chapter, so it should be fairly easy to grasp.
Creating the Network Manager Object
Earlier in the chapter, you saw how to wrap network functionality in a simple class for the Robot Tag game. In that game, the player joined the first available network session. In this game, we are introducing asynchronous network operations (such as querying available sessions) and a much more error-friendly processing environment.
- In the
GameStateManager project, add a new class called NetworkManager.cs. Notice that it is a normal GameComponent, which the screen manager will add to the game's Components collection.
using System;

using Microsoft.Xna.Framework;

using Microsoft.Xna.Framework.Net;

using Microsoft.Xna.Framework.GamerServices;


namespace GameStateManager

{

    public class NetworkManager : GameComponent

    {

        // Implementation to follow...

    }

}
- Create a region called
Fields and add the following fields to the region. These fields expose a packet reader and packet writer, a local gamer representing the gamer on this Zune device, and an underlying NetworkSession object.
#region Fields


public PacketReader PacketReader

{

    get;

    private set;

}


public PacketWriter PacketWriter

{

    get;

    private set;

}


public LocalNetworkGamer Me

{

    get;

    private set;

}


public NetworkSession Session

{

    get;

    private set;

}


#endregion
- Add a region called
Events & Delegates. This region defines events (and corresponding delegates) that are raised at various stages of network processing. This allows game screens to be notified when network events occur.
#region Events & Delegates


public delegate void NetworkSessionsFoundHandler(

    AvailableNetworkSessionCollection availableSessions);


public delegate void GameJoinedHandler();

public delegate void GameJoinErrorHandler(Exception ex);


public event NetworkSessionsFoundHandler NetworkSessionsFound;

public event GameJoinedHandler GameJoined;

public event GameJoinErrorHandler GameJoinError;


#endregion
- Add the constructor. The constructor adds a
GamerServicesComponent to the game's Components collection, which is required for some elements of networking, such as gamer tag acquisition.
#region Constructor(s)


public NetworkManager(Game game)

    : base(game)

{

    game.Components.Add(new GamerServicesComponent(game));

}


#endregion
- Add a region called
Public Methods, which will contain several public methods that manipulate the network state. The first such method is called KillSession, which completely disposes and resets the network state in the event the game needs to start over or recover from an error.
#region Public Methods


public void KillSession()

{


    if (Session != null && Session.IsDisposed == false)

        Session.Dispose();


    Session = null;

}


#endregion
- In the
Public Methods region, add a method called CreateZuneSession. This method attempts to create a new network session and handles any errors that may arise.
public void CreateZuneSession(int maxNetworkPlayers)

{

    KillSession();


    try

    {

        Session = NetworkSession.Create(NetworkSessionType.SystemLink, 1,

            maxNetworkPlayers);


        Me = Session.LocalGamers[0];

    }

    catch (NetworkNotAvailableException)

    {

        throw new NetworkNotAvailableException("Zune wireless is not
enabled.");

    }

    catch (NetworkException ne)

    {

        throw ne;

    }


    if (Session == null)

        throw new NetworkException("The network session could not be
created.");

}
- In the
Public Methods region, add the following methods, which attempt to join a network session. The first method joins a specific network session asynchronously. The second method specifies a callback method called GameJoinedCallback.
public void JoinSession(AvailableNetworkSession session)

{

    try

    {

        NetworkSession.BeginJoin(session, new AsyncCallback
(GameJoinedCallback),

            null);

    }


    catch (Exception ex)

    {

        if (GameJoinError != null)

            GameJoinError(ex);

    }

}


public void GameJoinedCallback(IAsyncResult result)

{

    try

    {

        Session = NetworkSession.EndJoin(result);

        Me = Session.LocalGamers[0];


        if (GameJoined != null)

            GameJoined();

    }

    catch (Exception ex)

    {

        GameJoinError(ex);

    }

}
- In the
Public Methods region, add the following methods, which attempt to discover available network sessions. The callback is called asynchronously when sessions are found (or when the operation times out because there are no sessions).
public void BeginGetAvailableSessions()

{

    // Destroy any existing connections

    KillSession();


    NetworkSession.BeginFind(NetworkSessionType.SystemLink, 1, null,

        new AsyncCallback(SessionsFoundCallback), null);

}


public void SessionsFoundCallback(IAsyncResult result)

{

    AvailableNetworkSessionCollection availableSessions = null;

    availableSessions = NetworkSession.EndFind(result);


    if (NetworkSessionsFound != null)

        NetworkSessionsFound(availableSessions);

}
- In the
Public Methods region, add the StartGame method, which tells the underlying NetworkSession object to start the game if it can.
public void StartGame()

{

    if (Session != null && Session.IsDisposed == false)

        Session.StartGame();

}
- Add a new region called
GameComponent Overrides. The two methods here will initialize and update the network session in the same fashion that any GameComponent would run these methods.
#region GameComponent Overrides


public override void Initialize()

{

    PacketReader = new PacketReader();

    PacketWriter = new PacketWriter();

    Session = null;


    base.Initialize();

}


public override void Update(GameTime gameTime)

{

    if (Session != null && Session.IsDisposed == false)

        Session.Update();


    base.Update(gameTime);

}


#endregion
And, voilà! We now have two complete library projects that we will use when building our game. Sure, this is a lot of groundwork. However, these are reusable projects that you can leverage in any other games you decide to build.
Now, it's time to begin work on the Crazy Eights game project. With all of this processing under our belt, it will be fun to begin looking at how the game actually works!
Building Crazy Eights
In your solution, you should already have a Zune Game project called CrazyEights. If you have not done so, go ahead and create this project now. Ensure it is set as the startup project.
In your solution, add references to the two library projects: CardLib and GameStateManager. Right-click the References node under the CrazyEights project and select Add Reference. Move to the Projects tab and Shift-click both projects to add them to the solution.
To prepare the Content project for the files we will be adding, create two new subfolders: Sounds and Textures. Under Textures, add two new subfolders called CardBackgrounds and Screens. We'll be adding files to these directories as we go.
We'll start with the first things first (menu screens and networking) and move on to the game a little later.
Creating the Main Menu Screen
The main menu screen (see Figure 7-6 earlier in the chapter) is a simple screen that launches different screens or exits the game.
The first option, Create Game, will instantiate a new network game. The second option, Join Game, will show a screen that looks for network sessions. The final option, Quit, simply quits the game. The implementation for this screen is strikingly simple. It contains a few MenuEntry instances, some events, and a background.
- Right-click the
Content/Textures/Screens folder and choose Add Existing Item. Navigate to the Examples/Chapter 7/Artwork folder and choose menuBackground.png.
- In the
Screens folder, add a new class called MainMenuScreen.cs. The default namespace will be CrazyEights.Screens. Change the namespace to CrazyEights.
- The code for this class, shown in Listing 7-9, is self-explanatory. We are loading one texture, adding some menu entries, and wiring up events, and then drawing these elements on the screen. Notice that we are using
SharedSpriteBatch to handle the drawing in this screen.
Listing 7-9. MainMenuScreen.cs.
using System;

using Microsoft.Xna.Framework;

using Microsoft.Xna.Framework.Graphics;


using GameStateManager;


namespace CrazyEights

{

    public class MainMenuScreen : BaseMenuScreen

    {

        MenuEntry createGameEntry;

        MenuEntry joinGameEntry;

        MenuEntry quitEntry;


        Texture2D backgroundTex;


        public MainMenuScreen()

            : base("Main Menu")

        {


        }


        public override void LoadContent()

        {

            backgroundTex = ScreenManager.Content.Load<Texture2D>

                ("Textures/Screens/menuBackground");


            createGameEntry = new MenuEntry("Create Game", ScreenManager.LargeFont);

            joinGameEntry = new MenuEntry("Join Game", ScreenManager.LargeFont);

            quitEntry = new MenuEntry("Quit", ScreenManager.LargeFont);


            createGameEntry.Selected += new EventHandler<EventArgs>(CreateSelected);

            joinGameEntry.Selected += new EventHandler<EventArgs>(JoinSelected);

            quitEntry.Selected += new EventHandler<EventArgs>(QuitSelected);


            MenuEntries.Add(createGameEntry);

            MenuEntries.Add(joinGameEntry);

            MenuEntries.Add(quitEntry);


            base.LoadContent();

        }


        public override void Draw(GameTime gameTime)

        {

            SharedSpriteBatch.Instance.Draw(backgroundTex, Vector2.Zero,

                Color.White);

            base.Draw(gameTime);

        }


        #region Event Handlers


        void QuitSelected(object sender, EventArgs e)

        {

            ScreenManager.Game.Exit();

        }


        void JoinSelected(object sender, EventArgs e)

        {

            ScreenManager.AddScreen(new JoinGameScreen());

        }


        void CreateSelected(object sender, EventArgs e)

        {

            ScreenManager.AddScreen(new CreateGameScreen());

        }


        #endregion

    }

}
Take a look at the CreateSelected event handler. Here, we are launching a new screen to create a network game. We haven't created that screen yet (or the join game screen), so the game won't compile. Next, we'll write the CreateGameScreen class.
Building the Create Game Screen
The create game screen (see Figure 7-7 earlier in the chapter) is responsible for creating a new network session and waiting for other players to join it. This screen cannot advance until all players are ready, and the player who initiates this screen will be known as the host during play.
The screen has a grid-style layout for outputting player data. Each row will contain the name and status of each player in the session. When all players are ready, the host player can press the middle button to start the game.
- In the
Screens folder, add a new class named CreateGameScreen.cs. Change the namespace to CrazyEights (from CrazyEights.Screens).
- Add the following file to the
Textures/Screens folder: Examples/Chapter 7/Artwork/newGameScreen.png. This graphic serves as the background for the screen.
- Stub out the class as shown:
using System;

using Microsoft.Xna.Framework;

using Microsoft.Xna.Framework.Graphics;

using Microsoft.Xna.Framework.Net;


using GameStateManager;


namespace CrazyEights

{

    public class CreateGameScreen : BaseScreen

    {

    }

}
- Add the following fields to the class. These fields store graphical as well as state elements. For example, the game cannot start until we have at least two ready players, so we have a flag for that. Also add the sole constant, which defines the maximum players at
5 (the maximum number our game can support).
#region Fields


private Texture2D backgroundTex;


private string statusText = "";

private Vector2 statusTextOrigin;


private bool createFailed = false;

private bool allPlayersReady = false;

private bool atLeastTwoPlayers = false;


#endregion


#region Constants


private const int MAX_PLAYERS = 5;


#endregion
- Add a region called
BaseScreen Overrides. The methods in this region will define how this screen performs as a screen object. First, put the code for the Initialize method in place. This method immediately attempts to create a network session and set the local gamer to Ready. If an exception is thrown, it is caught and made user-friendly. Also, add the event handler for GameStarted, which launches a new PlayingScreen (which we have not added yet).
public override void Initialize()

{

    try

    {

        ScreenManager.Network.KillSession();

        ScreenManager.Network.CreateZuneSession(MAX_PLAYERS);

        ScreenManager.Network.Session.LocalGamers[0].IsReady = true;


        ScreenManager.Network.Session.GameStarted +=

            new EventHandler<GameStartedEventArgs>(GameStarted);

    }

    catch (NetworkNotAvailableException)

    {

        statusText = "No network available.
" +

            "Enable Wireless on the Zune and try again.";

        createFailed = true;

    }

    catch (NetworkException)

    {

        statusText = "Session could not be created
" +

            "due to network issues.";

        createFailed = true;

    }

    catch (Exception)

    {

        statusText = "An unexpected error occurred.";

        createFailed = true;

    }


    base.Initialize();

}


void GameStarted(object sender, GameStartedEventArgs e)

{

    ScreenManager.RemoveScreen(this);

    ScreenManager.AddScreen(new PlayingScreen(true));

}
- Add the
LoadContent method to the BaseScreen Overrides region. This method uses the screen manager to load the newGameScreen.png file, which we added to the project earlier.
public override void LoadContent()

{

    backgroundTex = ScreenManager.Content.Load<Texture2D>

        ("Textures/Screens/newGameScreen");


    base.LoadContent();

}
- In the
BaseScreen Overrides region, add the Update method. This method is responsible for determining how many players are ready and if it is okay to start the game. This method also sets and measures the status text.
public override void Update(GameTime gameTime, bool otherScreenHasFocus,

    bool coveredByOtherScreen)

{

    // Determine readiness to start the game

    allPlayersReady = true;

    foreach (NetworkGamer gamer in ScreenManager.Network.Session.AllGamers)

    {

        if (gamer.IsReady == false)

        {

            allPlayersReady = false;

            break;

        }

    }


    // Determine the status text

    if (ScreenManager.Network.Session.AllGamers.Count >= 2)

        atLeastTwoPlayers = true;

    else

        atLeastTwoPlayers = false;


    if (allPlayersReady && atLeastTwoPlayers)

        statusText = "READY TO START
PRESS THE MIDDLE BUTTON!";

    else

        statusText = "Waiting for other players...";


    statusTextOrigin =

        ScreenManager.SmallFont.MeasureString(statusText) / 2;


    base.Update(gameTime, otherScreenHasFocus, coveredByOtherScreen);

}
- In the
BaseScreen Overrides region, override HandleInput next. If Back is pressed, the game returns to the main menu screen (since this screen is removed). When the middle button is pressed, the game is started, but only if all players are ready.
public override void HandleInput(InputState input)

{

    if (input.NewBackPress)

    {

        ScreenManager.Network.KillSession();

        ScreenManager.RemoveScreen(this);

    }


    if (input.MiddleButtonPressed)

    {

        if (allPlayersReady && atLeastTwoPlayers)

        {

            if (ScreenManager.Network.Session != null)

                ScreenManager.Network.Session.StartGame();

        }

    }

}
- Add the
Draw method in the BaseScreen Overrides region. The Draw method draws the background, list of players (if any), and status text.
public override void Draw(GameTime gameTime)

{

    SharedSpriteBatch.Instance.Draw(backgroundTex, Vector2.Zero, Color.White);


    if (createFailed == false)

    {

        int playerIndex = 0;

        foreach (NetworkGamer gamer in ScreenManager.Network.Session.

AllGamers)

        {

            DrawGamerInfo(playerIndex, gamer.Gamertag, gamer.IsHost,

gamer.IsReady);

            playerIndex++;

        }

    }


    SharedSpriteBatch.Instance.DrawString(ScreenManager.SmallFont, statusText,

        LobbyGameScreenElements.StatusMessagePosition, Color.White,

        0.0f, statusTextOrigin, 1.0f, SpriteEffects.None, 0.5f);


    base.Draw(gameTime);

}
- Add a new region for
Helper Methods and add the DrawGamerInfo method, which takes a gamer and some associated information and draws it on the screen. This method allows the host to take a collection of gamers, iterate through them, and draw each one on the screen such that their information fits in the table in the user interface.
private void DrawGamerInfo(int playerIndex, string name, bool isHost, bool isReady)

{

    Vector2 namePosition = LobbyGameScreenElements.InitialTextListPosition;

    namePosition.Y += LobbyGameScreenElements.PLAYER_VERTICAL_SPACING *

playerIndex;

    Vector2 statusPosition = LobbyGameScreenElements.

InitialListStatusPosition;

    statusPosition.Y = namePosition.Y;


    string readyStatus = isReady ? "Ready" : "Not Ready";

    Color readyColor = isReady ? Color.White : Color.LightGray;


    if (isHost)

        name += " (host)";


    SharedSpriteBatch.Instance.DrawString(ScreenManager.SmallFont,

        name, namePosition, readyColor);

    SharedSpriteBatch.Instance.DrawString(ScreenManager.SmallFont,

        readyStatus, statusPosition, readyColor);

}
At this point, IntelliSense goes crazy because of the unresolved LobbyGameScreenElements class. This is just a static class with some values that help you lay out the create game and lobby screens. We'll add the code for this class next.
- In the
Screens folder, add the following new class named LobbyGameScreenElements.cs. (I determined the values in this file manually, to produce an attractive screen layout.)
using Microsoft.Xna.Framework;


namespace CrazyEights

{

    public static class LobbyGameScreenElements

    {

        public static Vector2 PlayerListPosition;

        public static Vector2 InitialTextListPosition;

        public static Vector2 InitialListStatusPosition;

        public static Vector2 StatusMessagePosition;

        public static Vector2 HighlightInitialPosition;


        public const int PLAYER_VERTICAL_SPACING = 20;

        public const int LIST_OUTLINE_OFFSET = 4;


        static LobbyGameScreenElements()

        {

            PlayerListPosition = new Vector2(14, 82);

            InitialTextListPosition = new Vector2(16, 82);

            InitialListStatusPosition = new Vector2(155, 82);

            StatusMessagePosition = new Vector2(120, 202);

            HighlightInitialPosition = PlayerListPosition;


            HighlightInitialPosition.X -= LIST_OUTLINE_OFFSET;

            HighlightInitialPosition.Y -= LIST_OUTLINE_OFFSET;

        }

    }

}
Now, the create game screen is complete. The next screen to implement is the join game screen, which enumerates all of the available games.
Building the Join Game Screen
The join game screen (shown earlier in Figure 7-8) is responsible for enumerating the available network sessions and allowing the user to pick one.
One caveat with this screen, and network session resolution in general, is that the asynchronous BeginFind method of the NetworkSession class leaves the network session open as it searches. This means that you must wait for the BeginFind method to end (successfully or unsuccessfully) before attempting to close the join game screen or start a new session. This screen handles this simply by preventing exiting until the previous find operation has completed.
- In the
Screens folder, add a new class called JoinGameScreen.cs. Stub it out with the embedded JoinScreenStatus enumeration:
using System;

using Microsoft.Xna.Framework;

using Microsoft.Xna.Framework.Graphics;

using Microsoft.Xna.Framework.Net;

using GameStateManager;


namespace CrazyEights

{

    public enum JoinScreenStatus

    {

        Finding,

        Joining,

        Joined,

        Error

    }


    public class JoinGameScreen : BaseScreen

    {

    }

}
- Right-click the
Content/Textures/Screens folder and choose Add Existing Item. Add the file Examples/Chapter 7/Artwork/joinGameScreen.png. This is the background for the join game screen, and is identical to the create game screen background, except for some of the text in the graphic.
- Right-click the
Content/Textures folder and choose Add Existing Item. Add the file Examples/Chapter 7/Artwork/listhighlight.png. This is a rectangular highlight graphic that is drawn under the currently selected session to emphasize the currently selected session.
- Add a
Fields region and the following fields to the JoinGameScreen class:
#region Fields


private Texture2D backgroundTex;

private Texture2D listHighlightTex;


private string statusText;

private int selectedSessionIndex = −1;

private AvailableNetworkSessionCollection availableNetworkSessions = null;

private JoinScreenStatus screenStatus = JoinScreenStatus.Finding;


private Vector2 statusTextOrigin = Vector2.Zero;


#endregion
- Add a region called
BaseScreen Overrides, which will define this screen's behavior as a game screen. Add the Initialize method, which wires up some network events and begins searching for available sessions.
#region BaseScreen Overrides


public override void Initialize()

{

    // Wire up events

    ScreenManager.Network.NetworkSessionsFound +=

        new NetworkManager.NetworkSessionsFoundHandler(NetworkSessionsFound);


    ScreenManager.Network.GameJoined +=

        new NetworkManager.GameJoinedHandler(GameJoined);


    ScreenManager.Network.GameJoinError +=

        new NetworkManager.GameJoinErrorHandler(GameJoinError);


    // Start looking for sessions

    ScreenManager.Network.KillSession();

    ScreenManager.Network.BeginGetAvailableSessions();


    base.Initialize();

}


#endregion
- Add a new region called
Event Handlers. These methods will handle the network events we subscribed to in the Initialize method. When network sessions are found, we either select the first found session or state that no sessions were found. When the game is successfully joined, we launch a LobbyScreen (which we have not created yet). When an error occurs trying to join a game, we output the error message to the screen.
#region Event Handlers


 void NetworkSessionsFound(AvailableNetworkSessionCollection

availableSessions)

 {

     availableNetworkSessions = availableSessions;

     if (availableNetworkSessions == null ||
         availableNetworkSessions.Count < 1)

     {

         selectedSessionIndex = −1;

         screenStatus = JoinScreenStatus.Error;

         statusText = "No sessions were found.
" +

             "Please try again by pressing BACK.";

     }

     else

     {

         if (selectedSessionIndex == −1)

             selectedSessionIndex = 0;

     }

 }


 void GameJoined()

 {

     screenStatus = JoinScreenStatus.Joined;

     statusText = "Game joined.";

     ScreenManager.AddScreen(new LobbyScreen());

     this.ExitScreen();

 }


 void GameJoinError(Exception ex)

 {

     statusText = "An error occurred.
Please press BACK and try again.";


     screenStatus = JoinScreenStatus.Error;

 }


 #endregion
- Add the
LoadContent override method to the BaseScreen Overrides region. This method loads the required content and sets up the initial status text.
public override void LoadContent()

{

    backgroundTex = ScreenManager.Content.Load<Texture2D>

        ("Textures/Screens/joinGameScreen");

    listHighlightTex = ScreenManager.Content.Load<Texture2D>

        ("Textures/listhighlight");


    statusText = "Please wait. Looking for games...";

    statusTextOrigin = ScreenManager.SmallFont.MeasureString(statusText) / 2;


    base.LoadContent();

}
- Add the
Update override method to the BaseScreen Overrides region. This method alters the status text and the currently selected network session based on the current screen status.
public override void Update(GameTime gameTime, bool otherScreenHasFocus,

    bool coveredByOtherScreen)

{

    switch (screenStatus)

    {

        case JoinScreenStatus.Finding:

            if (availableNetworkSessions == null ||
                availableNetworkSessions.Count <= 0)

            {

                statusText = "Please wait. Looking for games...";

                selectedSessionIndex = −1;

            }

            else

            {

                if (availableNetworkSessions.Count >= 1)

                {

                    statusText = "Press the middle button to join.";

                }

            }

            break;

        case JoinScreenStatus.Joining:

            statusText = "Attempting to join game...";

            break;

        case JoinScreenStatus.Joined:


            statusText = "Game joined.";

            break;

    }


    statusTextOrigin = ScreenManager.SmallFont.MeasureString(statusText) / 2;


    base.Update(gameTime, otherScreenHasFocus, coveredByOtherScreen);

}
- Add the
HandleInput override method to the BaseScreen Overrides region. This method will handle four different kinds of input. It will go back to the main menu screen if the network session is not busy looking for games. It will scroll up and down in the list of network sessions if there are available sessions. Finally, it will attempt to join the selected session if it is available when the middle button is pressed.
public override void HandleInput(InputState input)

{

    // Kill the session and go back

    if (input.NewBackPress)

    {

        if (availableNetworkSessions != null)

        {

            ScreenManager.Network.KillSession();

            ScreenManager.RemoveScreen(this);

        }

    }


    // Scroll down in the list of sessions

    if (input.NewDownPress)

    {

        if (availableNetworkSessions != null && availableNetworkSessions.

Count > 1)

        {

            if (selectedSessionIndex < availableNetworkSessions.Count - 1)

                selectedSessionIndex++;

        }

    }


    // Scroll down in the list of sessions

    if (input.NewUpPress)

    {

        if (selectedSessionIndex > 0)

            selectedSessionIndex--;

    }


    // Attempt to join the selected game

    if (input.MiddleButtonPressed)

    {


        if (selectedSessionIndex >= 0 && availableNetworkSessions != null

            && availableNetworkSessions.Count > 0)

        {

            screenStatus = JoinScreenStatus.Joining;

            AvailableNetworkSession session =

                availableNetworkSessions[selectedSessionIndex];


            ScreenManager.Network.JoinSession(session);

        }

    }

}
- Add the
Draw override method to the BaseScreen Overrides region. This method will draw all of the session information and status text on screen. It also utilizes a private method called DrawSessionInfo to draw the session information with highlights.
public override void Draw(GameTime gameTime)

{

    // Draw the background

    SharedSpriteBatch.Instance.Draw(backgroundTex, Vector2.Zero, Color.White);


    // Draw the network sessions

    if (availableNetworkSessions != null)

    {

        for (int sIndex = 0; sIndex < availableNetworkSessions.Count;

sIndex++)

        {

            AvailableNetworkSession session = availableNetworkSessions

[sIndex];

            DrawSessionInfo(sIndex, session.CurrentGamerCount,

                session.HostGamertag);

        }

    }


    // Draw the status text

    SharedSpriteBatch.Instance.DrawString(ScreenManager.SmallFont, statusText,

        LobbyGameScreenElements.StatusMessagePosition, Color.White, 0.0f,

        statusTextOrigin, 1.0f, SpriteEffects.None, 0.5f);

}
- Finally, create a new region called
Private Methods and add the GetHighlightPosition and DrawSessionInfo methods to that region. GetHighlightPosition determines where to draw the highlight graphic given a specific index into the list of sessions. DrawSessionInfo uses GetHighlightPosition and the currently drawn network session to draw the text above the highlight. Notice how this screen also makes use of the values in LobbyGameScreenElements.cs.
#region Private Methods


private Vector2 GetHighlightPosition(int positionIndex)

{

    Vector2 position = LobbyGameScreenElements.HighlightInitialPosition;

    position.Y += positionIndex * LobbyGameScreenElements.PLAYER_VERTICAL_

SPACING;

    return position;

}


private void DrawSessionInfo(int sessionIndex, int numGamers, string

hostGamertag)

{

    Vector2 namePosition = LobbyGameScreenElements.InitialTextListPosition;

    namePosition.Y +=

        LobbyGameScreenElements.PLAYER_VERTICAL_SPACING * sessionIndex;


    Vector2 statusPosition = LobbyGameScreenElements.InitialListStatus

Position;

    statusPosition.Y = namePosition.Y;


    string sessionStatus = numGamers.ToString() + " player";

    sessionStatus += numGamers == 1 ? "" : "s";


    // Determine the text color for the session

    Color sessionColor = sessionIndex ==

        selectedSessionIndex ? Color.White : Color.Black;


    // Draw the highlight

    if (sessionIndex == selectedSessionIndex)

    {

        // Draw the highlight before the text

        SharedSpriteBatch.Instance.Draw(listHighlightTex,

            GetHighlightPosition(sessionIndex), Color.White);

    }


    // Draw the host gamer tag

    SharedSpriteBatch.Instance.DrawString(ScreenManager.SmallFont,

        hostGamertag, namePosition, sessionColor);


    // Draw the session status

    SharedSpriteBatch.Instance.DrawString(ScreenManager.SmallFont,

        sessionStatus, statusPosition, sessionColor);

}


#endregion
We are nearly at a point where we can compile and test the game safely. There are two screens we still need to implement. The first is LobbyScreen.cs, which is where a joining user is taken after joining a network session. The second is PlayingScreen.cs, where most of the game logic occurs. Let's look at LobbyScreen.cs first.
Building the Lobby Screen
The lobby screen (shown earlier in Figure 7-9) allows joining players to declare their readiness to begin. This screen also shows the names of other network players in the session. When the host starts the game, this screen disappears, and all players are transitioned to the playing screen.
- In the
Screens folder, add a new class called LobbyScreen.cs. Stub it out as follows:
using System;

using Microsoft.Xna.Framework;

using Microsoft.Xna.Framework.Graphics;

using Microsoft.Xna.Framework.Net;


using GameStateManager;


namespace CrazyEights

{

    public class LobbyScreen : BaseScreen

    {

    }

}
- Right-click the
Content/Textures/Screens folder and choose Add Existing Item. Browse to the file Examples/Chapter 7/Artwork/lobbyScreen.png and add it. This graphic is also based on the create game screen background, with a grid that will show the players in the session.
- Add a
Fields region and the following three fields to the class:
#region Fields


private Texture2D backgroundTex;

private string statusText;

private Vector2 statusTextOrigin = Vector2.Zero;


#endregion
- Add a region called
BaseScreen Overrides and add the Initialize method, which wires up network events to local handlers. Add the event handlers as well.
#region BaseScreen Overrides


public override void Initialize()

{

    // Wire up events


    ScreenManager.Network.Session.GameStarted +=

        new EventHandler<GameStartedEventArgs>(GameStarted);


    ScreenManager.Network.Session.SessionEnded +=

        new EventHandler<NetworkSessionEndedEventArgs>(SessionEnded);


    base.Initialize();

}


#endregion

#region Event Handlers


void GameStarted(object sender, GameStartedEventArgs e)

{

    ScreenManager.RemoveScreen(this);

    ScreenManager.AddScreen(new PlayingScreen(false));

}


void SessionEnded(object sender, NetworkSessionEndedEventArgs e)

{

    ScreenManager.RemoveScreen(this);

}


#endregion
- Add the
LoadContent override method to the BaseScreen Overrides region. This method loads the background texture and initializes status text.
public override void LoadContent()

{

    backgroundTex = ScreenManager.Content.Load<Texture2D>

        ("Textures/Screens/lobbyScreen");


    statusText = "When you're ready,
press the MIDDLE button.";

    statusTextOrigin = ScreenManager.SmallFont.MeasureString(statusText) / 2;


    base.LoadContent();

}
- In the
BaseScreen Overrides region, add the HandleInput override method, which will attempt to set the player as Ready (or exit the screen).
public override void HandleInput(InputState input)

{

    if (input.NewBackPress)

    {

        ScreenManager.Network.KillSession();

        ScreenManager.RemoveScreen(this);

    }


    if (input.MiddleButtonPressed)

    {

        if (ScreenManager.Network.Session != null)

        {

            try

            {

                ScreenManager.Network.Session.LocalGamers[0].IsReady = true;

                statusText = "Waiting for the host to start.";

            }

            catch

            {

                this.ExitScreen();

            }

        }

    }

}
- Add the
Draw method to the BaseScreen Overrides region. This method loops through all the players in the session and draws them with the private DrawGamerInfo method (shown in step 8).
public override void Draw(GameTime gameTime)

{

    // Draw background

    SharedSpriteBatch.Instance.Draw(backgroundTex, Vector2.Zero, Color.White);


    // Draw players in session

    int playerIndex = 0;

    foreach (NetworkGamer gamer in ScreenManager.Network.Session.AllGamers)

    {

        DrawGamerInfo(playerIndex, gamer.Gamertag, gamer.IsHost,

gamer.IsReady);

        playerIndex++;

    }


    // Draw status text

    SharedSpriteBatch.Instance.DrawString(ScreenManager.SmallFont, statusText,

        LobbyGameScreenElements.StatusMessagePosition, Color.White,

        0.0f, statusTextOrigin, 1.0f, SpriteEffects.None, 0.5f);


    base.Draw(gameTime);

}
- Finally, add a new region called
Private Methods, and add the DrawGamerInfo method. This method draws information for a specific network gamer in a list on the screen.
#region Private Methods


private void DrawGamerInfo(int playerIndex, string name, bool isHost, bool isReady)

{

    Vector2 namePosition = LobbyGameScreenElements.InitialTextListPosition;

    namePosition.Y += LobbyGameScreenElements.PLAYER_VERTICAL_SPACING *

playerIndex;

    Vector2 statusPosition = LobbyGameScreenElements.

InitialListStatusPosition;

    statusPosition.Y = namePosition.Y;


    string readyStatus = isReady || isHost ? "Ready" : "Not Ready";

    Color readyColor = isReady || isHost ? Color.White : Color.LightGray;


    if (isHost)

        name += " (host)";


    SharedSpriteBatch.Instance.DrawString(ScreenManager.SmallFont,

        name, namePosition, readyColor);


    SharedSpriteBatch.Instance.DrawString(ScreenManager.SmallFont,

        readyStatus, statusPosition, readyColor);

}


#endregion
All of our matchmaking screens are complete! We can now stub out PlayingScreen.cs and do a quick build.
Adding the Playing Screen, Compile and Deploy Check
Now we will get the playing screen started, but we won't fully implement it. This is the last piece of this phase's puzzle. After doing this, you should be able to create and join network sessions between two wireless-enabled Zune devices.
- In the
Screens folder, add a new class called PlayingScreen.cs. The following stub will match the constructor signatures called from the create game and lobby screens. When called from the create game screen, the playing screen is constructed with host = true. When called from the lobby screen, the playing screen is instantiated with host = false.
using Microsoft.Xna.Framework;

using GameStateManager;

using CardLib;


namespace CrazyEights

{

    public class PlayingScreen : BaseScreen

    {

        private bool isHost;


        public PlayingScreen(bool host)

        {

            isHost = host;

        }

    }

}
- Compile the game at this time. Correct any typos or other errors (consult the provided source code if necessary).
- Run without debugging to one Zune. Once the game is running on that Zune, swap out with a different Zune. Set this new Zune as the default and deploy with debugging on. (In both cases, wait until the wireless icon shows up in the Zune user interface before connecting.) You should be able to create and join network sessions between the two Zunes without any trouble.
We will come back to the playing screen in a little while. First, we need to write some more complex helper classes that will manage the display and game flow.
Three classes play a central role in the management of the game. The first is called the Crazy Eights game manager component, which handles the turn system, game rules, and top-level network calls. Next is the player view component, which is a drawable component shown on the screen with a collection of cards. This component is drawn directly into the player screen and is the main point of interaction between user and game. The playing screen instantiates, adds, and handles the communication between these two components. The playing screen also handles some game logic, but to a far lesser extent than the other two classes. The outbound network messaging is handled by a static class called NetworkMessenger, which you will see shortly. The game manager component handles receipt of network traffic.
Before building these more complex classes, let's create the CrazyEightsPlayer object, which brings together some useful fields that our more complex logic classes can use.
Creating the CrazyEightsPlayer Class
The CrazyEightsPlayer class is used to represent a player in the game with a bit more detail than, say, the NetworkGamer class does.
Every peer will keep a list of CrazyEightsPlayer objects. A CrazyEightsPlayer object has a few obvious properties attached to it: a list of cards, a name, whether it is this player's turn, and whether this player is the host. To avoid having every peer stay up-to-date with every player's hand, only the host will maintain a list of each player's cards.
- Right-click the
CrazyEights game project and add a new class to it, called CrazyEightsPlayer.cs. Stub it out like so:
using System.Collections.Generic;

using CardLib;


namespace CrazyEights

{

    public class CrazyEightsPlayer

    {

        // Implementation to follow...

    }

}
- Add the
Name, Cards, IsHost, and IsMyTurn fields to the class:
#region Fields


public string Name

{

    get;

    private set;

}


public List<Card> Cards

{

    get;

    private set;

}


public bool IsHost

{

    get;

    private set;

}


public bool IsMyTurn

{

    get;

    set;

}


#endregion
- Add the constructor, which initializes the fields. We will set the turn to
false by default, since the host will determine when to set this value to true via a network message. We will also instantiate the cards to a new array of cards. This means we need to know only the player name and whether that player is the host.
#region Constructor(s)


public CrazyEightsPlayer(string name, bool isHost)

{

    Name = name;

    IsHost = isHost;

    IsMyTurn = false;

    Cards = new List<Card>();

}


#endregion
- Add a public method called
DealCard. This is an abstraction of the dealer actually dealing the card to a player. It just adds the specified card to this player's list of cards. This method is called when cards are initially dealt at the beginning of the network session.
#region Public Methods


public void DealCard(Card card)

{

    Cards.Add(card);

}


#endregion
- Finally, override the
Equals method. This will allow us to check, by player name, whether two player objects correspond to the same gamer. This will be useful when we want to receive only network messages intended for us, and in other situations where we need to determine whether two player objects are the same.
#region Overriden Methods


public override bool Equals(object obj)

{

    CrazyEightsPlayer player = obj as CrazyEightsPlayer;

    if (player == null)

        return false;


    return player.Name == this.Name;

}


#endregion
Next, you will see the game take shape from the network side of things with the NetworkMessenger class.
Creating the NetworkMessenger Class
The NetworkMessenger class is responsible for sending outbound network messages to all peers in the session. Whenever the host or peer needs to synchronize a piece of information with the other gamers on the network (or even one gamer in particular), a method of this class is called.
The network messaging infrastructure works on the basic premise that we will first send a single byte indicating what the following data is to be used for, and then send the data atomically (piece by piece). If you were to build a huge game with many different message types that needed to be easily extended, there would probably be a better approach. For our situation, we will define an enumeration (of type byte) that sets up nine different network messages. The NetworkMessenger class will expose static methods that send the data for each of these messages.
- In the
CrazyEights game project, add a new class called NetworkMessenger.cs. Stub it out as follows:
using System;

using Microsoft.Xna.Framework.Net;

using GameStateManager;

using CardLib;


namespace CrazyEights

{

    public enum NetworkMessageType : byte

    {


    }


    public static class NetworkMessenger

    {


    }

}
Here, we have a public enumeration called NetworkMessageType that inherits from byte. This means that we can easily cast members of this enumeration back to a byte for sending or receiving, and that helps to minimize network traffic. Also, in our game, byte is not used for any other purpose, so it helps you mentally mark these values as message types.
- Add the following values to the
NetworkMessageType enumeration. Each value is described in Table 7-4, and they map very closely to the messages discussed in the "Network State Design" section earlier in the chapter.
public enum NetworkMessageType : byte

{

    HostSendPlayer,

    HostDealCard,

    HostAllCardsDealt,

    HostDiscard,


    HostSetTurn,

    PlayCard,

    RequestCard,

    SuitChosen,

    GameWon

}
Table 7-4. Network Message Types
| Message |
Sent by |
Processed by |
Description |
HostSendPlayer |
Host |
All players |
Sends a new CrazyEightsPlayer to all other players. |
HostDealCard |
Host |
Intended player |
Deals a card to a player. |
HostAllCardsDealt |
Host |
All players |
Message sent when all cards have been dealt, indicating that play may start. |
HostDiscard |
Host |
All players |
Sent when the first card is discarded from the deck. |
HostSetTurn |
Host |
Intended player |
Sets the player's turn to True if it is the intended player; False otherwise. |
PlayCard |
Player |
All players |
Adds the played card to the discard pile. |
RequestCard |
Player |
Host |
Sent when a player needs to draw a card. Answered with HostDealCard. |
SuitChosen |
Player |
All players |
Sets the currently active suit to the one chosen by the player who played the eight. |
GameWon |
Player |
All players |
Sent when a player wins the game by running out of cards. |
- Now that we have the network message types in place, it's time to determine what the structure of the data will look like when it is sent. First, we must have a reference in this class to the screen manager, which contains a
NetworkManager object. We must also ensure that this value has been set before attempting to use it. Add the following two fields to the NetworkMessenger class:
public static class NetworkMessenger

{

    private static ScreenManager screenManager;

    private static bool isInitialized = false;

}
- We will also need a static method on this class that sends all of the available data in the packet writer in one go. We use a
foreach loop for two reasons. One is that if the game is ever ported to a device where there can be more than one local player (such as the Xbox 360), this code will still work. The other reason is that, in all cases, we will always have a local gamer object to work with, which the foreach loop provides. Implement the SendData method as follows, along with the Initialize method that sets the screen manager object.
public static void Initialize(ScreenManager manager)

{

    screenManager = manager;

    isInitialized = true;

}


private static void SendData()

{

    if (isInitialized == false)

        throw new Exception("This object must be initialized first.");


    foreach (LocalNetworkGamer gamer in screenManager.Network.Session.

LocalGamers)

        gamer.SendData(screenManager.Network.PacketWriter,

            SendDataOptions.ReliableInOrder);

}
Notice that the send data options specify reliable in-order messaging. This requires the most network bandwidth, but because our game sends a comparably small amount of data infrequently, it's better to choose robustness over performance.
- Implement the static
Host_SendPlayer method, which sends a player and indicates whether that player is the host. This method maps to the HostSendPlayer message type.
public static void Host_SendPlayer(NetworkGamer gamer)

{

    screenManager.Network.PacketWriter.Write(

        (byte)NetworkMessageType.HostSendPlayer);


    screenManager.Network.PacketWriter.Write(gamer.Gamertag);

    screenManager.Network.PacketWriter.Write(gamer.IsHost);

    SendData();

}
- Implement the static
Host_DealCard method, which sends a card to a player. It sends the card in its serialized string form. This method maps to the HostDealCard message type.
public static void Host_DealCard(Card card, CrazyEightsPlayer player)

{

    screenManager.Network.PacketWriter.Write((byte)NetworkMessageType.

HostDealCard);

    screenManager.Network.PacketWriter.Write(player.Name);

    screenManager.Network.PacketWriter.Write(card.Serialize());

    SendData();

}
- Implement the static
Host_Discard method, which informs the players of the newly discarded card. It sends the card in its serialized string form. This method maps to the HostDiscard message type.
public static void Host_Discard(Card card)

{

    screenManager.Network.PacketWriter.Write((byte)NetworkMessageType.

HostDiscard);

    screenManager.Network.PacketWriter.Write(card.Serialize());

    SendData();

}
- Implement the static
Host_ReadyToPlay method, which informs the players that all players have their cards and play can begin. This method maps to the HostAllCardsDealt message type.
public static void Host_ReadyToPlay()

{

    screenManager.Network.PacketWriter.Write(

        (byte)NetworkMessageType.HostAllCardsDealt);


    SendData();

}
- Implement the static
Host_SetTurn method, which tells the players to set the current turn index. This method maps to the HostSetTurn message type.
public static void Host_SetTurn(int turn)

{

    screenManager.Network.PacketWriter.Write((byte)NetworkMessageType.

HostSetTurn);

    screenManager.Network.PacketWriter.Write(turn);

    SendData();

}
- Implement the static
PlayCard method, which informs the other players that this player has played a card. This method maps to the PlayCard message type.
public static void PlayCard(Card card)

{

    screenManager.Network.PacketWriter.Write((byte)NetworkMessageType.

PlayCard);

    screenManager.Network.PacketWriter.Write(card.Serialize());

    SendData();

}
- Implement the static
RequestCard method, which informs the host that this player needs a card dealt. This method maps to the RequestCard message type.
public static void RequestCard(CrazyEightsPlayer player)

{

    screenManager.Network.PacketWriter.Write((byte)NetworkMessageType.

RequestCard);

    screenManager.Network.PacketWriter.Write(player.Name);

    SendData();

}
- Implement the static
SendChosenSuit method, which informs the other players that this player has chosen a suit (sent as an integer). This method maps to the SuitChosen message type.
public static void SendChosenSuit(Suit suit)

{

    screenManager.Network.PacketWriter.Write((byte)NetworkMessageType.

SuitChosen);

    screenManager.Network.PacketWriter.Write((byte)suit);

    SendData();

}
- Finally, implement the static
GameWon method, which informs all gamers that the gamer with the specified name has won the game. This does not cross-check with the host's game status. Whenever a player runs out of cards, that player sends this message. When players receive this message, they transition to the game over screen. This method maps to the GameWon message type.
public static void GameWon(string winner)

{

    screenManager.Network.PacketWriter.Write((byte)NetworkMessageType.

GameWon);

    screenManager.Network.PacketWriter.Write(winner);

    SendData();

}
We've finished all of the network message plumbing we need to send appropriate messages between Zunes. The important thing to remember here is the order in which data is sent. For example, the Host_DealCard method deals the player's name, followed by the card. Therefore, the data must be received in that same order (player then card).
Next, we'll build the player view component, which is responsible for displaying the player's "heads-up display," so to speak.
Creating the Player View Component
The player view component runs as a child of the playing screen and is more of a display component than anything else. However, this component is one of the most crucial to the user experience. It handles all of the bells and whistles that allow a player to visualize what is happening in the game.
Each Zune will have a player view component running in the playing screen during game play. This component is responsible for displaying runtime data to the player, including the following:
- All the cards in the player's hand
- A graphical notification overlay when the active suit has changed (after another player plays an eight and selects a suit)
- The current card to play against
- Any status text
It also allows the player to select from playable cards, while dimming others. See Figure 7-10, earlier in this chapter, for an example of this.
This screen is also derived from our custom DrawableComponent class, so that it may adopt the life span of its parent screen (PlayingScreen). As such, we could choose to handle input within this component, but instead we will handle input in the playing screen, because input events such as PlayCard will require access to the CrazyEightsGameManager component (built next) as well to propagate those changes to other Zunes.
We'll approach the implementation sequence differently for this component. You need to understand how a card graphic is drawn, as we have not covered that yet.
In the player view component, we'll add the deck.png image shown in Figure 7-14. I mentioned earlier that many elements of the card library are built around the arrangement of this card deck.
Figure 7-14. The layout of the card deck
If you look at the values of our Suit enumeration, you'll see Clubs = 1, Diamonds = 2, Hearts = 3, Spades = 4. This is alphabetical, yes, but you can see in Figure 7-14 that the cards go from values of 1 to 13 from left to right, and repeat in this order of suits going downward. This allows us to "index" into this image, given the suit and value, in much the same way that you would access an element in a matrix or a two-dimensional array. The method that accomplishes this specific piece of logic is called GetSourceRect, which we'll add at the beginning of the PlayerViewComponent class. GetSourceRect takes a Card object and returns a Rectangle that we can use as the source rectangle. Then we can simply draw the entire Deck texture, specifying this source rectangle, and we will receive a the graphic that represents the card that was input. "Genius," you say? It's actually a very common practice in game development.
Now, let's build the player view component.
- In the
CrazyEights game project, add a new class called PlayerViewComponent.cs. Stub it out as shown:
using System;

using Microsoft.Xna.Framework;

using Microsoft.Xna.Framework.Graphics;

using Microsoft.Xna.Framework.Audio;

using CardLib;

using GameStateManager;


namespace CrazyEights

{

    public class PlayerViewComponent : DrawableComponent

    {

    }

}
- Right-click the
Content/Textures folder and add deck.png from Examples/Chapter 7/Artwork. This image is shown in Figure 7-14.
- Right-click the
Content/Sounds folder and add CardSelect.wav from Examples/Chapter 7/SoundFX.
- Add a region for
Private Utility Methods to the PlayerViewComponent class and add the GetSourceRect method to it, as follows. This method makes use of card size constants, which we haven't defined just yet, so don't be worried if IntelliSense nags at you.
#region Private Utility Methods


private Rectangle GetSourceRect(Card card)

{

    // Only draw defined cards.

    if (!card.IsDefined)

        throw new ArgumentException("Undefined cards cannot be drawn.");


    // Define the value (subtract 1 because arrays are zero-based)

    int cardColumn = card.CardValue.Value - 1;


    // Define the suit (subtract 1 because are enum has

    // the first defined suit starting at 1, not zero)

    int cardRow = (int)card.Suit - 1;


    // Calculate the X position, in pixels.

    int x = cardColumn * CARD_WIDTH;


    // Calculate the Y position, in pixels.

    int y = cardRow * CARD_HEIGHT;


    // Create the rectangle and return it.

    return new Rectangle(x, y, CARD_WIDTH, CARD_HEIGHT);

}


#endregion
With that piece of code, we get a source rectangle for any card we want! This means that we can draw deck.png with the specified source rectangle, and we'll just get the card we requested. Now, we can resume implementing this class from the top.
- Add a region called
Fields to the class. This region will hold all the values that this component should expose, such as the currently selected card, the player this component represents, and whether or not the player currently has a move.
#region Fields


public CrazyEightsPlayer Player

{

    get;

    set;

}


public Card SelectedCard

{

    get

    {

        return Player.Cards[selectedIndex];

    }

}


public bool HasMove

{

    get;

    private set;

}


#endregion
- Add a region called
Private Variables to the class and the following variables. These are privately used values that contribute to the effect of the screen, and do not need to be exposed. Note the values for card animation. These will be used in a SmoothStep function to "slide" the selected card up from the group.
#region Private Variables


// Status text

private string statusText = "";


// Positioning and measurement

private Vector2 screenCenter;

private Vector2 currentCardPosition;

private Vector2 statusTextPosition;

private Vector2 statusTextOrigin;

private int screenWidth;


// Currently selected card index

private int selectedIndex = 0;


// Content

private SoundEffect cardSelectedSound;

private Texture2D deckTexture;

private Texture2D backgroundTex;


// "Suit changed" overlay textures

private Texture2D clubTex, diamondTex, heartTex, spadeTex;


private Color overlayTintColor;


// For card animation

private bool animatingSelected = false;

private float animateDistance = 0.0f;

private float stepValue = 0.0f;


#endregion
- Add the following constants. The first two specify the size of a single card, in pixels. The last specifies the maximum width of the card viewer control; the player's cards will always be shown together in a horizontal area 220 pixels wide or less.
#region Constants


private const int CARD_WIDTH = 44;

private const int CARD_HEIGHT = 60;

private const int MAX_WIDTH = 220;


#endregion
- Add the constructor for this component. It initializes the
currentCardPosition (the card to play against) and the tint color for the overlay graphics (the ones that say "Suit Changed"). It also initializes this component with the necessary ScreenManager reference.
#region Constructor(s)


public PlayerViewComponent(ScreenManager screenManager)

    : base(screenManager)

{

    currentCardPosition = new Vector2(98, 48);

    overlayTintColor = new Color(1.0f, 1.0f, 1.0f, 0.8f);

}


#endregion
- Add the method
SelectCard to the Private Methods region. This method is called internally by the component by public methods. This method will attempt to select a playable card, play a sound effect, and set the currently selected card. If the player has a move, this card will animate itself; otherwise, the first card will be selected internally. This way, when the next turn comes up, the search for playable cards will begin from the far left side (index 0). This method also makes use of the Player field, which is set externally.
#region Private Methods


private void SelectCard(int index)

{

    StopAnimating();


    if (HasMove)

    {

        if (Player.IsMyTurn)

            cardSelectedSound.Play();

        selectedIndex = index;

        animatingSelected = true;

    }

    else

        selectedIndex = 0;

}
- Add the method
SelectLastCard to the Private Methods region. This method is used to select the last card in the list.
private void SelectLastCard()

{

    selectedIndex = Player.Cards.Count - 1;

}
- In the
Private Methods region, add the StopAnimating method, which resets animation of the cards. This is the last private method, so add the #endregion marker.
private void StopAnimating()

{

    stepValue = 0.0f;

    animateDistance = 0.0f;

    animatingSelected = false;

}


#endregion
These are the internal card selection methods. We need to expose some public methods that attempt to select cards based on user input, for example.
- The first method we'll write is called
SelectFirstPlayableCard. This method starts at the leftmost card and tries to find a playable card. If no cards are found, HasMove is set to false and the last card is selected internally. This method makes use of the static method CrazyEightsGameManager.CanPlayCard (which we haven't added yet), which checks to see if the selected card can be played. Add a region called Public Methods and add the SelectFirstPlayableCard method:
#region Public Methods


public void SelectFirstPlayableCard()

{

    StopAnimating();


    Card card;

    bool foundCard = false;

    for (int i = 0; i < Player.Cards.Count; i++)

    {

        card = Player.Cards[i];

        if (CrazyEightsGameManager.CanPlayCard(card))

        {

            foundCard = true;

            HasMove = true;

            SelectCard(i);

            break;

        }

    }


    if (foundCard == false)

    {

        HasMove = false; // No playable card found

        SelectLastCard();

    }

}


#endregion
- In the
Public Methods region, add a method called SelectNextCard, which is called when the user clicks the Right button of the Zune to select the next card to the right. This method starts at the currently selected card and moves toward the right of the deck. If no playable cards are found after looping over once, HasMove is set to false. If HasMove is already false (there are no playable cards), this method has no effect.
public void SelectNextCard()

{

    if (HasMove)

    {

        int startIndex = selectedIndex;

        selectedIndex++;


        // Search for playable cards

        while (selectedIndex != startIndex)

        {

            if (selectedIndex > Player.Cards.Count - 1) // loop over

                selectedIndex = 0;


            if (CrazyEightsGameManager.CanPlayCard(Player.

Cards[selectedIndex]))

            {

                SelectCard(selectedIndex);

                HasMove = true;

                break;

            }


            selectedIndex++;

        }


        // No playable card found

        if (selectedIndex == startIndex &&

            CrazyEightsGameManager.CanPlayCard(

                Player.Cards[selectedIndex]) == false)


            HasMove = false;

    }

}
- Add a method called
SelectPreviousCard to the Public Methods region. This method is basically the inverse of the SelectNextCard method. It moves to the left instead of the right, but otherwise does the same thing.
public void SelectPreviousCard()

{

    if (HasMove)

    {

        int startIndex = selectedIndex;

        selectedIndex--;


        while (selectedIndex != startIndex)

        {

            if (selectedIndex < 0) // Loop over

                selectedIndex = Player.Cards.Count - 1;


            if (CrazyEightsGameManager.CanPlayCard(Player.Cards

[selectedIndex]))

            {

                SelectCard(selectedIndex);

                HasMove = true;

                break;

            }


            selectedIndex--;

        }


        // No playable card found

        if (selectedIndex == startIndex &&

            CrazyEightsGameManager.CanPlayCard(

                Player.Cards[selectedIndex]) == false)


            HasMove = false;

    }

}
Next, we'll begin implementing the LoadContent, Update, and Draw methods. First, we need to load some textures to use. (We already added deck.png.)
- Right-click the
Content/Textures/Screens folder and choose Add Existing Item. Add playingBackground.png from Examples/Chapter 7/Artwork.
- Right-click the
Content/Textures/CardBackgrounds folder and choose Add Existing Item. Add the following four files from Examples/Chapter 7/Artwork: clubBackground.png, diamondBackground.png, heartBackground.png, and spadeBackground.png. These images will be overlaid on the screen when the suit is changed.
- Add a new region called
DrawableComponent Overrides. Override the LoadContent method as follows. This method takes some screen measurements and loads content (textures and a sound).
public override void LoadContent()

{

    // Get screen dimensions

    Viewport viewport = ScreenManager.Graphics.Viewport;

    screenCenter = new Vector2(viewport.Width / 2, viewport.Height / 2);

    screenWidth = viewport.Width;


    // Load sprite batch and textures

    spriteBatch = new SpriteBatch(ScreenManager.Graphics);

    deckTexture = ScreenManager.Content.Load<Texture2D>("Textures/deck");

    backgroundTex = ScreenManager.Content.Load<Texture2D>(

        "Textures/Screens/playingBackground");


    // Load in the card backgrounds for when an eight is played

    clubTex = ScreenManager.Content.Load<Texture2D>(

        "Textures/CardBackgrounds/clubBackground");

    diamondTex = ScreenManager.Content.Load<Texture2D>(

        "Textures/CardBackgrounds/diamondBackground");

    heartTex = ScreenManager.Content.Load<Texture2D>(

        "Textures/CardBackgrounds/heartBackground");

    spadeTex = ScreenManager.Content.Load<Texture2D>(

        "Textures/CardBackgrounds/spadeBackground");


    // Initialize text positions

    statusTextPosition = new Vector2(120, 155);

    statusTextOrigin = ScreenManager.SmallFont.MeasureString(statusText) / 2;


    cardSelectedSound = ScreenManager.Content.Load<SoundEffect>(

        "Sounds/CardSelect");


    base.LoadContent();

}
- Override the
Update method. Based on what you've seen already in this screen, you might be worried that this is a complicated method. Actually, the Update method is very simple. It handles the animation of the selected card, and modifies the status text based on whose turn it is and whether you have a playable card. Most of the nasty code is in the Draw method.
public override void Update(GameTime gameTime)

{

    if (animatingSelected)

    {

        stepValue += (float)gameTime.ElapsedGameTime.TotalSeconds / 0.2f;

        animateDistance = MathHelper.SmoothStep(0.0f, 20.0f, stepValue);

        if (stepValue >= 1.0f)

        {

            animatingSelected = false;

            stepValue = 0.0f;

        }

    }


    // Update status text

    if (Player != null)

    {

        if (Player.IsMyTurn)

        {

            if (HasMove == false)

            {

                statusText = "You have no playable cards.
" +

                    "Press MIDDLE to draw a card.";

            }

            else

                statusText = "Select a card to play.";

        }

        else

            statusText = "Waiting for other players...";

    }


    statusTextOrigin = ScreenManager.SmallFont.MeasureString(statusText) / 2;


    base.Update(gameTime);

}
In this method, we first check to see if we are animating the selected card. If so, we add a slice of time to the step value. Then we calculate the distance away from the rest of the cards using a SmoothStep function with a minimum of 0 and a maximum of 20. This will cause the card to gradually move 20 pixels higher than the other cards when it is selected, highlighting it, in effect. Then the status text is modified to tell the player what to do based on the game status. If the player has no move, he is told to draw a card. If the player has a move, he is told to select a card to play. Otherwise, he is told that another player is busy.
- We are left with the
Draw method, which is admittedly rather complicated. Part of what makes this method so complex is the requirement to draw the cards with a stacked appearance, but the selected card must always appear on top. We will analyze this method in chunks so you can get a better feel for it. Go ahead and stub out the Draw method as follows:
public override void Draw(GameTime gameTime)

{


}
Add the following code to draw the background:
SharedSpriteBatch.Instance.Draw(backgroundTex, Vector2.Zero, Color.White);
The whole component should be drawn only if the player actually exists, so we need to wrap everything that follows in an if statement:
if (Player != null)

{
The next bit of code defines the width of the display area for the cards and the position where the cards will start being drawn. When there are more than five cards in view, the list of cards will show up in the full 220 pixels of space. Otherwise, the cards will be displayed in a smaller area, so that when two or three cards are available, they appear closer together instead of spaced really far apart. A spacing variable is also initialized. This variable indicates how much space (in pixels) exists between each of the cards, given the area they are confined to when distributed evenly across that area. If the cards end up overlapping, spacing will be negative. This code sets up those variables.
int width;

int startPosition;


if (Player.Cards.Count > 5)

{

    width = MAX_WIDTH;

    startPosition = 10;

}


else

{

    width = 150;

    startPosition = 45;

}


float spacing = (float)(width - (CARD_WIDTH * Player.Cards.Count)) /
    (Player.Cards.Count - 1);
Next, we set up four temporary variables. These store data needed for drawing each card: the depth to draw at, the destination vector (or point), the card to draw, and the tint color for the card (which will be gray if the card cannot be played).
float depth = 0.0f;

Vector2 destination = new Vector2();

Card card;

Color tintColor;
Now, we loop through all of the cards and draw them. The destination vector starts off with a Y component of 200, which is modified if the selected card is animating. The X component of this vector (startPosition) is added to as the loop proceeds. The tint color for the card is determined by whether the card can be played. If it's the current player's turn, the selected card is animated and drawn at the highest depth of 1.0f. Otherwise, all the cards are drawn with increasing depth values. The start position is then incremented by the spacing value times the card width. Draw calls with a depth value closer to 1.0f are drawn at the top, and those with depth values closer to 0 are drawn nearer the back. To accomplish the depth effect, we use the SharedSpriteBatch's Draw method that allows us to specify the sort mode, to which we supply FrontToBack.
for (int i = 0; i < Player.Cards.Count; i++)

{

    card = Player.Cards[i];

    destination.X = startPosition;

    destination.Y = 200;


    tintColor = CrazyEightsGameManager.CanPlayCard(card) ? Color.White :

Color.Gray;


    if (i == selectedIndex && Player.IsMyTurn)

    {

        destination.Y = 200 - animateDistance;


        SharedSpriteBatch.Instance.Draw(SpriteSortMode.FrontToBack,

deckTexture,

            destination, GetSourceRect(card), tintColor, 0.0f, Vector2.Zero,

1.0f,

            SpriteEffects.None, 1.0f);

    }

    else


    {

        depth += 0.001f;


        SharedSpriteBatch.Instance.Draw(SpriteSortMode.FrontToBack,

deckTexture,

            destination, GetSourceRect(card), tintColor, 0.0f, Vector2.Zero,

1.0f,

            SpriteEffects.None, depth);

    }


    startPosition += CARD_WIDTH + (int)spacing;

}
We can then close the top-level if statement in which this for loop sits.
Regardless of whether we have a player assigned to this component yet, it should still draw the current play card, suit overlay (if any), and the status text. The current play card (or the card to be played against) is determined from the Crazy Eights game manager component as a static property, as are the SuitChanged and ActiveSuit properties. We'll implement those in the next section. The final blocks of code draw those three common components on the screen.
// Draw the discarded card

if (CrazyEightsGameManager.CurrentPlayCard != null)

{

    SharedSpriteBatch.Instance.Draw(deckTexture, currentCardPosition,

        GetSourceRect(CrazyEightsGameManager.CurrentPlayCard), Color.White,

        0.0f, Vector2.Zero, 1.0f, SpriteEffects.None, 1.0f);

}


// Draw the overlay if the suit has changed

if (CrazyEightsGameManager.SuitChanged)

{

    switch (CrazyEightsGameManager.ActiveSuit)

    {

        case Suit.Clubs:

            SharedSpriteBatch.Instance.Draw(

                clubTex, Vector2.Zero, overlayTintColor);

            break;

        case Suit.Diamonds:

            SharedSpriteBatch.Instance.Draw(

                diamondTex, Vector2.Zero, overlayTintColor);

            break;

        case Suit.Hearts:

            SharedSpriteBatch.Instance.Draw(

                heartTex, Vector2.Zero, overlayTintColor);

            break;

        case Suit.Spades:

            SharedSpriteBatch.Instance.Draw(


                spadeTex, Vector2.Zero, overlayTintColor);

            break;

    }

}


// Draw the status text, if any

SharedSpriteBatch.Instance.DrawString(ScreenManager.SmallFont,

    statusText, statusTextPosition, Color.White, 0.0f, statusTextOrigin, 1.0f,

    SpriteEffects.None, 0f);


base.Draw(gameTime);
That concludes the (rather hairy!) Draw method. Don't forget to check your curly braces!
Thankfully, this also concludes the player view component code. We have only a few things left to cover! One is the Crazy Eights game manager component, which you have heard a lot about. The time has come to finally implement this class and see what all the fuss is about.
Creating the Crazy Eights Game Manager Component
The LogicComponent class is responsible for handling all the rules and sending all the network messages for the Crazy Eights game. It abstracts away all of the game logic, so that the game play screen can just focus on being a screen. I'm not necessarily happy with the need to have some properties exposed as static, but for now, that's acceptable—it just works!
This component exists to run background logic only; it doesn't draw or load any kind of content. It's the engine behind our game; the glue in the woodwork; the ... well, you get the picture.
- In the
CrazyEights project, add a new class called CrazyEightsGameManager.cs. Stub it out as shown:
using System;

using System.Collections.Generic;

using Microsoft.Xna.Framework.Net;

using GameStateManager;

using CardLib;


namespace CrazyEights

{

    public class CrazyEightsGameManager : LogicComponent

    {


    }

}
- Add the following fields to the class in a region marked
Fields. Some are marked static because other components and classes need to access these values. For example, there can only be one current card and active suit. This class also manages the deck, list of players, and so on. Some of these fields are only populated on the host side, however.
#region Fields


public CrazyEightsPlayer Me

{

    get;

    private set;

}


public Deck Deck

{

    get;

    private set;

}


public int TurnIndex

{

    get;

    private set;

}


public static Card CurrentPlayCard

{

    get;

    private set;

}


public List<CrazyEightsPlayer> Players

{

    get;

    private set;

}


public static bool SuitChanged

{

    get;

    private set;

}


// This field is marked private

private static Suit chosenSuit;


public static Suit ActiveSuit

{

    get

    {

        if (SuitChanged)

            return chosenSuit;

        else

            return CurrentPlayCard.Suit;

    }

}


#endregion
- This engine also makes extensive use of events to notify other game elements when certain things happen. Specifically, there are events for when all players have joined, all cards have been dealt, players cards need to be updated, and when the game is won. Add a region for
Events and Delegates and add this code:
#region Events and Delegates


public delegate void AllPlayersJoinedHandler();

public delegate void AllCardsDealtHandler();

public delegate void CardsUpdatedHandler();

public delegate void GameWonHandler(string playerName);


public event AllPlayersJoinedHandler AllPlayersJoined;

public event AllCardsDealtHandler AllCardsDealt;

public event CardsUpdatedHandler CardsUpdated;

public event GameWonHandler GameWon;


#endregion
- Add a region for the constructor, which initializes these values and sets the current turn to a dummy index of
−1.
#region Constructor(s)


public CrazyEightsGameManager(ScreenManager screenManager)

    : base(screenManager)

{

    Players = new List<CrazyEightsPlayer>();

    Deck = new Deck();

    TurnIndex = −1;

}


#endregion
- Add a region called
LogicComponent Overrides and add the Initialize method. This initializes the NetworkMessenger with the current ScreenManager (remember that we must initialize that class) and resets/shuffles the deck (which matters only on the host, as the deck is not used on the peers).
#region LogicComponent Overrides


public override void Initialize()

{

    NetworkMessenger.Initialize(ScreenManager);


    Deck.ResetDeck();

    Deck.Shuffle();

}


#endregion
- Add a region called
Public Static Methods. This contains the CanPlayCard method, which returns a Boolean value indicating whether the specified card is valid against the current play card. According to the rules, you can play a card if it matches the suit or value, or if it is an eight.
#region Public Static Methods


public static bool CanPlayCard(Card chosenCard)

{

    if (CurrentPlayCard == null)

        return false;


    if (chosenCard.Suit == ActiveSuit)

        return true;

    if (chosenCard.CardValue.Value == CurrentPlayCard.CardValue.Value)

        return true;

    if (chosenCard.CardValue.Value == 8)

        return true;


    return false;

}


#endregion
- Add a
Private Methods region and a private method to advance the current turn:
#region Private Methods


private void AdvanceTurn()

{

    TurnIndex++;


    // This will reset TurnIndex to zero when the turn

    // is equal to Players.Count and needs to reset.

    TurnIndex = TurnIndex % Players.Count;


    NetworkMessenger.Host_SetTurn(TurnIndex);

}


#endregion
- Add a region called
Public Methods. We will add two methods here. One will retrieve a player object by name, and the other will discard a specified card and set the current play card.
#region Public Methods


public CrazyEightsPlayer GetPlayerByName(string name)

{

    foreach (CrazyEightsPlayer player in Players)

    {

        if (player.Name == name)

            return player;

    }


    throw new Exception("Player '" + name + "' not found.");

}


public void Discard(Card card)

{

    Deck.Discard(card);

    CurrentPlayCard = Deck.DiscardedCards[Deck.DiscardedCards.Count - 1];

}


#endregion
- Create a region called
Host-side Networking Methods. These methods are responsible for initiating a message from the host (or receiving data when the host is the intended recipient). The networking methods utilize the static methods we wrote in the NetworkMessenger class. In the Host_NewRound method, we load all the players, deal all their cards, discard the first play card, and send the "Ready to Play" message. The Host_SendPlayers method is used to send out player data. The Host_CardRequested method is used to respond to a player asking for a card to be dealt.
#region Host-side Networking Methods


public void Host_NewRound()

{

    Deck.ResetDeck();

    Deck.Shuffle();


    foreach (CrazyEightsPlayer player in Players)

    {

        for (int i = 0; i < 8; i++)

        {

            NetworkMessenger.Host_DealCard(Deck.Deal(), player);

        }

    }


    NetworkMessenger.Host_Discard(Deck.Deal());

    NetworkMessenger.Host_ReadyToPlay();


    AdvanceTurn();

}


public void Host_SendPlayers()

{

    foreach (NetworkGamer gamer in ScreenManager.Network.Session.AllGamers)

    {

        NetworkMessenger.Host_SendPlayer(gamer);

    }

}


public void Host_CardRequested(string playerName)

{

    Card dealtCard = Deck.Deal();

    NetworkMessenger.Host_DealCard(dealtCard, GetPlayerByName(playerName));

}


#endregion
- Add a
Peer Networking Methods region. This is for methods that any peer can invoke:
PlayCard, RequestCard, and ChooseSuit.
#region Peer Networking Methods


public void PlayCard(Card card)

{

    Me.Cards.Remove(card);

    if (Me.Cards.Count <= 0)

        NetworkMessenger.GameWon(Me.Name);

    else

        NetworkMessenger.PlayCard(card);

}


public void RequestCard()

{

    NetworkMessenger.RequestCard(Me);

}


public void ChooseSuit(Suit suit)

{

    NetworkMessenger.SendChosenSuit(suit);

}


#endregion
- Finally, add a region called
Receive Data, with a similarly named method. This method contains a big switch statement that checks for all of the available network messages. Remember that both the host and the peers will receive the same data they send, but this block of code is where you determine how to process the received messages. Let's start off by stubbing out this region and method:
#region Receive Data


public void ReceiveNetworkData()

{


}


#endregion
We are now working within the ReceiveNetworkData method. Add two string variables. The player name and serialized card value are used frequently, so we just moved them up here.
int card = −1;

string name = "";
Now we begin the "big read." This is a loop that checks for available data, then pops off the message type and decides what to do with it. Remember that we always send the network message type first, followed by the actual data. Also remember that every network message has a type, and that type is always sent first, so it is safe to pop that off before entering the switch statement.
foreach (LocalNetworkGamer gamer in ScreenManager.Network.Session.LocalGamers)

{

    while (gamer.IsDataAvailable)

    {

        NetworkGamer sender;

        gamer.ReceiveData(ScreenManager.Network.PacketReader, out sender);


        // Interpret the message type

        NetworkMessageType message =

            (NetworkMessageType)ScreenManager.Network.PacketReader.ReadByte();


        switch (message)

        {

            // Implementation following...


        }

    }

}
We are now working within the switch statement, where we determine what to do with received data. All of these cases should go in place of the // Implementation following... comment. I will describe what happens (in a declarative style) in each of these situations, case by case, so that you can see how we finally wrap around to the game logic. The first case occurs when the host deals someone a card. "If I am the intended recipient, I will add this card to my list and declare that my cards have changed."
case NetworkMessageType.HostDealCard:

    name = ScreenManager.Network.PacketReader.ReadString();

    card = ScreenManager.Network.PacketReader.ReadInt32();


    CrazyEightsPlayer player = GetPlayerByName(name);

    if (player.Equals(Me) || Me.IsHost)

    {

        player.DealCard(new Card(card));

        if (CardsUpdated != null)

            CardsUpdated();

    }

    break;
Next, "If the host says it has dealt all the cards, I will notify my components that play may begin by firing the appropriate event."
case NetworkMessageType.HostAllCardsDealt:

    if (AllCardsDealt != null)

        AllCardsDealt();

    break;
"When the host discards the initial card, I will make note of it and notify my components that cards have changed."
case NetworkMessageType.HostDiscard:

    card = ScreenManager.Network.PacketReader.ReadInt32();

    Discard(new Card(card));


    if (CardsUpdated != null)

        CardsUpdated();


    break;
"When the host sets the turn, I will set my turn flag accordingly (true if it is my turn; false otherwise). I will then update the cards."
case NetworkMessageType.HostSetTurn:

    int turn = ScreenManager.Network.PacketReader.ReadInt32();

    TurnIndex = turn;


    if (Players[turn].Equals(Me))

    {

        Me.IsMyTurn = true;

    }

    else

        Me.IsMyTurn = false;


    if (CardsUpdated != null)

        CardsUpdated();


    break;
"When the host sends player data, I will copy that player to my list. If that player is me, I will make note of which one is me. If the host has sent all the players, I will fire the appropriate event."
case NetworkMessageType.HostSendPlayer:

    name = ScreenManager.Network.PacketReader.ReadString();

    bool isHost = ScreenManager.Network.PacketReader.ReadBoolean();


    CrazyEightsPlayer newPlayer = new CrazyEightsPlayer(name, isHost);

    Players.Add(newPlayer);

    if (newPlayer.Name == ScreenManager.Network.Me.Gamertag)

    {

        this.Me = newPlayer;

    }


    if (Players.Count == ScreenManager.Network.Session.AllGamers.Count)

    {

        if (AllPlayersJoined != null)

            AllPlayersJoined();

    }

    break;
"When someone plays a card, I will make note of the card played (and whether it was an eight). If I am the host, I will discard this card into my deck, and then I will advance the turn."
case NetworkMessageType.PlayCard:

    card = ScreenManager.Network.PacketReader.ReadInt32();


    CurrentPlayCard = new Card(card);

    if (CurrentPlayCard.CardValue.Value != 8)

        SuitChanged = false;


    if (CardsUpdated != null)

        CardsUpdated();


    if (Me.IsHost)


    {

        Deck.Discard(CurrentPlayCard);

    }


    AdvanceTurn();


    break;
"If I am the host and someone requests a card, I will deal that player a new card."
case NetworkMessageType.RequestCard:

    name = ScreenManager.Network.PacketReader.ReadString();

    if (Me.IsHost)

        Host_CardRequested(name);

    break;
"If someone has chosen a suit after playing an eight, I will set the current suit to the one chosen."
case NetworkMessageType.SuitChosen:

    Suit suit = (Suit)ScreenManager.Network.PacketReader.ReadByte();

    SuitChanged = true;

    chosenSuit = suit;

    if (CardsUpdated != null)

        CardsUpdated();

    break;
"If someone has won the game, I will fire the appropriate event, so my screen knows to move to the game over screen."
case NetworkMessageType.GameWon:

    name = ScreenManager.Network.PacketReader.ReadString();

    if (GameWon != null)

        GameWon(name);

    break;
That concludes the method that receives network messages. You can see how each case responds differently. Some cases will process the sent data only if the machine running this code is the host. Others will be processed regardless of who the player is.
Now, we have all of the central components built and ready to go. We have three remaining pieces, and they are all super easy (they are short screens!). Let's start by building the suit selection screen, a simple menu that allows you to select a suit.
Creating the Suit Selection Menu
This suit select screen (shown earlier in Figure 7-11) is responsible for displaying a menu with four choices: Clubs, Diamonds, Hearts, and Spades. When the user clicks a menu item, an event is fired that indicates which suit was chosen via the event arguments.
- Right-click the
Screens folder in the CrazyEights game project and add a new class called SuitSelectionMenu.cs. This class will also contain a new kind of event argument, which exposes a value of type Suit. We'll start off the stub with this event argument type included:
using System;

using Microsoft.Xna.Framework;

using Microsoft.Xna.Framework.Graphics;


using CardLib;

using GameStateManager;


namespace CrazyEights

{

    public class SuitSelectionEventArgs : EventArgs

    {

        public Suit Suit

        {

            get;

            private set;

        }


        public SuitSelectionEventArgs(Suit suit)

            : base()

        {

            Suit = suit;

        }

    }


    public class SuitSelectionMenu : BaseMenuScreen

    {

        // Implementation to follow...

    }

}
- In the
SuitSelectionMenu class, add a Fields and Events region with the following fields and events:
#region Fields and Events


MenuEntry clubsEntry;

MenuEntry diamondsEntry;

MenuEntry heartsEntry;

MenuEntry spadesEntry;


Texture2D menuBackground;


public delegate void SuitSelectedHandler(SuitSelectionEventArgs e);

public event SuitSelectedHandler SuitSelected;


#endregion
- Add the constructor, which sets the title:
#region Constructor(s)


public SuitSelectionMenu()

    : base("Select Suit")

{


}


#endregion
- Right-click the
Content/Textures/Screens folder and choose Add Existing Item. Add the file Examples/Chapter 7/Artwork/suitSelectBackground.png.
- Add a region called
Overrides. Override the LoadContent method, which loads the background for the screen.
public override void LoadContent()

{

    menuBackground = ScreenManager.Content.Load<Texture2D>(

        "Textures/Screens/suitSelectBackground");

    base.LoadContent();

}
- Override the
Initialize method, which creates menu items and wires up the appropriate event handlers. We will add the event handlers in step 8.
public override void Initialize()

{

    MenuEntries.Clear();


    clubsEntry = new MenuEntry("Clubs", ScreenManager.LargeFont);

    diamondsEntry = new MenuEntry("Diamonds", ScreenManager.LargeFont);

    heartsEntry = new MenuEntry("Hearts", ScreenManager.LargeFont);

    spadesEntry = new MenuEntry("Spades", ScreenManager.LargeFont);


    clubsEntry.Selected += new EventHandler<EventArgs>(ClubsSelected);

    diamondsEntry.Selected += new EventHandler<EventArgs>(DiamondsSelected);

    heartsEntry.Selected += new EventHandler<EventArgs>(HeartsSelected);

    spadesEntry.Selected += new EventHandler<EventArgs>(SpadesSelected);


    MenuEntries.Add(clubsEntry);

    MenuEntries.Add(diamondsEntry);

    MenuEntries.Add(heartsEntry);

    MenuEntries.Add(spadesEntry);


    base.Initialize();

}
- Override the
Draw method and draw the background texture using the shared sprite batch.
public override void Draw(GameTime gameTime)

{

    SharedSpriteBatch.Instance.Draw(menuBackground, Vector2.Zero, Color.

White);

    base.Draw(gameTime);

}
- Finally, add a region for
Event Handlers and add the four special event handlers to the region. These event handlers instantiate new SuitSelectionEventArgs objects with the chosen suit. This way, subscribers will know which suit was selected.
#region Event Handlers


void ClubsSelected(object sender, EventArgs e)

{

    if (SuitSelected != null)

        SuitSelected(new SuitSelectionEventArgs(Suit.Clubs));

}


void DiamondsSelected(object sender, EventArgs e)

{

    if (SuitSelected != null)

        SuitSelected(new SuitSelectionEventArgs(Suit.Diamonds));

}


void HeartsSelected(object sender, EventArgs e)

{

    if (SuitSelected != null)

        SuitSelected(new SuitSelectionEventArgs(Suit.Hearts));

}


void SpadesSelected(object sender, EventArgs e)

{

    if (SuitSelected != null)

        SuitSelected(new SuitSelectionEventArgs(Suit.Spades));

}


#endregion
Ah, what a breath of fresh air it is to see a screen that's not very complex. Even with all the events, this screen is still very compact. The game over screen is even simpler. Both of these screens are used directly by the playing screen, which we will finalize after building the game over screen.
Building the Game Over Screen
The game over screen (shown earlier in Figure 7-13) is arguably the simplest in the entire game. It takes in the name of the winner, draws a background, and displays a message. When the user clicks the middle button, the game ends.
- Right-click the
CrazyEights/Screens folder and add a new class called GameOverScreen.cs. Stub it out as shown:
using Microsoft.Xna.Framework;

using Microsoft.Xna.Framework.Graphics;

using Microsoft.Xna.Framework.Audio;


using GameStateManager;


namespace CrazyEights

{

    public class GameOverScreen : BaseScreen

    {

        // Implementation to follow...

    }

}
- Add the screen background texture to the
Content/Textures/Screens folder. This is the file Examples/Chapter 7/Artwork/gameOverScreen.png.
- Load the two sound effects. Right-click the
Content/Sounds folder and choose Add Existing Item. Add the Lose.wav and Win.wav files from Examples/Chapter 7/SoundFX.
- Add the following private fields to the
GameOverScreen class:
#region Private Fields


// Text

private string text;

private Vector2 textOrigin, textPosition;


// Content

private Texture2D backgroundTex;

private SoundEffect sound;


// Flag

private bool isWinner;


#endregion
- Add the constructor, which sets the text displayed.
#region Constructor(s)


public GameOverScreen(string winnerName, string myName)

    : base()


{

    if (winnerName == myName)

    {

        isWinner = true;

        text = "You won!
";

    }

    else

    {

        isWinner = false;

        text = "You lost.
";

    }


    text += winnerName + " wins!";

}


#endregion
- Add a region called
BaseScreen Overrides. Override Draw (which draws the background and the status text) and HandleInput (which quits the game on a middle button press).
public override void Draw(GameTime gameTime)

{

    SharedSpriteBatch.Instance.Draw(backgroundTex, Vector2.Zero, Color.White);

    SharedSpriteBatch.Instance.DrawString(ScreenManager.SmallFont, text,

        textPosition, Color.White, 0.0f, textOrigin, 1.0f,

        SpriteEffects.None, 0.0f);

    base.Draw(gameTime);

}


public override void HandleInput(InputState input)

{

    if (input.MiddleButtonPressed)

        ScreenManager.Game.Exit();

}
- Finally, override
LoadContent, which loads the background texture and the appropriate sound (the lose or win sound). When the sound is loaded, it is played immediately.
public override void LoadContent()

{

    backgroundTex = ScreenManager.Content.Load<Texture2D>(

        "Textures/Screens/gameOverScreen");


    textPosition = new Vector2(120, 160);

    textOrigin = ScreenManager.SmallFont.MeasureString(text) / 2;


    if (isWinner)

        sound = ScreenManager.Content.Load<SoundEffect>("Sounds/Win");


    else

        sound = ScreenManager.Content.Load<SoundEffect>("Sounds/Lose");


    sound.Play();


    base.LoadContent();

}
That concludes the game over screen. The last main chunk of work we have to do is to complete the playing screen.
Wrapping Up the Playing Screen
The playing screen, PlayingScreen.cs, will bring together the game manager and the player view components to handle messaging between the two, and will respond to events that cause the game to change states.
- Open
PlayingScreen.cs, which we created earlier. It should look like this:
using Microsoft.Xna.Framework;

using GameStateManager;

using CardLib;


namespace CrazyEights

{

    public class PlayingScreen : BaseScreen

    {

        private bool isHost;


        public PlayingScreen(bool host)

        {

            isHost = host;

        }

    }

}
We will continue without having to remove any of this code.
- Add the following three private fields to the
PlayingScreen class (two components and one screen):
PlayerViewComponent playerView;

CrazyEightsGameManager gameManager;

SuitSelectionMenu suitMenu;
- Create a region called
BaseScreen Overrides. Here, we will start with the Initialize method. This method creates and adds the components, wires up event handlers, and starts the game if this is the host. It also listens for suits to be selected when appropriate.
#region BaseScreen Overrides


public override void Initialize()

{

    playerView = new PlayerViewComponent(ScreenManager);

    gameManager = new CrazyEightsGameManager(ScreenManager);

    Components.Add(gameManager);

    Components.Add(playerView);


    suitMenu = new SuitSelectionMenu();

    suitMenu.SuitSelected +=

        new SuitSelectionMenu.SuitSelectedHandler(SuitSelected);


    base.Initialize();


    gameManager.AllPlayersJoined +=

        new CrazyEightsGameManager.AllPlayersJoinedHandler(AllPlayersJoined);

    gameManager.AllCardsDealt +=

        new CrazyEightsGameManager.AllCardsDealtHandler(AllCardsDealt);

    gameManager.CardsUpdated +=

        new CrazyEightsGameManager.CardsUpdatedHandler(CardsUpdated);

    gameManager.GameWon +=

        new CrazyEightsGameManager.GameWonHandler(GameWon);


    if (isHost)

    {

        gameManager.Host_SendPlayers();

    }

}


#endregion
- Override the
HandleInput method. Left and Right will cycle through the player's cards if the player has a move. Back will remove the screen and return to the main menu. The middle button is multipurpose. If it's your turn, pressing the middle button will play the selected card (or draw cards until one is playable). If the card you played is an eight, it will allow you to select a suit.
public override void HandleInput(InputState input)

{

    if (input.NewRightPress)

    {

        if (playerView.HasMove)

            playerView.SelectNextCard();

    }


    if (input.NewLeftPress)

    {


        if (playerView.HasMove)

            playerView.SelectPreviousCard();

    }


    if (input.NewBackPress)

    {

        if (ScreenManager.Network.Session != null)

            ScreenManager.RemoveScreen(this);

    }


    if (input.MiddleButtonPressed && gameManager.Me.IsMyTurn)

    {

        if (playerView.HasMove)

        {

            Card selected = playerView.SelectedCard;

            if (selected.CardValue.Value == 8)

            {

                ScreenManager.AddScreen(suitMenu);

            }

            else

                gameManager.PlayCard(selected);

        }

        else

        {

            gameManager.RequestCard();

        }

    }


    base.HandleInput(input);

}
- Override the
Update method, which causes the game manager to receive network data.
public override void Update(GameTime gameTime, bool otherScreenHasFocus,

    bool coveredByOtherScreen)

{

    gameManager.ReceiveNetworkData();

    base.Update(gameTime, otherScreenHasFocus, coveredByOtherScreen);

}
- Finally, add all of the event handler methods, which respond to events on the game manager and suit-selection menu objects:
#region Event Handlers


void GameWon(string playerName)

{

    ScreenManager.RemoveScreen(this);


    ScreenManager.AddScreen(new GameOverScreen(playerName,

gameManager.Me.Name));

}


void CardsUpdated()

{

    playerView.SelectFirstPlayableCard();

}


void AllCardsDealt()

{

    playerView.SelectFirstPlayableCard();

}


void AllPlayersJoined()

{

    playerView.Player = gameManager.Me;


    if (isHost)

    {

        gameManager.Host_NewRound();

    }

}


void SuitSelected(SuitSelectionEventArgs e)

{

    gameManager.ChooseSuit(e.Suit);

    ScreenManager.RemoveScreen(suitMenu);


    gameManager.PlayCard(playerView.SelectedCard);

}


#endregion
Notice that we are not actually drawing anything in this screen. That's because the player view component is already drawing everything automatically by virtue of being added to this screen. Another way to architect this would have been to have everything in the player view component exist in the playing screen instead. However, the player view component started as a way to display the cards in that stacked order, and it simply became easier to include all of the drawing in that component.
We have but one file left to modify, and then we will be finished!
Coding the Entry Point (Game.cs)
Now, we just need to make some modifications to the main game class. We are working with generated code here, so read carefully.
- If you haven't already done so, rename the default
Game.cs to CrazyEightsGame.cs.
- Add the appropriate
using directives:
using System;

using Microsoft.Xna.Framework;

using Microsoft.Xna.Framework.Graphics;


using CardLib;

using GameStateManager;
- The only two fields you need on this class are the graphics device and the screen manager (you can remove the default sprite batch that is created for you):
public class CrazyEightsGame : Microsoft.Xna.Framework.Game

{

    GraphicsDeviceManager graphics;

    ScreenManager screenManager;

    // ... rest of class below ...

}
You can delete the entire Initialize, Update, and UnloadContent methods. We don't need them with all of the work our screen manager component does for us.
- In the constructor, along with the generated code, create a new screen manager component, add it to the components collection, and add a main menu screen to it.
public CrazyEightsGame()

{

    graphics = new GraphicsDeviceManager(this);

    Content.RootDirectory = "Content";


    // Frame rate is 30 fps by default for Zune.

    TargetElapsedTime = TimeSpan.FromSeconds(1 / 30.0);


    screenManager = new ScreenManager(this);

    Components.Add(screenManager);


    // Start the game with the main menu screen.

    screenManager.AddScreen(new MainMenuScreen());

}
- All you need in
LoadContent is the initialization of the shared sprite batch object:
protected override void LoadContent()

{

    SharedSpriteBatch.Instance.Initialize(this);

}
- All you need in the
Draw method is the graphics device clear, the call to draw all components, and the explicit End for the shared sprite batch:
protected override void Draw(GameTime gameTime)

{

    GraphicsDevice.Clear(Color.DarkGreen);

    base.Draw(gameTime);

    SharedSpriteBatch.Instance.End();

}
It's Play Time!
The game is complete. Remember that if you can't get your version of the game to work, you can find the working version in the Examples/Chapter 7/CrazyEights folder.
Ensure both Zunes have wireless enabled, and deploy without debugging to both of them. On one Zune, create a new game. On the other Zune, choose Join Game and join the available session. Indicate you are ready by pressing the middle button. On the host Zune, press the middle button to start the game. Game play will begin, and the first person to run out of cards is the winner.


Summary
This book has taken you on a journey from the most basic XNA fundamentals to the more advanced concepts involved in creating a fully networked Zune game. You have learned about the media player, visualizers, landscape mode, and Zune pad input. You have learned good architecture techniques, such as sprite batch sharing and optimizing network usage.
Most of these concepts come into play regardless of the type of game you want to write. Moreover, the techniques and principles you learned in this book can be quickly applied to other XNA-capable platforms, such as the PC and Xbox 360.
A whole world of game development awaits you. Be sure to check out the samples at the Creators Club web site, http://creators.xna.com, to expand your knowledge even further. Please see the appendices for further reading and a quick reference for Zune development.