4. Working with Calendars and Reminders
One of the best—and incredibly useful—features of iCloud is its ability to keep your calendar events and reminders in the cloud, automatically synchronizing them among all your devices. Imagine you’ve just finished an appointment at the dentist, and the receptionist asks to set up your next date. Whipping out your iPhone, you enter the next appointment into the Calendar app, and in a moment, that appointment appears on the rest of your devices.
Similarly, iCloud can create synchronized reminders for things you need to do. With the iOS 5 Reminders app, you can even set a reminder to appear only when you arrive at a particular geographical location.
But probably the most useful feature of iCloud calendaring is that you can share your calendars with family, friends, and colleagues. So when your daughter adds her soccer practice to the family shared calendar, it appears on the rest of the family’s schedule as well.
Setting up Calendars
You begin with calendars in iCloud by creating them, either in iCal or in the iOS Calendar app. You can also create calendars on the iCloud website ![]() , which I’ll discuss later in this chapter.
, which I’ll discuss later in this chapter.
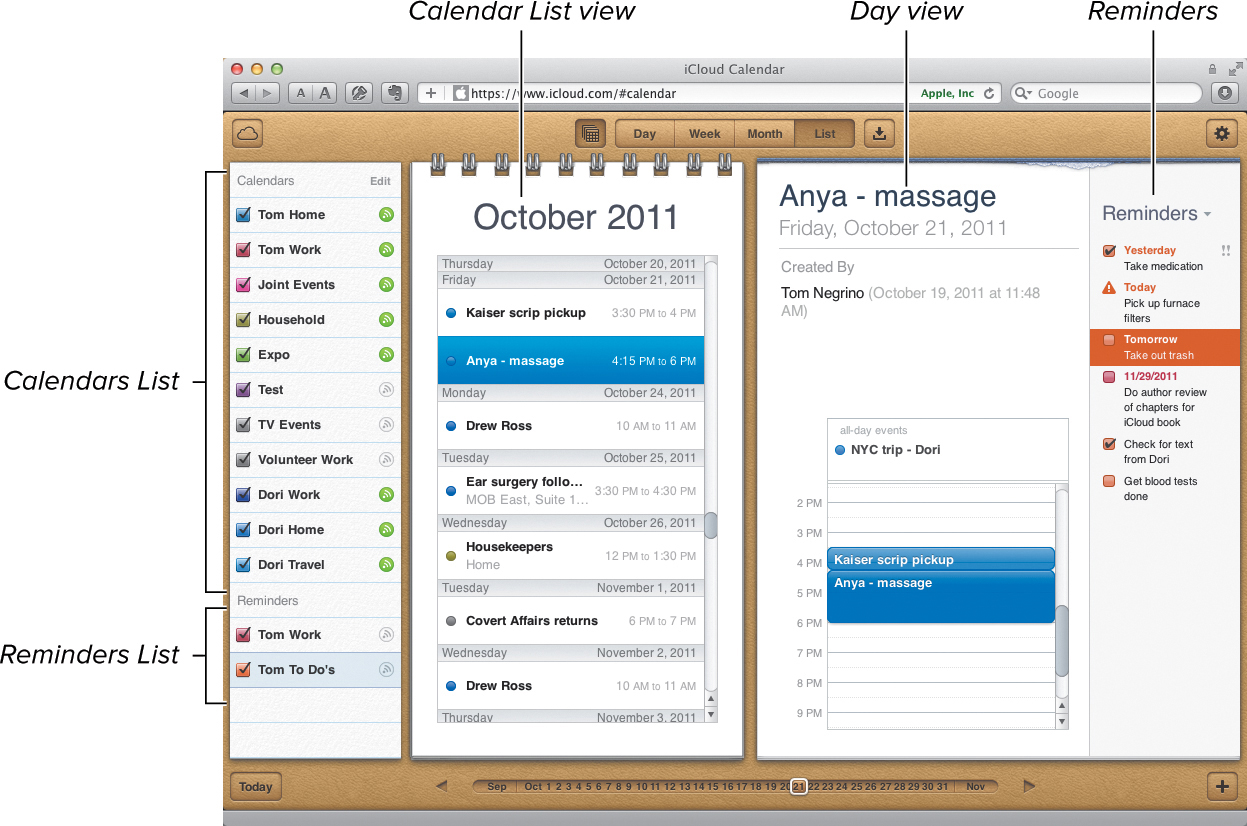
![]() The Calendar application on the iCloud website has a variety of calendar views.
The Calendar application on the iCloud website has a variety of calendar views.
There’s one important concept to get when you start managing your schedule and to-dos with iCloud. There are two kinds of items that iCloud deals with:
• Events are items that appear in the body of your calendar views. They will appear in the Day, Week, Month, and List views. They always have dates and times associated with them (though sometimes the associated time is “all-day”).
• Reminders are to-do items. They work differently than they did with MobileMe, in that Reminders “calendars” now appear in a separate Reminders section in the Calendar List in iCal and the iCloud website (as such, a group of reminders is now properly called a Reminder List, not a Calendar) and you work with them in the iOS Reminders app, rather than with the Calendar app. Reminders don’t appear in the calendar views; you have to show the Reminders pane in iCal and the iCloud website to see them. Reminders may have a date and time associated with them, but don’t have to. Unlike Events, you can also set a Priority (None, Low, Medium, High) for a Reminder. Using a feature called “geofencing,” they can also be set to trigger on your iOS device when the device is physically near a location, using your device’s GPS and Location Services. Even cooler, geofencing can be set to trigger the reminder when you arrive at or leave a particular location. So that’s how the Siri personal assistant built into the iPhone 4S and later can deal with commands like “Text my wife when I leave the office.”
In this book, I’m focusing on iCloud, rather than working with iCal or the iOS Calendar app, so I’ll deal mostly with working with events on the iCloud website, rather than in the Mac or iOS programs. However, because Reminders are so intimately connected with iCloud, I’ll be going into detail with the iOS Reminders app in the “Working with Reminders on Your iOS Device” section, later in this chapter.
1. Launch iCal ![]() .
.
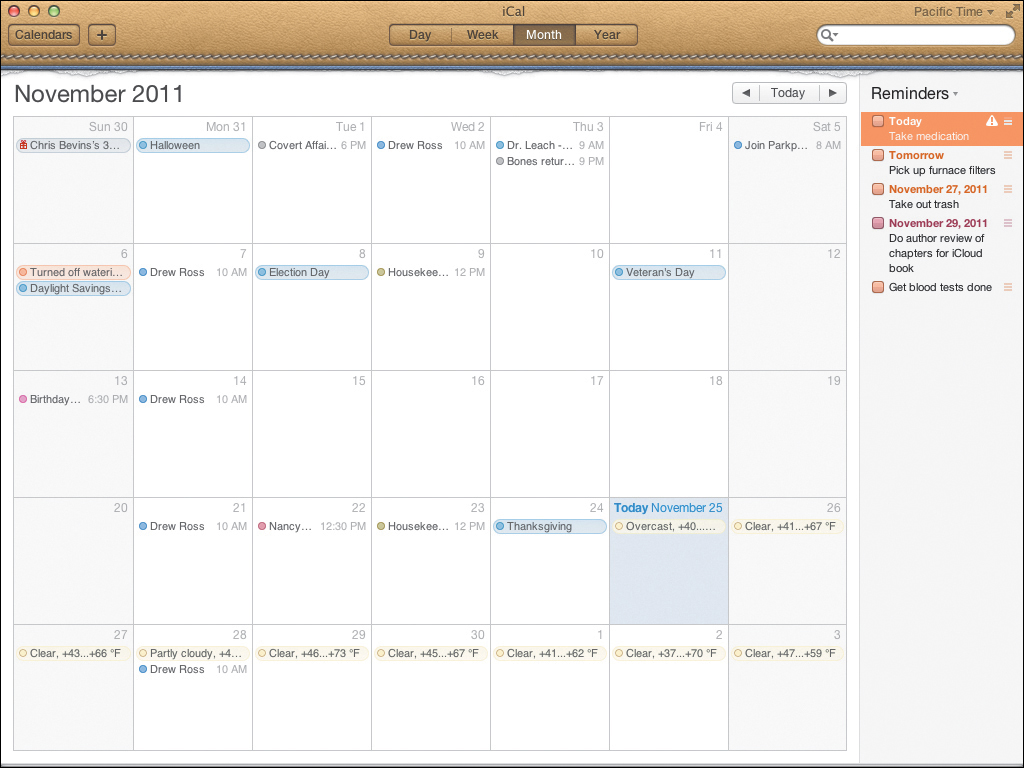
![]() On the Mac, iCal for Mac OS X Lion has a faux-leather look that people either love or hate.
On the Mac, iCal for Mac OS X Lion has a faux-leather look that people either love or hate.
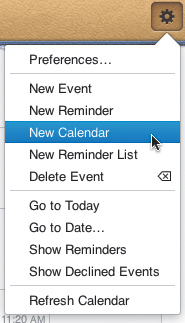
2. Choose File > New Calendar > then either iCloud or On My Mac ![]() .
.

![]() Choose where you want to create your new calendar.
Choose where you want to create your new calendar.
Choosing iCloud will place the calendar on iCloud, where it can be shared by your other devices and by other people. If the calendar is on your Mac, it will be private and will only exist on the Mac where you created the calendar.
3. The Calendars popover appears, allowing you to name the new calendar ![]() . Enter the name, then click anywhere else to save it.
. Enter the name, then click anywhere else to save it.
![]() Name the new calendar in the Calendars popover.
Name the new calendar in the Calendars popover.
To create a calendar on an iOS device
1. On your iPhone or iPad, start the Calendar app.
2. Tap the Calendars button.
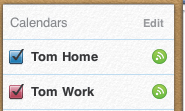
The Calendars (iPhone) or Show Calendars (iPad) popover appears ![]() .
.
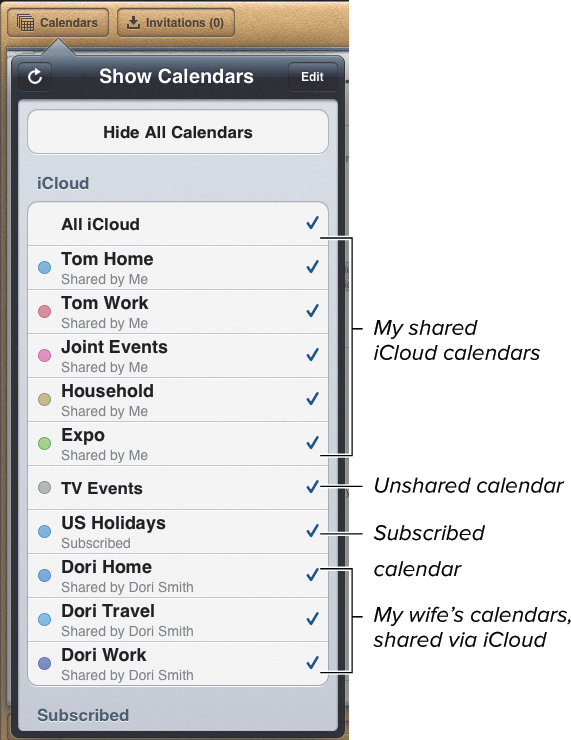
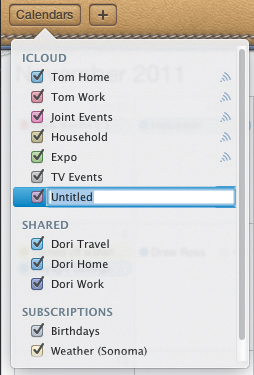
![]() On the iPad, the Show Calendars popover tells you the status of all your iCloud calendars.
On the iPad, the Show Calendars popover tells you the status of all your iCloud calendars.
3. Tap the Edit button.
The screen name changes to Edit Calendars.
4. At the bottom of the iCloud section, tap Add Calendar.
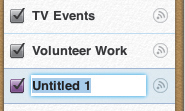
5. In the resulting Add Calendar popover ![]() , delete the name Untitled Calendar, then type the name you want for the new calendar.
, delete the name Untitled Calendar, then type the name you want for the new calendar.
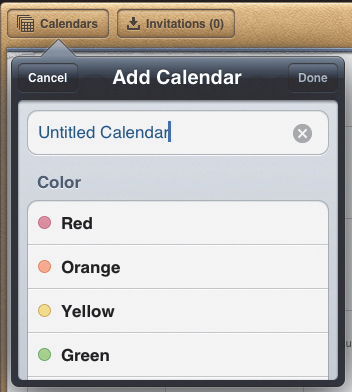
![]() Type the name you want for your new calendar.
Type the name you want for your new calendar.
6. Tap next to the color you want the calendar events to appear as.
You may be able to see additional colors by scrolling.
7. Tap Done.
The popover will go back to the Edit Calendars screen, and the new calendar you created appears in the list.
8. Tap Done.
1. In iCal, click the Calendars button at the upper left corner of the window.
The Calendars popover appears.
2. Right-click the calendar you want to change, and choose Get Info.
The info dialog appears for that calendar ![]() .
.
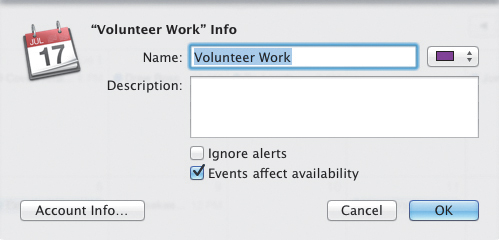
![]() In iCal on the Mac, each calendar has an info dialog.
In iCal on the Mac, each calendar has an info dialog.
3. Do one or more of the following:
• Change the name of the calendar.
• From the color pop-up menu next to the Name field, choose the color in which you want the calendar’s events to appear. One difference in iCal versus the Calendar app on iOS is that one of the color choices is Other, which when chosen brings up a color picker that allows you to choose any color you want, rather than a preset color.
4. Click OK.
To edit a calendar on an iOS device
1. On your iPhone or iPad, start the Calendar app.
2. Tap the Calendars button.
The Calendars (iPhone) or Show Calendars (iPad) popover appears ![]() .
.
3. Tap the Edit button.
The screen name changes to Edit Calendars.
4. In the Calendar list, tap the name of an existing calendar.
5. In the Edit Calendar screen, change the name or the associated color of the calendar, then tap Done.
Happily, if iCal isn’t feature-rich enough for your needs, a variety of alternative calendar programs still use the iCal calendar and reminders data and provide a superior calendaring experience. My favorite for Mac is BusyMac’s BusyCal ![]() , which allows you to share events and to-dos over iCloud, MobileMe, or Google Calendar; gives you much more flexibility in calendar views; has easier event entry than iCal; has a wide variety of event types, such as all-day banners, sticky notes in the calendar, and graphics; and much more (BusyCal is also compatible with iCloud calendars even when it is running on a Mac with Mac OS X 10.6 Snow Leopard, making calendar sharing possible for people who haven’t yet upgraded to Lion). Another good iCal alternative for the Mac is Flexibits’ Fantastical, which lives in your menubar and drops down when you need it. One really attractive thing about Fantastical is that it understands natural-language requests, so you can simply enter “Lunch next Tuesday at 2 with Cliff” and the program correctly parses the sentence and sets the calendar event.
, which allows you to share events and to-dos over iCloud, MobileMe, or Google Calendar; gives you much more flexibility in calendar views; has easier event entry than iCal; has a wide variety of event types, such as all-day banners, sticky notes in the calendar, and graphics; and much more (BusyCal is also compatible with iCloud calendars even when it is running on a Mac with Mac OS X 10.6 Snow Leopard, making calendar sharing possible for people who haven’t yet upgraded to Lion). Another good iCal alternative for the Mac is Flexibits’ Fantastical, which lives in your menubar and drops down when you need it. One really attractive thing about Fantastical is that it understands natural-language requests, so you can simply enter “Lunch next Tuesday at 2 with Cliff” and the program correctly parses the sentence and sets the calendar event.

![]() I prefer to use BusyCal over iCal, because it shows me more information at a glance, such as the mini-months, the reminders list, and the detail for the selected event.
I prefer to use BusyCal over iCal, because it shows me more information at a glance, such as the mini-months, the reminders list, and the detail for the selected event.
On iOS, there are many alternatives for the Calendar app, but the one I use is called Calvetica ![]() , from Mysterious Trousers. I like it because of its minimalist design, and because it requires just a couple of taps (and the text entry for the event name, of course) to enter an event, far fewer than Calendar. It’s fast, lets you create an event quickly, and gets out of your way.
, from Mysterious Trousers. I like it because of its minimalist design, and because it requires just a couple of taps (and the text entry for the event name, of course) to enter an event, far fewer than Calendar. It’s fast, lets you create an event quickly, and gets out of your way.

![]() On iOS, the faster you can enter an event the better, which is why I prefer Calvetica, rather than the stock Calendars app.
On iOS, the faster you can enter an event the better, which is why I prefer Calvetica, rather than the stock Calendars app.
Working with Calendars on the iCloud Website
The iCloud website gives you a great deal of control over your calendar and reminders. With it, you can add, view, and change events and reminders; manage calendars and reminders lists; and share your calendars with others (for that last, see the “Sharing Your Calendars with Others” section, later in this chapter).
In this section, all the action will take place on the iCloud website. We’ll begin by creating, editing, and deleting calendars, then move on to working with calendar events.
1. Go to the iCloud website, and login using your iCloud Apple ID and password.
2. On the iCloud Home screen ![]() , click Calendar.
, click Calendar.

![]() On the iCloud website, click the Calendar icon to get started.
On the iCloud website, click the Calendar icon to get started.
The Calendar screen appears ![]() .
.

![]() You can do almost anything that you can do in iCal on the iCloud website.
You can do almost anything that you can do in iCal on the iCloud website.
3. Click the Actions button at the upper-right of the window.
The Actions pop-up menu appears ![]() .
.
![]() Choose New Calendar from the Actions pop-up menu.
Choose New Calendar from the Actions pop-up menu.
4. Choose New Calendar.
A new calendar appears at the bottom of the Calendars List, ready for you to add a name ![]() .
.
![]() Type the name of your new calendar.
Type the name of your new calendar.
5. Enter the name, then click outside the name field to save it.
See “Working With Events” later in this chapter to add and edit calendar events.
To view (or not) a calendar or the Calendars List
In the Calendars List, select the checkbox next to a calendar’s name to see that’s calendar’s contents. If the checkbox is cleared, the events associated with that calendar will disappear from your calendar views. Nothing’s happened to the events; you are simply choosing not to see them.
or
If you want to hide the Calendars List, click the Show/Hide Calendars List button at the top of the window. Clicking the button again will bring the list back.
1. In the iCloud website’s Calendar screen, click the Edit link at the top of the Calendars list at the upper-left corner of the window ![]() .
.
![]() To enter calendar Edit mode, click the Edit link.
To enter calendar Edit mode, click the Edit link.
The Calendars list changes into edit mode ![]() .
.
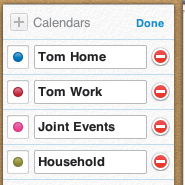
![]() In Edit mode, you can change the calendar color, its name, or delete the calendar.
In Edit mode, you can change the calendar color, its name, or delete the calendar.
2. Do one or more of the following:
• To change the color associated with the calendar, click the color button next to the name of the calendar, then choose a different color from the popover ![]() . You can also click the Custom color link to pop up a more full-featured color picker, if you don’t like the six standard choices.
. You can also click the Custom color link to pop up a more full-featured color picker, if you don’t like the six standard choices.

![]() Clicking the color button brings up a color picker.
Clicking the color button brings up a color picker.
• Click in the name field of the calendar, and change it to rename the calendar.
• To delete a calendar, click the red button with a minus sign in it. As usual when you’re potentially about to destroy data, iCloud warns you and asks if you’re sure ![]() . If you are, click Delete Calendar.
. If you are, click Delete Calendar.
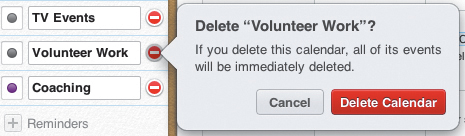
![]() Make sure you really want to delete that calendar!
Make sure you really want to delete that calendar!
3. When you’re done changing your calendars, Click the Done link.
Tip
That dialog isn’t joking; remember that iCloud is the master repository for all your data. So if you delete that calendar, it and all of its events will disappear not just from the iCloud website but from all your Macs and iOS devices as well. Be careful!
Tip
Note that a Plus button also appears when you’re editing calendars ![]() . Yes, that means that it’s another way to add a calendar.
. Yes, that means that it’s another way to add a calendar.
On the iCloud website, you have a choice of Day, Week, Month, or List calendar views. Click one of the Calendar View buttons in the toolbar ![]() to view the calendar as you wish.
to view the calendar as you wish.
To change date views
At the bottom of the window, you’ll find the Date selector ![]() . This selector changes depending on the calendar view. For example, if the Month view is set, you’ll see years and months in the Date selector. If the Day or List view is set, you’ll see individual days in the selector. Do one or more of the following (assuming the Month view is active; the other views are similar in operation):
. This selector changes depending on the calendar view. For example, if the Month view is set, you’ll see years and months in the Date selector. If the Day or List view is set, you’ll see individual days in the selector. Do one or more of the following (assuming the Month view is active; the other views are similar in operation):
• Click one of the months to view its contents.
• Click the Previous or Next buttons to move to the previous or next month. If you’re already viewing January or December, your view will change to the previous or next year.
• Click the Previous Year or Next Year buttons to change the calendar view by an entire year.
• Click the Today button at the lower left corner of the window to jump to today’s date.
• If you need to view a date that’s more than a few clicks away, click the Actions menu ![]() and choose Go to Date. The resulting date picker
and choose Go to Date. The resulting date picker ![]() allows you to type or navigate to the date you want. Choose that date, then click OK.
allows you to type or navigate to the date you want. Choose that date, then click OK.

![]() The Date selector changes, depending on the calendar view.
The Date selector changes, depending on the calendar view.
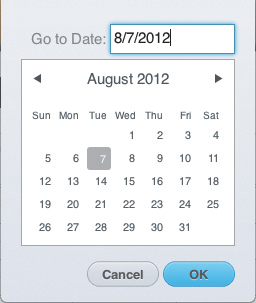
![]() You can jump to dates many months or years away with this date picker.
You can jump to dates many months or years away with this date picker.
Working with Events
The Calendar application on the iCloud website makes it easy to create or change events. Its abilities are very similar to iCal or the iOS Calendar app, but there are a couple of differences. With the website, you can’t mark an event as one that shows that you are Busy or Free.
To create an event
1. In the Calendars List, click to select the calendar in which you want to create the event.
2. Do one or more of the following, and the New Event popover appears:
• In Month view, double-click in the day in which you want the event.
• In Day, Week, or List view, drag the mouse cursor across a time range to create an event that covers that range.
• In any view, click the New Event button (it looks like a plus) in the lower-right corner of the window. When you do this, the event is created on the date you last selected in the calendar.
• From the Actions pop-up menu, choose New Event.
3. In the New Event popover ![]() , do one or more of the following:
, do one or more of the following:
• Enter the title of the event.
• (Optional) Enter the event’s location.
• (Optional) If the event is going to last all day, click the all-day checkbox.
• In the From section, set the event’s starting date and time.
• In the To section, set the event’s ending date and time.
• (Optional) If this will be a recurring event, choose the recurring schedule from the pop-up menu next to Repeat. You can choose Every Day, Every Week, Every Month, Every Year, or Custom. If you choose Custom, you get a pop-up dialog that allows you to choose dates with any flexibility you want on a Daily, Weekly, Monthly, or Yearly basis. The Monthly or Yearly Custom choices also allow you to choose intervals such as the first, second, third, fourth, or last days of a month.
• (Optional) If you want to be reminded before the event starts, choose from the Alert pop-up menu, and select the interval before the event. If you set an alert, a 2nd Alert pop-up menu appears, allowing you to set an interval for a second reminder. Alerts appear as notifications on your iOS devices, and also in iCal on your Mac, and as a dialog on the iCloud website in your browser ![]() .
.

![]() Get to know the New Event popover well, because you’ll be seeing it a lot.
Get to know the New Event popover well, because you’ll be seeing it a lot.

![]() One of the places that alerts can appear is on the iCloud website.
One of the places that alerts can appear is on the iCloud website.
• (Optional) If you want, you can change the calendar for the event with a pop-up menu in the Calendar section.
• (Optional) If you want to invite friends or colleagues to the event, enter their name or email address into the Invitees field. As you type, iCloud looks up a matching contact in your iCloud contacts list, providing a pop-up menu with possible matches. Select a contact from the menu to accept it. You can add multiple invitees to an event. If your invitees use iCloud, the invitation will appear in the Notifications button on the iCloud website, in iCal, and in the Calendar app on their iOS devices. Invitees have the option to Accept, Decline, or mark the event as Maybe.
• (Optional) You can also add a note to the event, perhaps with details about the meeting.
4. Click OK to save the event.
The event appears on your calendar.
Double-click an event in your calendar to bring up the popover with the event details, change the details you desire, then click OK.
or
In the Date or Week views, drag the top or bottom border of an event on the calendar to change its duration.
To move an event
Do one or more of the following:
• On the calendar, drag the event from one location to where you want it. For example, you might want to move the meeting that is been rescheduled from one day to the next.
• Double-click the event to open its pop-up window, then change the event details. You might need to use both these techniques if an event is moved both in day and time.
To delete an event
In any calendar view, click an event to select it, then press the Delete or Backspace keys.
or
Double-click the event to bring up the popover with the event details, then click the Delete button.
Tip
If I’m going to be making a lot of changes to my calendar events or reminders, I’ll often choose to do them on my Mac, rather than on an iOS device, because I still find it easier to use a separate hardware keyboard and mouse, rather than tapping and swiping on a touchscreen. Perhaps I’m a dinosaur.
Sharing Your Calendars with Others
Perhaps the most useful thing about iCloud’s calendar is its ability to share your calendars and events with family, colleagues, and friends who are also using iCloud. You can allow other people to share any of your calendars, and they can ask you to share theirs. Of course, you can still have calendars that are private to you; iCloud will synchronize those private calendars among all your devices, but nobody else will be able to see them. You can have any mix of shared and private calendars you want.
There’s a difference between sharing and inviting. When you share, you’re sharing a whole calendar and all its events with another iCloud user. When you invite, you are offering to share a particular event with another person, whether or not they are using iCloud. Keep this difference in mind when you decide which of the kinds of collaboration you want. For example, I’m comfortable in sharing most of my calendars with my wife. But there might be a particular meeting on my Work calendar that I have with an editor; rather than share the whole calendar, I’d be likely to simply invite that editor to only that one meeting; the invitation will be sent via email. When the editor accepts the invitation, the event appears for both of us.
iCloud’s calendar sharing uses the industry-standard CalDAV protocol, so you can share calendars with people running iCal or variety of other calendar programs on the Mac, and Microsoft Outlook 2007 or later on Windows.
1. On the calendar application of the iCloud website, the Calendars List will show a Share icon next to each calendar ![]() . A gray icon indicates the calendar isn’t being shared, and a green icon indicates that it is.
. A gray icon indicates the calendar isn’t being shared, and a green icon indicates that it is.
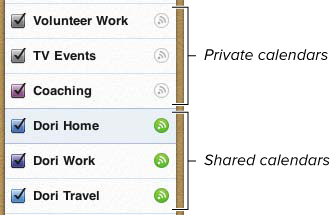
![]() The icons next to the calendars tell you the calendar’s sharing status.
The icons next to the calendars tell you the calendar’s sharing status.
2. Click a gray icon to begin the sharing process.
The Share Calendar popover appears ![]() .
.

![]() Enter the name and the sharing privileges for each person with which you want to share the calendar.
Enter the name and the sharing privileges for each person with which you want to share the calendar.
3. In most cases, you’re going to want to share the calendar privately with one or more people. Click the Private Calendar radio button, then in the field underneath, begin typing the person’s name or email address. iCloud will do a lookup of your Contacts list and provide a pop-up menu with possible matches. Click a contact with the mouse to select it.
4. Choose whether you want the person to be able to View & Edit the calendar (that’s the default choice) or to just be able to View the calendar.
You might want to make a calendar read-only (the View choice) if the events of the calendar are ones that you merely want to have the other person informed about, but not to be able to change, such as your business travel plans.
5. (Optional) Repeat steps 3 and 4 for anyone else you want to share the calendar with.
6. Click Share.
iCloud displays a confirmation message ![]() , and sends email invitations to the people you chose
, and sends email invitations to the people you chose ![]() . If they accept the invitation by clicking the Join Calendar button in the email, they’ll be added to the calendar.
. If they accept the invitation by clicking the Join Calendar button in the email, they’ll be added to the calendar.
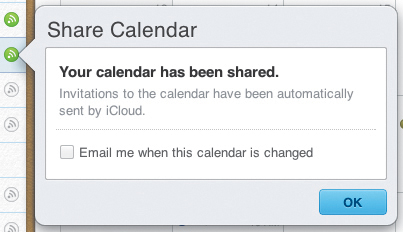
![]() When the sharing process is underway, iCloud lets you know.
When the sharing process is underway, iCloud lets you know.

![]() Invitees get an email invitation to your calendars. Accepting the invitation is as easy as clicking the Join Calendar button.
Invitees get an email invitation to your calendars. Accepting the invitation is as easy as clicking the Join Calendar button.
7. (Optional) If you click the Email me when this calendar is changed checkbox, you’ll get an email when anyone other than you makes a change to the calendar.
8. Click OK.
Tip
If you share one of your calendars, you are considered to be the calendar’s owner. Only you have the right to allow other people to view or edit the calendar. Conversely, if you are sharing someone else’s calendar you only have the privileges they have allowed you. And you can’t change those privileges for yourself or anyone else.
Tip
To check the status of a calendar you don’t own, click the green Share icon next to it. iCloud will show you the Shared Calendar Info popover ![]() .
.
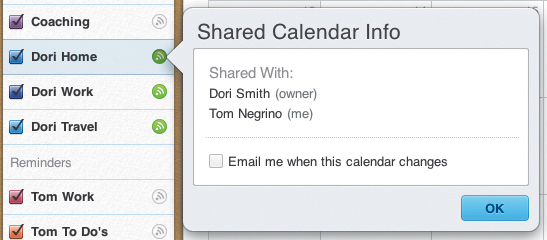
![]() You can see who is sharing calendars that you don’t own.
You can see who is sharing calendars that you don’t own.
Tip
To remove someone from calendar sharing of the calendar you own, click the Share icon, which brings up the Share Calendar popover. The popover will show you the people who are currently sharing the calendar. Click on the person who you would like to remove from sharing, then click the red minus icon next to their name.
Tip
You can stop sharing a calendar altogether by clicking the Share icon, which brings up the Share Calendar popover, and clicking the Stop Sharing button at the bottom. You’ll get the usual iCloud confirmation dialog; click Stop Sharing again.
Subscribing to Public Calendars
Besides the calendar events of yourself, family, friends, and colleagues, you might be interested in importing other kinds of calendars. For example, you might want to subscribe to an automatically updated calendar for holidays in your country. Or if you’re a sports fan, you might want the playing schedule for your favorite team to appear in your calendar. Maybe you want the local weather, or the phases of the moon. All of these, and many more, are available as public calendars to which you can subscribe. You’ll typically use iCal on the Mac to subscribe to one of these calendars, but once you do, you can choose to either keep that calendar local to your Mac, or to share it with the rest of your devices via iCloud.
In this section, I’m going to show you how to find a public calendar using iCal, subscribe to it, and then view it in your calendar.
To subscribe to a public calendar
1. Open iCal on your Mac.
2. Choose Calendar > Find Subscriptions.
Your default web browser will open and bring you to Apple’s list of available public iCal calendars ![]() . at the top of the list, you can choose to view the calendar feeds by Most recent, Most popular, or Alphabetical.
. at the top of the list, you can choose to view the calendar feeds by Most recent, Most popular, or Alphabetical.
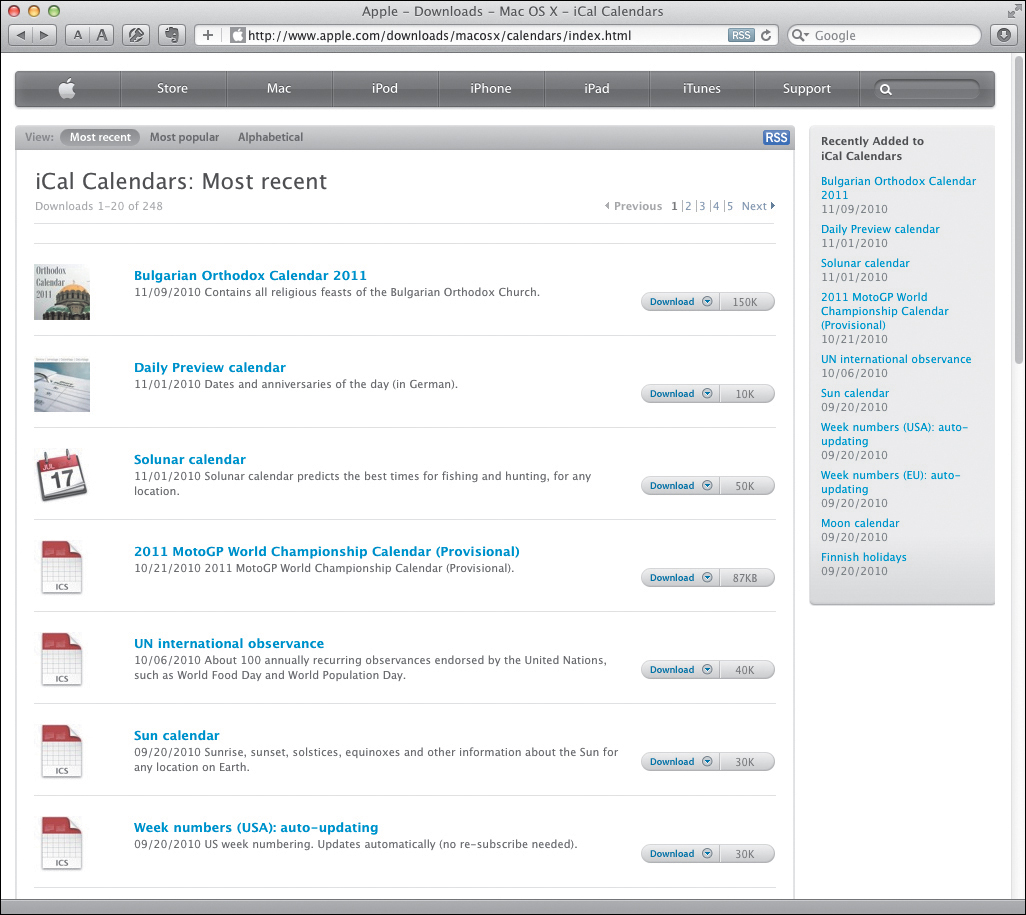
![]() Apple maintains a list of public calendars.
Apple maintains a list of public calendars.
3. Find the calendar to which you wish to subscribe, then click the Download button for that calendar.
Depending on the source of the calendar, you may be taken to a different website where you can choose from a number of calendars. If so, find the calendar feed you want from that website, then click to subscribe to it.
When you subscribe to a public calendar, iCal shows you a dialog with the URL of the calendar ![]() .
.

![]() When you subscribe to a calendar in iCal, it shows you the calendar’s URL.
When you subscribe to a calendar in iCal, it shows you the calendar’s URL.
4. Click Subscribe.
iCal shows you a detail screen about the calendar ![]() .
.

![]() Subscribing to the calendar gives you its information, and allows you to choose whether you want to subscribe to it only on your local Mac, or via iCloud.
Subscribing to the calendar gives you its information, and allows you to choose whether you want to subscribe to it only on your local Mac, or via iCloud.
5. Do one or more of the following:
• Change the name of the calendar.
• From the color pop-up menu next to the Name field, choose the color in which you want the calendar’s events to appear.
• Using the Location pop-up menu, choose either iCloud or On My Mac. This is probably your most important choice in this dialog; choosing iCloud will make the subscribed calendar appear on all your devices.
• By default, most subscribed calendars have Alerts, Attachments, and Reminders removed. In most cases, I recommend you keep it that way.
• From the Auto-refresh pop-up menu, choose how often you want the calendar to refresh its data from the original URL.
6. Click OK.
The subscribed calendar appears in iCal. Double-click one of the calendar events to see its details ![]() .
.
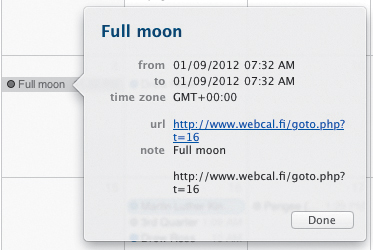
![]() You can’t change the details of the events in a subscribed calendar, but you can view them.
You can’t change the details of the events in a subscribed calendar, but you can view them.
Tip
You can find public calendars in many more places than just Apple’s directory. For example, in the U.S., all the Major League Baseball clubs offer calendars that you can download into iCal.
To delete a subscribed calendar
1. In iCal, click the Calendars button in the upper left corner of the window.
2. The calendar you want to delete will appear in the Subscriptions section of the calendar list. Right-click that calendar, then choose Delete from the shortcut menu ![]() .
.
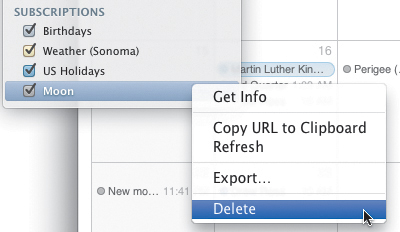
![]() Right-click the calendar you want to delete, then choose Delete from the shortcut menu.
Right-click the calendar you want to delete, then choose Delete from the shortcut menu.
iCal asks you if you’re sure you want to delete the calendar.
3. Click Delete.
The calendar and its events and reminders are deleted. If you had the calendar shared on iCloud, the events and reminders will disappear from all your devices.
Setting iCloud Calendar Preferences
The iCloud Calendar application has two preference panes, General and Advanced. They closely mirror the preferences in iCal.
To set General preferences
1. Click the Actions button, then choose Preferences from the pop-up menu.
The General preferences appear ![]() .
.
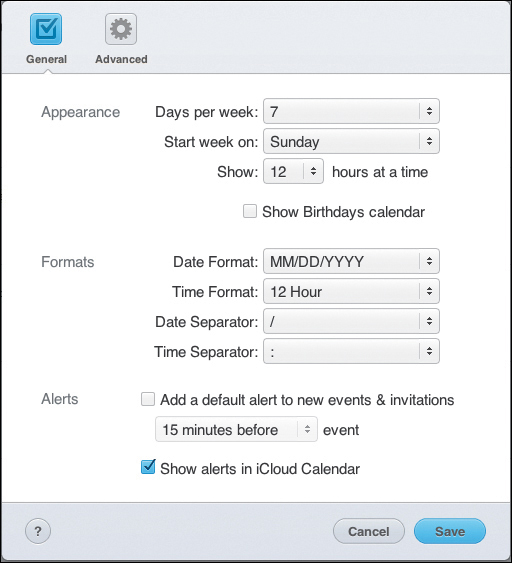
![]() The General Preferences screen lets you set the calendar’s appearance, formats, and alerts.
The General Preferences screen lets you set the calendar’s appearance, formats, and alerts.
2. Choose one or more the following:
• In the Appearance section, choose whether you want to display 5 or 7 days per week, on which day of the week you want the displayed week to start, and how many hours at a time you want to display in the Day and Week views. If you select the Show Birthdays calendar checkbox, the Calendar application will show a new Birthdays calendar, with information taken from the Birthday field of the people in your iCloud Contacts list.
• In the Format section, choose the Date format (your choices are MM/DD/YYYY, DD/MM/YYYY, and YYYY/MM/DD) and the Time format (12 hour or 24 hour). You can also choose the Date Separator (/, -, or .) and the Time Separator (: or .).
• In the Alerts section, if you select Add a default alert to new events and invitations, you can choose from the pop-up menu the amount of time before which the event is scheduled that you’ll get an alert on your iCloud-enabled devices. If you select Show alerts in iCloud Calendar, alerts will appear as pop-up dialogs on the iCloud website.
1. Click the Actions button, then choose Preferences from the pop-up menu.
2. Click the Advanced button in the toolbar.
The Advanced preferences appear ![]() .
.
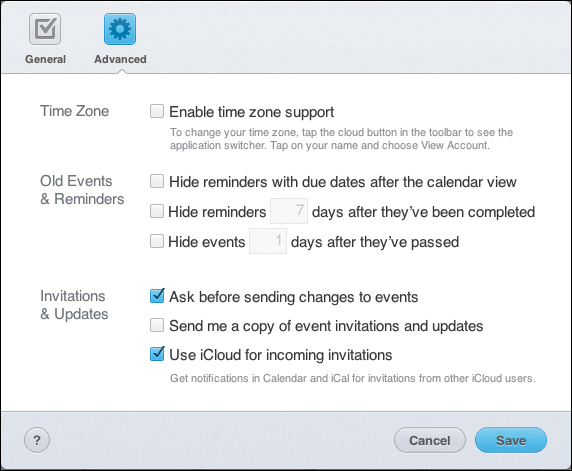
![]() The Advanced Preferences screen is a potpourri of settings.
The Advanced Preferences screen is a potpourri of settings.
3. Choose one or more the following:
• In the Time Zone section, if you select Enable time zone support, you can change the time zone for the whole calendar, or just for individual events that are different from the time zone you’re in. If you choose this, a new Time Zone pop-up menu will appear in the New Event and Edit Event popovers. Choosing a new time zone from the pop-up menu will make Calendar automatically change the time of the event as shown on your calendar to match the chosen time zone. For example, if you’re on the West Coast of the United States, you have time zone support enabled, and you set an event to occur at 3 p.m. Eastern time, the event will automatically be translated to noon Pacific time.
• In the Old Events & Reminders section, select the various checkboxes to hide reminders and events.
• In the Invitations & Updates section, if you select Ask before sending changes to events (it’s on by default), iCloud will check with you before it sends out emails alerting people to changes in events. This keeps changes in your calendar from cluttering other people’s mailboxes. Choosing Send me a copy of event invitations and updates is self-explanatory, as is Use iCloud for incoming invitations.
Adding Reminders
The iCloud Calendar application doesn’t just deal with calendars and events. It can also work with to-do items, which it refers to as reminders. In a major change from the way reminders were handled in MobileMe, reminders in iCloud appear on their own separate calendars, which iCloud calls reminder lists ![]() . On the iCloud website, reminder lists appear in the Reminders section directly below your Calendar list. On iOS devices, you deal with calendar events and reminders in two entirely separate apps, the Calendar and Reminders apps, respectively
. On the iCloud website, reminder lists appear in the Reminders section directly below your Calendar list. On iOS devices, you deal with calendar events and reminders in two entirely separate apps, the Calendar and Reminders apps, respectively ![]() . On the Mac, you work with both events and reminders in iCal or other calendar programs that work with iCloud, and on Windows you can use Microsoft Outlook 2007 or later (which calls reminders Tasks).
. On the Mac, you work with both events and reminders in iCal or other calendar programs that work with iCloud, and on Windows you can use Microsoft Outlook 2007 or later (which calls reminders Tasks).
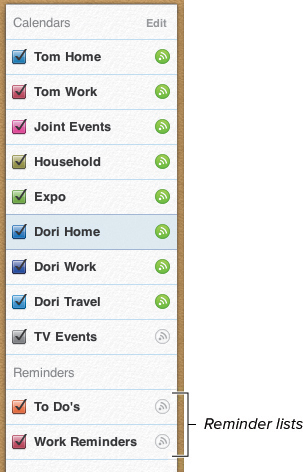
![]() The Reminder lists appear the bottom of the calendar list.
The Reminder lists appear the bottom of the calendar list.
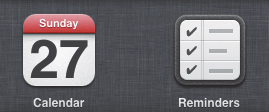
![]() On iOS, you use two separate applications to handle events and reminders.
On iOS, you use two separate applications to handle events and reminders.
Reminders are different from calendar events, in that they can be checked off as completed; you can assign a priority to them; and you can give them a due date (but you don’t have to). Reminders with due dates not yet marked as completed automatically remain in your Reminders list (you can change this behavior somewhat in the Advanced section of Preferences; see the “To set Advanced preferences” section, earlier in this chapter).
In this section, you’ll learn how to use the iCloud website to work with reminder lists and reminders. Remember that as you use the iCloud website, changes you make there will automatically propagate to the rest of your iCloud-enabled devices.
To add a Reminder List on the iCloud website
1. In your web browser, open the Calendar application on the iCloud website.
2. If the Reminders pane isn’t visible, click the Actions button and choose Show Reminders from the pop-up menu ![]() .
.
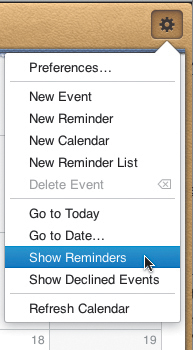
![]() If it isn’t already visible, choose Show Reminders from the Actions pop-up menu to display the Reminders pane.
If it isn’t already visible, choose Show Reminders from the Actions pop-up menu to display the Reminders pane.
The Reminders pane appears on the right side of the window ![]() .
.

![]() The Reminders pane allows you to check off completed tasks, shows you if a task has a priority associated with it, and tells you if a task is overdue.
The Reminders pane allows you to check off completed tasks, shows you if a task has a priority associated with it, and tells you if a task is overdue.
3. Click the Actions button and choose New Reminder List from the pop-up menu ![]() .
.
In the Reminders section below your Calendars list, a new reminder list appears, ready for you to name it ![]() .
.

![]() Type the name of your new reminder list.
Type the name of your new reminder list.
4. Enter a name for the list, then click anywhere in the Calendar view to save the new name.
Tip
You can change the color assigned to the reminder list and its name, you can share it, and you can delete it, just as you would any other calendar. See the corresponding sections for doing those actions with calendars, earlier in this chapter, to see how.
To add Reminders on the iCloud website
1. In your web browser, open the Calendar application on the iCloud website.
2. If the Reminders pane isn’t visible, click the Actions button and choose Show Reminders from the pop-up menu.
3. Select one of the reminder lists and choose Actions > New Reminder.
or
Double-click in an empty area of the Reminders pane.
The New Reminder popover appears ![]() .
.
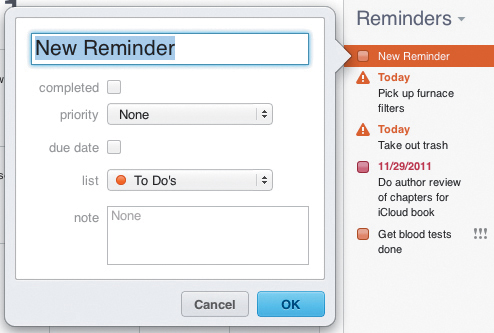
![]() The New Reminder popover is how you’ll be adding your tasks.
The New Reminder popover is how you’ll be adding your tasks.
4. Do one or more of the following:
• Enter the reminder title.
• From the Priority pop-up menu, assign the reminder’s priority level (None, Low, Medium, or High). If you assign a priority, the reminder will show the priority as an icon of one or more exclamation points in the Reminders pane, as shown in the Priority pop-up menu ![]() .
.
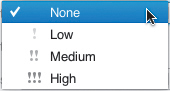
![]() You can choose a priority for a reminder.
You can choose a priority for a reminder.
• If you want to assign a Due Date to the reminder, select that checkbox, then enter a date in the field that appears. Interestingly, the iCloud website doesn’t allow you to also add a time, whereas the Reminders iOS app does.
• (Optional) If you assigned a due date, the Alert pop-up menu appears. If you want an alert, pick one of the choices from the pop-up menu (None, 1 day before, 2 days before, or On date of reminder).
• If you like, you can change the Reminder List for the reminder.
• If you want, add a Note to the reminder.
5. Click OK.
The new reminder appears in the Reminders pane.
To edit or delete a reminder
1. Double-click a reminder in the Reminders pane.
A popover appears with the reminder’s details.
2. Change the aspects of the reminder you wish, then click OK.
or
To delete the reminder, click the Delete button in the popover.
Tip
A faster way to delete a reminder is to select it in the Reminders pane, then press Delete or Backspace.
Tip
You can mark a reminder as completed by clicking the checkbox next to it in the Reminders pane.
Tip
Clicking the Reminders header at the top of the reminders pane allows you to sort your reminders by due date, priority, title, or list.
Working with Reminders on Your iOS Device
As mentioned before, you work with iCloud reminders on an iOS device in the Reminders app, which was introduced with iOS 5. Even though a reminders list is a kind of calendar, it makes sense to me that Apple chose to separate managing events and reminders on mobile devices, because adding the interface necessary to properly deal with reminders into the Calendar iOS app would have made the app feel as though those reminder features were shoehorned in.
In this section, you’ll see how to use the Reminders app to set up a to-do. Adding or editing a task in Reminders makes it automatically synchronize with the rest of your iCloud-enabled devices.
1. Start the Reminders app.
The app appears, set to its default List view ![]() . To see your tasks that have due dates, tap the Date button
. To see your tasks that have due dates, tap the Date button ![]() . Note that tasks that don’t have due dates will not appear in the Date view, though all tasks assigned to a particular list (whether they have dates or not) will show when you select that list in List view.
. Note that tasks that don’t have due dates will not appear in the Date view, though all tasks assigned to a particular list (whether they have dates or not) will show when you select that list in List view.
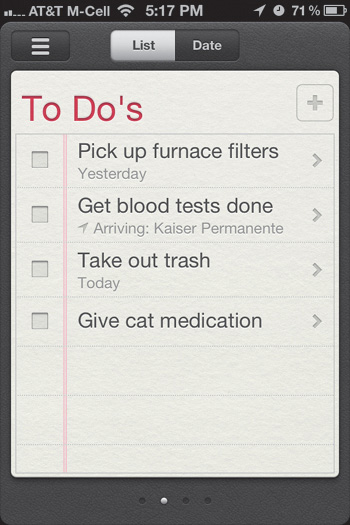
![]() You’ll work with your tasks in the Reminders app. This is the List view.
You’ll work with your tasks in the Reminders app. This is the List view.

![]() You can see tasks with associated due date in the Date view.
You can see tasks with associated due date in the Date view.
On the iPhone or iPod touch, you can move between your different reminders lists in List view by swiping right or left. Similarly, in Date view, you can change the date by swiping right or left, or by tapping a date in the navigation bar at the bottom of the screen. On the iPad, with its larger screen, you can see more information at one time ![]() .
.
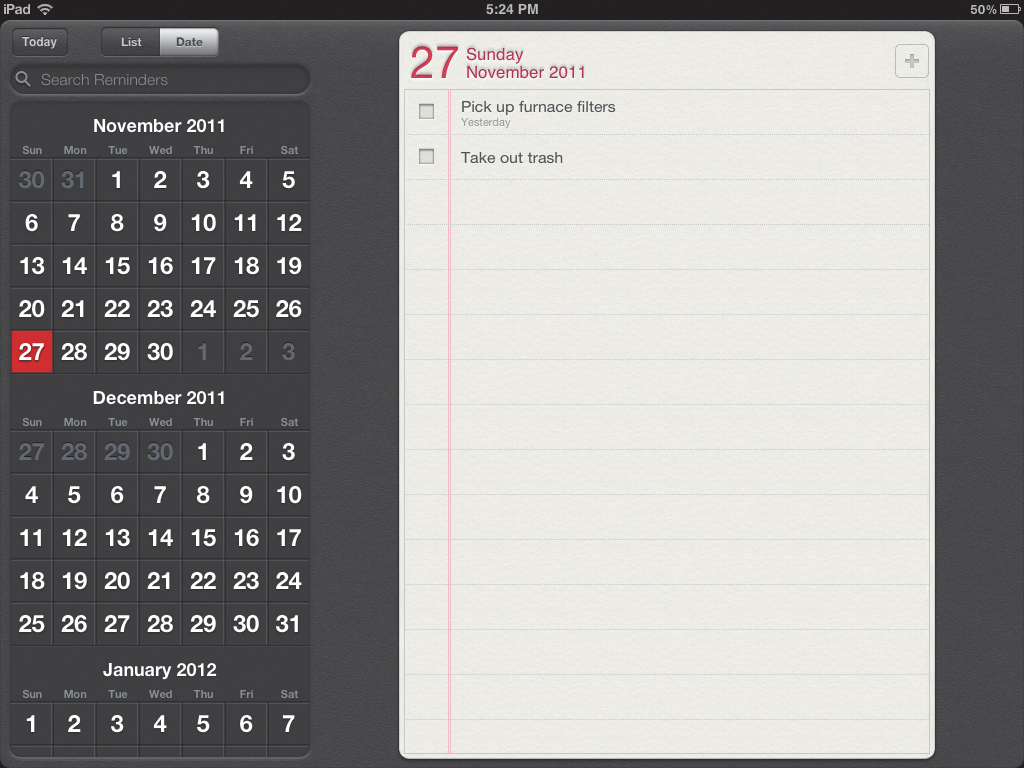
![]() The Reminders app on the iPad gives you a nice set of mini-months, making it easier to jump to future dates.
The Reminders app on the iPad gives you a nice set of mini-months, making it easier to jump to future dates.
2. In either List or Date view, tap the plus button to add a reminder.
In the list that you’re on, on the first blank line, an insertion point appears.

![]() Enter the title for your reminder.
Enter the title for your reminder.
4. (Optional) You can tap the Return key and enter more tasks.
5. On an iPhone or iPod touch, tap the Done button. On an iPad, tap somewhere other than the line you’re typing in, or tap the Hide Keyboard key ![]() .
.
The new reminder appears in the list.
6. To adjust the reminder’s details, tap it in the list. A Details screen or popover (on the iPad) appears ![]() .
.
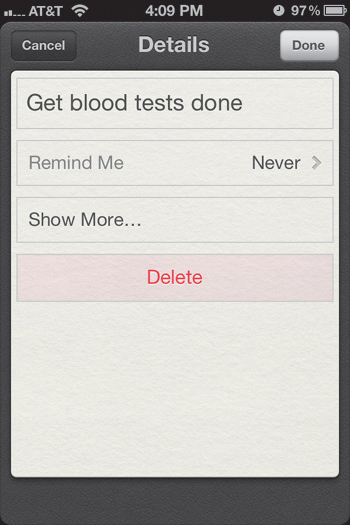
![]() On the Details screen, you can choose to set a reminder date or location, or you can add other information to the reminder.
On the Details screen, you can choose to set a reminder date or location, or you can add other information to the reminder.
On this screen, you can set a time or geographical reminder by tapping Remind Me.
or
If you tap Show More, you have the opportunity to set the reminder’s Priority, change its assigned reminders list, or add Notes.
8. To set a due date or geographical reminder, tap Remind Me.
9. On the resulting Remind Me screen ![]() , you can turn on either (or both) On a Day and At a Location.
, you can turn on either (or both) On a Day and At a Location.
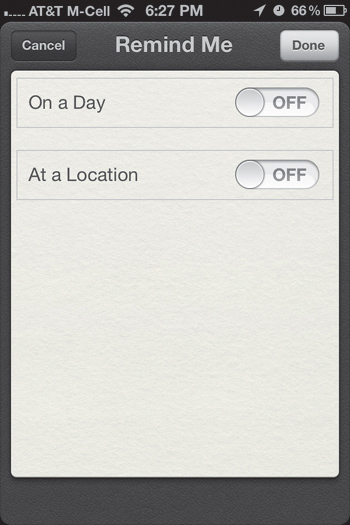
![]() You can set either time or location-based reminders.
You can set either time or location-based reminders.
If you choose On a Day, Reminders will show you the standard date and time picker. Choose when you want to be reminded, then tap Done.
If you choose At a Location, the Location screen will appear, showing your current location, your Home and Work locations from your iCloud Contacts list, and a Choose Address button. Tapping that button opens your Contacts list, from which you can choose the location where you want to be reminded. Pick a contact with an address, and you’ll be returned to the Location screen. When you tap the Remind Me button, you’ll see the contact name and address ![]() . You’ll also get two new options, When I Leave and When I Arrive. Choose one of these.
. You’ll also get two new options, When I Leave and When I Arrive. Choose one of these.

![]() If you choose to be reminded at a location, you can also choose whether that reminder triggers when you leave or arrive at the location.
If you choose to be reminded at a location, you can also choose whether that reminder triggers when you leave or arrive at the location.
10. Tap Done.
Tip
Location-based reminders are associated with the iPhone 4 and 4S. They don’t work on earlier iPhones, the iPad, or iPod touch. Reminders with location information still appear on those other devices, but the location-specific information doesn’t appear. As I write this, it’s unclear if this is a bug that will be fixed or not.
On the other hand, the Clock app only runs on the iPhone, which you often carry on your person, and you can set it up to give you a recurring alarm (as well as setting as many different alarms you need in a particular day). Because it’s not integrated with iCloud, there is no calendar clutter. And the Clock app’s repeating function ![]() has day-of-the-week options that the Reminders app does not
has day-of-the-week options that the Reminders app does not ![]() . By the way, if you need multiple reminders in the same day, there’s a terrific app called HabiTimer from Sciral that’s perfect for things that neither Clock nor Reminders does well, like alerting you to take medications multiple times in a day.
. By the way, if you need multiple reminders in the same day, there’s a terrific app called HabiTimer from Sciral that’s perfect for things that neither Clock nor Reminders does well, like alerting you to take medications multiple times in a day.
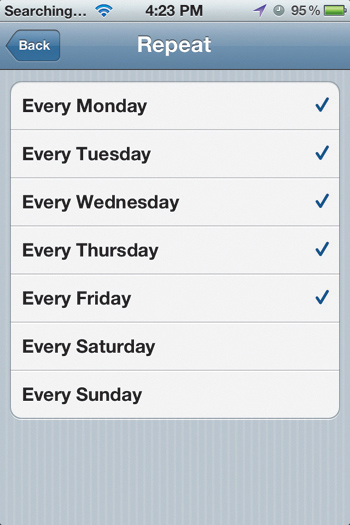
![]() In the Clock app, you have a bit more flexibility in terms of recurring day-of-the-week alarms.
In the Clock app, you have a bit more flexibility in terms of recurring day-of-the-week alarms.
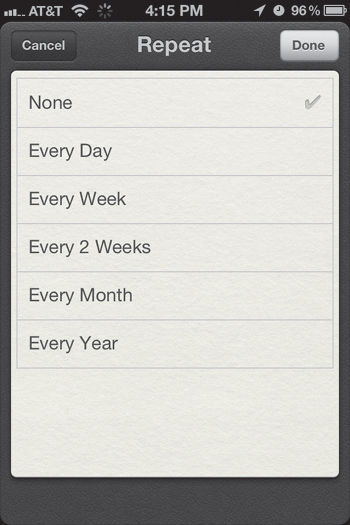
![]() The Reminders app allows you to set reminders at intervals up to a year away.
The Reminders app allows you to set reminders at intervals up to a year away.