9. Working with Documents in the Cloud
A real problem with using many devices is that it’s surprisingly easy to work on a project and lose track of a document, or worse, its latest version. For example, I’m writing this chapter in Microsoft Word 2011 on the MacBook on my kitchen table. Later, I’ll save and close the chapter, go up to my office, and continue working on the Mac Pro. If I wanted to, I could even be a huge cliché, head over to Starbucks, and write on my iPad, using a Word-compatible app.
I can work on one document across all devices because my Word file is in a folder using the free Dropbox service, which automatically keeps it synchronized and available everywhere. But I still have to worry about where the document is (it has to be in Dropbox), and saving it. It would be even better if the document would auto-save and push its latest version to my devices. That’s the aim of iCloud’s Documents in the Cloud feature.
Configuring Documents in the Cloud
Before we get into the details of Documents in the Cloud, let’s define what it is (and what it isn’t), at least as of the Fall of 2011, when I’m writing this.
• What it is: A good way to work on iWork documents between iOS devices and (to a lesser extent) your Macs. As you work on an iWork document on iOS, it is, like all iOS documents, automatically saved in a mysterious location that you don’t have explicit access to (because iOS hides the file system from the user). When Documents in the Cloud is enabled, iCloud automatically pushes the latest version to your other iOS devices, though you must manually download the changed version to your Macs from iCloud.com. Since the concept of a file system is foreign to iOS (each program has its private “bucket” of documents), we’ll eventually have to see some standardized way that programs with both Mac and iOS versions can access the same files, but that doesn’t exist yet.
You can also think of Documents in the Cloud as an invisible and seamless way of backing up your iWork documents, since they are sent to iCloud as soon as you change them. As a facilitator of your work between iOS devices, Documents in the Cloud works quite well. You can start a document on your iPhone as inspiration strikes, then continue working on it on your iPad, and you’ll pick up right where you left off.
As more developers build Documents in the Cloud into their apps (as I write this, there are very few), it will become increasingly more useful beyond the iWork realm.
• What it isn’t: A general automatic file synchronization service. For Documents in the Cloud to work, the developer needs to enable it in their app, and it is really intended to support iOS, more than Mac OS X or Windows. If you’re more interested in a general sync service that works across many platforms, including Mac OS X, iOS, and Windows, there are many, including Dropbox (www.dropbox.com), Sugar-Sync (www.sugarsync.com), and Box.net (www.box.net). These services also allow you to set one or more individual folders for synchronization between devices, using the familiar file system metaphor of files and folders. What you don’t get with a general service that you do get with iCloud is the automatic updating of documents (iWork or otherwise) across mobile devices (though some of these services offer automatic synchronization on desktop operating systems). That’s a manual process if you use one of these services. Documents in the Cloud is also emphatically not a competitor to online document creation services like Google Docs. There’s no website where you can create documents that then are synchronized via Documents in the Cloud.
Any documents that you synchronize using Documents in the Cloud count against your free 5 GB iCloud storage quota.
Tip
Because Keynote documents can contain large files, especially graphics, it’s a good idea to make them as small as possible before you move them to iOS devices, in order to save both space on your devices and to minimize the impact on your iCloud storage quota. Before you upload a Keynote presentation from your Mac to iCloud.com (where it will be pushed automatically to your iOS devices), in Keynote for Mac, choose File > Reduce File Size. This command resamples the graphics in your presentation to screen resolution, greatly reducing their size.
Documents in the Cloud also includes and synchronizes app data between your mobile devices. For example, a game that’s been written to be universal (meaning it plays on both the iPad and smaller-screened iOS devices) and has been updated to take advantage of Documents in the Cloud can automatically synchronize its game data using iCloud, so you could play a few levels of the game on one device, and continue playing the game at the same point you left off on another device (many games use Apple’s Game Center, which is part of iOS, to achieve the same goals).
Tip
Don’t forget that the versions of the iWork programs for iOS still have a subset of the features of iWork for Mac. So there could be some aspects of your documents (for example, certain slide builds or transition effects in Keynote) that don’t survive a round trip journey from your Mac through iCloud to Keynote for iOS and back.
To enable Documents in the Cloud on Mac
1. Choose System Preferences, then click the iCloud icon.
The iCloud preferences appear ![]() .
.
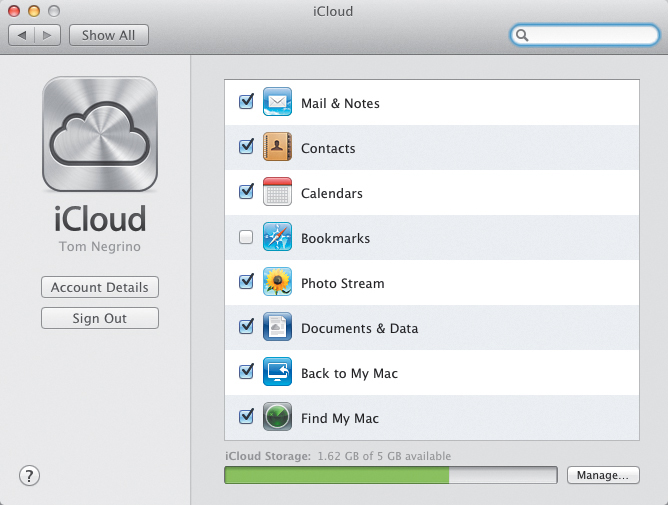
![]() On the Mac, you’ll turn on Documents in the Cloud in the iCloud preference pane.
On the Mac, you’ll turn on Documents in the Cloud in the iCloud preference pane.
2. Click the checkbox next to Documents & Data.
To enable Documents in the Cloud on iOS
1. Tap Settings, then iCloud.
The iCloud settings appear ![]() .
.
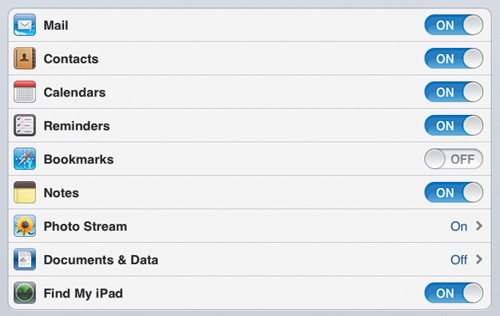
![]() On iOS, you’ll use the Documents & Data section of the iCloud Settings.
On iOS, you’ll use the Documents & Data section of the iCloud Settings.
2. Tap Documents & Data ![]() .
.

![]() When you switch Documents & Data on, iCloud will begin synchronizing your iWork documents to the iCloud servers.
When you switch Documents & Data on, iCloud will begin synchronizing your iWork documents to the iCloud servers.
3. On the resulting screen ![]() , slide the Documents & Data switch to On.
, slide the Documents & Data switch to On.
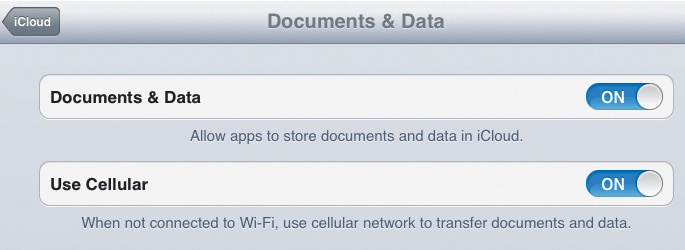
![]() You can choose whether or not you want to use cellular data networks to synchronize your document and other data.
You can choose whether or not you want to use cellular data networks to synchronize your document and other data.
4. (Optional) If you want to allow your documents and data to synchronize over the cellular data network, slide the Use Cellular switch to On.
If you have bandwidth caps and you regularly transfer a lot of cellular data, you might want to leave this option turned Off.
5. (Optional) Some of your apps (for example, the iWork apps for iOS) may have Use iCloud switches in their sections in the Settings app ![]() . You may need to turn these on. Other apps won’t use the Settings app for their settings, but will contain their settings within the app itself
. You may need to turn these on. Other apps won’t use the Settings app for their settings, but will contain their settings within the app itself ![]() .
.
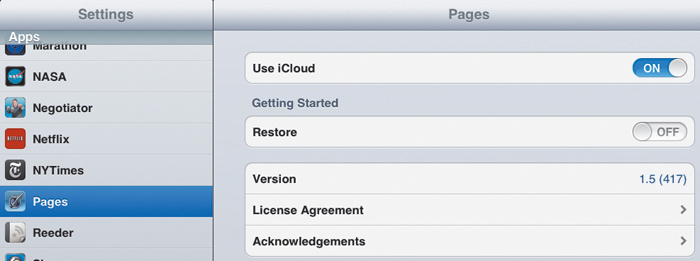
![]() The iCloud settings for the iWork applications are in the system Settings app (this one is for Pages).
The iCloud settings for the iWork applications are in the system Settings app (this one is for Pages).
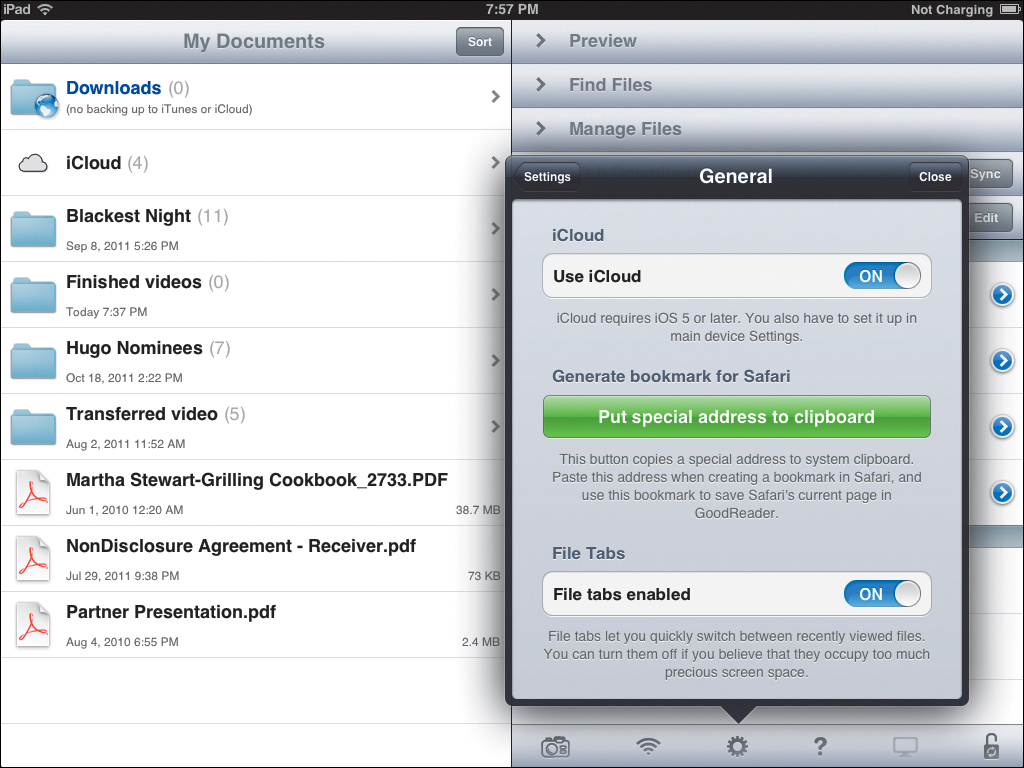
![]() Some App makers prefer to keep their settings inside their apps, as with the iCloud settings shown here for GoodReader, an excellent app that lets you read, annotate, and manage PDF, office, iWork, and even image and video files.
Some App makers prefer to keep their settings inside their apps, as with the iCloud settings shown here for GoodReader, an excellent app that lets you read, annotate, and manage PDF, office, iWork, and even image and video files.
Tip
After you turn on Documents in the Cloud, if you take a look at the Document Managers in the iWork programs, you can see the files being updated ![]() . After updating, you can work with them as usual
. After updating, you can work with them as usual ![]() .
.
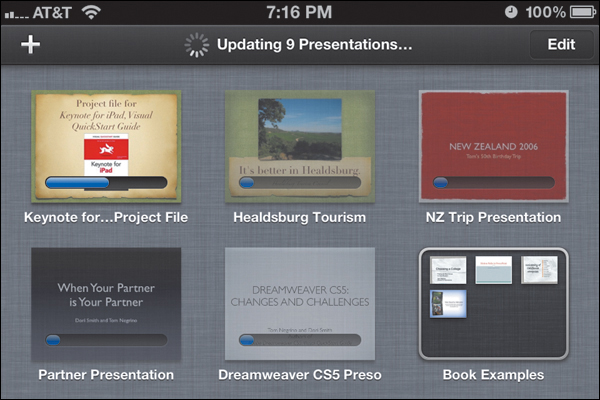
![]() Here are Keynote presentation files that were on my iPad in the process of being updated on my iPhone via iCloud.
Here are Keynote presentation files that were on my iPad in the process of being updated on my iPhone via iCloud.

![]() This Keynote file started life on my Mac, then was transferred to the iPad, where it got a few touch-ups before the presentation.
This Keynote file started life on my Mac, then was transferred to the iPad, where it got a few touch-ups before the presentation.
Working with iWork Documents on the iCloud Website
In order to get iWork files from your Mac into iCloud, where they will then be automatically distributed to your iOS devices, you need to use the iCloud website. Conversely, you can access files that are already in iCloud on a computer through the web interface, and download them to your computer. The iCloud website allows you to download or upload the files onto your computers in one of the iWork formats (Keynote, Pages, or Numbers); Microsoft Office formats (PowerPoint, Word, or Excel); or as a PDF.
It’s important to remember that files that you get from iCloud and then update on your computer are not automatically updated on iCloud and your mobile devices. To deal with your files on a computer, it’s a manual process of uploading and downloading using the website.
To manage iWork files on the iCloud website
1. Go to the iCloud website, and login using your iCloud Apple ID and password.
2. On the iCloud Home screen ![]() , click iWork.
, click iWork.
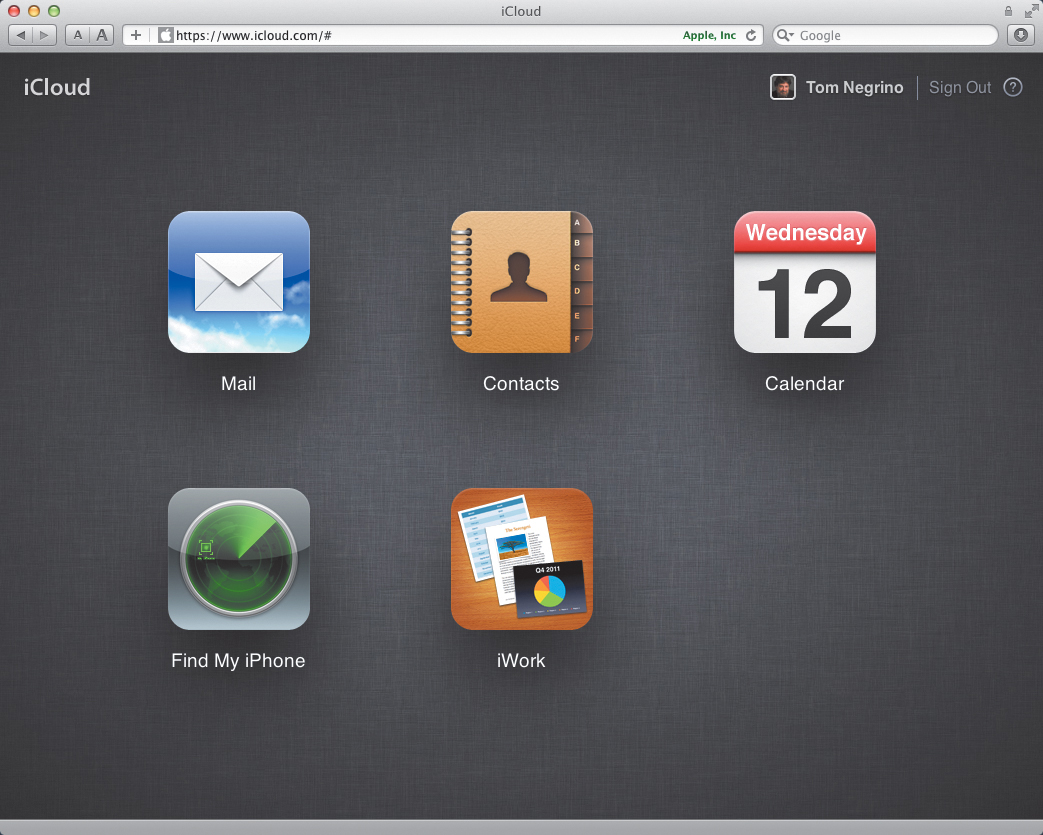
![]() Begin managing your files on your computer on the iCloud website.
Begin managing your files on your computer on the iCloud website.
The iWork screen appears ![]() .
.
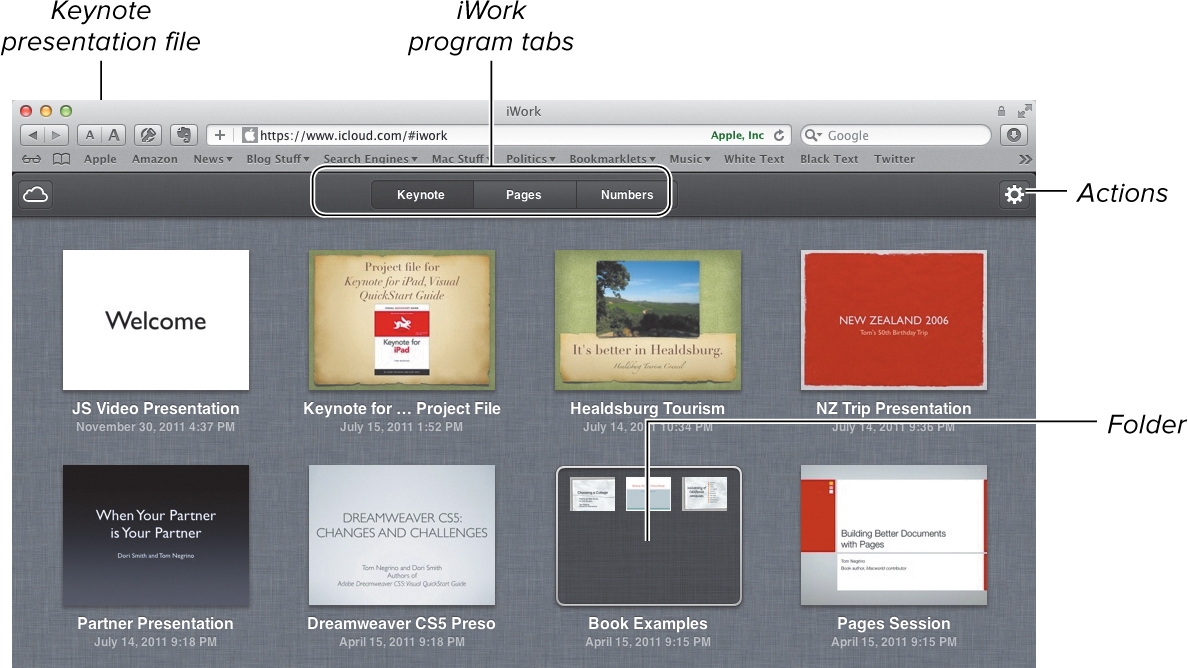
![]() The iWork screen shows you all of your iWork documents that have been uploaded to iCloud.
The iWork screen shows you all of your iWork documents that have been uploaded to iCloud.
3. At the top of the window, click the tab for the iWork program you wish to work with.
4. Do one of the following:
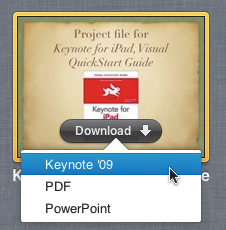
• To download a file to your computer, click on the file, and a Download button appears. Click the Download button, and choose the format you want the download to be in from the pop-up menu ![]() . You can also download a file by selecting the file, clicking the Actions button, and choosing Download filetype from the pop-up menu
. You can also download a file by selecting the file, clicking the Actions button, and choosing Download filetype from the pop-up menu ![]() . You’ll get a dialog that allows you to choose the download format
. You’ll get a dialog that allows you to choose the download format ![]() .
.
![]() Choose the download format you want.
Choose the download format you want.
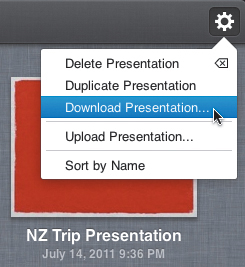
![]() You can also manage your iWork files with the pop-up menu from the Actions button.
You can also manage your iWork files with the pop-up menu from the Actions button.
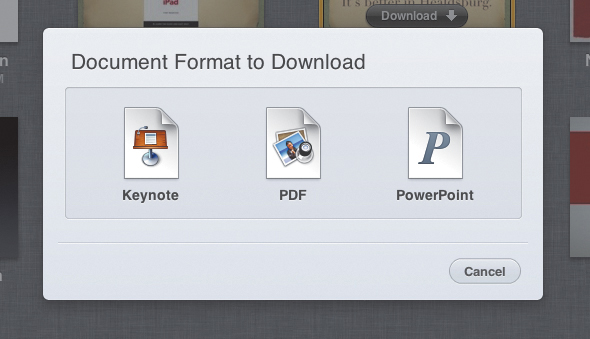
![]() This dialog also allows you to choose your preferred download format.
This dialog also allows you to choose your preferred download format.
• To upload a file from your computer to iCloud, drag the file from your desktop into the iWork website window ![]() , or click the Actions button, and choose Upload filetype from the pop-up menu.
, or click the Actions button, and choose Upload filetype from the pop-up menu.
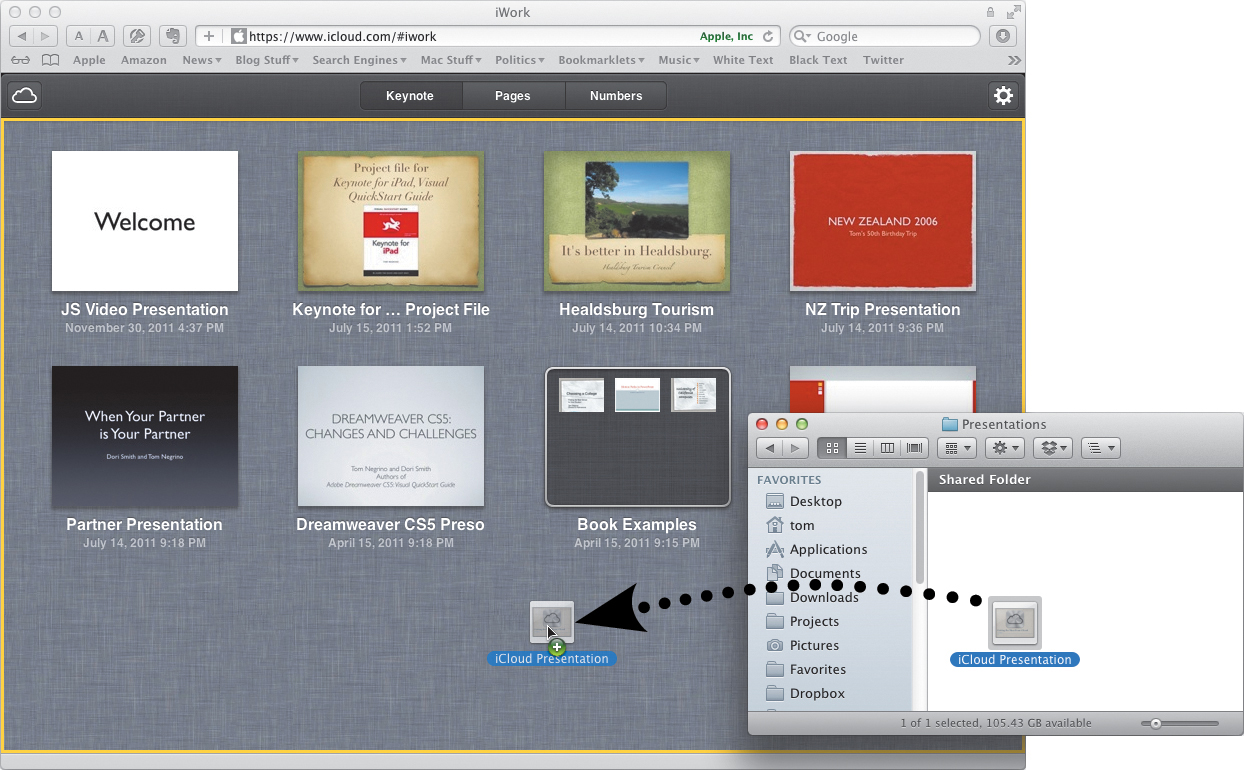
![]() Drag the iWork file you want to upload from your desktop into the iWork browser window.
Drag the iWork file you want to upload from your desktop into the iWork browser window.
• You can create folders on the iWork website by dragging presentations on top of one another, then naming the resulting folder. The folder then appears in a similar way to folders on iOS ![]() . Clicking the folder opens it and shows you its contents.
. Clicking the folder opens it and shows you its contents.
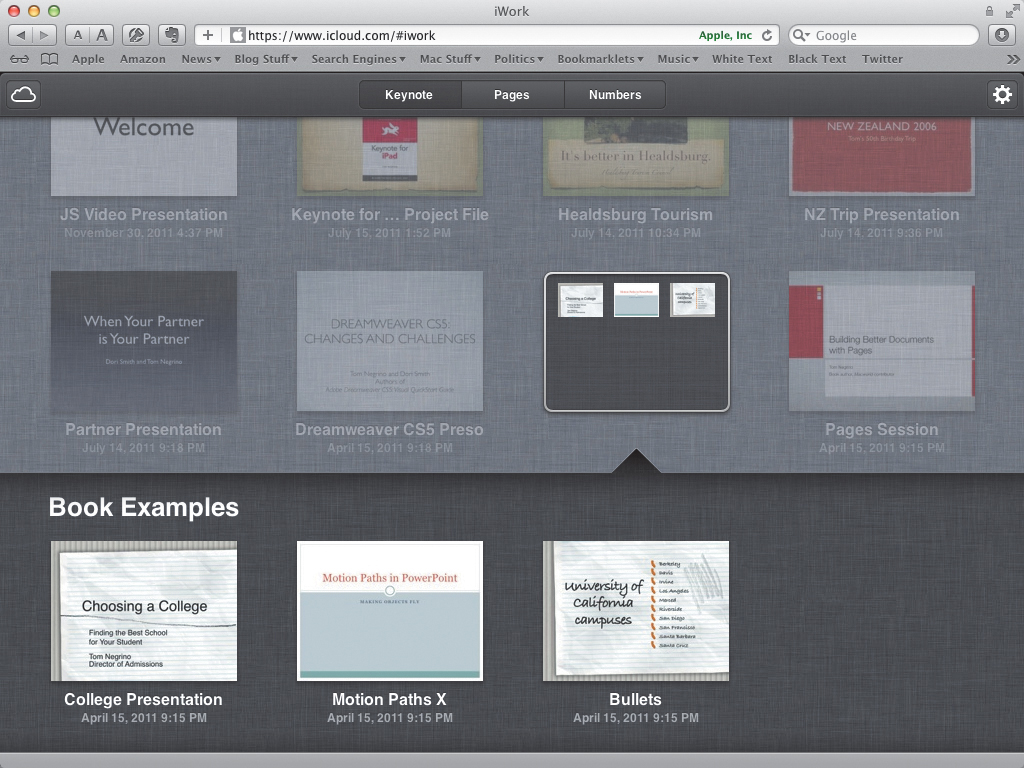
![]() Clicking a folder opens it, showing you the files within.
Clicking a folder opens it, showing you the files within.
• To delete a document from iCloud, click to select it, then press Delete, Backspace, or click the Actions button and choose Delete filetype from the pop-up menu. As usual when you are destroying data, iCloud will ask you to confirm your choice ![]() . Click Delete.
. Click Delete.
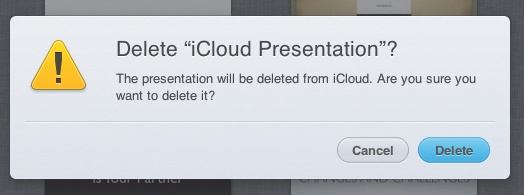
![]() You always have a last chance before you delete data.
You always have a last chance before you delete data.
Tip
Frankly, it seems pretty lame that you need to mess with the web interface in order to update your iWork documents on your Mac. It puts the onus on you to remember to upload files to your Mac from your iOS devices when you want to work with them. As it turns out, there is a workaround, though not one sanctioned by Apple. This workaround allows iWork documents on iCloud to automatically synchronize between iCloud and the Mac. For more information and details about the procedure, see Ted Landau’s article, “Bugs & Fixes: True sync of iWork docs between Macs and iCloud” in Macworld magazine, at www.macworld.com/article/163291/.