1. Getting Started with iCloud
Welcome to iCloud: Visual QuickStart Guide. This book will help you get up and running with Apple’s iCloud online service, which allows your iOS devices (the iPhone, iPad, iPod touch, and Apple TV), your Macs, and your Windows PC to work together in ways that couldn’t be done before.
The iCloud service doesn’t do just one thing; it’s a collection of tools that allows you to better manage your mobile devices, automatically synchronizing your personal information, including calendars, contacts, photos, music, and documents with all your devices. You can use iCloud to find the location of friends, family, and your devices, should those devices (or people) go missing. And iCloud also has added small benefits, such as freeing you from the tyranny of your wireless carrier’s overpriced text messaging plans.
In this book, I’ll show you how to get the most out of iCloud’s various services, allowing you to use your computers and devices and more efficiently. Let’s get started.
What Is iCloud?
iCloud is Apple’s online service that is, more than anything else, devoted to automatically and seamlessly synchronizing your personal data between all of the devices you may happen to use. First, let me clarify one bit of terminology I’m using in this book. When I refer to a “device,” it could be a Mac desktop computer, a Mac notebook computer, or any iOS device, such as an iPhone, iPad, iPod touch, or even the Apple TV. It could even be a Windows PC.
Things have changed quite a bit from the world in which we were tied to our desktop, or even laptop computers. With the advent of the iPhone and the iPad, you might want to check your mail, add to your calendar, edit a contact, or snap a photo when you’re away from your computer, and if you have more than one computer, or more than one mobile device, it would be nice if changes you made on one device automatically appeared on all your other devices.
Essentially, that’s what iCloud is all about. It liberates you from needing to worry about where your data is. There is no wondering about “Did I take my iPhone photos off the phone and put it on my computer?” or “Did I remember to take that appointment I entered on my iPad and put it on my iMac?” With iCloud, these things simply happen, in the background, and you never have to worry about them. Ideally, all your important data and documents are pushed to all your devices. It’s a way to make sure that not just your digital life but your entire life is with you wherever you happen to be.
But really, I tend to think of iCloud as “plumbing in the sky.” It doesn’t so much do things itself as it enables devices and software to interact with one another in ways that make your life easier.
If, like me, you’ve been using the Mac for a long time, and you used previous Apple online services such as .Mac and MobileMe, you might be tempted to think that iCloud is just the newest flavor of those services. However, I think that’s the wrong way to think about it. Those older services weren’t built from the ground up, as iCloud has been, with the idea that your personal information and the documents you create should be ubiquitous and available no matter what device you have within reach.
So let’s take the 10,000 foot view of what iCloud can do for you, and I think you’ll see that in most cases, it does things that make excellent sense for most of us.
• Wherever you go, your stuff is there. In the early days of Mac OS X, there was a program called iSync that allowed you to manually synchronize information (mostly contacts) between mobile phones and a Mac, connected by a wire (or sometimes via Bluetooth). Compared to iCloud, you can think of iSync as roughly equivalent to a stone ax. With iCloud, you can wirelessly synchronize contacts, calendars, email, browser bookmarks, photos, music, apps, documents, and more. You don’t have to “initiate a synchronization,” and you don’t have to do any manual copying, either. All you need do is make or edit something, and it automatically appears on the rest of your devices within a minute or so. So you can shoot a picture on your iPhone, get a decently large-sized view of it on your iPad, then move immediately to your Mac and touch up the photo.
• You don’t need to carry all your stuff with you. The last time I bought an iPhone, I bought the model with 16 GB of storage. Why that instead of the fat 32 GB model? Because I didn’t want to spend the extra $100 to double the storage. I knew that most of the storage space used on an iOS device is taken up by music and video, and I knew that my iTunes library was already far larger than any device I could buy, so I knew that I would always be carrying a subset around with me. Little did I know that Apple was already working on ways to make all of my data available to me, whether I chose to put it on my device or not. With a decent Wi-Fi connection and an optional service called iTunes Match, you can stream the contents of your iTunes library to your iOS device, whether or not you have purchased that content from Apple. You’ll find more about using iTunes with iCloud in Chapter 6.
• Your information is safer, even if you forget. One of the best things you can do with iCloud is have it automatically backup your iOS devices to Apple’s servers, once a day, as long as you have a Wi-Fi connection. That means that if your device is tragically either lost or stolen, you’ll be able to purchase a replacement device, run through the setup process, and restore from the latest backup, without a lot of manual torment. You simply run through the restore process, and your device is in the same state it was the last time iCloud backed it up for you. And from any other iOS device or from the iCloud website, you can remotely lock or erase the data on your wayward device. Don’t get me wrong; losing a device is still a pain. But with iCloud, at least it’s a pain in your wallet, rather than the pain of identity theft. You’ll find more about backing up with iCloud in Chapter 7, and more about remotely locking and erasing an iOS device in Chapter 10.
• There’s less need for wires. Because iCloud can synchronize many kinds of data and backup your device over a Wi-Fi connection, most of the time you’ll only need a USB-to-Dock connector cable to charge your iOS device. Even upgrading to a new version of iOS (once you’re on iOS 5) can be done wirelessly; one of the nice little features in iOS 5 are “delta updates,” which upgrades only the portion of the operating system that needs it, rather than requiring the whole thing to be downloaded. But in a big conceptual shift, Apple has cut the cord when it comes to iOS devices, meaning that you no longer need a Mac or PC to set them up or maintain them. With iOS 5, the days of needing to plug your iOS device into a computer running iTunes to set it up are gone; a Setup process runs right on the device.
Whether you use the bare minimum of iCloud’s services, or you jump in with both feet, iCloud has the ability to blur the location of your data. And that’s a good thing. The important thing to understand is that you, personally, won’t be dealing so much with iCloud as you will be dealing with the apps on your devices (or, if you prefer, with the iCloud website).
Let’s talk a little more about the specific features that iCloud enables. Many of these are familiar, either as apps on your devices, or from use with MobileMe. These features include:
• Email. An iCloud account comes with a me.com account (if you previously had a mac.com account, that will work too; in fact, they are treated as the same account), and email from that account appears on all your devices. iCloud also deals with notes and text messages. You’ll find more information about all of these functions in Chapter 2.
• Contacts and Calendars. Your address book and calendar information can be shared not only with your own devices but also with other people for whom you give permission. I cover these features in Chapters 3 and 4.
• Browser Bookmarks. If you like, you can synchronize your Safari (or on Windows, your Internet Explorer) browser bookmarks via iCloud. You’ll find more information about that in Chapter 8.
• Photos. Part of iCloud is a new concept called Photo Stream, which pushes the contents of your iOS device’s Camera Roll up to the cloud and down to your other devices. Look for more about that in Chapter 5.
• Synchronized Documents. In iCloud, you can share documents created in other applications, for example Apple’s iWork applications: Keynote, Pages, and Numbers. Documents that you create or edit on one device can update automatically on all your other devices, so no matter what device you’re working on, you’re always up-to-date. Apple calls this feature Documents in the Cloud, and it’s not limited to just Apple’s own programs; third-party programs can take advantage of the feature as well. You’ll find more information about that in Chapter 9.
• Location Services. Using iCloud, you can find the location of people and devices. Again, turn to Chapter 10 for more information on finding and working with people and devices.
All of these services are tied together using storage on Apple’s servers. With every iCloud account, you get 5 GB of storage for free, and you can purchase more storage on a yearly basis if needed (up to 50 GB). Some items, such as anything you buy from the iTunes Store and photos in your Photo Stream, don’t count against the 5 GB storage quota.
Hardware and Software Requirements
In order to use iCloud, Apple required users to break with past operating systems and start anew with the latest versions of both their desktop (Mac OS X) and mobile (iOS) operating systems. iCloud also works on recent versions of Microsoft Windows, though many iCloud features work best with or require a Mac.
On the Mac, using iCloud requires that you be running Mac OS X 10.7.2 Lion or later ![]() . That means that iCloud on the Mac has the same hardware requirements as Lion. A Mac requires an Intel Core 2 Duo, Core i3, Core i5, Core i7, or Xeon processor. For portable machines, that includes most of the Intel-based MacBooks (excluding only the original 2006 model); MacBook Pro (if introduced after October 2006); and all models of the MacBook Air. For desktop machines, it includes the Mac mini (mid 2007 or later); iMac (after September 2006); and all versions of the Mac Pro. Your computer needs at least 2 GB of memory (as usual with a Mac, you’ll get better performance with more memory), and at least 7 GB of available storage space.
. That means that iCloud on the Mac has the same hardware requirements as Lion. A Mac requires an Intel Core 2 Duo, Core i3, Core i5, Core i7, or Xeon processor. For portable machines, that includes most of the Intel-based MacBooks (excluding only the original 2006 model); MacBook Pro (if introduced after October 2006); and all models of the MacBook Air. For desktop machines, it includes the Mac mini (mid 2007 or later); iMac (after September 2006); and all versions of the Mac Pro. Your computer needs at least 2 GB of memory (as usual with a Mac, you’ll get better performance with more memory), and at least 7 GB of available storage space.

![]() On your Mac, you must be running Mac OS X Lion 10.7.2 or later to use iCloud.
On your Mac, you must be running Mac OS X Lion 10.7.2 or later to use iCloud.
On an iOS device, you must be running iOS 5 or later ![]() (as I write this, iOS 5.0.1 has been released); iCloud comes free as part of iOS 5. In fact, much of the amazing things that you can do with iCloud are completely dependent on the features in iOS 5. In terms of hardware, most, but not all, iOS devices are compatible with iOS 5. Any iPhone from the iPhone 3GS or later; any iPad; and the iPod touch 3rd generation or later can run iOS 5, and therefore use iCloud. The 2nd generation Apple TV, which is a modified iOS device, can use iCloud’s Photo Stream and iTunes Match services, but the original Apple TV cannot.
(as I write this, iOS 5.0.1 has been released); iCloud comes free as part of iOS 5. In fact, much of the amazing things that you can do with iCloud are completely dependent on the features in iOS 5. In terms of hardware, most, but not all, iOS devices are compatible with iOS 5. Any iPhone from the iPhone 3GS or later; any iPad; and the iPod touch 3rd generation or later can run iOS 5, and therefore use iCloud. The 2nd generation Apple TV, which is a modified iOS device, can use iCloud’s Photo Stream and iTunes Match services, but the original Apple TV cannot.

![]() You’ll need to be using iOS 5 on your mobile devices to use iCloud features.
You’ll need to be using iOS 5 on your mobile devices to use iCloud features.
On a Windows PC, you can install the iCloud control panel on any version of Windows 7, or Windows Vista with Service Pack 2 or later.
On any platform, you can do some interaction with iCloud services with nothing more than a web browser ![]() . I’ll discuss the interaction on the iCloud website in each of the chapters that relates to that section of the website.
. I’ll discuss the interaction on the iCloud website in each of the chapters that relates to that section of the website.
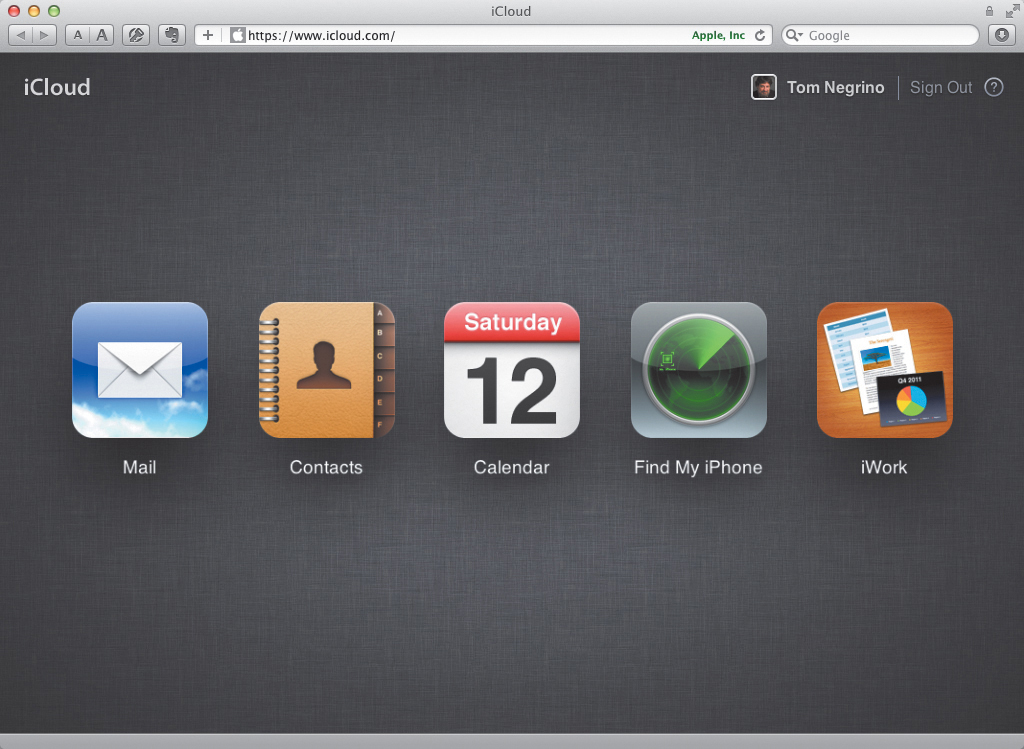
![]() The iCloud website allows you to access and work with much of your iCloud data.
The iCloud website allows you to access and work with much of your iCloud data.
Apple ID Considerations
Before you can move to iCloud, you’ll need one crucial bit of information: your Apple ID and password. The Apple ID is the glue that holds all your iCloud information together. You may already have an Apple ID, because one is required if you’ve ever bought anything from the iTunes Store or Mac App Store. And Mac OS X users have been prompted to create an Apple ID when they set up their Macs for years.
The Apple ID must be a valid email address, and is usually a me.com address, which Apple will give to you for free. You’ll create and sign into your iCloud account using a single Apple ID, which will then be the Apple ID you use for all iCloud services (but there are caveats; see the “Dealing with Multiple Apple IDs” sidebar later in this section).
Under Mac OS X Lion, your Apple ID can serve as an alternate set of credentials to your usual username and password for services such as file sharing, screen sharing, and account recovery. In Lion, the Apple ID is integrated into the Users & Groups preference pane ![]() .
.
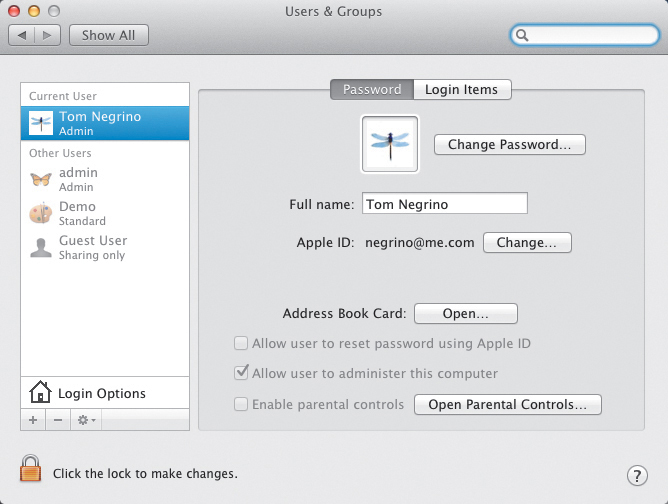
![]() In Lion, there is now an entry for Apple ID in the Users & Groups preference pane.
In Lion, there is now an entry for Apple ID in the Users & Groups preference pane.
It’s worth pointing out that if you have previously been sharing your Apple ID with others (perhaps because you have been sharing your iTunes library using Home Sharing, or to share purchases from the iTunes Store), those people now have access to your account on a Lion-based Mac, either over a local network or remotely via Back to My Mac. Before you upgrade to iCloud, it’s a good idea to reflect upon your security requirements, and if necessary, change the password associated with your Apple ID. Along the same lines, now is the time to think about how secure your Apple ID password is. If it is easily guessable, a word that is in a dictionary, a consecutive sequence of numbers or letters, or otherwise weak, I strongly recommend you change it to a stronger password before moving to iCloud. A quick Google search using the phrase “making a good password” will lead you to much good advice.
If multiple people use a single Apple ID (for example, if your entire family has been using your Apple ID for iTunes Store purchases) you can still do so for that purpose, but each person will have to create a separate Apple ID/iCloud account for syncing and backup of their personal devices.
Tip
When I wrote this book, rather than blur my Apple ID in the book’s many screenshots, I chose to leave it in readable form. But before the book went to print, I changed the password (which was already pretty good) to an even more secure password.
Tip
If you click the Change button in the Users & Groups preference pane under Lion, it’s possible to associate your user account with more than one Apple ID.
Configuring iCloud on Your iOS Devices
It’s easy to set up iCloud on your iOS device. You can either set it up when you set up iOS 5 for the first time, or you can turn it on at any time. In either event, you’ll need an Apple ID. If you don’t already have an Apple ID, you can create one during the process.
If you previously had a MobileMe account, there are some other important considerations before you turn on iCloud on your iOS devices. Before you continue in this section, you should first read the “Migrating to iCloud from MobileMe” section, later in this chapter.
To set up iCloud on your iOS device
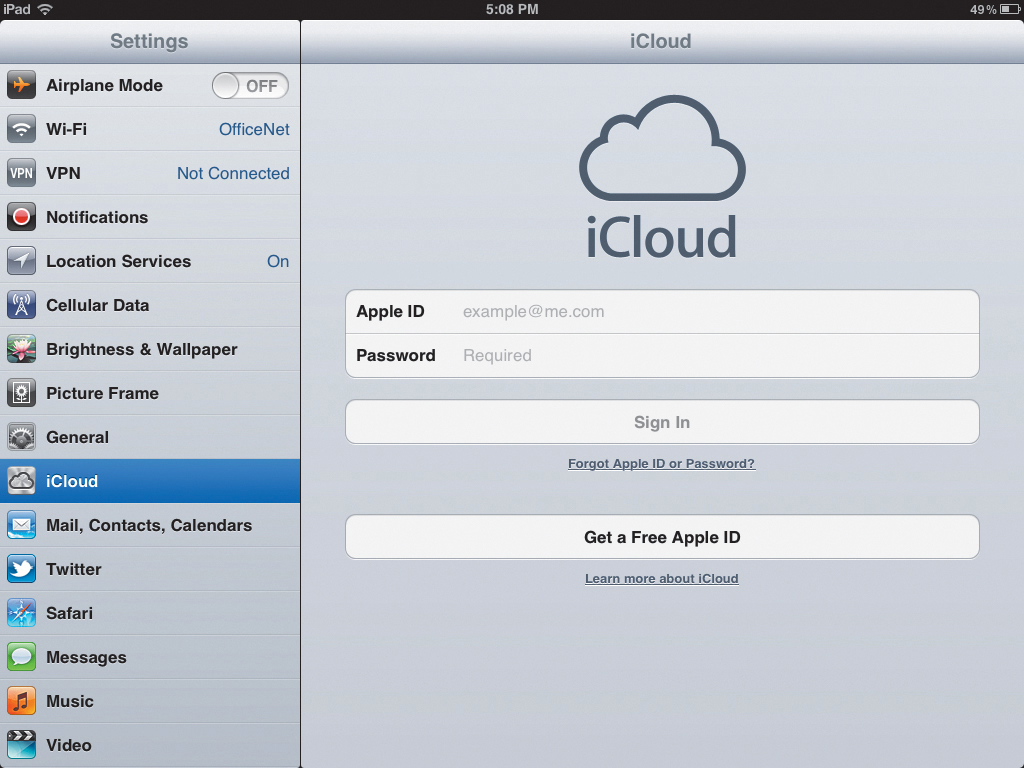
1. During iOS 5 initial set up, one of the screens that you will see is the Apple ID screen ![]() . If you have already gone through the iOS 5 setup process, skip to step 4.
. If you have already gone through the iOS 5 setup process, skip to step 4.

![]() During iOS 5 setup, you’ll be prompted to sign in with an existing Apple ID, or create a new one.
During iOS 5 setup, you’ll be prompted to sign in with an existing Apple ID, or create a new one.
You’ll need to be connected to a Wi-Fi network during the setup process.
2. Tap Sign In with an Apple ID if you already have an Apple ID.
or
If you need an Apple ID, tap Create or Get (depending on the device) a Free Apple ID. You’ll be prompted through the sign-up process, where you’ll get a me.com email address and enter a password.
3. On the Apple ID screen, enter your Apple ID and password, then complete the setup process.
4. In the iOS Settings app, tap iCloud ![]() .
.
![]() You can sign in to iCloud in the iCloud pane of the iOS Settings app.
You can sign in to iCloud in the iCloud pane of the iOS Settings app.
5. Enter your Apple ID and password, then tap Sign In.
6. In the iCloud Settings panel, turn on the services you wish to use (![]() and
and ![]() ).
).
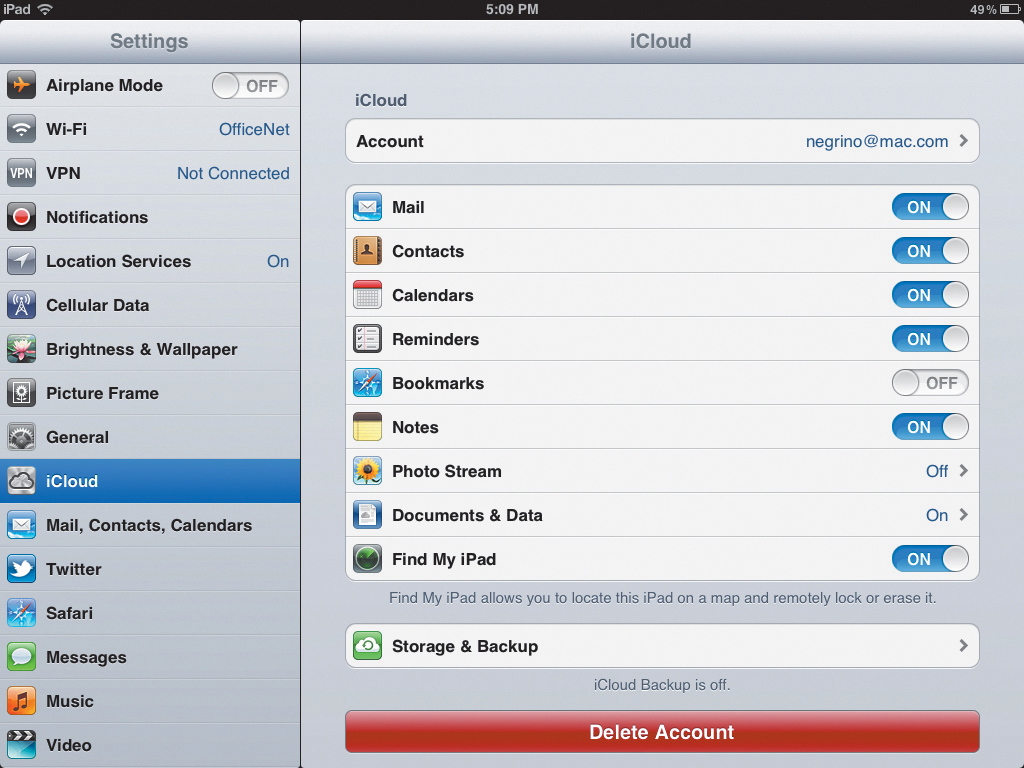
![]() Once you are signed in to iCloud...
Once you are signed in to iCloud...
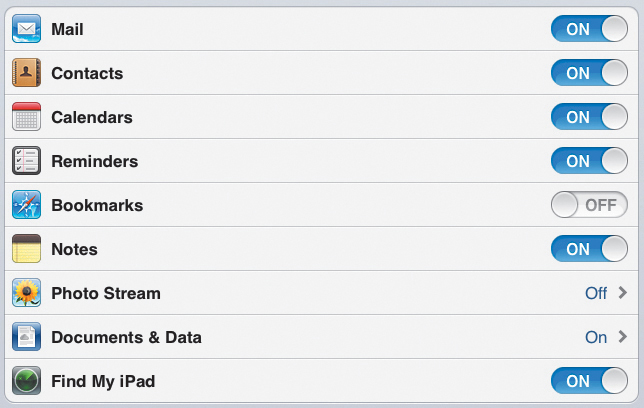
![]() ... you can turn on the specific services you want to use.
... you can turn on the specific services you want to use.
Configuring iCloud on Your Mac
To activate iCloud on your Mac, you have to make sure that you have first upgraded to Mac OS X Lion 10.7.2 or later. That update added the iCloud preference pane in System Preferences.
As with an iOS device, if you previously had a MobileMe account, there are some other important considerations before you turn on iCloud on your Mac. Before you continue in this section, you should first read the “Migrating to iCloud from MobileMe” section, later in this chapter.
To set up and configure iCloud on your Mac
1. From the Apple menu, choose System Preferences ![]() .
.
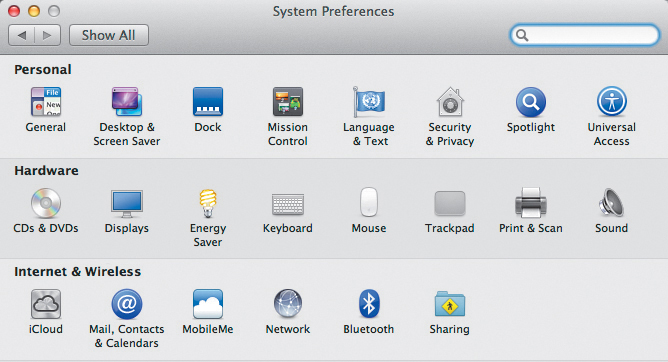
![]() Begin the iCloud setup process by opening System Preferences.
Begin the iCloud setup process by opening System Preferences.
2. Click the iCloud icon.
The iCloud preference pane appears ![]() .
.
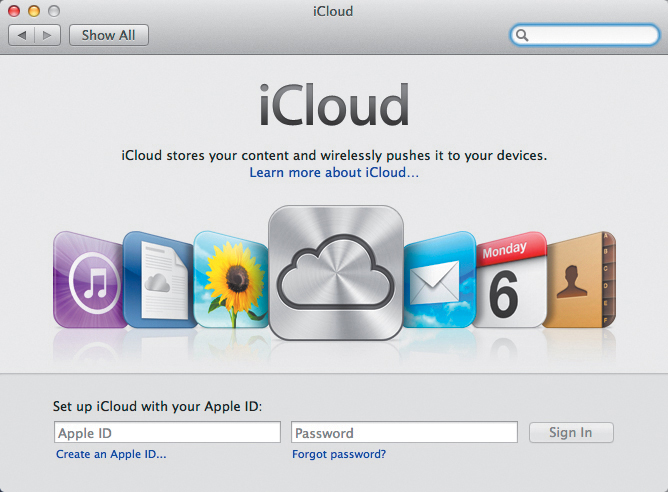
![]() In the iCloud preference pane, enter the Apple ID you wish to use with iCloud, as well as its password.
In the iCloud preference pane, enter the Apple ID you wish to use with iCloud, as well as its password.
3. Enter your Apple ID and password, then click Sign In.
4. (Optional) If you already had a MobileMe account, iCloud will offer to begin the migration process ![]() . if you’re ready to do that migration, click Move, then see the “Migrating to iCloud from MobileMe” section, later in this chapter.
. if you’re ready to do that migration, click Move, then see the “Migrating to iCloud from MobileMe” section, later in this chapter.
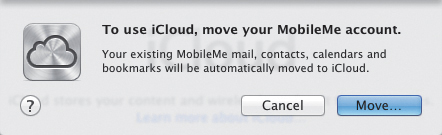
![]() If you already had an active MobileMe subscription, iCloud offers to begin migrating your data.
If you already had an active MobileMe subscription, iCloud offers to begin migrating your data.
5. In the iCloud preference pane, select the checkboxes next to the services you want to enable ![]() .
.
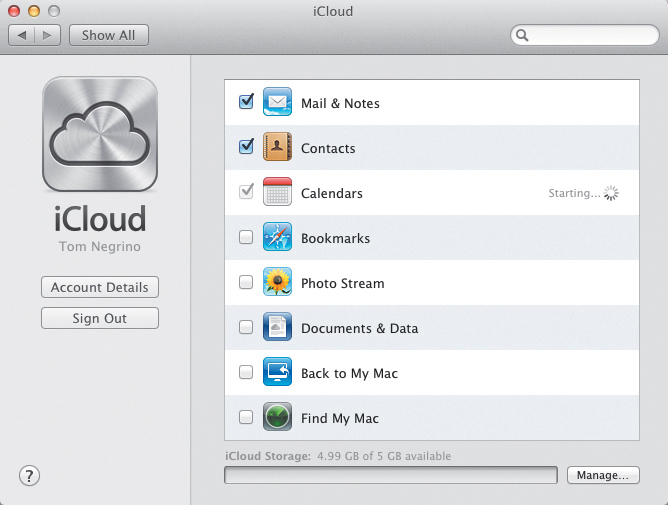
![]() If you didn’t have a MobileMe account, choose the iCloud services you want to use from the preference pane.
If you didn’t have a MobileMe account, choose the iCloud services you want to use from the preference pane.
Configuring iCloud on Your PC
If your main computer is a Windows PC, as opposed to a Mac, you can still use iCloud with it, though you only have access to a subset of the services that you would have on a Mac. On the PC, you can use iCloud for email (with a me.com address), contacts, calendars, and tasks (called Reminders on the iOS device), all synchronizing with Microsoft Outlook 2007 or 2010. The bookmark synchronization service works with Internet Explorer 8 or later. Your Photo Stream can also be pushed to and from your Windows PC, using folders you designate as the source and destination for iCloud photos.
Before you can use iCloud on Windows, you’ll need to download the iCloud control panel from Apple’s website at http://support.apple.com/kb/DL1455. This download will be a standard .exe file, which you open and install like any other Windows program.
To set up and configure iCloud on your PC
1. Choose Start Menu > Control Panel > Network and Internet ![]() .
.

![]() Open the Network and Internet section of the Windows Control Panel to start working with the iCloud Control Panel.
Open the Network and Internet section of the Windows Control Panel to start working with the iCloud Control Panel.
2. Click iCloud.
3. In the resulting iCloud control panel ![]() , select the checkboxes for the services you wish to enable.
, select the checkboxes for the services you wish to enable.
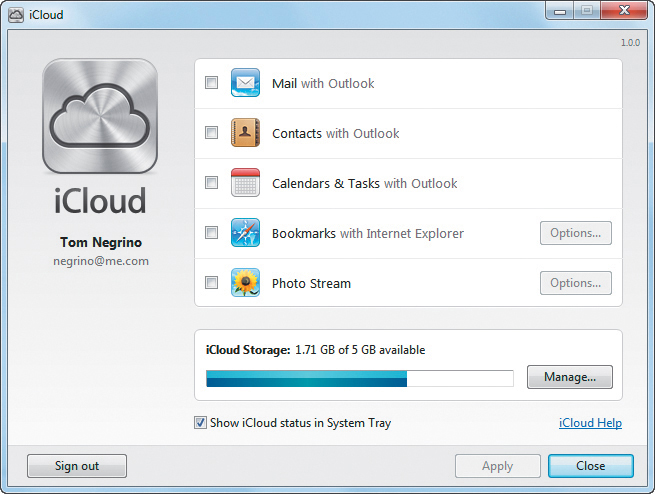
![]() Click the checkboxes for the iCloud services you want to use.
Click the checkboxes for the iCloud services you want to use.
Migrating to iCloud from MobileMe
If you were previously a MobileMe subscriber, as part of the process of enabling iCloud on your Mac, Lion will detect your active MobileMe account and prompt you to begin the migration of your MobileMe data to iCloud. As noted earlier in this chapter, not all of the services that you enjoyed with MobileMe will survive the migration. However, MobileMe services will remain active through June 30, 2012, so services that aren’t in direct conflict with iCloud, such as iWeb site hosting, the MobileMe Photo Gallery, and the contents of your iDisk, will remain active and available until the MobileMe end date.
Although I know literally dozens of people who have made the migration from MobileMe to iCloud with no problems, there’s no guarantee that you’ll also be one of them. Therefore, my advice is simple and clear: make sure that you have a complete backup of all your data on both your Mac and your iOS devices before you move to iCloud. Let me repeat that: have at least one good backup of every bit of your data before you start your iCloud migration. It doesn’t matter if you use Apple’s Time Machine, or Shirt Pocket’s SuperDuper, or any other backup program, as long as you have a solid backup that won’t be affected as soon as you convert to iCloud. Because I’m a stickler for backups, I made sure to update all three of my regular backup systems (yes, I use three entirely separate backup programs; yes, I know I’m a freak) immediately before I clicked the Get Started button with my MobileMe to iCloud migration.
To migrate to iCloud from MobileMe
1. From the Apple menu, choose System Preferences.
2. Click the iCloud icon.
The iCloud preference pane appears.
3. Enter your Apple ID and password, then click Sign In.
4. iCloud will offer to begin the migration process ![]() .
.

![]() If you had an active MobileMe account, Lion is smart enough to recognize that and offer to begin your iCloud migration.
If you had an active MobileMe account, Lion is smart enough to recognize that and offer to begin your iCloud migration.
5. Click Move.
Safari will launch and begin the migration process ![]() .
.
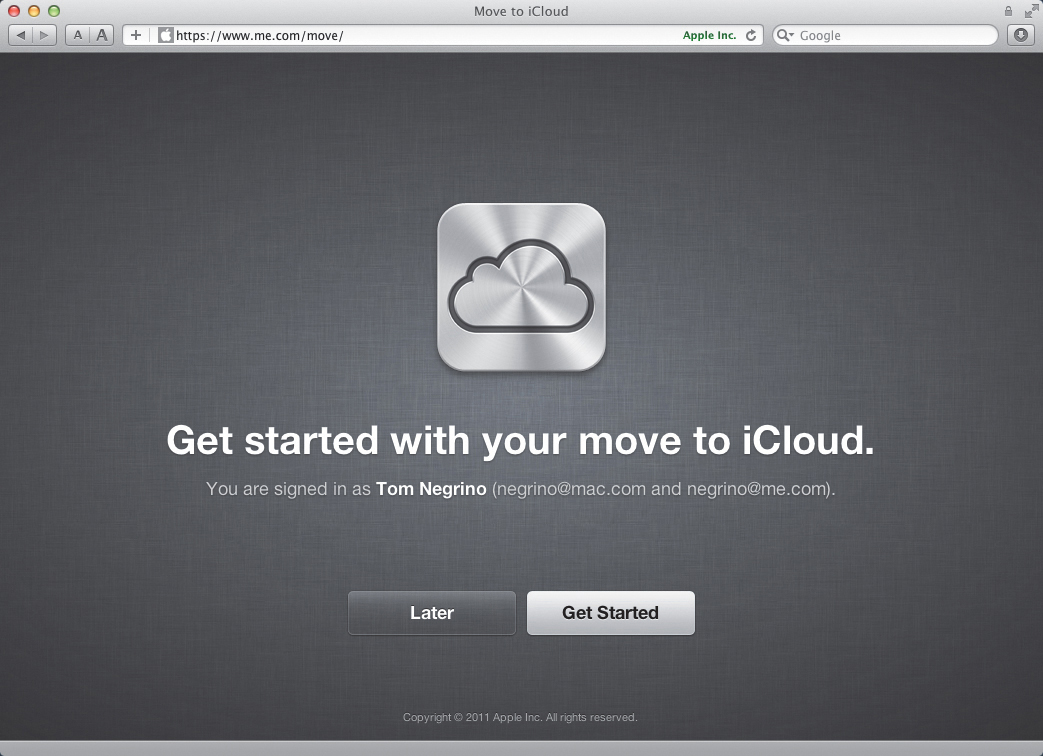
![]() In your web browser, you can begin the migration process.
In your web browser, you can begin the migration process.
6. Click Get Started.
The website will show you three informational screens that explain how your mailing calendars will be moved from MobileMe to iCloud; how you’ll still be able to use Gallery, iDisk, and iWeb publishing; and which MobileMe features will no longer be available. Finally, you’ll get to a screen that says “Now, upgrade your devices for iCloud.” ![]() .
.
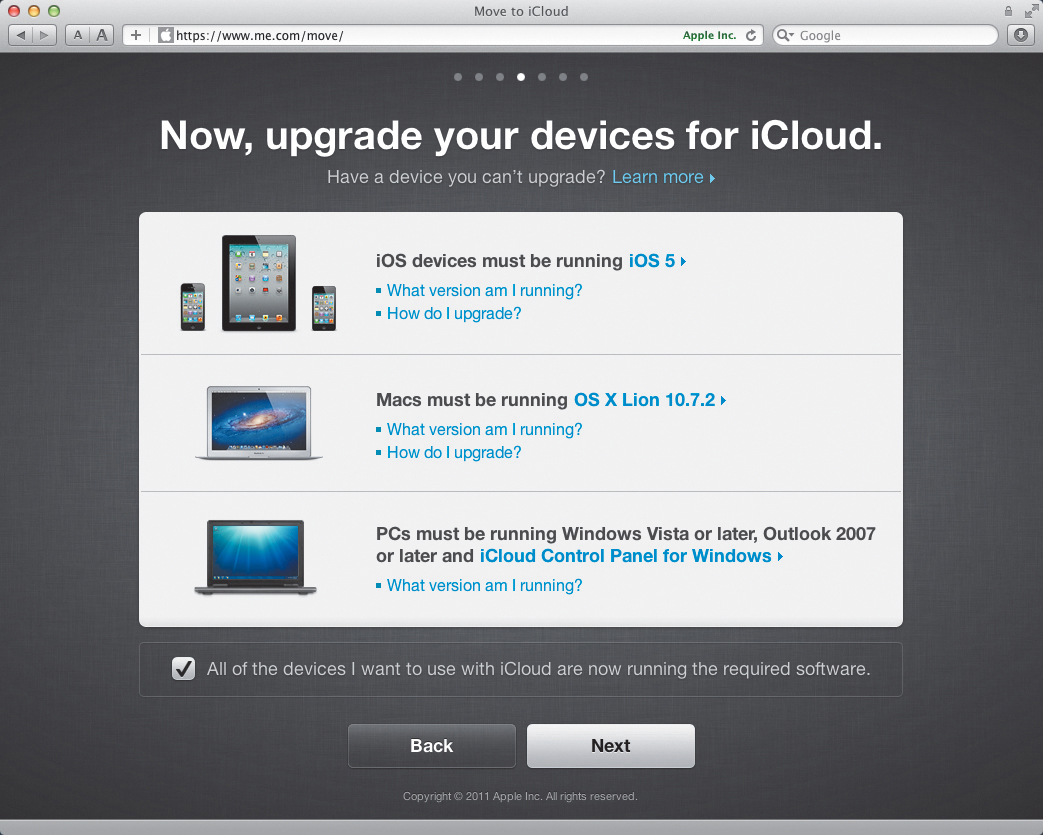
![]() You need to confirm that all your devices are ready for iCloud.
You need to confirm that all your devices are ready for iCloud.
7. Select the “All of the devices I want to use the iCloud are now running the required software” checkbox, then click Next.
Another couple of informational screens will appear, reminding you to have up-to-date contacts and bookmarks on one of your devices and to back up your contacts, calendars, and bookmarks before moving. Click Next to move through each of the screens, until you get to the iCloud Terms of Service screen ![]() .
.
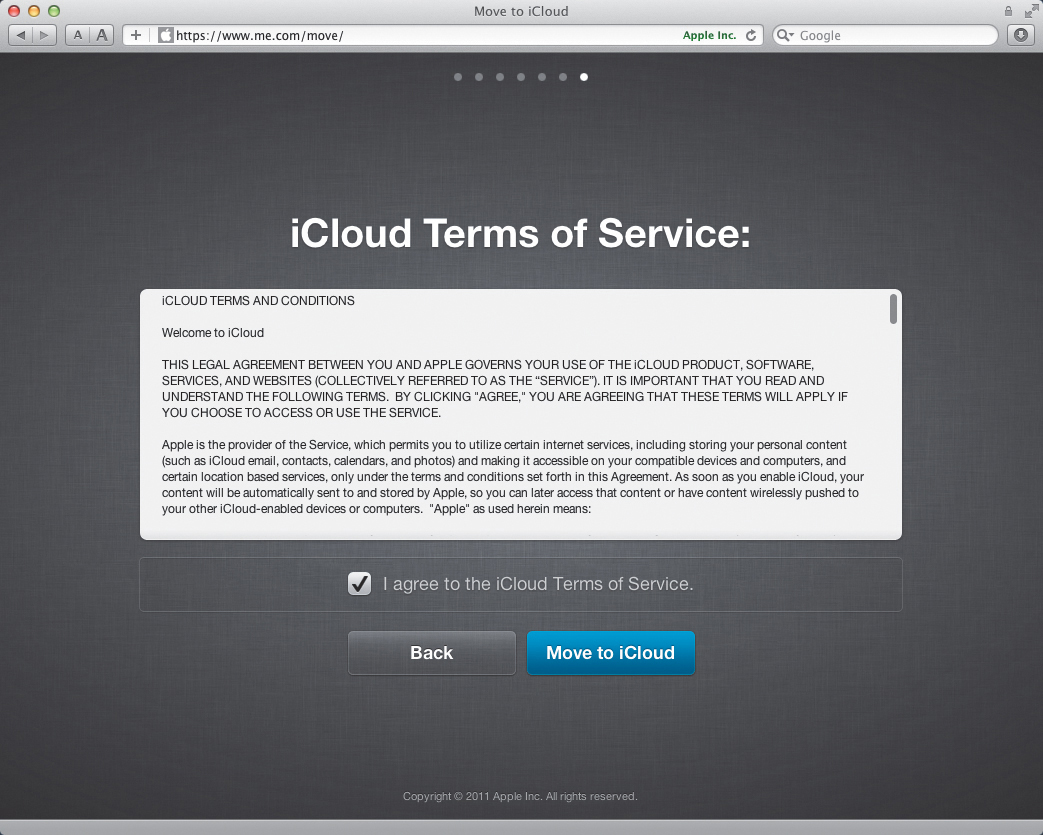
![]() Once you agree to the iCloud Terms of Service and click the Move to iCloud button, the actual migration begins.
Once you agree to the iCloud Terms of Service and click the Move to iCloud button, the actual migration begins.
8. Select the “I agree to the iCloud Terms of Service” checkbox, then click Move to iCloud.
One or more screens may appear in your browser informing you of progress in moving your data from MobileMe to iCloud ![]() . The final informational screen in your browser informs you that you will be getting alerts on your iOS devices, your Macs, and your Windows PCs
. The final informational screen in your browser informs you that you will be getting alerts on your iOS devices, your Macs, and your Windows PCs ![]() . The screen will show you what the alerts on each of those devices will look like.
. The screen will show you what the alerts on each of those devices will look like.
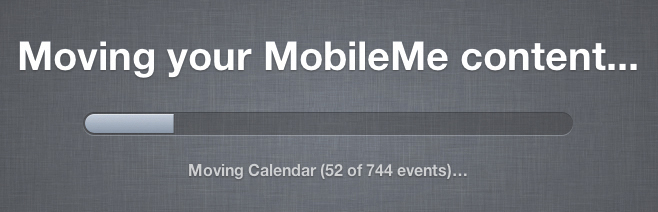
![]() During the migration, the browser shows you the process’s progress.
During the migration, the browser shows you the process’s progress.
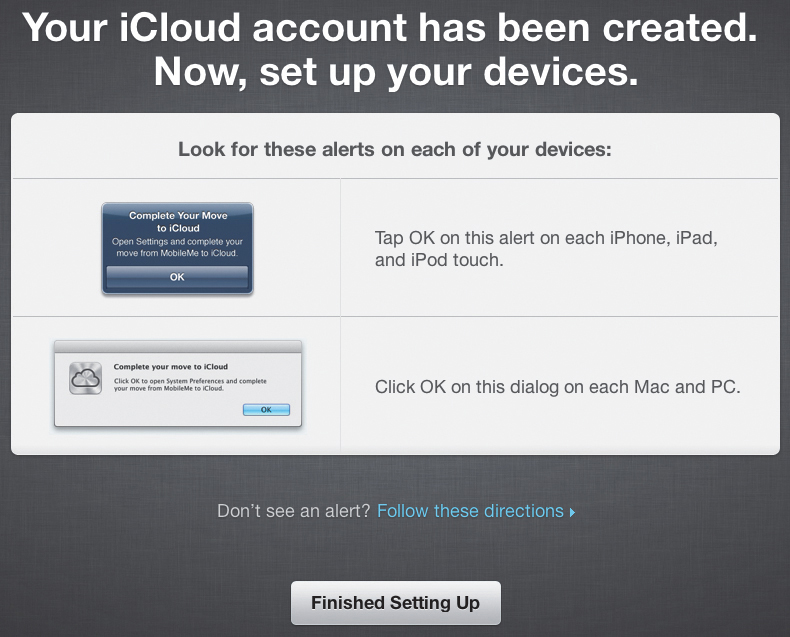
![]() The browser shows you the alerts you’ll be getting on your mobile and desktop devices to complete your move to iCloud.
The browser shows you the alerts you’ll be getting on your mobile and desktop devices to complete your move to iCloud.
It’s possible that iCal will open and begin upgrading your calendars. If it doesn’t, you should open it manually and allow it to upgrade the calendar data (you should open iCal at least once even if you use a third-party calendar program such as BusyMac’s BusyCal, since almost all other calendar programs use iCal’s data).
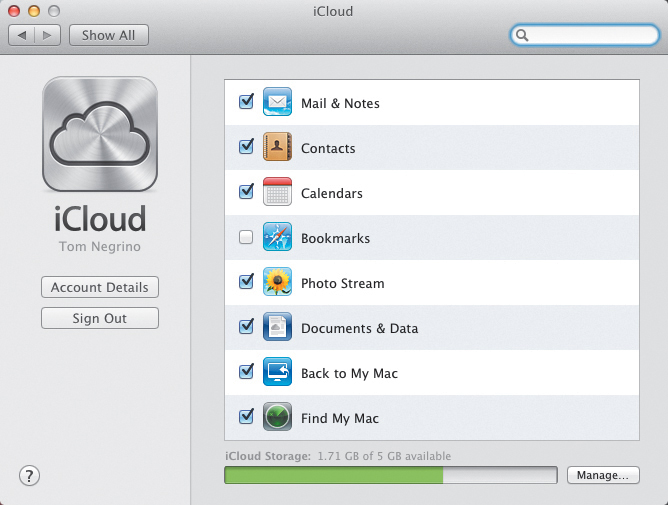
![]() Select the checkboxes in the iCloud preference pane to turn on the iCloud services you wish to use.
Select the checkboxes in the iCloud preference pane to turn on the iCloud services you wish to use.
The iCloud preference pane should open by itself. If it does not, open it manually from System Preferences.
10. In the iCloud preference pane, select the checkbox next to each service you want to use in iCloud ![]() .
.
If you have more than one Mac, repeat step 10 for each computer. Ideally, you want to enable the same services on every computer.