
3. Working with Contacts
The people and companies that you deal with are stored in your Mac’s Address Book, and in the Contacts app in iOS and iCloud. Using iCloud, changes that you make on any of your devices get synchronized immediately to the rest of your devices. So, for example, if you change a contact’s address, phone number, email address, or other information in Address Book on your Mac, those changes will be pushed automatically and effortlessly to your mobile devices, and to any other Macs that share your iCloud account. The reverse is also true; changes made on a mobile device are synchronized back to your Macs over the air, whether it be via Wi-Fi or the cellular network.
In addition to the changes you can make to contacts on your Macs and mobile devices, you can also manage contacts using the Contacts application on the iCloud website. In this chapter, we’ll focus mainly on using the website for contact management.
Searching, Adding, and Editing Contacts in iCloud
To begin working with your contacts, go to the iCloud website ![]() , sign in if necessary, and click on the Contacts application
, sign in if necessary, and click on the Contacts application ![]() , which closely resembles the Address Book application on the Mac.
, which closely resembles the Address Book application on the Mac.
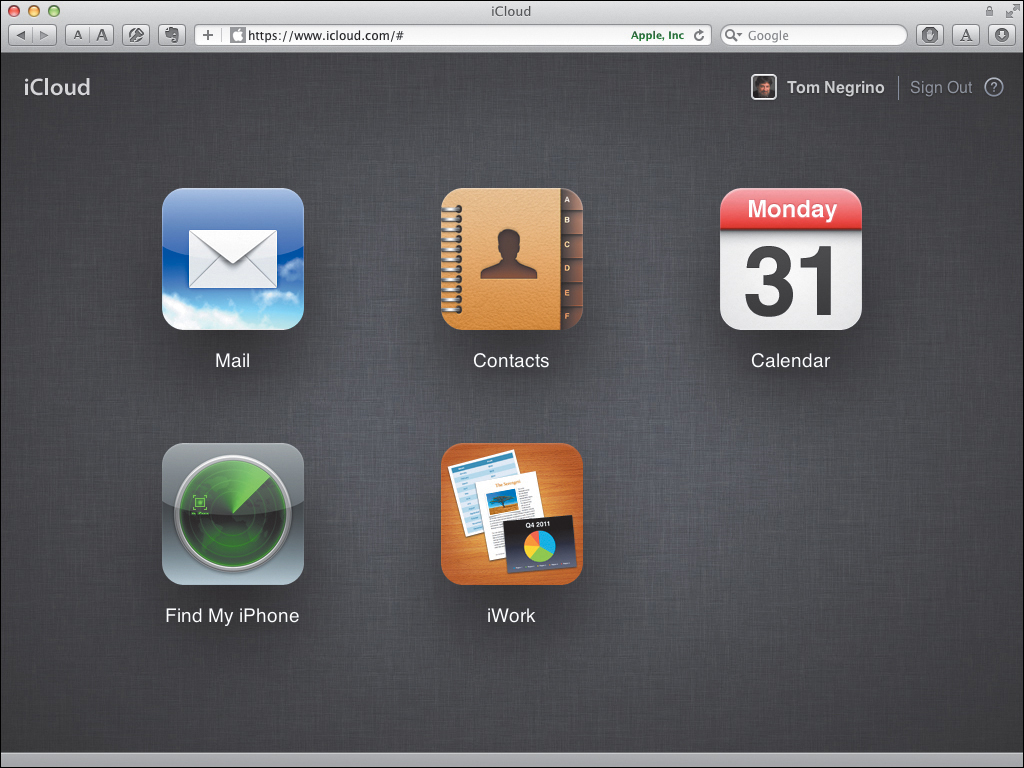
![]() Choose the Contacts application from the iCloud website.
Choose the Contacts application from the iCloud website.
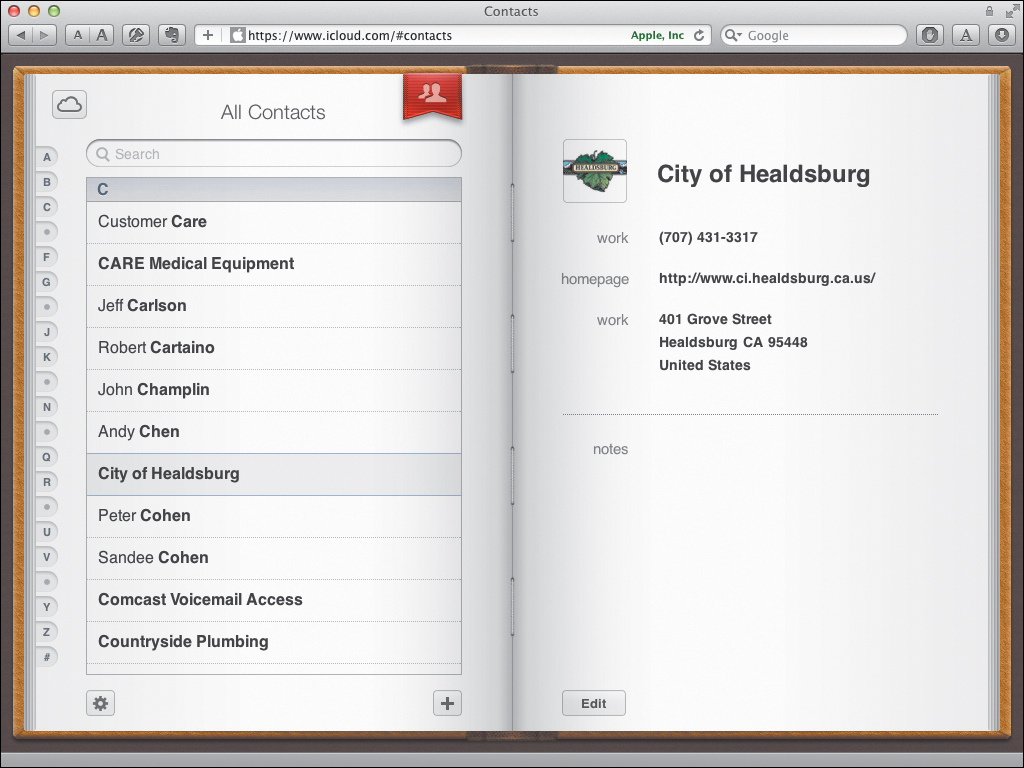
![]() The iCloud Contacts web application closely resembles the Mac Address Book application.
The iCloud Contacts web application closely resembles the Mac Address Book application.
You can view any contact by scrolling through the All Contacts list, or by clicking on one of the letter tabs at the left side of the window to jump you to that part of the alphabet. Clicking to select a contact in the list gives you that contact’s details on the right side of the window.
Besides simply finding things manually, you can also search your Contacts, add new ones, and edit existing contacts through the website application.
In the Search field at the upper left part of the Contacts application, type all or part of any item in the contact’s information. The Contacts List immediately shrinks to show the search results ![]() . To clear the Search field, click the round button with an X in it.
. To clear the Search field, click the round button with an X in it.
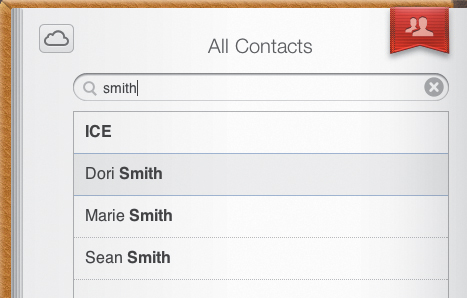
![]() Typing in the Search field immediately narrows the list of found contacts.
Typing in the Search field immediately narrows the list of found contacts.
The search term will be highlighted in each found contact’s entry.
Tip
Note that iCloud searches through all of the information in your Contacts data, not just names. So you can do useful things like search for all of the people with Gmail addresses, or search through your contact’s Notes field.
Tip
Some of the information in the contact record is clickable. To send the contact an email message, click an email address. Similarly, URLs are clickable, opening a new browser window. To display a map of the contact’s address, click a real-world address, which opens another window showing you the address in Google Maps ![]() .
.
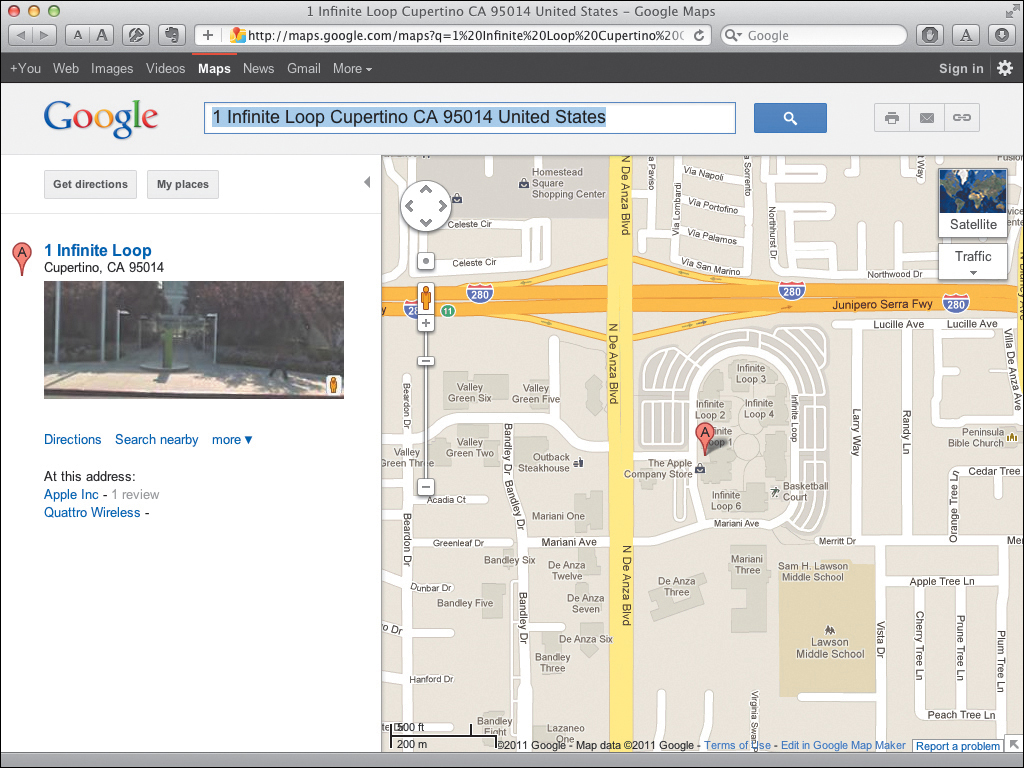
![]() Clicking a physical address in the Contacts application opens another browser window, displaying that location in Google Maps.
Clicking a physical address in the Contacts application opens another browser window, displaying that location in Google Maps.
1. On the iCloud website, click the Plus button at the bottom of the Contacts list.
or
From the Action menu (the gear icon at the bottom of the Contacts list), choose New Contact ![]() .
.
![]() The Action pop-up menu at the bottom of the Contacts list gives you a variety of choices.
The Action pop-up menu at the bottom of the Contacts list gives you a variety of choices.
2. In the resulting Edit Contact screen ![]() , enter the information for your new contact.
, enter the information for your new contact.
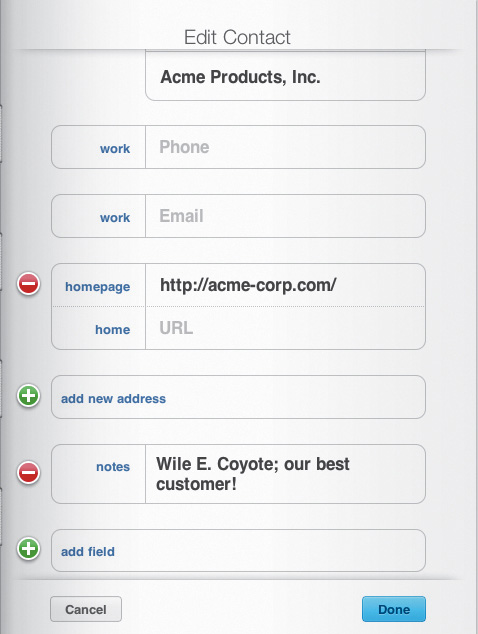
![]() A new contact has a variety of fields already laid out for you, but you can also add custom fields by clicking the Add Field button at the bottom of the contact record.
A new contact has a variety of fields already laid out for you, but you can also add custom fields by clicking the Add Field button at the bottom of the contact record.
3. Click Done.
iCloud saves your work, and will shortly synchronize it to the rest of your iCloud-enabled devices.
1. Find the contact you wish to change in the Contacts List, then click on it to select it.
2. Click Edit.
3. Make the changes you need, then click Done.
Tip
When you’re editing contacts, you can add a new optional field called Related People. This new field lets you specify other people who are related to the person whose contact record you are editing. For example, if you choose to add a Related People field, you can choose the relationship (Father, Mother, Spouse, Child, and so on) from a pop-up menu, then enter the name of the related person in the field ![]() . If you have a iPhone 4S or other device that uses Siri, make sure to add one or more of these fields to your own contact card, so Siri knows what you mean when you say things like “Text my wife that I’ll be late.”
. If you have a iPhone 4S or other device that uses Siri, make sure to add one or more of these fields to your own contact card, so Siri knows what you mean when you say things like “Text my wife that I’ll be late.”
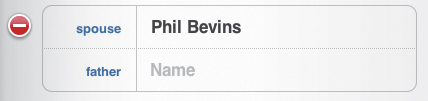
![]() Related People allow you to connect other people and their relationship to a particular contact.
Related People allow you to connect other people and their relationship to a particular contact.
To delete a contact
1. Find the contact you wish to delete in the Contacts List, then click on it to select it.
2. Press Delete or Backspace.
You’ll get a confirmation dialog asking if you really want to delete that record. Click Delete.
Tip
You can use the Shift or Command keys to select multiple contacts in the list before you delete them.
Working with Contact Groups
A contact group is a list of one or more contacts. You can create them on the Mac Address Book, or on the iCloud Contacts application. These are handy for things like grouping similar people together. For example, I have a Friends group in my Mac Address Book, with the names of five friends to whom I often share interesting email. In Mail on the Mac, all I have to do to address a message to all five people is to enter the name of the group in the email’s To field.
While you can create and work with contact groups on the Mac’s Address Book, and those groups synchronize to iOS devices, oddly, the Mail app in iOS 5 doesn’t allow you to use Groups to address mail. You also can’t add, edit, or delete groups on a mobile device. It’s as though the feature is there as the foundation for a future revision of iOS.
You can work with groups on the iCloud website, however. Let’s take a look at how to do that.
1. At the top of the Contacts List, click the Groups ribbon ![]() .
.

![]() Click the Groups ribbon at the right of the window to change to Groups mode.
Click the Groups ribbon at the right of the window to change to Groups mode.
The display will switch to showing just your groups on the left ![]() . The All Contacts group is always at the top of the list, which displays your entire Contacts list on the right side of the window.
. The All Contacts group is always at the top of the list, which displays your entire Contacts list on the right side of the window.
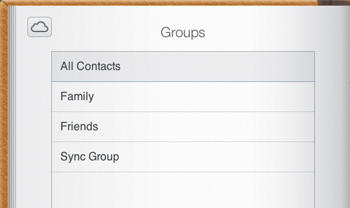
![]() The Groups list appears on the left side of the window.
The Groups list appears on the left side of the window.
2. Click a Group name to display its members on the right side of the window ![]() .
.
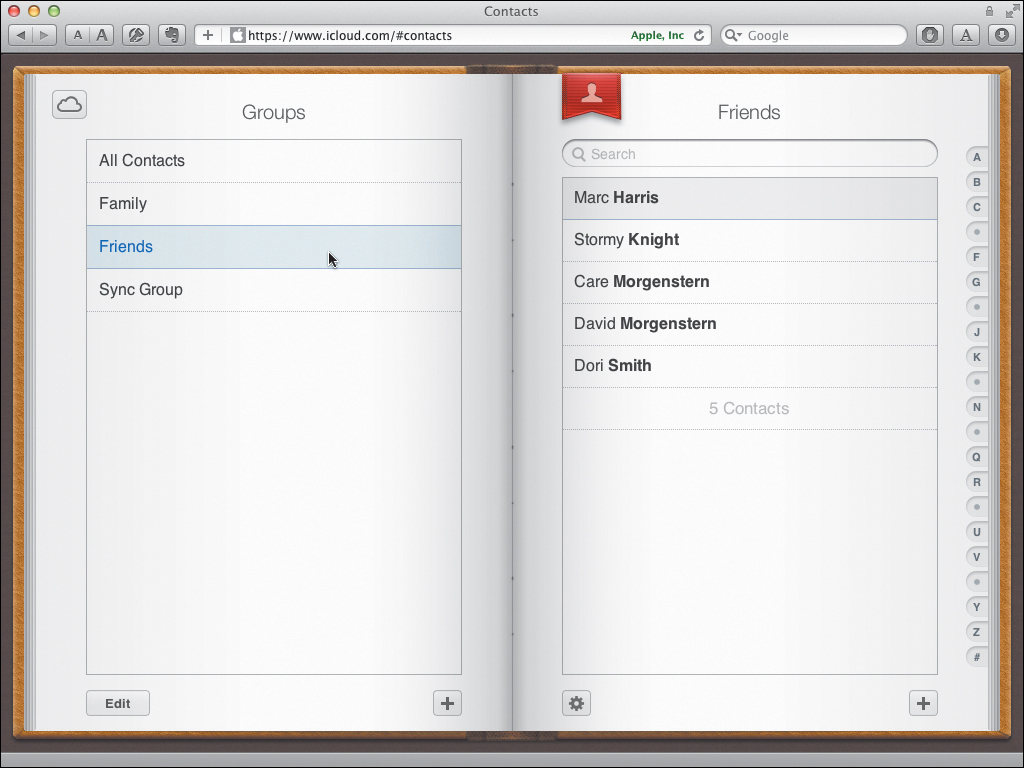
![]() Clicking the name of the group displays its members on the right side of the window.
Clicking the name of the group displays its members on the right side of the window.
3. Do one or more of the following:
• Add a group by clicking the Plus button at the bottom of the Groups pane.
• Remove a group by clicking the Edit button at the bottom of the Groups pane, then click the minus icon next to the group you want to delete. As usual, you’ll get a confirmation dialog. Click Delete.
• Rename a group by clicking the Edit button at the bottom of the Groups pane, then change the group’s name. Click Done to save your changes.
• Add a member to a group by clicking the All Contacts group, then drag a contact into another group to add it to that group. It’s okay if a contact is in more than one group, so you can drag names from one group to another.
• Remove a member from a group by first selecting the group and then the contact you want to remove. Press the Backspace or Delete key. Interestingly, you won’t get a confirmation dialog when you delete a contact from any group other than All Contacts.
4. When you’re done working with groups, click the individual ribbon at the top of the window.
Using the Action Menu
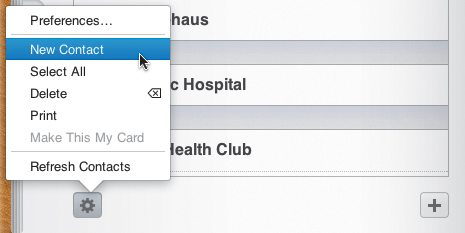
The Action menu at the bottom of the iCloud Contacts application’s window gives you a variety of additional commands ![]() .
.
• Preferences will be covered in the next section.
• Choose New Contact to add a contact to the Contacts list. This is the equivalent of clicking the Plus button at the bottom of the Contacts list.
• Select All lets you easily select all of your contacts at once.
• Delete allows you to remove one or more selected contacts. It’s the equivalent of selecting a contact and pressing Backspace or Delete.
• Print allows you to print the selected contact cards. You will get the usual system printing dialog, so you can adjust the print settings to your liking.
• Make This My Card allows you to specify your own contact card. When you do this, Contacts marks it with the silhouette icon ![]() . Mac OS X and iOS uses this information to identify you for mail, contacts, and more.
. Mac OS X and iOS uses this information to identify you for mail, contacts, and more.
• Refresh Contacts forces the website to reload your contact data if you’ve updated contacts on another device, and those changes haven’t yet appeared on the iCloud website.

![]() The Action menu allows you to work further with your contacts.
The Action menu allows you to work further with your contacts.

![]() The silhouette icon denotes your own contact card.
The silhouette icon denotes your own contact card.
Setting iCloud Contact Preferences
Choosing Preferences from the Action menu allows you to set some general behavior of the iCloud Contacts application.
To set Contact preferences
1. Choose Preferences from the Action menu.
The preferences dialog appears ![]() .
.
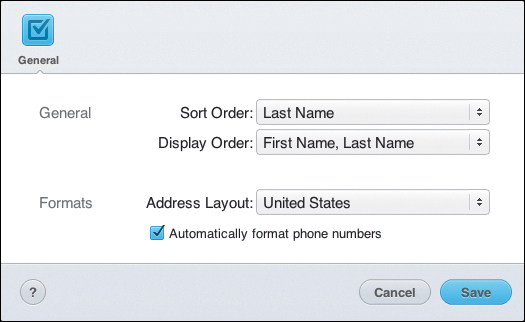
![]() The Preferences dialog allows you to choose how the iCloud Contacts application sorts and displays your contacts.
The Preferences dialog allows you to choose how the iCloud Contacts application sorts and displays your contacts.
2. Choose one or more of the following:
• In the Sort Order pop-up menu, choose either First Name or Last Name to tell iCloud how you want contacts sorted.
• In the Display Order pop-up menu, choose either First Name, Last Name or Last Name, First Name to tell iCloud how you want names to appear in the list.
• In the Address Layout pop-up menu, choose a country name to determine how addresses are shown.
• Choose Automatically Format Phone Numbers to tell iCloud to automatically format telephone numbers in the format appropriate for the country you chose in the Address Layout pop-up menu.