
10. Using iCloud to Find People and Devices
Need to find your iOS devices? How about your friends or family members? Or maybe your Mac? iCloud can help you with that. iCloud has a rich suite of services that allow you to find your iOS devices or your Macs, and locate them on a map. Once you’ve found them, you can send an audio signal, a text alert, remotely lock and add a passcode to the device, and even remotely wipe the device in the event of theft or loss.
Finding your iOS device isn’t just useful in case of nefarious action. You can use the audio signaling feature to track down your iPhone after it has slipped out of your pocket and in between the couch cushions.
To find devices, you can use the iCloud website, or you can use Apple’s Find My iPhone app, which runs on any iOS device. Another Apple app, Find My Friends, allows you to permanently or temporarily locate your friends (as long as they are carrying an iOS device).
Configuring iCloud Locating on the Mac
With Mac OS X 10.7 Lion and later, applications and websites can get and use information based on the current location of your Mac. For example, a web browser like Safari may ask for your location while browsing a shopping website in order to find good deals near you, or to determine nearby movie showtimes. Actually, the website you’re browsing is asking Safari for your geolocation and Safari is passing the request on to you. You have to give your permission before the application or website can use your location information, which is handled by a part of the OS called Location Services (see the “Understanding Location Services” sidebar).
The Find My Mac service in iCloud uses Location Services, which in turn determines the approximate location of your Mac based on nearby Wi-Fi networks. You have to turn on the Find My Mac feature before you can, well, find your Mac.
If your Mac doesn’t have Wi-Fi capabilities (like my old Mac Pro) or has Wi-Fi turned off, but is still connected to the Internet via Ethernet, you won’t be able to use the iCloud website or the Find My IPhone app to locate that Mac on a map, but you can still activate the other features, such as Remote Lock and Remote Wipe, discussed in the “Using Find My Mac” section, later in this chapter.
To activate Find My Mac
1. From the Apple menu, choose System Preferences.
2. In the Internet & Wireless section, click iCloud.
3. In the iCloud Preference pane, click the checkbox next to Find My Mac ![]() . While you’re at it, click the checkbox next to Back to My Mac. We’ll be using that later in this chapter.
. While you’re at it, click the checkbox next to Back to My Mac. We’ll be using that later in this chapter.
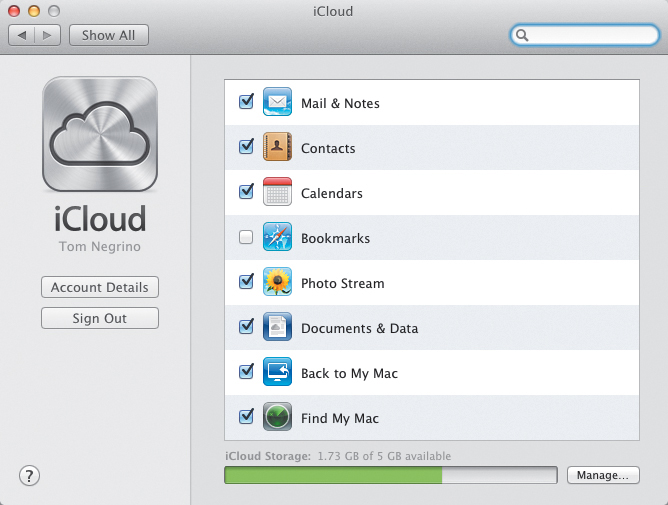
![]() You’ll need to enable Find My Mac in the iCloud pane of System Preferences.
You’ll need to enable Find My Mac in the iCloud pane of System Preferences.
4. Close the System Preferences window.
There are two other places in System Preferences where you can deal with Location Services, if you’re using a Mac with Wi-Fi. On all Macs running Lion or later, choose System Preferences > Security & Privacy > Privacy ![]() . If you want to turn off Location Services (it’s enabled by default), deselect the Enable Location Services checkbox. You’ll probably have to click the padlock icon at the bottom of the window and enter your admin password before you can make this change. The list in this preference pane shows the applications that have requested your location. The checkbox next to an application name in this list indicates whether or not you have granted that application permanent location-finding ability. If the checkbox is unselected, the application will ask you each time it wants to use your location (for privacy reasons, that’s the setting I actually recommend).
. If you want to turn off Location Services (it’s enabled by default), deselect the Enable Location Services checkbox. You’ll probably have to click the padlock icon at the bottom of the window and enter your admin password before you can make this change. The list in this preference pane shows the applications that have requested your location. The checkbox next to an application name in this list indicates whether or not you have granted that application permanent location-finding ability. If the checkbox is unselected, the application will ask you each time it wants to use your location (for privacy reasons, that’s the setting I actually recommend).
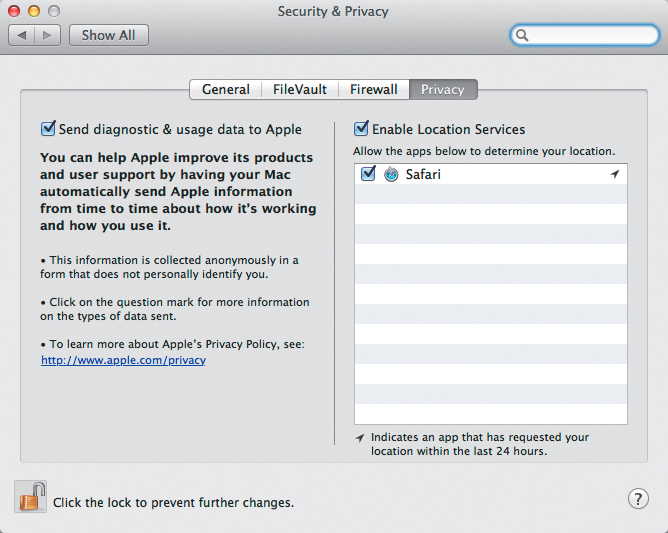
![]() Location Services are enabled by default, but you can control them in the Security & Privacy pane of System Preferences.
Location Services are enabled by default, but you can control them in the Security & Privacy pane of System Preferences.
If Location Services is enabled and Wi-Fi is turned on, your Mac can set its time zone automatically using the current location. Choose System Preferences > Date & Time > Time Zone ![]() . Select the checkbox next to Set time zone automatically using current location. Location Services will work its magic, put a red pushpin near your current location, and set the time zone.
. Select the checkbox next to Set time zone automatically using current location. Location Services will work its magic, put a red pushpin near your current location, and set the time zone.
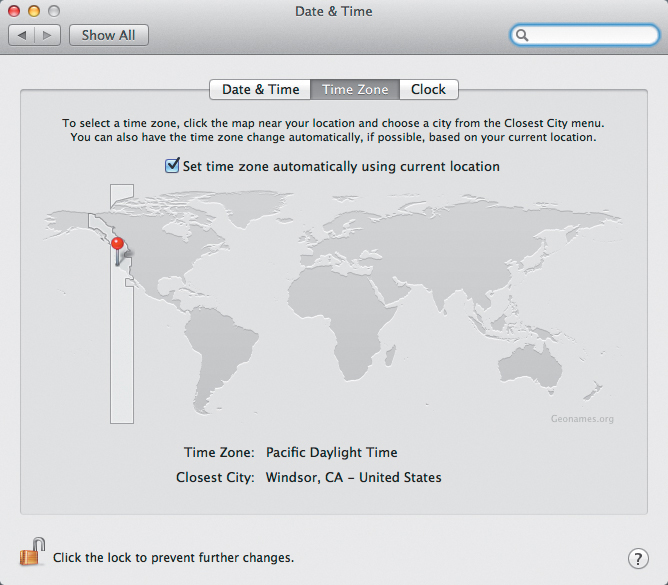
![]() Location Services can automatically set your Mac’s time zone.
Location Services can automatically set your Mac’s time zone.
Finding and Working with Your Devices
You can use the iCloud website or the Find My iPhone app, running on an iOS device, to find an iPhone, iPad, iPod touch, or Mac (see the next section for specific information about finding a Mac). It’s important to note that you can only find the devices that you have already set up for use with Find My iPhone. Set those devices up now, so you can find them later.
To use the finding features, your iOS device must be using iOS version 3.1.3 or later. So you’re not limited only to iOS devices eligible for iCloud (and therefore capable of running iOS 5 or later); even the oldest iPhone or iPod touch will work, as long as it was updated to the latest iOS version it could handle.
In this section, we’ll be using the iCloud website to find and work with your devices. The Find My iPhone app, running on an iOS device, works similarly to the website, with minor differences because it’s running on a mobile device with differently sized screens.
If you lose track of your mobile device, you will first want to try to find it. If it turns out that you didn’t simply misplace the device and it appears to have been stolen, you can try sending a sound and message to the device. Next, you can remotely lock the device and add a passcode, preventing someone else from using it. The passcode must be entered before the device can be used. If all else fails, you can remotely wipe the device, which erases all the information on it, preventing a thief from seeing or using your information.
To configure your iOS device for location
1. Tap Settings > iCloud.
2. Scroll down the list, then turn on Find My iPhone or Find My iPad or Find My iPod Touch, depending on your device ![]() .
.
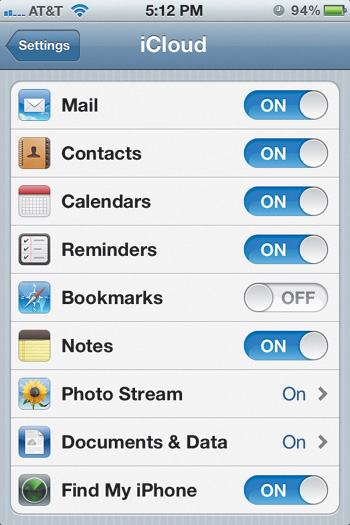
![]() On your iOS device, turn on Find My iPhone in Settings > iCloud.
On your iOS device, turn on Find My iPhone in Settings > iCloud.
3. Press the device’s button to close the Settings app.
To find your device
1. Using a web browser, sign in to your iCloud account at http://www.icloud.com.
2. If the iCloud website brings you to the last application you are working in, rather than the iCloud home screen, click the cloud button at the upper left corner of the window ![]() .
.
![]() If necessary, click the cloud icon in one of the other iCloud website applications to bring you back to the iCloud homepage.
If necessary, click the cloud icon in one of the other iCloud website applications to bring you back to the iCloud homepage.
The website brings you back to the home screen.
3. Click the Find My iPhone icon ![]() .
.
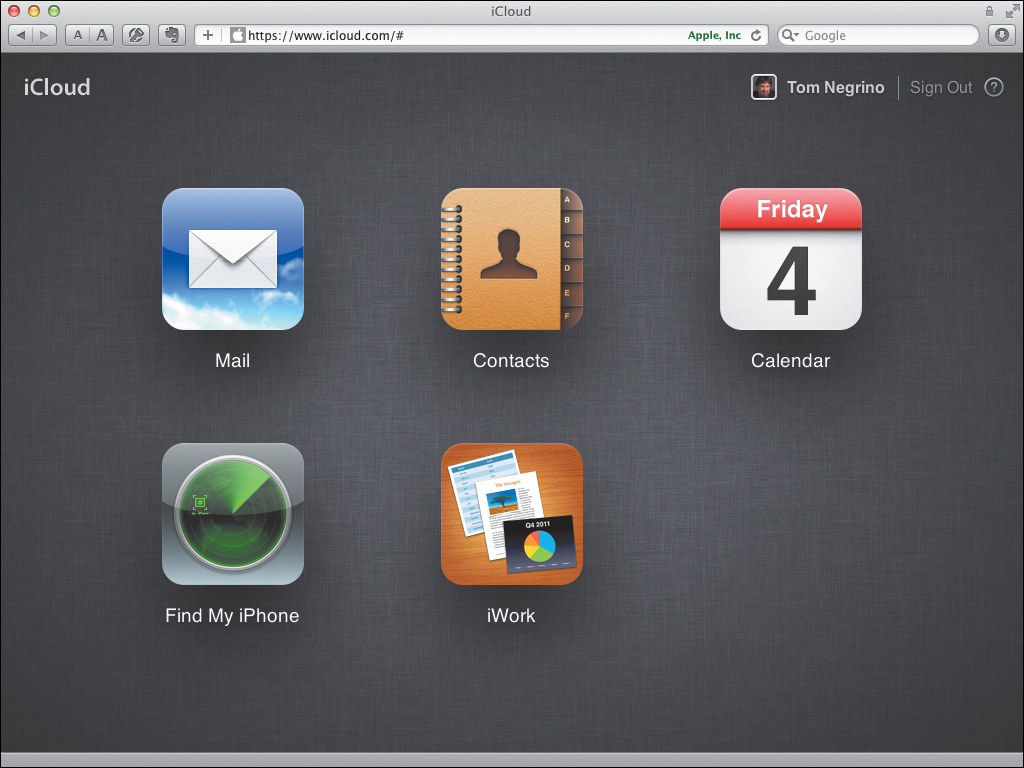
![]() On the iCloud homepage, click the icon for Find My iPhone.
On the iCloud homepage, click the icon for Find My iPhone.
4. The application launches, and for security purposes, asks you to enter your iCloud password. Do so, then click OK.
The website displays a list of the devices you have activated with iCloud, with the selected device appearing on a Google map ![]() .
.
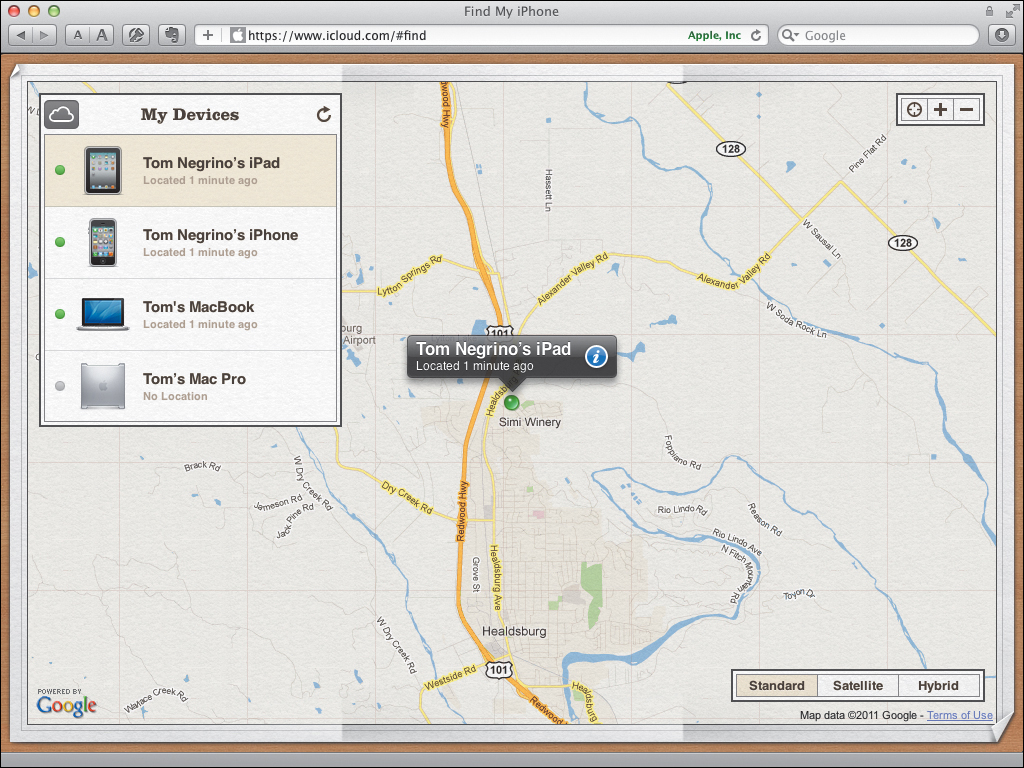
![]() You can select any of the devices in the My Devices list to display its location.
You can select any of the devices in the My Devices list to display its location.
5. In the My Devices list, click the device you wish to find.
6. (Optional) As with all Google maps, you can use the controls in the window to zoom in or out, and switch from a standard map view to a satellite view, or a hybrid view that overlays street and location names over the satellite view.
Tip
In the My Devices list, a colored dot will appear next to each device. A green dot means the device was recently located. A gray dot means that Find My iPhone is trying to connect to the device or that it can’t be located.
Tip
You can manually update the location of all your devices by clicking the Refresh button at the upper right corner of the My Devices list.
When GPS is obstructed (or the device doesn’t have GPS at all), and the device falls back to Wi-Fi hotspot location or cell tower triangulation, you will usually see a large circle around the reported location of the device, indicating that the device is somewhere in that area ![]() . Sometimes, as in the figure, that radius is quite large, and wouldn’t be very useful in tracking down that wayward MacBook.
. Sometimes, as in the figure, that radius is quite large, and wouldn’t be very useful in tracking down that wayward MacBook.

![]() The error radius when using Wi-Fi positioning can be pretty large; it’s true that my MacBook is somewhere within that big green circle, but it really isn’t very near the center.
The error radius when using Wi-Fi positioning can be pretty large; it’s true that my MacBook is somewhere within that big green circle, but it really isn’t very near the center.
1. On the map, your device will appear with its name, when it was last located, and a blue I (for Information) icon ![]() .
.
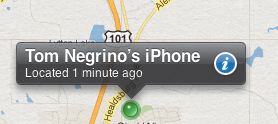
![]() When you select a device, a popover shows its name, when it was located, and the blue Info icon.
When you select a device, a popover shows its name, when it was located, and the blue Info icon.
2. Click the blue icon.
The Info popover appears ![]() .
.
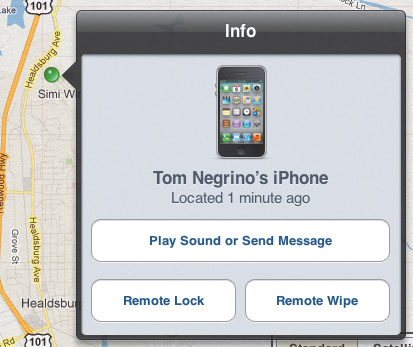
![]() The Info popover allows you to work remotely with your device.
The Info popover allows you to work remotely with your device.
3. Click the Play Sound or Send Message button.
The Send Message popover appears ![]() .
.
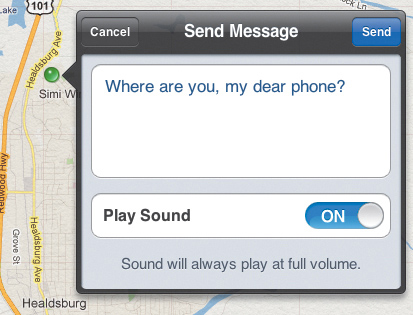
![]() To send a message or play a sound on your device, enter the message here, then click Send.
To send a message or play a sound on your device, enter the message here, then click Send.
4. Choose one or both of the following:
Enter a message that will be displayed on the device.
Turn on Play Sound.
Usually within a minute, the device will receive and display the message ![]() .
.

![]() The message appears as a notification on the lock screen of your iOS device.
The message appears as a notification on the lock screen of your iOS device.
The iCloud website will send a confirmation email to the address associated with your Apple ID ![]() .
.

![]() The iCloud website also sends you an email confirmation whenever it interacts with one of your devices.
The iCloud website also sends you an email confirmation whenever it interacts with one of your devices.
To remotely lock and add a passcode to your iOS device
1. On the iCloud website or with the Find My iPhone app, find your device.
2. Click the blue icon.
The Info popover appears ![]() .
.
3. Click the Remote Lock button.
The Remote Lock popover appears ![]() .
.
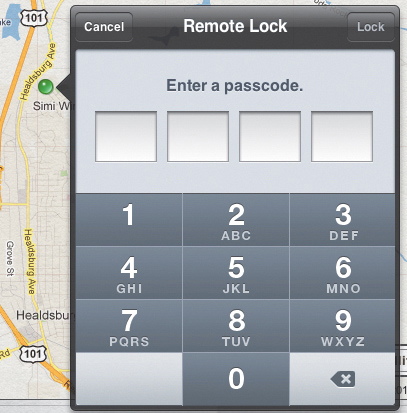
![]() To begin the Remote Lock process, enter a four digit passcode.
To begin the Remote Lock process, enter a four digit passcode.
4. Enter a four-digit passcode.
After you enter the passcode, the screen will automatically change to another screen asking you to reenter the passcode.
5. Reenter the passcode, then tap the Lock button.
The iOS device will immediately lock, the Info popover on the iCloud website will reappear showing you the device has been locked ![]() , and the iCloud website will send you a confirmation email. To use the device again, the passcode will need to be entered.
, and the iCloud website will send you a confirmation email. To use the device again, the passcode will need to be entered.
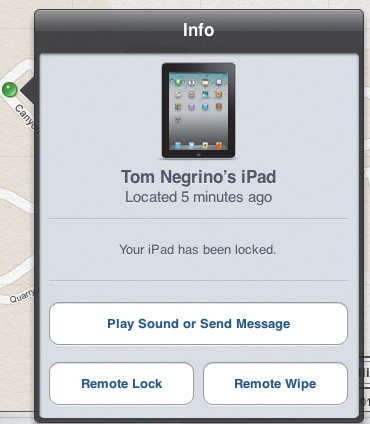
![]() After the device has been locked, the Info popover lets you know the process was successful.
After the device has been locked, the Info popover lets you know the process was successful.
Tip
If the iCloud website could not contact the device when you send the Remote Lock command, the Info popover will show a line that says Pending Actions and how long ago the lock was requested. At the bottom of the Info popover, you’ll get a message saying that the device will be locked when it connects to the Internet.
To remotely wipe your iOS device
1. On the iCloud website or with the Find My iPhone app, find your device.
2. Click the blue icon.
The Info popover appears ![]() .
.
3. Click the Remote Wipe button.
The Remote Wipe popover appears ![]() .
.
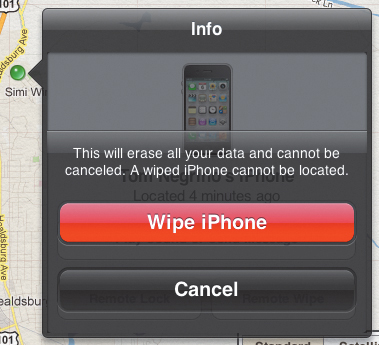
![]() Are you sure you want to wipe your device? I sure wasn’t; I chickened out and clicked Cancel.
Are you sure you want to wipe your device? I sure wasn’t; I chickened out and clicked Cancel.
4. Click the Wipe button.
The data is wiped immediately, if the device is online. Otherwise, the device will be wiped when it reconnects to the Internet.
Tip
Once you remotely wipe a device, it can no longer be found from the iCloud website or the Find My iPhone app. If you are truly convinced that the device has been stolen, wiping it can protect your important data (and then you’ll be able to restore to a replacement device using either your iCloud backup or your iTunes backup). But if you think you have merely misplaced the device and you may be able to retrieve it, think twice about sending the Remote Wipe command.
Using Find My Mac
When you’re using the iCloud website to work with a Mac, some things work in much the same way as with and iOS device, but with other things there are some differences. Finding and signaling your Mac work the same way as with a mobile device, so I refer you to the instructions earlier in this chapter to accomplish those tasks.
Things work a little differently if you want to Remote Lock or Remote Wipe a Mac from the iCloud website or from the Find My iPhone iOS app. First, it’s important to note that Find My Mac is only available on Macs running iCloud, which is to say a Mac running Mac OS X 10.7.2 Lion or later.
All Macs running Lion have a feature called Lion Recovery, which is normally intended to let you repair your boot disk or reinstall Mac OS X Lion without the need for a physical install disc. The way that Lion Recovery works is that during the installation of Lion, the installer program creates an invisible read-only boot volume on your hard drive, called Recovery HD, which contains a variety of utilities that allow you to download and reinstall Mac OS X; use Disc Utility to repair or erase your hard drive; restore from a Time Machine backup; or browse with Safari to get online help.
The Remote Lock and Remote Wipe features in iCloud make use of this bootable Recovery HD. When you invoke Remote Lock from the iCloud website, you are asked to set a six digit passcode (a bit more secure then the four digit passcode you can set from the Find My iPhone iOS app). If your Mac is online, it immediately restarts and reboots from the Recovery HD volume, presenting a screen requiring the passcode. If the Mac is off-line, the passcode lock happens the next time it’s online.
As a last resort, you might want to use Remote Wipe. If your Mac is online, it immediately restarts from the Recovery HD volume, and begins erasing your boot disc, destroying all of its information. If the Mac is off-line, the erasure happens the next time it connects to the Internet.
Tip
Interestingly, if you execute Remote Lock or Remote Wipe on your Mac, it’s possible that you’ll still be able to find it later with Find My Mac, because Lion also stores your iCloud credentials and the status of the Find My Mac feature on the Recovery HD.
To remotely lock your Mac
1. On the iCloud website or with the Find My iPhone app, find your device.
2. Click the blue icon.
The Info popover appears ![]() .
.
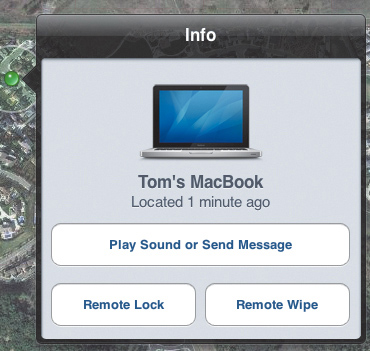
![]() To begin the Remote Lock process for your Mac, you’ll start in its Info popover.
To begin the Remote Lock process for your Mac, you’ll start in its Info popover.
3. Click the Remote Lock button.
The Remote Lock popover appears.
4. Enter a six-digit passcode ![]() .
.
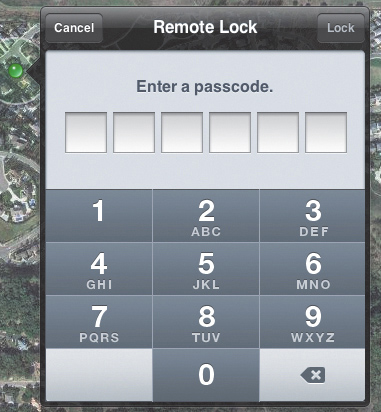
![]() Enter a six digit passcode for the Remote Lock.
Enter a six digit passcode for the Remote Lock.
After you enter the passcode, the screen will automatically change to another screen asking you to reenter the passcode.
The screen will automatically change to another screen that allows you to enter a message that will be shown on your Mac’s screen after it’s been locked ![]() . For example, you might want to enter your contact information so that someone who finds your Mac and is inclined to return it can easily do so.
. For example, you might want to enter your contact information so that someone who finds your Mac and is inclined to return it can easily do so.
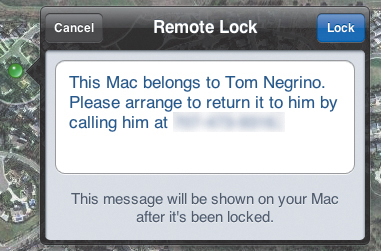
![]() You can enter a message that will appear on the boot screen of your Mac after it has been locked.
You can enter a message that will appear on the boot screen of your Mac after it has been locked.
6. (Optional) Enter a message.
7. Click the Lock button.
A confirmation dialog appears, asking if you really want to lock the Mac. It also warns you that a locked Mac can’t be wiped ![]() .
.
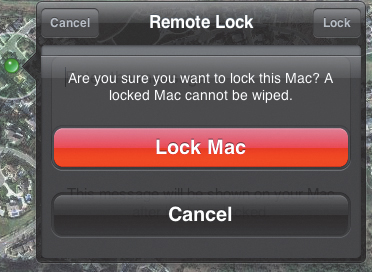
![]() The iCloud website warns you that a locked Mac can’t be wiped.
The iCloud website warns you that a locked Mac can’t be wiped.
The Mac will immediately lock and reboot using the Recovery HD, the Info popover on the iCloud website will reappear showing you the device has been locked ![]() , and the iCloud website will send you a confirmation email. To use the device again, the passcode will need to be entered
, and the iCloud website will send you a confirmation email. To use the device again, the passcode will need to be entered ![]() .
.
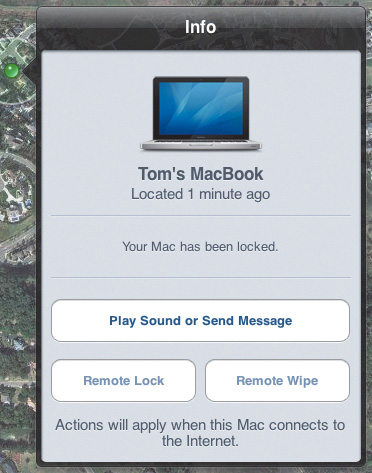
![]() After the deed has been done, the Info popover lets you know your Mac has been locked and rebooted into the lock screen.
After the deed has been done, the Info popover lets you know your Mac has been locked and rebooted into the lock screen.
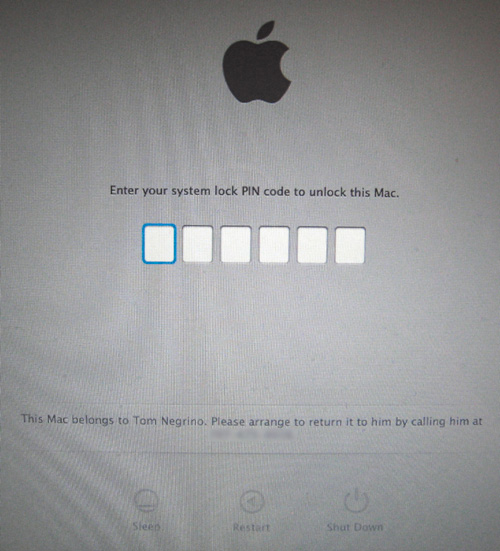
![]() This photo shows what my MacBook’s screen looked like after it was locked.
This photo shows what my MacBook’s screen looked like after it was locked.
1. On the iCloud website or with the Find My iPhone app, find your device.
2. Click the blue icon.
The Info popover appears ![]() .
.
3. Click the Remote Wipe button.
The Remote Wipe popover appears ![]() .
.
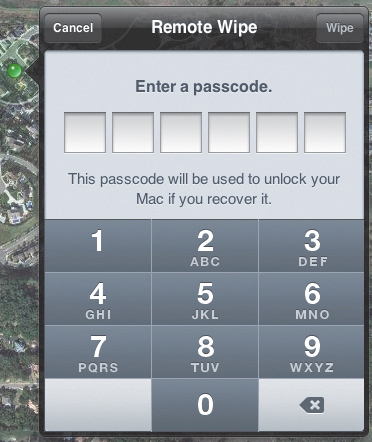
![]() Enter a six digit passcode for the Remote Wipe.
Enter a six digit passcode for the Remote Wipe.
4. Enter and reenter a six digit passcode.
The passcode will be needed to unlock the Mac even though the boot disc has been erased. The popover will automatically change to another screen that allows you to enter a message that will be shown on your Mac’s screen after it’s been locked and wiped. This might allow you to recover the hardware, even though you’ll have to restore your data from a backup.
5. (Optional) Enter a message.
6. Click the Wipe button.
A confirmation dialog appears, asking if you really want to wipe the Mac.
7. Click Wipe Mac.
The Mac will immediately lock, reboot using the Recovery HD, and begin erasing the regular boot drive.
Using Find My Friends
At the same time Apple released iCloud and iOS 5, they also released a free new iOS app called Find My Friends. With this app, you can locate the iOS devices (presumably being carried by your contacts), as long as they’ve given you permission to locate them.
You can use Find My Friends in two ways. You can set up a list of contacts that you can locate all the time (for example, your close family members) and you can also set up temporary events to which you can invite people and that automatically expires at a set time. You might want to set up and use temporary events when you and a group of colleagues are attending a conference, or when extended family members are at a vacation spot, or when you and some friends are attending a concert or sporting event.
For privacy purposes, Find My Friends allows anyone who has authorized you to find their location to revoke that authorization at any time, and it also allows you to hide your location from all followers whenever you want.
Find My Friends requires iOS 5 or later, and all the participants must have downloaded the app to their mobile device. You can only use the Find My Friends features from the app; you can’t use the iCloud website for this purpose.
To set up Find My Friends for the first time, download it from the App Store, then tap Find Friends on your iOS device ![]() . Enter your Apple ID (which is the same as your iCloud account name) and password. Tap Sign In, then confirm the app is allowed to use your location.
. Enter your Apple ID (which is the same as your iCloud account name) and password. Tap Sign In, then confirm the app is allowed to use your location.
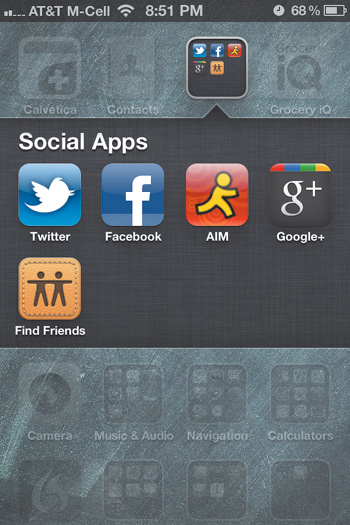
![]() Tap the Find Friends app to get started.
Tap the Find Friends app to get started.
1. On the All tab of the Find My Friends app, it will initially show that you have yet to add any contacts ![]() . Tap Invite Friends, or tap the Add button (+).
. Tap Invite Friends, or tap the Add button (+).
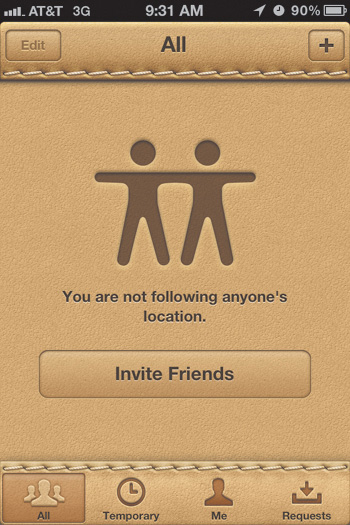
![]() Sadly, you don’t have any friends yet. Better click that Invite Friends button.
Sadly, you don’t have any friends yet. Better click that Invite Friends button.
The Add Friends screen appears ![]() .
.
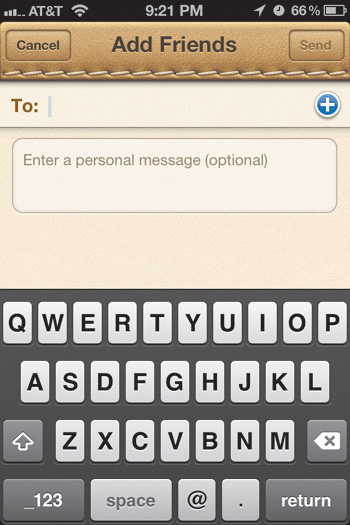
![]() You need to enter your friend’s Apple ID in the screen, and optionally send them a personalized invitation message.
You need to enter your friend’s Apple ID in the screen, and optionally send them a personalized invitation message.
2. Type a friend’s Apple ID, or tap the Add Contact button (+) to bring up your Contacts list. If you want, you can send a request to multiple people at the same time. You can also enter a personalized message.
One drawback to the Find My Friends app is that it doesn’t tell you which of your friends are also using the app, and, if they have multiple email addresses, which one of those is their Apple ID.
3. Tap Send.
The app will show you a message explaining that after your friend has approved your request, he or she will appear in your friends list.
Tip
Just because you’ve sent someone a request and they approved it, it doesn’t mean that they can also see your location. For that, they’ll need to send you a location request as well.
1. Usually, a location request will appear as an iOS notification on the home screen. Tap the notification to launch the Find My Friends app.
2. Tap the Requests button at the bottom of the screen ![]() .
.
3. Click Accept.
4. (Optional) If you’re not already following the person who requested your location, and you want to add them to your friends list, tap the Ask To Follow button, which sends a request back to the person.
To locate friends
1. Tap the All button at the bottom of the screen ![]() , which shows a list of each friend and their general location. Then tap All Friends to display a map showing all of the friends in your list. On the map, your location will show a blue dot, and everyone else’s map pins will be purple.
, which shows a list of each friend and their general location. Then tap All Friends to display a map showing all of the friends in your list. On the map, your location will show a blue dot, and everyone else’s map pins will be purple.
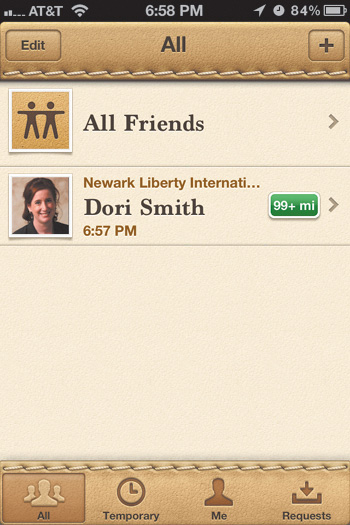
![]() The All tab shows the friends you’ve permanently added, and their approximate distance from you.
The All tab shows the friends you’ve permanently added, and their approximate distance from you.
or
Tap a friend in the list to see details of their location and their contact information ![]() .
.

![]() Tapping an individual friend in the list shows you their detailed location and contact information.
Tapping an individual friend in the list shows you their detailed location and contact information.
2. To see your friend’s location on a map, tap the address with the map thumbnail shown under Current Location, and the display will switch to the map view ![]() .
.
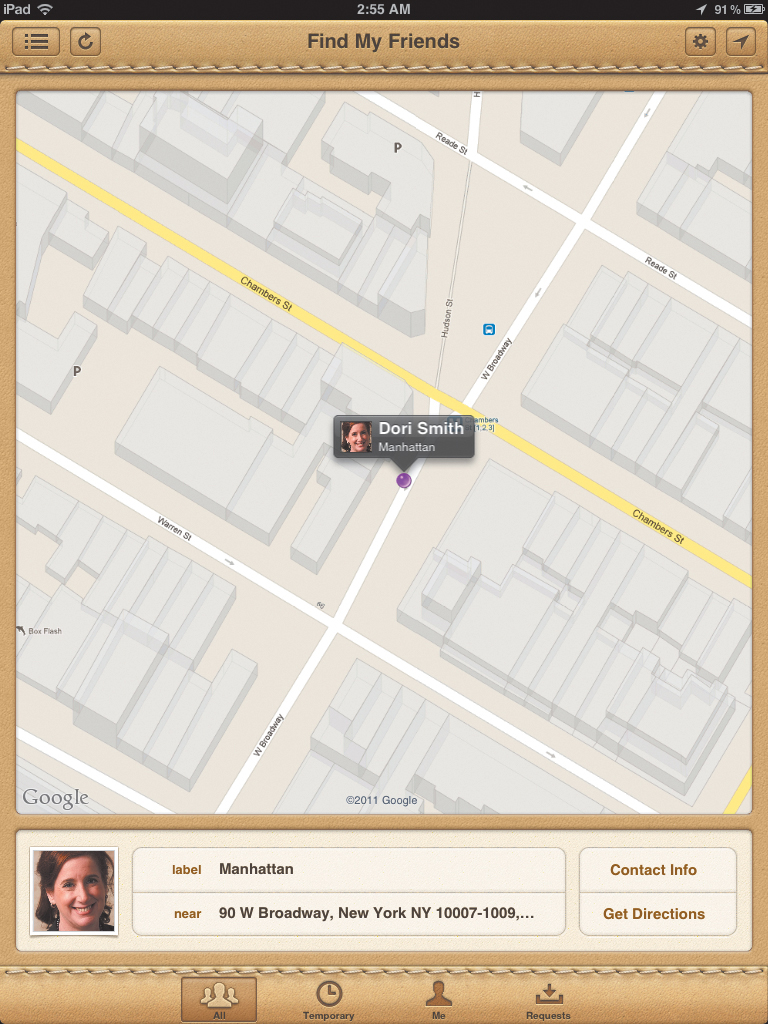
![]() You can get a map of your friend’s location (shown here on Find My Friends on an iPad), and as usual that map can be a standard street view, a satellite view, or a hybrid of the two.
You can get a map of your friend’s location (shown here on Find My Friends on an iPad), and as usual that map can be a standard street view, a satellite view, or a hybrid of the two.
3. (Optional) To contact your friend, do one or more of the following:
Tap the Send Message button to send a text message (you’ll be prompted for which phone number or address to use; choosing your friend’s iCloud address will send an iMessage, and choosing their mobile phone number will send a regular SMS).
or
Tap the FaceTime button to initiate a video conference (if the recipient has a capable FaceTime device).
or
Tap an email address to open the Mail app and compose an email.
Setting Up Temporary Events
If you only want to share your location with other people for a limited period of time, setting up a temporary event is just what you want. Find My Friends allows you to invite friends with a specified ending date and time, after which the location sharing automatically ends.
To set up a temporary event
1. In Find My Friends, tap the Temporary button, then tap the Invite Friends button ![]() .
.
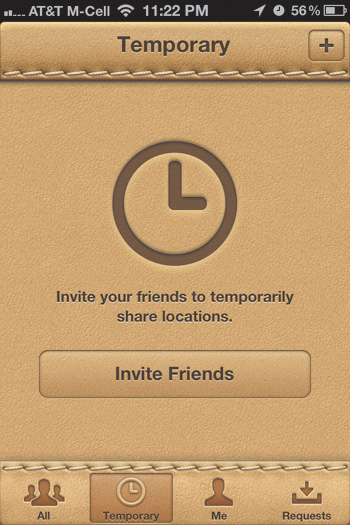
![]() To begin setting up a temporary event, you’ll need to invite one or more friends.
To begin setting up a temporary event, you’ll need to invite one or more friends.
2. Add the people you want to invite, give the event a name, and then tap the Ends field to choose a date and time the event will end.
3. Tap Send, and Find My Friends sends your invitation. If one of your recipients isn’t already using Find My Friends, they’ll get an email with the invitation (with instructions on how to download the app); recipients already using Find My Friends will receive an iOS notification, which they can accept or decline in the app ![]() .
.
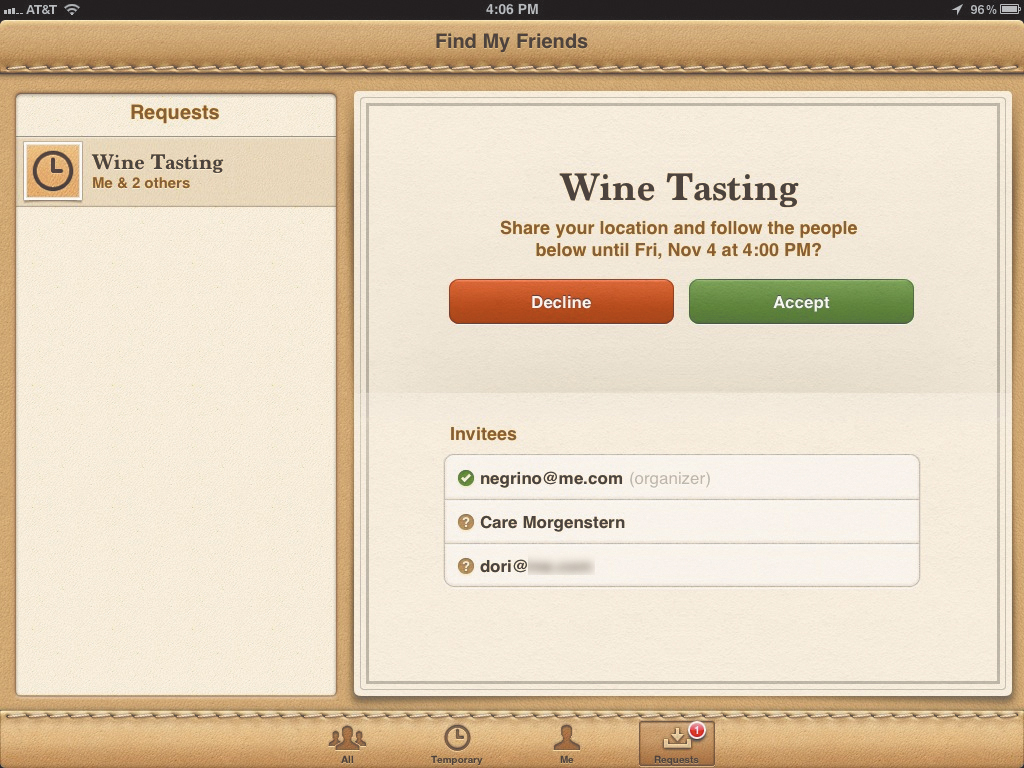
![]() Everyone who gets an invitation to the temporary event has the chance to accept or decline it.
Everyone who gets an invitation to the temporary event has the chance to accept or decline it.
4. During the event, you can tap the Temporary button in the app to show a list of the event’s participants ![]() . You can tap Send iMessage to send everyone a text message, or tap View Map to display a map with all the participants locations marked.
. You can tap Send iMessage to send everyone a text message, or tap View Map to display a map with all the participants locations marked.
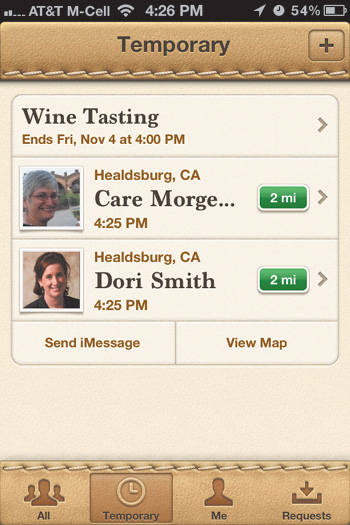
![]() During the event, tapping the event’s name shows you its participants and their approximate distance from you.
During the event, tapping the event’s name shows you its participants and their approximate distance from you.
Tip
Unlike permanent location sharing, when someone joins an event, they can automatically see everyone else who is part of the event, without each person having to exchange location authorization with every other person.
Tip
If you are part of an event and wish to leave it, just tap the event name in the Temporary tab, then tap Leave Event.
Tip
If you created the event, you can change the event name and ending time, remove or add participants, or delete the event.
Using Back to My Mac
Back to My Mac is one of the features that migrated to iCloud from MobileMe. It allows you to connect to one of your Macs from another Mac over the Internet. Once you are connected using Back to My Mac, it’s just like being connected on a local network. You can mount volumes on the remote Mac for file sharing, or you can initiate a Screen Sharing session to control the remote Mac directly.
Imagine that you’re on a business trip, and you’re working in your hotel room on your Mac laptop when you realize that you left a vital file on your iMac at home. Naturally, you’re not connected to your home network. But as long as you have turned on Back to My Mac before you left on your trip, you will usually be able to reach it from your room’s Internet connection. You’ll be able to mount the home Mac’s hard disk as if it were just another network volume, and copy files back and forth between your local hard disk and your hard disk at home.
In the last paragraph, I said you could usually connect, because sometimes, due to poor or outdated network configuration in the location where you’re staying, Back to My Mac just can’t make the connection. That kind of failure to connect has become increasingly rare (Back to My Mac was originally introduced in 2007), but it still occasionally occurs.
In this section, we’ll first show you how to configure your Mac so it can be accessed remotely, then show you how to use file sharing with your remote Mac, and finally show you how to start up a Screen Sharing session with the remote Mac.
Tip
Besides connecting one Mac to another over the Internet, you can also use Back to My Mac to connect to a Time Capsule or AirPort Disk.
To set up your Mac so it can be remotely accessed
1. On the Mac you will want to access remotely, open System Preferences > iCloud, then make sure that the checkbox next to Back to My Mac is selected ![]() .
.
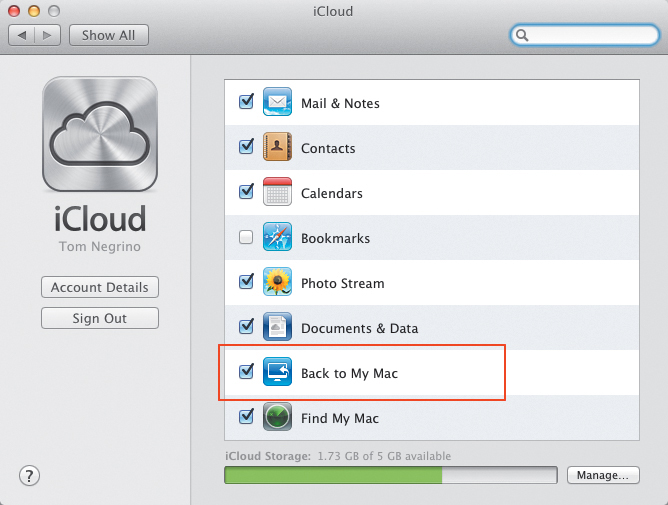
![]() The first thing you need to do is make sure that Back to My Mac is checked in the iCloud preference pane.
The first thing you need to do is make sure that Back to My Mac is checked in the iCloud preference pane.
2. In the Sharing pane of System Preferences, select the checkboxes for Screen Sharing and File Sharing ![]() .
.
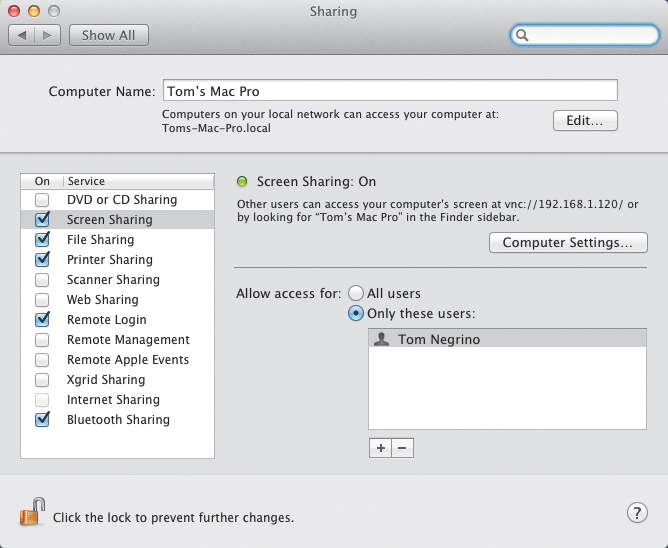
![]() You need to make sure that Screen Sharing and File Sharing are enabled on the Mac you’ll be accessing before you leave home.
You need to make sure that Screen Sharing and File Sharing are enabled on the Mac you’ll be accessing before you leave home.
With both these types of sharing, you’ll ensure better security if you click the radio button for Only these users in the Allow access for section, click the Plus button, and add your own username.
3. You will also need to enable Back to My Mac in the iCloud pane of System Preferences on the Mac that you are taking with you on the road.
Tip
You must be signed in to iCloud with the same Apple ID on both computers for Back to My Mac to work.
To use file sharing on your remote Mac
1. Open a window in the Finder. In the window’s sidebar, the Shared section will show your remote computer, using its Computer Name that is set in its Sharing preference pane.
2. Click the remote computer in the Finder window sidebar. After a moment, the volumes that you have allowed to be shared will appear in the Finder window ![]() .
.
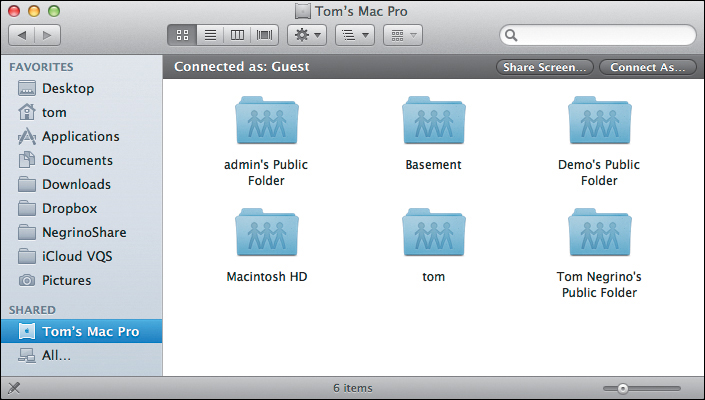
![]() When you click the remote Mac in the sidebar of a Finder window, its available volumes appear.
When you click the remote Mac in the sidebar of a Finder window, its available volumes appear.
3. By default, you will be connected as a Guest, which will prevent you from accessing files in your home folder. Click the Connect As button in the Finder window, then enter your username and password (to authenticate as a registered user), or click the Using an Apple ID button, which uses your iCloud credentials ![]() .
.
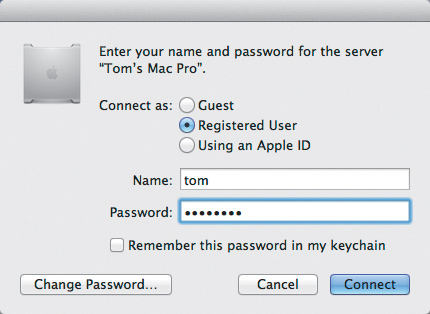
![]() You can sign in for File Sharing as either a registered user, or you can use your Apple ID.
You can sign in for File Sharing as either a registered user, or you can use your Apple ID.
4. You can now work with the remote files as if they were on any other file server.
To share the screen of your remote Mac
1. Open a window in the Finder. In the window’s sidebar, the Shared section will show your remote computer.
2. Click the remote computer in the Finder window sidebar.
3. By default, you will be connected as a Guest. Click the Share Screen button in the Finder window, then enter your username and password (to authenticate as a registered user), or click the Using an Apple ID button, which uses your iCloud credentials ![]() .
.
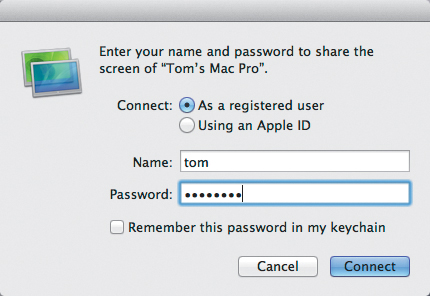
![]() You can sign in for Screen Sharing as either a registered user, or you can use your Apple ID.
You can sign in for Screen Sharing as either a registered user, or you can use your Apple ID.
4. Screen Sharing will start, and a window displaying the screen of your remote Mac will appear ![]() . You can click inside and work on objects in this window with your mouse and keyboard as if you were sitting in front of the remote Mac.
. You can click inside and work on objects in this window with your mouse and keyboard as if you were sitting in front of the remote Mac.
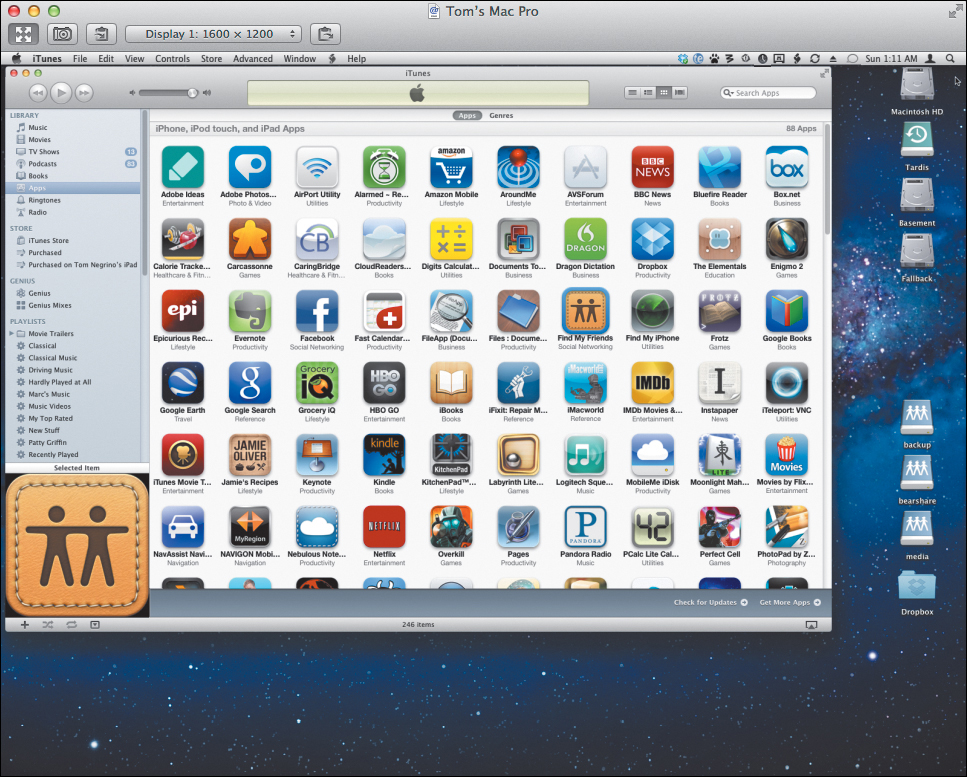
![]() Once Screen Sharing is started, you can see and work with the screen of the remote Mac.
Once Screen Sharing is started, you can see and work with the screen of the remote Mac.