Chapter 2
Setting Your Sights on iPhoto’s Menus
Menus are found at the top of every Macintosh application. The Apple (symbol) menu is always farthest left. Next to it is the applicationmenu. The title of this menu is always the name of the program you are using. As we see in Figure 2–1, if you are running iPhoto, you get the iPhoto menu. In this chapter, we’ll explore each menu, beginning with iPhoto, and work our way to the last menu in every application, the Help menu. This will familiarize you with all the menu options you have at your fingertips. It’s a crash course, so strap yourself in for a quick ride.
iPhoto Menu
The iPhoto menu, shown in Figure 2–1, provides a list of helpful items. Some of these—such as Preferences…—contain several noteworthy tabs, each with additional features designed to make your iPhoto experience a good one. In the following sections, I give an overview of each of these options.
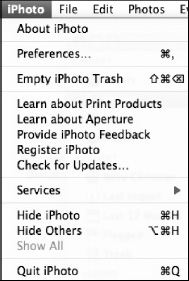
Figure 2–1. The complete iPhoto menu
About iPhoto
The About iPhoto option, as I discussed in the “Common Features” section of the Quick Start guide of this manual, just shows you the version of the program you are running.
Preferences…
This is an important section for any application. Preferences are settings that affect how the application works. For iPhoto, there are five different tabs with many features to configure: General, Appearance, Sharing, Accounts, and Advanced. A description of each follows.
General Tab
The General tab is shown in Figure 2–2.
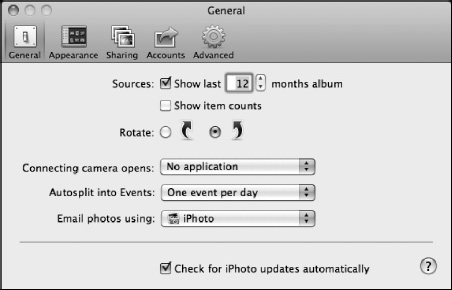
Figure 2–2. General tab of the menu choice Preferences… found in the iPhoto menu
The General tab’s various options are as follows:
- Sources: The first line allows you to set how many months will appear for the Last Import section in the sidebar. The second line asks if you want to show the number of items in each sidebar section. For example, if you have 15 photos in the Photos section, by default it will not display 15. If you check this box, 15 will appear next to Photos.
- Rotate: This option determines if you want your photos to rotate clockwise or counter-clockwise (the default).
- Connecting camera opens:You are given the choices in Figure 2–3. If you remember, when you launched iPhoto for the first time, you were asked to decide what would happen when you attach a camera (via USB). By accessing this menu option, you can modify your original choice. Image Capture is an application supplied by Apple that can manage input devices such as cameras and scanners. iPhoto is a much more sophisticated application, so I feel that Image Capture is not the best choice.
- Autosplit into Events: When you import photos into iPhoto, by default it creates one event per day. With this setting, you can modify it to one event per week, or break it down into two-hour or eight-hour gaps. This is shown in Figure 2–4.
- Email photos using: You can choose between iPhoto and other email clients when you want to email a photo within iPhoto. This is shown in Figure 2–5.
- Check for iPhoto updates automatically: If you check the box next to this setting, iPhoto will check with Apple whenever it starts up and checks for updates.

Figure 2–3. Options available when connecting a camera
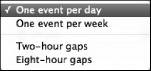
Figure 2–4. Importing photos—options for event creation
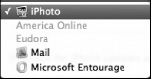
Figure 2–5. Choices for email client or using iPhoto (default)
Appearance Tab
The Appearance tab is shown in Figure 2–6.
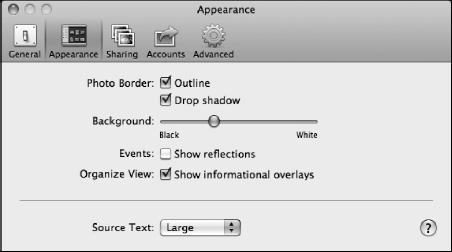
Figure 2–6. Appearance tab of the menu choice Preferences… found in the iPhoto menu
Its options are described in the following:
- Photo Border: This determines how your photo appears in iPhoto. By default, there is an outline and drop shadow around every photo.
- Background: This determines the color of the background behind your photos. Totally black is one extreme, and totally white is the other.
- Events: You can add a little more flair to your events by checking the box next to Show reflections. By default, this is turned off. See Figure 2–7 for an example of the reflection turned on.
- Organize View: You can choose to have informational overlays appear on the screen as you scroll through your library. The default is to show them. This will be a grey screen that contains appropriate info as you scroll (dates or ratings for example) that appears in the middle of window in the Photos view. Showing the date is the default, but you can also sort by ratings or titles.
- Source Text: This determines the size of the font in the Source List—or, as I call it, the sidebar. It can be large (default) or small.

Figure 2–7. Example of Reflections turned on for events
Sharing Tab
If there is more than one Mac on your network, you can share your photos (whole library or selected albums) or view photos from users that are sharing theirs. The Sharing tab is shown in Figure 2–8.
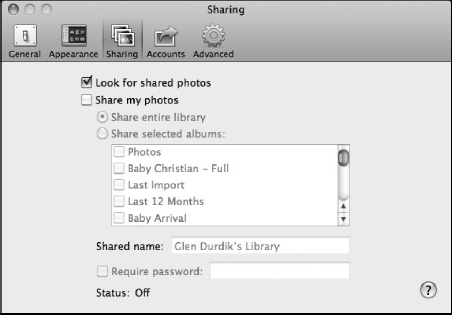
Figure 2–8. Sharing tab of the menu choice Preferences… found in the iPhoto menu
The options are described in the following:
- Look for shared photos: Check this box if you want to see shared photos. They will appear in the iPhoto sidebar.
- Share my photos: You can select your entire library or selected albums.
- Shared name: This is the name that others will see if you share your photos.
- Require password: Check this box if you want to keep your shared photos private. You must enter a password for this to function.
- Status: This just tells you if you are currently sharing your photos.
Accounts Tab
In Figure 2–9, the Accounts tab tells you what online accounts are currently being used in iPhoto. MobileMe is Apple’s online service. I have two email accounts that I use, and my photos are shared via my Facebook account.
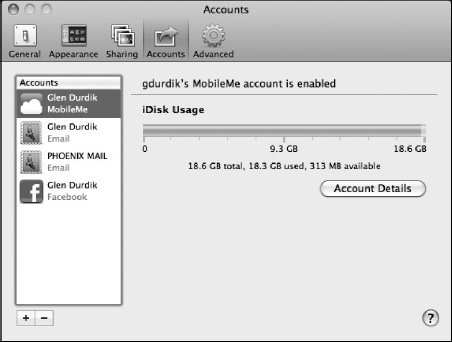
Figure 2–9. Accounts tab of the menu choice Preferences… found in the iPhoto menu
Advanced Tab
The Advanced tab is shown in Figure 2–10.
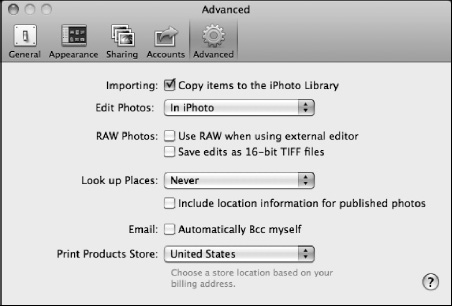
Figure 2–10. Advanced tab of the menu choice Preferences… found in the iPhoto menu
The following list explains the options in the Advanced tab:
- Importing: Decide if you want to actually add (duplicate) the photo into the iPhoto Library. If this is not checked, the item will not be duplicated, and iPhoto will use a pointer to the file. By default this is turned on.
NOTE: If you decide not to copy the item, any changes to the photo will only take place in iPhoto; the original will not be changed. As I said earlier, if you make changes to photos (with this item checked), the change is permanent. Duplicate the photo if you want to experiment.
- Edit Photos: This may sound unusual, but you can actually have iPhoto edit photos in another application. You might have a more powerful photo editor and choose to use it instead.
- RAW Photos: RAW photos are the highest quality image a camera can take. Only high-end cameras can take RAW photos. These two options deal with these type of photos. The first line, when checked, will open the RAW copy of your photo as opposed to the JPEG or TIFF copy iPhoto made when it imported the photo. The second line allows you to save the file as a TIFF file. A TIFF file uses a much better compression technology, so it is recommended that you check this box if using RAW files.
- Look up Places: If your camera takes GPS data when a photo is taken, iPhoto can use the information to place the photos on the Places map. If your photo has this data, chose Automatically for this option. Most cameras do not record GPS data, so Never is the default.
- Include location information for published photos: You can manually add the location to any of your photos. If the check box next to this item is checked, the location data you entered will be transferred if you publish the photo.
- Email: If you check the box next to Automatically Bcc myself, you will always receive a copy of any email you send via iPhoto. Bcc (blind carbon copy) means that no one else will know that you sent the email to yourself.
- Print Products Store: Apple has set up an online store to provide you with products supported by iPhoto. If you are a United States citizen—not an evil alien from Planet X—it should read United States.

NOTE: The Help button appears in every section of the Preferences… window tabs. If you click on it, you can get more help on the section you are currently viewing. This guide gives you a great start to learning iPhoto, but this Help button or the Help menu can answer any other questions you might have.
Empty iPhoto Trash
When you delete a photo in iPhoto, it is not immediately deleted. You must click the Empty iPhoto Trash option to actually erase the item. When you do, a popup menu appears asking you to confirm that you want to permanently delete the selected files. An example of this is shown in Figure 2–11.
NOTE: To delete a photo, you can either click on the right-hand mouse button and chose Trash from the window that appears, or go to the Photo menu and chose Move to Trash.
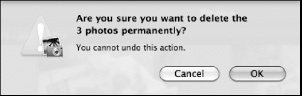
Figure 2–11. Permanently deleting items in the iPhoto trash can
Learn About Print Products
This option directs you to a website displaying descriptions of the projects you can create in iPhoto. This is includes books, card, calendars, and prints.
Learn About Aperture
Aperture is a more advanced photo management tool designed by Apple. It offers more selective retouching, more special effects, and produces more advanced slideshows, more advanced Faces and Places features, and a few more enhancements that make in more “professional” grade.
Provide iPhoto Feedback
I love it. Do you want new features? Here is your chance to let Apple know how you feel about iPhoto.
Register iPhoto
Basically, this is an option to fill out registration info for your application. Registration of this Apple product is not required for licensing purposes.
Check for Updates…
This subject was covered in detail in Part 1: “Quick Start Guide.” Basically, it goes out to an Apple server and checks if the software you are running is up to date.
Services
Some applications have special add-ons called services. By default, iPhoto has none installed.
Hide iPhoto
Closes all the visible open windows of iPhoto. It does not quit the application.
Hide Others
Closes all the visible open windows of applications, other than iPhoto. If you have five applications open, this feature is nice, as it leaves just iPhoto windows on your screen. This feature works for all Mac applications, so you can hide iPhoto and other apps while working on another “main” application.
Show All
This allows you to bring back all of the windows you closed in the either of the previous two menu options.
Quit iPhoto
The studio has closed and it’s time to close iPhoto. This option quits the application.
File Menu
The File menu (shown in Figure 2–12) contains a few very important options and some minor ones as well. Here you can create a new item that varies from a simple, new eventto complex photo book. In this menu, you can export your work to a variety of standard image formats.
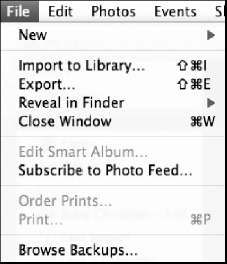
Figure 2–12. File menu
New
With the New command, you can create a variety of new items. As shown in Figure 2–13, you can create new projects such as a book, card, calendar, or slideshow. You can also create a new Empty Album, Smart Album, or Folder.
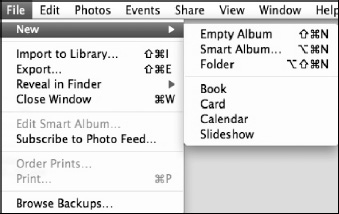
Figure 2–13. New menu option found in the File menu
A Smart Album is an album that you create that gives you the ability to have iPhoto automatically newly imported photos based on you criteria. Figure 2–14 shows just a handful of the conditions you can select.
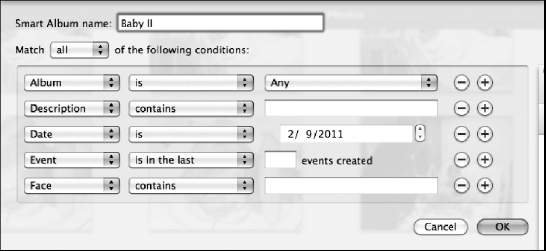
Figure 2–14. Sampling of the criteria options available for a Smart Album
Import to Library…
This was covered earlier in the chapter. It is used to add photos or videos to your iPhoto library.
Export…
You can export your photos into a vast number of formats through any one of four tabs: File Export, Web Page, QuickTime, or Slideshow.
File Export Tab
Figure 2–15 shows the File Export tab selected in the Export window. This window contains the following options:
- Kind: You can choose the type of file (JPEG or TIFF, for example).
- JPEG Quality: If you choose for JPEG files, you have the option to select the quality. Remember that higher quality means a larger file size.
- Include: You can chose to add Title, Keywords, and Location information.
- File Size: You change the file size if you wish (Small to Full Size).
- File Name: You are given options as to how iPhoto set its default name for a photo you want to export. UseFilename is the default, but you can also choose others. Below File Name, you can add a prefix to sequential filenames.

Figure 2–15. File Export window of the Export menu option found in the File menu
Web Page Tab
Figure 2–16 shows the Web Page tab selected. This window allows you to export your file as a web page for use in a web creation package with the following options:
- Page: Allows you to give the web page a title. Determine how you want the photos to appear on the page (how many rows and columns). Apply a Plain (default) or Framed template. Choose a background color for the web page and the texts color as well.
- Thumbnail: This is the small preview icon for the web page. In Figure 2–16, the maximum width and maximum height of 240 is the default. You are also given the option to add title and description info for the thumbnail.
- Image: Sets the image size for photos. The default is a maximum of 640 × 640. You can also add title, description, metadata, and location data.
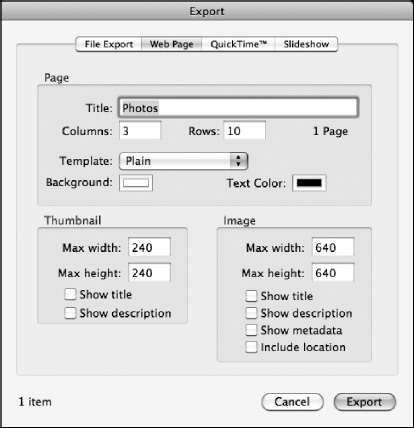
Figure 2–16. Web Page Export window of the Export menu option found in the File menu
QuickTime Tab
Figure 2–17 shows the QuickTime tab selected. You can set the width and height of the image to be exported, as well as how long it is going to be displayed. You can set the background color or image. Last, you have the option to add the currently selected slideshow music to the movie you want to export.
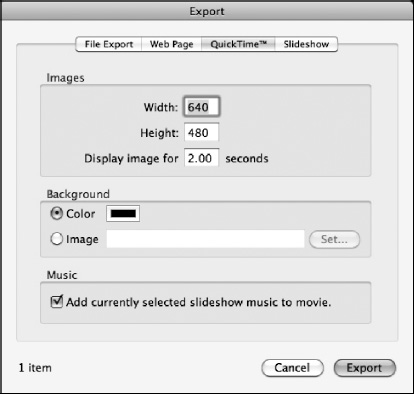
Figure 2–17. QuickTime export window of the Export menu option found in the File menu
Slideshow Tab
When selected, the Slideshow tab opens the window shown in Figure 2–18. This menu option will be discussed later in Chapter 6: And now ... A Slideshow”
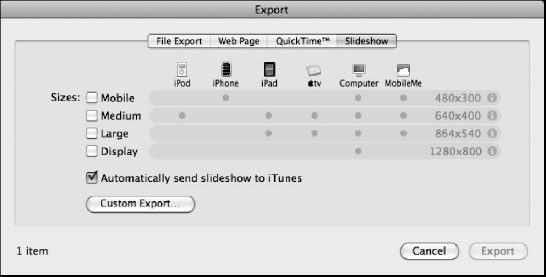
Figure 2–18. Slideshow export window of the Export menu option found in the File menu
Reveal in Finder
If you chose this option, iPhoto will bring up the actual location of the file you have selected on the hard drive on which it is saved.
Close Window
Closes the iPhoto window you are working in.
Edit Smart Album…
Allowsyou to modify the criteria you set originally when you created a Smart Album.
Subscribe to Photo Feed…
This brings up a window in which you can enter in a web address of a photo feed you are subscribing to.
Order Prints…
Here you can order high-quality hard copies of your photos.
Print…
This function allows you to print your photos to your attached printer.
Browse Backups . . .
Current Mac operating systems include a built-in backup utility called Time Machine. If you are using this application, you can browse previous backups for photos that might have been modified or deleted accidentally.
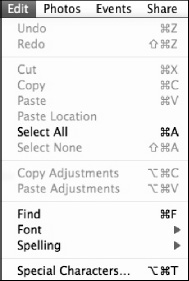
Edit Menu
The Edit menus for all iLife applications are very similar (see Figure 2–19). The commands to Undo an action or the very important tasks of Cut, Copy, and Paste are found in this menu. I will go over these commands and all of the others available in this menu in the following sections.
- Undo: Undoes the last change you applied to your photo or project.
- Redo: Decided that you really want the change you just undid? Then use this button to redo the formatting change.
- Cut: Deletes the item you have highlighted.
- Copy: Puts the item you highlighted into the Mac memory so you can add to other locations.
- Paste: Takes the last item that you copied and “pastes” it in your current cursor location.
- Paste Location: If you have GPS info or manually added location data, you can use this command to copy this info to any other photo in your library.
- Select All: This selects all the items in the open window. This can be photos in an event or album or files on your hard drive.
- Select None: The opposite of Select All. Deselects what you just highlighted using Select All.
- Copy Adjustments: If you make adjustments using edit tools, this allows you to apply these formatting changes to any photo in your library. Very powerful, very convenient. You just perfect one photo to your liking and then apply the changes to any others. Great timesaver, don’t you agree?
- Paste Adjustment: If you used the Copy Adjustment command, this pastes or duplicates the adjustments that were made to the photo you chose.
- Find: Brings you to the Search tool found in the iPhoto window.
- Font: Reveals the Font options available to modify text in your projects. This is shown in Figure 2–20.
- Spelling: This brings up the Spelling tool. The options available are shown in Figure 2–21.
- Special Characters: This is covered in Chapter 1: “Getting Around Your Digital Darkroom.” Basically, a resource to find unique symbols.
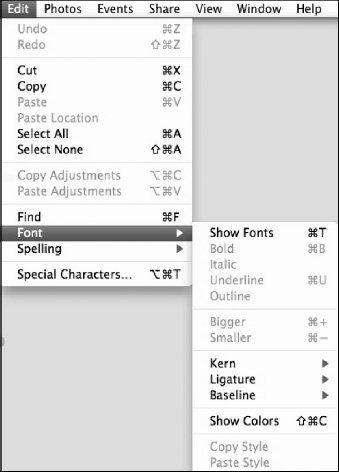
Figure 2–20. Font options found in the Edit menu
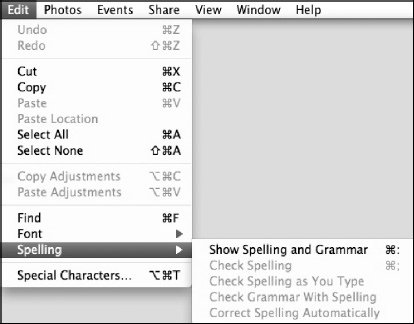
Figure 2–21. Spelling options found in the Edit menu
Photos Menu
With the Photos menu (shown in Figure 2–22), you have a lot of options to modify a photo. Whether it is a simple Rotate or a more complex Edit Photo feature, this menu means business.
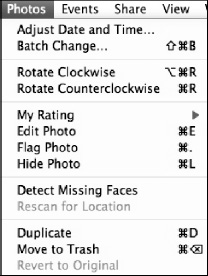
Figure 2–22. Photos menu
- Adjust Date and Time…: You can modify the date and time of the photo selected. Perhaps your camera’s clock was set incorrectly; this option allows you to correct it.
- Batch Change…: You can change the title, date, or description of a selected group of photos.
- Rotate Clockwise: Does what it states: rotates your photos 90 degrees to the right.
- Rotate Counterclockwise: Rotates your photos 90 degrees to the left.
- My Rating: You can assign each photo a rating. iPhoto uses a five-star rating system. Figure 2–23 shows the full rating scale.
- Edit Photo: Brings up the Edit tool.
- Flag Photo: If you have gazillions of photos, tagging them makes it easier to find the specific photos you want. If you flag a photo, it appears in the Flagged section of the iPhoto sidebar.
- Hide Photo: Hides the currently selected photo from view. You must go to the View menu and select Hidden Photos to see the photo(s) again.
- Detecting Missing Faces: After iPhoto has a selection of detectable Faces to search through, you can use this tool to attach a face to aphoto. I will cover Faces later.
- Rescan for Location: Rescans your library for photos that have location data in them. Helpful if your camera’s GPS data is off.
- Duplicate: This simply makes a copy of your photo.
- Move to Trash: Takes the selected photo and moves it the iPhoto trash can, not the Macintosh trash can. You must go to the iPhoto menu and select Empty iPhoto Trash to permanently delete the file.
- Revert to Original: This menu option reverts your photo back to its original state.
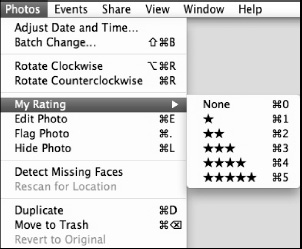
Figure 2–23. My Rating system found in the Photos menu
Events Menu
Every photo in iPhoto must be in an event. If you want to create a new event for, say, trips to Florida, the Edit menu is where you do it (see Figure 2–24). I discussed flagging photos in the previous chapter. One of the benefits of flagging photos is that, if you have a ton of photos and only the best are flagged, you can gather them all and place them in one unified event.
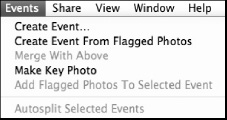
Figure 2–24. Events menu
- Create Event…: This creates a blank event if no photo is selected. If you choose this option when one or more photos are selected, the photos will be removed from the event they are currently in and moved into the new event. A photo can only be in one event.
- Create Event From Flagged Photos: This is what most users are probably going to do. Select the photos you want to add to a new event and select this option. iPhoto will note that a photo can only be in one location and move the photo to its new location (the new event).
- Merge With Above: This simply merges two events.
- Make Key Photo: This is a little tool that is very important. Each Event has one photo that always appears as the front-most photo. If you select this option for any photo in your Event, it will make the new photo the top or “key” photo.
- Add Flagged Photos To Selected Event: Simply adds any flagged photos you have to the event you have selected.
- Autosplit Selected Events: You can split Events based on smaller amounts of time. First, you must set the event timeframe in iPhoto Preferences…. Then when you chose this command, the Event will be split into these new smaller timeframes.
Share Menu
I have to admit, the Share menu is one of the reasons I love applying technology to the already powerful art of photography (see Figure 2–25). Sharing ones precious memories with someone, or nowadays to the whole world via the web, is simply amazing. With this menu, a user can easily email a photo or make it available to the rest of the plugged-in society. I think you will agree that the options available in this menu are a lot more fun and powerful then going to a store and ordering extra prints!
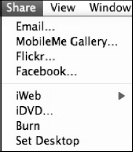
Figure 2–25. Share menu
- Email…: You can send your photos via email to any of your friends or family.
- MobileMe Gallery…: As I mentioned earlier, MobileMe is a service from Apple, which you must pay for. It is great for sharing photos or videos, because it allows others to download your media if you wish.
- Flickr…: You can upload your photos to a Flickr account.
- Facebook…: You can upload your photos to a Facebook account.
- iWeb: I will start to discuss iWeb in Chapter 10: “Welcome to Web Creation the iWeb Way!” It is iLife’s web page creation tool. It allows you to send it iWeb as a photo page or blog.
- iDVD: I will begin the discussion on iDVD starting in Chapter 7: “Beginner DVD Creation via iDVD. iDVD allows you to create amazing DVDs from your media library.
- Burn: You can “burn” (which means write) to a blank CD, CDR, or DVD. These are all optical disks that store large amounts of data.
- Set Desktop: Absolutely love one of the newly imported photos? With this command, you can make any photo the desktop picture for your Macintosh.
View Menu
The View menu (see Figure 2–26) contains a few important features to help make your time using iPhoto much easier. You can make finding photos a snap by searching for titles, ratings, or keywords. Note that you have to enter in a custom title, rate a photo, or add keywords to all of your photos to make this possible. Once this data is entered, you can use the powerful Sort tool also found in this menu.
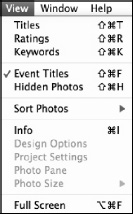
Figure 2–26. View menu window
- Titles, Ratings, Keywords: All of these options can be shown when viewing a photo album or event. Just hover your mouse over the option you want and it will show underneath your photo.
- Event Titles: This is turned on by default. Titles for each of the Events the photos are in will appear in the Photos section of the sidebar when activated.
- Hidden Photos: If you previously hid photos being viewed on the screen, you can see them again by choosing this command.
- Sort Photos: You can sort your photos in a number of ways. All of the available options are shown in Figure 2–27.
- Info: This was covered earlier in the chapter when discussing the Info button.
- Design Options and Project Settings: These two settings are only available when working on a project such as book or card.
- Photo Pane: When in a project, this brings up the Photos sidebar.
- Photo Size: This determines at what size the photos in the Photos sidebar will appear. Choose either small or large.
- Full Screen: This gives you the option of having iPhoto take up all of screen’s real estate and hide all other items. If you are going to be doing a lot of work in iPhoto, this is a nice way to cut down on distractions.
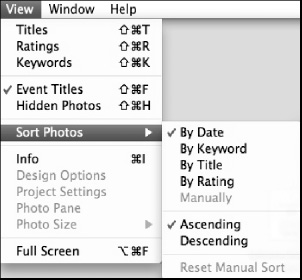
Figure 2–27. Options for sorting your photos (Date and Ascending are the defaults)
Window Menu
Hmmm… I would describe the Window menu (see Figure 2–28) as one that performs a few tasks. Minimize and Zoom are found in every Apple application. New to this menu are the settings for Manage My Keywords and Manage My Places. Simple menu, but important nonetheless.
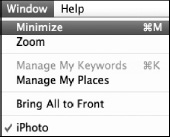
Figure 2–28. Window menu
- Minimize: This takes the current window and shrinks it down into the Dock. This is the same as the orange button found at the top left of every file or folder. To bring it back, select iPhoto from this menu or click on the small icon of the file in the Dock.
- Zoom: This makes the current window the largest it can be. This is the same as the green button found at the top left of every file or folder.
- Manage My Keywords: If you entered keywords into the photo’s info section, this option will help manage them for you.
- Manage My Places: Here you can see all the Places you set in iPhoto. I will discuss Places and Faces after the Help menu is discussed.
- Bring All to Front: If you have more than just iPhoto open, you might have a lot of open windows. This command brings all of the open iPhoto windows to the front. If you are a power user, you will find this feature very helpful.
- iPhoto: This just tells you that iPhoto is running.
Help Menu
How do I create a calendar? If you have the Help menu handy (see Figure 2–29) you will learn how to create one in a snap. You can try torely on the built-in Help system to get you on the right path to iPhoto nirvana; the Help system in iLife is filled with useful videos and step-by-step instructions. I have found, however, that some items are hard to find or are not covered at all. I think this is one of the best reasons to readthis book. It covers every topic from A to Z.

Figure 2–29. Help menu
- Search: In the Search field, enter a topic that you have a question about.
- iPhoto Help: This brings up the screen shown in Figure 2–30. You have two choices: Get Started and Browse Help. Get Started is a list of seven lessons to help you get familiar with the most common tasks users want to know about. This is shown in Figure 2–30. Browse Help gives you a more detailed list of help topics. This is shown in Figure 2–31.
- Welcome to iPhoto: This brings up the Welcome Screen when you first launch iPhoto.
- Keyboard Shortcuts: These are shortcuts that usually use the Command key (
 ) or Option key and perform a function. For example, hold down the and the press the Q key to quit an application.
 - Service and Support: This brings you to an Apple site that covers tips and news about iPhoto.
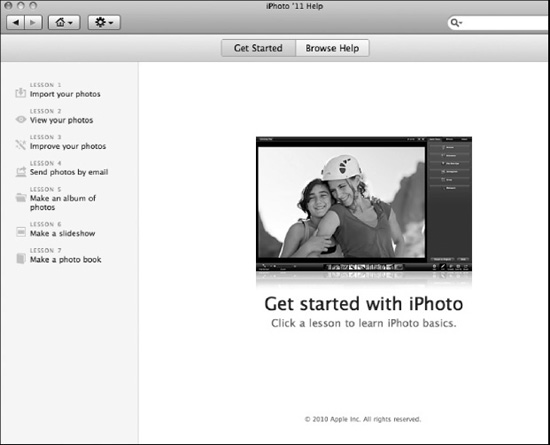
Figure 2–30. Get Started section of the iPhoto Help window
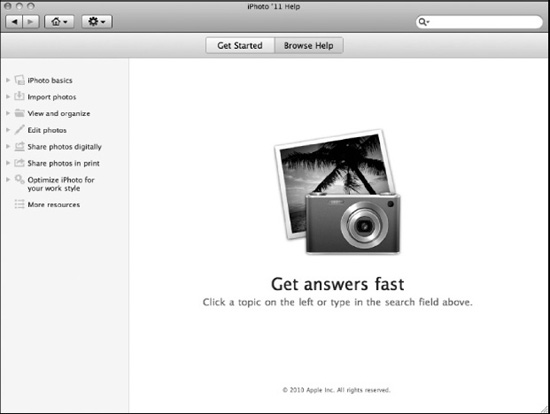
Figure 2–31. Browse Help section of iPhoto Help
Summary
With the previous chapter on navigating the iPhoto workspace and this chapter on menus, you should have a good idea of how to use iPhoto and become a digital darkroom master in no time. So get your creative juices flowing, because the next chapter shows you how to get your memories into the digital darkroom of iPhoto and to start using your knowledge to get you on the road to becoming a digital photo master, one click of the mouse at a time!