Chapter 12. Media: audio and recording
- Accessing the iPod library to play music
- Recording audio from the built-in microphone
- Playing sounds
- Recording, playing, and accessing video
In the previous chapter, we discussed the basics of images. This chapter will detail how to play and record various types of audio and video. This will include how to play back audio items in the user’s iPod library as well as how to record to and play from the user’s video library.
To further demonstrate these concepts, you’ll create two sample applications. The first application is a simple media player that lets the user choose a song from their iPod library and play it back within the application. The next will be a simple recording and playback application that lets the user record audio of an arbitrary length and play it back.
12.1. Playing audio from the iPod library
You may wonder: why do you want to play music from the iPod music library. Many people bought their fancy new iPhones for the sole purpose of combining their electronics (cell phone, iPod, GPS, camera, and so on).
Apple saw the need for such control within an application and provided the Media Player framework to allow you to retrieve items from the iPod media library as well as play them.
There are many reasons why you’d want to have control over the iPod in your applications. You may want to allow the user to use their personal music instead of your game music, or you may want to create a “Name That Tune” sort of game that uses songs from the user’s iPod library. Apple has now made it simple to access and play these items. We’ll look at how to retrieve items from the media library, how to get information about an item, and how to play an item, and we’ll put it all together in a concrete example at the end of the section.
12.1.1. Retrieving audio items from the iPod media library
Retrieving items from the iPod media library is similar to retrieving photos from the photo library. The process is as follows:
- Display the MPMediaPickerController in the current view.
- Select media items from the iPod library.
- A callback method in the MPMediaPickerControllerDelegate is called with the media items.
The following example demonstrates how to display the MPMediaPickerController to select media items:
MPMediaPickerController  *picker = [[MPMediaPickerController alloc]
   initWithMediaTypes:MPMediaTypeMusic];
[picker setDelegate:self];

[self presentModalViewController:picker animated:YES];
MPMediaPickerController allows you to select multiple items. To enable this feature, you must set the allowsPickingMultipleItems property to YES.
Because MPMediaPickerController is a view controller, it can be displayed any way that you can display a view controller. It can be inside a tab bar view controller, pushed onto a navigation controller stack, or, in this case, presented as the modal view controller. How you choose to display it is up to you. Make sure you choose the method that fits the flow of your application. Figure 12.1 shows what the MPMediaPicker-Controller looks like when displayed.
Figure 12.1. The MPMediaPickerController
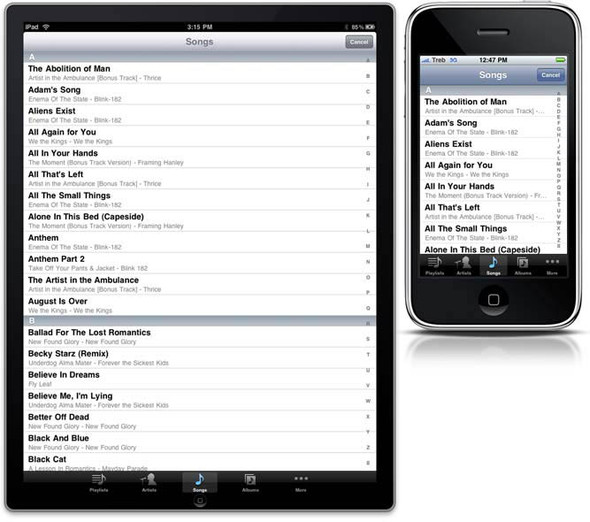
The media types you select aren’t limited to music. You can also select podcasts and audio books. When you initialize a new MPMediaPickerController, you have the option of selecting what type of media is shown by default. In the previous example, the picker will display the user’s music library. Following in table 12.1 are the constants you can use to change which library is shown.
Table 12.1. Media constants
|
Constant |
Description |
|---|---|
| MPMediaTypeMusic | The media type is music, and the picker is limited to the music library. |
| MPMediaTypePodcast | The media type is a podcast, and the picker is limited to the podcast library. |
| MPMediaTypeAudioBook | The media type is an audio book, and the picker is limited to the audio book library. |
| MPMediaTypeAnyAudio | The media type is an unspecified type of audio. The picker isn’t limited to any specific audio type. |
| MPMediaTypeAny | Similar to MPMediaTypeAnyAudio. This allows the picker to pick any audio item from the library. |
After you’ve created your MPMediaPickerController, you need to create a delegate to respond to two methods: mediaPicker:didPickMediaItems: and mediaPickerDidCancel:.
mediaPickerDidCancel: is called when the user presses the Cancel button in the toolbar. Typically, you want to hide the MPMediaPickerController from this method.
When a media item has been selected, the mediaPicker:didPickMediaItems: method of the delegate automatically is called with an MPMediaItemCollection containing the selected item. An MPMediaItemCollection is a sorted set of MPMediaItems.
12.1.2. Getting information about an MPMediaItem
When you select an MPMediaItem from the iPod’s media library, it comes with all the associated meta-information. To get access to this information, you call the valueFor-Property: method of the MPMediaItem with a given key. The complete list of keys can be found in the API documentation for MPMediaItem. Table 12.2 provides a short list of some of the more common keys.
Table 12.2. Common MPMediaItem keys
|
Constant |
Description |
|---|---|
| MPMediaItemPropertyMediaType | Corresponds to one of the media types discussed in table 12.1 |
| MPMediaItemPropertyAlbumTitle | The title of the album that the media item belongs to |
| MPMediaItemPropertyArtist | The artist of the current media item |
| MPMediaItemPropertyPlaybackDuration | An NSInteger that represents the length in seconds of the current media item |
| MPMediaItemPropertyArtwork | The artwork image for the media item |
Other properties you have access to include genre, composer, duration, track and disc number, album artwork, rating, lyrics, last played date, and play and skip counts.
Now that you know how to select media items from the iPod library, playing these items is fairly easy.
12.1.3. Playing media items using MPMusicPlayerController
The class used to play media items is MPMusicPlayerController. It gives you total control over the built-in iPod on the device.
When initializing a new MPMusicPlayerController, you have two options for interacting with the iPod. The first way limits the iPod playback to your application. When you choose this method of playback, the iPod will stop playing as soon as your application exits. The other allows you to invoke the global iPod application. Exiting your application won’t cause the iPod to stop playing. The following code snippet details how to initialize the MPMusicPlayerController:
MPMusicPlayerController *player =
     [MPMusicPlayerController applicationMusicPlayer];
By using the applicationMusicPlayer method of MPMusicPlayerController, you’re limiting the media playback to your application. Using this method doesn’t affect the device’s iPod state in any way. If you want to use the main iPod application for media playback, you use the iPodMusicPlayer method.
After you’ve initialized the MPMusicPlayerController, you need to tell it which items you want it to play. You do so with the setQueueWithItemCollection: method. This method takes an MPMediaItemCollection as an argument. Conveniently enough, an MPMediaItemCollection is available to you when the MPMediaPicker-Controller selects an item. Here’s an example detailing how to set up the media player to play items selected from the user’s media library:
- (void)mediaPicker: (MPMediaPickerController *)mediaPicker
     didPickMediaItems:(MPMediaItemCollection *)mediaItemCollection {
   [player setQueueWithItemCollection:mediaItemCollection];
}
After you set up the MPMusicPlayerController, quite a few settings are available to further control the iPod (see table 12.3).
Table 12.3. Common iPod control properties
|
Constant |
Description |
|---|---|
| currentPlaybackTime | The current playback time in seconds. |
| nowPlayingItem | A reference to the currently playing item in the queue. |
| playbackState | The current playback state of the media player. The states are stopped, playing, paused, interrupted, seeking forward, and seeking backward. |
| repeatMode | The repeat mode of the player. The repeat modes are default, none, one, and all. |
| shuffleMode | The shuffle mode of the player. The shuffle modes are default, off, songs, and albums. |
| volume | The volume of the player. This is a float value between 0.0 and 1.0. |
See the documentation for the names of the constants for playbackState, repeat-Mode, and shuffleMode.
The MPMusicPlayerController provides a full set of methods that you’d expect to control the playback of the iPod. Table 12.4 provides a complete list of these methods as well as their descriptions.
Table 12.4. Playback control methods for MPMusicPlayerController
|
Method |
Description |
|---|---|
| play | Starts or resumes the iPod’s playback of the current media item. |
| pause | Pauses the playback if the player is currently playing. |
| stop | Stops the playback if the player is currently playing. |
| beginSeekingForward | Moves playback forward at a faster than normal rate. |
| beginSeekingBackward | Moves playback backward at a faster than normal rate. |
| endSeeking | Stops seeking and resumes playback. |
| skipToNextItem | Starts playback of the next media item in the playback queue. This method ends playback if it’s already at the last item in the queue. |
| skipToBeginning | Starts playback of the current media item at the beginning. |
| skipToPreviousItem | Starts playback of the previous media item in the playback queue. This method ends playback if it’s already at the first item in the queue. |
As you can see, the API gives you quite a bit of control over the iPod. With all of these controls, you’re able to create fully featured media playback applications. In the next section, we’ll show you how to put it all together, and you’ll create a simple media player application.
12.1.4. Example: creating a simple media player application
You’ve already written most of the code needed to create a simple media player application. This example will demonstrate how to use the MPMediaPickerController to find media and then play it using the MPMusicPlayerController.
Make sure you’re testing directly on your device, because the Simulator doesn’t have an iPod application. Testing from the Simulator will yield an error when trying to display the picker.
Creating a View-Based Application
You’ll start the application from the View-Based Application template provided by Apple. This template creates an application delegate as well as a view controller. The View-Based Application is perfect, because you’ll only need to add three buttons to the view. Name the application iPodTest.
Adding the Needed Frameworks
This project requires one more framework beyond the defaults provided by the View-Based Application template: MediaPlayer.framework. To add it, right-click Frameworks and select Add; then, select Existing Frameworks. Search for Media-Player.framework and select it.
Setting up the IBActions
Before you create the interface, you need to create the actions that the buttons will connect to. Open iPodSampleViewController.h, and add the code in the next listing.
Listing 12.1. iPodSampleViewController.h
#import <UIKit/UIKit.h>
#import <MediaPlayer/MPMusicPlayerController.h>
#import <MediaPlayer/MPMediaPickerController.h>
  @interface iPodTestViewController :
   UIViewController<MPMediaPickerControllerDelegate> {
     MPMusicPlayerController * player;
     MPMediaPickerController * picker;
}
- (IBAction) pickMedia:(id) sender;
- (IBAction) playMedia:(id) sender;
- (IBAction) stopMedia:(id) sender;

@end
The first import is added by default. The next two are needed to access the music player and media picker. They contain all the classes and methods that you’ll be referencing.
Looking at the class signature for iPodTestViewController, you see that it implements the MPMediaPickerControllerDelegate interface. This means the class is the delegate for the MPMediaPickerController. It receives all the actions sent by the media picker and allows you to respond to them.
After declaring the media player and media picker, you declare the IBActions. These actions are hooked up to the UIButtons on the interface. As you can see, you implement only two of the nine methods found in MPMusicPlayerController. Because the rest of the methods are similar, we’ll leave implementing them up to you.
Creating the Interface
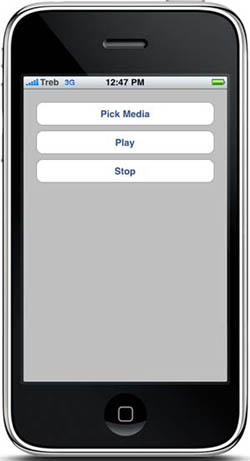
Open iPodTestViewController.xib for editing. Drag three UIButtons from the library onto your view, and title them Pick Media, Play, and Stop. Connect each of them to its corresponding IBAction by right-clicking it and dragging to the File’s Owner icon. The interface should look like figure 12.2.
Figure 12.2. A simple media player interface
Next you will need to edit the view controller implementation file and add the code that will control this interface
Writing the Code
Open iPodTestViewController.m, and add the code in the following listing.
Listing 12.2. iPodTestViewController.m
#import "iPodTestViewController.h"

@implementation iPodTestViewController

- (void)viewDidLoad {
    player = [MPMusicPlayerController iPodMusicPlayer];
    picker = [[MPMediaPickerController alloc]
       initWithMediaTypes:MPMediaTypeAnyAudio];
       [picker setDelegate:self];
       [super viewDidLoad];
}

- (void )mediaPicker: (MPMediaPickerController *)mediaPicker
    didPickMediaItems:(MPMediaItemCollection *)mediaItemCollection {
    [player setQueueWithItemCollection:mediaItemCollection];
    [self dismissModalViewControllerAnimated:YES];
}

- (IBAction) pickMedia:(id) sender {
    [self presentModalViewController:picker animated:YES];
}

- (IBAction) playMedia:(id) sender {
     [player play];
}

- (IBAction) stopMedia:(id) sender {
     [player stop];
}

- (void)dealloc {
    [super dealloc];
     [player release];
     [picker release];
}

@end
You begin by initializing the media player and picker. Because the player is being initialized with the iPodMusicPlayer method, the application uses the global iPod player when playing media items. The media picker is initialized with the MPMediaTypeAnyAudio constant; this lets the user select any sort of audio media from the iPod library. Finally, you set the class as the delegate to the MPMediaPickerController so you can respond to its actions.
The mediaPicker method is called automatically whenever the user selects an audio item from the iPod library. It receives an MPMediaItemCollection, which contains the audio item to be played. The next line takes this collection and adds it to the iPod media collection’s queue. To hide the picker, you call dismissModalViewControllerAnimated.
The pickMedia method displays the media picker on top of the current view. The playMedia and stopMedia methods are fairly self-explanatory because they only control the media player. Use these methods as a template for implementing other media player controls on your own.
Finally, you need to make sure to release objects that you allocate. Doing so ensures that your application doesn’t use more memory than it needs and runs as efficiently as possible.
In the next section, we’ll discuss how to let users record audio files.
12.2. Recording audio
In this section, you’ll learn how to record audio by building a demo app with AVFoundation framework.
AVFoundation framework is really easy to use for a simple audio recording or playing task. You can find all the classes for recording audio in the AV Foundation framework. In order to use these classes, you must add AVFoundation.framework to your project. We’ll look at how to initialize and control the audio reader and also how to respond to its associated events.
12.2.1. Initializing the audio recorder
When you’re initializing a new AVAudioRecorder object, you should avoid using the default constructor init. This is to reduce complexity, because this class requires quite a bit of configuration. The constructor you should use is initWithURL:settings:error. It allows you to specify the location on disk to record the audio to as well as provide various audio settings.
The first parameter is the location where the recording will be stored. Although it’s expressed as an NSURL, it’s really a local path that points to a location on disk. In most cases, you’ll want to store recordings in the Documents directory.
The next parameter is an NSDictionary that contains the settings for the recording. Table 12.5 lists some of the settings that you may want to consider when setting up your recorder.
Table 12.5. Basic audio settings for AVAudioRecorder
|
Setting key |
Description |
|---|---|
| AVSampleRateKey | A sample rate, in Hertz, expressed as an NSNumber floating-point value. |
| AVFormatIDKey | A format identifier. A common value for this is kAudioFormatAppleLossless. |
| AVNumberOfChannelsKey | The number of channels expressed as an NSNumber integer value. You can set this value to 1. |
| AVEncoderAudioQualityKey | A key that refers to the quality of the audio being played. |
You can specify quite a few other settings when creating your recorder. All of these settings are optional and have default values; you can use them to fine-tune your audio recording. The next listing demonstrates how to build an AVAudioRecorder object with some basic settings.
Listing 12.3. Initialization code for AVAudioRecorder
NSString * filePath = [NSHomeDirectory()
   stringByAppendingPathComponent:@"Documents/recording.caf"];
NSDictionary *recordSettings =
 [[NSDictionary alloc] initWithObjectsAndKeys:
 [NSNumber numberWithFloat: 44100.0], AVSampleRateKey,
 [NSNumber numberWithInt: kAudioFormatAppleLossless],AVFormatIDKey,
 [NSNumber numberWithInt: 1], AVNumberOfChannelsKey,
 [NSNumber numberWithInt: AVAudioQualityMax], AVEncoderAudioQualityKey,nil];
AVAudioRecorder * soundRecorder =
   [[AVAudioRecorder alloc] initWithURL: [NSURL fileURLWithPath:filePath]
   settings: recordSettings
   error: nil];
Note the filePath. This is an NSString that points to a file named recording.caf in the Documents directory. This path is converted to an NSURL during the construction of the recorder.
12.2.2. Controlling the audio recorder
After you construct an AVAudioRecorder, you have quite a bit of control over it. Table 12.6 lists all the methods you can call on a recorder to control the recording session.
Table 12.6. Methods to control audio recording
|
Method |
Description |
|---|---|
| - (BOOL)prepareToRecord | Creates the recording file on disk at the specified URL path. This method also prepares the system for recording. |
| - (BOOL)record | Starts or resumes recording. This method implicitly calls the prepareToRecord method. |
| - (BOOL)recordForDuration: (NSTimeInterval)duration | Starts the recorder and records for a specified amount of time. |
| - (void)pause | Pauses a recording. To resume recording, call the record method again. |
| - (void)stop | Stops the recording and closes the audio file. |
| - (BOOL)deleteRecording | Deletes the current recording. For this method to work, the recording must be stopped. |
The following code shows how to make a simple toggleRecord method that can be used as an IBAction for a button. The code assumes you’ve created a few global properties. Theses properties include recording of type BOOL and soundRecorder of type AVAudioRecorder:
- (IBAction) toggleRecord:(id) sender {
 if (recording) {
    [soundRecorder stop];
 } else {
  [soundRecorder record];
 }
  recording = !recording;
}
When toggleRecord is called for the first time, record is set to NO. This starts the audio recording and sets the recording property to YES. The system creates the recording file and begins receiving input from the built-in microphone. If the device’s headset is plugged in, the system uses the headset’s microphone instead.
The second time toggleRecord is called, the recorder stops recording. This closes the audio file and allows it to be played. The recording property is also set to NO.
12.2.3. Responding to AVAudioRecorder events
Like many API classes, AVAudioRecorder sends messages to a delegate. To respond to delegate actions from the AVAudioRecorder, your class must implement the AVAudioRecorderDelegate. Table 12.7 describes the methods that can be implemented.
Table 12.7. AVAudioRecorderDelegate methods
|
Method |
Description |
|---|---|
|
- (void)audioRecorderDidFinishRecording: (AVAudioRecorder *)recorder successfully:(BOOL)flag |
Called when the recorder finishes recording. This method is passed a reference to the recorder and a Boolean value that’s YES if it was successful. |
|
-(void)audioRecorderEncodeErrorDidOccur: (AVAudioRecorder *)recorder error:(NSError *)error |
Called when an error occurs during recording. |
|
- (void)audioRecorderBeginInterruption: (AVAudioRecorder *)recorder |
Called when the recording is interrupted. The most common interruption is when the user gets an incoming call while recording. |
|
- (void)audioRecorderEndInterruption: (AVAudioRecorder *)recorder |
Called when the interruption ends. An example is pressing Ignore in response to an incoming call. |
As with most delegate classes, it’s important to implement all of these methods in your class. Doing so ensures that your application responds correctly in any circumstance.
Now that you know how to record audio, the next step is to play it back. The next section will discuss the method for playing your recordings as well as any other audio files in your application.
12.3. Playing sounds
Prior to the release of the iOS 3.0 API, playing audio files was a fairly complex task. There were functions to simplify the process, but they were limited to 30 seconds and didn’t support simultaneous playback. To achieve this functionality, you had to use some relatively low-level audio libraries. These include Audio Queue Services, Audio File Stream Services, Audio File Services, OpenAL, Audio Session Services, and more.
The aforementioned audio libraries are powerful but are no longer needed. The AVAudioPlayer has replaced all of them and is now recommended by Apple for all audio playback. According to the API documentation of the AVAudioPlayer, “Apple recommends that you use this class for audio playback unless your application requires stereo positioning or precise synchronization, or you are playing audio captured from a network stream.”
The AVAudioPlayer class provides a fully featured interface for playing and managing audio. Following is a list of some of the features available in AVAudioPlayer:
- Plays sounds of any length
- Loops sounds
- Plays sounds simultaneously
- Controls the playback level for each sound
- Seeks, which allows you to do fast forward and rewind
- Obtains and displays metering data about levels, peaks, and so on
Let’s look at how to use the AVAudioPlayer. Later in the section, we’ll also explain how to vibrate an iPhone.
12.3.1. Initializing the AVAudioPlayer
The AVAudioPlayer provides two methods for initialization. The first method is initWithData:error. This method initializes the player with an NSData object containing the audio data to be played. The second parameter is a reference to an NSError for error reporting. This method is useful when you have audio data on hand and don’t need to load it from disk.
The second method of initialization is initWithContentsOfURL:error. This method will probably be more useful unless you’re working on an audio-editing application. The first parameter is an NSURL containing the location of the audio file. You’ll need to build an NSURL from the path to your audio file. Here’s an example of initializing an AVAudioPlayer using the initWithContentsOfURL:error method:
NSString * filePath = [NSHomeDirectory() stringByAppendingPathComponent:
                          @"Documents/recording.caf"];

AVAudioPlayer *newPlayer = [[AVAudioPlayer alloc] initWithContentsOfURL:
                              [NSURL fileURLWithPath:filePath] error: nil];
newPlayer.delegate = self;
This example initializes an audio player with a file named recording.caf located in the Documents directory. Like the AVAudioRecorder, this variable is of the type NSURL.
After building a new AVAudioPlayer object, you need to set its delegate to respond to its actions. In this example, the delegate is assigned to the calling class.
12.3.2. The AVAudioPlayerDelegate
The delegate for the AVAudioPlayer is similar to the delegate for the AVAudio-Recorder. It responds to exactly the same events, replacing recorder with player. Table 12.8 discusses these events.
Table 12.8. AVAudioPlayerDelegate methods
|
Description |
|
|---|---|
|
- (void)audioPlayerDidFinishPlaying: (AVAudioPlayer *)player successfully:(BOOL)flag |
Called when the player finishes playing. This method is passed a reference to the player and a Boolean value that’s YES if it was successful. |
|
-(void)audioPlayerDecodeErrorDidOccur: (AVAudioPlayer *)player error:(NSError *)error |
Called when an error occurs during audio playback. |
|
- (void)audioPlayerBeginInterruption: (AVAudioPlayer *)player |
Called when the player is interrupted. The most common interruption is when the user gets an incoming call while playing. |
|
- (void)audioPlayerEndInterruption: (AVAudioPlayer *)recorder |
Called when the interruption ends. An example is pressing Ignore in response to an incoming call. |
As you can see, there’s nothing new here. These delegate methods are as expected and should all be implemented in your delegate class.
12.3.3. Controlling the AVAudioPlayer
One useful thing Apple did with the AVAudioPlayer was to allow it to be controlled like a music player. It contains all the methods you’d expect and then some. These include play, pause, and stop. You can also seek by modifying the currentTime property.
One additional method you may find useful is prepareToPlay. This method preloads the player’s buffer with the audio data so that it’s ready to play when the play method is called. It minimizes the lag between initializing the player and playing the audio.
An example usage is in a video game. You want to preload all the audio for a given level before the user starts playing. That way, when the user attacks an enemy, the attack sound plays right away rather than after the user has already defeated the enemy.
You need to consider quite a few other properties when coding an AVAudioPlayer. Here’s a list of these properties along with their descriptions:
- playing—A Boolean value that’s YES when the player is currently playing a sound file. This property is read-only.
- volume—The relative volume of this sound. The value is a float and ranges from 0.0 to 1.0.
- numberOfLoops—The number of times to loop the sound. The default value for this is 0, which means to play the sound once. Setting this value to a positive number loops the sound that many times. To loop the sound indefinitely until the stop method is called, set this value to any negative number.
- numberOfChannels—The number of audio channels in the sound. This property is read-only.
- duration—The total length in seconds of the sound file. This property is read-only.
- currentTime—The current playback time of the sound. This file can be used to “seek” or fast-forward and rewind.
- URL—An NSURL with the location of the sound file.
- data—An NSData object containing the audio data for the sound file.
- meteringEnabled—A Boolean value that determines if metering is currently enabled. When this is set to YES, you have access to some metering data associated with the sound. By default, this property is set to NO.
These properties make it simple to manage and control audio objects. You no longer need advanced knowledge of audio programming to integrate sounds into your applications. This code shows how to play back the recording you created in the previous section:
NSString * filePath = [NSHomeDirectory() stringByAppendingPathComponent:
                          @"Documents/recording.caf"];

AVAudioPlayer *newPlayer = [[AVAudioPlayer alloc] initWithContentsOfURL:
                              [NSURL fileURLWithPath:filePath] error: nil];
newPlayer.delegate = self;
[newPlayer play];
Again, you resolve the URL from the file path and pass it to the player. Next, the delegate is set to the caller class. Finally, play is called to start the audio playback.
One cool feature of the API related to audio programming is vibrating the iPhone. It’s related because it uses the system’s audio interface. The API used is a C interface found in the Audio Toolbox framework. It’s a really powerful API on iOS. We will cover details on Audio Toolbox framework in Chapter 22 for background audio.
You can find the function for vibrating the device in AudioToolbox/AudioServices.h. Make sure you add the AudioToolbox.framework to your project and import AudioToolbox/AudioServices.h. Here’s the single line of code needed to vibrate the iPhone or iPad:
AudioServicesPlaySystemSound(kSystemSoundID_Vibrate);
Place that line of code in any method that needs to vibrate the phone. It’s short and easy to use.
12.4. Example: creating a simple audio recording/playback application
Years ago, little electronic devices, commonly available in grocery stores, allowed you to press a button, record some audio, and play it right back. In this section, you’ll create an application that will function similarly to one of these devices.
The interface for the application is fairly simple. It contains only a Record button and a Play button. When the user presses the Record button, they must hold it down for as long as they’d like to record. When they release the button, the recorder stops. The user then presses the Play button to play back the audio they just recorded.
12.4.1. Creating a view-based application
As you did in the last example, start by creating a new view-based application. You need this template, because it provides a single view along with the application’s delegate. Name the project TalkBack.
12.4.2. Adding the needed frameworks
You’ll need to add two additional frameworks to the project in order for it to function. The first framework you need is AVFoundation.framework. This contains all the sAVAudioRecorder and AVAudioPlayer classes and methods you’ll be using. The next framework is CoreAudio.framework; it contains a constant that’s needed in the application.
12.4.3. Setting up the IBActions
The application will need to respond to three events. The first is when the user initially pushes the Record button; this event should initialize the recorder and start the recording. The second event occurs when the user releases the Record button; this should stop the recorder. Finally, the third event occurs when the user presses the Play button; this should play back the recorded audio. You need to write the method signatures for each of these methods in the header file. The following listing contains the code inside TalkBackViewController.h.
Listing 12.4. TalkBackViewController.h
#import <UIKit/UIKit.h>
#import <AVFoundation/AVAudioRecorder.h>
#import <AVFoundation/AVAudioPlayer.h>
#import <CoreAudio/CoreAudioTypes.h>

@interface TalkBackViewController :
     UIViewController<AVAudioPlayerDelegate,AVAudioRecorderDelegate> {
    AVAudioRecorder * recorder;
}

- (IBAction) record: (id) sender;
- (IBAction) recordStop: (id) sender;
- (IBAction) play: (id) sender;
@end
This code import the APIs you use, declares an AVAudioRecorder, and then declares the IBActions. Now that you’ve set up the IBActions, you need to create the interface.
12.4.4. Creating the interface
Open TalkBackViewController.xib, and add two UIButtons to the view. Title one Record and the other Play. You can place them anywhere on the view, which should look like figure 12.3.
Figure 12.3. The talkback interface: a simple record/playback application
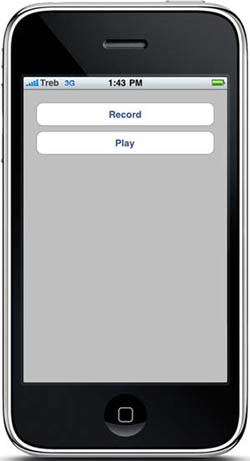
The Record button will have both the record and recordStop methods connected to it, but they’ll be connected to different selectors. Click the Record button, and open the connection inspector. Drag from the Touch Down action to the File’s Owner object, and select Record. Doing so invokes the record method when the button is first touched. Next, drag the Touch Up Inside action to the File’s Owner object, and select recordStop. This will execute after the button has been released. This way, the application will start recording when the Record button is pressed and keep recording until it’s released.
Now, click the Play button and open the connection inspector. Drag from Touch Up Inside to the File’s Owner object, and select the Play action.
12.4.5. Setting up the audio recorder and implementing the IBActions
Now that the interface is set up and the connections have been made, it’s time to implement these actions. The next listing contains the code that you need to add to TalkBackViewController.m.
Listing 12.5. TalkBackViewController.m
#import "TalkBackViewController.h"

@implementation TalkBackViewController

- (void)viewDidLoad {
[super viewDidLoad];
NSString * filePath = [NSHomeDirectory()
stringByAppendingPathComponent: @"Documents/recording.caf"];

NSDictionary *recordSettings =
[[NSDictionary alloc] initWithObjectsAndKeys:
[NSNumber numberWithFloat: 44100.0],AVSampleRateKey,
[NSNumber numberWithInt: kAudioFormatAppleLossless],AVFormatIDKey,
[NSNumber numberWithInt: 1], AVNumberOfChannelsKey,
[NSNumber numberWithInt: AVAudioQualityMax],AVEncoderAudioQualityKey,nil];
recorder = [[AVAudioRecorder alloc]
  initWithURL: [NSURL fileURLWithPath:filePath]
  settings: recordSettings error: nil];

recorder.delegate = self;


}

- (IBAction) record: (id) sender {
  [recorder record];
}

- (IBAction) recordStop: (id) sender {
  [recorder stop];
}

- (IBAction) play:(id) sender {
  NSString * filePath = [NSHomeDirectory()
  stringByAppendingPathComponent: @"Documents/recording.caf"];

  AVAudioPlayer * player = [[AVAudioPlayer alloc] initWithContentsOfURL:
   [NSURL fileURLWithPath:filePath] error: nil];
  player.delegate = self;
  [player play];
}

- (void)dealloc {
  [super dealloc];
  [recorder release];
}

@end
You perform all the setup for the AVAudioRecorder in the viewDidLoad method. This is so the recorder is available for recording when the user presses the Record button.
The next few methods are straightforward. record starts the recorder when the button is pressed, and recordStop stops recording when the button is released. The play method builds a new AVAudioPlayer and initializes it with the audio file you just recorded. After the player is initialized, the play method is called to start playback.
As always, you should be a good steward of the iPhone’s memory: make sure you release the recorder when you’ve finished using it. The application should be ready to launch.
Next, we’ll look at how to work with video.
12.5. Recording, playing, and accessing video
At the time of writing, the iPhone 4, iPod Touch 4th Generation, and the iPad 2 have two built-in video cameras. This allows users to easily record video and save it to their media library. The code for recording video is almost identical to the code to show the camera in chapter 11, but it does have a few required checks.
The following listing shows the code for bringing up the video camera interface.
Listing 12.6. Displaying the video camera

The first thing you do is check to see if the device has camera support ![]() . In two cases, this returns false. The first is when the when the video camera is not available on the device. The other
case is that the camera is damaged on the current device.
. In two cases, this returns false. The first is when the when the video camera is not available on the device. The other
case is that the camera is damaged on the current device.
Next, you check to see what media types the camera supports ![]() . In this case, you look for the media type kUTTypeMovie. If this is found, the camera supports video. You set the media type of the picker to kUTTypeMovie to tell it to display the video camera. By default, it’s set to kUTTypeImage, which specifies photos, so it’s necessary that you set it. The camera control interface will allow the user to switch between
the front facing camera and rear camera.
. In this case, you look for the media type kUTTypeMovie. If this is found, the camera supports video. You set the media type of the picker to kUTTypeMovie to tell it to display the video camera. By default, it’s set to kUTTypeImage, which specifies photos, so it’s necessary that you set it. The camera control interface will allow the user to switch between
the front facing camera and rear camera.
Finally, you display the video camera on the screen ![]() . One great feature that Apple added is the ability to edit the video on the fly. This is easy to integrate in the code. Add
this line prior to displaying the video camera:
. One great feature that Apple added is the ability to edit the video on the fly. This is easy to integrate in the code. Add
this line prior to displaying the video camera:
myImagePicker.allowsEditing = YES;
This great one-liner from Apple adds a ton of functionality. After the user finishes recording the video, the delegate method didFinishPickingMediaWithInfo: for the picker is called. The dictionary passed to this method contains a system path URL to the video file that was just recorded. The following code shows how to use this path to retrieve and play back the video:
- (void)imagePickerController:(UIImagePickerController *)picker
    didFinishPickingMediaWithInfo:(NSDictionary *)info {

    NSURL * pathURL = [info objectForKey: UIImagePickerControllerMediaURL];
    MPMoviePlayerController * player =
        [[MPMoviePlayerController alloc] initWithContentURL:pathURL];
    [player play];
}
The first thing this method does is retrieve the path URL from the info dictionary. The path URL is the object stored with the key UIImagePickerControllerMediaURL. Next, an MPMoviePlayerController is allocated with the contents of the path URL. This loads the video and prepares it to play. The last thing to do is call the play method, and the video begins.
12.6. Summary
Even novice programmers can now achieve audio recording and playback. With the AV Foundation frameworks, writing fully featured audio applications is a breeze.
The MPMediaPickerController provides a method for accessing the user’s iPod media library. Using this in conjunction with the MPMusicPlayerController gives you the ability to create applications in which the user has complete control over the audio being played.
In addition to discussing how to play music from the user’s iPod library, we covered how to play audio from within your own application. This can be anything from simple sounds to recordings made with the AVAudioRecorder. The AVAudioPlayer makes audio playback a simple and painless task.
Although we’ve only begun to scratch the surface of audio management, you now have the tools necessary to integrate audio into any application. In iOS 4.0, you can also enable background audio as part of its multitasking features. You will learn the details in Chapter 22.