Chapter 3
Setting Up Your Camera for Photographic Greatness
IN THIS CHAPTER
![]() Using iCloud to store your photos
Using iCloud to store your photos
![]() Understanding My Photo Stream
Understanding My Photo Stream
![]() Sharing Albums
Sharing Albums
![]() Auto-Playing videos
Auto-Playing videos
![]() Transferring your photos to a computer
Transferring your photos to a computer
![]() Customizing your iPhone’s camera
Customizing your iPhone’s camera
In this chapter, you discover all the ways to make your iPhone’s photography workflow as seamless and as powerful as possible. In the same way that a custom shop can radically enhance the performance of a normal assembly line car, you can fully tune up your iPhone’s camera with the tips in this chapter.
While this chapter isn’t really about the physical act of taking a photo, it does set your camera up to take better photos by altering a few different Settings options.
Turning on iCloud Photos
As of this writing, everyone who buys and registers an iPhone using iCloud automatically receives 5GB of free cloud storage. If you’re not familiar with iCloud or even what cloud storage is, here’s how it works:
- You take a photo on your iPhone.
- When on Wi-Fi, that photo is automatically sent to the Apple computer servers.
- Your photo now lives in the cloud, which simply means a large data storage facility.
- When you need to have your full-resolution photo, it will download back to your iPhone.
So why bother with the complexity of your photo going up to the cloud and then back down? There are a number of reasons why this process is helpful, but the one that is usually the most valued is based on theft, damage, and loss of your iPhone. If you have an unfortunate iPhone problem and you can’t access your data anymore, no worries. All your photos and iPhone data are stored safely on the cloud!
Before setting up iCloud so that your photos are safe, you may rightfully ask how secure and safe iCloud is and whether it protects your valuable digital assets. While no cloud backup is 100 percent safe against natural or purposeful damage, Apple has a very good data privacy track record compared to the international average of other company’s cloud security reputation. Still, you can always skip this step if you’re not convinced, and you can create just as great photos.
To set up iCloud to automatically send your photos to the cloud, follow these steps:
- Open the Settings app.
- Scroll down until you see the option of tapping Photos.
- When inside the Photos settings page, tap the iCloud Photos toggle on so that it turns green (see Figure 3-1).
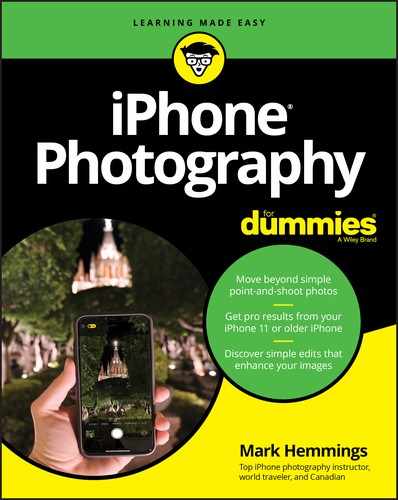
On the off-chance that you can’t access some of the preceding steps, you may be signed out of your Apple ID. Tap on your name at the top of the Settings page and scroll to the bottom of the Apple ID page. If you don’t see the words Sign Out in red, you need to sign in to access iCloud (see Figure 3-2).

FIGURE 3-1: Toggle iCloud Photos on.
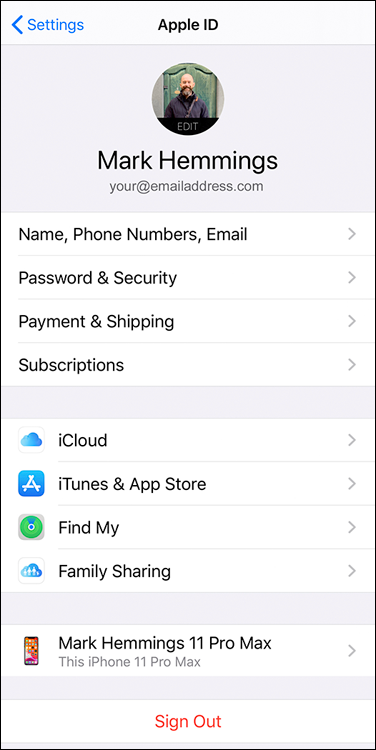
FIGURE 3-2: If you see the words Sign Out, you’re signed in to your Apple ID.
Optimizing iPhone Storage
Your iPhone has a really intelligent way to allow you to take far more photos than what you could normally store on your mobile device. If you chose to turn on iCloud Photos, you can save a massive amount of internal storage space on your iPhone. When your photos upload to the cloud, there will be a smaller resolution and lesser quality photo stored in your phone, and the large original master version of the photo will be stored in iCloud.
The nice thing about this arrangement is that you can edit your lower res versions as if they were the original master versions. Your editing instructions go up to the cloud, and the cloud versions get edited exactly the way you want them edited.
Figure 3-3 shows Optimize iPhone Storage checked, which means that the large resolution master photos will always go up to iCloud and your editable smaller versions will stay in your iPhone. This is the ultimate tool to free up valuable space on your device.

FIGURE 3-3: Turn Optimize iPhone Storage on if you’re running low on iPhone storage space.
If you have an iPhone with 64GB of storage or less, you may want to consider turning on this feature so that you have space for other things like apps, podcasts, music, or anything else.
 If you have an iPhone with 128GB of storage or more and your photo collection is not all that large, you may be able to get away with keeping this option off. That will mean that your originals are still saved in the cloud, but the versions on the phone are of the same original master quality. This option is perfectly fine, but keep in mind that as your photo collection grows, you may find yourself running out of iPhone storage space. If and when this happens, you’ll probably want to toggle this option on.
To find out how much storage space your iPhone model has, follow these steps.
- In Settings, scroll down to locate General and tap on it.
Locate and tap on the words iPhone Storage.
At the top of the page, you see how many gigabytes you’ve used and how many are remaining (see Figure 3-4).
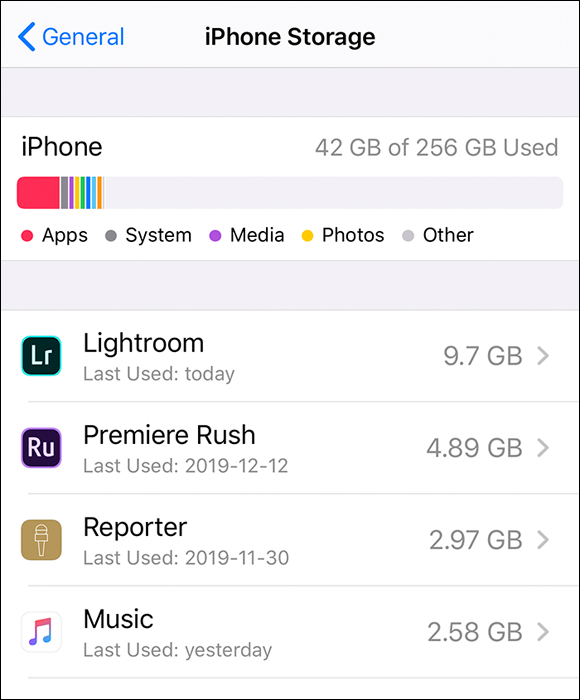
FIGURE 3-4: The iPhone Storage section shows you how much iPhone storage space you have remaining.
If your phone is low on storage, make sure to optimize your iPhone storage.
Downloading the Original Photos
After setting up your iPhone to send all photos into the cloud for ultimate optimization, you would be tempted to ask why would anyone feel the need to go back to having all of those large photos on their iPhones.
One reason is that if iPhone users upgrade from an older model iPhone to one with a large storage capacity, such as a 32GB model to a 256GB model, they can afford the space that their original master photos would take up within their new iPhone storage.
Another reason that some people tap the Download and Keep Originals is for when they want to export a lot of photos to external hard drives. It’s much easier to let your iPhone download the master photos overnight while you’re sleeping, so that you have access to a quicker transfer the next day. Keep in mind that if you choose this option, your iPhone storage will probably fill up quickly, depending on how many photos and videos you’ve taken over the years.
Regardless of your reasons, the option is always there to return your photos back to full storage on your device, as shown in Figure 3-5. Keep in mind that your photos are still safely copied in the cloud, even if you stop doing photo optimization.

FIGURE 3-5: Tap Download and Keep Originals if you have enough space on your iPhone.
Uploading to My Photo Stream
My Photo Stream is a service that allows you to freely store up to 30 days or 1,000 photos in the cloud, even if you don’t pay for iCloud storage. My Photo Stream was a really great way to sync photos to your various devices prior to Apple’s iCloud Photo Library service. However, these days most people keep this option turned off by default.
Keep in mind this easy decision-making parameter when deciding to use My Photo Stream:
- If you don’t want to upgrade from the free 5GB iCloud storage tier but you have more than 5GB of photos, it may be beneficial to turn on My Photo Stream.
- For all other users, keep My Photo Stream turned off, as shown in Figure 3-6, as it’s really not necessary. Your iCloud Photo Library’s automatic cloud uploading will take good care of you!
FIGURE 3-6: Keep My Photo Stream turned off if you plan to take a lot of photos and use iCloud Photo Library.
Sharing Albums
Did your dog just perform the best trick ever? Did your grandchild create a funny face that begs to be shared with the rest of the family? You probably have countless reasons to share photo albums with friends and family, and your iPhone’s Photos app allows you to do just that.
First of all, take a look at the toggle shown in Figure 3-7 within the Photos settings page. There is really no reason to have this toggle turned off. Even if you actually never get around to sharing photo albums with friends, it doesn’t hurt to just keep this toggle in the green on position.

FIGURE 3-7: Keep the Shared Albums toggle to the on position by default, even if you don’t yet share photos.
This section tells you how to turn on the Shared Albums feature, not how to actually use the feature. If you want to share photo albums, take a look at Chapter 13.
Watching Cellular Data
You’ve probably heard horror stories of smartphone users going over their data quota and owing their mobile provider hundreds of dollars in data overage fees. While a lot of companies now give warnings when you’re nearing the data limit for your particular monthly phone plan, it’s still wise to watch your Photos data consumption. You can do so by following a few simple steps:
- In your Photos settings page, tap on the words Cellular Data.
Toggle the Cellular Data option off or on (see Figure 3-8).
If you have a limited mobile data plan, toggle the Cellular Data option to the off position. Data transfers will happen only over Wi-Fi.
If you have a generous data plan, you may want to toggle Cellular Data on, but keep Unlimited Updates off. Your iPhone will restrict data transfers to a reasonable amount per day to avoid data overages.
If you have an unlimited data plan with your mobile provider, you could keep both options toggled green, which keeps your photos updated all the time without the need for Wi-Fi.

FIGURE 3-8: Minimal mobile data usage without Wi-Fi, chosen by tapping Cellular Data to the on position, for those with large mobile data plans.
 There is a danger in having both of these cell data options turned on. Say that you have an unlimited data plan and choose to have both Cellular Data and Unlimited Updates turned on. But then later on, you downgrade your mobile data plan and forget to turn these toggles off. You run the risk of going over your data plan quickly, depending on how frequently you take photos. If you’re in doubt, turn both off, which restricts all photos-related data to Wi-Fi connections only.
Auto-Playing Videos and Live Photos
Within your Photos settings page, the next option is called Auto-Play Videos and Live Photos, located just under the words PHOTOS TAB. When this toggle is set to the green-colored on position, your videos and Live Photos will start playing automatically when you preview your video within the Photos app.
When the Auto-Play option is turned off, you will need to press the play icon in the center of the video to watch it, as the video won’t start playing by itself.
So, which one do you choose? It doesn’t really matter one way or the other, as it’s mostly personal preference. One could possibly argue that having Auto-Play turned off would save battery power, but it would probably be so minimal that you wouldn’t even notice.
Viewing Full HDR
HDR stands for High Dynamic Range, which is a process where your iPhone takes three photos of the same scene, but at three different exposures. One exposure is bright, the other normal, and the third photo is dark. The camera then does some mixing of these three photos to give you a final photo that has the best tonal qualities of all three photos, mixed into one very well-exposed photo.
With the option of View Full HDR turned on, you can see the effects of your HDR photo in real-time. Why not keep this option turned on? It’s always nice to see what your photo looks like just after you take it.
Transferring to Mac or PC
The last option on your Photos settings page is labeled as TRANSFER TO MAC OR PC. This option allows for the transfer of what are called High Efficiency image and video files to either be converted to universally readable formats, such as the well-known JPEG format. As this option is a bit technical and involves new files formats called HEIC and HEVC, here is an easy decision-making parameter:
- Are you a beginner or hobbyist iPhone photographer? If yes, choose Automatic.
- Are you an advanced amateur who is adept at photo and video editing? If so, choose Keep Originals.
If you’re in doubt as to which of the two options best describes your level of photo and video editing, it’s probably best to choose Automatic, which will guarantee a smooth transition from your iPhone to some Windows computers or many older devices.
Customizing Your iPhone’s Camera
The extremely useful Camera option takes you out of the Photos app setting page and into your Camera’s settings page. Go back to your iPhone’s Settings app and then scroll down and tap on the Camera icon, which looks like Figure 3-9.
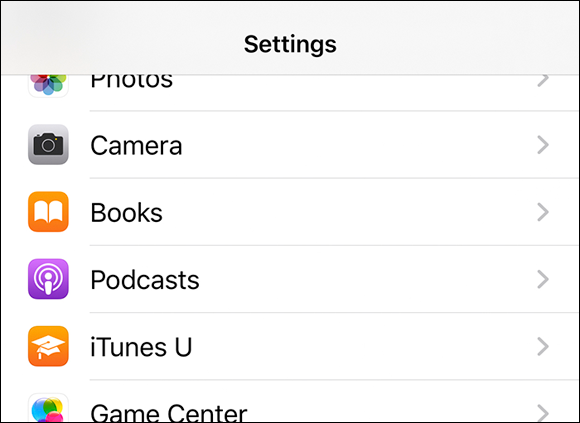
FIGURE 3-9: Tap on the Camera icon within your iPhone’s Settings app.
As soon as you have your Camera settings page open, you see options similar to Figure 3-10. If you have an X series model iPhone or earlier, your options may be slightly different.
Preserve Settings: If you want your iPhone to remember to activate your last mode, such as switching to video because your last capture was video, then turn on Camera Mode. If you like to use the same filter or other creative control on your next photo automatically, turn on Creative Controls.
Usually these two options are left off, as most photographers tend to want to start fresh with each new photo opportunity. However, if you’re doing a photo shoot for a client and they always want the same filtered look for each capture, then you may want to choose to engage these Preserved Settings options.
The Live Photo option is best left to the on position, however. This setting allows you to selectively activate Live Photo instead of it always being on, which may be handy for users who don’t have much storage space left on their iPhones.
- Grid: Turn the grid on for architectural and landscape photos or to study the Rule of Thirds (see Chapter 5). Turn the grid off if you find it distracting.
- Scan QR codes: Turn this option on to retrieve shopping and product information by photographing the code supplied by a retailer. Your camera then opens the retailer’s website in your Safari mobile browser.
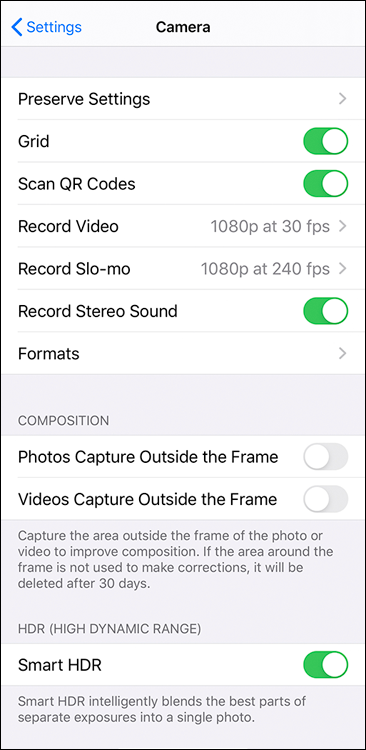
FIGURE 3-10: Your Camera settings page.
- Record Video: Unless you have video creation and editing experience and can make good use of 4k, at this point 1080p HD at 30 fps is fine for your normal video of kids and family events. If you’re running low on space on your iPhone, choose 720p HD at 30 fps. If you also see the option to choose Auto Low Light FPS, turn it on. You can find out more about video creation in Chapter 14.
- Record Slo-Mo: Choose 1080p HD at 240 fps for really cool looking slow-motion effects. If you’re concerned about running out of space on your iPhone, choose 1080 HD at 120 fps.
- Record Stereo Sound: Turn Record Stereo Sound to the on position, which gives your viewers a better audio experience.
Formats: Choose High Efficiency, which reduces the file size of your photos and videos. These file formats are new, so not all devices understand them yet, but your iPhone has you covered. You can choose Automatic to be assured that you can share your photos and videos to devices that can’t yet read High Efficiency file formats. (See the section “Transferring to Mac or PC,” earlier in this chapter.
Choose Most Compatible only if you have a technical or industry-specific reason for doing so. These JPEG and H.264 files are internationally readable; however, they take up about double the amount of space on your iPhone.- Composition: If your iPhone has these options, turn them on for greater cropping abilities, which I discuss in greater detail in Chapter 11. Turn these options off if you like the challenge of photographing exactly what you see, wanting no extra help with composition choices.
- Smart HDR: Turn Smart HDR on as a default setting, as it will do a great job of giving you an evenly exposed photo. If you’re an advanced iPhone photographer who prefers to do HDR photos by yourself in Adobe Photoshop or other software, turn this option off. If you are an avid street photographer who likes gritty images with plenty of deep shadows, turn Smart HDR off. Just remember to turn it back on again when photographing lighter-toned subjects, such as family, nature, and landscapes.