
In this recipe, we'll show you how the selection of units in an RTS can work and also implement functionalities to show you when a unit has been selected. We'll use AppState, which handles mouse selection and we will also create a new Control class to be used by any spatial we want to be made selectable. In the recipe, Control will display a marker at the feet of the selected spatial, but it can easily be extended to do other things as well.
This recipe will work fine if you have already started creating a game where you would like to select things by clicking on them or if you've completed the previous recipe. The least you will need for this recipe is a scene with something to click on. In the text, we will refer to TestScene, which was created in Chapter 1, SDK Game Development Hub, and the Jaime model which is used in it. It is assumed that you have some experience in action handling. If not, it's recommended that you refer to the Attaching an input AppState object recipe of this chapter to get an introduction to it.
Perform the following steps to select units in RTS:
- Let's start by creating the Control class and name it
SelectableControl. It should extendAbstractControl. - The class only has two fields: selected, which keeps track of whether the
spatialfield is selected or not (duh), and marker, which is anotherspatialfield to show when selected is true. - The only logic in the class is in the
setSelectedmethod; we let it handle attaching or detaching the marker:public void setSelected(boolean selected) { this.selected = selected; if (marker != null) { if (this.selected) { ((Node) spatial).attachChild(marker); } else { ((Node) spatial).detachChild(marker); } } } - We might want to display different markers for different types of selections, so let's make it flexible by adding a setter method for the marker.
- Now, we create a new
AppStateclass calledSelectAppState. It should extendAbstractAppStateand implementActionListenerto receive mouse click events. - We'll add two fields, one static string to represent the mouse click, and a
List<Spatial>calledselectableswhere it will store anything that is selectable, as follows:private static String LEFT_CLICK = "Left Click"; private List<Spatial> selectables = new ArrayList<Spatial>();
- The
initializemethod should look familiar if you've read any of the other game control recipes. We add a mapping forLEFT_CLICKand register it with the application'sInputManagerto ensure it listens for it. - The only thing the
onActionmethod will currently do is to trigger theonClickmethod when the left mouse button is pressed. - Mouse selection (or picking) works by shooting
Rayfrom the position of the mouse cursor into the screen. We begin by getting the position of the mouse cursor on the screen as follows:private void onClick() { Vector2f mousePos2D = inputManager.getCursorPosition(); - Then, we get the position this represents in the game world as follows:
Vector3f mousePos3D = app.getCamera().getWorldCoordinates(mousePos2D, 0f);
- Now, we can see what direction this would be by extending the position deeper into the camera's projection, as follows:
Vector3f clickDir = mousePos3D.add(app.getCamera().getWorldCoordinates(mousePos2D, 1f)).normalizeLocal();
The following figure shows you how
BoundingVolume, in the shape of a box, can enclose the character: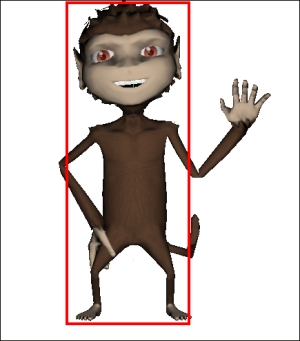
- We define
RayusingmousePos3Das the origin andclickDiras the direction and aCollisionResultsinstance to store any collisions that will occur. - Now, we can define a
forloop that goes through ourselectableslist and checks whetherRayintersects with any ofBoundingVolumes. TheCollisionResultsinstance adds them to a list, and we can then retrieve the closest collision which, for most cases, is the most relevant one, as follows:for (Spatial spatial : selectables) { spatial.collideWith(ray, results); } CollisionResult closest = results.getClosestCollision(); - After this, we can parse through our
selectablelist to see whether thespatialthat was clicked on has any of the items in the list. If it is, we call the following code:spatial.getControl(SelectableControl.class).setSelected(true);
- Depending on the requirements, we might want to deselect all other spatials at this point. If we're using nodes, we might also need to see whether it is any of the spatial's children that were hit by the ray as well.
- To test this, we can use the same class used in the previous recipe, with a few additional lines.
- First of all, we need to create and attach
SelectAppStateas follows:SelectAppState selectAppState = new SelectAppState(); stateManager.attach(selectAppState);
- Create
SelectableControland something that can be used as a marker (in this case, it will be a simple Quad). - Lastly, we need to add
SelectableControlto our Jaime model, and then add Jaime as a selectable toAppStateas follows:jaime.addControl(selectableControl); selectAppState.addSelectable(jaime);
- If we now run the example and click on Jaime, the Quad should be rendered near his feet.
This example shows you one of the strengths of using Control and AppState, as it's easy to add functionalities to a spatial object as long as the logic is kept modular. Another (although possibly less effective) way of performing the selection would be to run a collision check against all spatial objects in a scene and use Spatial.getControl (SelectableControl.class) to see whether any of the spatials should be possible to select.
In this recipe, the items in the selectables list extend the Spatial class, but the only actual requirement is that the objects implement the Collidable interface.
When shooting the ray, we get the position of the mouse cursor from InputManager. It's a Vector2f object, where 0,0 is the bottom-left corner, and the top-right corner equals the height and width of the screen (in units). After this, we use Camera.getWorldCoordinates to give us a 3D position of the mouse click (or any position on the screen). To do this, we must supply a depth value. This is between 0, which is closest to the screen, and 1f, into infinity. The direction would then be the difference between the nearest and farthest value, and it would be normalized.