6
Scanning Solutions

We start this chapter by clarifying the role of your scanning process, which is to convert paper documents into electronic images that can also be converted into “machine readable” content that can be processed by software applications. This may be as simple as being able to search for specific text in the document or going all the way to recognizing data on a form and transferring that data directly into a software application. A classic example is to identify the wages and compensation figure on a W-2 form and transfer that number directly to the tax preparation software “hands free.”
The key topics we will cover in this chapter include the following:
Centralized versus distributed scanning model
Alternative scanning devices
Image processing software
Document processing software
Workflow integration
Centralized Versus Distributed Scanning
It is much easier to start a good habit than it is to break a bad habit. The same can be said for defining a business process. It is much easier to design the optimal process from the start, rather than trying to change an ill-conceived process down the road. When it comes to your scanning process, for most of us, it is still early enough in the game to change your approach without disrupting your firm too much. This all relates to choosing the optimal scanning model for your firm: centralized or distributed.
Centralized scanning refers to a model whereby you have only designated people responsible for doing virtually all the firm’s scanning at a centralized scanning workstation. Distributed scanning refers to having multiple scanning devices located throughout the office, perhaps even at everyone’s desk, and everyone is responsible for scanning their own documents. In our opinion, centralized scanning is the better model for a number of reasons, including investing in higher quality scanning equipment and software, having trained scanning operators applying consistent quality control procedures, and implementing a lower cost scanning process through the use of administrative staff to perform an administrative task.
The temptation to use a distributed scanning model exists primarily because people like to have as much control over their workflow as possible. However, this is a case in which failing to relinquish this task to dedicated administrative staff results in inconsistency of quality control and a high cost of labor to scan documents. We suggest that you start showing the time spent scanning on your client invoices at the typical staff rates and see how long it takes for you to get a call from the client. The only legitimate argument for distributed scanning is perhaps to control access to sensitive documents or to expedite scanning of individual documents on demand. To that point, it makes sense to deploy a hybrid model that relies primarily on a centralized scanning operation but also accommodates minimal personal scanning through the distribution of personal scanners throughout the office. However, the more you make the personal scanners available, the more tempting it will be for your professional staff to do all of their own scanning under the misconception that it is more efficient. Box 6-1 outlines the differences between centralized and distributed scanning processes.
Alternative Scanning Devices
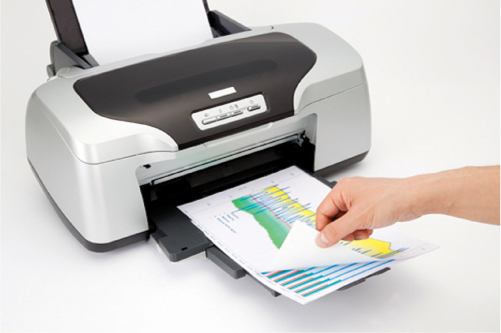
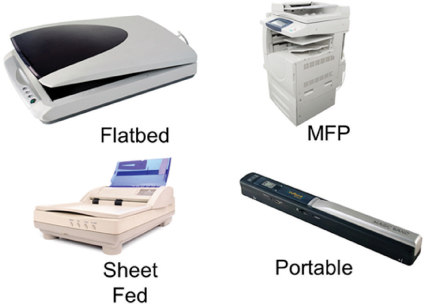
When it comes to procuring your physical scanning devices, you have a wide array of options to choose from. There are four basic form factors to choose from: multifunction printer/scanners (MFPs), Sheet Fed Scanners, Flatbed Scanners, and Portable Scanners.
The tables below outline some of the pros and cons of each device to help you determine which has the features that best meet your needs.
Multifaunction Printer/Scanners (MFPs)
| Pros | Cons |
| Leverage investment by extending functionality of the copier printer | No option to put on desktop |
| Multisheet feeder quality varies | |
| Large footprint |
Sheet Fed Scanners
| Pros | Cons |
| Faster scanning of multipage documents | More moving parts to replace or repair |
| Smaller footprint | |
| Direct connect to PC workstation |
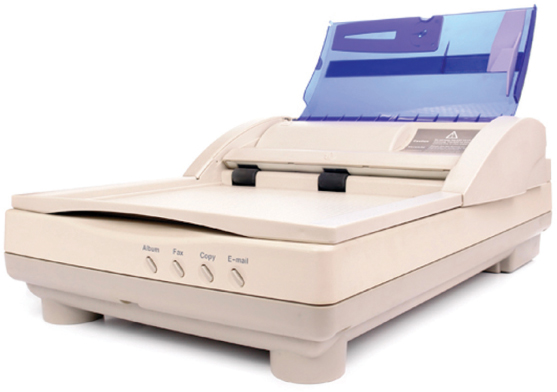
Flatbed Scanners
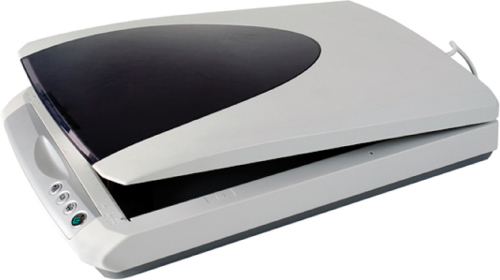
| Pros | Cons |
| Can handle small and large paper sizes | Excessive paper handling with single sheet feeding operation |
| Fewer moving parts to maintain or repair | Large footprint |
| Good for scanning book and magazine pages |
Portable Scanners

Source: Used with permission from VuPoint. All product names, logos, brands, and other trademarks referred herein are the property of their respective owners and are used only to describe the product(s) shown in the image.
| Pros | Cons |
| Lightweight and portable | Single sheet feeder bin |
| Inexpensive | Slow |
Do not forget about using your smartphone, tablet, or digital camera as an option for doing single page scanning. These devices are suitable for one-up scanning when you are away from the office or have a document that is too small to feed into your scanner, for example, small cash register receipts.
Scanner Features
Regardless of the form factor you select for your scanner, the key features you want to evaluate include the following:
Scanner Speed. Scanner speed is rated in terms of pages per minute (ppm). Portable scanners typically scan in the range of 5–20 ppm, Sheetfed and multifunction printers (MFP) and scanners 20–100 ppm. Keep in mind that overall performance is also affected by the speed of the document feeder, connection type, and image processing software.
Automatic Document Feeder. The automatic document feeder (ADF) is the tray that holds the stack of documents to be scanned. Obviously, the higher your scanning volume, the larger the capacity that is required. The specific attributes that you want to focus on are the ADF speed, the capacity, and paper handling features, particularly the ability to handle multisized documents.
Connectivity. The type of connection between the scanner and the computer is important because of the impact on overall scanning speed. The USB connection is, by far, the most popular with today’s scanners, with lots of flexibility to connect to various types of computers. The SCSI interface is appropriate for dedicated scanning stations that have the scanner connected directly to the PC that will be processing the images in a production environment. MFP devices will typically utilize an ethernet connection like other network attached peripherals.
Twain Compliant. This is an acronym that translates into either “technology without an interesting name” or “never the twain shall meet,” depending on whom you ask. Regardless, the nature of a twain compliant scanner is that it allows you to control the scanner device from within your various software applications. For example, you can control the scanner settings from within Adobe Acrobat if it is twain compliant. Otherwise, you will have to process your scanning jobs from the application software provided with the scanner. The good news is that the overwhelming majority of scanners on the market are twain compliant.
Image Processing Software. This is arguably as important as the scanning device itself. Image processing software takes the original document image created by the scanner and cleans it up. The typical features include despeckling to remove stray marks, deskewing to align the document image, blank page recognition and deletion, optical character recognition to convert the image into machine readable text, and image cropping to meet the size of the original document. The most widely used image processing software on the market is Kofax VRS (see appendix C, “Resource Center”) and is often included as part of the scanner bundle.
Advanced Document Processing Software for Tax Preparation
There is a niche category of software applications designed specifically to automate the process of scanning and organizing the supporting documents for 1040 tax preparation. The typical set of features these applications offer include the following:
Document recognition. Identifies the type of document for purposes of sorting and bookmarking.
Automatic bookmarking. Generates a bookmark in the PDF file that contains the document name, for example, W2 – General Motors.
Document sorting. Rearranges the scanned image pages into the sequence in which the tax return is typically prepared, that is, W-2s, 1099 INT, 1099 DIV, and so forth.
Scraping. This refers to the process of actually identifying information located on a scanned image and transferring it to a software application. An example of this is scanning a W-2 form and transferring the wages and compensation figure over to the tax preparation software.
An example of these types of software is depicted as figure 6-1.
Figure 6-1: Sample of GruntWorx 1040 PDF Organizer
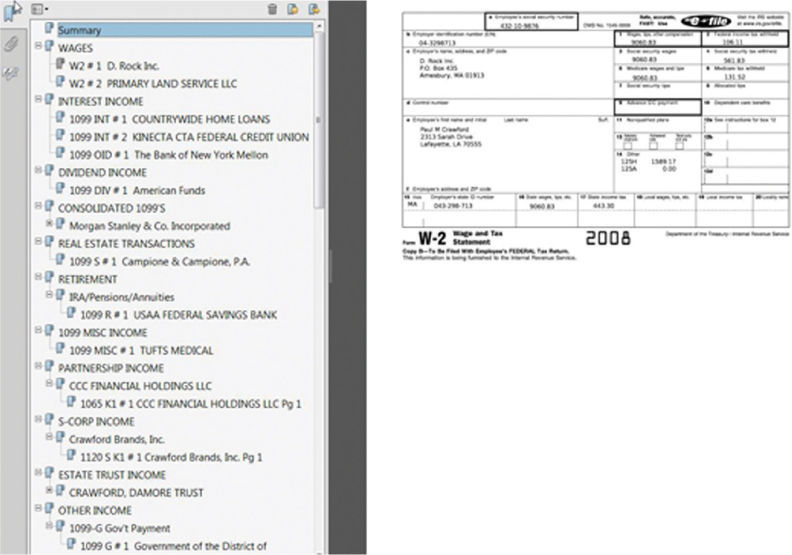
Source: Used with permission from GruntWorx.
Workflow Integration
The most important decision about your scanning system is determining how you will integrate scanning into your core business processes. The key decisions are who will do the scanning and when will it be done. We have already discussed the benefits of centralized scanning versus distributed scanning, so that should make the decision about “who” a little easier.
Deciding when to do your scanning requires analysis of each workflow process and determining what format you want your documents to be in at various stages in the process, that is, paper or electronic image. There are three basic options available to you for every business process: front end, mid-point, and back end scanning.
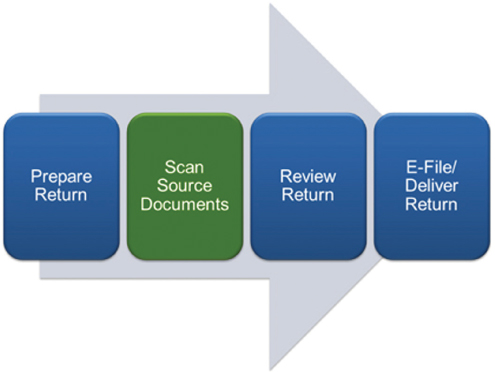
Front End Scanning
Front end scanning means that you scan all your paper documents before you begin your process, whether it is preparing a tax return, performing an audit test, or compiling a financial statement. If you scan them at the beginning, you then have the ability to establish a truly paperless workflow. Figure 6-2 outlines the front end scanning process.
One of the key items to consider with this approach includes deciding where the documents will be stored, so that they can be easily accessed during the process. This is where the document management system plays an important role. You also have to determine how you will annotate your electronic documents with notes and tick marks. This is extremely important because it is the biggest challenge of going paperless, and we will discuss this more fully in the next chapter. Finally, you have to decide what to do with the original paper documents: return them to the client, destroy them, or have them flow through the process using traditional red rope folders. The latter is not recommended because people will be tempted to work with the paper documents instead of the document images, and you will lose the benefit of working with the files in a digital format. You also run the risk of having two sets of documents with different content based on who is working with the online documents versus those who are working with the paper documents. If you are going to keep the original paper documents, our recommendation is to put them in temporary storage during the process if your intent is to return them to the client or destroy them at the end of the process.
Figure 6-2: Front End Scanning = Paperless Workflow

Mid-Point Scanning
Mid-point scanning refers to the concept of working with the original paper documents as your working papers for the first part of the process, for example, preparing the return, and then scanning the source documents in at a designated step in the process to convert to working in paperless mode. This might be at a point after the preparation step and before the review process. The optimal point to scan will be different for every process. Figure 6-3 outlines the midpoint scanning process.
Figure 6-3: Mid-Point Scanning = Hybrid Workflow
Back End Scanning
Back end scanning is the easiest approach and a good way to get exposure to the whole concept of going paperless. Back end scanning refers to working with the documents in paper form throughout the process and then scanning them at the end of the engagement. The benefit of this approach is that you utilize electronic archiving as opposed to costly and inefficient paper file storage. In addition, you will have your prior year working papers in digital format when the engagement rolls around next year. Figure 6-4 outlines the back end scanning process.
Figure 6-4: Back End Scanning = Paperless Archiving Only
