4. Creating Mobile Versions of a Print Layout
Lesson Overview
In this lesson you’ll learn key skills and techniques that will help you convert a printed brochure to a mobile format:
• Adding animation
• Adding interactivity
• Editing movie files in Adobe Photoshop
• Adding video
• Creating alternate layouts for different screen sizes
• Exporting to iPad and EPUB formats

You’ll probably need between one and two hours to complete this lesson.

Learn how to use Adobe InDesign CS6 to adapt your print content for mobile media. Prepare video and online media, add them and other interactive elements to the document, and then export it as an iPad magazine and an EPUB eBook.
Mobile Publishing with Adobe InDesign
In Lesson 3, you learned how the latest web technologies help web designers and developers create designs that adapt to different screen sizes, screen shapes, and device hardware when building a website from scratch with HTML, CSS, and JavaScript. When you start from a print-oriented Adobe InDesign publication and you want to adapt it for viewing as an EPUB for eBooks or as a magazine-style app on a tablet, such as iPad, it’s a different situation. Designing for print publications and desktop websites has traditionally assumed one target layout. As with websites, the way forward with EPUBs and tablet apps is to have a way of making a publication available in layouts that fit a range of screens and devices.
Before you start working on this lesson, make sure that you’ve installed the Creative Suite 6 software on your computer and that you have correctly copied the Lessons folder from the DVD in the back of this book onto your computer’s hard drive (see “Copying the Classroom in a Book files” on page 3).
Many publications start from a print perspective because print design is so mature that it’s where the most creative layouts and advanced typography is possible. When starting from a print publication and moving to mobile devices, a complicating factor is that HTML, CSS, and JavaScript cannot handle all of the design and typography features that are available in print. When preserving the sophistication of a print layout is very important, InDesign offers a powerful range of tools and options for adapting the content, such as alternate layouts, layout rules, the Content Collector, and linked content. You’ll explore these later in this lesson.
Converting a Print Publication to EPUB Format
In this lesson, you’ll put the finishing touches on a promotional booklet, export the document as an EPUB, and then preview the exported document.
Because electronic publications are fundamentally different than print publications in several key ways, some basic information about EPUBs may help as you work through this lesson.
The EPUB standard was designed to let publishers create reflowable content that can be displayed on any electronic reading device and software that supports the EPUB format, such as the Barnes & Noble Nook, Kobo eReader, Apple’s iBooks for iPad, iPhone, Sony Reader, and Adobe Digital Editions software. Because the size of e-reader screens varies from device to device and content flows in a single, continuous thread, the page size of the InDesign document doesn’t have to correspond to any particular screen size. Therefore, the fact that the document starts out at 7.5 inches by 10 inches is purely due to its original print page size, not because of any EPUB requirements.
Also, the current EPUB format does not accommodate highly designed layouts; it is primarily designed for a single text story, such as the chapter of a novel. Each page of creatively composed graphics in the sample publication will need to be exported as a single rasterized image.
Install Adobe Digital Editions
To be able to read the EPUB format documents you’ll produce during this lesson, Adobe Digital Editions software must be installed on your computer. You can use Adobe Digital Editions software to download and purchase eBooks and other digital content and read them both online and offline. You can also highlight text and add comments, as well as borrow eBooks from libraries.
1. Using your web browser, go to www.adobe.com/products/digitaleditions.
2. On the web page, click the Launch button for Adobe Digital Editions Installer.
3. Follow the installation instructions. At the end, you’ll be asked to activate the Adobe Digital Editions software. This is optional but recommended.

Open the sample document
In this lesson, you’ll convert the same print-oriented InDesign document to more than one output format. So that you can easily start from scratch for each part of the lesson, the sample InDesign document is saved as a template.
1. Start InDesign. To ensure that the panels and menu commands match those used in this lesson, choose Window > Workspace > [Advanced], and then choose Window > Workspace > Reset Advanced. To begin working, you’ll open an InDesign document that is already partially completed.
2. Open the Lesson04 folder in your Lessons folder, and double-click the file Print.indt.
3. Choose File > Save As, and save the document into your Lesson04 folder as Pluralist.indd. If you find the guides distracting, press W to switch to Document Preview mode.

You can see that this is a highly designed, print-oriented document that includes several double-page spreads. The EPUB format is not set up to accommodate the level of design in this document. You’ll export an EPUB version of the current document to observe this.
4. Choose File > Export. Navigate into the EPUB Exported folder in your Lesson04 folder, choose EPUB from the Format menu, and click Save.
If the EPUB opens in an application other than Adobe Digital Editions, close that application, start Adobe Digital Editions, choose Library > Add to Library, and then locate and double-click the EPUB file you exported in step 4.
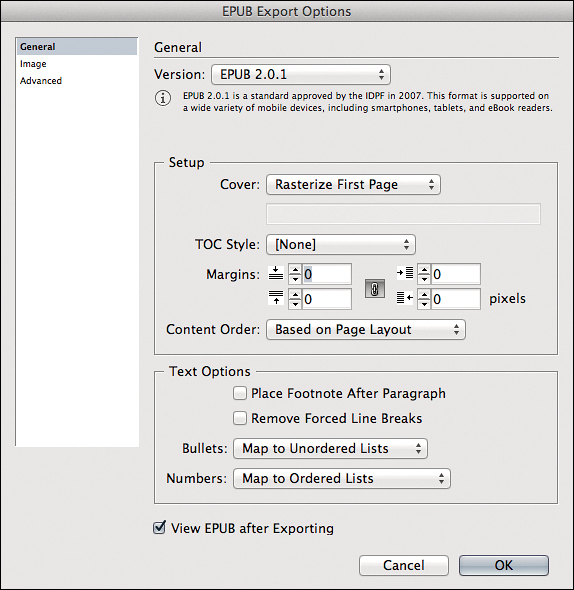
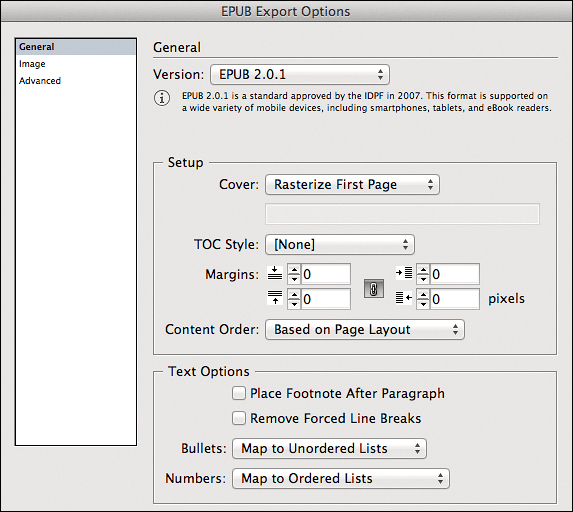
5. In the EPUB Export Options dialog box, make sure View EPUB After Exporting is selected, leave the rest of the options at their default settings, and click OK. The EPUB document opens in Adobe Digital Editions.
6. Scroll through the document.

You will naturally find it disappointing. The layers of objects and images appear in sequence instead, destroying all of the carefully composed layouts. The only part that seems to display correctly is the long article of text, which is what the EPUB format is optimized for.
7. Return to your Pluralist.indd document in InDesign and choose File > Save.
Preparing page layouts for the EPUB format
To include the highly graphical pages, you’ll have to set them up to be rasterized at export time. Any pages that primarily consist of imported and graphic objects must be grouped into a single object and then set up for rasterization. In particular, you should redesign the double-page spreads as single vertical pages.
1. In the Pluralist.indd document, choose File > Document Setup. Set the Intent to Digital Publishing, set the Page Size to Kindle Fire/Nook, set the Orientation icon to Portrait, and click OK.
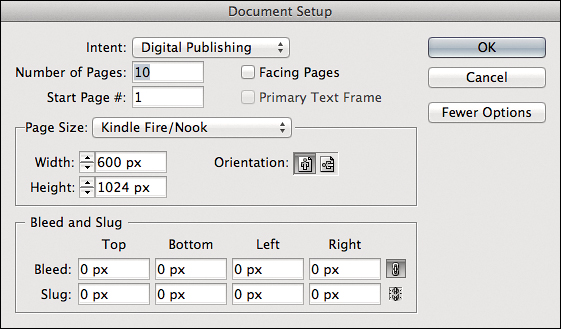
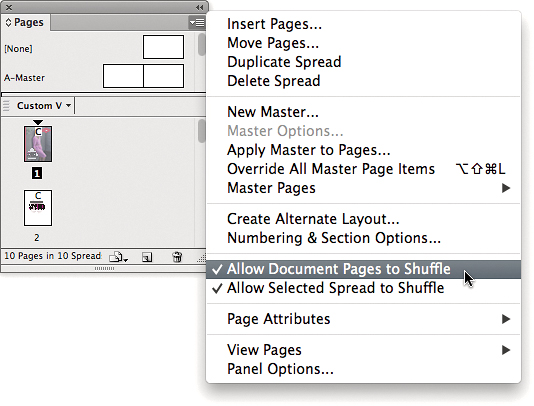
2. Choose Allow Document Pages to Shuffle from the Pages panel menu. If an alert asks you if you want to maintain the number of pages on each spread, click No. All spreads should now be single pages.
3. With the Selection tool, drag a selection marquee around all of the objects on page 1, and choose Object > Group.
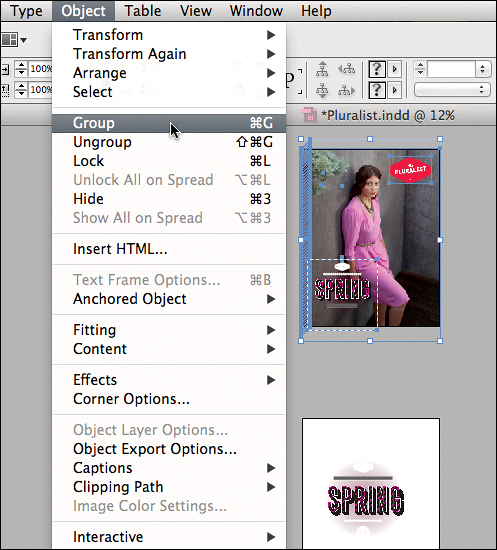
4. With the group still selected, choose Object > Object Export Options.
5. In the Object Export Options dialog box, click the EPUB and HTML tab, and select Custom Rasterization. For Resolution (ppi), choose 150. Leave the other settings as they are, and click Done.
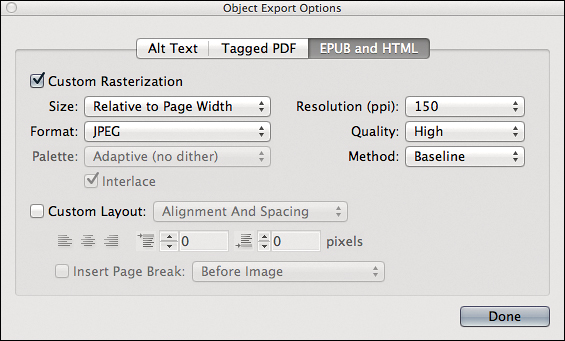
If some of the grouped objects export to EPUB as separate objects, make sure you have grouped all objects on the page and properly set the Object Export Options to rasterize the group.
6. Drag the Spring type from page 2 to page 3, and compose it with the photo on page 3. When you’re done, group everything on page 3 as you did in step 3.

7. Set the Object Export Options for the group on page 3, as you did in steps 4 and 5.
8. Recompose the objects on page 4 and 5 to fit on page 4 only. You can scale down the Beauty text.
9. For page 4, repeat steps 3 through 5 to create one group out of all the objects on the page.
10. Use the Pages panel to delete the empty pages 2 and 5.

11. On pages 5 and 6, delete all objects except the two-column text frame. Leaving only the text frame allows it to flow as a single text story, which is the optimum design for an EPUB document because it doesn’t rasterize the text.
12. If you didn’t delete the “A” drop cap, delete it now, because the graphic drop cap won’t translate to EPUB format.
13. Then, using the Type tool, click an insertion point at the beginning of the two-column text frame and type a capital A to replace the drop cap.
14. Open the Paragraph Styles panel (Window > Styles > Paragraph Styles), and choose Edit All Export Tags from the Paragraph Styles panel menu.
EPUB is based on HTML, so for compatibility with the widest selection of e-readers, it’s a good idea to map publication styles to HTML CSS styles.
15. For the style Print_BODY, click Automatic in the Tag column; then click the arrows to see the style choices, and choose p. Click OK.
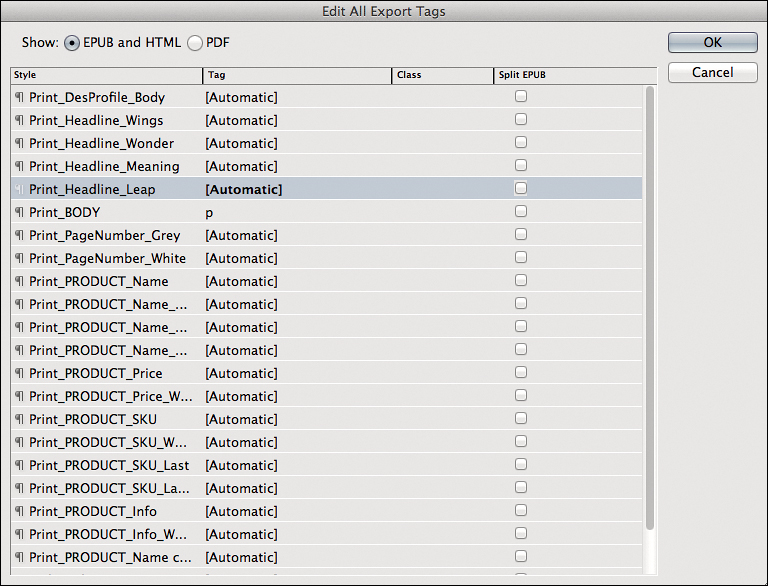
The Split EPUB option you see in the Edit All Export Tags dialog box is a way to insert a page break before specific paragraph styles. You may want to do this to control pagination and make long documents easier to navigate. However, this option results in a higher number of files in the EPUB package.
This particular document isn’t text-heavy, but if it was, mapping the rest of the styles to standard HTML CSS styles would make a more noticeable visual difference. In addition, you’d be able to define styles that set page breaks, and then apply those styles to headings or inline graphics to mark the beginning of each page.
Adding metadata
When an EPUB document is listed in an e-reader or other database, the information that’s visible is taken from the metadata for the file. It’s a good idea to customize that information.
1. Choose File > File Info.
2. For Document Title, type Pluralist. For Author, type your name.
Note that the rest of the dialog box gives you an opportunity to enter detailed descriptive text, including a copyright notice.

3. Click OK.
Understanding More Details About Exporting to EPUB
Now it’s time to export the document again, to see whether the settings you changed will result in a better EPUB document than the one you exported earlier.
1. Choose File > Export. Navigate into the EPUB Exported folder in your Lesson04 folder, choose EPUB from the Format menu, and click Save without changing the filename. Click Replace when asked if you want to replace the existing document.
Not all e-readers support font embedding. If possible, test your EPUB on various devices to ensure that you’re satisfied with the output.
2. In the EPUB Export Options dialog box that appears, make sure View EPUB After Exporting is selected.
Although many of the EPUB export options can remain at their default settings, you may consider adjusting the following:
InDesign automatically generates a Unique ID for an EPUB; however, for commercial EPUBs, you would enter the ISBN.
• In the General pane under the Text Options section, it’s a good idea to select Map to Unordered Lists in the Bullets menu and select Map to Ordered Lists in the Numbers menu.
• In the Image pane, make sure Preserve Appearance from Layout is selected to maintain image cropping and settings.
By default, items on a page that was originally designed for print may not appear in an ideal order when exported to EPUB format. For more control over the reading order and the relationships among page items, arrange them in the Articles panel (Window > Articles).
• In the Advanced pane, leave all the check boxes selected to help preserve the original appearance of the document.
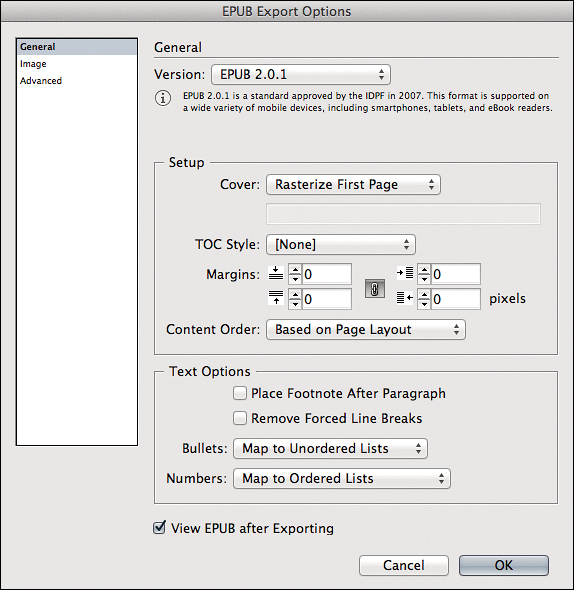
By default, hyperlinks open in an in-app Viewer, not in Safari. You can use the Folio Overlays panel to change the settings of a hyperlink to Open In Device Browser so that it opens a website in Safari.
3. Click OK. The EPUB document opens in Adobe Digital Editions.
The result this time should look much better, resolving the issues seen after the previous time you exported to EPUB. If you were to design an EPUB document from scratch, you would design it as one, long, text story with full-page layouts consolidated into single, rasterized graphics.
4. Exit Adobe Digital Editions, and in InDesign close the document Pluralist.indd.
The video-editing features in Photoshop CS6 are not meant to replace the full power of a professional, video-editing application, such as Adobe Premiere Pro CS6 (which is not included in Adobe CS6 Design & Web Premium). Instead, the video tools in Photoshop are intended to let designers easily work with video and include it in design projects
Creating a Video with Photoshop
When you move a publication from paper to mobile devices, you introduce the possibility of adding media, such as a video, that you couldn’t use in a printed piece. Video is now easy to capture using most mobile devices, easy to edit on almost any new computer, and easy to distribute over broadband networks. Consistent with these trends, the video-editing features that were once included only in Adobe Photoshop Extended are now in the Standard edition of Adobe Photoshop CS6.
You’ll use Photoshop to create an animated piece that’s included in an iPad publication you’ll build later in this lesson.
1. Start Adobe Photoshop CS6.
2. Choose Window > Workspace > Essentials (Default), and then choose Window > Workspace > Reset Essentials.
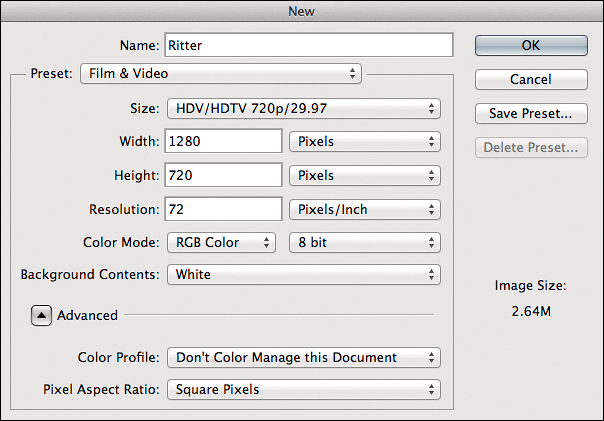
3. Choose File > New. From the Preset menu, choose Film & Video. For Size choose HD/HDTV 720p/29.97. For Name, type Ritter, and click OK. If you see a pixel aspect ratio warning, click OK.
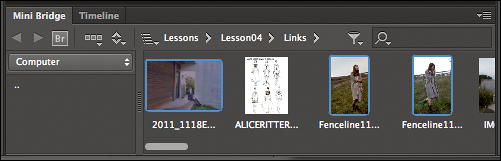
4. Click the Mini Bridge tab at the bottom of the workspace to expand the panel, and then click Launch Bridge. (If you don’t see a Mini Bridge tab, choose Window > Mini Bridge.)

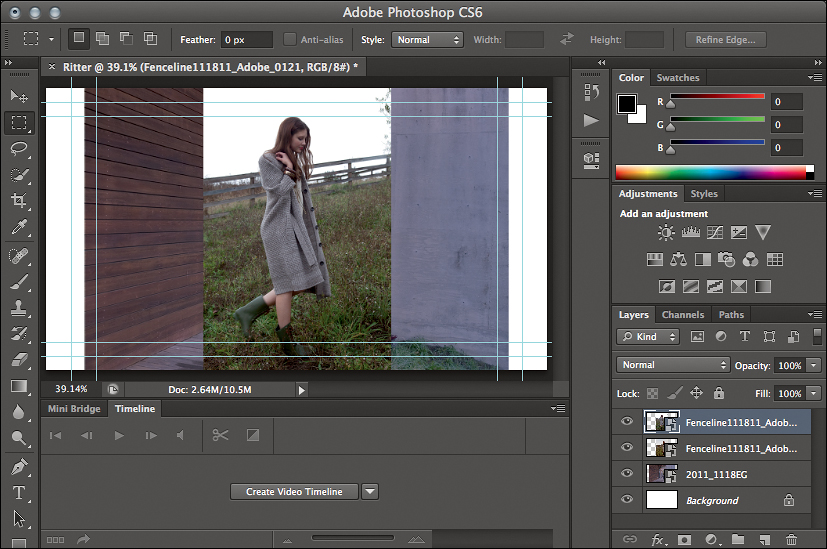
5. Use Mini Bridge to locate and select the folder Links in your Lesson04 folder. Images should appear in Mini Bridge.
6. Click the Sort icon, and make sure it’s set to sort by filename.
7. Select the first three photo thumbnails in Mini Bridge (not including the sketches), and drag them into the document.
8. When the first image appears in the document, press Enter to place it in the document as a Smart Object. Continue pressing Enter until all images are placed.
9. Click the Timeline tab to reveal the Timeline panel, and then click Create Video Timeline. Photoshop creates a video timeline of all layers in the document; the timeline is five seconds long by default. Drag the top edge of the Timeline panel so you can see all of the layers.
10. In the Layers panel or the Timeline panel, Shift-select all three photo layers, and then with the Move tool, Shift-drag all selected layers to the left until they are offscreen.
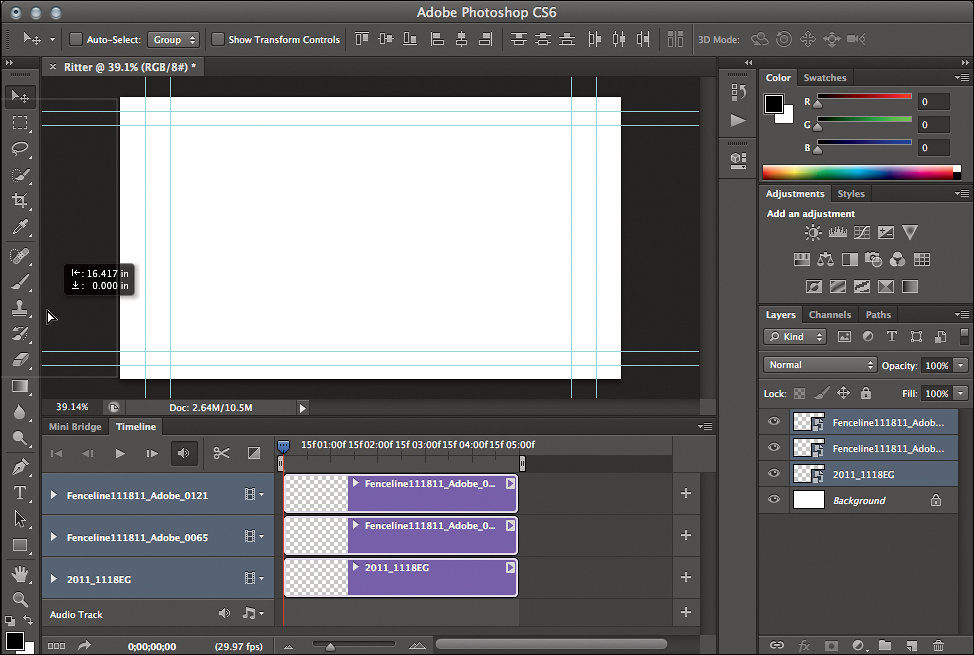
11. Choose Select > Deselect Layers.
12. In the Timeline panel, click the disclosure triangle to the left of the bottom layer, 2011_1118EG. Click the icon for the Transform property to enable it, adding yellow keyframe markers to the Timeline.
13. Drag the blue current-time indicator to the 1-second mark on the Timeline.
14. With the Move tool, drag layer 2011_1118EG until the sitting model’s boots are just inside the action-safe guides.

15. Move the current-time indicator to the beginning of the Timeline, and click Play. The two keyframes you set control the start and end of the layer animation.
16. Select the middle layer in the Timeline. Repeat steps 11 through 13, but this time set the starting keyframe at 1 second and the ending keyframe at 2 seconds, and stop the image before it overlaps the left model in the bottom layer.
17. Select the top layer in the Timeline. Repeat steps 11 through 13, but this time set the starting keyframe at 2 seconds and the ending keyframe at 3 seconds, and stop the image as soon as it’s aligned with the left edge of the frame.
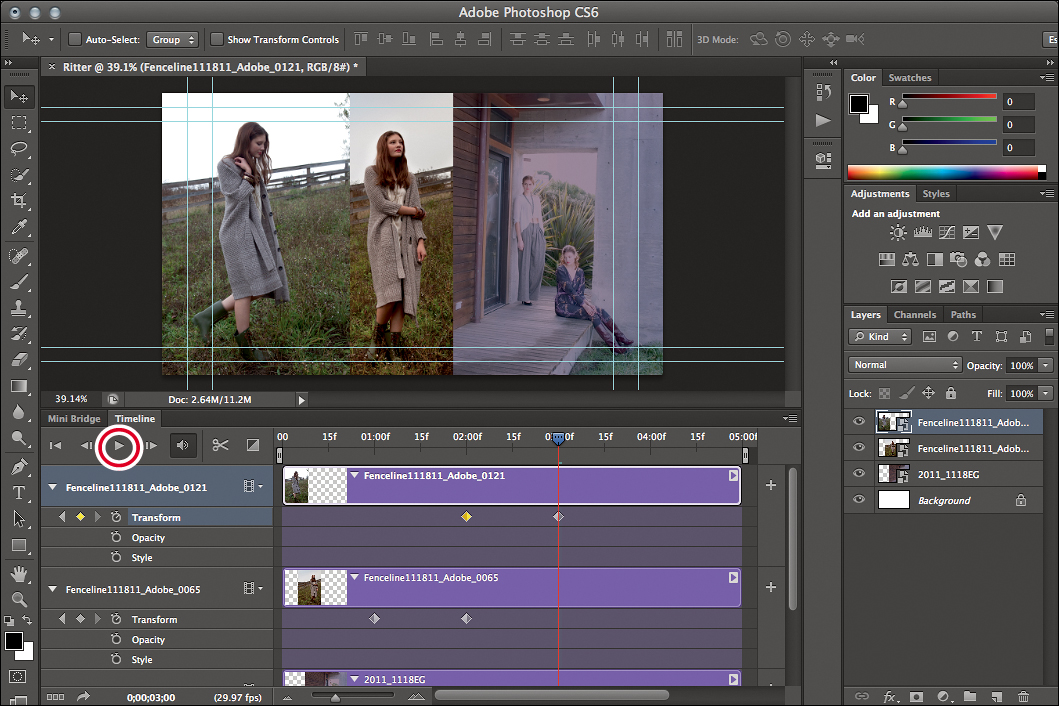
18. Return the current-time indicator to the beginning of the Timeline, and click Play. The three layers should appear in turn, filling the frame from right to left.
Render the timeline to a final video file
Up until now, the video exists only as objects on a timeline. When you’re done editing, you need to export the timeline into a video format that’s appropriate for your purposes. Because you plan to use this video as part of a mobile application, you’ll use the H.264 format.
1. Choose Render Video from the Timeline panel menu.
2. In the Render Video dialog box, click Select Folder and navigate to the Links folder in the Lesson04 folder.
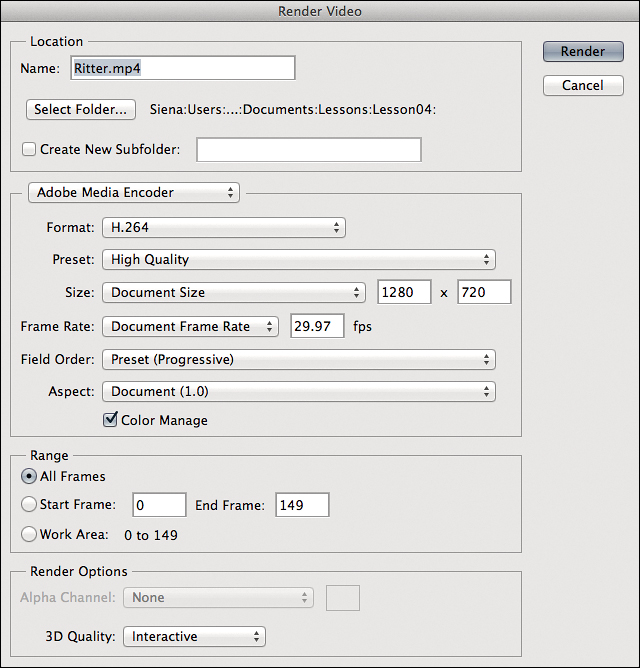
3. Make sure Adobe Media Encoder and the H.264 format are selected; click Select Folder, navigate to the Lesson04 folder and click Choose, and then click Render.
4. When rendering is complete, double-click the Ritter.mp4 video file to view it.
Of course, this is just a taste of the Timeline because you’re not limited to working with stills. You can also edit video clips in the Timeline, add text layers, and add audio, and none of these tasks are more difficult than animating stills, as you just did.
Converting a Print Publication to an iPad App Using InDesign
Earlier you adjusted a layout for export to the EPUB format, and in the process you learned about the limitations of EPUB. When you want to preserve more layout flexibility and distribute your publication on tablets, such as the Apple iPad, you can create a mobile app from an InDesign document with the help of the Adobe Digital Publishing Suite (DPS). The advantage of using the DPS app over the EPUB format is that you use the advanced layout capabilities of HTML5 when rendering through WebKit-based browsers, which means you can more easily execute sophisticated designs and rasterize entire pages less often. The DPS mobile app is more appropriate for a magazine-style layout.
When you create a DPS publication, you create a folio, which contains one or more digital publishing articles. You can view folios using the Adobe Content Viewer, which comes with InDesign.
One of the ways InDesign enables mobile apps is by allowing for multiple layouts in a single InDesign document, including the ability to link primary and secondary layouts so that you have to edit content only once. You’ll start by converting a print publication so that you can work with alternate layouts, such as the horizontal and vertical orientations of a tablet.
Setting up the vertical layout
To streamline the production of mobile apps, InDesign uses a primary layout and alternate layouts. The primary layout is the initial layout of a document and contains the source content for alternate layouts you create later. Content in alternate layouts can be linked so that you need to edit only one instance of the content.
1. Double-click the file Print.indt in the Lesson04 folder.
2. Choose File > Save As, and save the document as Pluralist iPad.indd.
3. Choose File > Document Setup, and choose Digital Publishing from the Intent menu. Make sure iPad is the selected Page Size and that the Orientation icon is set to Portrait, and click OK. Notice that the page size changes.

Adding interactive elements
Interactive elements in a digital publication include slide shows, hyperlinks, graphics that a viewer can pan and zoom, and movies and sounds. Much like you can modify a graphics frame by adding a stroke or a special effect like a drop shadow or rotation, you can control the appearance and function of interactive elements.
Creating hyperlinks and buttons
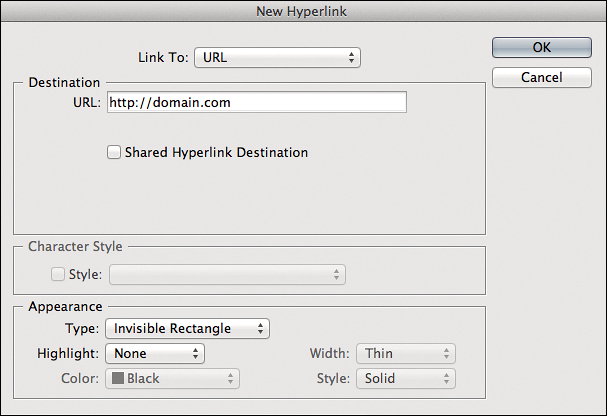
Hyperlinks let viewers jump to other locations in a document, as well as to other documents or websites. A hyperlink includes a source (text, a text frame, or a graphics frame) and a destination, which is the URL, file, e-mail address, page text anchor, or shared destination to which the hyperlink jumps. Next, you’ll create a hyperlink to a website using an empty graphics frame.
1. Select the Rectangle Frame tool (F), and drag a rectangle around the Pluralist logo on page 1.
2. Choose Window > Interactive > Hyperlinks.
3. Choose New Hyperlink from the Hyperlinks panel menu.
4. Select URL from the Link To menu, and type a URL address in the URL field. Deselect Shared Hyperlink Destination. Under Appearance, leave Invisible Rectangle and None selected. Click OK.

5. Choose Window > Folio Overlays, and make sure Open in Folio is selected. This will come into play when you preview the link later.

6. Choose Edit > Deselect All.

Adding a video
InDesign CS6 lets you easily add a video to a document so that it can play back on desktop and mobile devices that support video. Adding a movie to a digital publishing document is the same as adding a photo or illustration to a print document. You’ll import a movie into the document and use the Media panel to choose a graphic as the poster image for the movie. Then you’ll use the Folio Overlays panel to control how the movie plays.
1. Go to page 2.
2. Choose File > Place and select the Ritter.mp4 video file that you created in the Links folder in the Lesson04 folder. Click Open.
3. On page 2, drag the Place icon to create a rectangle to the right of the models, about halfway down the page, to contain the video.
4. Choose Object > Fitting > Fit Frame to Content to make the frame fit exactly the size you dragged.

5. Choose Window > Interactive > Media.
6. From the Poster menu in the Media panel, choose Choose Image. Select the IMG_0968.jpg in the Links folder in the Lesson04 folder, and then click Open. This sets the image that appears on the page when the video isn’t playing.
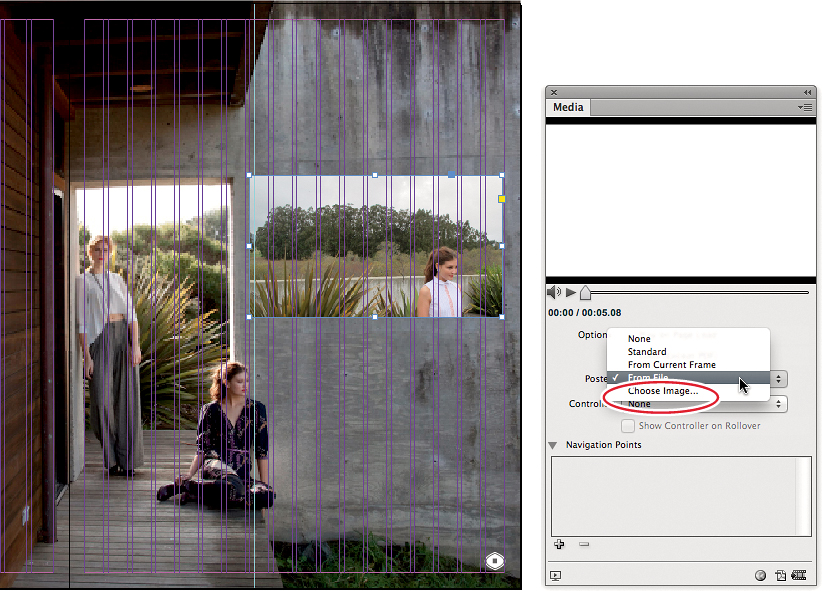
7. With the movie object still selected, make sure that Auto Play and Play Full Screen are not selected in the Folio Overlays panel, and that Tap To View Controller is selected.

8. Choose File > Save.
Testing interactivity
You can use the Folio Overlays panel to preview the interactive overlays you’ve added.
1. At the bottom of the Folio Overlays panel, click Preview.
An alert appears warning you that only one page per spread is supported. The reason is that mobile devices typically display one page per screen. You’ll need to convert all spreads to single pages, as you did for the EPUB document earlier in this lesson.
2. Choose File > Document Setup, and make sure Facing Pages is deselected. Click OK.
3. Choose Allow Document Pages to Shuffle from the Pages panel menu. If an alert asks you if you want to maintain the number of pages on each spread, click No. All spreads should now be single pages.
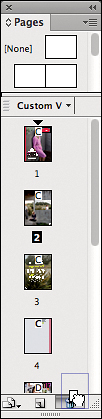
4. Due to the logo on page 2, which is left over from a double-page spread, page 1 and page 2 are now redundant, so in the Pages panel, drag page 2 to the trash can icon. Do the same for the empty page 4. If a warning appears, click OK.
5. At the bottom of the Folio Overlays panel, click Preview. Adobe Content Viewer starts and displays the document. Scroll through the document using the up and down arrow keys or by swiping up and down with the mouse.

6. Go to page 1 and click the logo with the link you created. It should go to the link. Click Done to return to the document.
7. Go to page 2 and click the movie you created. It should begin playing back.
Set up layout rules
The document is set up for a vertical orientation only. But a mobile app also needs a layout for a horizontal orientation. InDesign provides for this through alternate layouts and helps you adapt your layouts with Liquid Layout rules.
Each page can have its own Liquid Layout rule:
• Scale simply fills the new page size with the current content resized.
• Re-center keeps content centered within the new layout
• An object-based rule allows for rules that control a specific object; you can pin any corner to maintain its relationship to the edge of a page.
• A guide-based rule constrains page adjustment along layout guides you position.
You’ll set up a combination of these rules, and then create an alternate layout based on them.
1. In InDesign, choose Layout > Liquid Layout.
2. On page 1, use the Page tool (Shift+P) to select the diagonal red stripes along the left side of the page.
3. In the Liquid Layout panel, choose Object-based, and for Pin, select Left.

4. Position the mouse over the handles on the selected object. Tool tips describe how the object will behave when the page is resized.
5. Still using the Page tool, select The Pluralist logo in the top-right corner, and in the Liquid Layout panel, choose Object-based and set the Pin options to Top and Right.

6. Select the Spring Collection logo in the bottom-left corner, and in the Liquid Layout panel, choose Object-based and set the Pin options to Bottom and Left.

7. Select the photo, and in the Liquid Layout panel, choose Object-based, and select the Auto-Fit and Width options.

8. With the Page tool still selected, test your settings by clicking the Landscape orientation icon in the Control panel. All objects on the page that use Liquid Layout rules should reposition and resize to maintain the intended layout despite the radical change in proportions.

9. Choose Edit > Undo Resize Item to restore the original orientation.
10. Choose File > Save.
Create a horizontal layout
In programs that don’t allow alternate layouts, creating a layout for a mobile device’s multiple orientations typically requires creating a separate document for each orientation. In InDesign, you simply create an alternate layout that exists as a separate section in the same InDesign document. You’ve already set up the rules that describe how page objects translate from one orientation to the other; now you’ll actually create the alternate layout for the landscape (horizontal) orientation.
1. Choose Layout > Create Alternate Layout.
2. For Page Size, choose iPad, and make sure the Orientation icon is set to landscape.
3. Click OK.

A new section appears in the document, duplicating the original pages but using a horizontal orientation. Notice how page 1 adapted well to the landscape orientation but the rest of the pages did not. The reason is that layout rules weren’t applied to the rest of the pages. You can experiment with applying layout rules to achieve an optimum conversion. Alternately, you can lay out the content manually but as linked content—where the content of the alternate layout is linked to the primary layout so you only have to update the primary content.
1. Go to page 4 of the alternate (horizontal) layout section, and delete the objects on that layout. Do the same for the alternate layouts for pages 5 and 6.

2. Go to page 4 of the primary (vertical) section, and use the Content Collector tool (B) to click the Alice and Ritter graphic headline text as well as the photo. Notice that they appear in the Content Collector conveyor.
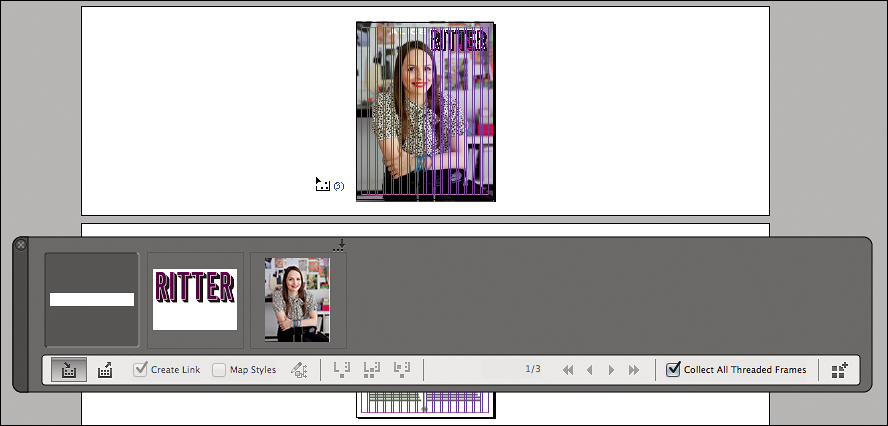
3. In the Content Collector conveyor, make sure Collect All Threaded Frames is selected; then on page 5, use the Content Collector tool to click the frame containing the threaded story.
4. Go to page 4 of the alternate (horizontal) layout section.
5. In the conveyor, click the Content Placer icon and make sure Create Link is selected.
6. Press the left or right arrow key to cycle through the items in the loaded pointer until you see the photo. On page 4 of the horizontal layout, drag from the top-left corner to the bottom-right corner to place the image.
7. Drag the white Alice text over the photo and the Ritter text across the top of the right half of the page.
8. Drag the text frame across the rest of the page, and then use the Selection tool to extend its width across the page if needed.
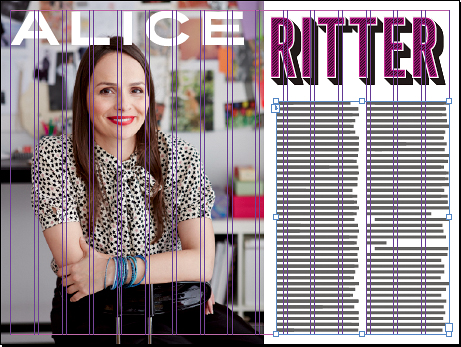
By selecting Create Link, the content you transferred is now linked to the primary layout. If you need to edit any part of the content, you only need to do so in the primary layout; the alternate layout will update, saving you time. The Content Collector helps you transfer multiple items more efficiently than dragging and dropping or copying and pasting.
Previewing the updated document
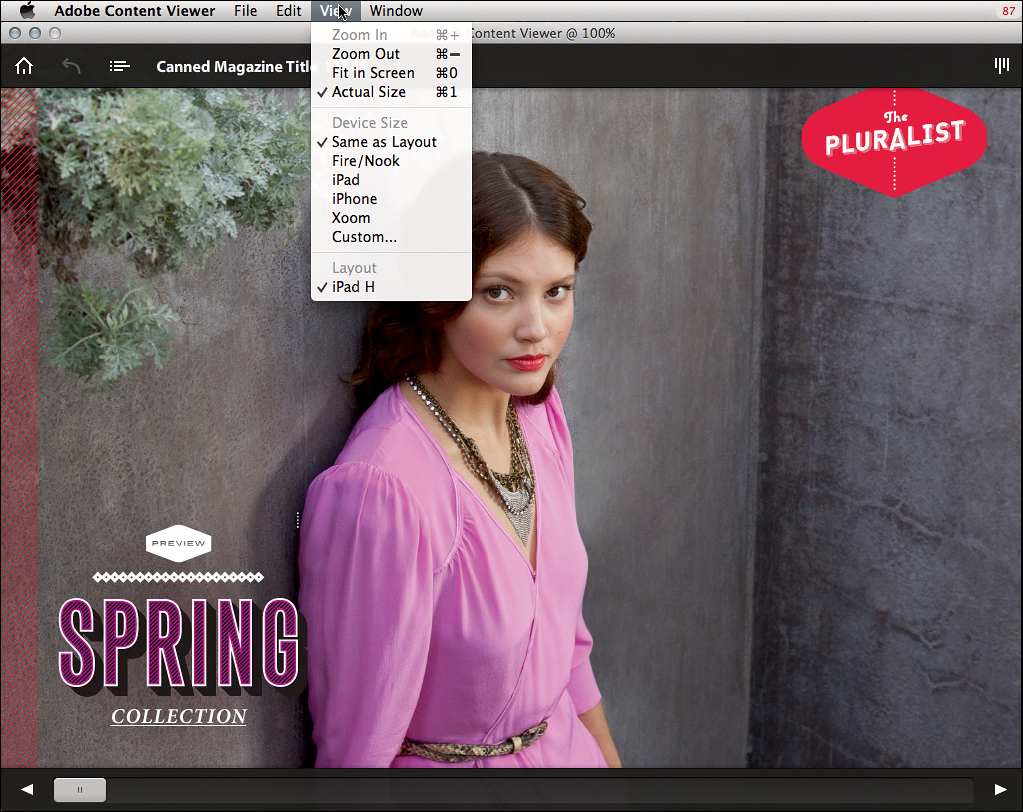
To see how your alternate layout looks while viewing any of the pages in the landscape format section, choose File > Folio Preview.
InDesign exports the folio to Adobe Content Viewer, where you can test the document. To navigate, drag the layout up and down or press the up arrow and down arrow keys. You can use the commands on the View menu to preview other screen sizes and orientations. Remember to click the movie you added on page 2.
You can also preview your folio by installing Adobe Content Viewer from the App Store, starting it, and signing in using your Adobe ID.
You can share the folio file with other individuals using Folio Producer, a publishing tool available when you log into Adobe Digital Publishing Suite using your Adobe ID. If you want to be able to submit a folio as an app to a store, additional steps and fees are required; see the sidebar “Publishing an App Through a Store.”
Wrapping Up
Congratulations! You’ve learned techniques for converting a print document into an EPUB document and an iPad app. Although manual adjustment was necessary, layout rules, mapped styles (in the Edit All Export Tags dialog box), alternate layouts, the Content Collector, and the Folio Viewer all work together to minimize the amount of rework you might have had to do otherwise, making it easier to publish mobile versions of your documents.
Review Questions
1. When would you want to export an InDesign document to the EPUB format, and when would you want to export it as a mobile application?
2. In InDesign, what is the difference between a button and a hyperlink?
3. What’s the difference between how you test EPUB documents and mobile applications in InDesign?
4. What is a poster image, and how do you set it?
5. What is the value of an object-based layout rule?
Review Answers
1. You would export to EPUB when you want to distribute a document to ereaders and when the document is primarily text. You would export as a mobile application for more sophisticated magazine-style layouts that are beyond the capabilities of EPUB.
2. Buttons tend to be graphics, and hyperlinks are usually text-based.
3. You can test EPUB documents in Adobe Digital Editions and mobile applications in Adobe Content Viewer.
4. A poster image is the frame that represents a video in an InDesign layout. By default, the poster image is the first frame of a video, but you can change that in the Poster menu in the Media panel.
5. An object-based layout rule lets you control how an object responds to a change in page dimensions. For example, you can pin the top and left edges of a graphic to the page so that it remains at the top-left corner of the page.