
6. Creating Interactive Forms
Lesson Overview
In this lesson you’ll learn how to create PDF forms by using new form tools in Adobe InDesign. You’ll learn these skills and techniques:
• Quickly laying out a form using a table grid
• Adding different types of form objects, such as text fields, radio buttons, check boxes, and combo boxes
• Duplicating form objects
• Testing your form in Adobe Acrobat X Pro

You’ll probably need about an hour to complete this lesson.
Learn how to combine advanced layout and typography tools with powerful new form tools in Adobe InDesign CS6 to produce PDF forms that are easy to fill out.
Creating PDF Forms in Adobe InDesign
Adobe InDesign CS6 includes form-building tools that you can use together with its advanced layout and typography features to create PDF forms that are functional and well designed. The forms tools in InDesign CS6 are a step up from those in InDesign CS5. You could design a form in InDesign CS5, but converting design elements to a functional form was done in Adobe Acrobat X Pro. Now you can accomplish most form-building tasks in InDesign CS6 alone, although you’ll still check your work in Acrobat X Pro.
The decisions you make with the form tools should be based on the data formats required for your data to be processed correctly by the database that will receive it. Before you begin designing an interactive form, discuss your goals with your web developers and have them review the design, the form field values, and any code or scripts used in the form. They might suggest ways to set up your form so that it collects your data efficiently and integrates smoothly with the receiving database.
Getting Started
The form that you’ll work with in this lesson is already partially built. It’s saved as a template file in your Lesson06 folder. You’ll open it and take a look at how it’s been put together so far.
1. In Adobe Bridge, navigate to the Lesson06 folder in your Lessons folder.
2. Double-click the file Subscription Form.indt to open it in InDesign CS6.
3. Choose View > Fit Page in Window.
The partially built form is in the large rectangle in the middle of the page. The form structure may not be visible if the document opened in the Preview screen mode.
4. Choose File > Save As, enter the filename Subscription Form.indd, navigate to your Lesson06 folder, and click Save.
5. Choose View > Screen Mode and make sure Normal is selected, or press the W key to toggle the screen mode to Normal. In Normal screen mode, the text frames and table grid are visible. Although you can edit in Preview mode, you’ll probably find it easier to work in Normal mode where object outlines are visible.
6. Zoom in so that you can see the top of the form more clearly.
To make it easy to align form objects with their labels, this form is laid out using a table. You’ll paste form objects into it as inline graphics so they flow with the table. You can also lay out forms using text with tabs or even as individual text and form objects that you select and line up using the Align panel. For the form used in this lesson, it was decided that a table would be the simplest way to develop this form.

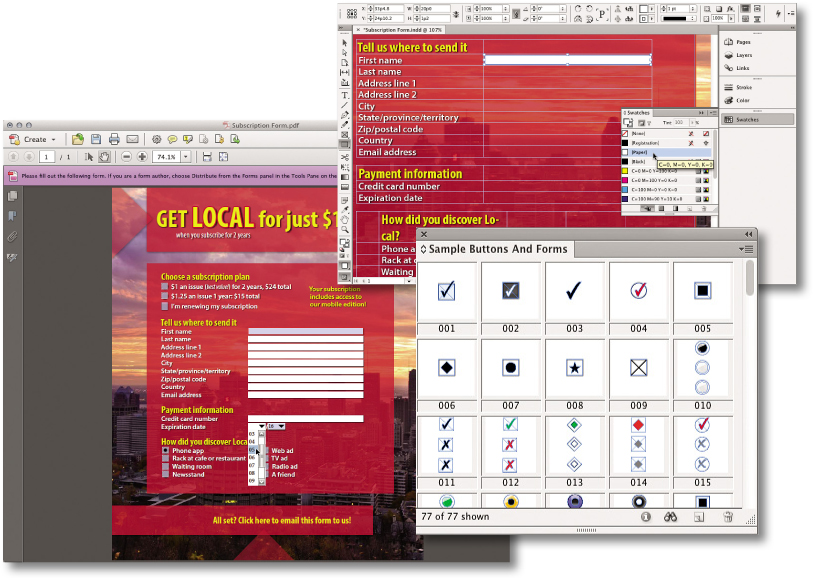
Using the Sample Buttons and Forms Panel
Next, you’ll add radio buttons and check boxes to the form.
1. Choose Window > Interactive > Buttons and Forms.
You use this panel to control how a form object works, but the options in the panel are available only when a form object is selected. There aren’t any form objects in this document yet, only the layout and text for the form, so you’ll add some form objects now. Fortunately, instead of having to design them from scratch, you can use premade form objects.
2. Choose Sample Buttons And Forms from the Button and Forms panel menu, and then scroll the panel to examine the form objects that are available.
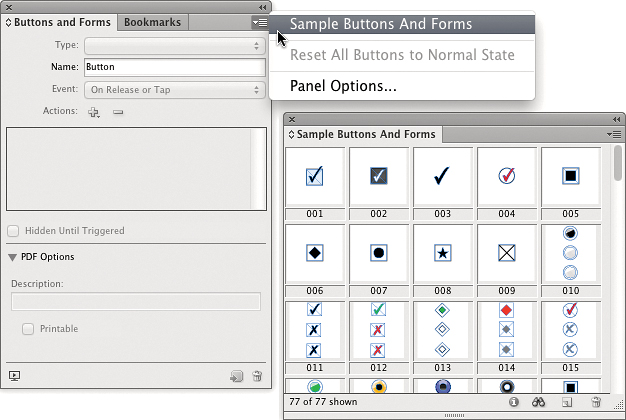
The Sample Buttons and Forms panel is an InDesign library containing a range of check boxes, radio buttons, and buttons of various shapes and designs.
When a form object, such as a button, radio button, or check box, is selected on the layout, you may see multiple states listed in the Buttons and Forms panel. These provide the alternate appearances of a form object that indicate when it’s selected or not selected, or when the mouse pointer is over it.
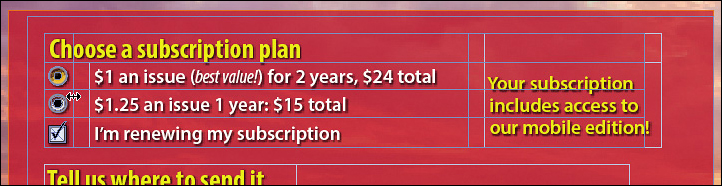
3. In the Sample Buttons and Forms panel, drag the radio button set 017 to the left of the heading for the first group of options, “Choose a subscription plan.” The exact position doesn’t matter right now.

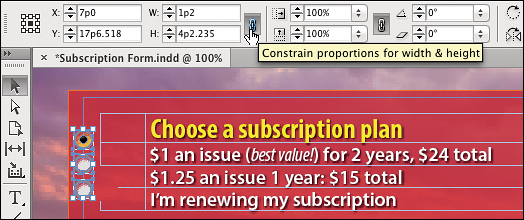
There are two different Constrain Proportions (link) icons near each other in the Control panel, so make sure you click the correct one as shown in the figure for step 4.
4. With the three radio buttons still selected, make sure the “Constrain proportions for width & height” button is selected in the Control panel, enter 1p2 into the W (Width) field in the Control panel, and press Enter/Return.
5. Choose Edit > Deselect All.
6. With the Selection tool (![]() ), select the first radio button and choose Edit > Cut.
), select the first radio button and choose Edit > Cut.
7. With the Type tool (![]() ), click an insertion point in the table cell to the left of the label “$1 an issue...” and choose Edit > Paste.
), click an insertion point in the table cell to the left of the label “$1 an issue...” and choose Edit > Paste.

8. Repeat step 6 for the second radio button, pasting it into the table cell below the first radio button.
The third choice, “I’m renewing my subscription,” is actually independent of the first two. You’ll replace it with a check box so that the person filling out the form can first select a subscription plan and then specify whether it is a renewal.
9. With the Selection tool, select the third radio button and press the Delete key.
10. In the Sample Buttons and Forms panel, drag the check box 001 to the left of the two radio buttons; again, the exact placement isn’t critical.
11. With the check box still selected, make sure the “Constrain proportions for width & height” button is selected in the Control panel, enter 1p2 into the W (Width) field in the Control panel, and press Enter/Return.
12. With the Selection tool, select the check box and choose Edit > Cut.
13. With the Type tool, click an insertion point in the table cell to the left of the label “I’m renewing...” and choose Edit > Paste.

14. Choose Edit > Deselect All, and save the document.
Checking Your Work So Far
You can’t preview form interactions in InDesign CS6, so you’ll do a quick export to Adobe Acrobat X Pro to make sure the form is working properly so far.
1. Choose File > Export.
2. For the format, choose Adobe PDF (Interactive), and click Save.

3. In the Export to Interactive PDF dialog box, make sure View After Exporting is selected, and make sure Include All is selected in the Forms and Media section.

4. Leave the other settings at the default and click OK.
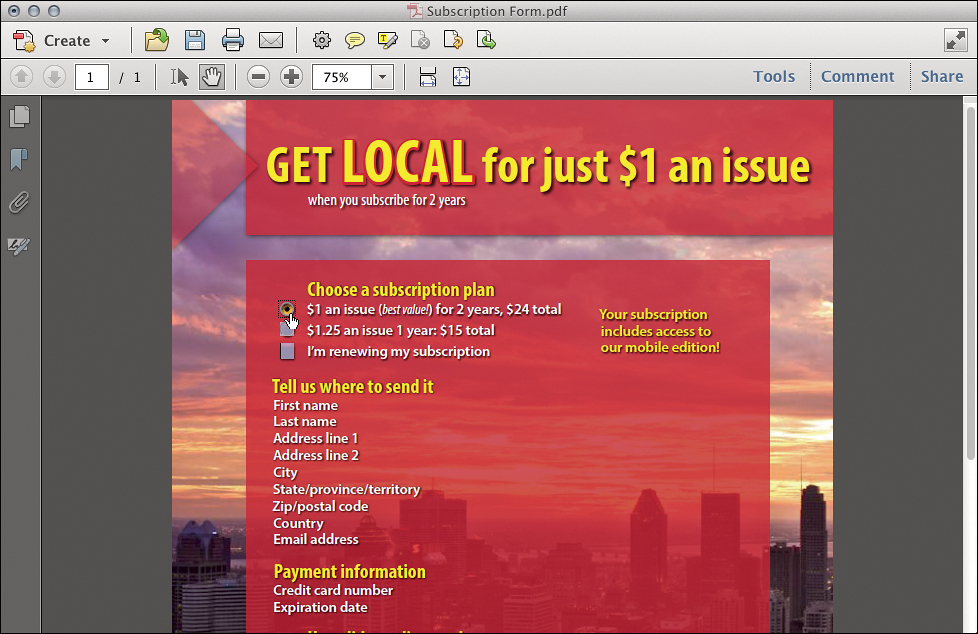
When the document opens in Acrobat, the form objects you added may look a little different because Acrobat highlights form objects.
Old or non-Adobe PDF readers may not support form features. For best results, preview forms in the most recent version of Acrobat Pro or Adobe Reader.
5. Click the radio buttons and the check box you added to make sure they work. Only one of the radio buttons should be selected at any time, and you should be able to click to toggle the check box on and off.
6. When you’re done, close the PDF file without saving changes, and switch back to InDesign.
If you leave the PDF file open, it may prevent InDesign from replacing it when you later export an updated PDF file.
Adding Text Fields
Adding text entry fields into an InDesign form is as easy as drawing a rectangle, because you can convert a selected rectangle to a text field. You’ll do this to build most of the two middle sections of the form. Fortunately, you can duplicate text fields, which will save you work.
1. With the Rectangle tool (![]() ), draw a rectangle that roughly fits in the table cell to the right of the First Name label. You’ll fine-tune the size next.
), draw a rectangle that roughly fits in the table cell to the right of the First Name label. You’ll fine-tune the size next.

Although you can convert any closed shape to a text field, in Acrobat it will always appear as a rectangle.
2. With the rectangle selected, in the Control panel deselect the “Constrain proportions for width & height” button, enter 20p into the W (Width) field, enter 1p2 into the H (Height) field, and press Enter/Return.
3. In the Swatches panel, set the fill color to Paper and the stroke color to None.

In this way you can customize the appearance of a rectangular text field. Given the colored background of this form design, a white fill color helps keep the text fields legible, even if the form is printed and filled out by hand.
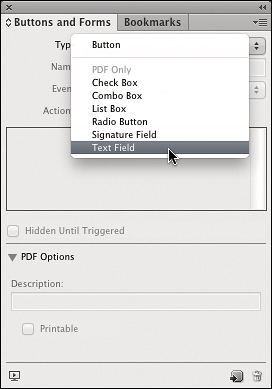
4. With the rectangle selected, in the Buttons and Forms panel choose Text Field from the Type menu.
5. Near the bottom of the Buttons and Forms panel, select the Required check box in the PDF Options group.

If some form fields are not optional, you can mark them as Required. This will outline them in red in the exported PDF file when Highlight Existing Fields is on.
6. With the Selection tool, select the rectangle and choose Edit > Cut.
7. With the Type tool, click an insertion point in the table cell to the right of the First Name label and choose Edit > Paste.
If the export fails because you get a warning about permission issues or the file being in use, first make sure the previous PDF draft isn’t still open in Acrobat. If that doesn’t work, try quitting Acrobat, and also try deleting the previous PDF draft.
8. Save the document and repeat steps 1–4 in the section “Checking Your Work So Far” to export another draft of the PDF form. If you get a warning that “Subscription Form.pdf” already exists, click the Replace button.
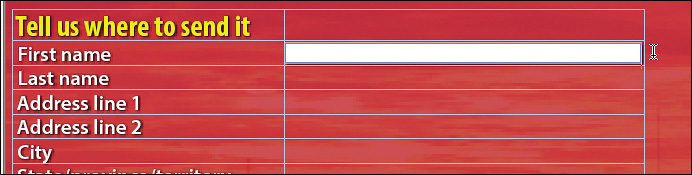
9. In Acrobat, type a name into the First Name field you created.
The field should work fine, but the text may be slightly large for the field. In the figure below, the descenders of some letters are cut off. Before you create the rest of the text fields, you’ll resolve this issue.

10. Close the PDF file without saving changes, and return to InDesign.
11. With the Selection tool, select the rectangle, and in the Buttons and Forms panel choose Auto from the Font Size menu.
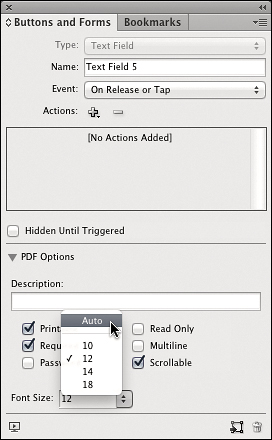
The Auto option resizes text so that it’s always completely visible inside a text field. However, if a large amount of text is entered into a small field, the text may become very small. With the short bits of text that will be entered into these fields, that should not be a problem.
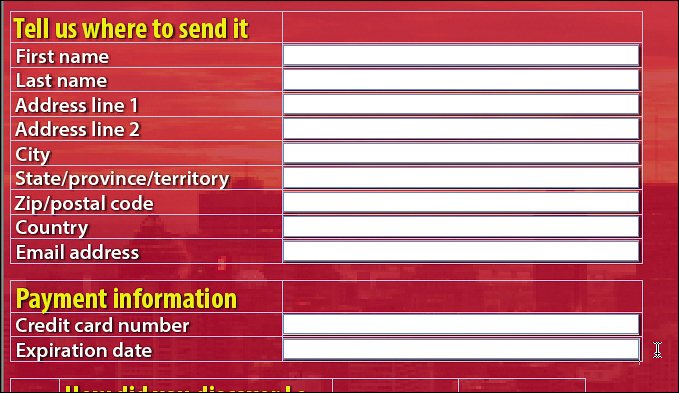
Now you’ll finish off the rest of the text fields.
12. With the Selection tool, select the rectangle and choose Edit > Copy.
13. With the Type tool, click an insertion point in the table cell to the right of the Last Name label and choose Edit > Paste.
You can still change attributes of each text field after pasting the duplicate text fields. For example, if you don’t want the form to require “Address line 2” because not all addresses have a second address line, select the field after “Address line 2” and deselect the Required check box in the Buttons and Forms panel.
14. Repeat step 13 for the subsequent table cells, pasting the last text field to the right of the Expiration Date label.
In form fields that are large enough, an icon in the bottom right corner indicates the field type.
Creating Combo Boxes
Now you’ll use combo boxes to simplify the entry of the credit card expiration date. You’ll use the pasted rectangle as a starting point.
1. With the Selection tool, select the rectangle you pasted to the right of the Expiration Date label.
2. In the Control panel, enter 3p into the W (width) field, and press Enter/Return.
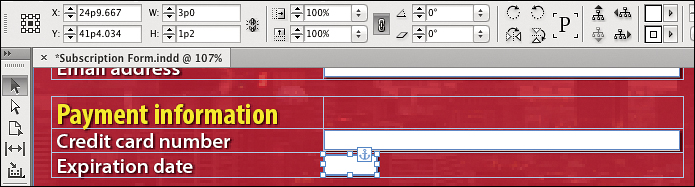
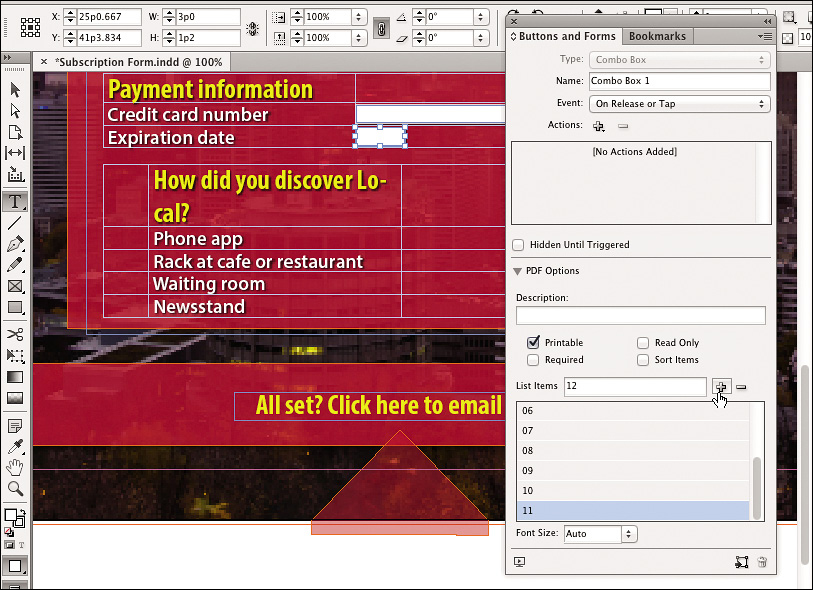
3. With the rectangle still selected, in the Buttons and Forms panel choose Combo Box from the Type menu.

Now you’ll create a list of months from 01 to 12.
4. Enter 01 in the List Items option that appears at the bottom of the Buttons and Forms panel, and press the + button or Enter/Return. Repeat for 02, 03, and so on until you get to 12.
5. With the Type tool, click to the right of the month combo box you just created and type a slash character (/). This is the slash that typically appears between the month and year.
6. With the Selection tool, select the month combo box and choose Edit > Copy.
7. With the Type tool, click an insertion point in the table cell to the right of the slash and choose Edit > Paste.

Next you’ll create a list of the next few years.
8. With the Selection tool, click the rectangle you just pasted and select the 01 list item in the Buttons and Forms panel and click the – (minus) button to remove it from the list. Repeat until only the one “12” item remains.

9. As you did in step 4, create a list, but this time have the series go from 2012 to 2018.

10. Save the document and export another version to PDF.
11. In Acrobat, try out the text fields and the combo boxes you just made.
12. Because this is just a test, close the PDF document without saving changes. Then return to InDesign.
Finishing the Form Objects
The table holding the form elements could use some tidying up. But first you’ll finish the set of radio buttons at the bottom of the form, as well as the submission button.
1. With the Type tool, highlight the radio button next to “$1 an issue...” at the top of the form, and choose Edit > Copy.
2. With the Type tool, click an insertion point in the table cell next to the Phone App label near the bottom of the form, and choose Edit > Paste.

3. With the Selection tool, select the radio button you just pasted, and in the Buttons and Forms panel, change the name to Discovery.

Changing the name is necessary because you’re starting a different group of radio buttons. If all radio buttons on a page had the same name, selecting one radio button would deselect all other radio buttons on the page.
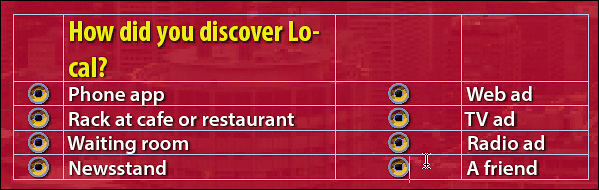
4. With the Type tool, highlight the radio button you just renamed, and copy and paste it into the other seven cells at the bottom of the form as shown.
The last item to make interactive is the text field at the very bottom of the page.
5. With the Selection tool, select the text frame containing the text “All set? Click here to email...”
6. In the Buttons and Forms panel, choose Button from the Type menu.
7. In the Buttons and Forms panel, click the plus sign menu next to the Actions label and choose Submit Form.

Normally, the next step would be to enter a path in the URL field, which would lead to a web server that is set up to receive the data in this form, but for this lesson you’ll omit that step.
8. Save the document and export another version to PDF.
9. In Acrobat, try out the text fields and the combo boxes you just made.
10. Because this is just a test, close the PDF document without saving changes. Then return to InDesign.
Cleaning Up the Table Containing the Form
You’ve probably noticed that the table headings aren’t all aligned. You’ll tidy up the table before you export the final version.
1. With the Type tool, drag to select the first two cells at the top of the form as shown in the following figure, and choose Table > Merge Cells.

2. Drag the Type tool down the three cells containing the radio buttons and the check box, and in the Control panel, click the Align Left button.
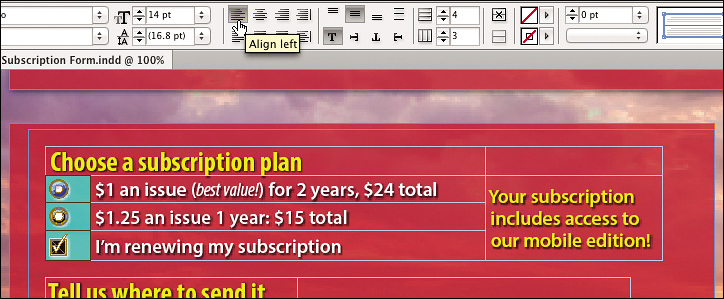
3. Position the pointer over the vertical cell border next to the three cells you just aligned, and drag to the left to remove the extra space.
4. Select the first two cells in the table containing the “How did you discover Local?” radio button group, and choose Table > Merge Cells.
5. Align the radio buttons and adjust the vertical cell borders until they are more consistent, similar to step 3 and as shown in the following figure.
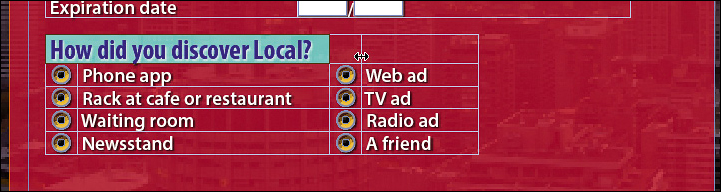
Now the headings are all aligned and are no longer too long for their cells.
6. Save the document and export another version to PDF.
If you’re distracted by Acrobat form field highlighting, click to deselect the Highlight Existing Fields button in the purple form toolbar at the top of the Acrobat window.
7. In Acrobat, try out the text fields and the combo boxes you just made. When you click the “All set? Click here...” link you set up at the bottom of the form, it will produce a warning; click Cancel. It is currently not set up to do anything, but in a real form it would be set up to submit the form data to an actual web server.

To let users of Adobe Reader 8 and later save data they enter into your PDF form, open it in Acrobat X Pro and choose File > Save As > Reader Extended PDF > Enable Additional Features. Click Save Now in the dialog box that appears, and then save it under a new name.
8. Close the PDF document without saving changes, and return to InDesign.
9. Close the InDesign document, and if you’re asked if you want to save changes, click Save.
Throughout this lesson you haven’t been saving changes to the PDF document, because you’ve only been testing the form. Saving changes to a PDF form is necessary when you’re entering data that you want to keep; a form recipient would want to save the changes.
Review Questions
1. Why is it important to consult with your web developer before designing a form?
2. What’s the main difference between radio buttons and check boxes?
3. Why do some of the sample form objects have three versions?
4. If selecting a radio button deselects all other radio buttons in other button groups instead of only within the same group, how do you fix it?
5. If a recipient is not able to fill out a PDF form, what will probably resolve the issue?
Review Answers
1. When a form is submitted electronically, the form field data must be formatted properly for the database that will receive it.
2. You can make only one selection from a group of radio buttons, but you can make multiple selections from a group of check boxes.
3. Form objects can support multiple visual states, so that the object can look different depending on whether it’s on or off, or the pointer is over it.
4. All buttons within a radio button group must use the same name, but the button name of each group must be different. If buttons are switching on and off in other groups, some buttons may be using a name of another button group.
5. Make sure the recipient is using a recent version of Acrobat Pro or Adobe Reader, because older versions or non-Adobe software that reads PDF files may not fully support form features.