
4. Mask Corrections
Lesson Overview
In this lesson, you’ll learn about the following:
• How to create and edit masks
• How to make adjustments inside and outside of masks
• How to use motion tracking to make a mask follow camera or subject motion
This lesson will teach you how to limit corrections using a shape, or mask. It should take approximately two hours to complete.
Download the project files for this lesson from the Lesson & Update Files tab on your Account page at www.peachpit.com and store them on your computer in a convenient location, as described in the Getting Started section of this book. Your Accounts page is also where you’ll find any updates to the chapters or to the lesson files. Look on the Lesson & Update Files tab to access the most current content.
Creating masks is one form of secondary corrections and useful for grading work that affects specific portions of the image.
Getting started
In this lesson, you’ll learn how to use shapes to create mask corrections, which are a form of secondary correction. Secondary color corrections are adjustments that affect specific portions of the image. Masks provide a quick way of isolating a geometric area of a picture to make adjustments to it.
![]() Note
Note
If you have not already downloaded the project files for this lesson to your computer from your Account page, make sure to do so now. See “Getting Started” at the beginning of the book.
For this lesson, you’ll use the project file located in the Lesson_04 folder.
1. Launch SpeedGrade (if necessary) and close the open project so the Timeline is empty.
2. Use the Desktop media browser’s hierarchical list at the left to find where you copied the SpeedGrade lesson media.
3. Open the Lesson_04 folder, and double-click the Lesson_4.ircp file to open that project.
4. If the clips in the Timeline appear brown, select the Tutorial_Media folder in the media browser to reveal its contents. Then open the Reels panel and click the Load From Desktop button to relink them to the clips in the open project.
5. Open the Monitor. If necessary, set the Zoom Level pop-up menu to Fit to see the entire frame, and then open the Look panel to prepare to work.
The ten clips in the Timeline will be used to show different techniques that masks make possible.
Using masks
After you’ve made a primary adjustment to the color and contrast of a clip to achieve an overall look, you need to make more specific changes using secondary color corrections. Of these, the mask correction is probably the easiest and most obvious to use.
Essentially, a mask correction uses a shape to isolate a portion of the image; you can make an additional set of color and contrast adjustments within that shape without affecting the rest of the image.
In addition, once you’ve placed your shape, you can make a separate set of adjustments to the region that falls outside of that shape for an additional level of versatility.
Masks are an excellent solution for adjustments you need to make to an easily identifiable geometric region of an image—for example, the top half or the bottom-left corner. If you can’t easily surround the region you want to adjust with a single shape, you may want to try using a secondary qualifier instead, as covered in Chapter 5.
Masks in SpeedGrade
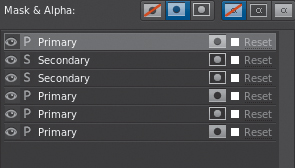
To use a mask in SpeedGrade, you draw a shape around the region you want to adjust and then assign that shape’s mask to one or more layers in the Layers list. You can assign either the inside of a mask or the outside to the layer, which lets you apply separate corrections to either half of the mask.
In SpeedGrade, you can have only one mask per grade. However, this design enables you to use the inside or outside of a mask to limit as many Primary, Secondary, or effects layers in the Layers list as you want to.
If you want to use multiple masks on a single clip, you can add a grade track to that clip in the Timeline. Each grade track can have its own mask, so by stacking up grade tracks, you can apply overlapping grades that are limited using different masks.

Grade tracks will be covered in subsequent lessons.
Setting up a mask correction
In the following three examples, you’ll use simple mask techniques in three different ways to make targeted improvements to images.
Example 1: Emphasize or deemphasize parts of an image
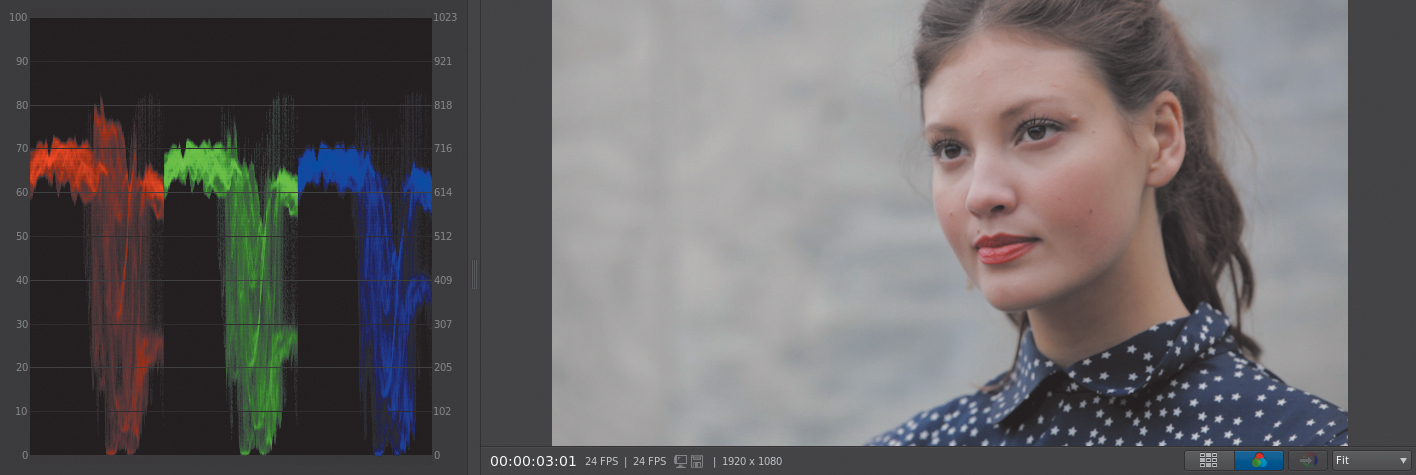
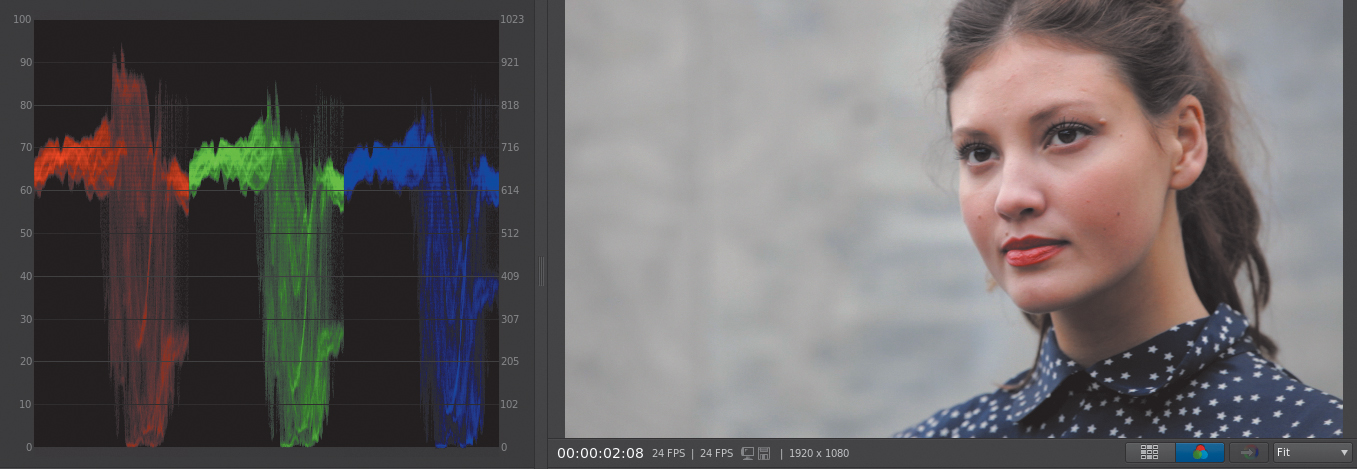
1. If necessary, open the Monitor and Look panels. Make sure the Monitor panel shows the Vectorscope and the Parade scope.
2. Move the playhead to the first clip in the Timeline if it’s not there already.
It’s important to keep in mind that in the majority of shots you work on, all secondary operations are built on top of an initial primary correction. You may often find that with a proper primary adjustment, secondary adjustments are unnecessary.
However, without a primary adjustment, you may find that you are doing way too much work, adding layer upon layer of corrections to fix things you could have taken care of with a well-considered overall adjustment.
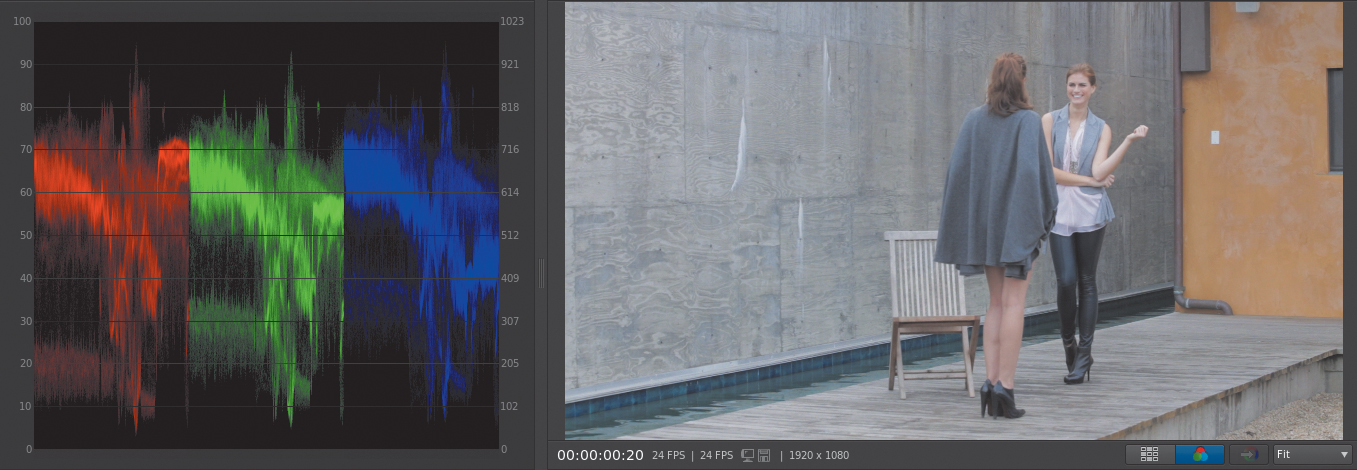
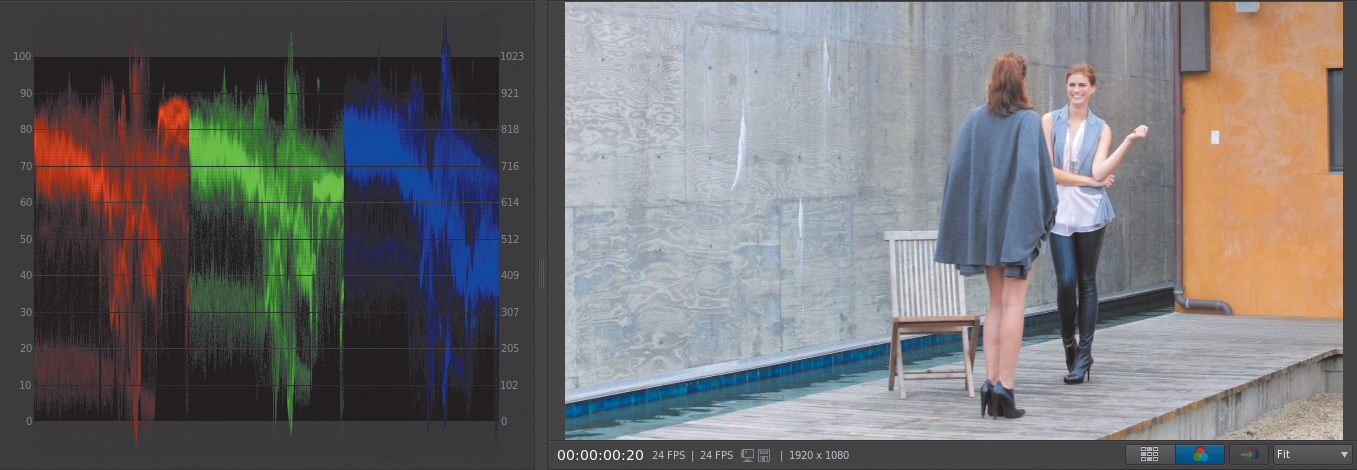
The initial state of the first clip is a bit low contrast and a bit flat. First, let’s see what we can do with an overall primary correction.
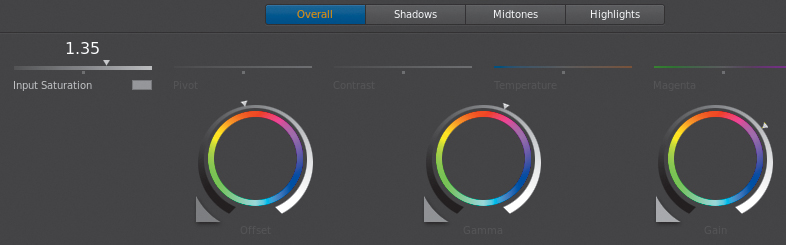
3. Drag the Offset ring to the left until the thickest part of the shadows in the red graph of the Parade scope touches 0%. Then drag the Gain ring to the right until the thickest part of the highlights in the red graph of the Parade scope touches 100%. Some individual spikes will go below 0% and above 100%, but this is detail you don’t mind clipping in this image.
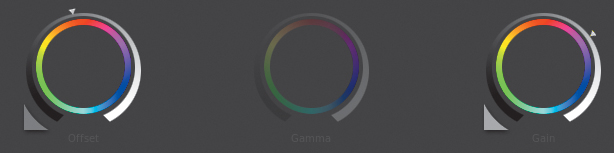
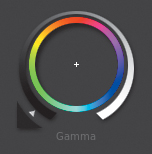
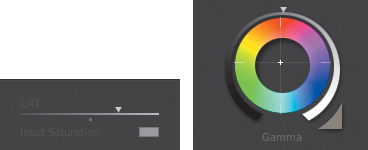
4. To lighten the image a bit further, drag the Gamma ring to the right, just enough to place the thickest portion of highlights in the Parade graph between 60 and 70 on the graph. Then drag the Input Saturation slider to the right between 1.30 and 1.40 to increase image saturation, depending on the look you prefer.
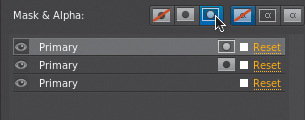
5. Click the eye icon of the Primary layer in the Layers list to turn this correction on and off. This gives you a sense of how much you’ve changed.
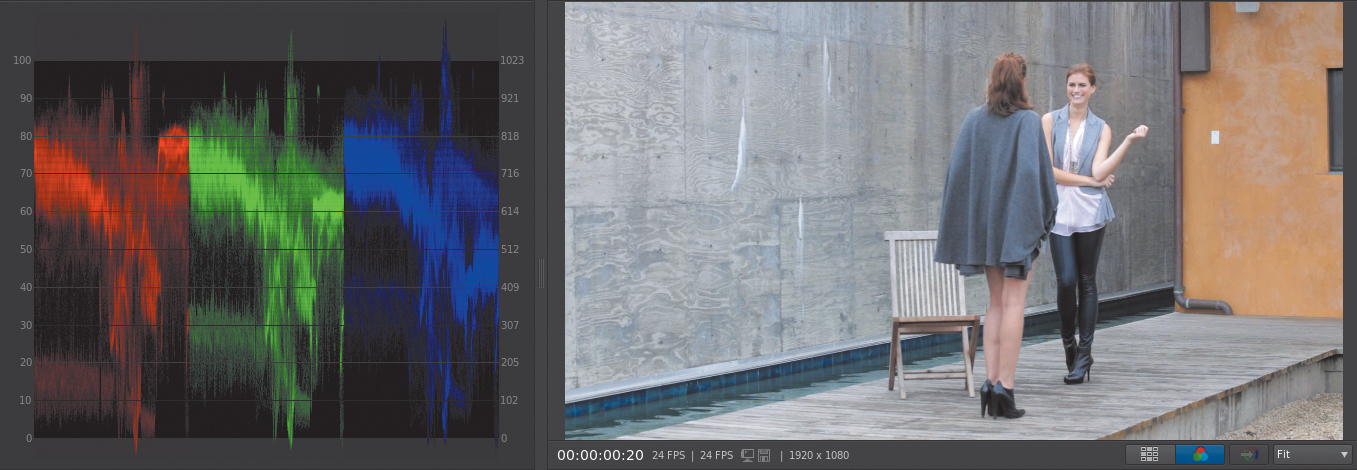
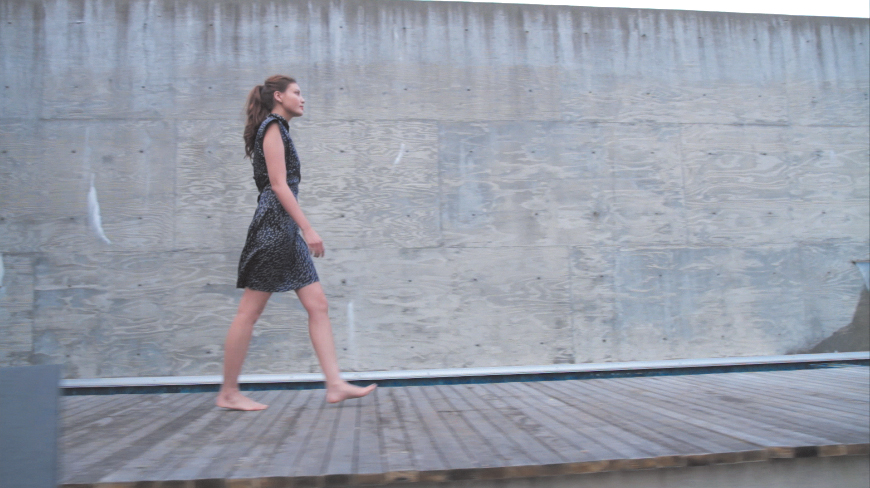
With just a few adjustments you’ve added more pop and life to the image. However, with the additional lightness, all areas of the image are now more visible, including the gravel pit to the right of the wooden walkway.
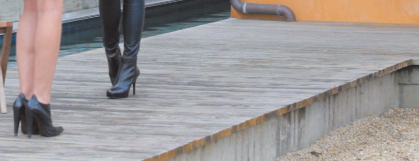
This is the kind of detail the client wanted hidden, and it’s the perfect sort of correction to make using a mask.
Before you can make the correction, you need to create and place the mask.
6. Open the Mask panel to the right of the Look panel.
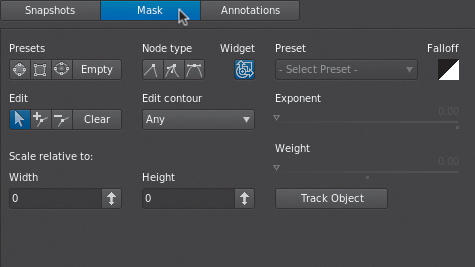
It’s necessary to select the Mask panel, even if it’s open, to access its controls and to show whatever mask shape happens to be currently drawn in the Monitor.
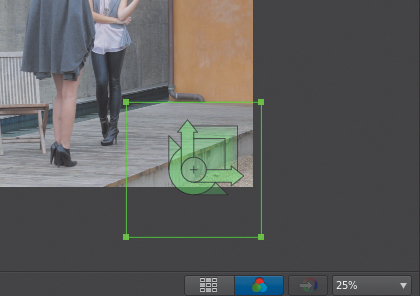
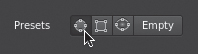
7. In the row of four mask buttons, click the one with the square icon.
A green square control displays within the Monitor. At the center, a widget provides a variety of integrated handles you can use to resize and reposition the overall shape. For simple geometries, these handles will get you where you need to go quickly.
Surrounding the widget, the shape consists of connected control points that you can use to deform and customize the shape.
The first three mask buttons create new mask shapes that you can customize, and the fourth button (empty) erases whichever shape is currently in use. If you don’t like the modifications you made to a customized shape and want to start over again, click one of the shape mask buttons again and a new default shape will overwrite the current one.
Let’s customize the shape to cover the sandpit.
8. Drag within the position handle (the circle with crosshairs at the center of the shape widget) to move it down to the corner.
At this point, there’s not a lot of room to maneuver the shape around, so you’ll need to shrink the image to keep working on it.
9. Set the Zoom Level pop-up menu to 25% to shrink the image, adding some room around the image you’ll be working on.
10. Next, drag the widget’s rotate handle (the half circle at the bottom left of the reposition handle) to rotate the shape so that its edge is parallel to the edge of the walkway.
11. Drag the reposition handle to line up the edge of the shape so that it falls just below the edge of the sand. Then drag the widget’s horizontal scale handle (the right-pointing arrow) to stretch the shape horizontally so that it’s wider than the visible area of the walkway.

12. Drag the widget’s feather handle (the outer edge of the square) to the right to feather the edge of the shape; keep dragging until the second outer shape that appears touches the wood of the walkway.

At this point, the shape is covering the part of the image you need to adjust and we’re ready to make the correction.
13. Click the Look tab, and then click the +P button under the Layers list to add a new layer.
Before making an adjustment with the mask you created, you need to create a new Primary layer to attach that mask to. That way, the mask will be limiting the effect of an additional correction while leaving your initial Primary correction as is.
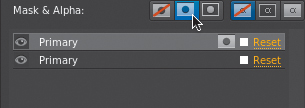
14. With the new, topmost layer selected, click the inside mask button.
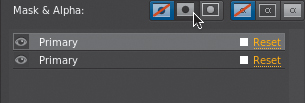
Clicking the inside mask button “assigns” the inside of the mask to the currently selected layer, which is indicated by the inside mask icon that appears on that layer.
Now you can make your adjustment.
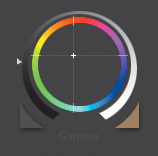
15. Choose Fit from the Zoom Level pop-up menu, and then drag the Gamma ring to the left to darken the sandpit. Make it dark enough to seem like it’s in shadow but not so dark that it begins to look rough and artificial.
By lowering the Gamma contrast control, you darken the image without clipping the blacks, producing a more naturalistic adjustment that still retains some detail and contrast.
This kind of selective darkening or lightening of the image is often referred to as “digital relighting,” and is similar to when the lighting crew flags the light to create a deliberate pool of shadow. By darkening that corner, you make the sandpit less noticeable and add contrast to the overall image. Click the eye icon on the new Primary layer to turn the adjustment on and off so you can see what a difference this small change makes.
Example 2: Lighten parts of an image
In the next example, you’ll perform one of the most common mask cheats there is—brightening a face to make it stand out.
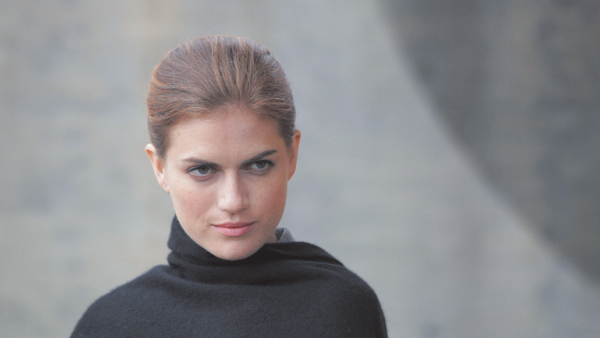
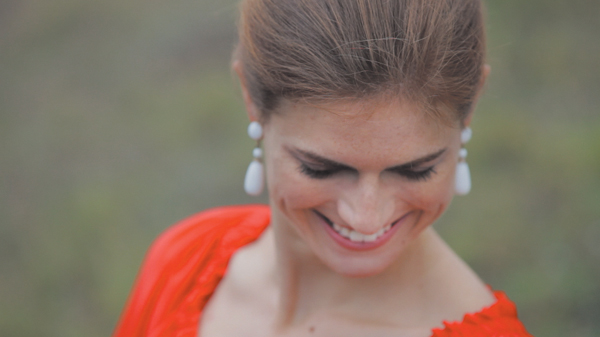
1. Move the playhead to the second clip.
A primary adjustment has already been made to this clip, which you can see by clicking the Primary layer’s eye icon to toggle it off and on. The shadows have a nice density as a result, but the client wants you to make her face stand out a bit more from the background.
2. Click the Mask panel, and then click the first circular mask button.
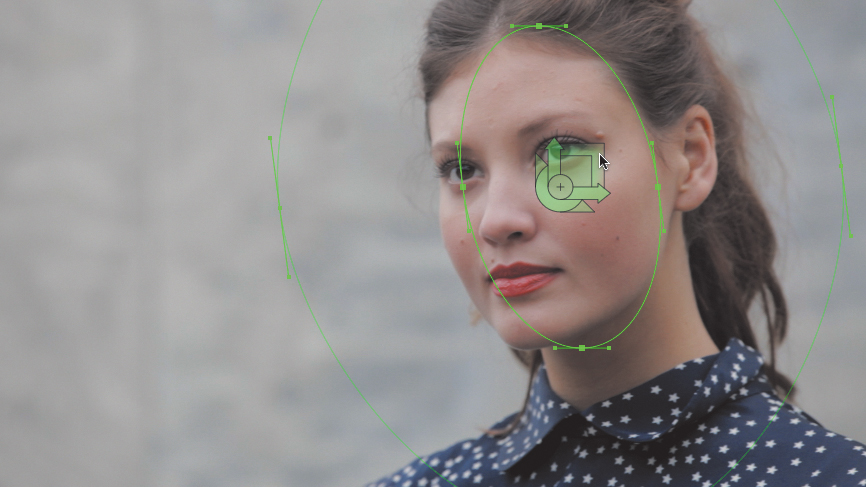
The Circular mask’s onscreen control appears at its default state, ready to be further customized for your use.
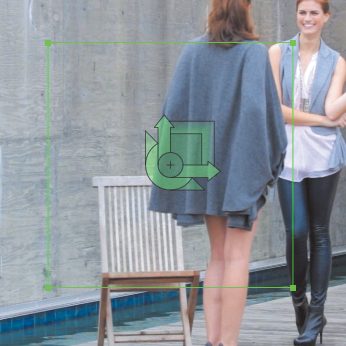
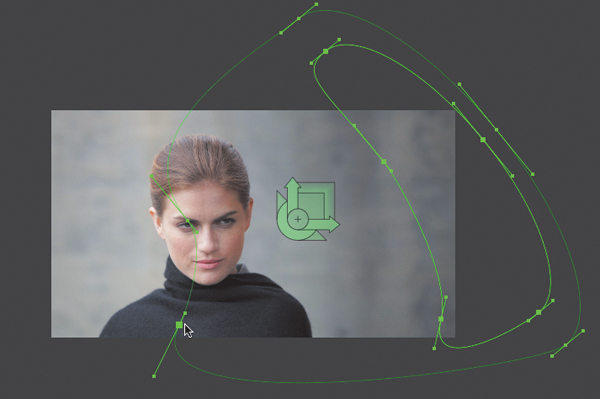
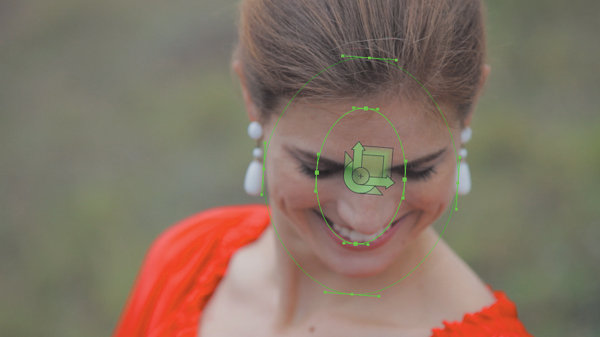
3. Click the mask widget’s position handle (the center circle), and drag the whole mask to center it on the woman’s face.

4. Click and drag from the widget’s scale handle (the upper-right box) to the right to scale up the entire circle until the borders of the circle reach her hairline and chin.

5. Drag from the widget’s horizontal scale handle (the right-pointing arrow) to the left to narrow the circle horizontally so it fits the woman’s face better.

6. Now click the widget’s vertical skew handle (the right-pointing triangle under the right-facing arrow) and drag to the right to skew the oval to the left, so that it follows the angle of the light hitting her face.

7. Drag the widget’s feather edge handle (the outer region of the square) to the right until the outer feather shape of the mask is approximately twice the size of the woman’s head.
Why such a large amount of feathering? Because this type of adjustment, if not handled carefully, can produce fringing around the subject being brightened. A broadly feathered area will create a more gentle transition from the area being manipulated to the area that isn’t, making it harder to spot what you’re doing.
8. Open the Look tab again, and click the +P button under the Layers list to create a new Primary layer. Then click the inside mask button.
Now the oval mask you created is used to limit whatever you do in this second Primary layer.
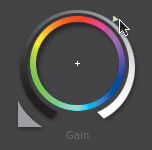
9. With the Look panel controls set to Overall, drag the Gain ring to the right until the top of the red graph just touches 95 in the Parade scope.
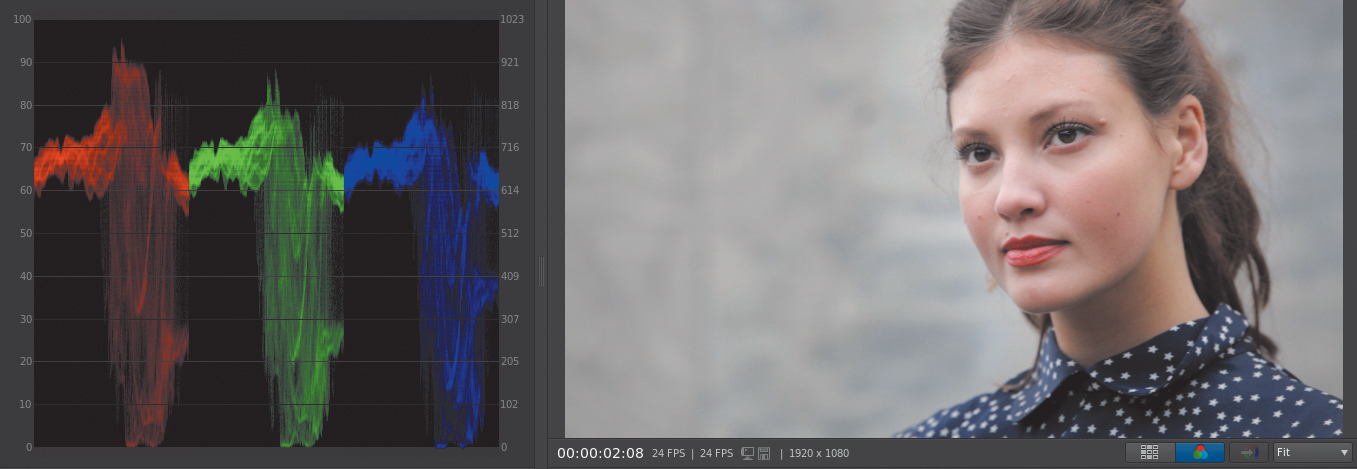
This lightens the woman’s highlights, but it also lightens the background a bit, too. You could stop here, but a more sophisticated approach would be to stretch the overall contrast of the woman’s face rather than just lightening it.
10. Drag the Gamma ring to the left just a bit until the gray cement behind the woman approximately matches the rest of the wall.
Now, lest you think you’ve merely made the woman’s face go dark again, click the eye icon in the top Primary layer in the Layers list to toggle the correction on and off to see what you’ve done.
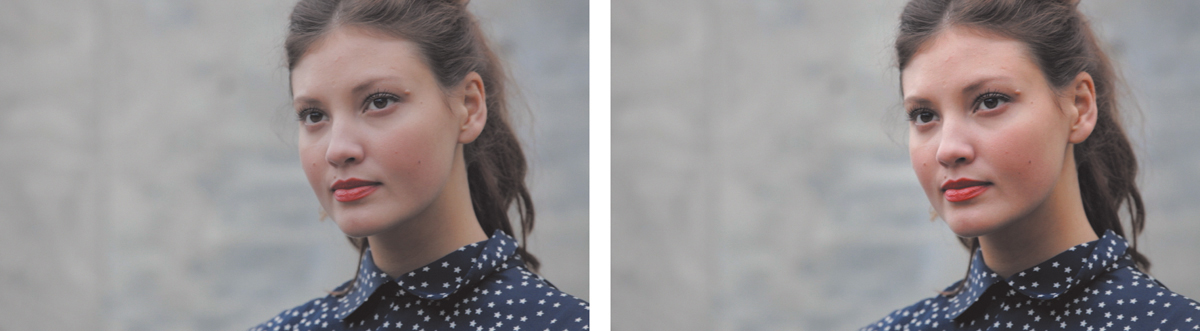
You’ve significantly brightened the woman’s highlights without affecting the background behind her too noticeably.
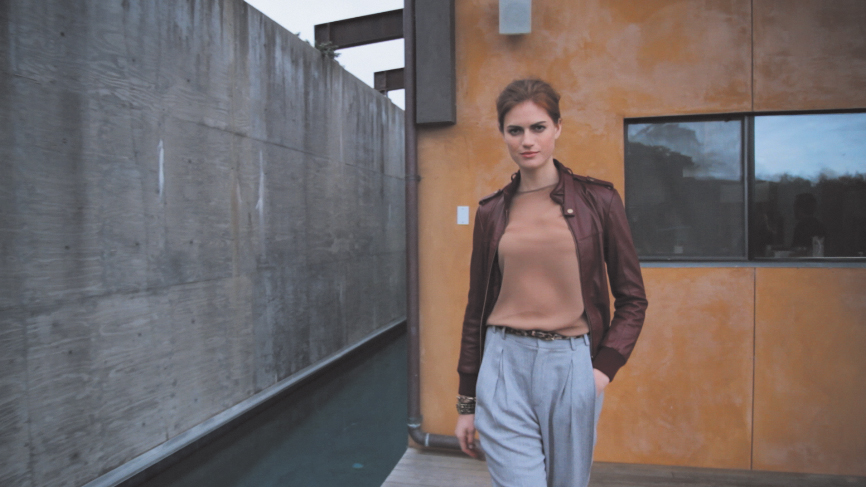
Example 3: Create an illusion of depth
So far, you’ve learned how to use masks to deemphasize parts of the picture you want to fall into shadow and to lighten parts of the image you want to draw a viewer’s eye to. In this next example, you’ll use a square mask to create an illusion of depth.
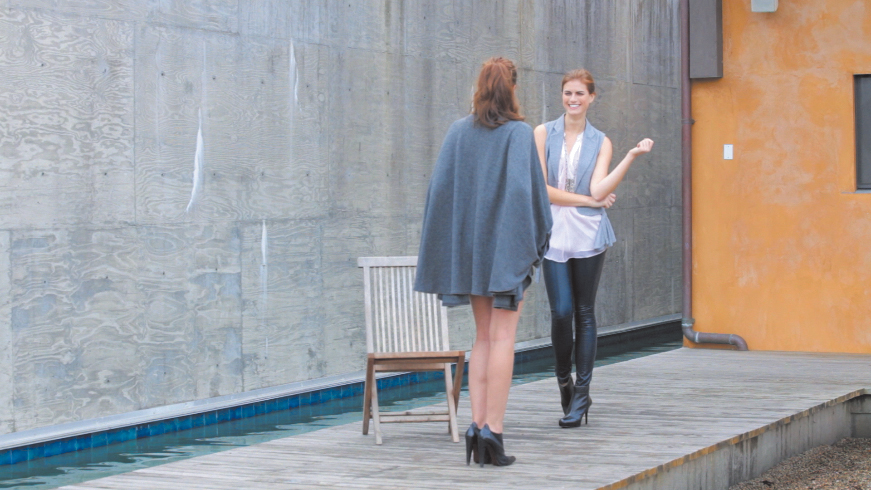
1. Move the playhead to the third clip.
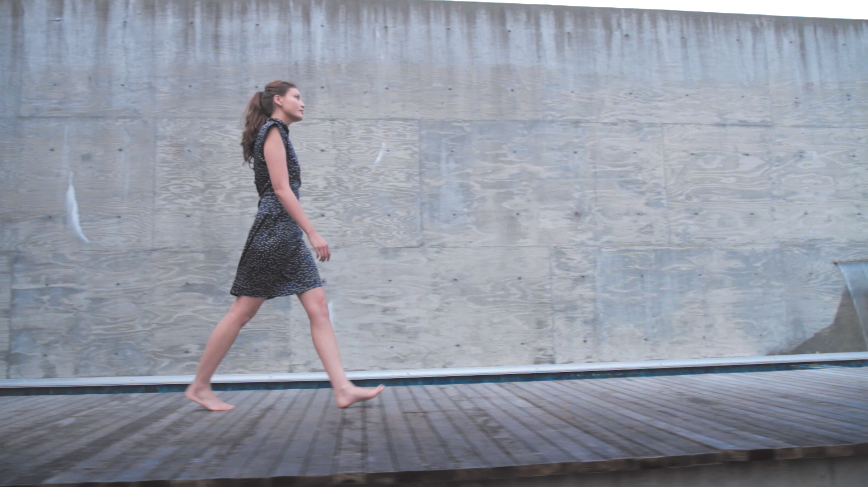
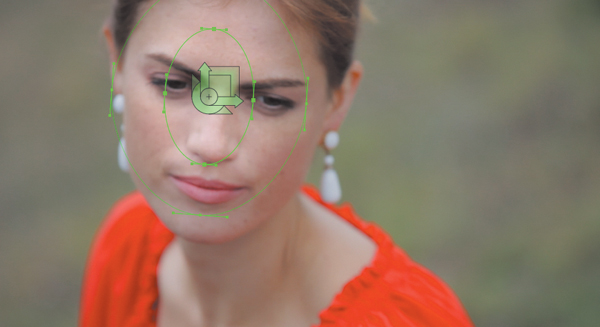
Like the last example, a primary correction is already applied to this clip. The image looks good, and the woman has a nice separation from the background, but the concrete background blends into the wooden walkway a bit too much.
2. Click the Mask panel again, and then click the square mask button to create a square mask.
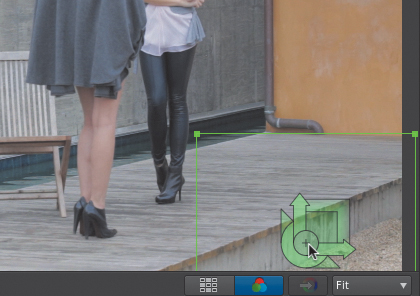
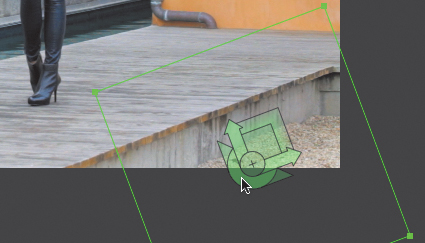
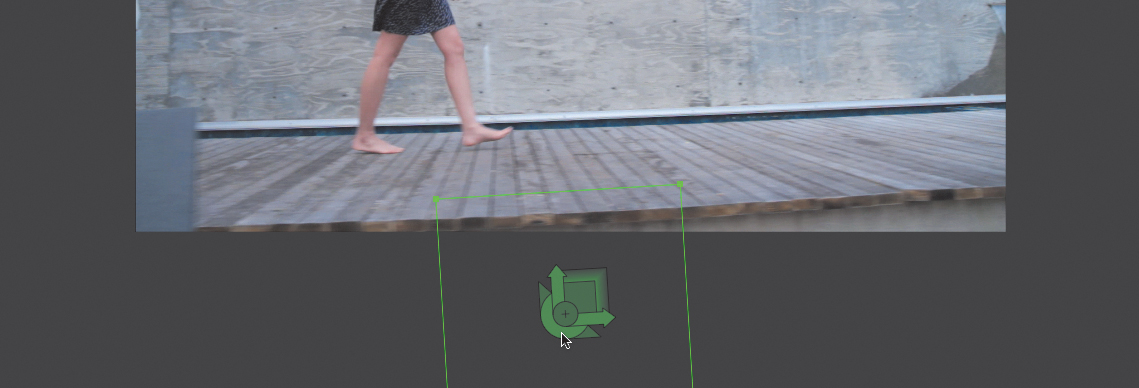
3. Set the Zoom Level of the Monitor to 25% to add some room to work, then drag the widget’s position handle (the center circle with crosshairs) down until the top of the square is just above the edge of the walkway.

4. Drag the widget’s rotation handle (the semicircle at the bottom left of the center handle) to align the edge of the mask with the angle of the walkway’s edge.
5. Drag the widget’s horizontal scale handle (the right-pointing arrow) to the right to stretch the rectangle until it’s wider than the frame.
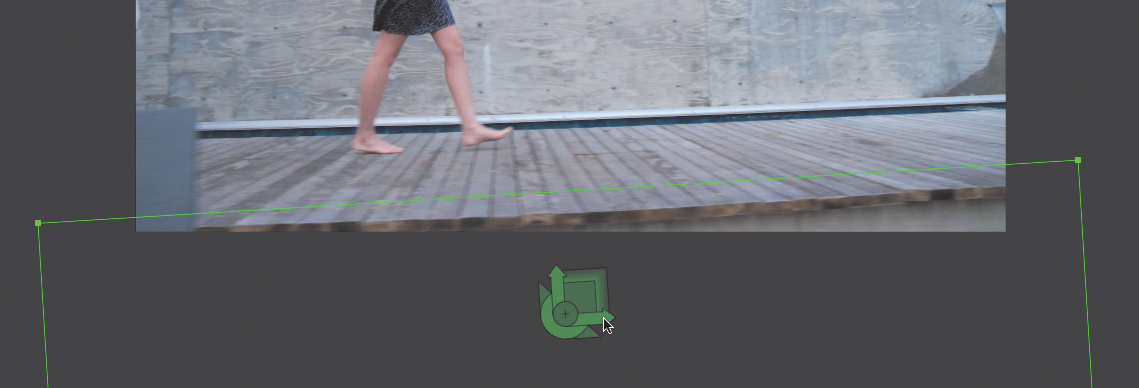
6. Now drag the widget’s feather handle (the outer square) to the right to feather the mask until the top of the feather edge hits the far side of the walkway.

7. Choose Fit from the Zoom Level pop-up menu to center the image again. Then open the Look tab again, click the +P button under the Layers list to create a new Primary layer, and click the inside mask button.
8. Drag the Gamma ring to the left to darken the walkway enough so that the falloff from dark to light caused by the feathering is clearly visible. The edge of the walkway should be quite dark (but not totally clipped), but the far edge of the walkway should be untouched.
This feathered falloff, a gradient from dark at the outer edge of the frame to light toward the middle of the image, creates a sense of depth. It’s an optical illusion to be sure, but one you can capitalize on to make your images more interesting. While you’re at it, now’s a good time to try a different method.
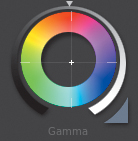
9. Drag the Gamma Color Balance control toward orange to add some color to the wood of the walkway.

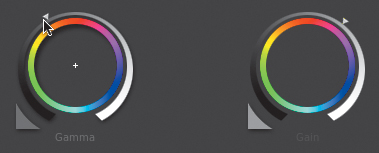
The image was fairly monochromatic, so adding a bit of color to the wood is one way of livening up the image. Because you’ve made two adjustments to the Gamma control (one to the outer ring and another to the inner Color Balance control), you should notice that there are now two reset arrows.
The arrow to the left resets the outer contrast ring control, and the arrow to the right resets the color balance adjustment you made; in fact, the right-pointing arrow shows the color of the actual adjustment.
Now the walkway looks neutral, and the dark falloff provides an interesting depth effect that, although barely noticeable, makes an appreciable difference when you toggle that layer’s eye icon off and on.
Separating interior and exterior adjustments
So far, you’ve made adjustments to the inside of masks that you positioned and resized in different ways. SpeedGrade also lets you assign the inside and outside of a mask to different layers of correction.
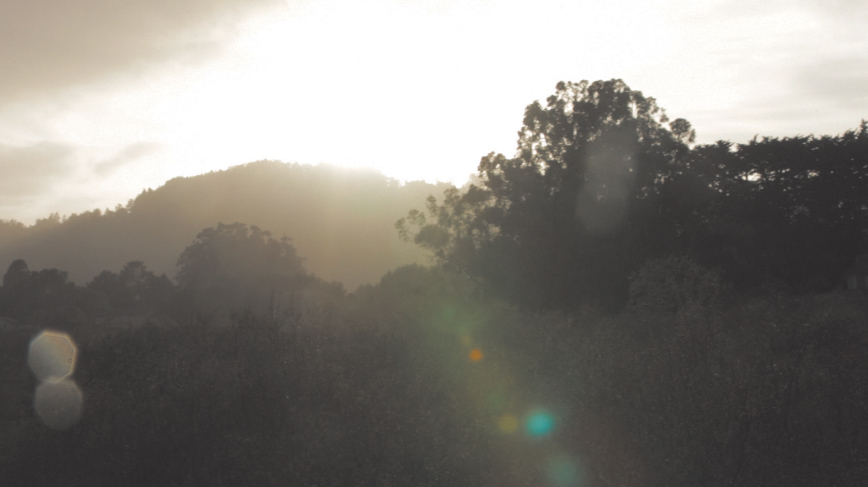
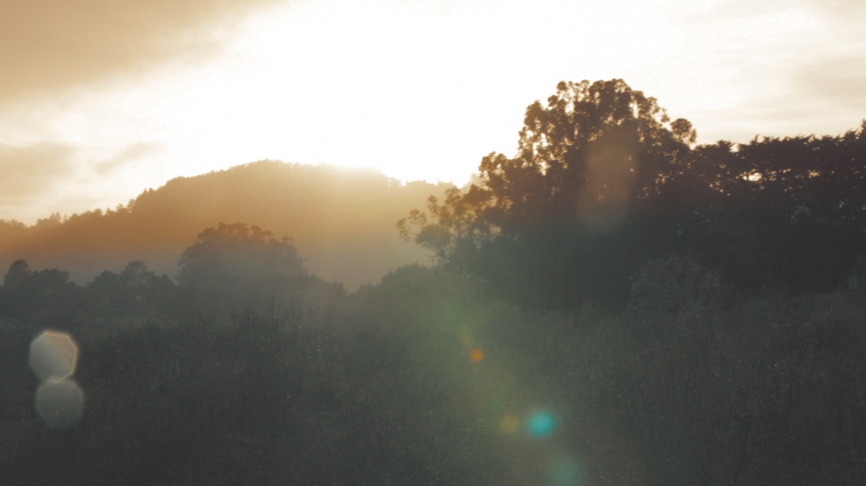
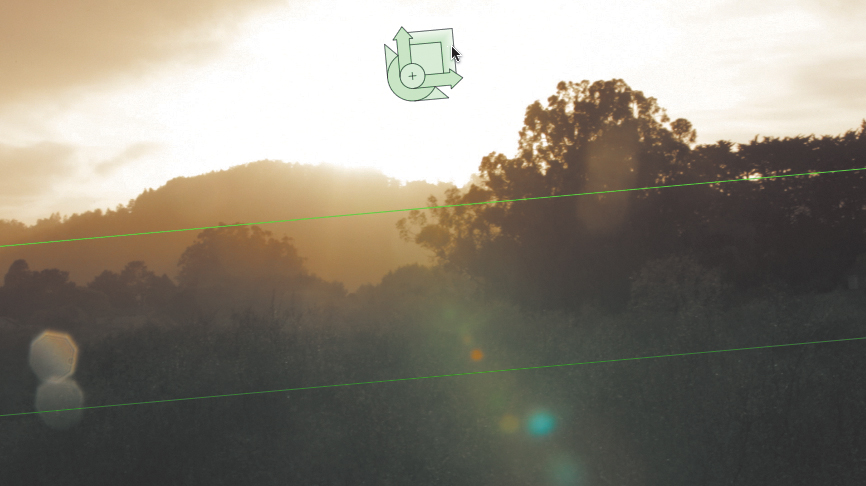
1. Move the playhead to the fourth clip.
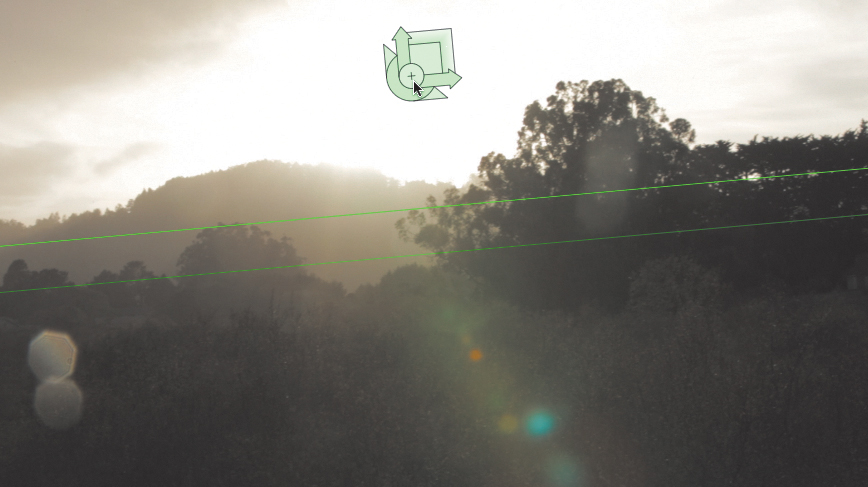
2. Click the Mask panel, click the square mask button, and use the widget handles to create a feathered strip that surrounds the sky and the tops of the trees, as shown in the following screen shot.
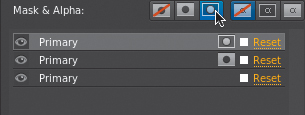
3. Open the Look tab and click the +P button twice to create two additional Primary layers.
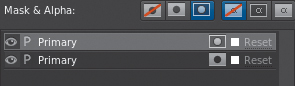
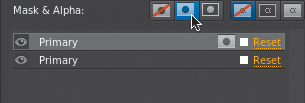
4. Click the middle Primary layer in the Layers list, and then click the inside mask button to assign the inside of the mask to that adjustment. Then click the top Primary layer, and click the outside mask button to assign the outside of the mask to it.
At this point, any adjustment you make using the middle Primary layer will affect the part of the image inside the mask; adjustments you make with the top Primary layer will affect everything outside of the mask.
5. Select the middle Primary layer in the Layers list, and drag the Gamma Color Balance control toward orange to add some natural-looking sunset color to the sky.
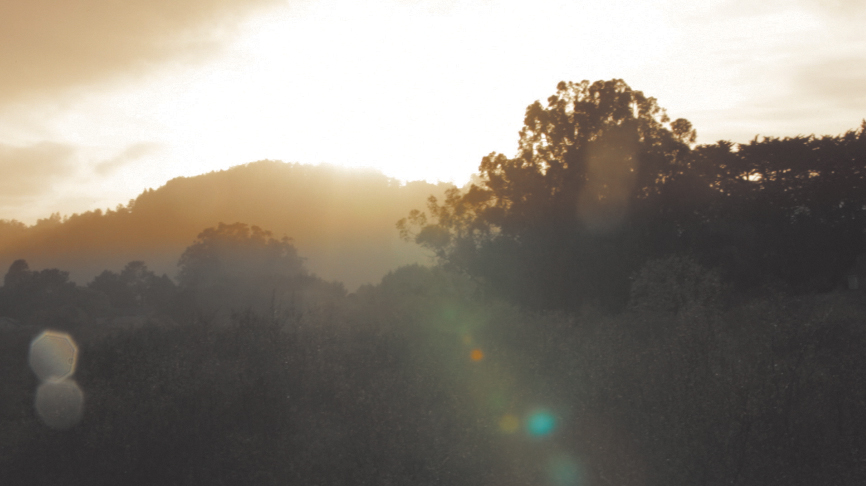
6. Select the top Primary layer, click the Shadows button, and drag the Gamma Color Balance control just a bit toward green to add a little more color to the treetops without affecting the lens flare too much.
By being selective about what range of image tonality you add color to, you can avoid blowing out the highlights and adding color to areas of the image where you don’t want it.
At this point, there’s a pretty clear border between the orange and green adjustments you’ve made. It’s a little artificial looking, so you can probably feather it out a bit more.
7. Click the Mask panel, and feather the shape out even more until there’s a nice blend between the sky and tree line corrections. For a convincing effect, you’ll probably need a very wide feather.
As you can see, you can continue to adjust a mask even after you’ve assigned it to one or more layers.
In the following exercise, you’ll use the same technique to “cheat” a split of warm and cool lighting in an image to accentuate a specific area of the frame.
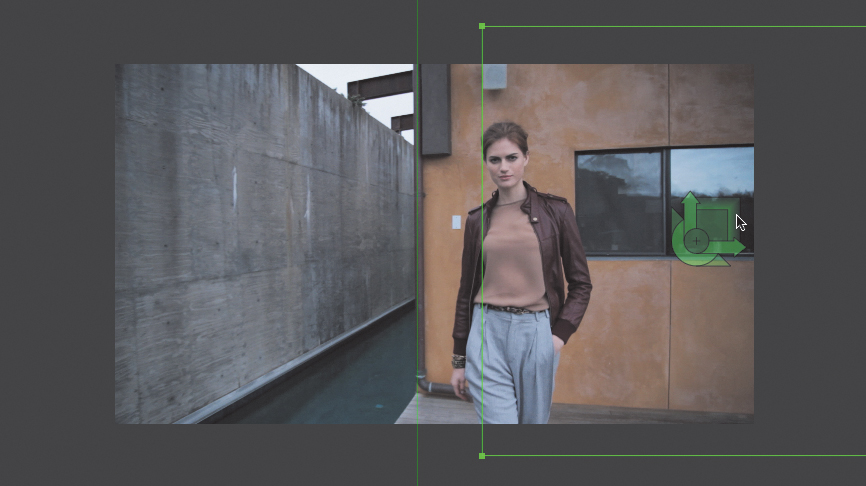
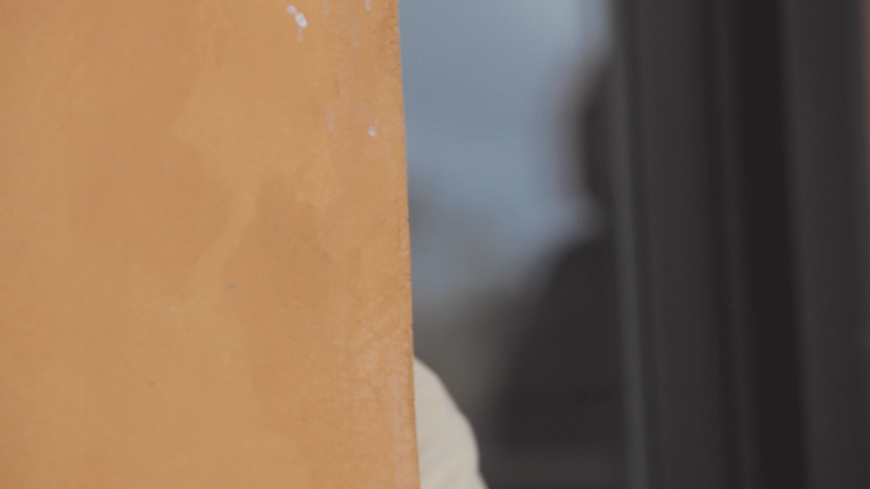
1. Move the playhead to the fifth clip.
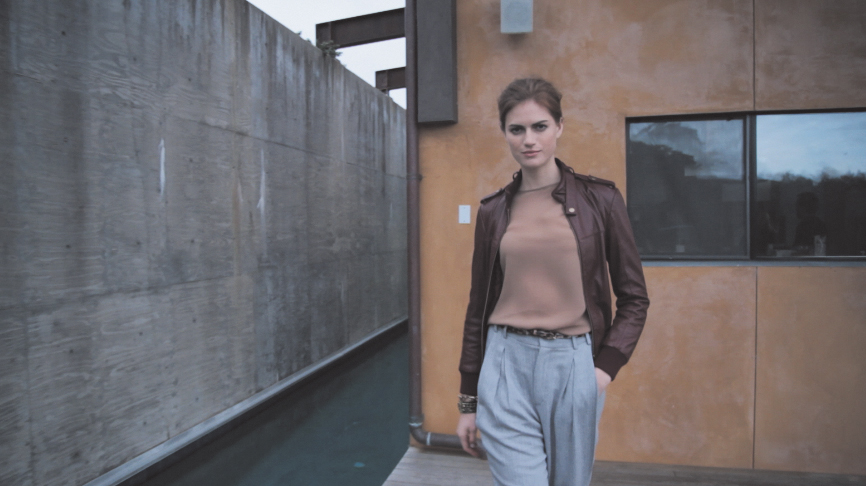
This clip has a primary grade on it already that’s creating a nice range of image contrast, but the color is a bit lackluster.
2. Click the Mask panel, click the square mask button, and use the widget handles to create a feathered region that surrounds the orange-walled right half of the screen. The left feathered edge should be where the building meets the concrete wall, and the solid inner edge should hit the left edge of the woman’s head. The top, right, and bottom of the mask should fall off the edge of the frame.
3. Open the Look tab and click the +P button twice to create two additional Primary layers.
4. Click the middle Primary layer in the Layers list, and click the inside mask button to assign the inside of the mask to that adjustment. Then click the top Primary layer, and click the outside mask button to assign the outside of the mask to it.
5. Select the middle Primary layer. With the Overall mode selected, raise Input Saturation to approximately 1.41, and then drag the Gain Color Balance control just a bit toward orange to add a bit of warmth to the highlights of the woman and the wall while leaving the shadows alone.
6. Select the top Primary layer, and drag the Gamma Color Balance control toward blue/cyan, to “cool off” the cement and water.
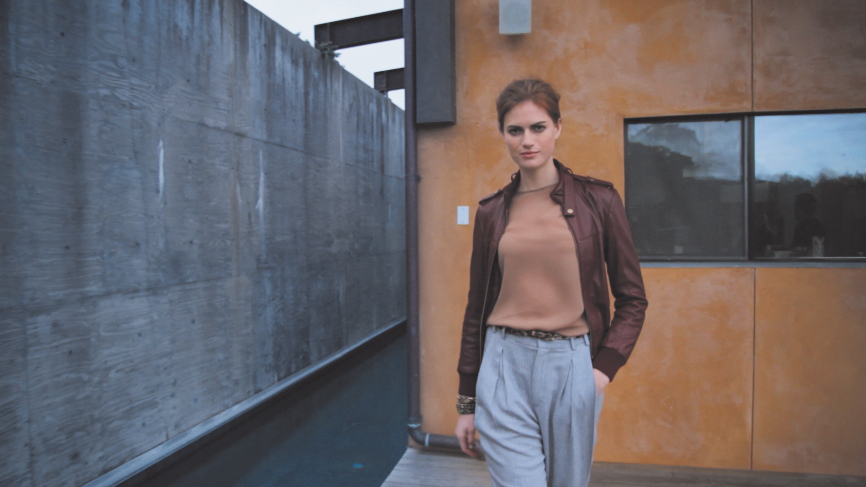
Because the cement wall is darker then the orange wall, the Gamma control has more influence in this part of the image. By pushing the color of the cool half of the image to a complementary hue of the warmer half that you corrected previously, you’ve created a more visually interesting image with more color contrast than before.
Drawing and adjusting custom masks
Thus far, you’ve used the mask buttons to create either squares or ovals that you’ve customized to suit your purpose. However, it’s also possible to draw a custom shape to more closely fit specific subjects when necessary.
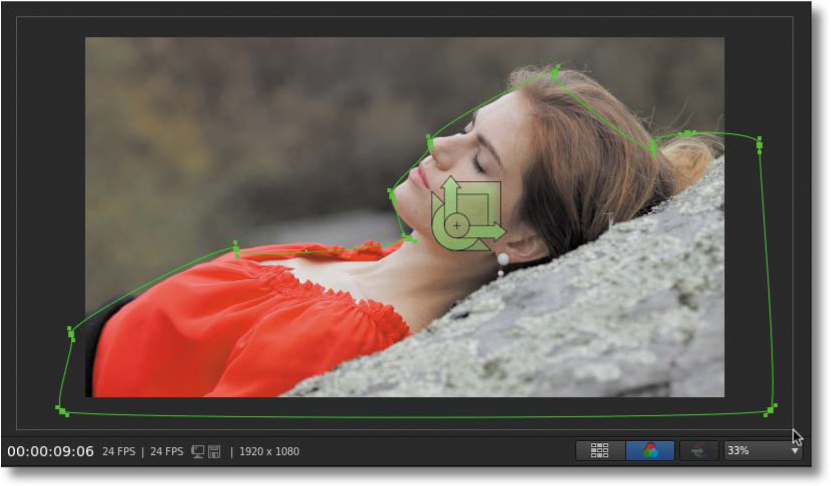
1. Move the playhead to the sixth clip.
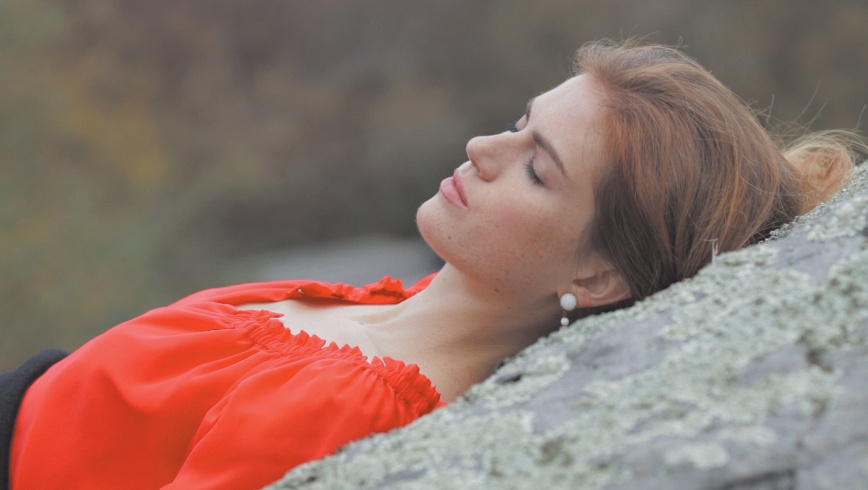
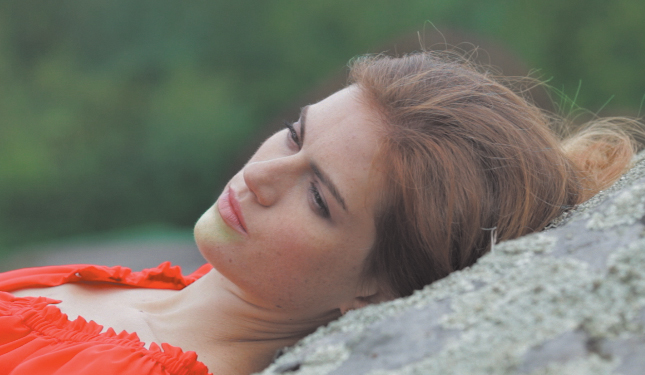
This clip has been graded for a nice, neutral, warm treatment of the woman in the red dress, but the foliage in the background looks a bit autumnal. This can be fixed by masking the woman and rock, and adding green to the trees behind her, but that will require a more specific shape.
It’s a good approach to start a correction with a simpler shape. Often, you’ll be able to use a customized version of one of the masks.
However, if you find that you’re fighting a shape that’s not quite working, you can delete the unsuccessful mask and draw a new one from scratch. In the previous example, you can see that a simple oval doesn’t quite fit the woman well enough to make an accurate adjustment to the foliage.
To delete a mask and start over again, just click the Empty button (the last of the four mask buttons).
2. To start drawing a new shape from scratch, click the add points button.

3. In Add Points mode, every time you click in the Monitor, you’ll add a control point to an ever-expanding polygon.
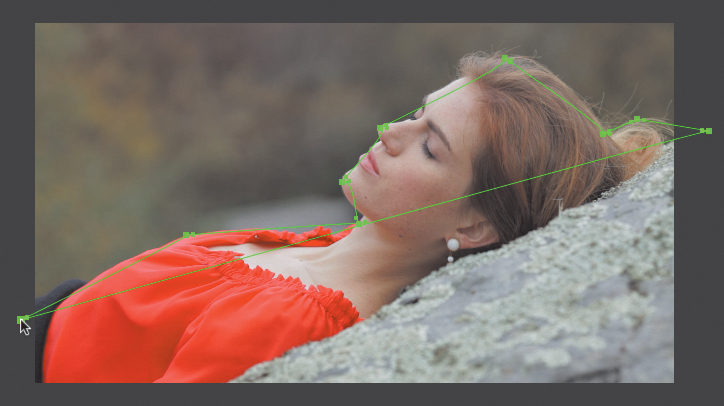
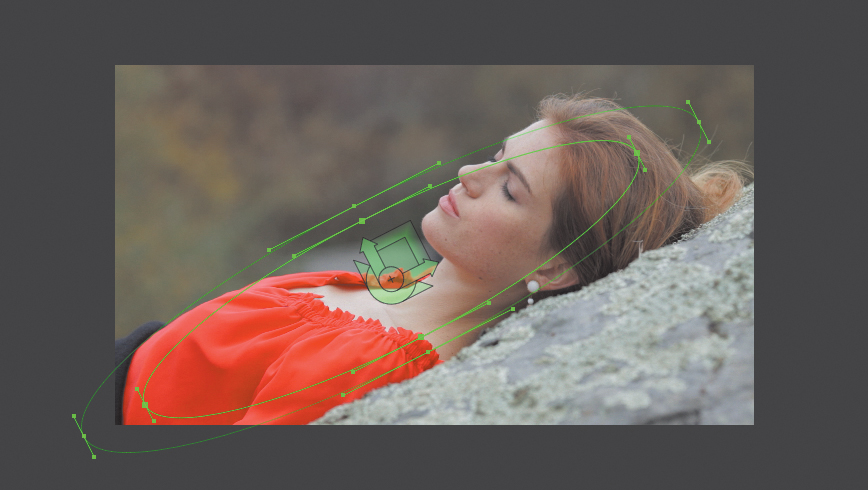
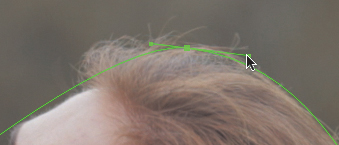
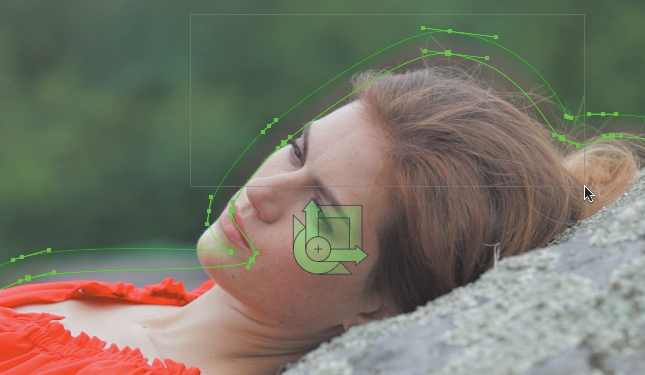
4. Click to draw a connect-the-dots outline of the woman and the rock using the fewest control points possible until you have a shape resembling the following screen shot.
5. When you’re finished, click the select points button.
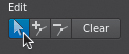
Now you have a shape created with what are referred to as cusp points with Bézier handles. Unfortunately, the automatically selected angles for many of these points are not ideal relative to the woman you’ve just traced. What you want are nice, smooth Bézier curves that conform to her outline.
6. Dragging anywhere within the Monitor creates a bounding box with which you can select one or more control points in a mask. Draw a bounding box to select every control point you’ve drawn.
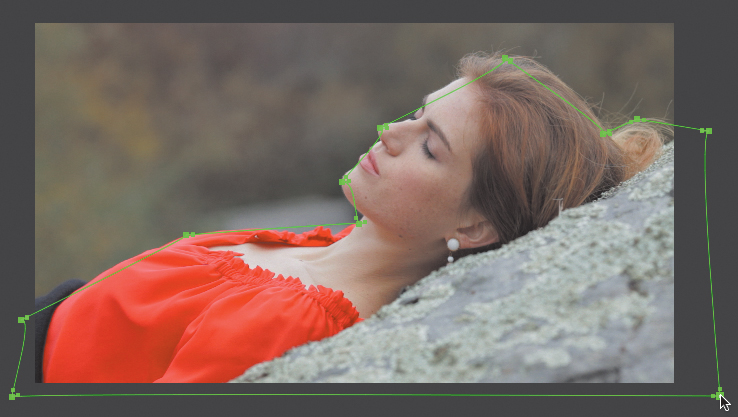
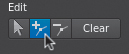
7. Click the first Make Selected Points Corners button to remove all of the Bézier splines from the control points, and then click the third Make Selected Points Smooth Spline button to add the Bézier handles back so they conform more closely to the angles of the shape.
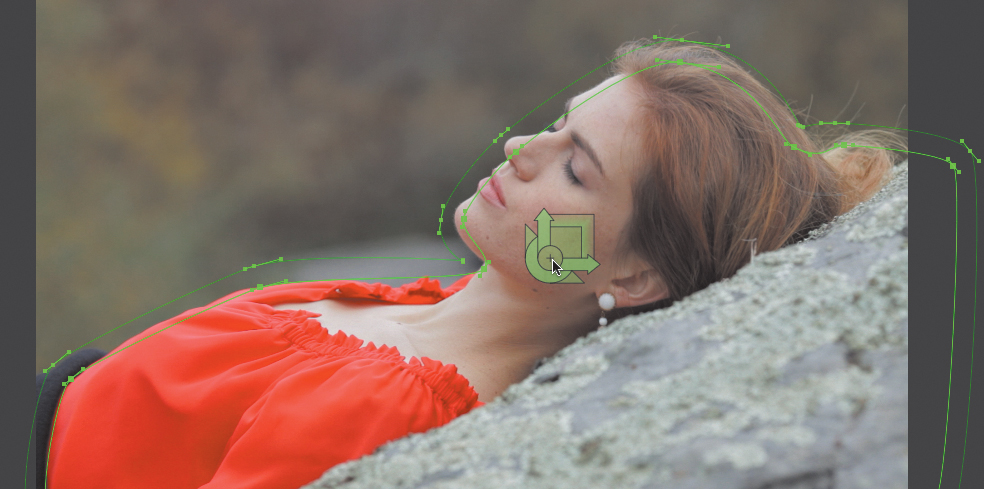
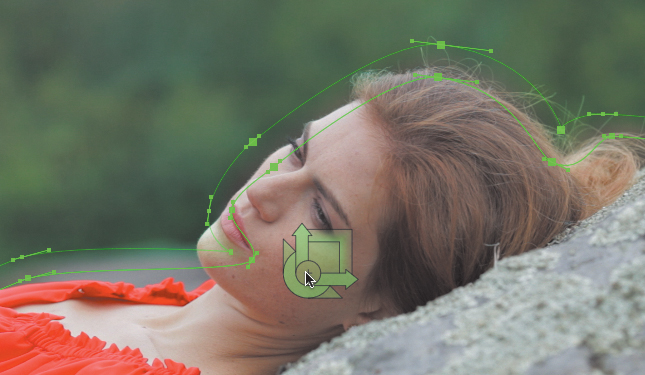
Each control point now has spline handles, and the overall shape has smoothed out to follow the curves of the woman’s position on the rock. You can use the three node type buttons to change one or more selected control points among three types of handles, depending on what kind of adjustment you need to make.
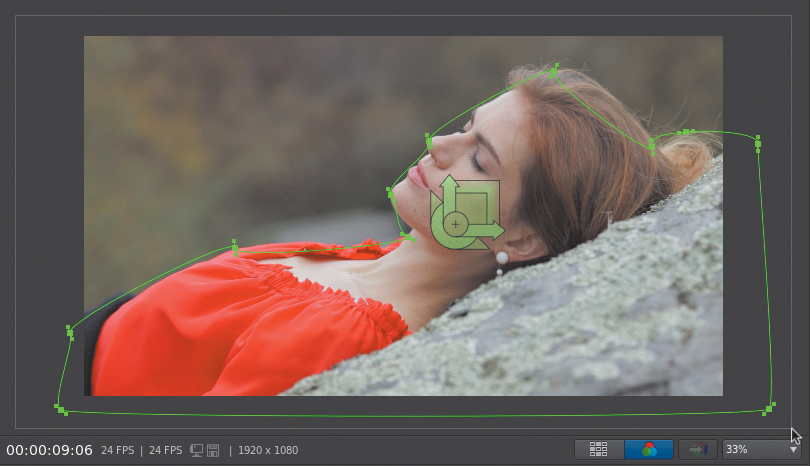
8. Click once in the background to deselect all the control points. Then use the spline handles to customize the shape so that it more accurately isolates the woman and rock from the foliage behind. If necessary, Command-scroll (Ctrl-scroll) to zoom into or out of the Monitor image to more accurately adjust the spline handles.
9. When you’re finished customizing the shape’s curves, click once in the background to deselect all the control points. Then use the widget to feather the edge of the overall shape and shrink the shape just a bit so that the feathered edge just barely intersects the edge of the woman.
At this point, you should have a shape that isolates the woman well, so it’s time to make a correction.
10. Open the Look tab, click the +P button to add a Primary layer, and then click the outside mask button to assign that correction layer to the outside of the mask.
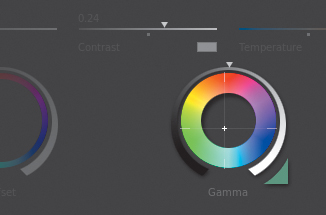
11. Drag the Gamma Color Balance control toward green to push the background foliage toward a more verdant hue. Then drag the Contrast slider to the left to add some definition to the background.
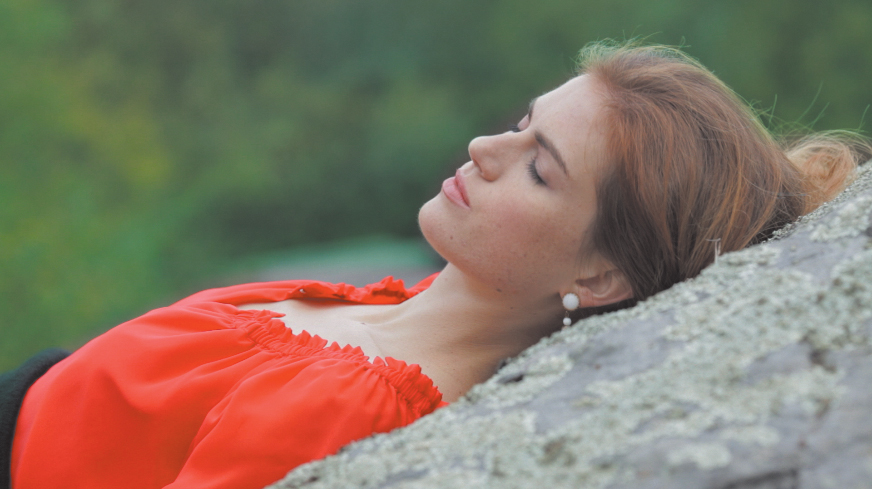
12. With this correction in place, play through the clip.
You should notice that as the woman turns her head, the mask that worked well before now reveals some fringing, especially around her head and hair.
This is easily corrected with some broader feathering.
13. Click the Mask panel, and draw a bounding box around the control points surrounding her head that reveal some fringing.
The mask widget’s influence changes depending on which control points are selected. If no control points are selected, the widget affects the overall shape. However, if one or more control points are selected, the widget will transform those points specifically, leaving the rest of the shape alone.
14. With the control points around the woman’s head selected, use the widget to reposition them closer to her head. Then drag the widget’s feather control to increase the feathering of just those points. When you’re finished, click anywhere outside of the shape to deselect all the control points.
Keep making adjustments until there’s a plausible separation between the woman and the greener background with a minimum of visible fringing.
Adjusting mask softness
At the end of the previous exercise, you started to make individual feathering adjustments to separate control points. In the following exercise, you’ll focus on adjusting individual control points to create custom feathering for more sophisticated blending effects.
1. Move the playhead to the seventh clip.

This clip has a very subtle primary adjustment to widen the contrast and neutralize warmth in the highlights. However, the client wants a more dramatic shadowy falloff toward the right side of the screen.
2. Click the Mask panel, click the vignette mask button, and use the widget handles to reposition, rotate, and resize the mask to look like the following screen shot.
3. Open the Look tab, click the +P button to add a Primary layer, and then click the inside mask button to assign that correction layer to the inside of the mask.
4. Drag the Gamma ring to the left to darken the area inside the mask.
This creates a not very well-integrated shadow against the wall that should be customized.
5. Click the Mask panel and drag the leftmost control point of the outer shape (the softness mask) so that it overlaps the woman’s face. Then drag the corresponding control point of the inner shape (the hard edge) to the left to create a diagonal falloff of shadow, similar to the following screen shot.
The outer softness mask can be reshaped to create custom feathering of any kind. In this example, you’re using a single feathered mask to do double duty, casting shadow on the wall and on the already-shadowed half of the woman’s face. However, there’s more you can do to the woman’s shoulder.
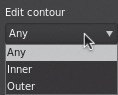
The Edit Contour menu lets you set which control points are editable, which helps you avoid adjusting any part of a mask you don’t want to. The default setting is Any, but you can also choose Inner or Outer. For now, leave this set to Any.
6. Click the add points button.
7. In Add Points mode, click once on the portion of the outer shape that overlaps the woman’s shoulder to add another control point to the shape. Before you continue, click the select points button, select the control point you just created, and click the Make Selected Points Smooth Spline button to lock both Bézier handles together.

You can always add or remove points from an existing shape using the edit buttons; by default added points have disconnected Bézier handles, which is good for some adjustments, but inconvenient for others.
![]() Note
Note
While in add points mode, you’ll continue to add or remove control points every time you click until you return to edit mode.
8. Click the select edit points button (the arrow) and adjust the new control point so the outer softness mask that overlaps the woman follows the contours of light and shadow falling off her left side, similar to the following screen shot.
Now that the shadow looks right, there’s an additional level of control you can exercise. Two sliders and a menu let you adjust how the falloff from the inner to the outer masks is contoured. You may need to drag the handle separating the Mask panel from the Timeline up to make room for these controls:

• The Falloff indicator provides a visualization of how the current Exponent and Weight settings are affecting shape feathering.
• The Exponent slider adds a slight nonlinearity to the distribution of feathering between the inner and outer shapes.
• The Weight slider lets you adjust how close to the inner or outer shapes the feathering is distributed. Lower settings pull the feathering back toward the inner shape, whereas higher settings push feathering out toward the outer shape.
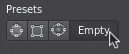
• A Preset menu lets you recall one of the six falloff presets.
These controls interact with one another, and you can use the shape you created in the previous example to experiment with them to see how different adjustments affect falloff.
Tracking masks
Throughout this lesson, you’ve created static masks in all the exercises. The movement in the clips hasn’t been drastic enough to give away the masks’ lack of motion. Indeed, if the feathering is soft enough and your mask placement is clever enough, you can get away with a fairly loose correlation between a mask and a moving subject. However, there are limits, and if the thing you’re adjusting moves too much, a masked correction can quickly look like a mistake unless you do something to match the motion of the mask to the subject.
Using motion tracking to follow camera motion
If a clip has motion that’s simply too much to overlook with details that will stick out if the mask doesn’t follow the motion of a subject or camera motion closely enough, SpeedGrade offers automated motion tracking that you can use to fix this.
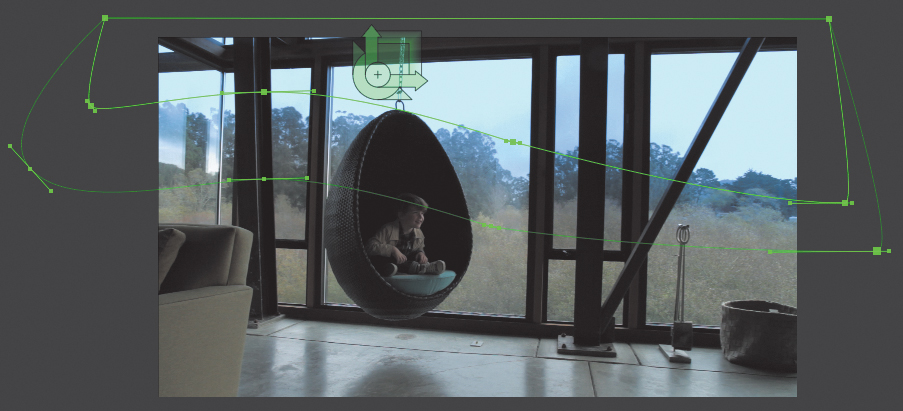
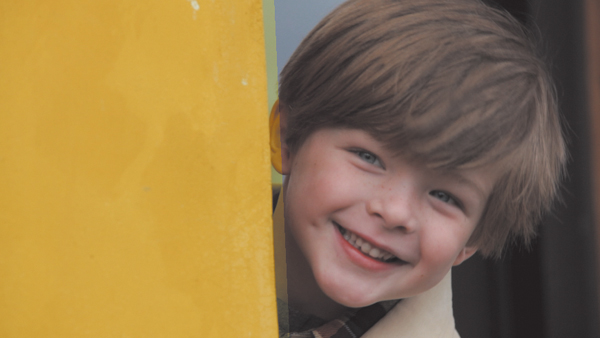
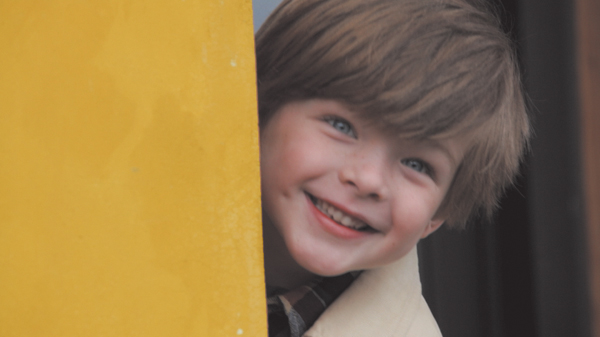
1. Move the playhead to the first frame of the eighth clip.
This clip has a primary adjustment that increases contrast and warms up the boy’s face, but the client wants a different color on the wall. Because the wall is so well defined and the boy doesn’t move in front of it, a shape will allow a nice, clean fix.
2. Click the Mask panel, click the square mask button, and use the widget handles to create an unfeathered region that fits the orange wall in the foreground and extends past the top and bottom of the image.
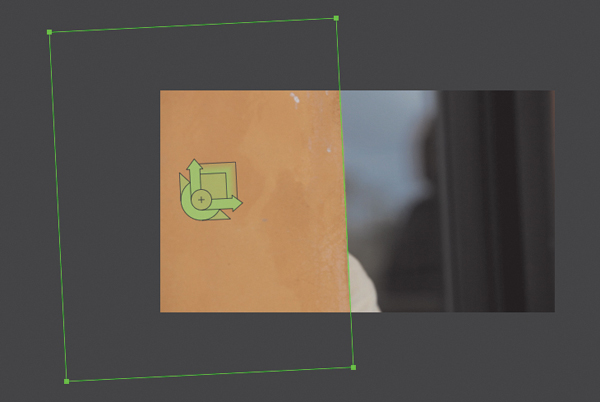
3. Open the Look tab, click the +P button to add a Primary layer, and then click the inside mask button to assign that correction layer to the inside of the mask.
4. Drag the Gamma color balance control toward yellow to change the color of the wall.
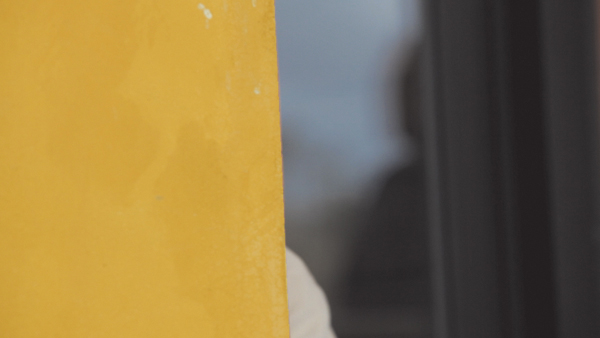
5. Now drag the playhead to scrub through the entire duration of the clip.
As you can see, when you get to the edge of the clip, the wall moves away from the shape you’ve drawn and a yellow fringe appears on the boy’s face. In this case, feathering probably won’t help.
Fortunately, there is an easy fix.
6. Move the playhead back to the first frame of the clip, and click the Track Object button in the Mask panel. (You may need to increase the height of the Mask panel to see this button.)
No options are available to select. When you click Track Object, SpeedGrade proceeds to track whatever happens to be inside the mask from the first frame to the last, generating keyframes at each frame until the analysis is complete.
Once tracking has concluded, the generated keyframes that appear above the tracked clip in the Timeline are averaged to reduce the total number of keyframes that appear. Moments of slow, predictable motion are averaged into fewer keyframes separated by arrows that indicate the keyframe interpolation that’s happening. Moments of fast, unpredictable motion result in one keyframe per frame.
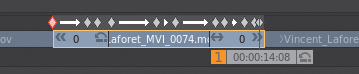
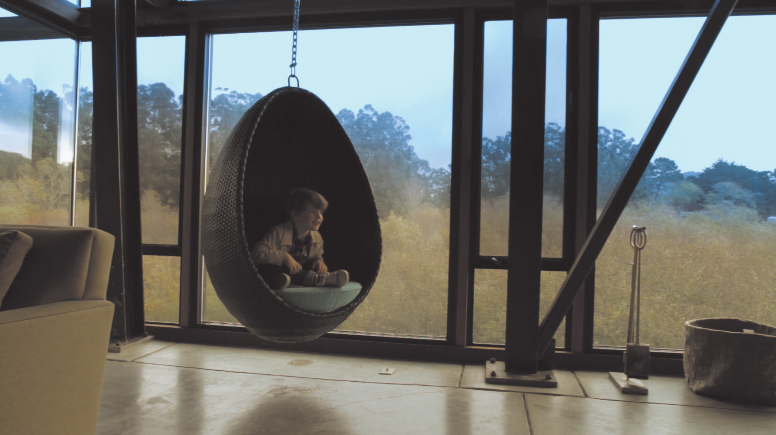
7. Scrub through the clip, and you’ll see that the mask hugs the wall, following the movement of the camera and resulting in a seamless effect.
Using motion tracking to follow a moving subject
In the next example, you’ll use motion tracking to make a mask follow the woman’s moving head.
1. Move the playhead to the first frame of the ninth clip.
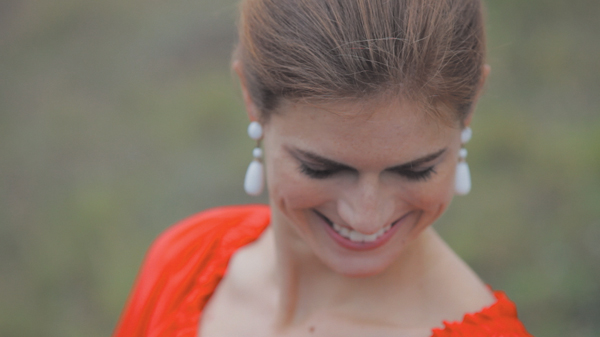
This clip has a primary adjustment that increases contrast, but the client wants the woman’s face to be brighter. As you saw in a previous exercise, this is an easy fix with an oval mask, but in this clip the woman’s face moves. Again, this is not a problem if you use motion tracking.
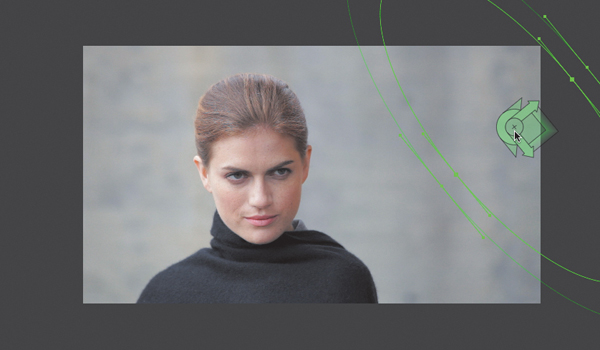
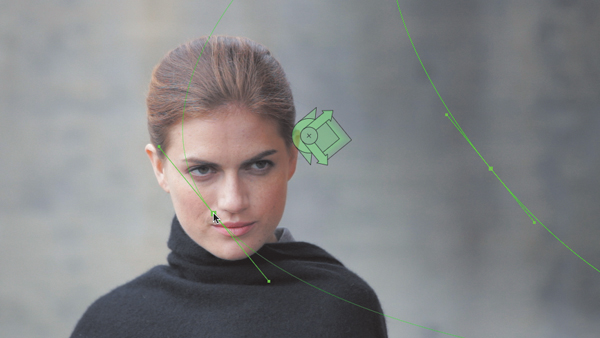
2. Click the Mask panel, click the circular mask button, and use the widget handles to create a feathered oval that fits the woman’s face, as in the following screen shot.
3. Open the Look tab, click the +P button to add a Primary layer, and then click the inside mask button to assign that correction layer to the inside of the mask.
4. Drag the Gain ring to the right to increase the lightness of the woman’s face so that the facial highlights in the Parade’s red channel hit 80%.
This sets you up to lighten the woman’s face, but now you need to track the oval to match the woman’s movement.
5. Before you start tracking, make sure the mask is well feathered. You want the lightness adjustment you made to blend into the background convincingly.
6. Make sure the playhead is on the first frame of the clip, and click Track Object.
When the tracking is done, scrub through the clip to see how well the mask fits the woman’s face. If all has gone well, you should now have a pleasing highlight on the woman’s face that follows her as she moves.
Tips for fixing problem tracks
1. Eliminate the tracked keyframes by clicking the Delete All Keyframes button.
2. Try moving the shape to another part of the woman’s face in the first frame of the clip and retrack.
3. If that doesn’t work, you can eliminate the tracked keyframes and modify the feathering of the mask to try to create a more convincing falloff.
4. It may simply be that you’re trying to make too aggressive an adjustment to her face. Easing off on how bright you’re trying to make her will result in a more realistic effect.
Review questions
1. What is a mask for?
2. How many masks can you have per grade?
3. Can you mask a correction layer using the inside, the outside, or either?
4. How many kinds of masks are there?
5. How can you adjust a mask that is cut off by the edge of the Monitor?
6. How do you draw a custom mask?
7. Can you switch a mask using Bézier curves to a polygon with sharp angles?
8. How do you adjust mask softness?
Review answers
1. Limiting the area of a correction using a geometric shape.
2. One.
3. Either.
4. Four; circular, square, vignette, and custom masks that you draw.
5. Zoom out of the Monitor.
6. Using the Mask panel’s Add Points mode.
7. Yes.
8. By using the softness control of the widget and by adjusting the outer softness shape of the mask’s onscreen control.