1. An Overview of Adobe SpeedGrade CC
Lesson Overview
In this lesson, you’ll learn about the following:
• How the SpeedGrade interface is arranged
• How to navigate your projects
• How to customize the areas of the SpeedGrade interface
This lesson will teach you how to work within the SpeedGrade interface. It should take approximately 30 minutes to complete.
Download the project files for this lesson from the Lesson & Update Files tab on your Account page at www.peachpit.com and store them on your computer in a convenient location, as described in the Getting Started section of this book. Your Accounts page is also where you’ll find any updates to the chapters or to the lesson files. Look on the Lesson & Update Files tab to access the most current content.

Getting started
Color correction is the process of adjusting the color, contrast, and texture of clips in a film or video so that they look great, are in balance with one another, have suitable levels for broadcast, and are stylistically in line with the needs of the program.
![]() Note
Note
If you have not already downloaded the project files for this lesson to your computer from your Account page, make sure to do so now. See “Getting Started” at the beginning of the book.
Generally speaking, camera original media is not always intended for delivery straight to an audience. A clip has never been shot that wouldn’t benefit from some level of adjustment, even if it’s just a slight darkening of the shadows. In worst-case scenarios, you may be presented with media that was underexposed or overexposed and be asked to “correct” it so it’s acceptable to the audience.
However, in the newer generation of digital cinema cameras, the cameras are often set to record media with a “flat” data profile that’s designed to preserve as much data from the shoot as possible. This media, although excellent for postproduction, won’t necessarily look very good. In fact, it requires grading to create a finished image with the full intended range of color and contrast. In this sense, digital grading is also a “development” process.

Making clips look good is only one aspect of the color correction process, however. Even the best shot clips in a scene will have slight variations from one angle to the next; this is even truer for documentary-style material shot in available light. You can use the same tools to balance out all of the clips in a particular scene so they appear consistent with one another, thus helping out the editor who’s trying to keep the edited pacing smooth and invisible to the audience.
The nicest grading in the world is useless if a broadcaster rejects it, so quality control remains an essential part of the process. Each broadcaster has specific maximum and minimum signal requirements that you are expected to adhere to, so evaluating the video signal using scopes and making adjustments to prevent the unwanted clipping of image detail later in the process are both important tasks.
In addition, there is the artistry of the job. Each program, whether it’s narrative, documentary, or promotional, has individual stylistic requirements. This may be as simple as “warming up” a clip by adding a bit of orange to the highlights, or it can be as complex as creating an aged film look by abusing the color channels, dropping saturation, washing out the shadows, and adding darkened vignetting at the edges. Whatever the needs of your program, you have many tools for delivering an artistically attractive program.
Grading in Adobe SpeedGrade
Adobe SpeedGrade is a dedicated color correction application that’s been designed to do all of the aforementioned tasks quickly and efficiently. Once you move an edited sequence into SpeedGrade, you have tools for quickly making image-wide color and contrast adjustments, zeroing in on specific features within the frame for targeted alteration, and adding custom-look layers to create more stylized adjustments than can be accomplished with the color controls alone.
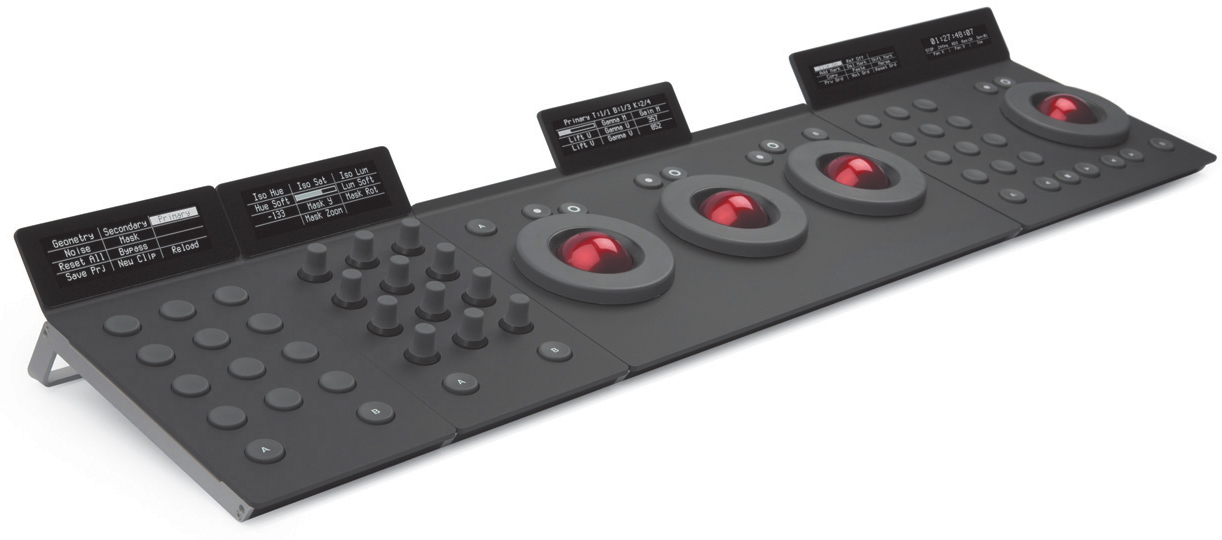
SpeedGrade has a unique onscreen interface that provides instant access to a variety of specific color adjustment tools. However, SpeedGrade is also compatible with third-party control surfaces, such as the Tangent Designs CP-200 series, Wave, and Element, which let you adjust parameters using physical knobs, rings, trackballs, and buttons, so you can work even more quickly and comfortably.
The SpeedGrade workflow
Adobe SpeedGrade supports a wide variety of media formats, including a subset of formats that are compatible with Adobe Premiere Pro. This makes it straightforward to move edited projects that use supported formats from Adobe Premiere Pro into SpeedGrade for grading before moving on to the final finishing aspect of the postproduction process. Working with SpeedGrade is simple:
1. Send an edited sequence from Adobe Premiere Pro to the SpeedGrade Timeline using one of a variety of workflows appropriate to your particular project. See Chapter 2 for more information about this process.
2. Use the Adobe SpeedGrade toolset to apply Primary corrections (which affect the entire image) and Secondary corrections (which affect specific features) as needed to create the look that’s right for each scene. More sophisticated looks can be created by adding Custom Look Layers to apply sophisticated filtering effects to your grade.
3. Render your final graded video media using the controls in the Render tab. If necessary, you can send the Timeline or the rendered, graded media back to Adobe Premiere Pro to finish the program by adding titling or additional compositing effects.
The following lessons and those in subsequent chapters take you through this process to give you a solid foundation for getting started with Adobe SpeedGrade.
Touring Adobe SpeedGrade
Before doing anything else, let’s take a quick look at each of the components of the SpeedGrade interface. The SpeedGrade user interface is specifically developed to make the process of importing, grading, and outputting media quick and efficient.
As a result, SpeedGrade probably doesn’t look like any other application you’ve ever used. However, once you get used to where everything is, you’ll find you can get around very easily.
One notable difference between SpeedGrade and other applications is that there’s no functionality in the menu bar other than the Quit SpeedGrade command in the SpeedGrade menu (Windows has no menu bar at all). Instead, all available commands and controls are in the Adobe SpeedGrade window.
When you first open SpeedGrade
Adobe SpeedGrade CC is divided into three main areas:
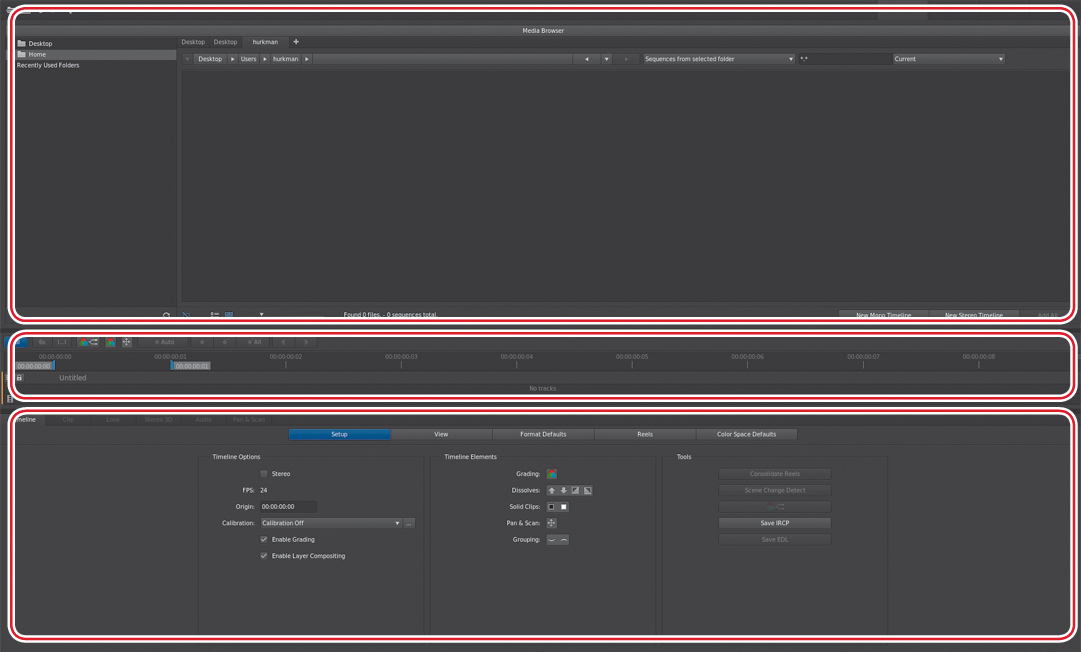
• The top region contains the Desktop media browser, the Monitor, the Render Result tab, the Output tab, and the Preferences window. Each tab is available from a strip at the very top of the window.
• The SpeedGrade Timeline runs through the middle of the window, from left to right, and has the option to either show or hide each clip’s visual content via a filmstrip view.
• The bottom area contains the bulk of SpeedGrade’s controls, which are organized into a second series of tabs just underneath the Timeline. These tabs include the Timeline, Clip, and Look controls, and other tabs of controls for more specific purposes.
If you open SpeedGrade on its own, by default the Media tab—showing the Desktop media browser—occupies the top of the window. The Timeline tab, open to the Setup panel, occupies the bottom, as shown in the preceding figure. This interface layout may not look particularly exciting, but it positions you for setting up a project and importing an Edit Decision List (EDL) and/or media to begin work.
In particular, with the Desktop media browser tab open, you can navigate the hierarchy of volumes and folders on your computer to find EDLs or media that you want to import into SpeedGrade. Once you find the files you need, you can simply drag EDLs and clips from the Desktop media browser tab into the Timeline below to add them to a new project.
Opening the first tutorial project
Before getting started, you’ll open a project to see what SpeedGrade looks like when you first launch it.
1. Follow the instructions in the “Getting Started” section of this book to download the lesson files and media .zip files. Make sure you’ve copied the downloaded .zip file to the fastest hard drive connected to your computer, and follow the instructions to unzip and organize all files as described for consistency with this book.
2. Launch SpeedGrade.
3. If necessary, click the Media tab at the top of the SpeedGrade window to open the Media browser and use one of the desktop tabs to begin browsing files.
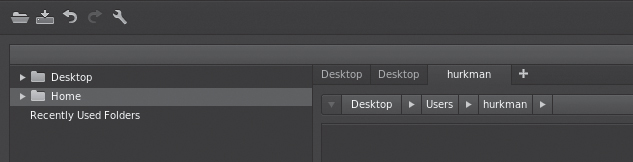
4. Use the hierarchical list at the left to find the disk and folder where you copied the lesson media. Double-click Desktop to open its contents, which lists all the hard drives and network volumes attached to your computer (these appear at the top of the hierarchical list).
5. Double-click the hard drive in the list that contains your media to open it and examine its contents.
As you open an item in the list, you can see the disclosure triangle to the left of the disk or folder name rotate down; the name of the Desktop tab changes to reflect the currently selected item in the list.
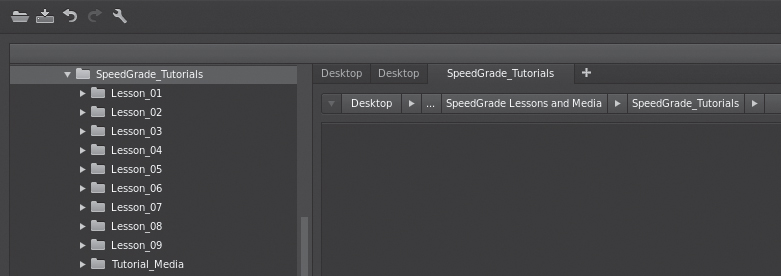
6. Scroll down the list until you find the SpeedGrade_Tutorials folder you copied, and open it. Click the Lesson_01 folder once to select it or double-click it to open it. In either case, the folder’s contents appear to the right.
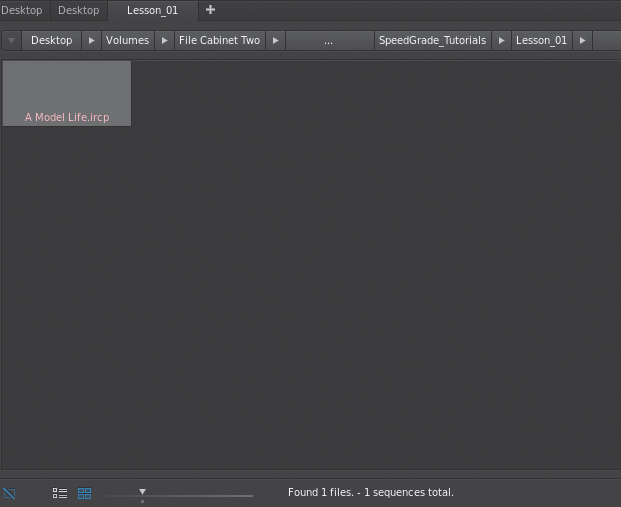
7. Double-click the A Model Life.ircp item to open that project.
8. If the clips in the Timeline appear brown, open the Tutorial_Media folder in the media browser list, open the Reels panel in the Timeline tab, and then click the Load From Desktop button to relink the clips, which should turn gray.
As you can see, SpeedGrade project files end with the .ircp file extension. If no other project is open, double-clicking a file opens that project’s clips and grade information into the Timeline.
Working in SpeedGrade
Once you’ve opened a project and loaded its accompanying media, you’re ready to start grading. You’ll need to open two other tabs to begin work.
1. Click the Color tab at the top of the SpeedGrade window.
2. Click the Look tab (third from the left) underneath the Timeline.
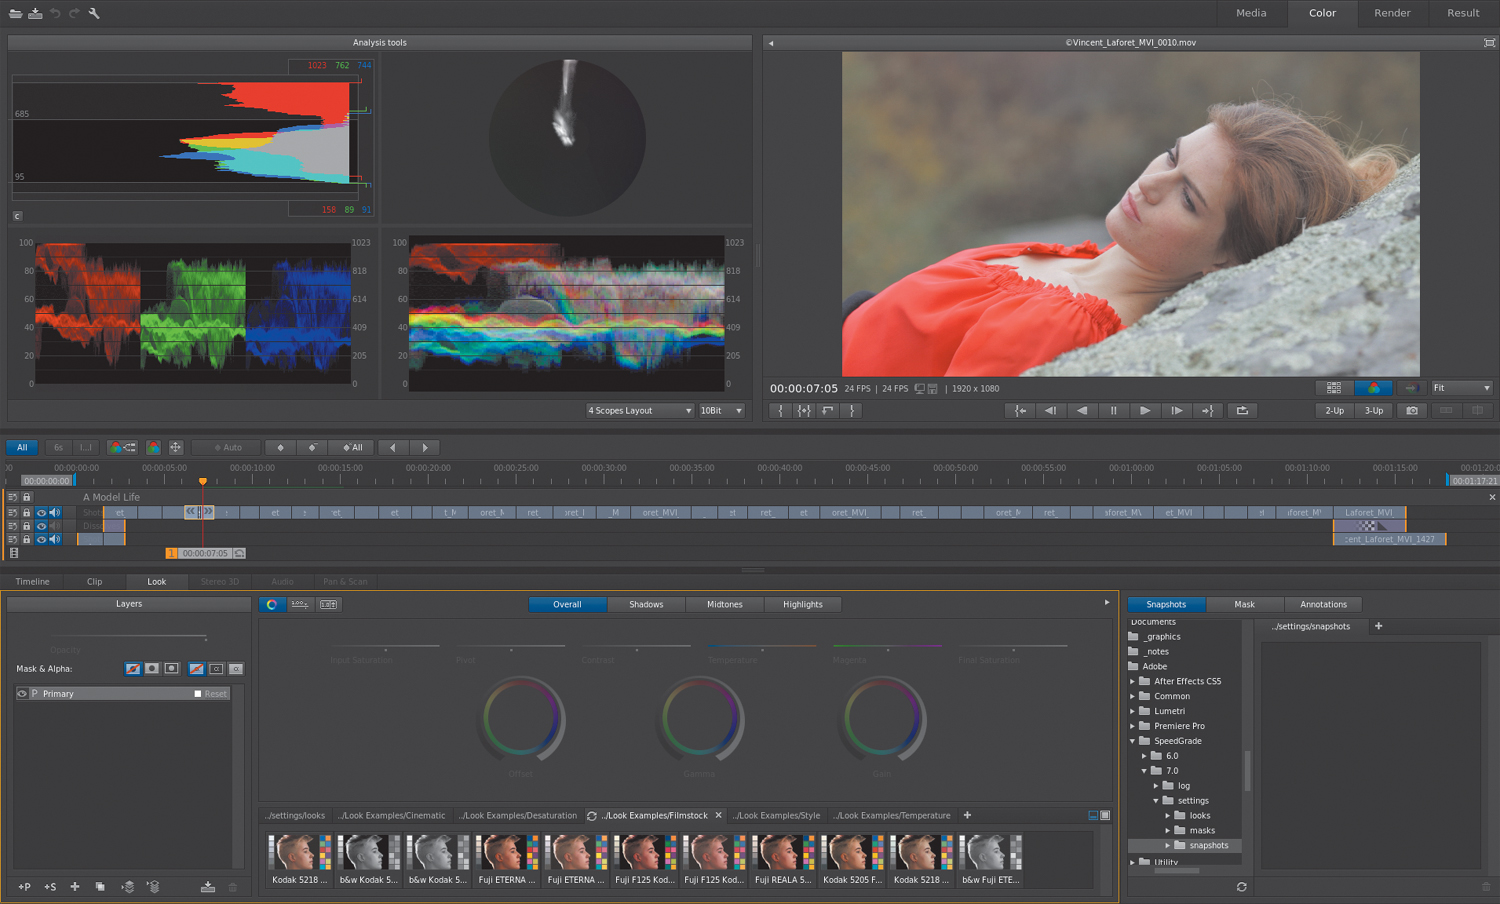
With the Color and Look tabs open, SpeedGrade can now be seen as the full-featured grading application that it is.
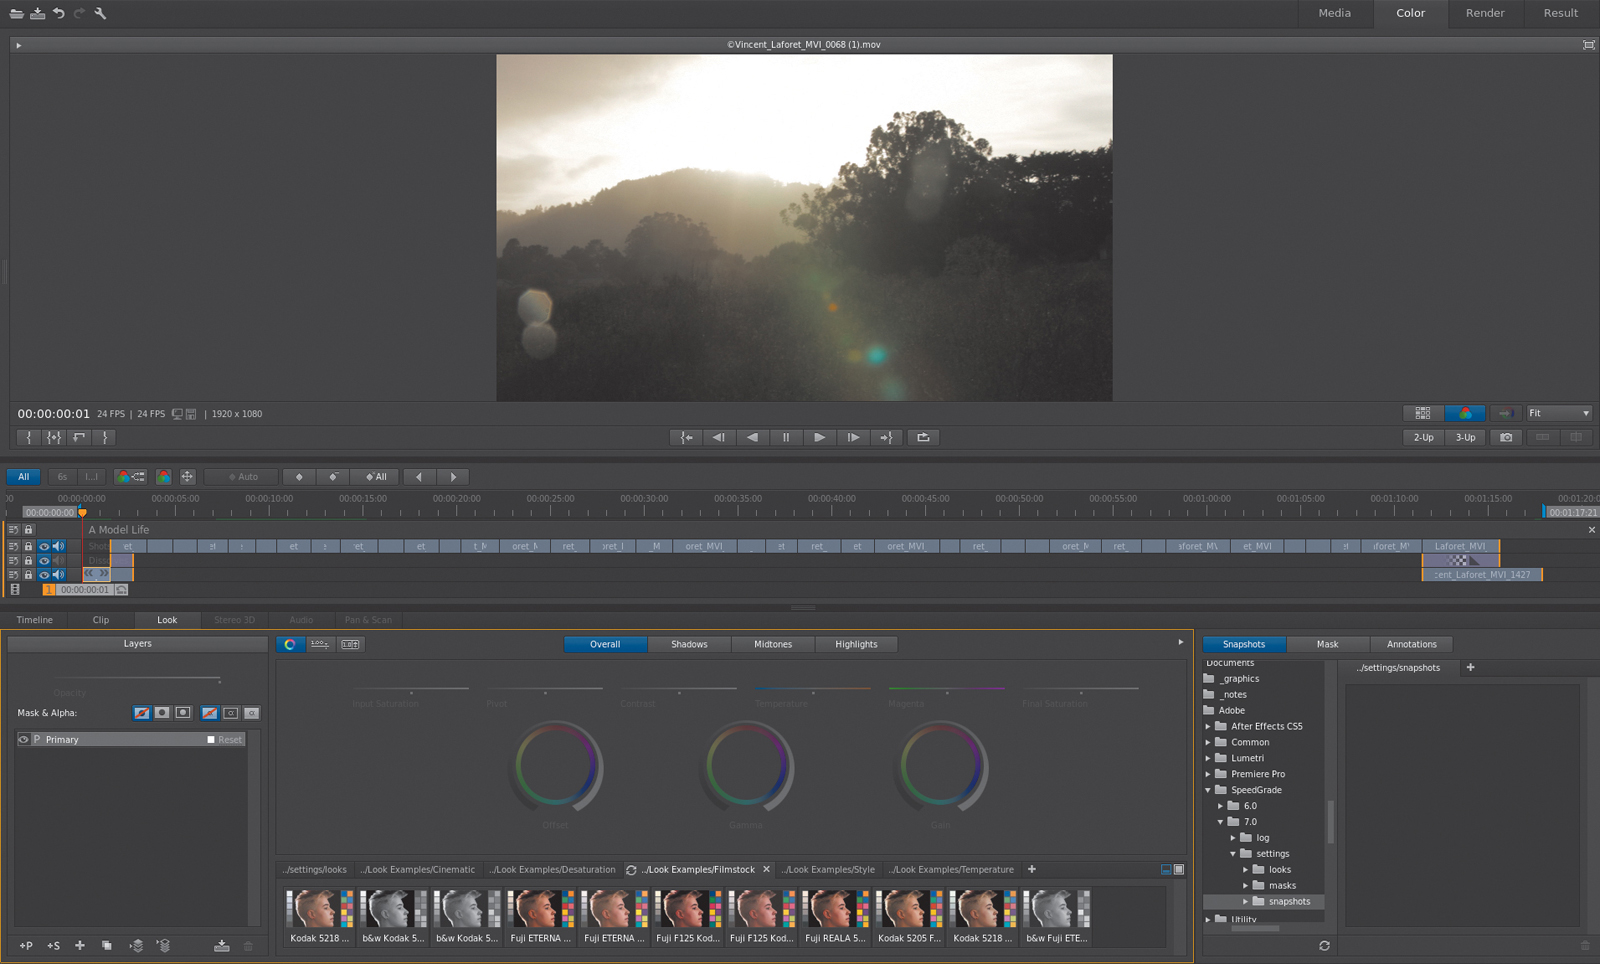
The Monitor
The Color tab at the top contains, by default, the image of the frame at the position of the playhead. The monitored image is resizable; this area also contains SpeedGrade’s built-in video scopes, which can be opened or closed as needed by clicking the small arrow at the upper-left corner of the Color tab area, or by pressing A (for Analysis).

SpeedGrade has a Histogram, Vectorscope, Parade scope, and a Luma Waveform; each can be displayed individually or as a two-, three-, or four-up layout to the left of the Monitor.
Directly underneath the Monitor are four groups of controls containing:
• Descriptive information about the project.
• Four buttons for setting In and Out points.
• Transport controls.
• Additional buttons at right for setting monitoring options, turning the overall grade on and off, selecting automatic color-matching of clips, zooming the image, taking snapshots for image comparison, and controlling split-screen and multiple playhead monitoring.

The Timeline
Once you open a project, import an EDL, or add a collection of media from the Desktop media browser, the Timeline fills up with a sequence of clips.
Because SpeedGrade was originally designed with EDL project import in mind, the Timeline holds only a single track of clips (unless the current project contains dissolves, in which case each dissolve will be structured as A and B rolls across two tracks).

However, you can have multiple grading tracks in the Timeline, as you’ll see in Chapter 6. Multiple grading tracks let you combine several grades, one on top of another. Grading tracks also let you apply a single grade to a range of clips.
Using the New Mono Timeline and New Stereo Timeline buttons in the Media tab, you can create multiple Timelines to have open at the same time, which lets you compare the contents of one Timeline to those of another via a split-screen in the Monitor. A playhead at the bottom of each Timeline shows the current frame of the current clip, which corresponds to the image in the Monitor. Dragging this playhead lets you scrub quickly through your project.
The Look tab
The Look tab shows all the controls available for making primary and secondary color corrections, either generally or selectively altering the color, contrast, and texture of individual clips or groups of clips using a Grading track.
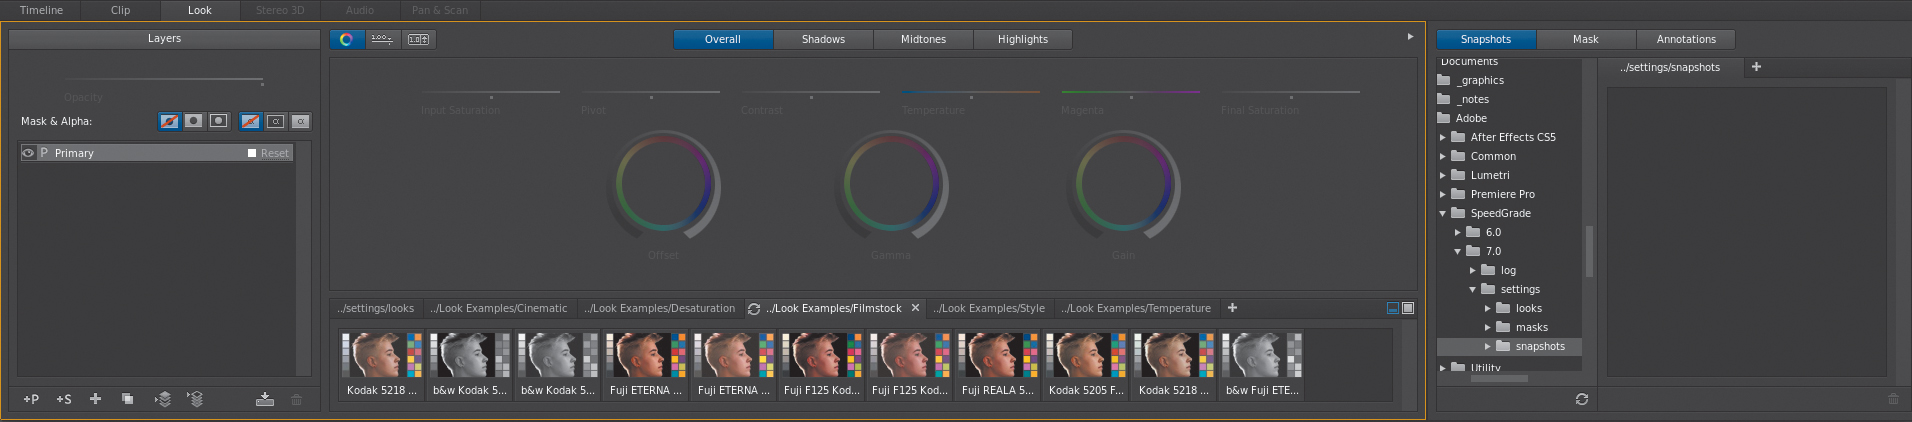
The Look tab is divided into four areas of interest:
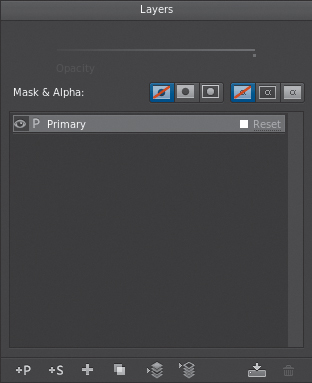
• The Layers list lets you create and manage multiple layers of correction. By default, each clip begins with a single Primary layer, and you can add additional Primary or Secondary layers as necessary to create more elaborate grades. The type of layer you select dictates which controls display elsewhere in the Look tab.
• The bulk of the Look tab consists of the Look panel, which contains different sliders and color balance controls for making color balance adjustments. Most of these controls can also be adjusted via an optional control surface. Currently the Tangent Element, Wave, or CP-200 series panels are supported. If you don’t have a control surface, you can make adjustments using a mouse or pen and tablet.
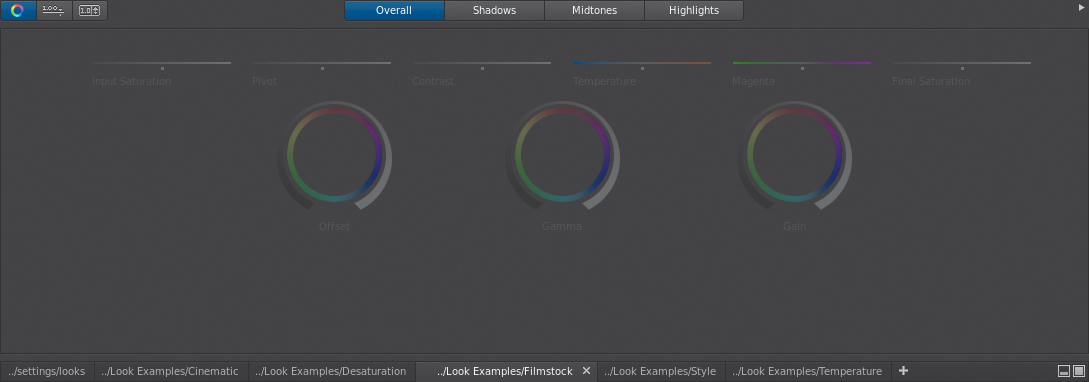
• At the bottom of the Look tab is the Look browser, which provides a series of tabs that you can use to save looks for future use. When you first install SpeedGrade, the Look browser is populated with a variety of stylistic looks that you can use to get started, but over time you’ll modify these tabs and their contents with your own saved grades. Using the two buttons in the upper right, you can close the Look browser or expand it into a larger area with a navigable hierarchical list.

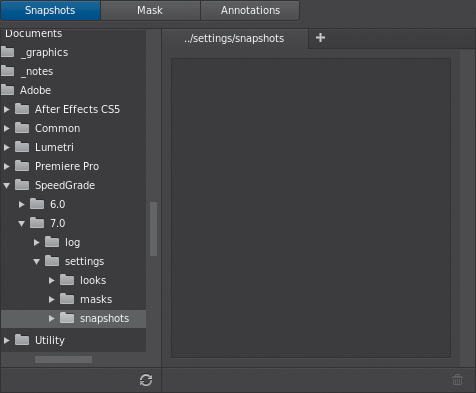
• To the right of the Look panel is a set of three panels with controls for organizing and recalling Snapshots to facilitate image comparison, Mask controls for using shapes to limit the effect of one or more corrections, and Annotations for keeping track of notes and client feedback as you work.
As you work, you can resize the bottom panel, including the Look tab, to free up more room to examine and manipulate your image. You can also hide the Look panel and leave the Timeline visible by pressing P. Press P again to toggle back to the full interface layout.
You can also set the Monitor to image-only mode by clicking the small button at the upper right of the Monitor or by pressing Shift-H, which hides all other controls and expands the Monitor image to fill the entire screen.
Either option can be useful if you’re using a control surface, which you can use to continue to manipulate various controls while the Monitor is occupying most of your screen. For more information about using a control surface with SpeedGrade, see the end of Chapter 3.
Getting around your project
Before you can start grading, you need to know how to find your way around your own Timeline. Now that you have a general orientation as to where everything is, it’s time to look a little deeper at how to use the Timeline to navigate and play through your project along with how to use the Monitor and video scopes to evaluate the images you’re working on.
Navigating with the playhead
In SpeedGrade, a project (saved as an .ircp file) consists solely of the contents of the Timeline. SpeedGrade is designed to use the Desktop media browser to quickly move whatever media you might need to add to a project into the Timeline. The only media references that are saved intrinsically within an .ircp file are the clips in the Timeline.
The Timeline has a set of header controls to the left of the tracks, a Timeline ruler that runs along the top, and a playhead at the bottom.
1. If it’s not already open, click the Color tab to show the image corresponding to the current frame at the position of the playhead.
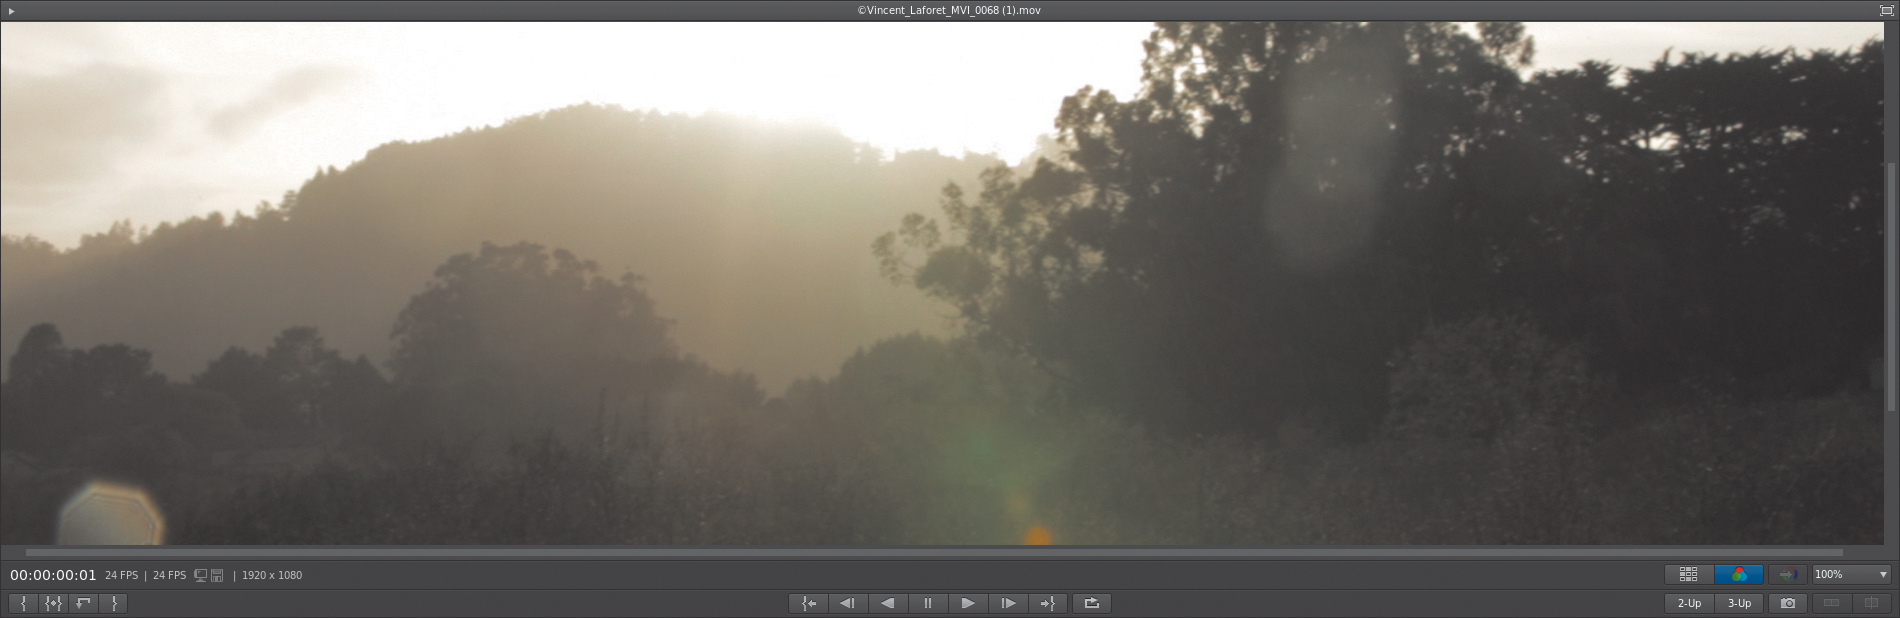
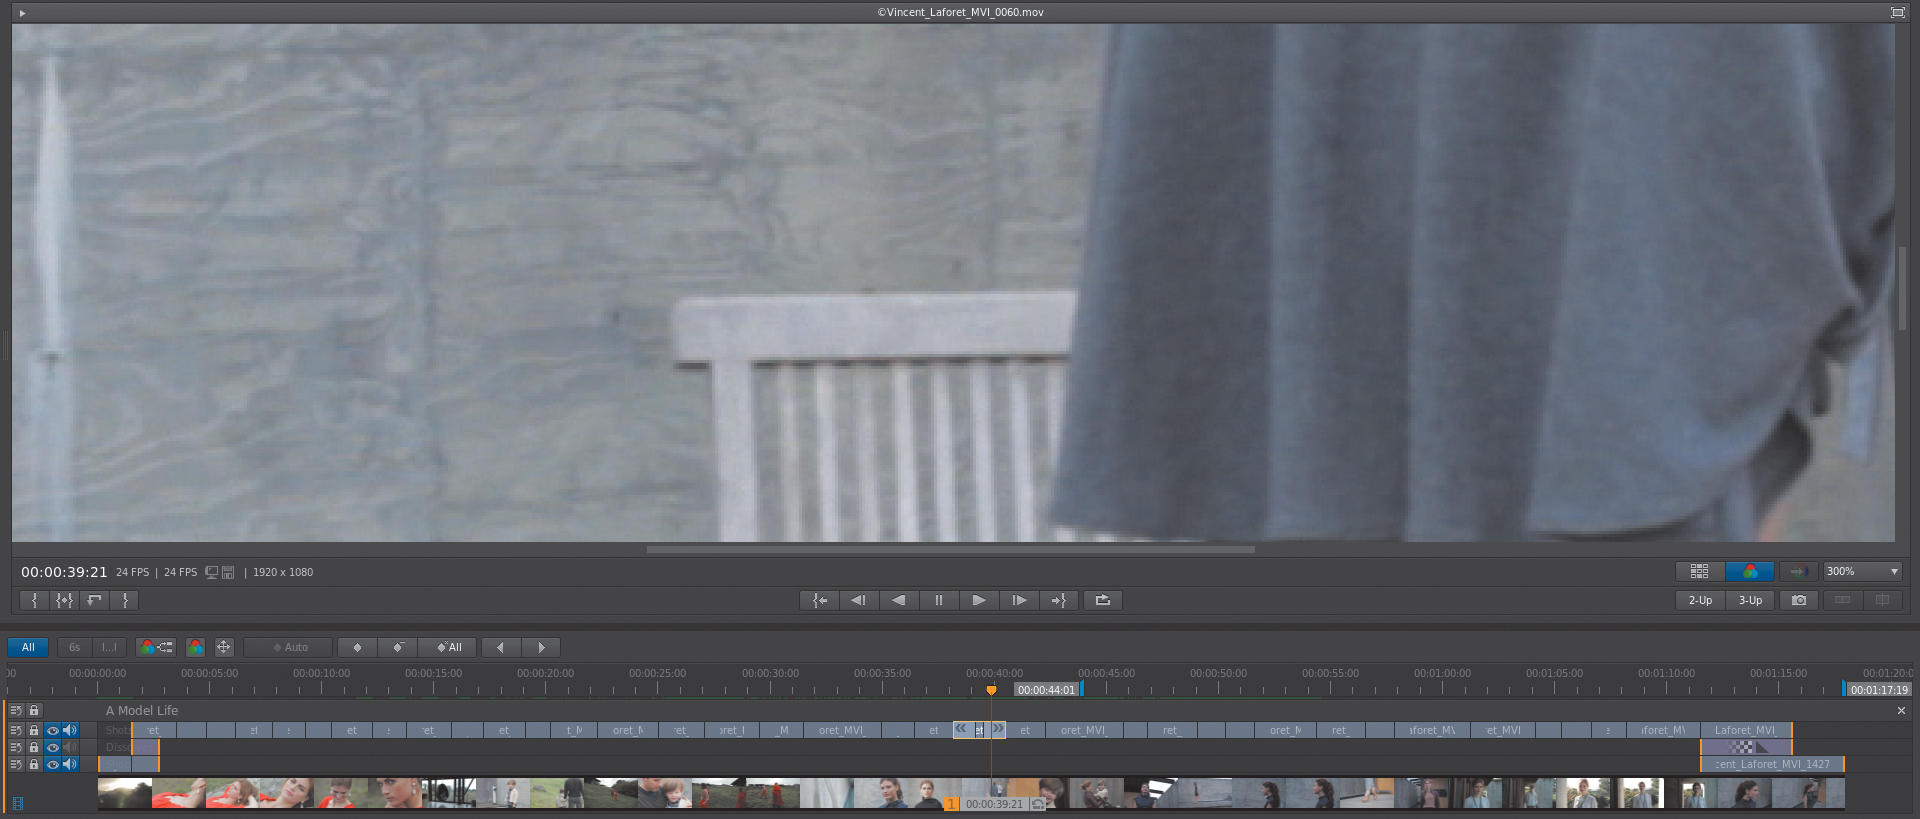
The Tutorial project contains high-definition clips, so if you ever select a zoom level other than Fit, your initial view of the image may be zoomed in too far, cropping off the top and bottom of the image.
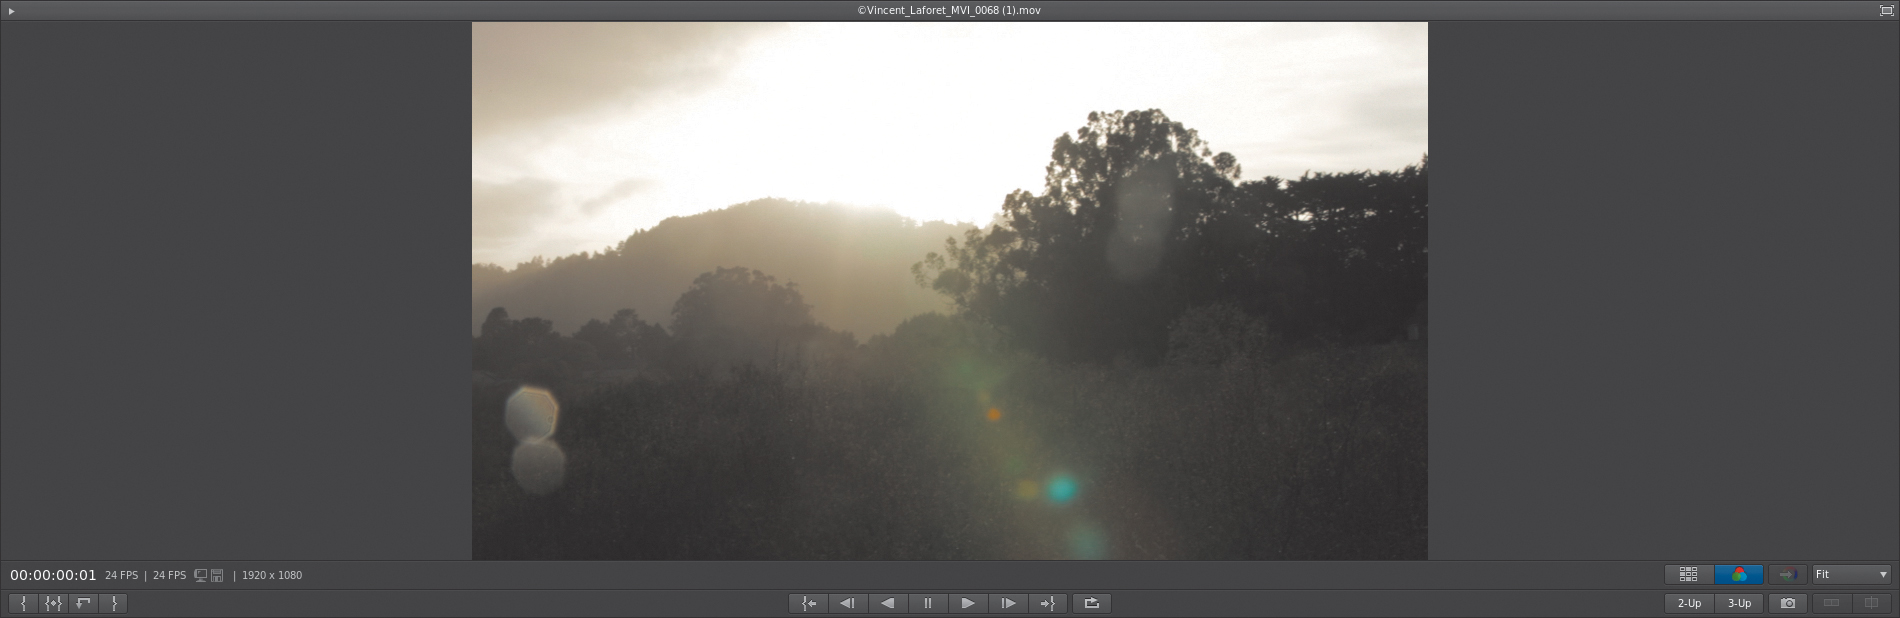
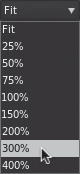
2. Choose Fit from the Zoom Level pop-up menu.
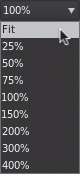
The image should appear entirely within the current area of the Monitor. Once you choose Fit, the image continuously rescales itself to fit within the current size of the Monitor, even if you resize it.
The Transport controls at the bottom of the Monitor work similarly to most other transport controls you’ve seen. You will find controls for moving the playhead to the In point, moving one frame back, playing in reverse, pausing, playing forward, moving one frame forward, and moving the playhead to the Out point.
These controls are useful if you’re driving with a mouse or pen alone, but in most instances you’ll be using different sets of keyboard controls or a control surface to control playback.
3. Press the spacebar once to begin playback; press it again to stop. Press the right arrow and left arrow to move one frame forward and one frame back, respectively. These are the quickest and easiest ways to control playback, but you can also use the JKL keys to control playback in more sophisticated ways.
4. Press L once to start playback; then after a few moments press K to stop playback, and press J to reverse playback. Press K again to stop playback when the playhead goes back to where it started.
Using these three keys to control playback makes it easy to move around the Timeline. You can do more with these three keys as well.
5. Press and hold K while simultaneously tapping L to move the playhead forward frame by frame. Then press and hold K while tapping J to move the playhead back frame by frame.
Using the same three keys to also move one frame at a time is very efficient, but that’s not all you can do.
6. Press L once to begin forward playback; then press it two more times to increase playback speed twice to fast forward. Press K to stop playback, and then press J three times to play in fast rewind.

Using the JKL keys is an effective way of playing through the Timeline with great precision. The JKL keys provide access to each of the graphical Transport controls in the Viewer. However, at times it will be faster to navigate a long Timeline using the mouse.
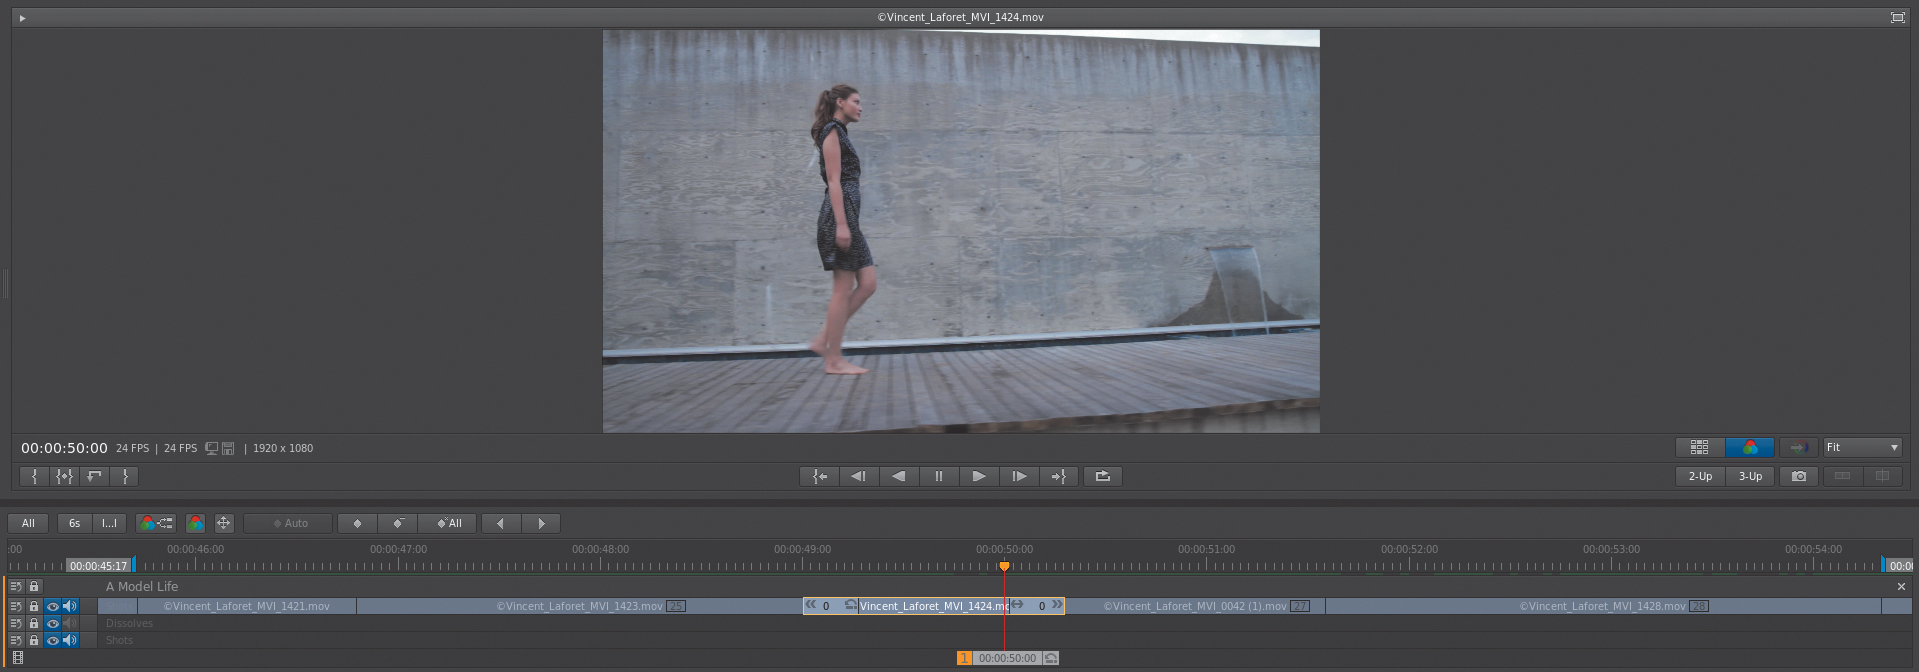
7. Drag the playhead under the Timeline until its timecode field displays 00:00:35:16.
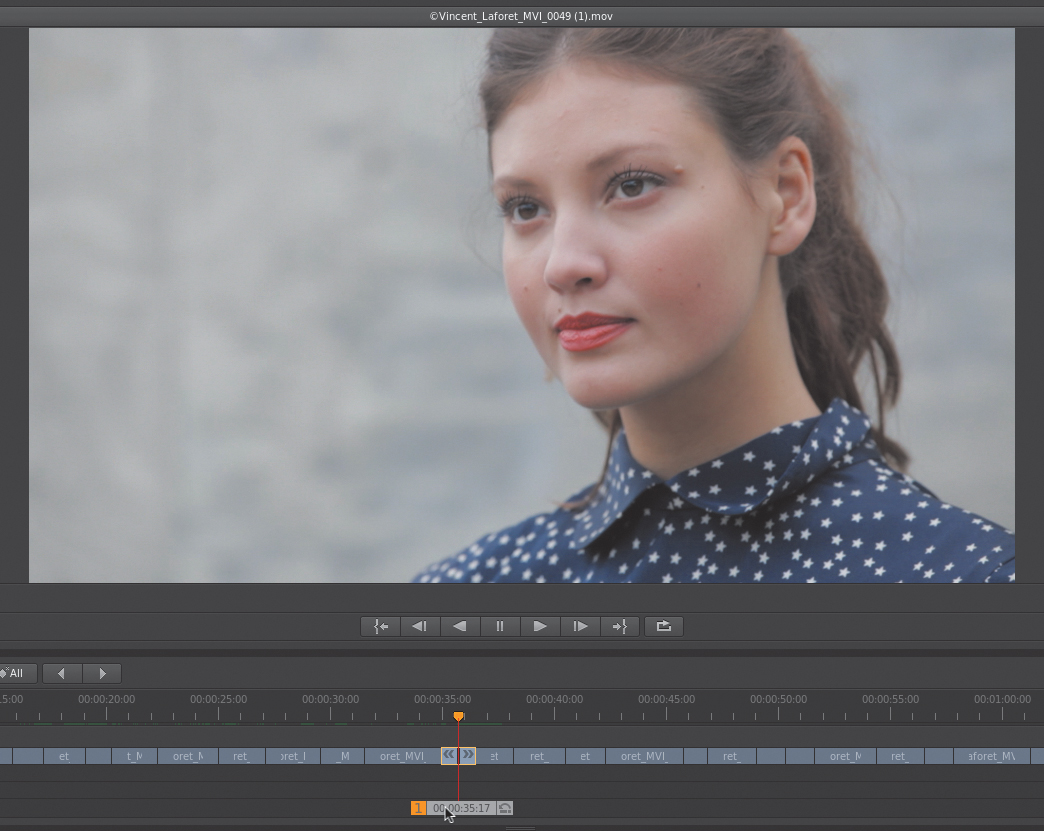
Dragging the playhead lets you scrub through the visible area of the Timeline, quickly examining large portions of your project.
8. Click once anywhere in the Timeline ruler above the clips or in the playhead scrub area below the clips to instantly jump the playhead to that frame.
The playhead contains different controls, some of which only matter when you use multiple playheads (covered in Chapter 6). The middle of the playhead displays a timecode for the currently displayed frame at the position of the centered red line intersecting each clip in each track of the current project.
You can also navigate the Timeline using absolute (Timeline position) or relative (plus or minus relative to the playhead) timecode values.
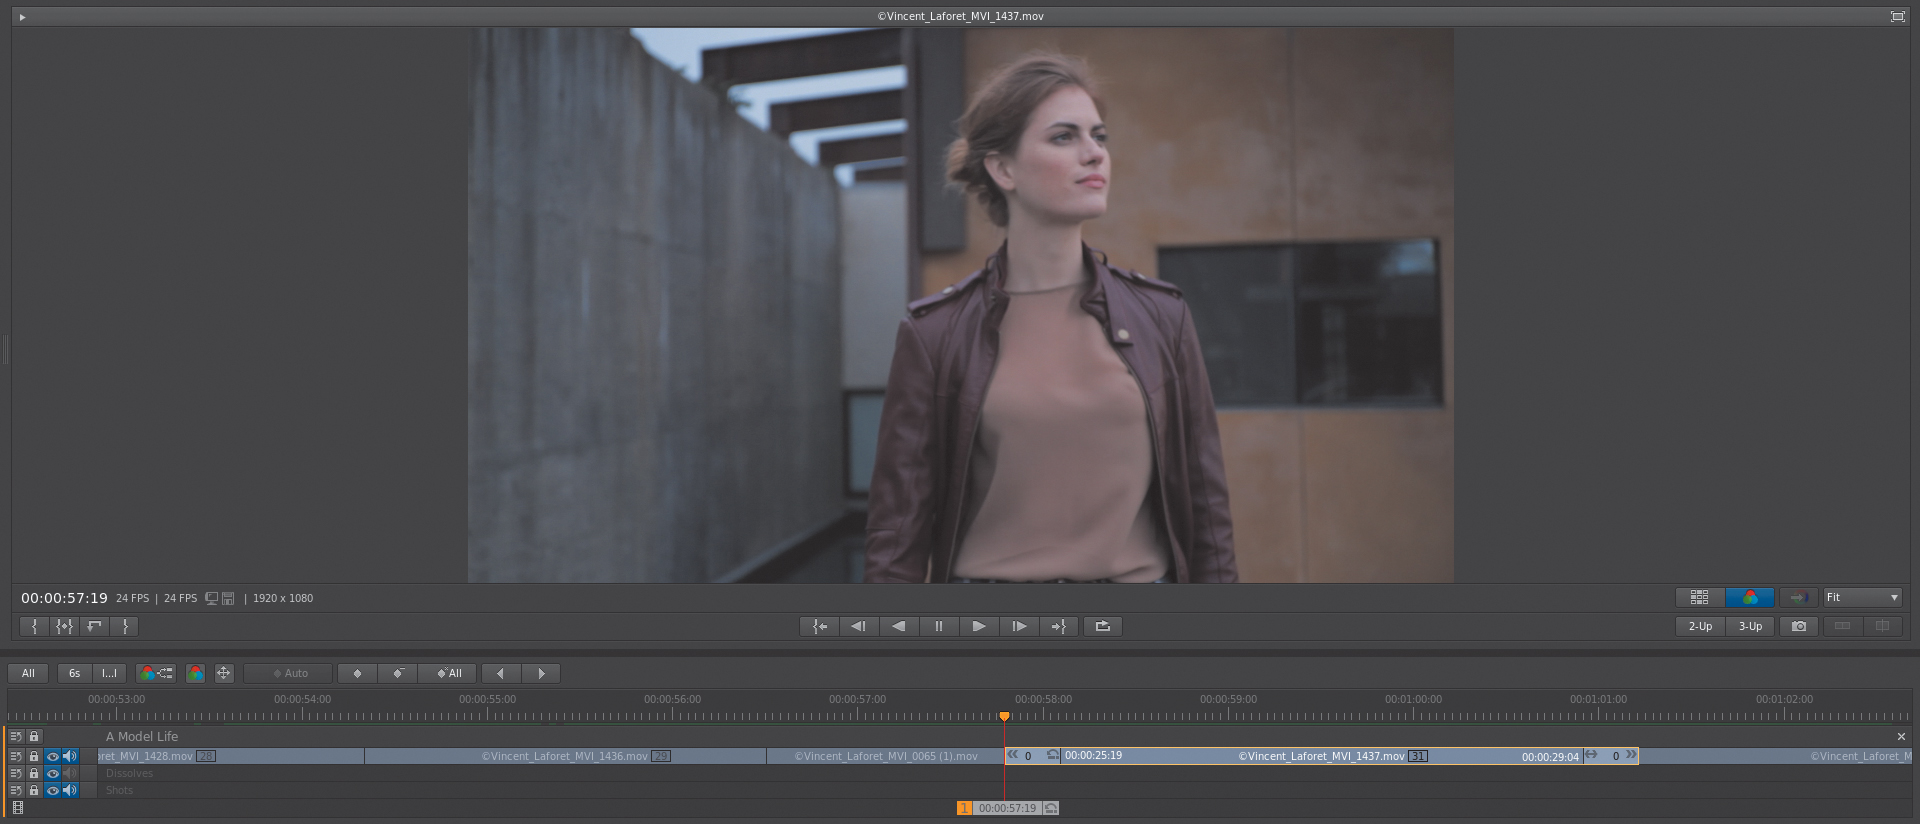
9. Double-click the playhead to show the timecode entry field; then type 5911 and press Return (Enter).
The playhead jumps to 00:00:59:11, which is an absolute timecode value. When you’re entering timecode in this way, there’s no need to enter leading zeroes or separators. Just type the timecode value from the leftmost number to the right, and press Return (Enter) to jump to that frame.
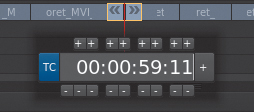
10. Double-click the playhead again, but don’t type anything yet.
Double-clicking the playhead opens an editable timecode field. Notice the additional controls. Plus and minus signs above and below each numeral let you modify the timecode value using a mouse or pen. A TC button at the left lets you switch between entering timecodes and frame numbers. You will also see a large plus button at the right.
11. Click the plus button.
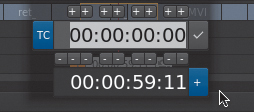
The timecode entry field changes, so the current timecode value is displayed underneath and the editable field shows all zeros.
12. Type 5, and then press Return (Enter).
The 5 has now been added to the timecode value in the editable field.
13. Press Return (Enter) again.
The playhead now moves forward five frames. This is an example of navigating by a relative timecode value. It’s also possible to jump the playhead forward and backward from edit point to edit point; this lets you quickly move from one clip to the next and compare the first frame of two adjacent clips.
14. When you’re navigating with the arrow keys, press the Command (Ctrl) in addition to the arrow key to jump to the first frame of the previous clip (left arrow) or the first frame of the next clip (right arrow). If you have multiple tracks, press Command-Shift (Ctrl-Shift) in addition to the arrow key to move to the next clip up (up arrow) or down (down arrow) in higher and lower tracks.
Controlling Timeline visibility
Now that you know the basics of playing through and navigating the Timeline, you can learn how to customize the range of clips visible in the Timeline to focus on a specific area of the project you’re working on. In the process, you’ll also see how the Timeline can be customized in different ways.
The Timeline View controls at the far left, above the Timeline, let you define how much of the Timeline is visible while you work.
By default, the All button is enabled, which sets SpeedGrade to always show every clip in the Timeline, no matter how many there are. This is an absolute view of your project that makes it fast to navigate. However, long Timelines with a lot of clips may appear a bit crowded.
1. Click the All button to turn it off, and then press the spacebar to initiate playback.
With All disabled, the Timeline is always centered on the current position of the playhead, which remains fixed. Playing your project or moving the playhead in this mode has the effect of scrolling the Timeline.
In addition, the Timeline zooms all the way in, so you can’t really see that much of your project.
2. Press Alt (Option) and push the scroll wheel of your mouse up to zoom into the Timeline. Keep Alt (Option) pressed and roll the scroll wheel of your mouse down to zoom out of the Timeline.
The two buttons labeled 6s and |...| to the right of the All button are for changing the Timeline zoom level to preset amounts. These can be useful if you’re not using a mouse.
3. Click 6s.
The Timeline zooms in to the six seconds immediately surrounding the playhead.
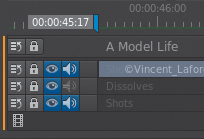
4. Drag the playhead to timecode 00:00:45:17 (or thereabouts), and click the Set In Point button (to the left of the Monitor Transport controls) or press I.
5. Next, drag the playhead to 00:00:54:07, click the Set Out Point button (or press O), and then click the |...| button (between the 6s and All buttons).
This zooms the Timeline to the section defined by the In and Out points you’ve created. As you play through the clip, the zoomed in section of the Timeline scrolls from right to left as the playhead stays locked in the center of the Timeline.
Now is a good time to quickly loop the clip. The Loop button is to the right of the Monitor Transport controls; it’s default mode is “loop from the beginning,” with the loop points defined by the Timeline’s In and Out points. If you play the Timeline right now, you’ll find that you’re looping the same section of the Timeline that you’ve zoomed into.
The Loop button has three states, which you can select among by clicking the Loop button repeatedly.
6. Double-click the clip that currently intersects the playhead. Then click the Loop button once so it resembles a left and right arrow, and press the spacebar to begin playback. Double-clicking a clip in the Timeline automatically sets the In and Out points to the duration of that clip.
The second loop mode is a “ping pong” effect, where you play forward, reverse from the beginning of a clip to the end, and then play back to the beginning again.
The third loop mode disables looping altogether.
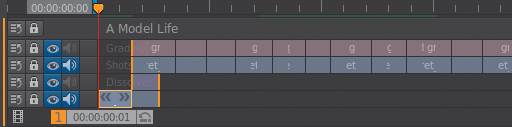
Timeline header controls
To complete the in-depth examination of the Timeline, let’s look at the track header controls at the left. A summary of the five controls follows:
• The Drag track handle lets you reposition tracks up or down in the Timeline. Dragging this control completely out of the Timeline deletes that track and its contents.
• Lock track prevents you from making any edits to the position or timing of clips on that track, but it doesn’t prevent you from making grades.
• Disable track turns off the contents of that track.
• Mute track mutes any audio associated with that track.
• Underneath these controls, a Filmstrip Visibility button lets you toggle a filmstrip view on and off. The filmstrip shows you a series of thumbnails under each track that provides a clear visual reference of the contents of each clip.

Customizing the Monitor
Now that you’re familiar with navigating the contents of the Timeline, let’s look more closely at how to customize the contents of the Monitor so you can see what you’re doing.
Most important is to know how to zoom into and out of the image to see as much or as little of the frame as necessary.
1. Click the All button in the Timeline zoom controls so you can see the entire project. Then drag the playhead to the clip at 00:00:39:02.

2. Move the pointer over the image in the Viewer, hold down Command (Ctrl), and roll the scroll wheel of your mouse up to zoom in. (Roll the scroll wheel down to zoom out of the image.)
If you’re not using a mouse, you can also use the plus and minus keys on the number pad to zoom in or out, respectively.
If you’re using a pen and tablet, the Magnification menu may be more convenient for zooming into or out of the image.
Once you zoom into the image, you may need to pan around to see what you want.
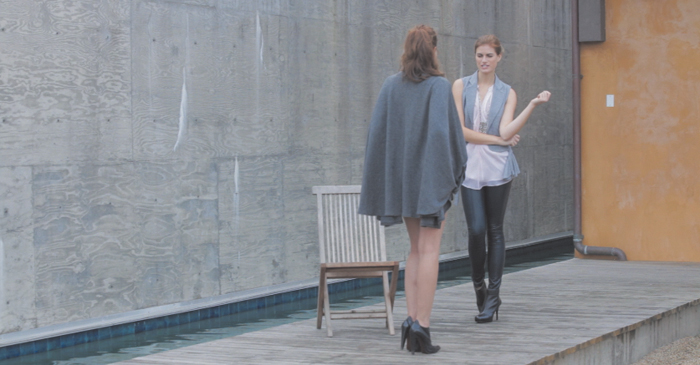
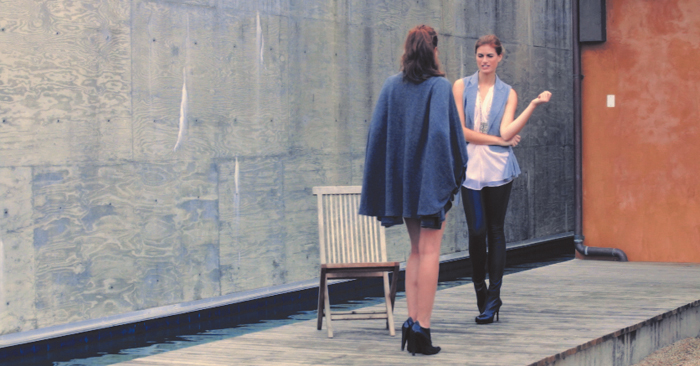
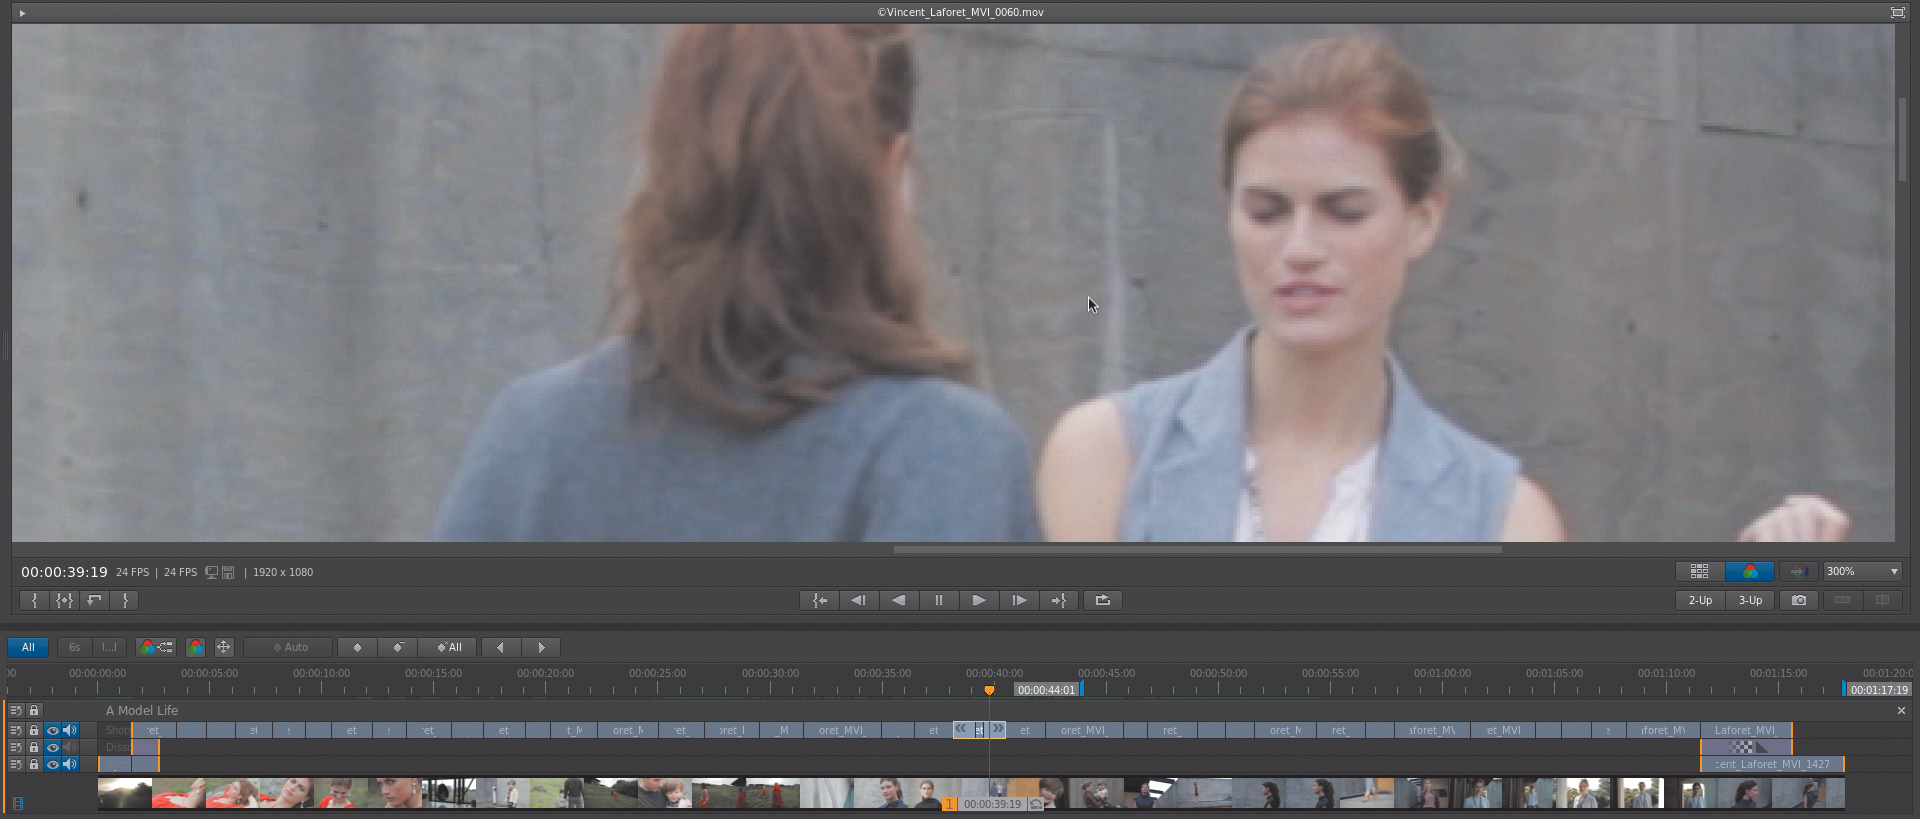
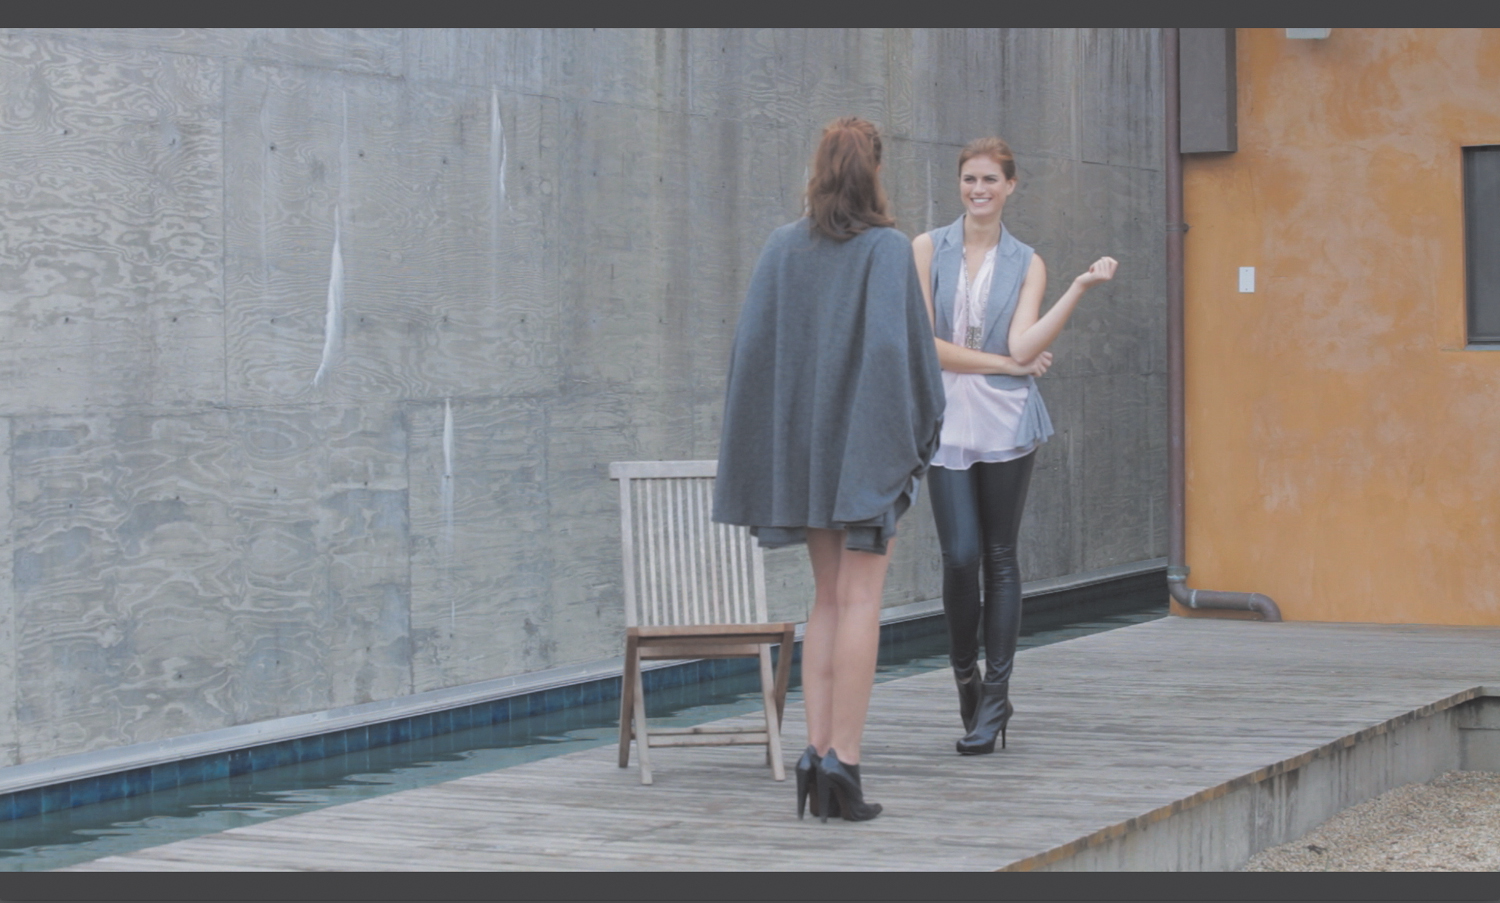
3. Middle-mouse click and drag the image in the Monitor to pan around it until you can see both women’s faces.
After you complete the task that you zoomed in for, you’ll likely want to go back to viewing the entire frame.
![]() Tip
Tip
If you don’t have an assignable third button, you’ll need to use the scroll bars to pan around your image, which can be inconvenient.
4. Choose Fit from the Zoom Level pop-up menu (or press Command-Home [Ctrl-Home]) to change the magnification to whatever is necessary for the image to be fully visible and centered in the available area of the Monitor.
If you want to hide the grading controls but keep the Timeline visible because you’re using a control surface to make adjustments, press P.
5. Click the Image Only button, or press Shift-H to hide the entire SpeedGrade interface, zooming the current frame to 100% and centering it onscreen.

The image takes over the entire screen.
6. When you’re done, press Shift-H to toggle this view off and return to the layout, which places the Monitor over the Look panel. Press Command-Home (Ctrl-Home) to fit the image to the Monitor.
Alternately, you can press Command-Shift-Home (Ctrl-Shift-Home) to zoom the image to 100% of its native resolution within the currently available space in the Monitor.
Clicking the View Options button opens the View panel.
Additional controls in the View panel in the Timeline tab let you evaluate different aspects of the image in the Viewer. The Channel View pop-up menu, for example, lets you solo the red, green, blue, alpha, and luma components of the current image.
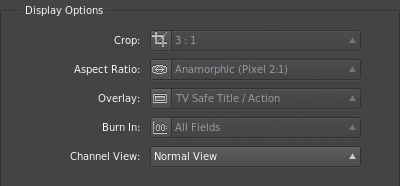
Pop-up menus control the Monitor’s Crop, Aspect Ratio, Overlays, and Burn-in settings. Buttons to the left of each menu let you turn each viewing option on and off.
When you enable one of the following buttons, a menu becomes available for fine-tuning the setting:
• Crop: The Crop menu lets you choose from a wide variety of framing aspect ratios to accommodate film scans in various widescreen formats. Cropping the image lets you see which portion of the image will be presented to the audience.
• Aspect Ratio: The Aspect Ratio menu lets you choose from one of the more frequently used pixel aspect ratios to take into account media shot using anamorphic lenses, or NTSC or PAL non-square pixel sizes, to make sure the image you’re monitoring looks correct.
• Overlay: The Overlay menu presents a single option, a pair of SMPTE standard action and title safe indicators.
• Burn In: The Burn In menu lets you choose one of a variety of preset window burn options for superimposing metadata as text over each of your clips.
• Channel: The Channel menu is like the RGBAL channel soloing toggles on steroids. A long list presents a wide variety of different image encoding formats and their corresponding components to which you can convert the monitored image. These encoding formats include HSV, HLS, XYZ, LAB, YUV, and YIQ.
Using dual displays
All controls for setting up video output or dual displays are in the Display panel in the Preferences window.
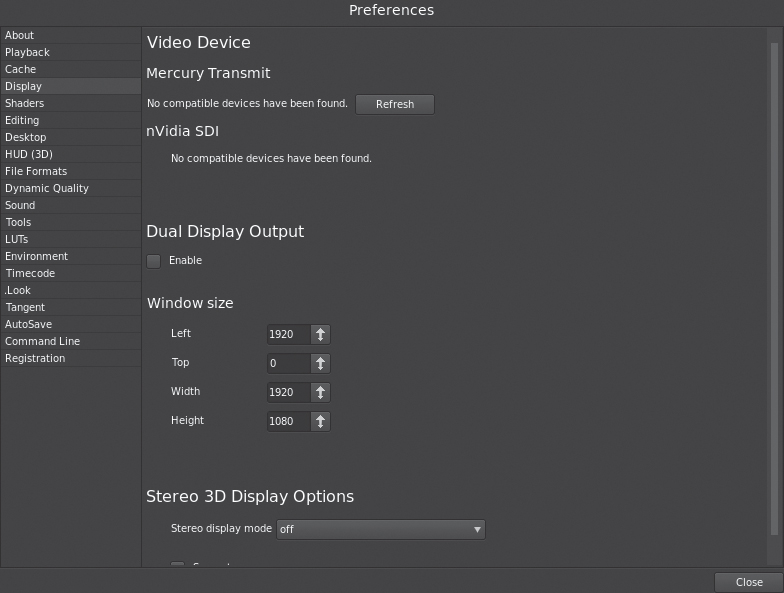
If you have a broadcast video interface that’s compatible with the Mercury Transmit engine and also has certified SpeedGrade drivers, you can select that device in the Mercury Transmit section.
Optionally, on Windows, you have the option of installing one of a select few Nvidia cards with integrated HD-SDI video output, which allows you to connect to a standard broadcast display.
Otherwise, you can select Enable Checkbox in the Dual Display Output section to send your video to a second monitor connected via the second DVI or DisplayPort output from your computer. Then the SpeedGrade controls can display on the first monitor, and the second monitor can be used as a large, dedicated image monitor. In this scenario, the image is not mirrored. This is an excellent solution for projects being delivered to the web—plus, if you’re careful with your choice of displays and calibration, this setup can approximate broadcast monitoring.
For more information on setting up SpeedGrade with an external monitor, consult the SpeedGrade user documentation.
Viewing and using video scopes
The video scopes available in SpeedGrade display within the Monitor area and you can toggle them at will. Later lessons discuss in greater detail how these scopes can be used, but here you’ll learn how to set them up and make them visible.
1. To see the image used in this section, move the playhead to 00:00:38:12.
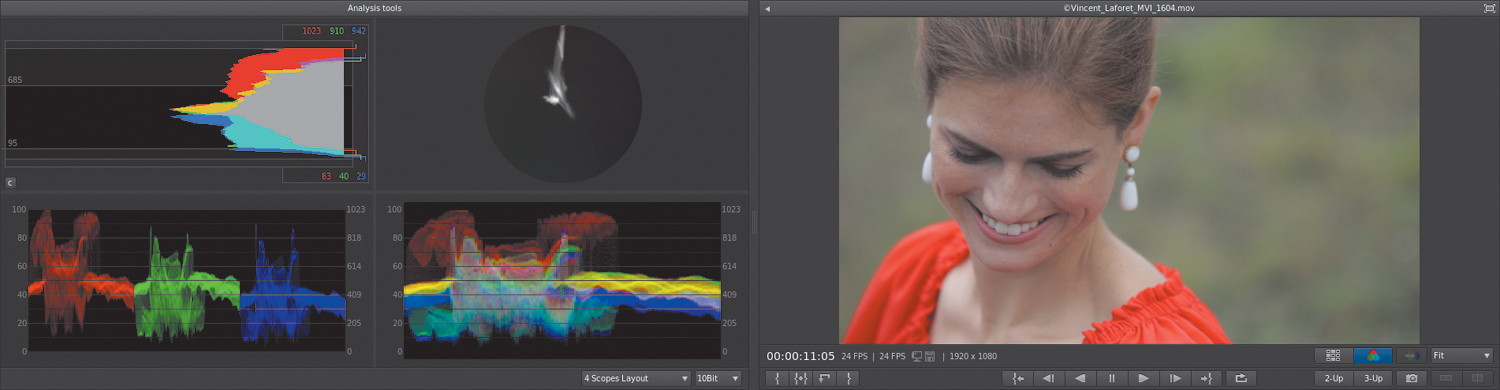
Four video scopes are available in the Analysis Tools panel, which can be shown or hidden by clicking the small triangle in the upper-left corner of the Monitor area or by pressing the A key.

By default, all four available scopes appear in a four-up arrangement:

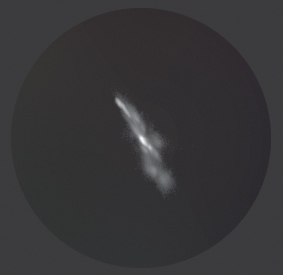
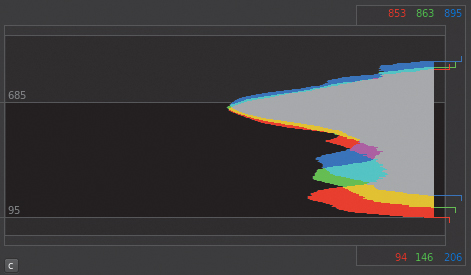
• The Vectorscope shows you a polar analysis of the range of hues and saturation of the color in the image within a circular graph that shows all hues as a series of angled vectors, with saturation measured by a graph’s distance from the center.
• The Waveform can be set to one of two modes: The default is an RGB overlay scope, which shows you a superimposed analysis of the relative strengths of the red, green, and blue channels. Alternately, you can right-click this scope and choose Switch to Luma Waveform to see an analysis of the Luma channel, which shows the tonal range of the video signal. The scale of the Waveform scope ranges from 0 (absolute black) to 100 percent (absolute white).
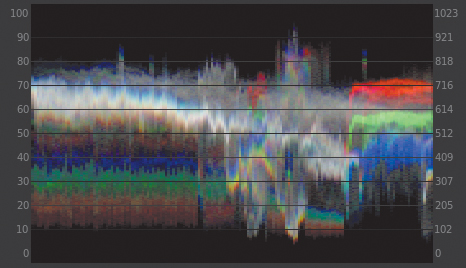
• The Histogram shows a vertically aligned statistical analysis of the strengths of the red, green, and blue channels of the image, superimposed over one another and color coded, along with a gray luma analysis. The scale of the Histogram represents the numeric range of image-encoding values allowable for a digital video signal. The bit depth and upper and lower boundaries can be adjusted in the Tools panel in the Preferences window to accommodate whatever data standard you need to work with.
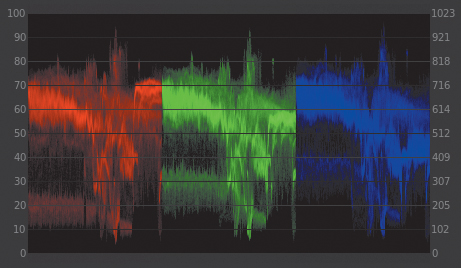
• The Parade scope shows you a side-by-side analysis of the relative strengths of the red, green, and blue channels from the shadows to the highlights of the image. The scale of the Waveform scope ranges from 0 (absolute black) to 100 percent (absolute white).
The layout and arrangement of the Analysis Tools can be customized.
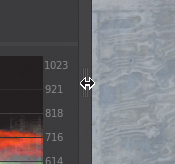
2. Click the handle to the right of the Analysis Tools panel and drag it farther to the left to shrink the video scopes or to the right to enlarge them.
3. Click and drag the Vectorscope onto the Histogram.
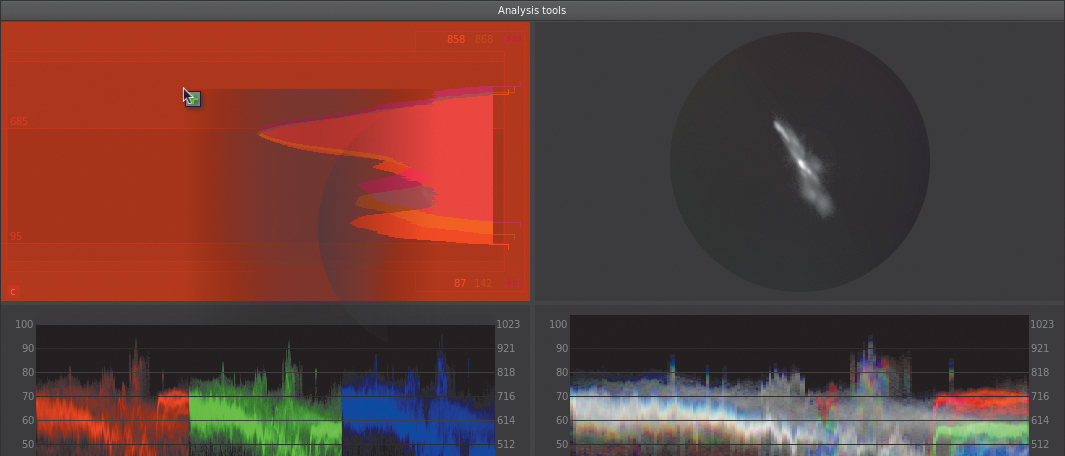
This swaps the position of the Vectorscope and Histogram. You can swap the positions of any scopes in this display.
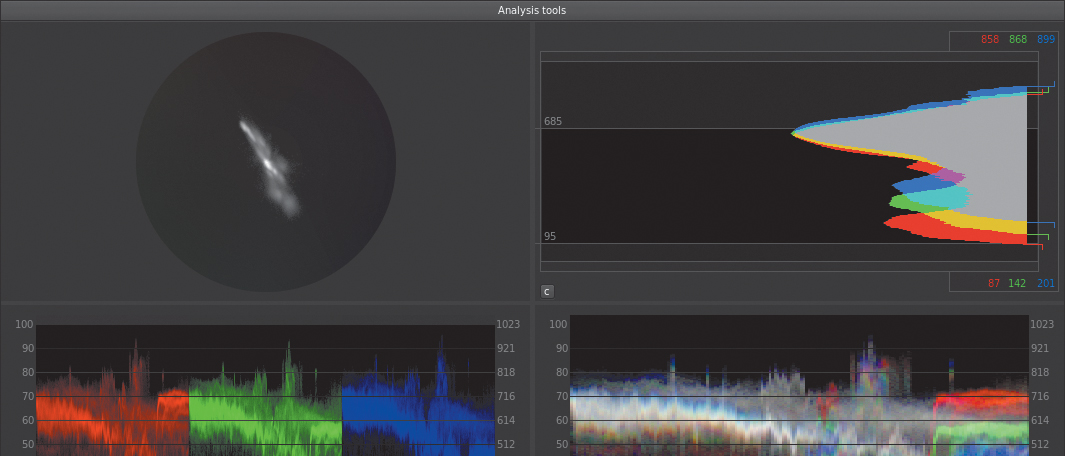
4. Choose 2 Scopes Layout from the Layout pop-up menu underneath the video scopes.
The Analysis Tools panel now shows only two scopes, the Vectorscope and the Histogram. You can choose to show one, two, three, or four scopes at a time. If you don’t like which scopes are shown in any layout, you can change this, too.
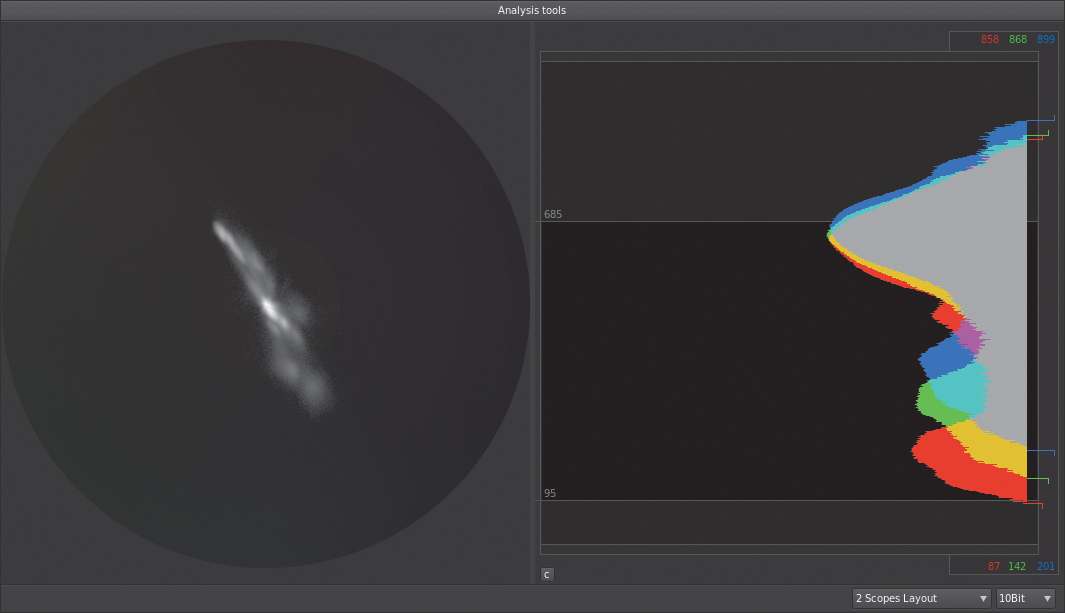
5. Right-click the Histogram scope, and choose Parade.
Now, you have a large, side-by-side view of the Vectorscope and RGB Parade scopes, two of the most commonly used video scopes when grading.
6. Click the Close button, the triangle at the upper right of the Analysis Tools title bar, to close the video scopes, or press A.
Customizing the video scopes
The Tools panel in the Preferences window offers a variety of options you can use to customize the video scopes:
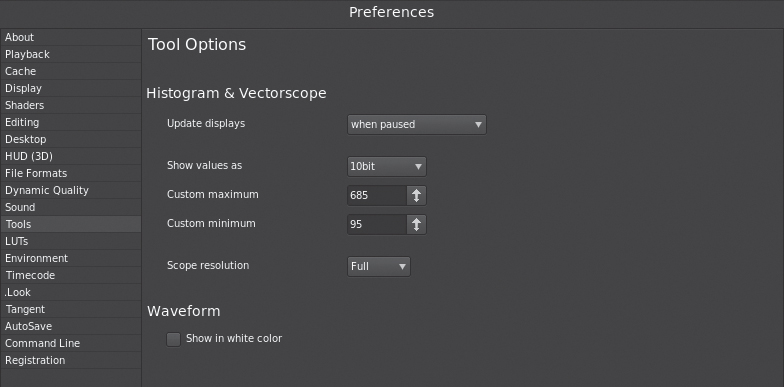
• Update Displays lets you set whether the scopes update only while playback is paused or update on Every Frame, so each scope shows an analysis during playback, which can reduce real-time performance.
• Show Values As lets you set the bit depth of the scale used to analyze the Histogram. This defaults to 10-bit, which is appropriate for most professional video signals. These options are also available in a pop-up menu at the bottom of the Analysis Tools panel.
• Custom Minimum and Maximum lets you set the scale used for minimum and maximum signal values in the Histogram. The default is 95 and 685, which correspond to the data range appropriate for broadcast video.
• Scope Resolution lets you reduce video scope resolution, sacrificing accuracy in order to increase real-time performance when you set Update Displays to Every Frame. This option defaults to Full.
• Show in White Color desaturates the Waveform’s RGB Parade scope to make it less distracting to experienced colorists.
Review questions
1. Where is the Monitor located?
2. What video scopes does SpeedGrade have?
3. Can you have multiple Timelines open?
4. What are the JKL keyboard shortcuts used for?
5. How do you zoom into or out of the Timeline using the mouse?
6. How do you hide the SpeedGrade UI to show only the monitor?
Review answers
1. In the Color tab.
2. Waveform, Vectorscope, Parade scope, Histogram.
3. Yes.
4. Play reverse, stop, play forward, fast forward, fast reverse, and frame-by-frame playback.
5. Press Option or Alt and roll the scroll wheel.
6. Press Shift-H.