6. Scene Balancing
Lesson Overview
In this lesson, you’ll learn about the following:
• How to save, recall, and copy grades
• How to compare clips using multiple playheads
• How to annotate issues you want to take care of later
This lesson will teach you the techniques that SpeedGrade offers for comparing clips and making corrections to match the shots within a scene to one another convincingly. It should take approximately an hour and a half to complete.
Download the project files for this lesson from the Lesson & Update Files tab on your Account page at www.peachpit.com and store them on your computer in a convenient location, as described in the Getting Started section of this book. Your Accounts page is also where you’ll find any updates to the chapters or to the lesson files. Look on the Lesson & Update Files tab to access the most current content.

One of the fundamental processes of any grade is to make all the clips within a scene match each other.
Getting started
This lesson covers different ways of saving and copying grades, which are useful skills to know when it comes time to start working on longer programs. SpeedGrade provides a couple of different methods for moving grades from one clip to another to save you work.
![]() Note
Note
If you have not already downloaded the project files for this lesson to your computer from your Account page, make sure to do so now. See “Getting Started” at the beginning of the book.
In addition, you’ll learn how to use the multiple playhead feature in SpeedGrade to compare clips in a scene with one another to accomplish one of the fundamental processes of any grade—making all the clips within a scene match each other.
For this lesson, you’ll use the project file located in the Lesson_06 folder.
1. Launch SpeedGrade (if necessary) and close the open project so the Timeline is empty.
2. Use the Desktop media browser’s hierarchical list at the left to find where you copied the SpeedGrade lesson media.
3. Open the Lesson_06 folder, and double-click Lesson_06.ircp to open that project.
4. If the clips in the Timeline appear brown, select the Tutorial_Media folder in the media browser to reveal its contents. Then open the Reels panel and click the Load From Desktop button to relink them to the clips in the open project.
5. Open the Monitor. If necessary, set the Zoom Level pop-up menu to Fit to see the entire frame, and then open the Look panel to prepare to work.
The different exercises in this lesson walk you through the process of grading and balancing the scene in the Timeline, showing you how to work quickly and efficiently.
Managing grades
In every program there will be opportunities to conserve your efforts by saving the grade you’ve created for one clip and applying it to other similar clips. For example, all the talking head shots corresponding to a particular interview subject in a documentary likely have the same lighting (although not always!), so the grade you create for the first talking head shot can likely be used for all the other shots of that subject.
Similarly, you may find that a particular exterior location is used over and over in a series of establishing shots within a narrative project. Here again, the grade you create for one of these exteriors can likely be used for others.
In these situations, the most obvious method of saving grades for future use is the Look browser that runs along the bottom of the SpeedGrade window.

The Look browser, by default, is populated with five bins, four of which contain different categories of presets that primarily contain creative looks. The Look browser is also your central repository for saving long-term grades that you want to apply throughout a program or perhaps even throughout several programs in a series.
Opening and closing the Look browser
The Look browser is closed by default, but you can either open it into its own panel or have it take over the entire Look panel, hiding the Look controls in the process.
1. Click the Set Quick View Mode button in the lower-right corner of the Look panel.

The Look browser’s Quick View mode makes it easy to quickly choose a tab from which to apply or save a custom look.
2. Click the Set Look Management View Mode button, or press Command-L (Ctrl-L).

The Look browser takes over the entire Look panel and has a file browser running along the left side that lets you choose a disk location to which to save looks, or from which you can apply looks.
Saving and applying looks
The Look browser tabs essentially provide ways of navigating the file system on your computer. However, this interface also makes it easy to save your own looks in your desired location.
1. If necessary, click the “../settings/looks” tab that appears to the far left of the Looks browser.
The file browser to the left shows a hierarchical view of your file system that you can use to navigate the volumes and folders on your disk.
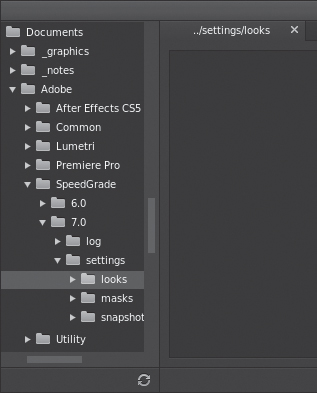
If you scroll down, you should be able to see that this tab is referencing the looks directory; on OS X this directory is User/Documents/Adobe/SpeedGrade/7.0/settings/looks/; on Windows this directory is c:UsersusernameAppDataRoamingAdobeSpeedGrade7.0settingslooks.
This is an excellent place to store your own grades, but you can choose another preexisting folder for your grades if you prefer. For now, you’ll use the default directory.
![]() Note
Note
If you had the previous version of SpeedGrade installed, you should notice that there’s also a SpeedGrade 6.0 directory that contains any custom grades you had already saved.
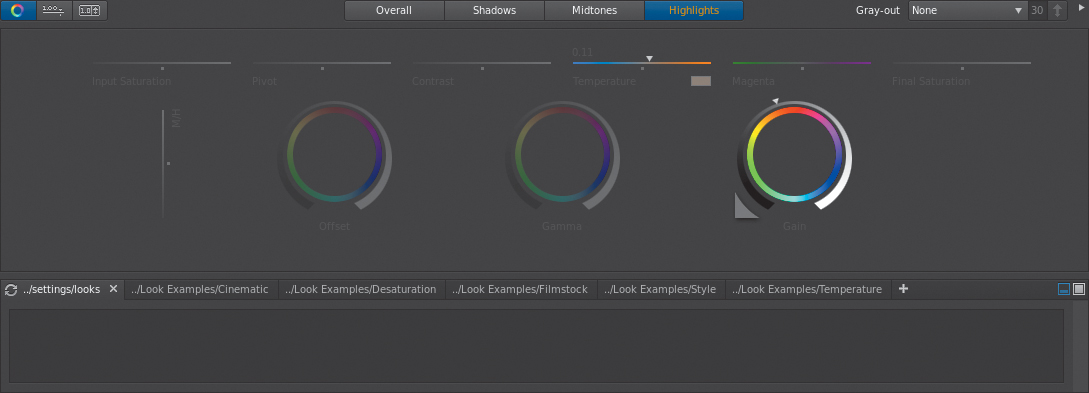
2. Switch to the Quick View mode to reveal the Look panel controls and the Look browser simultaneously.

Let’s create a grade to save.
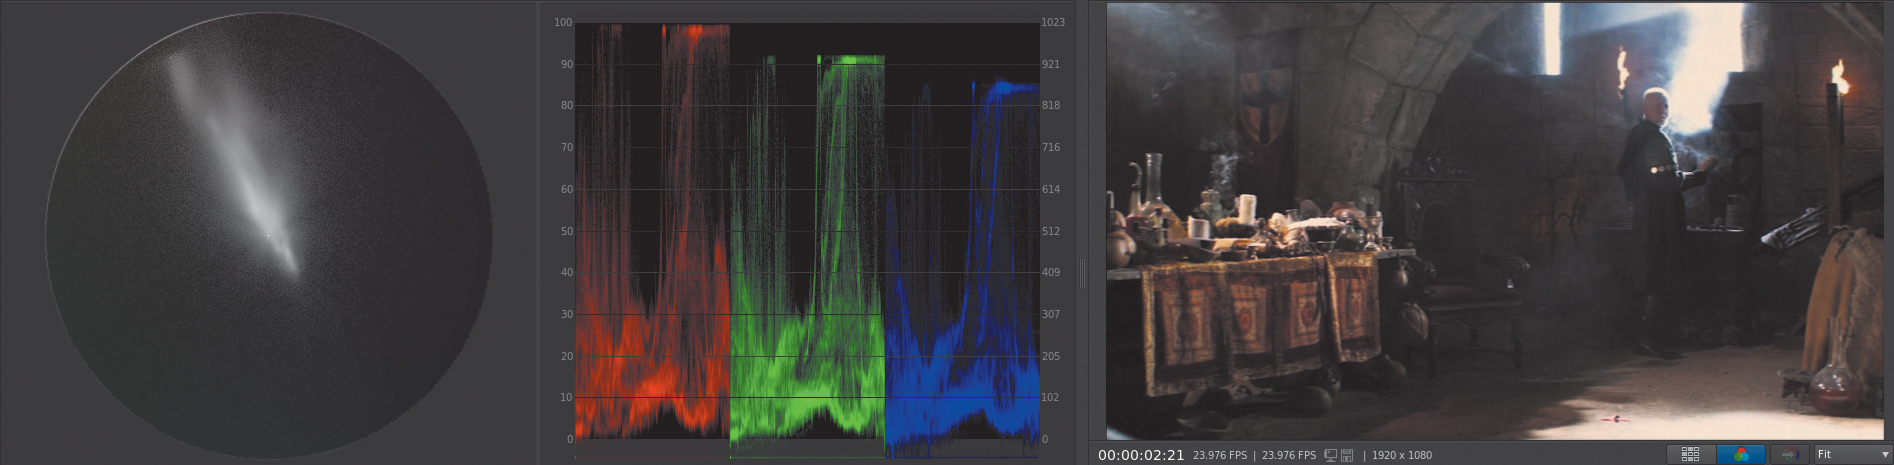
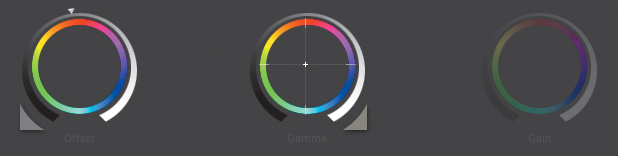
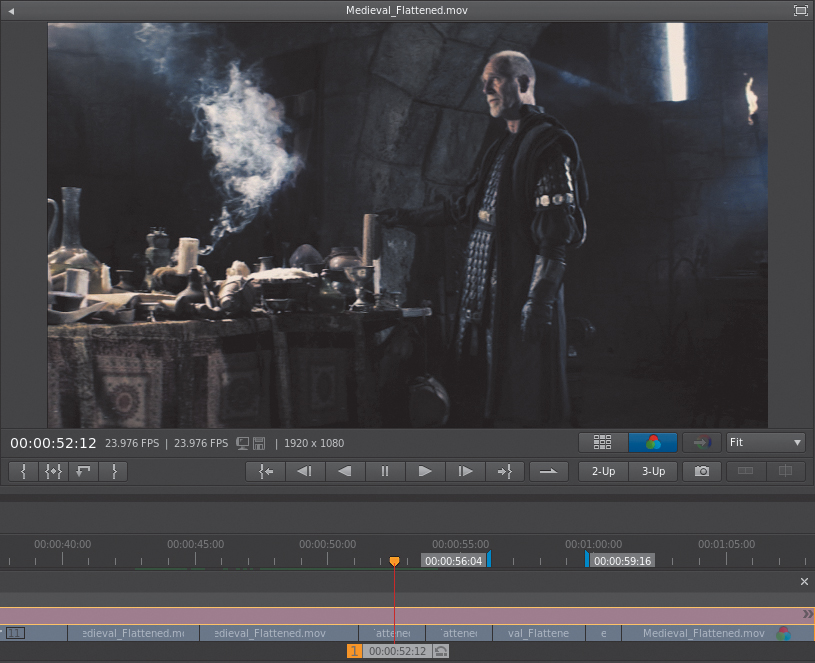
3. Move the playhead to the third clip in the Timeline, and make the following adjustments: Drag the Offset contrast ring until the bottoms of the RGB graphs in the Waveform scope touch 0; then drag the Gain ring to the right until the tops of the RGB graphs touch 100. Click the Midtones mode button, and drag the Gamma contrast ring to the left to compress the shadows by about 4% in the Waveform scope.

4. With this contrast adjustment accomplished, click the +P button under the Layers list to create another Primary layer. Then click the Highlights adjustment mode button, and drag the Temperature slider to the right to warm up the highlights (just to .11 or so). This results in the red channel going above 100, which will clip some of the highlight detail in the smoke. To resolve that problem, drag the Gain contrast ring to the left until the top of the red waveform is level with 100 in the Waveform scope.
At this point, you’ve created a general treatment you’d like to use as the starting point for this angle of coverage everywhere within this scene. Now you’ll save the whole grade.
5. Click the Save Look button under the Layers list.
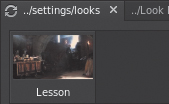
The look you’ve just saved appears as a thumbnail in the currently selected Look browser tab. By default, it bears the same name as the project file with the timecode from which it was saved appended at the end. If you haven’t saved a project, this will appear as Lesson, but with the current lesson saved, it should appear as Lesson_06 with the timecode value in the filename.
6. Click the name of the saved look thumbnail to select it. Then select just the text Lesson_06 00-00-04-19, type Mage Wide, and press Return (Enter).
Once saved, looks are easily applied.
7. Move the playhead to the first clip in the sequence, which is a continuation of the clip you just graded, and click once on the look you’ve just saved and renamed.
When you click a saved look, the word PREVIEW appears at the top of the Look browser to indicate that you still have the chance to back out of applying that look by pressing Delete (Backspace). If you have a variety of saved grades and you want to see if any of them will work well, click among them to apply each in turn. If you don’t like any of them, pressing Delete (Backspace) will return the clip to its original grade.
That look is applied to the current clip. You should notice that both Primary layers appear in the Layers list. Applying saved looks in this way overwrites whatever Grading clips were previously applied to that clip.
![]() Note
Note
The PREVIEW indicator disappears when you move the playhead to another clip.
8. Move the playhead through the project, and apply this saved look to clips five, seven, and nine, all of which are from the same scene.
Organizing, exporting, and deleting looks
Once you’ve started saving a variety of looks, you’ll need to think about how to organize them. Managing looks in SpeedGrade is pretty simple once you know where all the controls are.
1. Click the + button to the right of the open tabs in the Look browser.
A new looks tab appears to the right of the selected tab and references the default folder: User/Documents/Adobe/SpeedGrade/7.0/looks on OS X; C:UsersusernameAppDataRoamingAdobeSpeedGrade7.0settingslooks on Windows. If you want to choose a different folder at this location, go back to your file system and create it so that it can be selected in the look tab’s file browser.
2. Click the new tab’s Close button to eliminate it.
3. Move the pointer over the Mage Wide look you saved in the previous exercise.
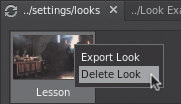
When you right-click a saved look in the Look browser, you access the menu options to Export and Delete looks.
Balancing a scene
As mentioned previously, the process of balancing a scene is one of the colorist’s fundamental tasks. Ideally, each clip within a scene of a movie should look like it was shot at the same time and in the same place. If the cinematographer was careful, there may not be much to do. However, any discrepancy in color or contrast between two clips that have been edited next to one another should be minimized, so the scene plays without any one clip being noticeable in a distracting way.
Generally speaking, the process of balancing a scene is as follows.
1. Play through the scene, choose a clip that is representative of how the scene should look, and grade it. You did this in the first exercise in this lesson when you adjusted the wide shot of the wizard.
2. Copy that grade to as many clips that match it as possible to save yourself some work. Clips shot from the same angle with the same lighting ought to be an easy copy.
3. Compare the main clip you graded to the other angles in the scene, such as reverse angles and close-ups, and adjust the other clips to match the first one you graded, either by using the Shot Matcher control or by manually adjusting the controls in the Look panel.
You can compare clips by jumping between adjacent clips, by using Snapshots to compare a saved image with any other clip, or by using the two- or three-up Continuity Checker with multiple playheads.
4. Each time you create a new matching grade between a new angle and the first one you graded, copy the new grade to as many matching clips as you can.
5. When you’ve worked your way through each set of angles, play through the entire scene, and make small tweaks, where necessary, to make the clips match a bit better.
The balancing process is iterative, and unless you’re an amazingly talented and experienced colorist, you’ll never get everything right on the first pass. Usually, you’ll make one or two tweaks during each subsequent playing of the scene. As you work, keep in mind that the goal is to create a convincing match. You don’t have to match every object in the frame, which could be time prohibitive. You just need to match the overall look and feel of each clip.
In the following lessons, you’ll learn how to compare two clips using the SpeedGrade playheads interface and how to quickly copy grades from clip to clip directly on the Timeline without having to save a grade to the Look browser first.
Comparing clips using multiple playheads
When you’re comparing two clips to make them match using the controls in the Look browser, it’s easiest to press Command-right arrow and Command-left arrow (Ctrl-right arrow and Ctrl-left arrow) to jump the playhead forward and backward among two adjacent clips.
This works well most of the time, but if you want to see a side-by-side or split-screen comparison of two clips or if you need to compare clips that aren’t right next to each other on the Timeline, you can use multiple playheads to set up the comparison view.
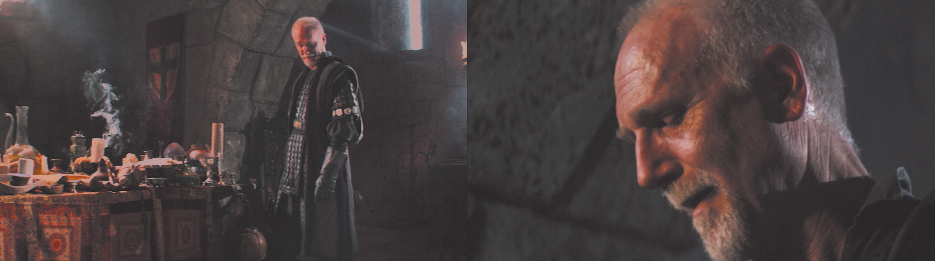
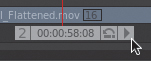
1. Move the playhead to the middle of clip 16 (the third clip from the end).
2. Press Command-right arrow (Ctrl-right arrow). Then press Command-left arrow (Ctrl-left arrow) to jump the playhead between the first frames of this clip and the next one on the Timeline (the wide shot).
Flipping between two full-screen images can make it easier to spot overall differences. However, there’s another way to work.
3. Move the playhead back to the middle of clip 16, turn off the All Timeline zoom control, and hold down Option (Alt) while scrolling to zoom the Timeline to a point where you can see the three clips immediately surrounding the playhead.
Being zoomed into the Timeline will make it easier to position multiple playheads where you need them.
4. Do one of the following:
• Click the 2-Up button, and then drag the second playhead that appears onto the next clip on the right. This is the speedy solution.
• Command-drag (Ctrl-drag) the Move Playhead handle to the right of the playhead to pull a second playhead out, moving it to clip 17, the next clip to the right (the wide shot). Depending on your monitor resolution, you may need to side-scroll to do this.

With either method you use, both images will appear side by side by default within the available width of the Media tab.
5. Click the Split-screen button underneath the Zoom level pop-up menu.
The Monitor image changes from a side-by-side to a split-screen view.

6. Click the Split-screen button again to change the split from a vertical to a horizontal split.
It’s easy to change the split-screen orientation using the Monitor controls, but you can also change the orientation of full-frame comparison.
7. Click the Side-by-side button once to return to a side-by-side comparison view, and then click it again to change the orientation of comparison to a vertical arrangement. Click again to return to side-by-side view.
It’s easy to see that the close-up has higher contrast and is more saturated than the wide shot. But perhaps the saved grade might make the wide shot match the close-up better, thus saving you some work. To apply it, you need to change which playhead is selected.
Using the Shot Matcher with playheads
Having identified a difference between two clips, you’ll use the automated Shot Matcher function to match one clip to the other.
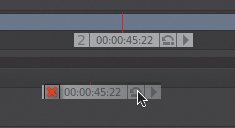
1. Click the number 2 handle to the left of the second playhead.

It turns orange and jumps to the center of the Timeline, because it is now the currently selected playhead. This means that the controls in the Look browser will adjust the clip at the position of playhead 2 rather than playhead 1.

2. Click the Match button to the left of the Zoom level pop-up menu.

SpeedGrade automatically applies a mathematically calculated AutoColorMatch layer to the Layers list that matches the clip at the currently selected playhead (the wide shot) to the clip at the secondary playhead (the close-up).

This actually does wonders to make the wide shot look more like the close-up, but the resulting highlights look a bit compressed.
Because the AutoColorMatch adjustment layer appears below the default Primary layer, you can use the Primary layer to fix the highlights.
3. Click the Primary layer to select it, and then drag the Gain ring to the right until the Red graph of the Parade scope just touches 100. Then click the Shadows mode, and drag the Gamma ring to the left to lower the lightness of the shadows by approximately 5% (try to match the look of the shadows in the close-up).
Now, let’s look at another pair of clips.
4. Click the 2-Up button once to turn it off; this causes playhead 1 to disappear, and playhead 2 becomes playhead 1. Then, click it again to turn it back on, so that playhead 2 again appears over the clip to the left. If necessary, Option-scroll to zoom into the Timeline so it is easier to see all of the playheads, and click the stop icon at the right of playhead 2 so it turns into a triangular play icon. Press the J key to play the clip backward.
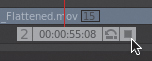
Notice that the two playheads are ganged, playing together as one. Keep playing backward until playhead 2 is over the close-up of the long-haired hero (clip 15, at right) and playhead 1 is over the close-up of the image (clip 16, at left).
Once you’ve set up the comparison, you may want to turn looping back on, and then fine-tune which frame appears for each clip.
5. Click the Play button that appears to the right of the currently deselected playhead.
It changes to a stop button, and you can now drag the two playheads independently, although the transport controls affect only the currently selected playhead (the playhead with the number highlighted in orange).
You can see that there’s a difference between the two clips, but it may be hard to spot looking at both clips side by side. You’ve learned how to create a vertical split-screen using the Monitor controls, but there’s another set of more highly customizable Screen Layout options.
6. Click the View Options button.
The View panel shows the Screen Layout controls at the left.
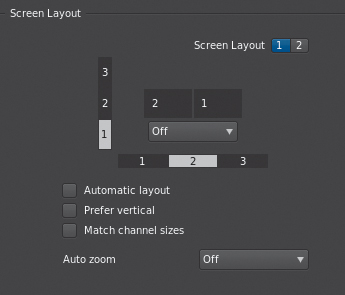
These controls let you customize how frames shown with multiple playheads are displayed. As you can see in the controls, you can have up to nine playheads arranged in a three-by-three grid. Currently, you have two playheads arranged two-up, side by side. If you want to change the display, you can use the number buttons.
7. Click button 2 in the vertical arrangement column and button 1 in the horizontal arrangement row.
The two frames at the position of the playheads are now vertically arranged.
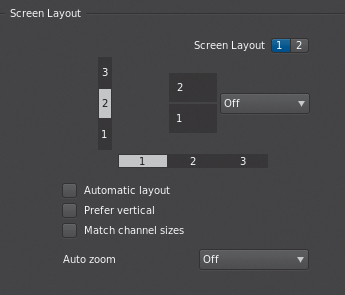
This arrangement can be useful, but for now you need a split-screen. Set up a 1-by-2 layout, as it was originally, and then choose Split from the menu above the horizontal arrangement row.

Now you have a single split-screen.

Although you created this arrangement the long way, you can still use the Monitor controls to modify the arrangement and split.
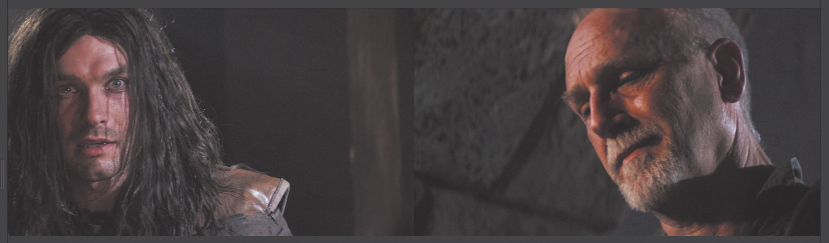
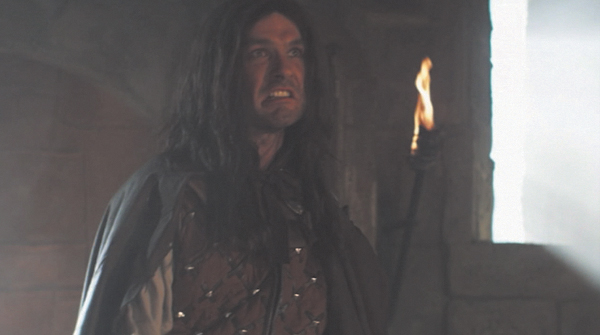
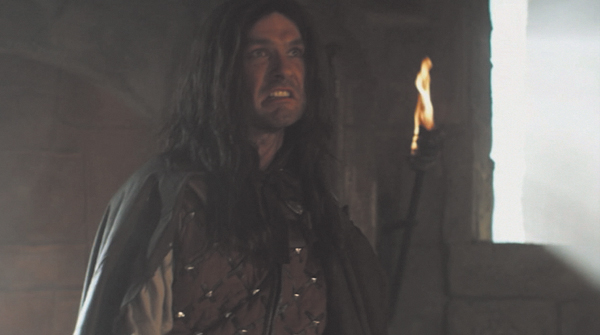
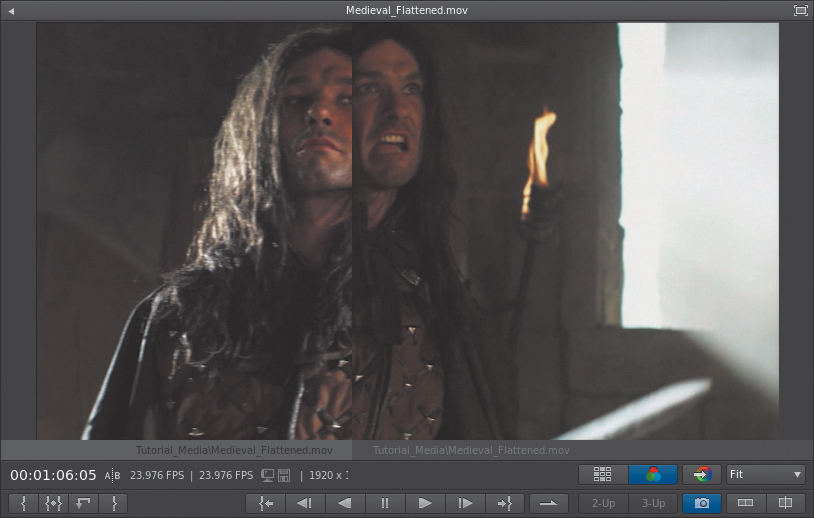
8. Click the Split-screen button to create a horizontal split, and then click it again to put the split back where it was with the long-haired hero to the left and the wizard to the right.
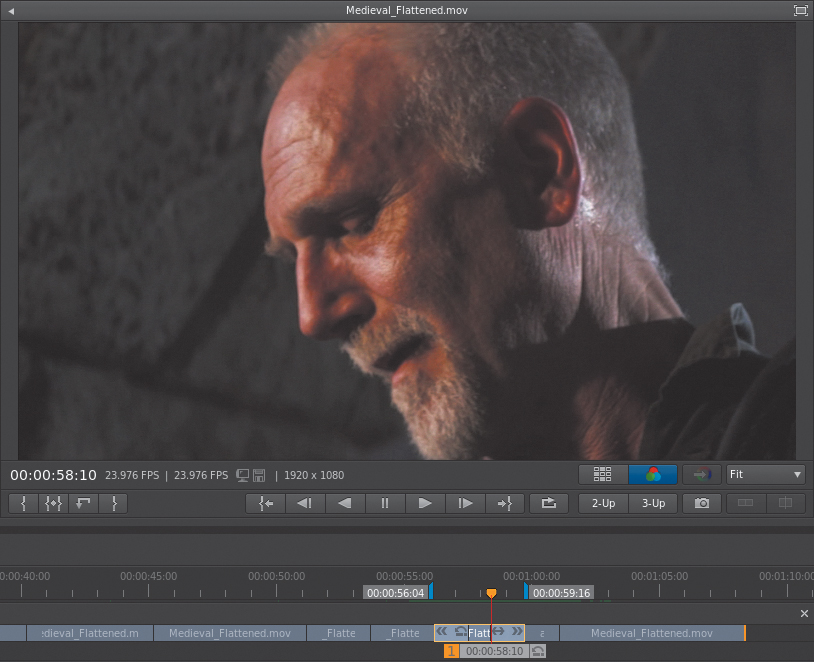
Now you have a suitable arrangement for comparison, but the wizard’s face is partially obscured.
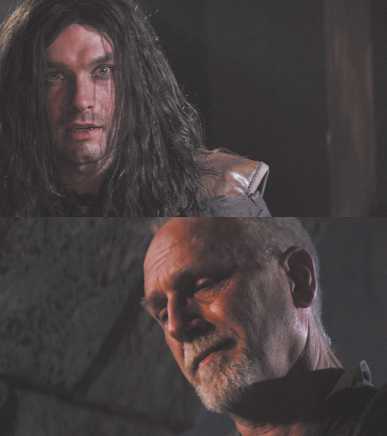
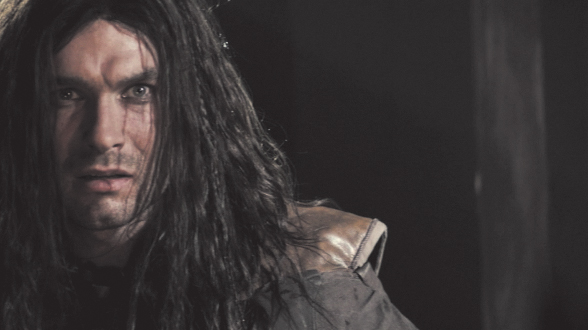
9. Drag the split slider under the frame in the Monitor to the left to see more of the older man’s face. (You can also Command-drag [Ctrl-drag] within the frame.)

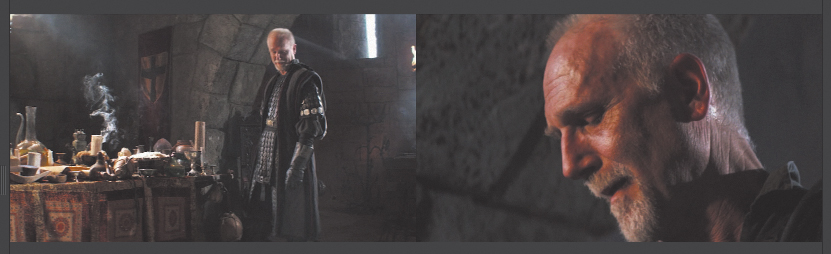
Now you have a perfect comparison of the two men’s faces, and it’s easy to see that the light on the older man’s face is much warmer than the light on the long-haired hero’s face.
10. Open the Look panel, and click the number of playhead 2 to select it to grade the long-haired hero.
This time you’ll practice making this adjustment manually; you can’t always rely on the Shot Matcher to make a perfect grade.
11. Make the following adjustments: With the Offset controls selected, drag the Offset contrast ring to the left to darken the shadows to match those of the image, and then drag the Gamma Color Balance control just a bit toward orange to match the color temperature of the hero’s face to that of the older image.

12. Click the 3-Up button next to the 2-Up button.
This automatically creates three playheads: Playhead 1 remains at the frame of the clip you’re currently adjusting, playhead 2 is on the last frame of the prior outgoing clip, and playhead 3 is on the first frame of the incoming clip of the next clip. This makes it very easy to see how these three clips compare. If you want to make an adjustment, click the number of the playhead that corresponds to the clip you want to adjust, and then use the controls in the Look panel to make that adjustment.
13. By comparison, the long-haired hero clip seems a little saturated, so drag the Final Saturation slider to the left to desaturate the image until it appears to be a good match for the neighboring clips.

Once you’ve found a convincing match, you can stop image comparison by turning off the 3-Up button, which leaves only a single playhead (playhead 1).
Alternately, you can delete any playhead by dragging its “move playhead” handle off the Timeline completely until it disappears.
Copying grades
You’ve now graded most of the major angles in this scene. Although you could elect to save a grade to the Look browser for each angle of the scene, if you’re in a hurry and this is the only scene with these grades, this may not be necessary. There is another way to quickly copy grades that are near one another on the Timeline.
1. Click the Save Look button under the Layers list to save the grade you made to clip 15, and rename it to Hero CU.
2. Click the All button to see the entire Timeline.
3. Move the playhead to clip 4, and click the look you just saved to the Look browser to apply it to the clip of the hero walking into the room.
This is the same angle you graded previously, so chances are that copying the grade from the matching close-up will at least be a good starting point.
4. Move the playhead to clip 8 in the Timeline, and press 4 on your keyboard’s numeric keypad. This step only works using a numeric keypad.
This copies the grade you applied to the fourth clip. The numeric keypad number keys let you use keys 1–9 to copy grades from one to nine clips back to the current clip at the position of the playhead. You can only copy grades forward; if there’s a clip to the left of a graded clip that you want to copy a grade to, you’ll need to save a look to the Look browser and apply it that way.
5. Move the playhead to clip 10, the next ungraded wide shot of the hero, and press 2 on the numeric keypad.
Because there’s a suitable grade to copy from two clips back, this is a fast procedure.
6. Move the playhead to clip 11, and press 2 on the numeric keypad.
This time you’ve copied the grade from a previously adjusted version of the wizard shot to the current clip, which is from the very same angle.
7. Move the playhead to the next clip of the wizard in the Timeline, clip 12, and press 1 on the numeric keypad.
This copies the wizard’s grade to the close-up, but it would appear there was a lighting change for the close-up, because the grade that looked good on the wide shot now looks too dark and too ruddy.
8. In hopes of getting lucky, press 2 to copy the hero grade from two clips back.
Fortunately, the hero grade works well; the lighting change must’ve been the same setup as for the hero. When you’ve graded enough different angles, you may be able to recycle some of them as you work through a scene, and once you’ve graded your main angles, it’s easy to copy looks forward in a shot-reverse-shot situation using the numeric keypad shortcut keys.
9. Move through the program and continue grading, copying, and applying saved grades until you’ve balanced the entire scene.
Comparing with the Snapshot browser
Although using playheads is a versatile way of comparing two clips and they allow for the use of the Match command, sometimes you’ll want to save reference images of certain key shots that you may want to refer to over and over without having to set up a playhead comparison.
In particular, the Snapshot browser can be tremendously useful when you’re comparing two clips that are far apart on the Timeline.
1. If necessary, click the All button to fit the entire Timeline into the current width of your computer display, and move the playhead to clip 4.
2. Open the Snapshots panel to the right of the Look panel.
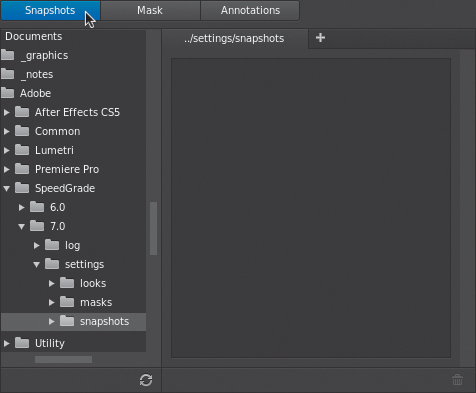
Like the Look browser, the Snapshot browser consists of a hierarchical list that shows the volumes and directories of your file system, and a panel that lets you browse the contents of any given folder. By default, the Snapshot browser is open to the User/Documents/Adobe/SpeedGrade/7.0/settings/snapshots directory in OS X and C:UsersusernameAppDataRoamingAdobeSpeedGrade7.0settingssnapshots on Windows.
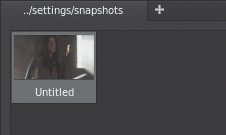
3. Click the Snapshot button.
A still image named Untitled is saved to the currently selected directory of the Snapshot browser, and its thumbnail appears in the panel. You can double-click its name and enter a more meaningful name to refer to.
The Snapshot button remains highlighted in blue and puts the Monitor into a split-screen view.
4. Move the playhead to the last clip in the Timeline, and drag the split-screen control to the left so you can see the hero’s face in both halves of the split.
As long as the Snapshot button under the Monitor is enabled (blue), the clip at the position of the playhead and the currently selected snapshot are presented using the current comparison mode, either side by side or split-screen.
5. As expected, the last clip doesn’t match the graded state of the snapshot clip, so click the saved grade for the hero in the Look browser to apply it, and see what you think. Feel free to adjust the result if you feel they don’t quite match; that’s what the Snapshot view is for.
6. To exit Snapshot mode, click the Snapshot button again, so it is disabled (it turns gray).
The Monitor returns to displaying only the image at the position of the playhead.
Saving masks with grades
You learned how to save looks earlier. There is also a separate, but similar, procedure for saving masks. As you work through a program, you may be using the same type of mask within many different clips. For example, if you create face-hugging masks or environmental shadow masks a lot, you can save frequently used shapes for future recall, saving a few steps in the process.
1. Move the playhead to clip 11.
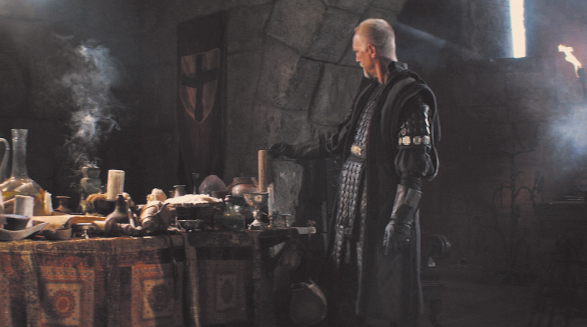
In this series of takes, the clip looks good, but the client thinks the table is too colorful and distracts from the character of the image. This is an easy fix using a mask.
2. Shrink the image in the Monitor to 25%, open the Mask panel, and then click the circular mask preset button. Customize the mask using the widget controls to produce a soft, vertically oriented oval similar to the following screen shot.

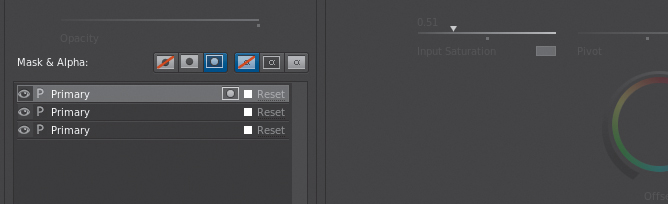
3. Open the Look browser, click the +P button to create another Primary layer, rename it if you like, and then click the Outside Mask button. Drag the Input Saturation slider to the left to desaturate the table and tablecloth until it matches the level of color found elsewhere in the clip.
4. Stop to consider whether this is a variation on this grade that you may want to apply elsewhere. Click the Save Look button at the bottom of the Layers list, or press Command-P (Ctrl-P) to save this grade with your mask to the Look browser.
5. Move the playhead to clip 13 (the fifth clip from the end). It occurs to you that the pillar at the right of the hero’s close-up is a little distracting, and that you could use the same shape you just saved to fix this, too.
6. Open the Look browser, if necessary, and click the look you just saved to apply it to this clip as well. At first, the mask within this saved grade desaturates the hero instead of the pillar, but this is easily fixed by opening the Mask panel and moving the oval mask so that it surrounds the hero and desaturates everything else.
As you work, you can build up a library of different looks using various masks that you will use frequently.
Working with Grade Tracks
With this scene now balanced, it’s possible to experiment with the application of additional stylistic adjustments on top of what you’ve just done. As long as you’ve done a good job of balancing the scene, other corrections you apply to all the clips at once should work seamlessly. SpeedGrade has the flexibility to allow multiple levels of adjustment via Grade Tracks.
1. Make sure the playhead is on clip 13 (the sixth clip from the end).
2. Click the Grading Clip button to the right of the Timeline framing controls, and drag it to an area just above the current clip rather than on the current clip to add a Grading clip. The Grading Clip button is a kind of source control for Grading clips.
Dragging a Grading clip on a clip adds a separate grade track to each clip in the Timeline; dragging a Grading clip above a clip adds a Grading clip to just that clip.
A new track appears on top of the current clip.
3. Click the Untitled Grading clip to select it.
With a Grading clip selected, all adjustments made to the image are applied via the Grading clip. In this case, the client wants to see what the scene looks like with a more desaturated, higher-contrast appearance.
4. Drag the Input Saturation slider to the left to around .60 to lower it. Then click Shadows, and drag the Gamma contrast ring just a bit to the left to compress the shadows for a more contrasty look. Click Midtones and drag the Gain contrast ring to the right just a bit to boost the highlights.
This look is applied only to the one clip, but you can change this by resizing the Grading clip to cover more clips in the scene.
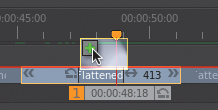
5. Drag the end of the Grading clip to the end of the Timeline, and then drag the beginning of the Grading clip to the beginning of the Timeline.

When you play through the Timeline, you can see that the look you created in the new Grading clip is being applied to every scene simultaneously. The nice thing about this is that one set of changes will ripple through every clip in the scene without affecting the underlying grades. This means that implementing changes is easy.
6. With the Grading clip selected, click the Overall grading mode button, and drag the Temperature slider to the left to cool down the image. Play through the scene to see how this change is simultaneously applied to every clip underneath the Grading clip.
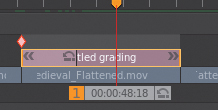
At this point, you may want to label the Grading clip so you know what it’s doing.
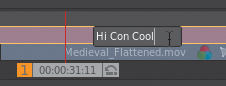
7. Double-click the name of the Grading clip to make it editable, type Hi Con Cool, and press Return (Enter).
You can place as many Grading clips as you like, each with its own primary and secondary controls, and each with its own mask. This makes Grading clips a versatile tool for expanding your creative possibilities in a variety of situations.
Using Annotations
Now that you’re considering programs in terms of the whole rather than individual parts, no conversation about color correction would be complete without considering the client review and feedback process.
As you work through a program, often the budget dictates how many changes you can make. If you reach the point where you need to move on to stay on schedule, but one or two more tweaks would be “nice to have,” it’s typical to note these for later in case you finish early and have time to revisit some additional changes.
Once you’ve gone through a program scene by scene, you typically have a review session where you and the client sit down and watch the entire show. This is the final iteration—and the time for final tweaks and notes.
Whether you’re noting issues as you go or taking feedback during a review session, SpeedGrade has some very useful Annotations features that make it easy to note issues using text and graphics. All these features are in the Annotations panel, which becomes available only if you have the base track of a clip selected.
In the following exercise, you’ll learn how to use the Annotations panel to make a variety of notes about different clips in the current program.
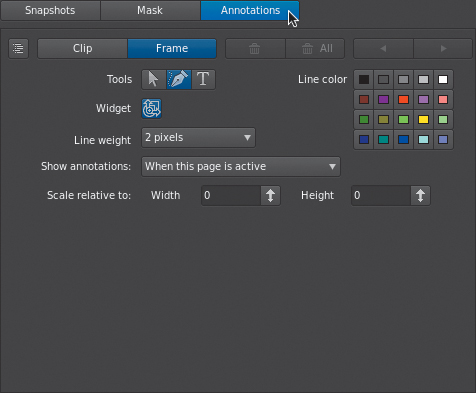
1. Move the playhead to the first clip, make sure the clip is selected and is not a Grading clip, and then click the Annotations panel.
The Annotations tools have two modes: Clip and Frame. These modes define whether the notes you make are clip-wide or apply to a particular frame with a specific issue.
In this first clip, the client thinks the highlight falling on the floor is distracting. That’s really a clip-wide issue, and you’ll note it for later.
3. To add a text note, click the text tool.
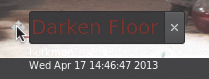
4. Click the highlight on the floor to place a text box, type Darken Floor, and then press Return (Enter).
Unfortunately, the floor is white, so it’s difficult to see your white note.
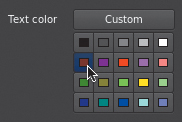
5. Click the new text box you’ve just created, and then click the red color swatch in the Text Color area to change the color of the text.
6. With the text selected, you can change its size using the Text Size menu. In this case, choose Large.

7. To move the text note to a better location, drag the widget to the left of the text note up a little bit, so it isn’t cut off by the frame edge.
8. Move the playhead to clip 5.
This is the clip that comes right before the practical lighting effect where the image casts a spell that results in a light flare. The client wants to see you try an animated lighting effect to determine whether you can prep the clip for later effects work.
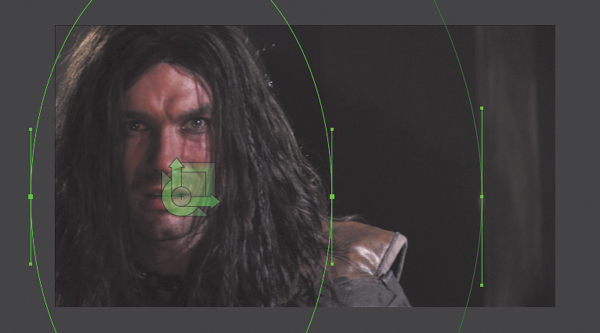
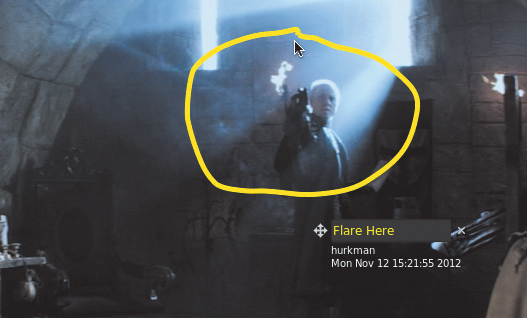
9. This is a frame-specific effect, so drag the playhead to 00:00:10:18. This time click the Frame mode button, and then click the text tool. Click anywhere on the frame to place a note, type Flare here, and press Return (Enter).
After you place the note, the client starts describing how the flare should be the most intense in a two-foot radius around the man’s outstretched hand in the image. You don’t want to forget this detail, so you decide to make a quick sketch.
10. Click the freehand drawing tool.
11. Click the yellow color swatch in the Text Color area, and then draw a circle around the man’s hand, simulating the radius of the flare effect.
12. Move the playhead to clip 10.
The client decides that he wants the hero’s face to be better lit.
13. Click the Clip mode button, and then click the text tool. Click anywhere in the frame and type Lighten face.
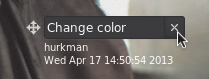
The client then asks if it would be possible to change the color of the hero’s tunic. You sigh deeply, and make a note of it.
14. Click the tunic, type Change color, and press Return (Enter).
Filled with a sense of foreboding and dreading the difficulty, you make an impassioned plea on behalf of the vision of the wardrobe department, discoursing on the hero’s current attire and its suitability for the narrative flow of the piece. The client is persuaded, and with great relief you delete the note.
15. Move the pointer over the “Change color” note. You’ll notice that the transform widget appears along with the date and time of the entry, the name of the user who entered the note, and an X button to the right that lets you delete the note. Click the X.
As you address the issues noted, you can expose a list of all the notes within the current clip by clicking the Show Object Tree button.
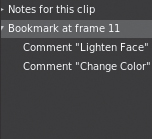
A hierarchical list appears showing all the notes you’ve applied. Clicking any item on this list selects that note. When you’re done with all the corrections that are called for, you can click the Delete All button to eliminate all notes applied to the current clip.
Review questions
1. How many correction layers can you add to a grade?
2. What is the Look browser for?
3. What are two ways of comparing clips in SpeedGrade?
4. What buttons are available under the Monitor for comparing clips using multiple playheads?
5. What is the result of using the Shot Matcher?
6. How can you copy grades forward?
7. Where are Snapshots saved?
8. What is a Grading clip?
Review answers
1. As many as you like.
2. Saving and retrieving preset looks, or grades.
3. Multiple playheads and snapshots.
4. 2-Up and 3-Up.
5. An AutoColorMatch layer is added to the Layer list that automatically adjusts one clip to match another.
6. Using the number keys on the numeric keypad.
7. In the Snapshot browser.
8. A grade that can be applied to several clips at once.