
Chapter 11, “Working with Databases,” covers all the basics for using an SQLite database in your Adobe AIR applications. Every interaction with a database that you’ll ever perform will use that information. But there are some other concepts and general techniques that you should also be aware of, and that’s the focus here.
This chapter teaches some new, more advanced ideas, as well as demonstrates a handful of best practices. To start, you’ll learn how to distribute a database with an application rather than having the application create it from scratch. The next three topics—prepared statements, fetching SELECT results in groups, and using transactions—can be used to improve the efficiency and security of your programs. The chapter concludes with more recommendations for improving performance, as well as a bunch of tips to aid you in debugging the inevitable database-related glitch.
The second example in the previous chapter includes the code for creating a new database. Your applications are obviously capable of doing that, but it actually doesn’t make much sense to include all that functionality in an application when the database only ever needs to be created once. A better solution is to create the database when you write the application, package the database with it, and then have the application copy the database to its final destination when the user runs the program for the first time. This is possible with SQLite databases, because the same database file can be transferred from one operating system to the next without complication (another reason for SQLite’s popularity).
In the next sequence of steps, you’ll learn how you can distribute databases with the programs you create. The specific database to be created will be for banking-like transactions and will be used in the rest of the examples in this chapter. Before getting into the steps, I should explain one fact: computers are tricky when it comes to working with numbers. As an example, if I stored the value 23.50 in an SQLite column defined as REAL, and then added 1 to this value, the result may end up as 24.4999999. Often these little quirks aren’t a problem, but when dealing with money, you can’t be too careful. The solution in this example will be to represent all dollar amounts (or whatever currency you want to work worth) in cents. So 23.50 will be stored as 2350.
Define the SQL commands necessary to create the database.
Database design is a big but very important topic, and I cover it in some of my other books (you can also find some tutorials online by searching for database design and database normalization). The following SQL commands are what I devised for creating the database to be used throughout the rest of the chapter:
CREATE TABLE accounts (id INTEGER PRIMARY KEY AUTOINCREMENT, name TEXT NOT NULL, balance INTEGER NOT NULL CHECK( (typeof(balance) = 'integer') AND (balance > 0) ) )
and
CREATE TABLE transfers (id INTEGER PRIMARY KEY AUTOINCREMENT, from_id INTEGER NOT NULL, to_id INTEGER NOT NULL, amount INTEGER CHECK( (typeof(amount) = 'integer') AND (amount > 0) ) )
The first table is the most important: It contains an ID column (the primary key), a column to store a person’s name, and a column to store the person’s account balance. In a real application, the person’s name would be divided into two (or three) columns, but I’m simplifying this a bit here.
The second table will record the history of all transactions. For this chapter’s examples, this means the transfers between accounts. The
accountstable will always be updated to reflect current balances, but it’s good to have another record of what has occurred. This second table has one column for the transfer ID, one for the person from whom the money is coming, and another for the person to whom the money is going. A fourth column reflects the amount being transferred. Fully fleshed out, I would likely also add a column that stores the date and time of each transaction.Note as well that in these two tables I use constraints for added data integrity. This topic is discussed in the “Adding Constraints” sidebar.
Create the application’s database on your own computer.
You can create an SQL database by writing an AIR application that does it for you (use Script 11.2 as an example, but you’ll need to assign each
CREATE TABLEcommand to anSQLStatementobject, and then execute each). You can also create the database using the command-linesqlite3client that comes with the software (if you’ve formally installed SQLite on your computer). A third option is to download and use one of the many third-party applications that exist for creating and managing SQLite databases.If you don’t want to go through the steps of creating the database yourself, you can download it from this book’s corresponding Web site at www.DMCInsights.com/air/ (see the Downloads page).
Copy the database file to the project’s directory.
For the purposes of this chapter, the name of the database created in step 2 is ch12.db.
In your project’s primary HTML file, begin a new JavaScript function (Script 12.1):
window.onload = function() {
}
Example 12.1. This script simply demonstrates the code that you would use to distribute a database with an application.
1    <html><!-- Script 12.1 -->
2    <head>
3    <title>Chapter 12</title>
4    <script type="text/javascript" src="AIRAliases.js"></script>
5    <script type="text/javascript">
6
7    // Function to be called when the application loads.
8    window.onload = function() {
9
10      // Database file:
11      var db = air.File.applicationStorageDirectory.resolvePath('ch12.db'),
12
13      // Copy the database file to the storage
14      // directory if it's not already there.
15      if (!db.exists) {
16         var original = air.File.applicationDirectory.resolvePath('ch12.db'),
17         original.copyTo(db);
18      }
19
20   }
21
22   </script>
23   </head>
24   <body>
25   </body>
26   </html>
The premise of the steps for distributing databases is that the database file will be bundled with the application, so it doesn’t need to be created on the user’s machine. After the program has been installed, the database will be in the application’s directory. That’s not where you want the database to be when the application starts writing data to it. Instead, the database needs to be moved to the application’s storage directory. That’s what will happen within this anonymous function.
Create a reference to the database file:
var db = air.File.applicationStorageDirectory.resolvePath('ch12.db'),Every application that uses a database also needs a
Fileobject that refers to it. As mentioned in step 3, the database that the running application uses needs to be in the application’s storage directory and, in this case, called ch12.db.If the file doesn’t exist, copy it from the application’s directory to the application’s storage directory:
if (!db.exists) { var original = air.File.applicationDirectory.resolvePath('ch12.db'), original.copyTo(db); }To end up with the database in the application’s storage directory, when the program runs, it should check for the presence of the database file in its final destination. If the database isn’t found there, the original should be copied from the application’s directory.
That’s all there is to it. The rest of the application can use the database normally.
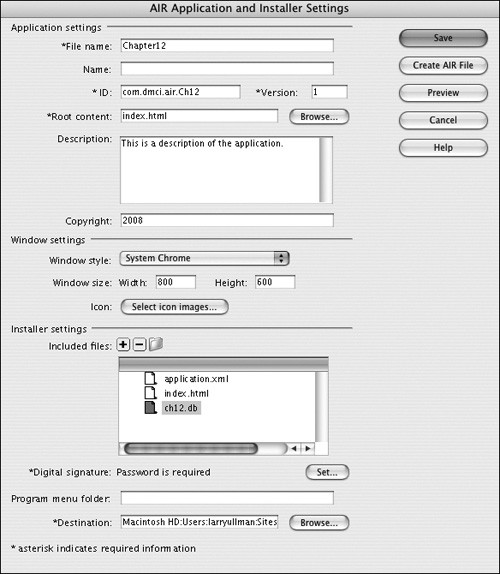
Be certain to include the database file when you package the final application (Figure 12.1).
✓ Tips
Using this method of distributing a database with an application has an added benefit: If the program has a “reinstall” or “clear database” functionality, all that would be necessary would be to replace the current database (in the application storage directory) with the distributed one (from the application directory).
You can create backups of an application’s data (if stored in a database) by simply copying the database file to another location.
In the INSERT example in the previous chapter, it was noted that an admitted security hole was present. Namely, the user’s input was being added to the query without taking extra precautions. This allows for SQL injection attacks, where the user purposefully enters malicious text in an attempt to break, damage, or simply learn something about the database. With some database applications, SQL injection attacks can be prevented by using an escaping function that sanctifies the submitted text. That’s not an option with SQLite, but there is another solution.
Most database applications support prepared statements, and SQLite is no exception. The premise behind a prepared statement is that the query to be executed is defined using placeholders for specific data:
var sql = new air.SQLStatement();
sql.sqlConnection = conn;
sql.text = 'INSERT INTO testing (something) VALUES (?)';
The question mark represents the actual value to be used in the query. Note that even though the value to be used in this particular case will be a text string, no quotation marks are placed around the question mark.
The next step is to associate values with the placeholders. When using question marks, which is to say unnamed placeholders, assign values to them by using the SQLStatement’s parameters attribute. It’s an indexed array, beginning at 0:
sql.parameters[0] = 'text to be inserted';
Then execute the query:
sql.execute();
The end result of these steps is the same as literally executing INSERT INTO testing (something) VALUES ('text to be inserted').
Instead of using question marks for placeholders, you can name the parameters, starting with either a colon or @, followed by a simple identifier:
sql.text = 'INSERT INTO users (username, email, password) VALUES (@un, @e, @p)';
sql.parameters['@un'] = 'troutster';
sql.parameters['@e'] = '[email protected]';
sql.parameters['@p'] = 'somepass';
sql.execute();
Whether you use named or unnamed parameters is really up to you. For simple queries, I prefer to go the unnamed route.
There are two benefits to using prepared statements. The first is the improved security: Data used in a query is separated from the actual query and aren’t vulnerable to SQL injection attacks. The second benefit is performance: The query is sent to the database and parsed (checked for syntax and validity) only once. Multiple executions of the same query with different values will go more quickly than repeatedly executing literal queries.
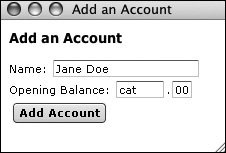
To practice this, let’s create an application for adding accounts to the database created in the previous section of the chapter (Figure 12.2).
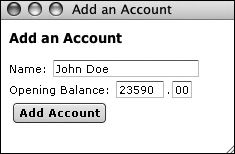
Figure 12.2. This program provides a way to add new accounts. The data entered here will be inserted into the database using prepared statements (see Script 12.2).
In your project’s primary HTML file, create the required objects (Script 12.2):
var conn = new air.SQLConnection();
var db = air.File.applicationStorageDirectory.resolvePath('ch12.db'),
var insert = new air.SQLStatement();
This application will use three objects. The first is of type
SQLConnection, which is required to connect to a database. The second is of typeFile, representing the actual database file. The third is aSQLStatementobject, which will represent the query to be executed.Create an anonymous function that does the prep work:
window.onload = function() {
  conn.addEventListener(air.SQLEvent.OPEN, dbOpen);
  conn.addEventListener(air.SQLErrorEvent.ERROR, dbError);
  insert.addEventListener(air.SQLEvent.RESULT, insertResult);
  insert.addEventListener(air.SQLErrorEvent.ERROR, dbError);
  conn.openAsync(db, air.SQLMode.UPDATE);
}
After the application has loaded, this function will be called, performing the necessary setup (see the previous chapter for explanations on these lines).
Example 12.2. This program uses prepared statements with its
INSERTquery for improved security and performance.1 <html><!-- Script 12.2 --> 2 <head> 3 <title>Add an Account</title> 4 <script type="text/javascript" src="AIRAliases.js"></script> 5 <script type="text/javascript"> 6 7 // Create the objects: 8 var conn = new air.SQLConnection(); 9 var db = air.File.applicationStorageDirectory.resolvePath('ch12.db'), 10 var insert = new air.SQLStatement(); 11 12 // Do the prep work after the application has loaded: 13 window.onload = function() { 14 15 // Add the event handlers: 16 conn.addEventListener(air.SQLEvent.OPEN, dbOpen); 17 conn.addEventListener(air.SQLErrorEvent.ERROR, dbError); 18 insert.addEventListener(air.SQLEvent.RESULT, insertResult); 19 insert.addEventListener(air.SQLErrorEvent.ERROR, dbError); 20 21 // Open the database: 22 conn.openAsync(db, air.SQLMode.UPDATE); 23 24 } // End of anonymous function. 25 26 // When the application has closed, close the database connection: 27 window.onbeforeunload = function() { 28 conn.close(); 29 } 30 31 // Function for reporting errors. 32 function dbError(e) { 33 alert('An error occurred.'), 34 } 35 36 // Function called when the database is opened. 37 function dbOpen() { 38 insert.sqlConnection = conn; 39 } 40 41 // Function called when the user clicks 'Add Item'. 42 function addAccount() { 43 44 // Insert the item: 45 insert.text = 'INSERT INTO accounts (name, balance) VALUES (?, ?)'; 46 insert.parameters[0] = document.getElementById('name').value; 47 insert.parameters[1] = +(document.getElementById('dollars').value + document. getElementById('cents').value); 48 insert.execute(); 49 50 } // End of addItem() function. 51 52 // Function called when an INSERT works. 53 function insertResult() { 54 55 // Notify the user: 56 alert ('The account has been added.'), 57 58 // Reset the inputs: 59 document.getElementById('name').value = null; 60 document.getElementById('dollars').value = null; 61 document.getElementById('cents').value = '00'; 62 63 } // End of the insertResult() function. 64 65 </script> 66 67 </head> 68 69 <body style="margin:10px;"> 70 71 <h3>Add an Account</h3> 72 73 Name: <input type="text" id="name"><br>Opening Balance: <input type="text" id="dollars" size="6">.<input type="text" id="cents" value="00" size="2" maxlength="2"><br><button onclick= "addAccount()">Add Account</button> 74 75 </body> 76 </html>Create a second anonymous function:
window.onbeforeunload = function() {
  conn.close();
}
This anonymous function will be called right before the application quits. Its sole purpose is to close the database connection.
Create an error handling function:
function dbError(e) {
  alert('An error occurred.'),
}
Per the event listeners added in step 2, this function will be called when a connection or query error happens. In this example, not much is done, but see code in the “Handling Errors” section of the previous chapter for suggestions as to what information you could include in the alert (or see the debugging section at the end of this chapter).
Create the
dbOpen()function.function dbOpen() { insert.sqlConnection = conn; }Once the database connection is made, this function will be called. It associates the connection with the
SQLStatementobject. If you want, you could do what the example in the previous chapter did: disable the Add Account button in the anonymous function, and then reenable it here after the database connection has been established.Define the
addAccount()function:function addAccount() { insert.text = 'INSERT INTO accounts (name, balance) VALUES (?, ?)'; insert.parameters[0] = document.getElementById('name').value; insert.parameters[1] = +(document.getElementById('dollars').value + document.getElementById ('cents').value); insert.execute(); }The application contains three text inputs and a button. When the user clicks the button, this function will be called. It defines and executes the query.
The query is first defined as a simple
INSERT, populating two of the three columns in theaccountstable (theidcolumn will be automatically assigned a value). Placeholders are used in the query to represent the values to be used. Then the values are assigned to theinsert.parametersattribute. Finally, the command is executed.For the account balance, the value to be used will be the cents amount concatenated to the dollars amount (so 4390 and 35 become 439035; see the explanation before the “Distributing Databases” set of steps as to why this is necessary). Unfortunately, if you were to assign just that as the parameter value, the query would fail the constraint check because the value type would be a string, not an integer. The solution is to forcibly cast the value to a number by applying the unary plus operator to it. This is just a little trick that guarantees the value will be a number (alternatively, you could add 0 to the value to achieve the same result, although that wouldn’t have the secondary benefit of guaranteeing that the number is positive).
To shorten the example, I omitted code that checks that all three form values aren’t empty, but you should do that in a real application. You could also include JavaScript code that confirms that the entered balance is a positive integer (which the database will also check) instead of forcing it to be, and you could check that the cents input is two characters long.
Create the
insertResult()function:function insertResult() { alert ('The account has been added.'), document.getElementById('name').value = null; document.getElementById('dollars').value = null; document.getElementById('cents').value = '00'; }This function will be called when the
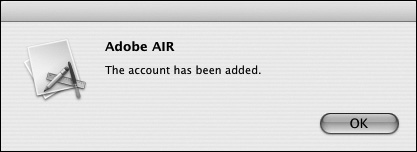
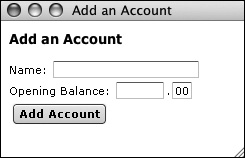
INSERTquery returns a positive result (thanks to the event listener created in step 2). It alerts the user that the account was added (Figure 12.3), and then resets the values in the form (Figure 12.4). As you can also see in Figures 12.2 and 12.4, the cents input will be given a default value of 00.Within the body of the page, add three text inputs and a button:
Name: <input type="text" id="name"><br>Opening Balance: <input type="text" id="dollars" size="6">.<input type="text" id="cents" value="00" size="2" maxlength="2"><br><button onclick="addAccount()">Add Account</button>
Save, test, debug, and run the completed application (Figure 12.5).
In Chapter 11, the SELECT query used retrieved and displayed every returned record in one series of actions. If your query returns a lot of records, that methodology can lead to some application delays and choppiness, even when performing asynchronous database communications. As an alternative, you can fetch the results of a SELECT query in groups.
The execute() method of the SQLStatement object takes an optional first argument, which is the number of records to fetch:
sql.execute(10);
That command would return the first ten records matched by the SELECT query. Then the function associated with the air.Event.SQLResult event would be called. Within it you should make sure that some results were returned and handle those. This process is the same as using execute() normally:
function selectResult() {
    var results = sql.getResult();
    if (results.data != null) {
       // Handle the results.
    }
To fetch more of the records matched by the query, you then call the next() method, providing it with the maximum number of records to return. Before doing this, you should make sure that the application hasn’t already fetched every returned record. With both these ideas in mind, the rest of the selectResult() function would look like this:
    if (!result.complete) {
       sql.next(10);
    }
} // End of selectResult() function.
If there are more records to fetch, the next ten will be requested, resulting in this function being called again. Those ten records will be handled, and then, if the result set hasn’t been completely fetched, the next ten. This process will be repeated until all the records have been returned.
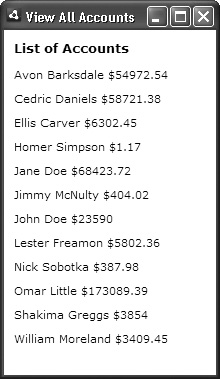
To demonstrate this, let’s create an application that retrieves and displays every account entered into the ch12.db database (Figure 12.6). This will be written as a separate program from Script 12.2, but you could easily apply the knowledge and code demonstrated in Chapter 11 to put the INSERT and SELECT functionality within the same application.
In your project’s primary HTML file, create the required objects (Script 12.3).
var conn = new air.SQLConnection();
var db = air.File.applicationStorageDirectory.resolvePath('ch12.db'),
var select = new air.SQLStatement();
Example 12.3. By changing the way the
execute()method is called, this application fetches the results of theSELECTstatement in smaller groups.1 <html><!-- Script 12.3 --> 2 <head> 3 <title>View All Accounts</title> 4 <script type="text/javascript" src="AIRAliases.js"></script> 5 <script type="text/javascript"> 6 7 // Create the objects: 8 var conn = new air.SQLConnection(); 9 var db = air.File.applicationStorageDirectory.resolvePath('ch12.db'), 10 var select = new air.SQLStatement(); 11 12 // Do the prep work after the application has loaded: 13 window.onload = function() { 14 15 // Add the event handlers: 16 conn.addEventListener(air.SQLEvent.OPEN, dbOpen); 17 conn.addEventListener(air.SQLErrorEvent.ERROR, dbError); 18 select.addEventListener(air.SQLEvent.RESULT, listAccounts); 19 select.addEventListener(air.SQLErrorEvent.ERROR, dbError); 20 21 // Open the database: 22 conn.openAsync(db, air.SQLMode.READ); 23 24 } // End of anonymous function. 25 26 // When the application has closed, close the database connection: 27 window.onbeforeunload = function() { 28 conn.close(); 29 } 30 31 // Function for reporting errors. 32 function dbError(e) { 33 alert('An error occurred.'), 34 } 35 36 // Function called when the database is opened. 37 function dbOpen() { 38 39 // Associate the connection with the SQLStatement: 40 select.sqlConnection = conn; 41 42 // Get all the accounts: 43 select.text = 'SELECT name, balance FROM accounts ORDER BY name ASC'; 44 select.execute(3); 45 46 } // End of dbOpen() function. 47 48 // Function that adds the items to the page. 49 function listAccounts() { 50 51 // Variables used to add elements: 52 var div = document.getElementById('list'), 53 var p, acct = null; 54 55 // Get the results of the query: 56 var results = select.getResult(); 57 58 if (results.data != null) { // Some records returned! 59 60 // Loop through the results: 61 for (var i = 0; i < results.data. length; i++) { 62 63 // Create what should be displayed: 64 acct = results.data[i].name + ' $' + (results.data[i].balance/100); 65 66 // Create the elements: 67 p = document.createElement('p'), 68 p.innerText = acct; 69 70 // Add to the DIV: 71 div.appendChild(p); 72 73 } // End of FOR loop. 74 75 // Get more if more exist: 76 if (!results.complete) { 77 select.next(3); 78 } 79 80 } // End of results.data != null IF. 81 82 } // End of listAccounts() function. 83 84 </script> 85 86 </head> 87 88 <body style="margin:10px;"> 89 90 <h3>List of Accounts</h3> 91 92 <div id="list"></div> 93 94 </body> 95 </html>This program uses the same database populated by Script 12.2. Keep in mind that for this to work, both scripts must have the same application ID value (in the XML descriptor file) and publisher ID value (which comes from the certificate used to sign the
.airfile; this is not applicable if you are running the examples using theadlutility).Create an anonymous function that does the prep work:
window.onload = function() {
  conn.addEventListener(air.SQLEvent.OPEN, dbOpen);
  conn.addEventListener(air.SQLErrorEvent.ERROR, dbError);
  select.addEventListener(air.SQLEvent.RESULT, listAccounts);
  select.addEventListener(air.SQLErrorEvent.ERROR, dbError);
  conn.openAsync(db, air.SQLMode. READ);
}
This code should be pretty familiar to you by now. When the
SELECTquery returns a positive result, thelistAccounts()function will be called. I’ll also point out that the database is opened in just read mode, because that’s all this program will do.Create a second anonymous function and the error handling function:
window.onbeforeunload = function() {
  conn.close();
}
function dbError(e) {
  alert('An error occurred.'),
}
Create the
dbOpen()function:function dbOpen() { select.sqlConnection = conn; select.text = 'SELECT name, balance FROM accounts ORDER BY name ASC'; select.execute(3); }When the database connection is made, this function will be called. It associates the connection with the
SQLStatementobject, then defines theSELECTquery, and executes it. Notice that I’m having the execute statement only return a fairly small number of records (three). This is because there aren’t that many records in the database. When you have a more populated database, you’ll want to change this value to 10 or 20 or 30.Begin the
listAccounts()function:function listAccounts() { var div = document.getElementById('list'), var p, acct = null; var results = select.getResult(); if (results.data != null) {The function begins by getting an association for the place on the page where all of the accounts will be listed. This will be within a
DIVwhoseidvalue is list. To thisDIV, one paragraph will be added for each record (you could also list the accounts within a table if you’d rather). Then the results are fetched and a conditional makes sure the results are not empty. That conditional would be false if the query didn’t return any records.Add each account to the page:
for (var i = 0; i < results.data.length; i++) {
  acct = results.data[i].name + ' $' + (results.data[i].balance/100);
  p = document.createElement('p'),
  p.innerText = acct;
  div.appendChild(p);
}
The loop goes through each fetched record. Within the loop, the
acctvariable is assigned the value of the account holder’s name, plus a space, plus a dollar sign, plus their balance (divided by 100 to turn the integer cents value into a decimal dollar value: e.g., 117 to 1.17). Then a new paragraph element is created, given theacctvalue, and appended to theDIV.Complete the
listAccounts()function:if (!results.complete) { select.next(3); } } // End of results.data != null IF. } // End of listAccounts() function.After the
forloop, a check needs to be made to see if there are more results to be fetched. This can be done by checking the value ofresults.complete. Ifresults.completeis not true, there are more records to be returned, soselect.next()is called and fetches three more records.Within the body of the page, add a
DIVwith anidof list:<div id="list"></div>
Save, test, debug, and run the completed application.
✓ Tip
One modification you could make to this and the next example would be to format the account balances as currency. This would mean separating thousands by commas and ensuring that there are always exactly two numbers after the decimal point. If you search online using JavaScript format currency, you’ll find sample code that does all this.
Transactions are a different way of executing database queries. With the standard method used in this and the previous chapter, a query is run as soon as its execute() method is called. More important, its effects are permanent: There is no way of undoing an executed query. An alternative method is to run queries within a transaction. By doing so, you can create checks that guarantee everything worked as expected. Then you can either make the queries permanent or undo their collective effects, depending on the overall result.
To use transactions in your Adobe AIR application, you use three SQLConnection methods. To start a transaction, call begin():
conn.begin();
From that point onward, every query will only have a temporary impact until the commit() method is called:
conn.commit();
The other option would be to undo all the queries by calling the rollback() method:
conn.rollback();
From a programming perspective, using these functions is really straightforward. The trick is being able to determine when it’s appropriate to commit a transaction and when it should be rolled back. This next application, which allows a user to transfer funds from one account to another (Figure 12.7), will demonstrate the logic underlying transactions. In this particular case, keep in mind that the transfer involves three steps:
Updating the “from” account to subtract the amount being transferred from the balance.
Updating the “to” account to add the amount being transferred to the balance.
Recording the transaction in the
transferstable.
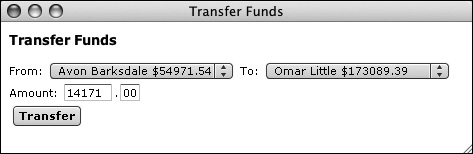
If any one of these three steps fail, the entire transaction should be undone.
In your project’s primary HTML file, create the necessary objects (Script 12.4):
var conn = new air.SQLConnection();
var db = air.File.applicationStorageDirectory.resolvePath('ch12.db'),
var select = new air.SQLStatement();
var update = new air.SQLStatement();
var insert = new air.SQLStatement();
Example 12.4. This program uses transactions to guarantee that a series of queries works completely. If not, all the potential effects are undone.
1    <html><!-- Script 12.4 -->
2    <head>
3    <title>Transfer Funds</title>
4    <script type="text/javascript" src="AIRAliases.js"></script>
5    <script type="text/javascript">
6
7    // Create the objects:
8    var conn = new air.SQLConnection();
9    var db = air.File.applicationStorageDirectory.resolvePath('ch12.db'),
10   var select = new air.SQLStatement();
11   var update = new air.SQLStatement();
12   var insert = new air.SQLStatement();
13
14   // Needed global variables:
15   var count, amount, to, from = 0;
16
17   // Do the prep work after the application has loaded:
18   window.onload = function() {
19      conn.addEventListener(air.SQLEvent.OPEN, dbOpen);
20      conn.addEventListener(air.SQLErrorEvent.ERROR, dbError);
21      select.addEventListener(air.SQLEvent.RESULT, listAccounts);
22      select.addEventListener(air.SQLErrorEvent.ERROR, dbError);
23      update.addEventListener(air.SQLEvent.RESULT, updateResult);
24      update.addEventListener(air.SQLErrorEvent.ERROR, transactionError);
25      insert.addEventListener(air.SQLEvent.RESULT, insertResult);
26      insert.addEventListener(air.SQLErrorEvent.ERROR, transactionError);
27
28      conn.openAsync(db, air.SQLMode.UPDATE);
29   } // End of anonymous function.
30
31   // When the application has closed, close the database connection:
32   window.onbeforeunload = function() {
33      conn.close();
34   }
35
36   // Function for reporting regular errors.
37   function dbError(e) {
38      alert('An error occurred.'),
39   }
40
41   // Function for reporting transaction errors.
42   function transactionError(e) {
43
44      // Alert the user:
45      alert('The transfer could not be made because an error occurred.'),
46
47      // Undo the effects:
48      conn.rollback();
49
50      // Cancel any outstanding queries:
51      conn.cancel();
52
53   } // End of transactionError() function.
54
55   // Function called when the database is opened.
56   function dbOpen() {
57      select.sqlConnection = conn;
58      update.sqlConnection = conn;
59      insert.sqlConnection = conn;
60      getAccounts();
61   } // End of dbOpen() function.
62
63   // Function that runs the SELECT query.
64   function getAccounts() {
65      select.text = 'SELECT id, name, balance FROM accounts ORDER BY name ASC';
66      select.execute();
67   }
68
69   // Function that adds the items to the page.
70   function listAccounts() {
71
72      // Clear existing values:
73      removeChildren('fromMenu'),
74      removeChildren('toMenu'),
75
76      var o, acct = null;
77      var results = select.getResult();
78      for (var i = 0; i < results.data.length; i++) {
79          acct = results.data[i].name + ' $' + (results.data[i].balance/100);
80
81          // Create the elements:
82          o = document.createElement('option'),
83          o.setAttribute('value', results.data[i].id);
84          o.innerText = acct;
85          document.getElementById('fromMenu').appendChild(o);
86          document.getElementById('toMenu').appendChild(o.cloneNode(true));
87
88      } // End of FOR loop.
89   } // End of listAccounts() function.
90
91   // Function for clearing nodes.
92   function removeChildren(which) {
93      var parent = document.getElementById(which);
94      while (parent.hasChildNodes()) {
95         parent.removeChild( parent.lastChild );
96      }
97   }
98
99   // Function that starts the transfer process.
100  function transfer() {
101
102     // Reset the counter:
103     count = 0;
104
105     // Get the form data:
106     amount = +(document.getElementById('dollars').value + document.getElementById('cents').value);
107     to = document.getElementById('toMenu').value;
108     from = document.getElementById('fromMenu').value;
109
110     // Start a transaction:
111     conn.begin();
112
113     // Update the "from" account:
114     update.text = 'UPDATE accounts SET balance = balance + ? WHERE id = ?';
115     update.parameters[0] = -amount;
116     update.parameters[1] = from;
117     update.execute();
118
119  } // End of transfer() function.
120
121  // Function called when an UPDATE returns a positive result.
122  function updateResult() {
123
124     // Increment the counter:
125     count++;
126
127     // See what stage we're at:
128     if (count == 1) { // Run the second update:
129
130        update.parameters[0] = amount;
131        update.parameters[1] = to;
132        update.execute();
133
134     } else if (count == 2) { // Run the insert.
135
136        insert.text = 'INSERT INTO transfers (from_id, to_id, amount) VALUES (?, ?, ?)';
137        insert.parameters[0] = from;
138        insert.parameters[1] = to;
139        insert.parameters[2] = amount;
140        insert.execute();
141
142     } else { // Problem!
143
144        alert('The transfer could not be
           made because an error occurred.'),
145        conn.rollback();
146        conn.cancel();
147
148     } // End of if-else if.
149
150  } // End of updateResult() function.
151
152  // Function called when an INSERT works.
153  function insertResult() {
154
155     // Check the count to verify success:
156     if (count == 2) { // Good!
157        alert('Transfer made!'),
158        conn.commit();
159        getAccounts();
160     } else { // Bad!
161        alert('The transfer could not be
           made because an error occurred.'),
162        conn.rollback();
163        conn.cancel();
164     }
165
166  } // End of insertResult() function.
167
168  </script>
169
170  </head>
171
172  <body style="margin:10px;">
173
174  <h3>Transfer Funds</h3>
175
176  From: <select id="fromMenu"><option>
     From Account</option></select> To:
     <select id="toMenu"><option>To Account
     </option></select><br>Amount: <input
     type="text" id="dollars" size="6">.<input
     type="text" id="cents" value="00" size="2"
     maxlength="2"><br><button onclick=
     "transfer()">Transfer</button>
177
178  </body>
179  </html>
Transferring funds from one account to another will require one
SELECTquery (to get all the account information), oneUPDATEquery (to update the balances), and oneINSERTquery (to record the transaction). OneSQLStatementobject for each of these is created, plus theSQLConnectionandFileobjects.Create the necessary global objects:
var count, amount, to, from = 0;
Because this program will go in and out of several functions, some global variables will be necessary. One,
count, will be used to track the success of the transaction. The other three all represent values used in the transaction. All four variables are initially given a value of 0.Create an onload anonymous function:
window.onload = function() {
  conn.addEventListener(air.SQLEvent.OPEN, dbOpen);
  conn.addEventListener(air.SQLErrorEvent.ERROR, dbError);
  select.addEventListener(air.SQLEvent.RESULT, listAccounts);
  select.addEventListener(air.SQLErrorEvent.ERROR, dbError);
  update.addEventListener(air.SQLEvent.RESULT, updateResult);
  update.addEventListener(air.SQLErrorEvent.ERROR, transactionError);
  insert.addEventListener(air.SQLEvent.RESULT, insertResult);
  insert.addEventListener(air.SQLErrorEvent.ERROR, transactionError);
  conn.openAsync(db, air.SQLMode.UPDATE);
}
For the most part, this should all be familiar territory. However, this code uses two different functions for handling the errors that might occur. The connection and
SELECTobject errors will be handled bydbError(). TheUPDATEandINSERTobjects, both of which will be used in the transaction, have their errors handled bytransactionError(). That function will take some extra steps thatdbError()will not.Define the onbeforeunload and
dbError()functions:window.onbeforeunload = function() { conn.close(); } function dbError(e) { alert('An error occurred.'), }This second function is the generic error handling function and is associated with the
connandselectobjects.Define the
transactionError()function:function transactionError(e) { alert('The transfer could not be made because an error occurred.'), conn.rollback(); conn.cancel(); }If an error occurs during the transaction, this function will be called. Its duty is to report the problem to the user (Figure 12.8), and then rollback any changes made. A call to the
cancel()method cancels any other queries that might be queued for execution on the database.Define the
dbOpen()method:function dbOpen() { select.sqlConnection = conn; update.sqlConnection = conn; insert.sqlConnection = conn; getAccounts(); }Along with associating the statements with the connection object, this function calls
getAccounts(), which executes theSELECTquery that populates the pull-down menus.Define the
getAccounts()function:function getAccounts() { select.text = 'SELECT id, name, balance FROM accounts ORDER BY name ASC'; select.execute(); }This function defines and executes the
SELECTquery. It returns every record in theaccountstable.Begin defining the
listAccounts()table:function listAccounts() { removeChildren('fromMenu'), removeChildren('toMenu'),This function’s purpose is to populate the two pull-down menus (see Figure 12.7). That will occur when the program first loads and after each transfer (so that the menus reflect the changes). In this second situation, the function needs to start by getting rid of the current options in both menus. To do so, another function named removeChildren is called, passing that function the
idvalue of the element to be cleared of subelements (this will be explained more in step 12).Retrieve the query results:
var o, acct = null;
var results = select.getResult();
for (var i = 0; i < results.data.length; i++) {
  acct = results.data[i].name + ' $' + (results.data[i].balance/100);
Two variables will be needed to create the pull-down menu options. Those are declared first. Then the results are fetched and a loop is written to access them all (to save space, I’ve omitted the check to see that
results.datais not equal to null). Within the loop, theacctvariable is assigned a value of the person’s name, followed by a space, followed by a dollar sign, followed by the balance divided by 100. The same thing was done with the query results in Script 12.3.Add each record as a pull-down menu option:
o = document.createElement('option'),
o.setAttribute('value', results.data[i].id);
o.innerText = acct;
document.getElementById('fromMenu').appendChild(o);
document.getElementById('toMenu').appendChild(o.cloneNode(true));
Still within the
forloop, a new element of typeoptionis created. It’s assigned an attribute called value with a value of the record’s ID. TheinnerTextattribute of this option will be theacctvariable, which is assigned a value in step 9. The end result will be this HTML code for each record in the table:<option value="1">John Doe $23590</option>
The element is first added to the “from” account menu, and then added to the “to” account menu by appending to that element a clone of the original object (Figure 12.9).
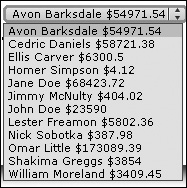
Figure 12.9. The dynamically generated pull-down menu of accounts. Both menus (see Figure 12.7) will contain the same options in the same order.
Complete the
listAccounts()function:} // End of FOR loop. } // End of listAccounts() function.
Define the
removeChildren()function:function removeChildren(which) { var parent = document.getElementById(which); while (parent.hasChildNodes()) { parent.removeChild( parent.lastChild ); } }This function is called—twice—by
listAccounts(). It’s needed to get rid of all the existing options in each pull-down menu. That will be necessary prior to repopulating the pull-down menus with the updated values after a transfer. To clear out the existing options, the function removes every existing node (i.e., child) of a given element.This function is passed the
idvalue of the element to be cleared of children. This will be either toMenu or fromMenu. The function then gets a reference for the parent element. Then a loop gets rid of each node, one at a time, for as long as the parent element has nodes.Begin defining the
transfer()function:function transfer() { count = 0; amount = +(document.getElementById ('dollars').value + document.getElementById('cents').value); to = document.getElementById ('toMenu').value; from = document.getElementById ('fromMenu').value;The other functions to this point handle the prep work and error handling; this one starts the application’s primary purpose. It will be called when the user clicks the Transfer button (see Figure 12.7). Within this function, the global
countvariable is assigned a value of 0. This variable will be used to track the success of the transaction. Then the three pertinent values—the amount being transferred, the ID of the user from whom that amount is coming, and the ID of the user to whom that amount is going—are assigned to global variables. To guarantee that the amount value is an integer, the unary plus sign operator is applied to its value (this little trick is briefly discussed in step 6 of “Using Prepared Statements”).Complete the
transfer()function:conn.begin(); update.text = 'UPDATE accounts SET balance = balance + ? WHERE id = ?'; update.parameters[0] = -amount; update.parameters[1] = from; update.execute(); } // End of transfer() function.
As I said, this function begins the transfer process, which means it needs to begin the transaction by calling
begin(). Then the query is defined using prepared statements. Ordinarily, the two update queries used in this situation would be:UPDATE accounts SET balance = balance - amount WHERE id = fromIDand
UPDATE accounts SET balance = balance + amount WHERE id = toIDHowever, the performance of the application will be improved if the query is the same for both. To make that possible, the “from” account will have the negation of the transfer amount added to that person’s balance (which is equivalent to just subtracting it).
Begin defining the
updateResult()function:function updateResult() { count++; if (count == 1) { update.parameters[0] = amount; update.parameters[1] = to; update.execute();Per the code in step 3, this function will be called when an
UPDATEquery runs successfully. That should be the case twice: when the query executed in thetransfer()function works and when the second update query (executed here) works. To know which specific update event just happened, thecountvariable will be used in a conditional, so the first thing this function does is increment the value ofcount. After the firstUPDATEquery runs,countwill have a value of 1, and this function will know to execute the secondUPDATEquery. To do that, the parameters are assigned new values using the global variables (you don’t need to reassign a query toupdate.text, because it already has the right value), and then theexecute()method is called.Add an
else ifclause to theupdateResult()function:} else if (count == 2) { insert.text = 'INSERT INTO transfers (from_id, to_id, amount) VALUES (?, ?, ?)'; insert.parameters[0] = from; insert.parameters[1] = to; insert.parameters[2] = amount; insert.execute();If count has a value of 2, then both
UPDATEqueries worked and it’s time to record the transaction in thetransferstable. This query also uses prepared statements.Complete the
updateResult()function:} else { // Problem! alert('The transfer could not be made because an error occurred.'), conn.rollback(); conn.cancel(); } // End of if-else if. } // End of updateResult() function.The
elseclause will only ever be applied if this function is called butcountdoes not have a value of 1 or 2. That should never happen, but just to be safe, if it does, the transaction is rolled back and any other queries waiting to be executed are cancelled (the same as if a database error occurred during the transaction).Define the
insertResult()function:function insertResult() { if (count == 2) { alert('Transfer made!'), conn.commit(); getAccounts(); } else { alert('The transfer could not be made because an error occurred.'), conn.rollback(); conn.cancel(); } }Per the code in step 3, this function will be called when the
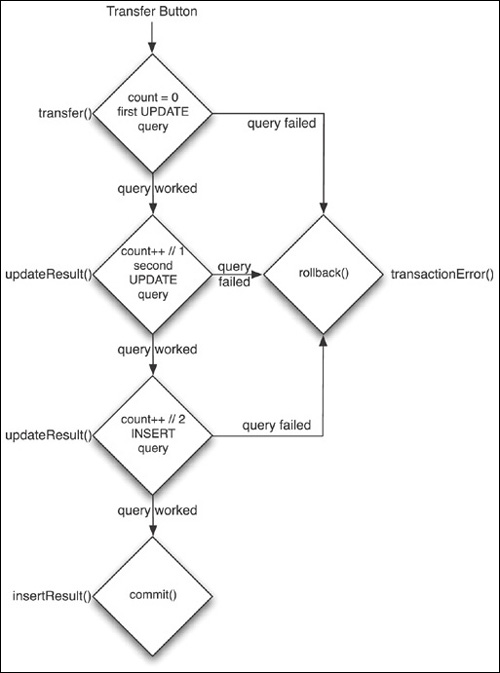
INSERTquery returns a positive result. If you follow the logic of this application (Figure 12.10), this should only be the case after bothUPDATEqueries worked, meaning thatcounthas a value of 2. If that’s the case, the user will be alerted (Figure 12.11), the transaction committed, and the pull-down menus updated (by calling thegetAccounts()function). If you want, you could also reset the form elements at this point.If, for some reason,
countdoes not equal 2, the user will be notified, the transaction rolled back, and any remaining queries canceled (again, as if a database error had occurred).Within the page body, add the necessary inputs:
From: <select id="fromMenu"><option>From Account</option></select> To:<select id="toMenu"><option>To Account</option></select><br>Amount: <input type="text" id="dollars" size="6">.<input type="text" id="cents" value="00" size="2" maxlength="2"><br><button onclick="transfer()">Transfer</button>
Save, test, debug, and run the completed application.
To see what would happen when a transfer fails, attempt to transfer out of one person’s account more money than is available.
✓ Tips
You can only perform one transaction (aka group of queries) at a time.
You can control how the database locking is handled during a transaction by passing an argument to the
begin()method. Database locking refers to what other activities can and cannot be performed while a transaction is in progress. The various options are defined in theSQLTransactionLockTypeclass.
In the two chapters in which working with SQLite is discussed—Chapter 11 and this one, most of the examples focus on the rudimentary steps: how to execute an INSERT query, how to retrieve SELECT query results, how to use prepared statements, and so on. You’ll also find occasional mention for improving your application’s performance when it comes to working with databases, but I’ll go ahead and list all the best practices I can offer here.
Select only what’s necessary from a database.
It’s easy and common to use
SELECTqueries that retrieve every column or potentially every row of a table, even if all that information will never be used. Always limit which columns and rows you select. Doing so thereby restricts how much data is being transferred back and forth, as well as how much logic your application may need to handle it all.Have the database do as much work as possible.
If you know that you’ll need to alter the selected data in any way, have your SQL query address that if it can, making the database do the heavy lifting. For example, in this chapter all dollar amounts have been stored in integer format, and then divided by 100 in the program to convert the values to dollars and cents. It would be best to have the query perform this math.
Use prepared statements.
Prepared statements won’t always be more efficient than standard queries, but if an application will run the same query multiple times (with variations on some of the data used in the query), then prepared statements are clearly the way to go.
Only connect to a database if and when necessary.
This goes back to a mistake commonly made by Web developers: connecting to a database on every page in a site, even if there are pages that don’t use the database. Obviously, having a program take steps that aren’t necessary, like connecting to a database, will always hinder performance.
Create the database connection before it’s needed.
If an application will use a database, make sure it exists and establish the connection (i.e., open it) before it’s time to execute queries on it. In the examples in this chapter, the database is opened after the window has loaded but before the user clicks any button that triggers some database actions.
Use the asynchronous methods.
Besides providing for a smoother user experience, asynchronous database communications perform better than synchronous ones.
Use transactions for related groups of queries.
Along with improving the database’s integrity, transactions can improve the performance of an application when there are lots of queries being run together.
Use separate
SQLStatementobjects for each query.I’ve made a habit of abiding by this rule in these two chapters and for good reason. Your AIR application will optimize how queries are handled, making them execute as efficiently as possible. Reusing the same
SQLStatementobject for different queries will prevent such possible optimizations.
Any time you have two technologies working together, the potential for errors increases exponentially. When using SQLite with an Adobe AIR application, problems could occur within your HTML page, your JavaScript code, the SQL syntax, or the SQLite database. Debugging such problems is first of all a matter of trying to hunt down where the true fault lies. The following list of tips cover everything you need to know and do to solve any database-related problem.
Use alerts to confirm the values of variables, queries, results, and so on.
This is also a general debugging tip, but when a SQL query depends on data coming from a variable—and most will, take extra steps to confirm what the values of those variables and queries are.
Use alerts to confirm which functions are called and when.
In more complicated programs, like Script 12.4, the execution will go in and out of lots of functions. To be certain which functions are called and when, use a simple alert like:
alert('Inside the selectResult() function.'),While developing a program, display as detailed an error message as possible.
Chapter 11 provides some code for displaying all the available error messages associated with a database problem. Use that to debug a problem, but don’t use it in released applications (where a user could see it, although by that time the program should be error free).
Validate all user-supplied input.
The examples in this chapter and Chapter 11 don’t do a good job of this, but for what it’s worth I do point out that shortfall. Chapter 15, “Security Techniques,” has some specific recommendations as to how you can validate user-supplied input.
Avoid making assumptions.
This is related to the previous bullet but also includes tasks like checking that a
SELECTquery returned some results prior to attempting to retrieve the results:if (results.data != null) {...Another check you might want to perform includes confirming that a database file exists prior to connecting to it.
Pay attention to where the database file is located.
This is particularly important when storing the database file in the application’s storage directory (which should often be the case). Where exactly on the user’s computer that location is found depends in part on the application’s ID and publisher ID. Be aware of these values when debugging problems (for example, if the database doesn’t seem to have the right tables or data in it, your application may be looking at the wrong database).
Run queries on, and confirm the structure and contents of, a database using a third-party application.
One of the absolute best debugging tips for any application (desktop or Web-based) that interacts with a database is to print out the query being run, and then run that query using another interface. By doing so, you’ll be able to see the syntax of the query, see the results it produces, and even immediately see any errors that may be caused without the middleman, which is JavaScript and your AIR application. Taking these steps will most likely clarify whether the problem is with the query, the query results, or how those results are being handled by the application.
Use prepared statements.
As stated in the corresponding section earlier in the chapter, prepared statements will make your application much more secure and less prone to bugs (because potentially problematic data won’t cause SQL syntax errors).
Use constraints in the database tables.
Constraints are added checks that the data being entered into a database is appropriate. Extra precautions are always a good idea.
Normalize the database.
Database normalization is a huge topic but one you should become familiar with if you use databases frequently. A properly designed database will be more reliable than one hastily put together. And when it comes to databases, the reliability of the data is paramount.
Explicitly name the columns to be populated in
INSERTqueries.There are two syntaxes for an
INSERTquery:INSERT INTO tablename VALUES (...)
and
INSERT INTO tablename (col1, col2,...) VALUES (...)
The second format, although more wordy, is less likely to cause errors. Or, in a worst-case scenario, the errors that do arise will be more evident.