Most of this book’s content focuses on interactions between an application and the operating system as a whole. This includes making windows, creating menus for common tasks, interacting with the clipboard, and working with files, directories, and databases. Naturally, much of what an application does involves these tasks. But there’s a whole different realm of interactions that can take place between an application and other computers: networking activities.
This chapter is dedicated to client-server communications, where the AIR application running on the user’s computer is the client and another computer is the server. One of this chapter’s examples will simply show how to confirm that a server is available for communications. Two examples will demonstrate how to send data to the server, and three will use server-provided content in the application.
Of the various networking-related classes you’ll use in an AIR application, URLRequest will be used the most. A URLRequest object only provides a reference to the resource to which your application should connect, so it doesn’t do much but will be needed by the classes that do.
When you create a URLRequest object, you can provide it with the URL the application will use:
var url = new air.URLRequest ('http://www.example.com'),A URLRequest object can use many different URL schemes: http, https, file, app, and app-storage. The last two, which point to items found within the application and application storage directories, can only be used in code running within the application security sandbox (see Chapter 15, “Security Techniques,” if you don’t understand what application security sandbox means). And although this chapter will use URLRequest objects to interact with other computers, they can be used in conjunction with File, Sound, and other object types.
As I said, the actual URLRequest object doesn’t do much, so as an example of how it can be used, I’ll turn to the URLMonitor class. It is defined in the servicemonitor.swf file that comes with the AIR SDK. The URLMonitor class can be used to literally monitor a URL—to see if this application on this computer can access a Web site.
When you create a URLMonitor object, you provide it with a URLRequest instance:
var monitor = new air.URLMonitor(url);
To the monitor you want to add an event listener that watches for status changes:
monitor.addEventListener(air.StatusEvent.STATUS, statusChange);
Finally, start the monitor:
monitor.start();
You can find the status of the resource being monitored by referring to the monitor object’s available property:
function statusChange(e) {
    alert(monitor.available);
}
If monitor.available has a value of true, the application can access that URL.
Let’s run through all this again in a simple, sample application.
In your project’s primary HTML file, include the Shockwave file (Script 13.1):
<script src="servicemonitor.swf" type="application/x-shockwave-flash"></script>
To use the
URLMonitorclass, an application must include this file. For thetypeattribute, make sure you specify its value as application/x-shockwave-flash.In a JavaScript block, create the two objects:
var url = new air.URLRequest ('http://www.example.com'),
var monitor = new air.URLMonitor(url);
This code is pretty much the same as the code explained earlier. The URL http://www.example.com will work (it does actually exist), or you can use any other address here.
Example 13.1. This first example confirms the application’s ability to access a particular Web site.
1    <html><!-- Script 13.1 -->
2    <head>
3    <title>URLRequest and URLMonitor</title>
4    <script src="servicemonitor.swf" type="application/x-shockwave-flash"></script>
5    <script type="text/javascript" src="AIRAliases.js"></script>
6    <script type="text/javascript">
7
8    // Create the two objects:
9    var url = new air.URLRequest('http://www.example.com'),
10   var monitor = new air.URLMonitor(url);
11
12   // Add the event listener:
13   monitor.addEventListener(air.StatusEvent.STATUS, statusChange);
14
15   // Start the monitor:
16   monitor.start();
17
18   // Function called whenever the monitor status changes.
19   function statusChange(e) {
20
21      // Find the document element:
22      var status = document.getElementById('status'),
23
24      // Set the value based upon availability:
25      if (monitor.available) {
26         status.innerText = 'available';
27      } else {
28         status.innerText = 'not available';
29      }
30
31   } // End of statusChange() function.
32
33   </script>
34   </head>
35   <body>
36
37   <div>The resource is <strong id="status"></strong>.</div>
38
39   </body>
40   </html>
Add an event listener to the
URLMonitorobject:monitor.addEventListener(air.StatusEvent.STATUS, statusChange);
When the
URLMonitorobject’s status changes—from available/connected to unavailable/unconnected or vice versa, thestatusChange()function will be called.Start the monitor:
monitor.start();
If you don’t include this line, the application won’t actually do anything.
Begin the
statusChange()function:function statusChange(e) { var status = document.getElementBy Id('status'),The role of this function is to add some text to the application indicating whether the given resource is available or not. The specific document element that will be updated is called status, and a reference to that is created here.
Complete the
statusChange()function:if (monitor.available) { status.innerText = 'available'; } else { status.innerText = 'not available'; } } // End of statusChange() function.If the
availableproperty of the monitor object has a value oftrue, the status element will be assigned aninnerTextvalue of available. Otherwise it’s assigned a value of not available.Within the body of the page, create an area with an
idof status:<div>The resource is <strong id="status"></strong>.</div>
Thanks to the conditional in the
statusChange()function, this sentence will end up reading either The resource is available. (Figure 13.1) or The resource is not available. (Figure 13.2).Copy the
servicemonitor.swfto the project directory.You’ll find it in the AIR SDK’s
frameworksfolder.Save, test, debug, and run the completed application.
Remember to include the Shockwave file when you build the actual
.airfile.As a quick way to test the application, while it’s running, temporarily disable or enable your Internet connection.


✓ Tips
There are several other properties of the
URLRequestclass that I don’t cover in this book. Most of them are only used for more advanced purposes, and some are only usable within application security sandbox content.The
URLRequestDefaultsclass is where you can set new default values for allURLRequestobjects used by an application. It also has asetLoginCredentialsForHost()method, which is used to set the hostname/username/password combination used to access restricted areas.
The first example in this chapter shows how easy it is to connect to a URL. That code can also confirm two things: that the user has a live network connection and that the named Web site is available. But you’ll almost always want your applications to do more than just this; normally, they should either retrieve data from that URL or send data to it.
To retrieve data, start by creating the URLRequest object:
var url = new air.URLRequest ('http://www.example.com/page.txt'),From there, instead of using a URLMonitor object, which can only monitor the status of a URL, create an object of type URLLoader
var loader = new air.URLLoader();
This class is used to handle the data returned by a resource. The data the server sends back will not be available until all of it has been received, so the URLLoader needs an event listener for the load completion:
loader.addEventListener(air.Event.COMPLETE, loadComplete);
Finally, start the loading by invoking the load() method, passing it the URLRequest object:
loader.load(url);
The function that handles the COMPLETE event should be written to accept an event argument:
function loadComplete(e) {
}
Within the function, you can access the retrieved data by either referring to the event’s target attribute or the original loader variable, if it’s global. For either, refer to the data property:
alert(e.target.data);
or
alert(loader.data);
To see how this works in a real example, this next application will fetch a stock quote stored in an online text file.
In your project’s primary HTML file, create the two required objects (Script 13.2):
var url = new air.URLRequest ('http://www.dmcinsights.com/air/ch13data.txt'),
var loader = new air.URLLoader();
The resource being requested—www.dmcinsights.com/air/ch13data.txt—is a plain text file that just contains a number. You can use this URL or change it to a page of your own creation.
Add an event listener to the
URLLoaderobject:loader.addEventListener(air.Event.COMPLETE, loadComplete); loader.load(url);
When the object has completely downloaded the entire response, the
loadComplete()function will be called. The second line begins the loading process.Example 13.2. This application reads in the data from a text file found online, and then places that content within the HTML page.
1 <html><!-- Script 13.2 --> 2 <head> 3 <title>Retrieving Data</title> 4 <script type="text/javascript" src="AIRAliases.js"></script> 5 <script type="text/javascript"> 6 7 // Create the two objects: 8 var url = new air.URLRequest('http://www.dmcinsights.com/air/ch13data.txt'), 9 var loader = new air.URLLoader(); 10 11 // Add the event listener: 12 loader.addEventListener(air.Event.COMPLETE, loadComplete); 13 14 // Load the resource: 15 loader.load(url); 16 17 // Function that handles the complete loading of the resource. 18 function loadComplete(e) { 19 20 // Update the page: 21 document.getElementById('data').innerText = loader.data; 22 23 } // End of loadComplete() function. 24 25 </script> 26 </head> 27 <body> 28 <div>According to the remote server, the Adobe Systems Inc. (ADBE) stock price is $<span id="data"></span>.</div> 29 </body> 30 </html>Define the
loadComplete()function:function loadComplete(e) { document.getElementById('data').innerText = loader.data; }As with the previous example, this function will update an element on the page. This time the value retrieved from the resource, accessible in
loader.data, is assigned to the span element with anidof data.Within the body of the page, create the text and the span element:
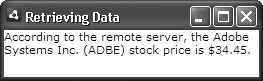
<div>According to the remote server, the Adobe Systems Inc. (ADBE) stock price is $<span id="data"> </span>.</div>
The stock price, which is stored in the text file on the server, will be inserted into this sentence.
Save, test, debug, and run the completed application (Figure 13.3).
✓ Tips
Script 13.2 may seem like a trivial example, but if you had a server page that dynamically retrieved and printed a stock price, that could be invoked by this application, thereby providing a desktop application with up-to-date stock quotes.
For security reasons, you want to be especially careful with how external data—like that coming from an online server—is used by an application. It’s much safer to use that data for an element’s
innerTextandvalueattributes than for itsinnerHTMLorouterHTMLattributes. See Chapter 15 for more on security.One AIR application can communicate with another AIR application running on the same computer by using the
LocalConnectionclass.
The previous example quickly demonstrated how simple it can be to retrieve content from an online resource and use it in a desktop application. Such functionality will often be at the heart of an Adobe AIR application, but the same concept can be used to better ends. In that example, one string of text was being read in; what if you wanted to retrieve more discrete bits of data? For example, what if instead of containing just a single stock price, the online file has the stock name, symbol, price, number of traded shares, and so forth?
One solution would be to store the information in XML format. That data could then be retrieved using a standard XMLHttpRequest. You could also still retrieve the content using the previous method, in which case, after retrieving the text string, you’d need to create a DOMParser object to turn the text into usable XML.
A simpler alternative to using XML is to represent the data as a series of name=value pairs like so: name=Adobe%20Systems%20Inc.&symbol=ADBE&price=34.45...
Each name=value pair is separated by an ampersand. The only trick to this format is that it needs to be properly URL-encoded: Spaces must be represented by %20 (as in the above), ampersands by %26, the equals sign by %3D, and so forth. (You’ll often see this in URLs in your Web browser; search the Web for more information.)
Once you have data in this format, you can tell the URLLoader object to expect it. By default, a URLLoader expects to receive plain text. It can also treat the received response as either binary data or as a URLVariables object. You don’t actually need to know anything else about this object right now, except to understand that it will automatically parse the names and values out of the text string, making them easier to refer to.
To tell the URLLoader object what to expect, assign the appropriate constant to its data attribute:
var loader = new air.URLLoader(); loader.dataFormat = air.URLLoaderDataFormat.VARIABLES;
The other two constants are air.URLLoaderDataFormat.TEXT (the default) and air.URLLoaderDataFormat.BINARY.
In the function that’s called when the load is complete, loader.data, will now be an object of type URLVariables. Assuming the example line of name=value pairs, the function could refer to loader.data.name, loader.data.symbol, loader.data.price, and so on.
To test this out, let’s create a new application, similar to the previous example, that retrieves more information from a different resource.
In your project’s primary HTML file, create the two required objects (Script 13.3):
var url = new air.URLRequest ('http://www.dmcinsights.com/air/ch13vars.txt'), var loader = new air.URLLoader();Again, you can use this URL or create your own. This particular file contains just one line of text:
close=34.45&change=0.32&date=3/20/2008
Change the expected data format:
loader.dataFormat = air.URLLoaderDataFormat.VARIABLES;
Instead of just receiving some plain text, this line indicates that the data will be a string of name=value pairs to be parsed by a
URLVariablesobject.Add the event listener and load the URL:
loader.addEventListener(air.Event.COMPLETE, loadComplete);
loader.load(url);
Example 13.3. By using the
URLVariablesclass behind the scenes, the data read from the server can be easily parsed into individual variables.1 <html><!-- Script 13.3 --> 2 <head> 3 <title>Parsing Data</title> 4 <script type="text/javascript" src="AIRAliases.js"></script> 5 <script type="text/javascript"> 6 7 // Create the two objects: 8 var url = new air.URLRequest('http://www.dmcinsights.com/air/ch13vars.txt'), 9 var loader = new air.URLLoader(); 10 11 // Indicate the data format: 12 loader.dataFormat = air.URLLoaderDataFormat.VARIABLES; 13 14 // Add the event listener: 15 loader.addEventListener(air.Event.COMPLETE, loadComplete); 16 17 // Load the resource: 18 loader.load(url); 19 20 // Function that handles the complete loading of the resource. 21 function loadComplete(e) { 22 23 // Assign the closing price: 24 document.getElementById('close').innerText = loader.data.close; 25 26 // Retrieve the price change: 27 var change = loader.data.change; 28 29 // Update the element's class: 30 var changeElement = document.getElementById('change'), 31 if (change < 0) { 32 changeElement.className = 'negative'; 33 } else if (change > 0) { 34 changeElement.className = 'positive'; 35 } 36 37 // Place the change on the page: 38 changeElement.innerText = Math.abs(change); 39 40 // Place the date on the page: 41 document.getElementById('date'). innerText = loader.data.date; 42 43 } // End of loadComplete() function. 44 45 </script> 46 47 <style> 48 .negative { color: #C03; } 49 .positive { color: #060; } 50 </style> 51 52 </head> 53 <body> 54 55 <h3>Adobe Systems Inc. (ADBE) Stock Price</h3> 56 <div>Last Closing Price: $<span id="close"></span></div> 57 <div>Price Change from Previous Close: $<span id="change"></span></div> 58 <div>Closing Date:<span id="date"> </span></div> 59 60 </body> 61 </html>Begin defining the
loadComplete()function:function loadComplete(e) { document.getElementById('close').innerText = loader.data.close;The three pieces of information retrieved from the online file will be placed within some context in the HTML page (Figure 13.4). To start, the element with an
idvalue of close will be provided with the close value from the text file.Handle the price change:
var change = loader.data.change;
var changeElement = document.getElementById('change'),
if (change < 0) {
   changeElement.className = 'negative';
} else if (change > 0) {
  changeElement.className = 'positive';
}
changeElement.innerText = Math.abs(change);
To make output a little more interesting, the price change (the difference between the most recent closing price and the previous closing price) will be formatted in the application page differently if it’s positive or negative. To accomplish that, this first line grabs the change value from the retrieved data. Then a conditional checks if that value is less than or greater than 0. If it’s negative, the associated element will be assigned a CSS class value of negative, meaning it’ll be displayed in red font. If the change is positive, it’ll be displayed in green, thanks to the positive CSS class definition. Finally, the absolute value of the change is added to the page (the negation symbol representing a price drop will no longer be necessary because the CSS indicates the downturn).
  document.getElementById('date').innerText = loader.data.date;
} // End of loadComplete() function.
Finally, the date value retrieved from the server is added to the page.
Define two CSS classes:
<style>
.negative { color: #C03; }
.positive { color: #060; }
</style>
As stated in step 5, these two classes will be used to format the change value, making its font color either red or green.
Within the body of the page, add the requisite content and elements:
<h3>Adobe Systems Inc. (ADBE) Stock Price</h3>
<div>Last Closing Price: $<span id="close"></span></div>
<div>Price Change from Previous Close: $<span id="change"> </span></div>
<div>Closing Date:<span id="date"> </span></div>
Save, test, debug, and run the completed application.

✓ Tips
For many of these examples, you could take the code from Script 13.1 to test for a connection to the resource prior to attempting to interact with it.
Instead of directly telling the
URLLoaderclass to receive aURLVariablesobject, you could have it receive the response as text, and then do this in the handling function:var vars = new air.URLVariables(loader.data);
Then you would refer to
vars.close,vars.change, andvars.date. I think it’s easier to take the route demonstrated in Script 13.3.
The previous two examples show how you can read data from a network resource into an Adobe AIR application, but data transfers can work the other way, too. AIR applications with access to a network connection can transmit data from the client to the server. An application might need to do this to request to update an online database, to submit user feedback, or to fetch more specific results from the server (for example, to indicate for which stock the price and other information should be returned).
To send data to a server, two URLRequest attributes are involved. The first is method. This property indicates the method used to request the URL page. The two most common methods are GET and POST, which are represented by the constants air.URLRequestMethod.GET and air.URLRequestMethod.POST (GET is the default value). If you’re not familiar with these terms, you may be best served by doing a quick search online (e.g., the Wikipedia entry is helpful). In simplest terms, a GET request is the most common type made: When you load a bookmarked URL in your Web browser or click on a link in a page, that’s GET. Such requests are normally used just to retrieve information from a server. POST requests are commonly used to provide information to a server, for example, when you submit a form.
To change the request type, do this:
var url = new air.URLRequest ('http://www.example.com/page.jsp'),
url.method = air.URLRequestMethod.POST;
The second attribute of the URLRequest object that you’ll use is data. To this property you can assign a string of text, a ByteArray, or a URLVariables object. To use this last option, create a URLVariables object:
var appData = new air.URLVariables();
Then add name=value pairs to the object by treating the name as an attribute of the object:
appData.make = 'Toyota';
appData.model = 'Sienna';
appData.year = 2004;
Those lines add three name=value pairs to the appData object.
The final step in sending data to a server is to associate the data with the URLRequest object, and then load the resource:
url.data = data;
loader.load(url);
The data will be sent to the server when the request is performed through the URLLoader object.
To help you conceptualize this process using the above code, think of it as being similar to having a form on a Web site with inputs named make, model, and year. When the form is submitted, it would send the user-entered values—Toyota, Sienna, and 2004—to www.example.com/page.jsp, which would handle the form data. This brings me to the last step in the process: The server resource needs to be written to accept data submission and respond in some way. You can do this using PHP, JSP (Java Server Pages), Ruby on Rails, ASP.NET, ColdFusion, and many other technologies.
For a real-world example of this concept, the next application will handle the entering of the application’s license code. This process normally works as follows:
The user purchases an online a license for an application.
The application asks for the license information to unlock it. The user enters the values returned by step 1.
The application submits the user-supplied information to the server.
If the submitted license information is correct, the application is updated to reflect that it’s been properly registered.
The following application will focus on steps 2 and 3 of this process.
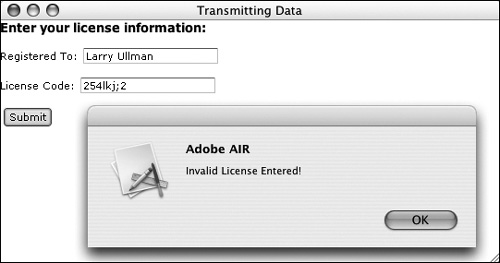
In your project’s primary HTML file, create the form (Script 13.4):
<h3>Enter your license information: </h3>
<p>Registered To: <input type="text" id="name"></p>
<p>License Code: <input type="text" id="license"></p>
<p><input type="submit" value="Submit" onclick="checkLicense();"></p>
So that you can follow the logic more easily, I’ll start by creating the form (Figure 13.5). It contains two text inputs and a button that calls the
checkLicense()function when clicked.Within the JavaScript code, create the three necessary objects:
var url = new air.URLRequest ('http://www.dmcinsights.com/air/ch13license.php'),
var loader = new air.URLLoader();
var data = new air.URLVariables();
This application needs
URLRequestandURLLoaderobjects, like the previous two examples, plus aURLVariablesobject.As for the page being used by this example, it’s a PHP script that expects to receive a name and a license value sent to it via the
POSTmethod. The script contains just:<?php if (isset($_POST['name'], $_POST['license']) && ($_POST['name'] == 'J. Doe') && ($_POST['license'] == 'XYZ123') ) { echo 'Valid License Entered!' } else { echo 'Invalid License Entered!'; } ?>Example 13.4. This application simulates the process of authenticating a program’s license by submitting user-entered values to a server.
1    <html><!-- Script 13.4 -->
2    <head>
3    <title>Transmitting Data</title>
4    <script type="text/javascript" src="AIRAliases.js"></script>
5    <script type="text/javascript">
6
7    // Create the objects:
8    var url = new air.URLRequest('http://www.dmcinsights.com/air/ch13license.php'),
9    var loader = new air.URLLoader();
10   var data = new air.URLVariables();
11
12   // Change the method:
13   url.method = air.URLRequestMethod.POST;
14
15   // Add the event listener:
16   loader.addEventListener(air.Event.COMPLETE, loadComplete);
17
18   // Function that handles the complete loading of the resource.
19   function loadComplete(e) {
20
21      alert(loader.data);
22
23   } // End of loadComplete() function.
24
25   // Function called when the user clicks the Submit button.
26   function checkLicense() {
27
28      // Assign the data to the URLVariables object:
29      data.name = document.getElementById('name').value;
30      data.license = document.getElementById('license').value;
31
32      // Assign the URLVariables object to the URLRequest object:
33      url.data = data;
34
35      // Load the resource:
36      loader.load(url);
37
38   } // End of checkLicense() function.
39
40   </script>
41
42   </head>
43   <body>
44
45   <h3>Enter your license information:</h3>
46   <p>Registered To: <input type="text" id="name"></p>
47   <p>License Code: <input type="text" id="license"></p>
48   <p><input type="submit" value="Submit" onclick="checkLicense();"></p>
49
50   </body>
51   </html>
In case you’re unfamiliar with PHP, I’ll explain what this means. The conditional checks if the script receives name and license values (both posted to this page). It also confirms that name has a value of J. Doe and license has a value of XYZ123. If those three conditions are all true, the text Valid License Entered! is printed by this PHP script. If any of those conditions is false, Invalid License Entered! is printed. In an actual program, the PHP script should match the information against that provided when the user bought the license (likely stored in a database), but for testing purposes, this code will suffice.
Change the request method:
url.method = air.URLRequestMethod.POST;
POSTis the logical method type to use in situations like this, where data is being sent to a page for validation purposes.Add an event listener to the
URLLoaderobject:loader.addEventListener(air.Event.COMPLETE, loadComplete);
There will be two aspects to this application: the sending of the data to the server and the reading of the response back from the server. The
loadComplete()function will handle the second part.Define the
loadComplete()function:function loadComplete(e) { alert(loader.data); } // End of loadComplete() function.This function, which is called when the response from the server is completely loaded, will just print out the returned text using an alert dialog. The response of the server should be one of the two messages printed by the PHP page (see step 2). Note that for this reason, the PHP page doesn’t include the basic HTML tags.
Begin defining the
checkLicense()function:function checkLicense() { data.name = document. getElementById('name').value; data.license = document.getElementById('license').value;This function needs to send the user-submitted data (from the form) to the server. It starts by adding name=value pairs to the
URLVariablesobject.Complete the
checkLicense()function:url.data = data; loader.load(url); } // End of checkLicense() function.
The final two steps are to associate the
URLVariablesobject with theURLRequestobject and to call theURLLoader’sload()method to actually send the request and read in the response.Save, test, debug, and run the completed application (Figures 13.6 and 13.7).


✓ Tips
The
air.sendToUrl()function will make a request of a URL without acknowledging the server’s response.Most large Web sites like Google, Amazon, Flickr, YouTube, and eBay provide an API (Application Programming Interface) through which an application—desktop or online—can interact with their site. Normally, you create an account with the site, and then provide that information along with certain parameters—search terms, specific product ID, and so on—in an application request. Using these APIs along with the code in Script 13.4, you can incorporate the content those sites provide in your applications.
Another way that a desktop application might interact with a server (besides accessing pages and reading in the response) is to download a file from it. The concept is the same, but the amount of data and what the application does with that data is different.
Start, of course, with a URLRequest object:
var url = new air.URLRequest ('http://www.example.com/somefile'),From there, you could use the URLLoader class to download the file data, reading in the response as binary data. However, if you know you’ll be handling binary data, the URLStream class provides a more basic tool for the job:
var urlStream = new air.URLStream();
To download small files, add an event listener that will be called when the download (aka, the server response) is complete:
urlStream.addEventListener(air.Event.COMPLETE, saveFile);
(The next section discusses alternative code for downloading large files.)
To begin the download, call the load() method of the URLStream object:
urlStream.load(url);
When all of the file data has been downloaded, it’s stored in the urlStream object. To turn that into a file on the user’s computer, you’ll need to read it into a ByteArray object (see Chapter 10, “Working with File Content”), and then write the ByteArray object to a file:
var data = new air.ByteArray();
urlStream.readBytes(data, 0, urlStream.bytesAvailable);
var file = air.File.desktopDirectory.resolvePath('somefile'),
var fileStream = new air.FileStream();
fileStream.open(file, air.FileMode.WRITE);
fileStream.writeBytes(data, 0, data.length);
fileStream.close();
This next script will implement all of this code, downloading a file from a server (after the user clicks a button, Figure 13.8) and saving that file on the user’s desktop.

In your project’s primary HTML file, create the first two necessary objects (Script 13.5):
var url = new air.URLRequest ('http://www.dmcinsights.com/air/ch13code.zip'),
var urlStream = new air.URLStream();
For this example, the item to be downloaded will be the code for this chapter’s examples. It’s called ch13code.zip and is located at this book’s corresponding Web site (www.DMCInsights.com/air/).
Example 13.5. To download a file from a server to the user’s computer, this script reads the server response into a
URLStream, then reads that data into aByteArray, and finally writes theByteArrayto a file.1 <html><!-- Script 13.5 --> 2 <head> 3 <title>Downloading Files</title> 4 <script type="text/javascript" src="AIRAliases.js"></script> 5 <script type="text/javascript"> 6 7 // Create the objects: 8 var url = new air.URLRequest('http://www.dmcinsights.com/air/ch13code.zip'), 9 var urlStream = new air.URLStream(); 10 11 // Add the event listener: 12 urlStream.addEventListener(air.Event.COMPLETE, saveFile); 13 14 // Function called when the user clicks the button. 15 function downloadFile() { 16 17 // Start the download: 18 urlStream.load(url); 19 20 } // End of downloadFile() function. 21 22 // Function called when all of 23 // the data has been downloaded. 24 function saveFile(e) { 25 26 // Read the downloaded data into a ByteArray: 27 var data = new air.ByteArray(); 28 urlStream.readBytes(data, 0, urlStream.bytesAvailable); 29 30 // Write the data to a file: 31 var file = air.File.desktopDirectory.resolvePath('ch13code.zip'), 32 var fileStream = new air.FileStream(); 33 fileStream.open(file, air.FileMode.WRITE); 34 fileStream.writeBytes(data, 0, data.length); 35 fileStream.close(); 36 37 // Notify the user: 38 alert('The file has been downloaded!'), 39 40 } // End of saveFile() function. 41 42 </script> 43 </head> 44 <body> 45 46 <button onclick="downloadFile();">Download the File</button> 47 48 </body> 49 </html>Add an event listener to the
URLStreamobject:urlStream.addEventListener(air.Event.COMPLETE, saveFile);
This line states that when the entire server response has been downloaded, the
saveFile()function should be called.Define the
downloadFile()function:function downloadFile() { urlStream.load(url); }This function will be called when the user clicks the button. It begins the downloading process by calling the
load()method.Begin defining the
saveFile()function:function saveFile(e) {This function will be called when the file download is complete. It takes an event as an argument, although it won’t be used.
Read the downloaded data into a
ByteArrayobject:var data = new air.ByteArray(); urlStream.readBytes(data, 0, urlStream.bytesAvailable);
The
urlStreamobject contains all the downloaded data. To access that data, it’ll need to be assigned to aByteArrayobject, so one is created first. Then thereadBytes()method reads all of the data (from 0 tourlStream.bytesAvailable) into theByteArrayobject. See Chapter 10 for more information on working withByteArrayobjects.Write the data to a file:
var file = air.File.desktopDirectory. resolvePath('ch13code.zip'), var fileStream = new air.FileStream(); fileStream.open(file, air.FileMode.WRITE); fileStream.writeBytes(data, 0, data.length); fileStream.close();A
Fileobject is created first and points to a file called ch13code.zip, which is located on the user’s desktop. Then the file is opened for writing, the data is written there, and the file is closed.Alert the user and complete the function:
alert('The file has been downloaded!'), } // End of saveFile() function.Within the body of the page, create a button that will start the process:
<button onclick="downloadFile();">Download the File</button>
Save, test, debug, and run the completed application (Figures 13.9 and 13.10).


One of the benefits of using URLStream instead of URLLoader to download files is that the URLStream object can access the returned data incrementally (a URLLoader object can only use the full response). When downloading large files, you’ll want to take advantage of this feature so as not to max out the computer’s RAM (because the downloaded data is stored in the application’s memory until its written to a file). To handle the download incrementally, add an event listener that responds to the download progress:
urlStream.addEventListener(air.ProgressEvent.PROGRESS, writeToFile);
Downloading a file incrementally really means writing the downloaded data to the file on the user’s computer incrementally. So, start by opening the file outside of the writeToFile() function (because the file should only be opened once and the writeToFile() function will be called repeatedly):
var file = air.File.desktopDirectory.resolvePath('largeFile'),
var fileStream = new air.FileStream();
fileStream.open(file, air.FileMode.WRITE);The writeToFile() function will still read the downloaded data into a ByteArray, and then write that ByteArray to the file:
var data = new air.ByteArray(); urlStream.readBytes(data, 0, urlStream.bytesAvailable); fileStream.writeBytes(data, 0, data.length);
Here’s how the writeToFile() function will work differently than the saveFile() function in Script 13.4: When the downloading begins, some of the online file’s data will be placed into the URLStream object, and then the writeToFile() function will be called because progress has been made. The function will write all the data that’s been downloaded thus far to the File object. Then that data will be automatically removed from the urlStream object and more will be downloaded into it, thus calling the writeToFile() function again. This loop will continue until all the data has been downloaded.
Let’s modify the previous example to handle the download in this manner.
Place a relatively large file on a server.
Rather than overwhelming my server by having X number of readers all repeatedly download a large file, I’ll leave it to you to find your own resource for this example. This can be any file of, say, 100 KB in size or greater that you place or find on a Web site. Make note of the file’s URL.
Open Script 13.5 in your text editor or IDE, if it is not already.
Change the
URLResourceobject’s value to use the target file created (or found) in step 1 (Script 13.6):var url = new air.URLRequest ('http://www.example.com/largeFile.pdf'),You’ll need to replace the sample value here with the complete address of your target. For my own purposes, I’ll download a large PDF file.
Move the lines that create the
FileandFileStreamobjects out of thesaveFile()function so they come after theURLStreamobject that is created:var file = air.File.desktopDirectory.resolvePath('largeFile.pdf'), var fileStream = new air.FileStream();Because these objects will be needed by multiple functions, they should be defined outside of any function to make them global in scope.
Example 13.6. This updated version of Script 13.5 writes the downloaded data to a file in increments instead of all at once.
1    <html><!-- Script 13.6 -->
2    <head>
3    <title>Downloading Large Files</title>
4    <script type="text/javascript" src="AIRAliases.js"></script>
5    <script type="text/javascript">
6
7    // Create the objects:
8    var url = new air.URLRequest('http://www.example.com/largeFile.pdf'),
9    var urlStream = new air.URLStream();
10   var file = air.File.desktopDirectory.resolvePath('largeFile.pdf'),
11   var fileStream = new air.FileStream();
12
13   // Add the event listeners:
14   urlStream.addEventListener(air.ProgressEvent.PROGRESS, writeToFile);
15   urlStream.addEventListener(air.Event.COMPLETE, saveFile);
16
17   // Function called when the user clicks the button.
18   function downloadFile() {
19
20      // Open the file:
21      fileStream.open(file, air.FileMode.WRITE);
22
23      // Start the download:
24      urlStream.load(url);
25
26   } // End of downloadFile() function.
27
28   // Function called when some of
29   // the data has been downloaded.
30   function writeToFile(e) {
31
32      // Only write every 50KB or more:
33      if (urlStream.bytesAvailable > 51200) {
34         var data = new air.ByteArray();
35         urlStream.readBytes( data, 0,
           urlStream.bytesAvailable);
36         fileStream.writeBytes( data, 0,
           data.length);
37      }
38
39   } // End of writeToFile() function.
40
41   // Function called when all of
42   // the data has been downloaded.
43   function saveFile(e) {
44
45      // Write the remaining data to the file:
46      var data = new air.ByteArray();
47      urlStream.readBytes(data, 0,
        urlStream.bytesAvailable);
48      fileStream.writeBytes(data, 0,
        data.length);
49
50      // Close the file:
51      fileStream.close();
52
53      // Notify the user:
54      alert('The file has been downloaded!'),
55
56   } // End of downloadComplete() function.
57
58   </script>
59   </head>
60   <body>
61
62   <button onclick="downloadFile();">Download
     the File</button>
63
64   </body>
65   </html>
Add a progress event listener to the
URLStreamobject:urlStream.addEventListener(air.ProgressEvent.PROGRESS, writeToFile);
When the download is complete, the
saveFile()function will still be called, but other download progress will be handled by thewriteToFile()function.Move the opening of the file to within the
downloadFile()function:fileStream.open(file, air.FileMode.WRITE);
Since the file needs to be opened outside of the
writeToFile()function, this can logically be done within thedownloadFile()function, which starts the download process.Define the
writeToFile()function:function writeToFile(e) { if (urlStream.bytesAvailable > 51200) { var data = new air.ByteArray(); urlStream.readBytes( data, 0, urlStream.bytesAvailable); fileStream.writeBytes( data, 0, data.length); } }This function needs to write the downloaded data to the file. However, it will be called repeatedly as the download progresses, and it shouldn’t write the data every time it’s called. If it did that, the application might just end up writing a couple of bytes at a time, which isn’t very efficient. Instead, a conditional is used to dictate that the data should be written only after 50 KB has been downloaded.
Update the
saveFile()function so it writes the last bit of data to the file, and then closes it:function saveFile(e) { var data = new air.ByteArray(); urlStream.readBytes(data, 0, urlStream.bytesAvailable); fileStream.writeBytes(data, 0, data.length); fileStream.close(); alert('The file has been downloaded!'), }This function will be called when the download is complete. By that point, most of the file’s data should have been written to the file. However, there’s likely to be some data left in the
URLStreambecause only every 50 KB or so is written to the file inwriteToFile(). For example, if only the last 12 KB of the file is downloaded after the previous call towriteToFile(), that data will still be inurlStream. This function therefore writes the remaining data to the file prior to closing it.Save, test, debug, and run the completed application (Figures 13.11 and 13.12).

Figure 13.11. This version of the application looks essentially the same as its predecessor (Figure 13.8).

✓ Tips
If a file download fails because not all the file’s content is properly written to the desktop file, the likely result will either be an inability to open the file or some of the file’s content will be missing.
Another way of understanding what happens in this example is to consider that a
URLStreamobject works exactly like aFileStreamobject. Script 10.3, which shows how aFileStreamis incrementally read, demonstrates the same basic concept being used here: incrementally accessing data.
The last topic to be covered in this chapter is how to upload a file to a server. There are a few different ways you could do this. One option would be to use the Socket class to FTP the document to a server. This is an excellent way to go, provided you know how to set up and use an FTP server.
A second method would be to read the file into a ByteArray, assign that to the URLRequest object’s data attribute, and then use a URLLoader to request a page on the server, thereby sending it the file as well. This is similar to Script 13.4 but uses a ByteArray instead of a URLVariables object.
The third option, and the one I’ll use here, is based upon the File class. The File class defines a method called upload(). This method performs an upload of the file to a server, as if the user had selected the file in a standard HTML form and then submitted that form. What’s nice about using this method is that the file upload is performed asynchronously, meaning that the upload will happen in the background while the user can continue to perform other tasks within the application.
Assuming you have a File object that already refers to a file on the user’s computer (for example, one the user has selected), the next steps would be to add event listeners to that object. The pertinent events are air.ProgressEvent.PROGRESS and air.Event.COMPLETE:
file.addEventListener(air.ProgressEvent.PROGRESS, uploadProgress);
file.addEventListener(air.Event.COMPLETE, uploadComplete).
The complete event is triggered once the file has been completely uploaded. The progress event is frequently triggered while the upload is happening. Within that handling function, you can refer to the event’s bytesLoaded attribute to see how much of the file has been uploaded. The event’s bytesTotal attribute reflects the total file size (as does the File object’s size attribute).
To call the upload() method, you need to provide it with a URLRequest object. That object should refer to the URL to which the file should be sent:
var url = new air.URLRequest ('http://www.example.com/upload.php'),
file.upload(url, 'aFile'),
The second argument in this method is the name associated with the uploaded file. This isn’t the file’s actual name from the user’s computer, but rather like the name given to a file input in an HTML form. This value provides the handling script with a reference to the uploaded file.
Handling file uploads using a server-side script is beyond the scope of this book, but this next example will demonstrate the AIR application code involved.
In your project’s primary HTML file, create two objects (Script 13.7):
var file = new air.File();
var url = new air.URLRequest ('http://www.dmcinsights.com/air/ch13upload.php'),
The URL referenced here is a dummy page on my site that won’t do anything with the uploaded file but is still quite usable for demonstrating this technique.
Add event listeners to the
Fileobject:file.addEventListener(air.Event.SELECT, fileWasSelected); file.addEventListener(air.Event.COMPLETE, uploadComplete);
Two separate events need to be attended to. The first is a
SELECTevent, which is triggered when the user has selected a file from the computer. The second is aCOMPLETEevent, which is triggered when the file has been uploaded.Define the
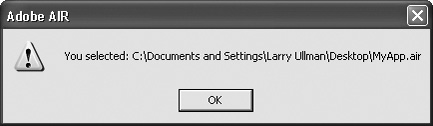
fileWasSelected()function:function fileWasSelected(e) { alert ('You selected: ' + file.nativePath); file.upload(url, 'theFile'), }This function does two things. First, it reports back to the user the file that the user selected (Figure 13.13). Second, it starts the file upload by calling the
Fileobject’supload()method.Define the
uploadComplete()function:function uploadComplete(e) { alert('The file has been uploaded.'), }This function lets the user know that the file was completely uploaded to the server (Figure 13.14). Because the upload happens asynchronously, the user can do other things in the application (if there were other things to do) while that file is being uploaded.
Example 13.7. This application uploads to a server a file that the user has selected.
1    <html><!-- Script 13.7 -->
2    <head>
3    <title>Uploading Files</title>
4    <script type="text/javascript" src="AIRAliases.js"></script>
5    <script type="text/javascript">
6
7    // Create the objects:
8    var file = new air.File();
9    var url = new air.URLRequest('http://www.dmcinsights.com/air/ch13upload.php'),
10
11   // Add the event listeners:
12   file.addEventListener(air.Event.SELECT, fileWasSelected);
13   file.addEventListener(air.Event.COMPLETE, uploadComplete);
14
15   // Function that will be called
16   // when the File has been selected.
17   function fileWasSelected(e) {
18
19      // Use an alert to print the selected item's name:
20      alert ('You selected: ' + file.nativePath);
21
22      // Upload the file:
23      file.upload(url, 'theFile'),
24
25   } // End of fileWasSelected() function.
26
27   // Function called when the upload is complete.
28   function uploadComplete(e) {
29      alert('The file has been uploaded.'),
30   }
31
32   // Function called when the user clicks the
33   // 'Select a File' button.
34   function selectFile() {
35
36      // Create the Open prompt:
37      file.browseForOpen('Choose a file:'),
38
39   }
40
41   </script>
42   </head>
43   <body>
44
45   <button onclick="selectFile();">Select a File to Upload</button>
46
47   </body>
48   </html>
Define the
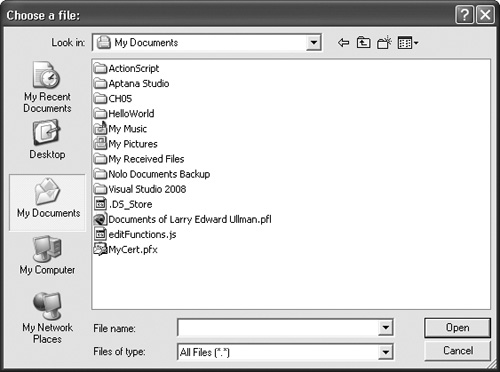
selectFile()function:function selectFile() { file.browseForOpen('Choose a file:'), }This function is called when the user clicks the Select a File button (Figure 13.15). It generates the browse for open prompt (Figure 13.16).
Within the body of the page, create the button.
<button onclick="selectFile();"> Select a File to Upload</button>
Save, test, debug, and run the completed application.