
Chapter 12: Producing Virtual Reality Content for WebGL
In the previous chapter, we explored the concept of game development for the native web and programmed an entire game using JavaScript and the HTML5 Canvas document type.
This chapter will focus on the Virtual Reality (VR) and WebGL glTF document types within Animate. Virtual reality is cutting-edge technology and Animate has its own take on this space using both panoramic and 360-degree VR concepts. We'll get an overview of the VR document type within the software and then move directly on to assembling our Virtual Reality environments with scenes and textures. Once these environments are established, we'll add in additional assets as part of each scene, animate them using the Asset Warp tool, which we first encountered in Chapter 9, Manipulating Warped Objects through Advanced Rigging, and write code to allow interaction with the user. Finally, we'll explore a panel in Animate specifically for testing and adjusting VR content.
After reading this chapter, you'll be able to perform the following functions in Animate:
- Discover a variety of VR and WebGL document types in Animate and know how to create content specifically for each format.
- Understand specific workflows for creating, managing, and testing VR environments.
- Import equirectangular and panoramic photographs to be used as textures, along with drawings and rendered 3D images that can be made interactive.
- Use the Asset Warp tool and warped object workflows to produce subtle animations on imported drawings.
- Write code that allows the user to move between scenes and interact with objects.
Technical Requirements
You will need the following to complete this chapter:
- Adobe Animate 2022 (version 22.0 or above).
- Please refer to the Animate System Requirements page for hardware specifications: https://helpx.adobe.com/animate/system-requirements.html.
The code in action video for this chapter can be found here: https://bit.ly/3CB9tnX
Overview of Virtual Reality Documents
In this section, we are going to get an overall idea of the VR document types within Animate and how they relate to one another. Following this, we'll learn how to configure scenes in our project and apply photographic background textures to those scenes.
Though separated into two distinct classifications, both the VR and WebGL document types are based on the WebGL glTF standard at their core. When using VR document types, we get a few extra workflow choices within Animate as opposed to the more general WebGL glTF document types.
Tip
To learn more about the WebGL glTF specification, visit https://www.khronos.org/gltf/.
All of the VR and WebGL document types can be found under the Advanced category of the New Document dialog:

Figure 12.1 – Both the VR and WebGL document types are considered BETA
While we will be focusing on VR projects in this chapter, it is important to understand that these document types are built on a standard WebGL glTF foundation. The WebGL glTF specification is a platform-agnostic asset delivery format specifically geared toward 3D and GPU-accelerated content.
Here are the differences between these four choices, in order of complexity:
- WebGL glTF Standard: This conforms to the standard specification and can be played back in any environment that supports standard WebGL such as the Babylon.js sandbox: https://sandbox.babylonjs.com/.
- WebGL glTF Extended: Builds upon the standard specification by extending it for fuller usage within the Animate environment to include things such as interactivity.
- VR Panorama: Adds extra tools to Animate to define layers as cylindrical VR textures and makes use of the VR View panel to position symbol instances in 3D space and test projects.
- VR 360: A variant of the VR Panorama document that applies the VR textures to a sphere in place of a cylinder.
There are also a set of limitations to consider for each of these platforms. For instance, WebGL glTF Extended allows you to use Button symbols, but both VR formats do not! When it comes to sound, the VR formats can only make use of Event Sync when it comes to sounds. An additional limitation is that all four document types only allow Static Text. Remember that all four of these formats are in beta and limitations are to be expected.
Note
Depending on the type of project you'd like to work on, you can create either a VR Panorama or VR 360 document. Aside from a few small differences, they function the same. I've included assets for both formats in the files for this chapter, which can all be downloaded from https://github.com/PacktPublishing/Adobe-Animate-2022-for-Creative-Professionals-Second-Edition.
Let's create a new Virtual Reality document in Animate to work with in this chapter:
- Create a new document by choosing File | New and clicking the Advanced category of the New Document dialog.
- Choose either VR Panorama or VR 360, noting that both are considered beta. The beta label indicates that Adobe is still working on these document formats and that certain aspects may change in future releases of Animate.
- Check that the document's properties have been set to 550px in width and 400px in height, with a framerate of 24fps. We will need to adjust these settings later but the defaults are fine for now.
- Click Create and save your new document via File | Save once it appears in Animate.
The new document is pretty plain right now and looks just about identical to any other freshly created document in Animate.
Now that we have created our document, we can start preparing it for use in our project concept.
Managing Scenes for Virtual Reality
The use of scenes in VR projects is not required but they allow for some pretty interesting user experiences. For instance, you can allow the user to explore the experience and, by interacting with different objects in the world, they can travel to additional rooms and environments. In our project, the user will be able to move from a park to a pond and back again.
Traditionally, scenes within an Animate document break the main timeline into manageable chunks. So, an animator might create one scene as an establishing shot and then have the second scene serve as a tighter shot focused on some action or character.
Note
HTML5 Canvas and WebGL glTF Standard documents cannot make use of the scenes feature within Animate, but just about every other document type can! Scenes effectively break the main timeline into segments and were originally used to construct scenes within a running animation.
As we mentioned previously, we will include two scenes within this project, so let's create those now:
- Open the Scene panel by choosing Window | Scene from the application menu:
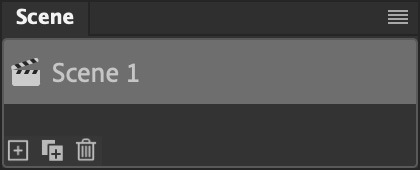
Figure 12.2 – Scene panel
The Scene panel will appear. This panel allows you to create, duplicate, and delete scenes. You can also reorder and rename scenes from here.
You should only have a single scene named Scene 1 when you first start. This is your main timeline.
- Double-click on Scene 1 and type in Park as its name. This will contain all the assets related to the park-based environment we will create.
- Click the Add Scene button that appears as a small plus (+) icon at the bottom left to create a new scene.
- Rename your new scene Pond:
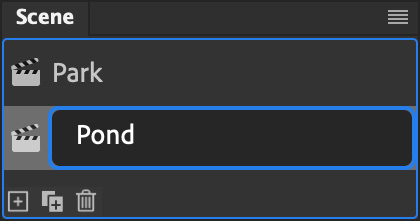
Figure 12.3 – Scene management
Similar to layers, library items, frame labels, and more, it is always a good idea to name your items in a way that provides organization and helps with recollection.
Clicking on either scene name within the Scene panel will switch to that particular scene. You can also switch scenes by using the Edit Scene selector above the stage:

Figure 12.4 – Scene switcher
Of course, you can include as many scenes as you like within a project. We are going to stick with two here and keep things fairly simple.
Now, before we start importing image content into our project, it is good to become familiar with how to acquire or generate photography for tasks like this.
Capturing Photographs for Virtual Reality
While you can acquire 360 equirectangular and panoramic photographs from various stock photo services, it is always good to know how to generate your own – especially for projects like this.
With VR documents in Animate, you need to use something for your environmental texture. If targeting VR 360, the texture is wrapped across the inside of a sphere with the user viewing from the center outward. For VR Panorama, we wrap our texture across the inside of a cylinder instead.
Note
You can also simply draw out your content for VR textures using software such as Adobe Photoshop, Illustrator, or even within Animate itself! It all depends on whether you want your environment to be photorealistic or not.
In the exercise files for this chapter, you will find examples of the same environment captured in both equirectangular and panoramic formats.
The easiest way to understand each format is to just open them and have a look:

Figure 12.5 – Panoramic versus 360 photograph
The panoramic image is very wide, without much height, and includes a bit of distortion to the perspective when viewed as a flat photograph. The 360 equirectangular photo will always present itself in a 2:1 ratio regarding width to height and is massively distorted when viewed as a flattened photograph.
With modern mobile devices, it is very easy to capture these types of photographs. It is a bit of a tedious process with Android or iOS as you must use camera software that can guide you to generate these photos, based on capturing and integrating multiple shots to compose the image.
Tip
Mobile device camera software normally does a fine job, but for even greater precision and ease, you can use hardware that is made specifically to take photos using these modes. Generally, I'd suggest using what you have first and upgrading if needed.
I captured the sample photographs for this project using a Google Pixel 3 XL running Android 11 and using the native camera application:

Figure 12.6 – Google Android advanced camera modes
The preceding screenshots should provide a good idea of what is available for this sort of image capture on Android devices today. As shown in the first screenshot, the camera app has several modes to choose from. I can access both Panorama and Photo Sphere from the Modes option on this screen.
With Panorama selected, you simply press record, and the software guides your movements to capture a full panoramic image. You stand on one spot and rotate slowly in one direction until you've captured the entire view.
For Photo Sphere, you may need to check your options, as displayed in the preceding screenshot, to ensure that you are creating a 360 photograph and not some other format. Once you press record, the software will prompt you to turn your camera toward different spots to capture a full set of photographs to stitch into an equirectangular image.
When using an Apple iPhone, you only have access to the panorama camera mode within the native camera software. To achieve a 360-degree image, you can use third-party software such as Google Street View or a variety of other camera apps:
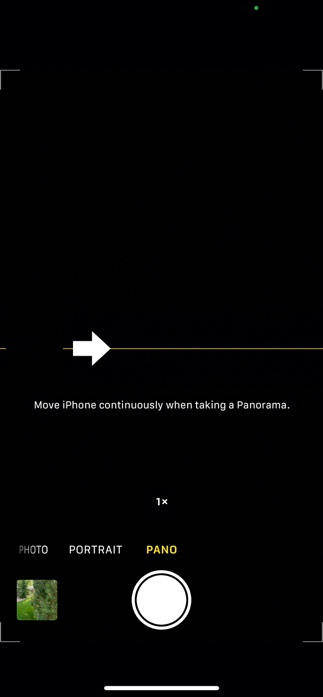
Figure 12.7 – Apple iOS Pano camera mode
The preceding screenshot is of an iPhone 12 using the Pano camera mode. It works very similarly to the same photographic mode on Android – however, is a bit more straightforward to access and activate.
With our panoramic and equirectangular images at hand, we are ready to return to Animate and integrate them into the scenes we have created.
Adding Textures to Virtual Reality Scenes
Probably the most important step in creating a VR environment with Animate is to implement the photographic content we've gathered as textures. These textures define the background of the world we create within each scene.
To define a photograph as a texture, perform the following steps:
- Make sure you are currently in the Park scene. If not, switch to it using the scene switcher above the stage.
- Locate the appropriate park photograph in your filesystem. I'm using the PXL_20201223_195419259.PHOTOSPHERE.jpg file since I am using a VR 360 document type.
- Drag your image file from the filesystem and onto the Animate stage.
- Select the new bitmap object on the stage and look at the Object tab of the Properties panel. Set the x position to 0 and the y position to 0. You could also use the Align panel to align it to the top left.
Looking at the stage at this point, you will notice that the photograph is much, much larger than our tiny stage. If you're using the equirectangular photograph, for instance, the stage width is 550 but the bitmap object width is 4000! We need to adjust our stage size so that it matches the bitmap object's size.
- Select the Doc tab of the Properties panel to view the document's properties and locate the Document Settings section.
- Click the Match contents button to resize the stage, as per its contents:

Figure 12.8 – Adjusting the stage's size to Match contents
The stage's width and height are automatically set to match the width and height of the bitmap object.
- Now, let's mark the layer to be used as a texture when published. Click the Mark for Texture Wrapping option within the Layer_1 layer:

Figure 12.9 – Mark for Texture Wrapping
This marks the layer for texture wrapping. The contents of the layer – in this case, an equirectangular photograph – will be used across the inside of a sphere. The distorted, flat photograph will appear with normal proportions when wrapped as a texture, but you will not see these effects until you test it.
- You will want to rename the Layer_1 layer Texture for clarity before moving on.
With that, the Park scene has been set up with a photographic texture. You will need to switch over to the Pond scene and perform the same set of steps there.
Note
You can mark as many layers as you want in this way but once a layer is marked as a texture, any animation or interactivity that was present in the layer will be disabled.
Once you've completed both scenes, they should each contain a single layer named Texture, which is marked as a texture. Each scene includes either a photograph of the pond or a photograph of the park, as per the scene's name.
Again, you can use either the panoramic or equirectangular versions of these photographs for your content:

Figure 12.10 – Panorama versus 360 differences
If you choose Fit in Window from the Zoom dropdown in the top-right area above the stage, you will see the full scene. Aside from the perspective differences between the VR Panorama and VR 360 document types, everything else should be the same, regardless of what document type you have chosen.
Note
For the remainder of this chapter, I'm going to focus on the VR 360 version of our document, but any of the steps that follow can be used across either document type.
You can perform a Test Movie right now and your VR experience will be fully functional, just through this initial setup of importing photographs and marking them as texture layers. When viewing it in the web browser, simply click and drag across the scene to change your view within the environment.
In this section, we provided an introduction to using VR within Animate and how it relates to WebGL glTF file types. We also learned how to manage scenes within a VR document. We then explored how to use mobile device cameras to gather photographs that are suitable for VR use, such as textures, and imported those photographs into our VR documents to be used as textures within each scene. Next, we'll add some additional visual content to our VR scenes by using imported 3D renders and then create some animated content using the Asset Warp tool.
Adding Additional Content
As we saw in the previous sections, the simple act of importing properly generated photographs as textures within a VR document goes quite far in establishing our VR environment. This is Adobe Animate, though, and we can add additional objects to our scene to be used for interactivity and animation!
First, we'll set up some additional objects to eventually be used to move between the Park and Pond scenes in the form of 3D rendered signage. Then, we'll get playful and add a small character drawing that can be animated using one of the most powerful creative motion tools in Animate – the Asset Warp tool.
Importing Transparent 3D Renders
Recall that we have established two scenes for our VR experience: Park and Pond. Ultimately, we want the user to be able to locate a sign within each scene that directs them to the other scene. Clicking a sign will transport the user to the other scene.
To create the signage assets, I used Adobe Dimension to configure and generate 3D models, which were then rendered as transparent PNG files. Dimension comes packed with a set of models, materials, and more to be used to create 3D scenic renders. In 2021, Adobe also released a new set of 3D applications as the Adobe Substance 3D collection. This includes Adobe Substance 3D Stager – an updated, more powerful version of Dimension. You can use either piece of software to create similar rendered objects for your Animate projects, but Adobe seems to be more committed to Stager moving forward and Dimension may disappear in the future.
Tip
To learn more about Dimension, visit the following URL: https://www.adobe.com/products/dimension.html.
Information about Stager can be acquired from https://www.adobe.com/products/substance3d-stager.html.
These renders have been made available alongside the photographs in the exercise files for you to download and are named ParkSign.png and PondSign.png.
Let's set up our signage for each scene:
- Insert a new layer above the Texture layer by clicking the New Layer button.
- Name the new layer Sign as this will contain our interactive signage:

Figure 12.11 – The Sign layer added across scenes
- Locate the ParkSign.png and PondSign.png image files within your file system and drag each into the appropriate scene. ParkSign.png should be placed in the Pond scene, while PondSign.png should be placed in the Park scene.
- Once the sign images have been placed on the stage, within the Sign layer of each scene, you'll want to reposition them to areas that make the most sense:
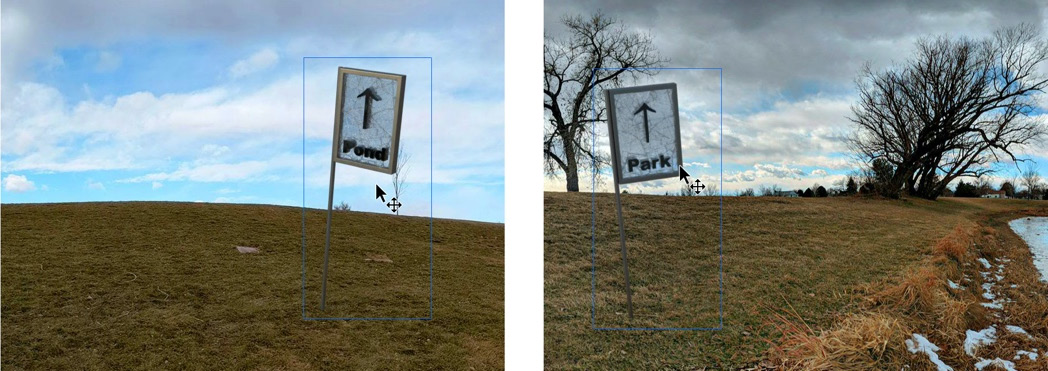
Figure 12.12 – Positioning the signs properly in each scene
I placed my ParkSign.png at an x of 460 and a y of 930. My PondSign.png is placed at an x of 3450 and a y of 958. You may also choose to resize the signs, but I left them at their native sizes in my examples.
The signs are now placed within each scene but are only decorative at this point. We will make them interactive later in this chapter.
Note
Since we are dealing with WebGL glTF as the basis of our VR experience, we can also import GLB and GLTF models for use directly within Animate! However, they are a bit buggy when used within VR documents and sometimes, they will not render properly. This is why we are using PNG-based renders from our Adobe Dimension (or Substance 3D Stager) models.
With our signage placed at the appropriate spots within each scene, we'll move our attention to animating content with Warped Objects and the Asset Warp tool.
Animating with the Asset Warp Tool
We'll now use the Asset Warp tool to create a smoothly animated character dwelling within the Park scene. As we saw in Chapter 9, Manipulating Warped Objects through Advanced Rigging, you can use the Asset Warp tool on both shapes and bitmaps. As you add pins using the tool to various locations across the object, a distortion mesh is created. Moving these pins will adjust the mesh and transform the underlying content. Pin positions can be changed across keyframes and classic tweens can be used to animate the content.
I have drawn a figure and painted it with Adobe Fresco, a digital drawing and painting application, that will work great for this:

Figure 12.13 – Spectre PNG file
You can find spectre.png in the exercise files for this chapter, alongside the others we've already worked with.
Tip
To learn more about Adobe Fresco, visit the following URL: https://www.adobe.com/products/fresco.html.
Let's add the image to our scene and prepare it for animation:
- Add a new layer within the Park scene and rename it Spectre.
- Import the spectre.png file into the stage either by dragging it from the filesystem or by choosing File | Import | Import to Stage… from the application menu.
- Select the image on the stage and look at the Object tab of the Properties panel. Set the x value to 1380 and the y value to 1015. height should have a value of 160. This places the figure beneath the large tree.
- With the object still selected, click the Convert to Symbol button:
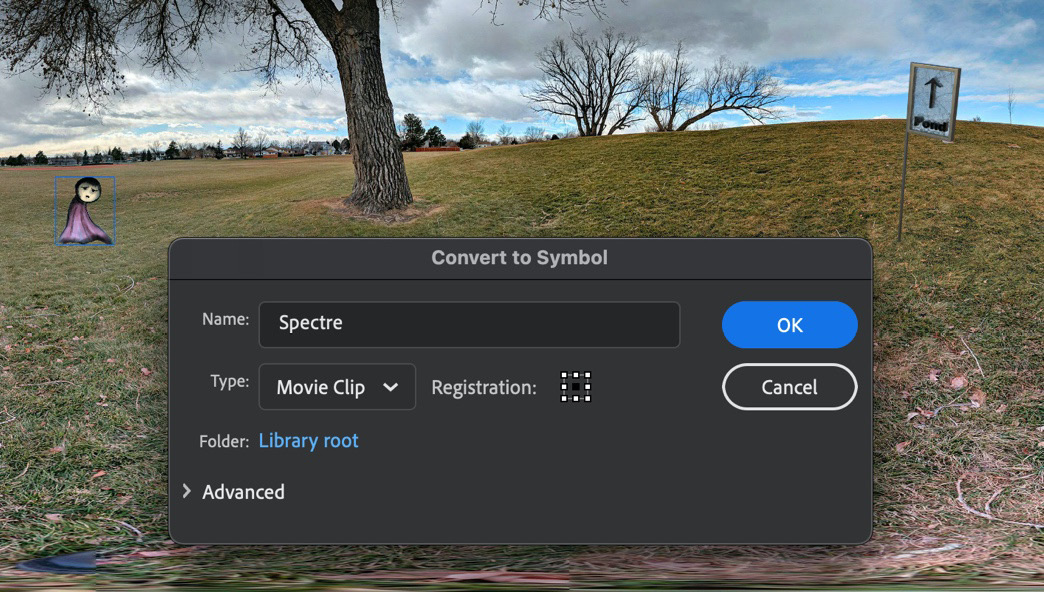
Figure 12.14 – Convert image to a Movie Clip Symbol
- In the dialog that appears, set Name to Spectre and be sure to select Movie Clip from the Type selection menu. We are using Movie Clip to loop its internal animation since the main timeline only consists of a single frame, and for interactivity purposes later. Movie Clip allows both of these features. Click OK when you're finished.
- Double-click on the Spectre symbol instance in the Park scene to enter the symbol timeline.
- Select the Asset Warp tool from the toolbar:

Figure 12.15 – The Asset Warp tool
- Now, click on various points across the bitmap image to create warp pins and a unified mesh:
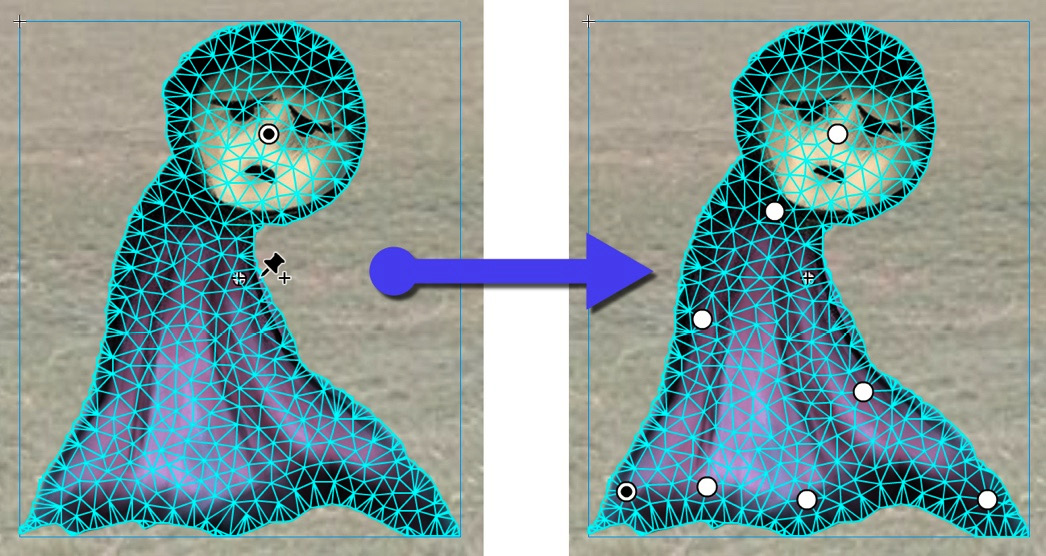
Figure 12.16 – Setting the warp pins
It's up to you how many warp pins to use and where to place them, but I suggest referring to the previous figure as a general guide.
With our warped object established, we'll now have a look at animating between mesh states, as established through regular keyframes.
Animating the Spectre Warped Object
We are now going to establish keyframes across the layer containing our warped object and will make use of classic tweens to animate between these keyframes. Any variation in the mesh between keyframes will cause a distortion effect, similar to moving cloth or morphing shapes.
Note
Again, I cannot stress enough how important it is to establish the warp points that are needed before creating additional keyframes or attempting any animation.
Let's start animating our little Spectre image:
- The first thing we must do is establish a set of keyframes across the timeline. The animation will be very subtle, so we only need a few. Insert keyframes at frames 16, 43, and 65:

Figure 12.17 – Adding keyframes across the timeline
- Now, let's modify the pins that have already been placed across the Warped Object mesh to provide small distortions across the timeline. Using the Asset Warp tool, shift the various pin locations slightly at frames 16 and 43:

Figure 12.18 – Adjusting the mesh pins across keyframes
Do not modify anything at frames 1 and 65 as we want these to be identical to create a smooth animation loop.
As you shift the pin's locations, the mesh will become distorted and the image will bend and warp to reflect this:

Figure 12.19 – Moving the pin's locations modifies the mesh
Move the pins to adjust the mesh. However, you don't want to shift things too much, as the distortion effect may become too severe and buckle the underlying artwork in undesirable ways.
- Once your modifications have been made within the necessary keyframes, add a Classic Tween to each of the frame spans:

Figure 12.20 – Classic Tween applied to Spectre
Now, you can preview the animation and ensure everything loops correctly by enabling the Loop option above the timeline. It should create a seamless loop of the subtle, smooth animation.
Once you're satisfied with your motion, I suggest that you convert the tweens into frame-by-frame animations. With the VR projects in Animate, your animation will likely be much smoother when this step has been taken! The downside of this is that you will not be able to render it as a warped object anymore.
To do this, select all the tweens, right-click, choose Convert to Frame-by-Frame Animation from the menu that appears, and choose the desired keyframe density.
Tip
Before converting frame by frame, you can also make a copy of the symbol from the Library panel. That way, you can always tweak things, even after conversion.
In this section, we imported a set of external image files to be used as interactive and animated objects within our VR experience. We also explored the Asset Warp tool and used it to create and animate warped objects within the VR space. Of course, you can use these tools and techniques in other document types as well! Next, we'll tie both scenes together and complete our VR experience by writing a little code.
Writing Code for Virtual Reality Interactions
As we've seen in previous chapters, there are several different approaches to writing code in Animate. When we programmed our small game in Chapter 11, Developing Web-Based Games, we did so by writing our JavaScript directly into the script editor of the Actions panel. For other projects, such as the clickable advertisement in Chapter 6, Interactive Motion Graphics for the Web, we used the Actions Wizard area to guide us.
Unlike coding within HTML5 Canvas documents, we cannot leverage CreateJS for our VR project. Even though all web-based document types in Animate use JavaScript as the programming language, the WebGL glTF and VR document types within Animate use a completely different library from what we've seen previously. This is a WebGL-based runtime library that Adobe has created specifically for these document types. Thankfully, though, the Actions Wizard area supports this runtime, so it is fairly easy to work with when you're programming simple interactions.
Moving from Scene to Scene
Our first task will be to program the signs we've already placed within each scene to allow the user to click on each to load a different scene. If the user is in the Park scene and clicks the pond sign, they will be taken to the Pond scene. Once at the Pond scene, if they click the park sign, they will be taken back to the Park scene.
Before writing any code, we need to prepare our document and the various objects within it for interactivity. This won't be anything new as we've performed these tasks a few times already in earlier chapters:
- Our signs within each scene are bitmap images right now. To make them interactive, they must be converted into movie clip symbols. Convert both ParkSign.png and PondSign.png into movie clip symbols by selecting each and using Modify | Convert to Symbol from the application menu.
- Each of the symbol instances will need to be given instance names to make them available for interactivity. Give them instance names of ParkSign and PondSign within the Object tab of the Properties panel.
- Additionally, we will provide the movie clip instance containing our Warped Object animation in the Park scene with an instance name. Select the movie clip symbol instance and give it an instance name of Spectre.
- The timeline for each scene will also need a layer without any visuals that we can bind our code to. Create a new layer at the top of the layer stack in each scene and name it Actions.
With that, each scene has been configured to make the animated figure and the set of sign instances interactive. Now, it's time to write some JavaScript code for each sign that will listen for mouse clicks from the user and respond by loading the alternate scene.
Let's program both of our sign instances using the Actions panel and Actions Wizard:
- Switch to the Park scene and ensure that you have selected frame 1 of the Actions layer.
- Open the Actions panel by choosing Window | Actions from the application menu.
- Click the Add Using Wizard button at the top of the panel to enable Actions Wizard. The script editor will be replaced with a step-by-step interface.
- In Step 1 of the interface, we are prompted to select an action. Locate Go to Next Scene and select it:
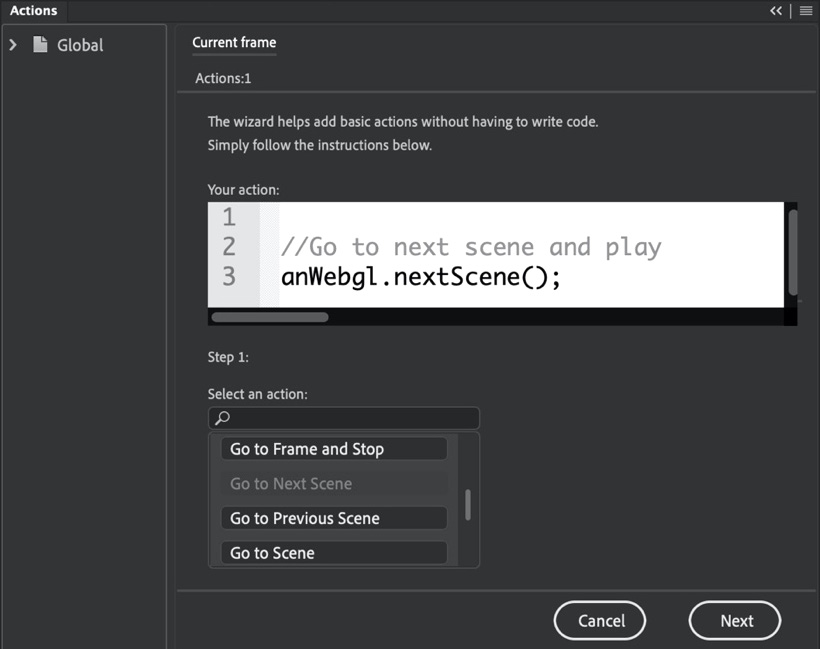
Figure 12.21 – Choosing an action in Step 1
- Click Next at the bottom of the panel interface to move on to the next step.
- Step 2 prompts you to select a triggering event. Choose On Click so that a mouse click will trigger the action you previously chose in Step 1.
- The final task is to select the object that will listen for our triggering event. Since we have provided instance names for two instances within the Park scene, they appear here. Choose PondSign and click Finish and add:

Figure 12.22 – Choosing a triggering event and object
The Actions Wizard interface will go away and be replaced with the script editor, with our completed code within it.
The code for moving from the Park scene to the Pond scene when a user clicks the sign that reads "Pond" is as follows:
{
var _this = this;
_this.PondSign.addEventListener(AnEvent.CLICK,
function() {
anWebgl.nextScene();
});
}
The preceding code establishes a reference variable of _this for scope retention, and then adds an AnEvent.CLICK event listener to the PondSign instance. When a click is detected, the next scene in the order of scenes is loaded via the nextScene() method.
Note
Be sure that your Park scene is listed first and that your Pond scene is listed last within the Scene panel. Otherwise, this code will not work as written!
You could always switch to the Pond scene now and run through all those steps again, choosing instead to go to the previous scene when the ParkSign instance is clicked, but there is a faster way to do this.
Since we've already done most of the work, we can simply duplicate the existing code and adjust it to our needs:
- Copy the entire code block from frame 1 of the Actions layer by selecting it and using the keyboard shortcut Command/Ctrl + C.
- Switch to the Pond scene and select frame 1 of the Actions layer within that scene.
- Open the Actions panel again and paste the copied code into the script editor using the Command/Ctrl + V.
- In the code, change _this.PondSign.addEventListener to _this.ParkSign.addEventListener and change anWebgl.nextScene(); to anWebgl.prevScene();.
That's all that needs to change!
The code for moving from the Pond scene back to the Park scene when a user clicks the sign that reads Park functions the same way as the previous code:
{
var _this = this;
_this.ParkSign.addEventListener(AnEvent.CLICK,
function() {
anWebgl.prevScene();
});
}
With our signs in each scene properly programmed, we can run a Test Movie and more fully experience the VR project.
Tip
You could also choose to use the anWebgl.gotoScene("scene_name"); function, along with the specific scene name, instead of anWebgl.prevScene(); or anWebgl.prevScene(); – it all depends on the project and how you want to handle any branching scene navigation.
Next, we'll make our little Spectre instance interactive as well by using Actions Wizard.
Interacting with Animated Objects
Making our signs interactive is necessary within this VR project because we need a mechanism for the user to be able to switch from one scene to another. We can also make other objects interactive just to be playful, and add some other things for the user to do while exploring the environment we've created.
Let's add some interactivity to the Spectre symbol instance and make it respond visually to various mouse movements:
- Since we are programming interactions for the Spectre symbol instance, be sure to switch to the Park scene and select frame 1 of the Actions layer.
- Open the Actions panel and click the Add Using Wizard button at the top of the panel to enable Actions Wizard.
- We will scale the instance up whenever a mouseover action is detected. For Step 1, choose the Set Scale Along X-Axis action and change the value of the highlighted code that appears from 1 to 3. This scales the visual object by a factor of three.
- Click Next at the bottom of the panel to proceed to the next step.
- To code the mouseover event in Step2, choose On Mouse Over from the triggering event list.
- Now, choose Spectre from the set of objects and click Finish and add.
The following JavaScript code will be added to the script editor:
{
var _this = this;
_this.Spectre.addEventListener(AnEvent.MOUSE_OVER,
function () {
_this.Spectre.scaleX = 3;
});
}
This code tells the Spectre instance to listen for a mouseover event and then react to that by scaling its width by a factor of 3.
We want to scale the height of our Spectre instance, along with its width, and need to have the scale reset when the mouse cursor moves off the Spectre instance.
Perform the following adjustments to the code using the script editor:
- Add a line of code beneath _this.Spectre.scaleX = 3; that reads _this.Spectre.scaleY = 3; for the instance to scale in both width and height simultaneously.
- Copy the entire code block using the Command/Ctrl + C keyboard shortcut, add a few line breaks beneath it, and paste a copy there using Command/Ctrl + V.
- In the secondary code block that we just created, change AnEvent.MOUSE_OVER to AnEvent.MOUSE_OUT to detect when the cursor leaves the object.
- Change the existing scale values from 3 to 1 to reset the scale when the mouse leaves.
The completed mouseout event code should look like this:
{
var _this = this;
_this.Spectre.addEventListener(AnEvent.MOUSE_OUT,
function () {
_this.Spectre.scaleX = 1;
_this.Spectre.scaleY = 1;
});
}
Click the Test Movie button in the top-right corner of the Animate interface to run the completed VR experience in your web browser. Click the signs to move from one scene to the other and interact with the Spectre animation to have it scale as per our programming.
The project is now complete, but there are some additional features to know about. We'll conclude this chapter by exploring the VR View panel, which we can use to refine the placement of the various objects within each scene.
Refining Perspective within the VR View Panel
You may have noticed when interacting with your VR project in the web browser that some of your interactive objects perhaps looked a bit odd in their initial placement within the VR environment. Recall that the content of the Texture layers in each scene looks completely distorted within the authoring environment; it only appears without distortion when rendered in a running project. The various other visual objects we added to the environment appear without distortion inside of Animate, but here is the tricky bit: when viewed within the VR environment, they may not visually map the perspective of the environment, based on the user's perspective. We are trying to fit a round peg into a square hole, no matter what we do. A tool to assist us in refining both placement and perspective is the VR View panel.
You can open the VR View panel by choosing Window | VR View from the application menu:

Figure 12.23 – The VR View panel
It appears as a floating panel initially, but you can always dock it to the interface, as with any panel in Animate. To render your VR project within the panel, click the Launch VR View button in the panel's center.
Note
The VR View panel only allows you to change the view and adjust components within the rendered view so that they appear better-suited to the VR environment. It will not allow you to execute any code in your interactions. For that, you need to run the project.
The currently active scene will render in a similar way to how you would view the project in a web browser:

Figure 12.24 – VR View launched
This is a great way to quickly test how your VR project will appear without having to leave Animate to view your content in a web browser. If you change scenes in Animate, the VR View panel will then adapt to display the selected scene. You can even click and drag to scroll around the environment, although any interactive elements will not function in this view.
The reason for this is that the various Movie Clip symbol instances you've established can be moved around and even transformed using your mouse cursor once selected:
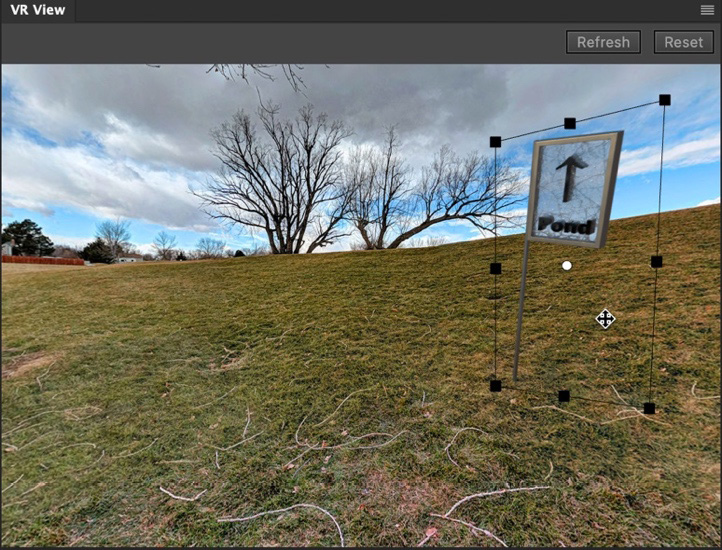
Figure 12.25 – Adjusting Movie Clip instances in VR View
It is much easier to place objects against a distortion-free perspective than the flat Animate stage with distorted environmental textures. While using VR View may not be necessary for your project if you've placed everything correctly on your first try, it's a good tool to be aware of for those times you may need it.
In this section, we prepared our visual objects for interactivity and then added the ability to move from one scene to another using JavaScript and the Actions panel. We then wrote additional code to make the animated figure react to mouse movements to add additional options for the user to explore. Finally, we looked at the VR View panel and how it can be useful in refining object placement and perspective against a properly rendered environmental texture.
Summary
In this chapter, we examined the different aspects of VR documents within Animate, alongside their relationship with WebGL glTF documents and the wider glTF specification. We gained an understanding of how VR 360 and VR Panorama documents differ from one another and explored how to generate photographic textures in formats appropriate to each document type. Expanding on this, we implemented our photographic imagery as textures across different scenes and imported renders of 3D models and a small drawing into our scenes. With everything positioned within each scene and subtle animations added to our drawing with the Asset Warp tool, we wrote JavaScript code to enable the user to interact with the various imported visual objects and animations in different ways.
In the next chapter, we will explore how to enable the Adobe AIR runtime and build a small application with this amazing cross-platform technology.