
Chapter 14: Extending Adobe Animate
In the previous chapter, we built a working application in ActionScript that interacts with native filesystems through the use of Adobe AIR on desktop and mobile.
This chapter concludes our book with an exploration of a set of options available to extend Adobe Animate. We can extend Animate through the creation and execution of custom in-app tutorials and will walk through how to accomplish this screen by screen. We can also use a JavaScript API, JavaScript for Flash (JSFL), to automate actions in the user interface (UI) or make use of the Custom Platform Support Development Kit (CPSDK) to extend the power of Animate to new platforms.
After reading this chapter, you'll be able to perform the following functions:
- Build custom in-app tutorials that can be executed and navigated within Animate itself.
- Extend Animate processes and actions through the use of the internal JSFL scripting language.
- Gain an understanding of the role of the CPSDK for adding additional platform targets to Animate.
- Work with additional platforms such as LottieFiles by extending Animate through the Adobe Creative Cloud Marketplace and with dedicated extension managers.
Technical Requirements
You will need the following to complete this chapter:
- Adobe Animate 2022 (version 22.0 or above).
- Refer to the Animate system requirements page for hardware specifications:
Creating Custom In-App Tutorials
In this section, we'll explore how to build in-app tutorials within Animate. These tutorials run within the application, highlighting tools and panels as the user works through them one step at a time.
Beginning with Animate 2020, Adobe began to ship a number of in-app tutorials within the software. While this began with a set of two introductory tutorials, the selection has now grown considerably larger and includes around 15 tutorials of varying complexity.
Adobe-supplied tutorials can be activated under the Help menu by selecting a specific tutorial from the Hands-on Tutorial submenu:

Figure 14.1 – In-app tutorial selection
These tutorials are meant to showcase certain techniques within the application in a way that is visual, engaging, and reliant upon the willful action of the user. They appear within the application directly, in the form of little card overlays on the application UI.
Card overlays can include text instructions, motion previews of the step in action, and the ability to navigate across the various steps of a tutorial:
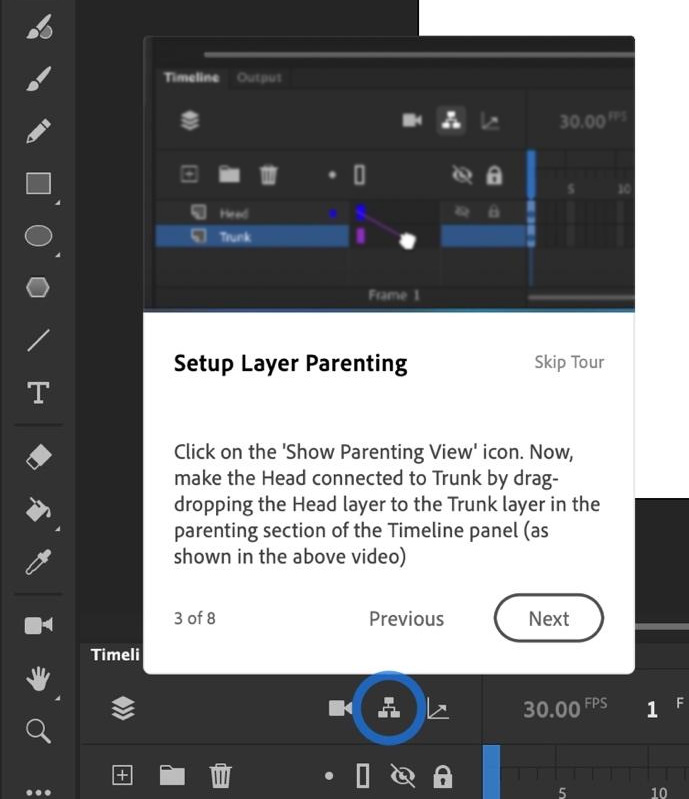
Figure 14.2 – Steps appear as contextual cards within Animate
Each tutorial will contain a curated set of steps prompting the user to perform certain actions in order to provide a step-by-step walk-through directly within the application.
The tools to build these same types of tutorials are now available to any Animate user through a built-in extension. All you need to do to get started is open Window | Extension | Hands-on Tutorial Creator to access this feature. With the panel open and ready, you'll then proceed step by step through the process, building out various cards that contain explanatory steps, preview images or animations, and contextual prompts anchored to the application UI.
The first screen you see in the Hands-on Tutorial Creator panel allows you to either create a new tutorial or edit one that has already been created and saved as a .zip archive:

Figure 14.3 – Create a new tutorial or edit an existing tutorial
To edit an existing tutorial, choose the Open radio button and then select Browse to find the tutorial bundle you want to modify.
Whether you are creating a new tutorial or editing an existing one, you'll next be taken to the Hands-on tutorial details screen:
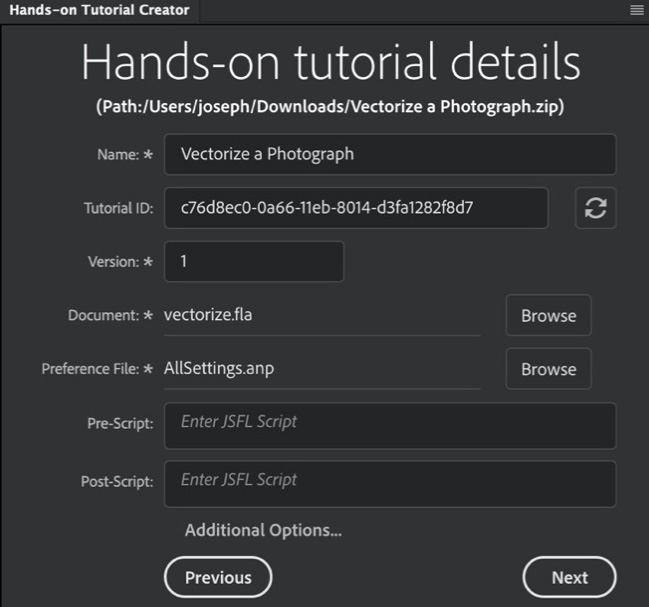
Figure 14.4 – The Hands-on tutorial details screen
Here, you are able to modify general properties in the Name and Version input fields, alongside an autogenerated tutorial ID.
You must have an existing Animate authoring document (.fla) file prepared to start with, in addition to an Animate preferences (.anp) file. The document file can be empty or may contain content across the timeline, stage, and library. An Animate preferences file can be exported from Preferences | Export Preferences…, and it is useful for arranging the workspace and other preferences exactly as you want for the tutorial you are creating.
Optionally, you can also include JSFL scripts to run alongside the tutorial. JSFL scripts allow you to automate certain processes within the Animate software while it is open. You can read more about JSFL in the next section.
There is a set of additional options that allow the inclusion of an overview video to welcome and inform the user, as well as a full description of the tutorial. If you choose to access these properties, you can include a preview image or even an animated SWF to give the user an overall idea of the tutorial contents and the expected results.
Clicking Next will take you to the Card list screen of the Hands-on Tutorial Creator panel:

Figure 14.5 – The Card list screen
This section is where most of the work takes place, and it is where tutorial cards are created. Each step in your tutorial is a card, and this screen is where you manage the order and details of each step.
Initially, no cards will be present in a new tutorial, so the first step would be to click the Add Card (+) button to add a new card. The Move the Card Up and Move the Card Down arrow buttons allow you to change the order of a selected card within the card list, and the preview selected card button (the play symbol) provides an in-app preview of the selected card. The delete button will, of course, remove the selected card.
Whether you are editing an existing card or creating a new one, next, you will be taken to the Card details screen:
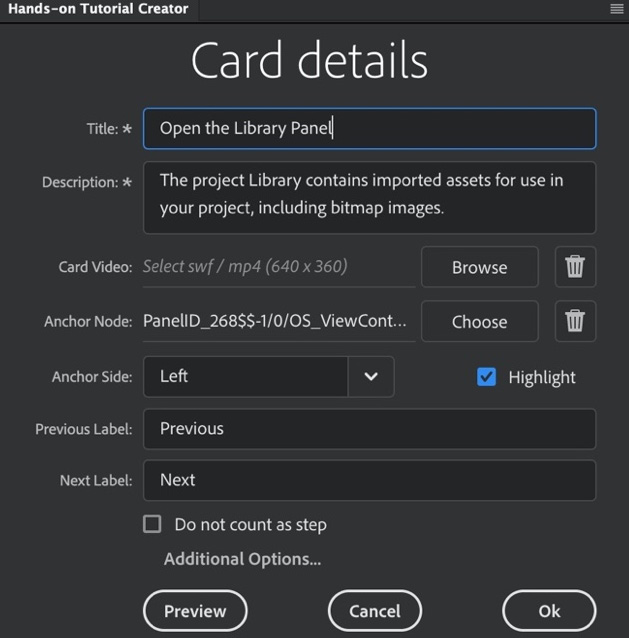
Figure 14.6 – The Card details screen
Each card you create must have a title and a description. Similar to the overall tutorial details, a card video can also be provided, and this will appear as part of the visual card along with the title and description text.
Cards can be anchored to specific portions of the Animate UI so that they are in close proximity to their content. You accomplish this when you choose an anchor node by clicking on the Animate user interface once the Choose button is activated. The card can be anchored to the top, bottom, left, or right of the selected anchor node with the Anchor Side drop-down selector. Choosing the Highlight checkbox will place a blue circular indicator overlay at the chosen anchor node.
Labels for the card's Previous and Next buttons can also be customized to read whatever you like. A card can also be excluded from the list of steps by choosing the Do not count as step checkbox. This is good to provide a card with additional or expanded information but isn't itself an actual step in the overall tutorial.
You can preview individual cards while you edit them and see exactly how they will appear in the UI. Clicking Ok will bring you back to the card list.
From the overall card list, you can choose Next in order to publish your tutorial:
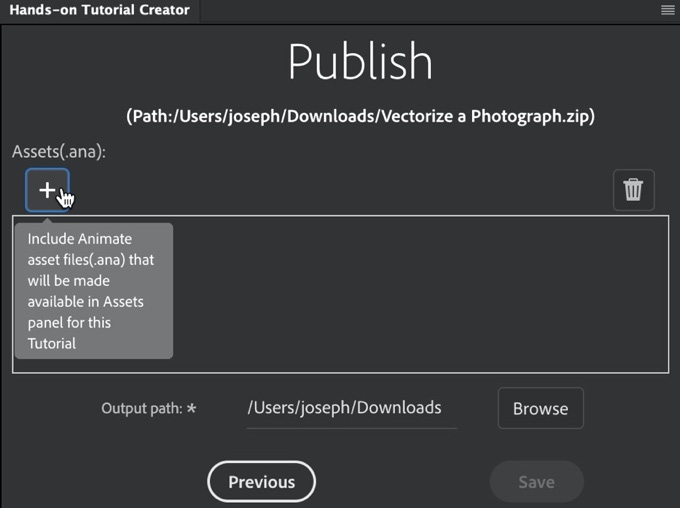
Figure 14.7 – The Publish screen
When publishing your tutorial, you can include additional assets in the form of Animate asset (.ana) files for the user to access during their interaction with your tutorial. When the tutorial is activated, any Animate asset files that are included here will be populated within the Custom area of the Assets panel.
When the tutorial is complete, choose a folder on your filesystem and click Save to generate a distributable .zip file. This file contains all the settings, images, videos, assets, data, and anything else your tutorial comprises. Because it takes the form of a ubiquitous .zip archive, it can easily be distributed to other Animate users. The archive also acts as a backup in case you'd like to edit your tutorial further.
To use a tutorial, it must be imported to the Help | Hands-on Tutorial menu by choosing Import Tutorial… and locating the .zip archive. Once a tutorial is imported, it becomes part of the menu of hands-on tutorials under Help and can be launched from there.
Tip
If you ever want to remove your custom tutorial from the list of tutorials, it can be removed by choosing Remove Tutorial from the Hands-on Tutorial menu. The default tutorials that ship with Animate cannot be removed.
In this section, we examined the workflow for creating hands-on tutorials which can be generating using Animate, and distributed to other Animate users to be installed with their version of Animate in order to learn in a hands-on manner within the program. Coming up, we'll have a look at another mechanism you can use to extend Animate functionality through JSFL scripts.
Writing JSFL Scripts
In this section, we explore the use of JSFL scripts in Animate. Using JSFL scripts will allow the automation of certain tasks that can be run with a menu-based command within an Animate document. These scripts can generate objects, or they can manipulate objects that already exist within a document. In our example for this chapter, we'll create a randomly generated splatter pattern across a document using JSFL.
This is one of those features that users will often hear about but never actually explore. JSFL scripts can not only improve workflows when dealing with repetitive tasks but can also be used to encapsulate specific procedures to share with others.
All of the JSFL commands can be executed and managed by selecting Commands from the application menu:

Figure 14.8 – The Commands menu
You have a number of different options here, but any installed JSFL scripts will appear in the lower portion of the Commands menu. By default, you will have four commands, but you can always add your own JSFL scripts as part of this menu. Choosing Run Command… from this menu lets you browse for a .jsfl file anywhere on your local system to run as a command.
The two main ways of writing JSFL scripts are to either write the code manually or to use the History panel. Either way, you'll first need to create a new .jsfl file in order to write any scripts.
Let's create a new .jsfl file now:
- From the Home screen in Animate, click on either Create New or More Presets and the New Document dialog will appear.
- Click the Advanced category along the top of the dialog in order to choose a new document by a specific document type.
- Scroll down past the PLATFORMS and BETA PLATFORMS groupings and you will find a new header for SCRIPTS at the very bottom. A set of code-based file types can be created here, including ActionScript 3.0 class files and JSFL script files.
- Choose JSFL Script File and then click the Create button to generate a new JSFL file that you can edit directly within Animate:
Figure 14.9 – JSFL Script File
The JSFL file opens in Animate in a similar way to how ActionScript files do, as discussed in Chapter 13, Building Apps for Desktop and Mobile.
- You'll want to save the file right away. Choose File | Save from the application menu and a save dialog will appear:
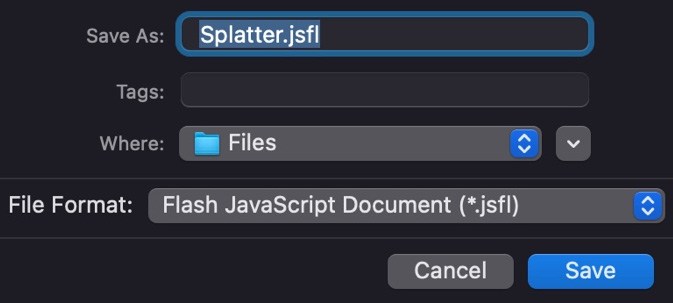
Figure 14.10 – Saving the JSFL file
The save dialog lets you define a name and location for your new file. There is only a single file format to choose from.
- Type in a name for the file. We'll be writing JavaScript code to generate a splatter pattern across the screen in this example, so I've named mine Splatter.jsfl and saved it to a location that is easy to remember.
- Click Save to save your new .jsfl file.
While we could just start writing code, there is a useful mechanism within Animate that makes it very easy to preserve certain actions for the purpose of automation. This is accessible through the History panel.
The History panel records a step-by-step record of every action taken within an Animate document. This could be the creation of a shape, a selection change, color assignment, or much more.
Let's now go ahead and make use of the History panel to assist us in writing our scripts:
- Create a new HTML5 Canvas or ActionScript 3.0 document by selecting File | New from the application menu.
- Open the History panel by choosing Window | History from the application menu.
- Perform a number of actions within the document. Create shapes, change selections, and add layers until a handful of steps appear within the History panel.
- Highlight the steps you want to copy within the History panel. Certain steps are not able to be copied – they are marked with a red X symbol over the step icon.
- With at least one valid step selected, open the panel options menu and choose Copy Steps:

Figure 14.11 – Copying steps from the History panel
- With the selected steps copied, switch to the JSFL document we created previously and paste in the steps using Ctrl/Command + V:
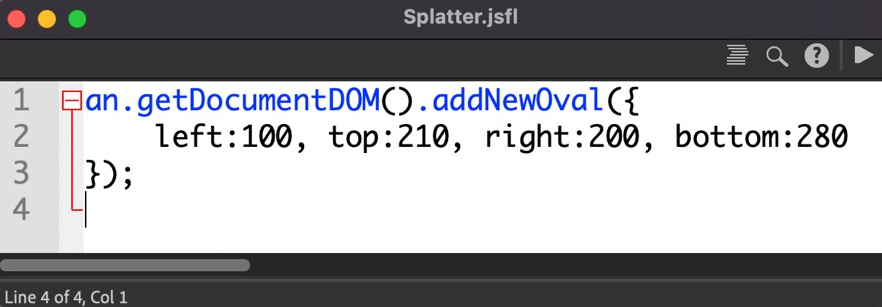
Figure 14.12 – The pasted code
The code to enact the step or steps is placed into the .jsfl file. In the previous figure, the code to create a new oval shape is added, along with the required location and size information, through an object defining the shape bounds across the left, top, right, and bottom values.
If you click the Run Script button at the top right of the script editor, the script will execute and your code will execute, performing the same steps that were copied within the .fla document.
We will want to make this more useful, of course. In my example, I'll automate and randomize the generation of many ovals in order to produce a cool splatter effect across the document.
Tip
Learn more about JSFL files and their capabilities by reading the Animate JavaScript API documentation at https://www.adobe.io/apis/creativecloud/animate/docs.html.
Let's walk through the creation of a splatter command by modifying the JSFL scripts to produce something much more useful. Follow these steps:
- Return to the .jsfl file and remove the initially pasted code to create the oval so that the file is completely empty. We'll add similar code later that does the same thing but in a smarter way.
- Insert the following code at line 1 of the script editor:
function randomize(min, max) {
return Math.round(Math.random() * max) + min;
}
Look familiar? This is the same randomization function we used when building the game in Chapter 11, Developing Web-Based Games. It accepts two numbers and returns a random one in between them.
- We'll next define a set of variables to be used within the script. Add a few empty lines following the randomize() function and write the following beneath it:
var x;
var y;
var r;
var c;
var h = an.getDocumentDOM().height;
var w = an.getDocumentDOM().width;
var fill = an.getDocumentDOM().getCustomFill();
fill.style = "solid";
Here, we set variables to determine the x and y positions, the radius, and the color alpha percentage. These will all have elements that are somewhat random and are simply declared at this point with no values.
Then, we set variables to retain the width and height of the Animate document with the JSFL JavaScript API. Finally, we create a new variable named fill to act as a custom color, and we set its style attribute to "solid".
The remainder of our script resides within a for loop, which is similar to the loops created within our JavaScript game and AIR application development experiences in previous chapters.
- Do you recall the initially pasted code to create the oval, that we removed? It will make a re-appearance now! Add the following code block below the existing lines of code:
for (var i = 0; i < 500; i++) {
x = randomize(-50, w);
y = randomize(-50, h);
r = randomize(10, 60);
switch(randomize(0,2)){
case 0:
c = "E6" //90%
break;
case 1:
c = "BF" //75%
break;
case 2:
c = "FF" //100%
break;
default:
c = "FF" //100%
};
fill.color = "#440000"+c;
an.getDocumentDOM().setCustomFill(fill);
an.getDocumentDOM().addNewOval({left:x, top:y, right:x+r, bottom:y+r}, false, true);
}
Let's examine this loop, as there is a lot going on here. The for loop itself runs 500 times to create 500 oval shapes in our document. Within the loop, we invoke randomize() to set the x and y position properties that were previously declared. When we request random position values, we make use of the stage width and height references through the w and h variables to ensure we cover the document stage with ovals. We also set a random radius size between 10 and 60 and set this to the r variable.
Following this is a switch statement, which determines the alpha transparency of the fill color, which is set directly following the switch block. To do this, we grab a random number between 0 and 2 and set the value of our c variable to a hexadecimal fragment alpha percentage based on the number returned. This is appended to the color attribute of our fill variable in order to create a color with varying opacity values, from 100% to 75%.
The last few lines of code set the custom fill color and then draw a new oval based on everything determined within the loop previous to this point. Note that the addNewOval() method is really the only remnant of our initial pasted code from the History panel.
- Be sure to save your .jsfl file.
In order to make this available as a command in the Commands menu, there is a special folder that the .jsfl file must be moved to. The location of this folder will vary depending on your operating system. The locations for both Windows and macOS are as follows:
- The Commands folder on Windows:
C:Users<USER>AppDataLocalAdobeAnimate <VERSION><LOCALE>ConfigurationCommands
- The Commands folder on macOS:
/Users/<User>/Library/Application Support/Adobe/Animate <VERSION>/<LOCALE>/Configuration/Commands
Tip
The Library folder is hidden by default on macOS. In Finder, click the Go menu at the very top of your screen and hold down the Option key. Library will appear as a menu option. Alternatively, select the Go to Folder… option from the Go menu and use ~/Library as your location.
In order to run the newly created command in Animate, perform the following steps:
- Move or copy Splatter.jsfl into the Commands folder alongside the JSFL commands that are installed with Animate:
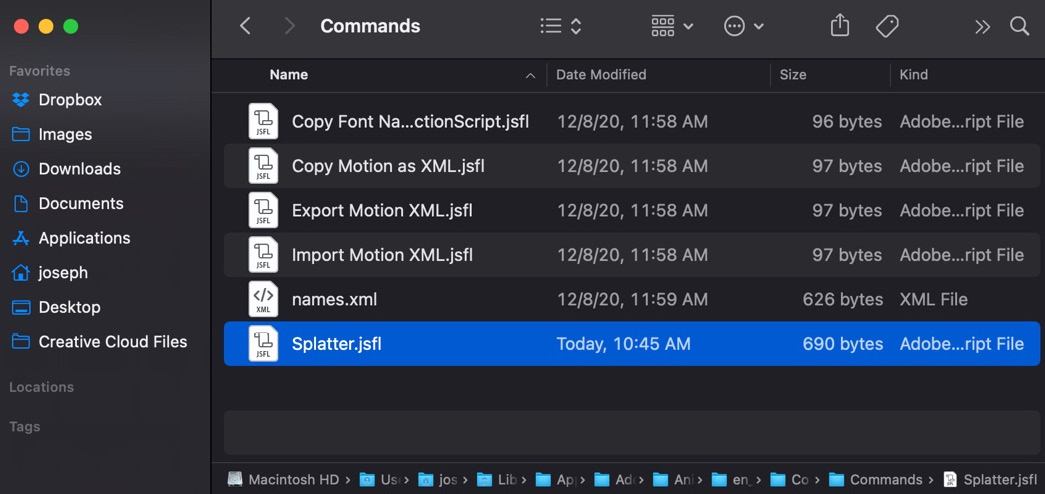
Figure 14.13 – Adding jsfl to the Commands folder
- With the file in place within the Animate Commands folder, close the file explorer and launch Animate once more.
- Create a new HTML5 Canvas or ActionScript 3.0 document by selecting Create New or More Presets and generating a fresh document.
- Once the new document is created, choose Commands from the application menu. At the bottom of the Commands menu is our new Splatter command option:
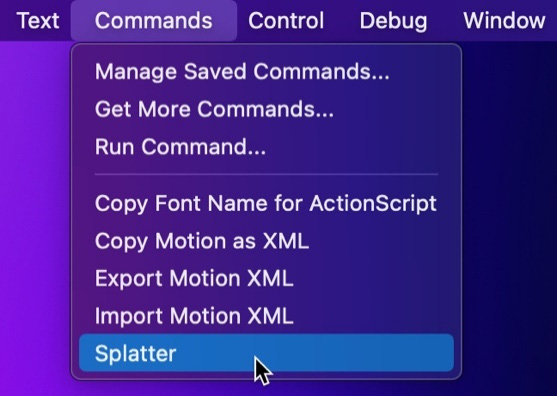
Figure 14.14 – The Commands menu and the Splatter command option
- Click Splatter and the command runs the associated JSFL script, generating a cool splatter pattern across the stage:

Figure 14.15 – The Splatter command run results
As you can see, using JSFL scripts and the Animate JavaScript API is a highly versatile way of extending Animate for all sorts of different purposes.
Once you have a number of custom commands installed, you can choose to manage, rename, or delete them by choosing Manage Saved Commands… in the Commands menu:
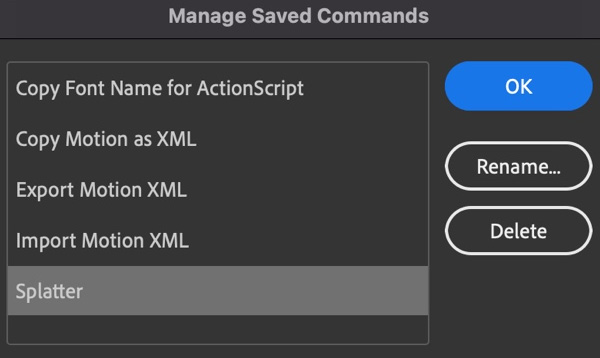
Figure 14.16 – Managing commands
Custom commands appear alongside the default commands in this dialog, so be sure to only modify the ones you really want to!
To download additional JSFL scripts, a browser-based search for download jsfl scripts or download jsfl commands will yield many results. Some of these collections can be found at the following locations:
- https://github.com/markknol/flash-jsfl-tools
- https://megacharlie.com/plug-ins.html
- https://ajarproductions.com/blog/flash-extensions/
- https://github.com/Simtey/Animate
In this section, we explored the use of JSFL scripts to create and execute commands within Animate. Next, we'll see how it is possible to extend Animate through the use of the CPSDK and add new publish targets to the software through the installation of plugins developed with this SDK.
Understanding the Animate Custom Platform SDK
In this section, we'll look at the Animate CPSDK and see how to install extensions from Adobe Exchange through the Creative Cloud desktop application.
Back before Adobe decided to re-brand Flash Professional to Animate, they were working under the hood to establish the software as a completely platform-agnostic solution for motion and interactivity. One team cannot target all platforms that exist in the world, so they came up with the solution to allow anyone to add target platforms to Animate through the use of the CPSDK.
Visit the adobe.io website and go to the Animate section (https://www.adobe.io/apis/creativecloud/animate.html), and you'll be able to view all of the ways to extend Animate:
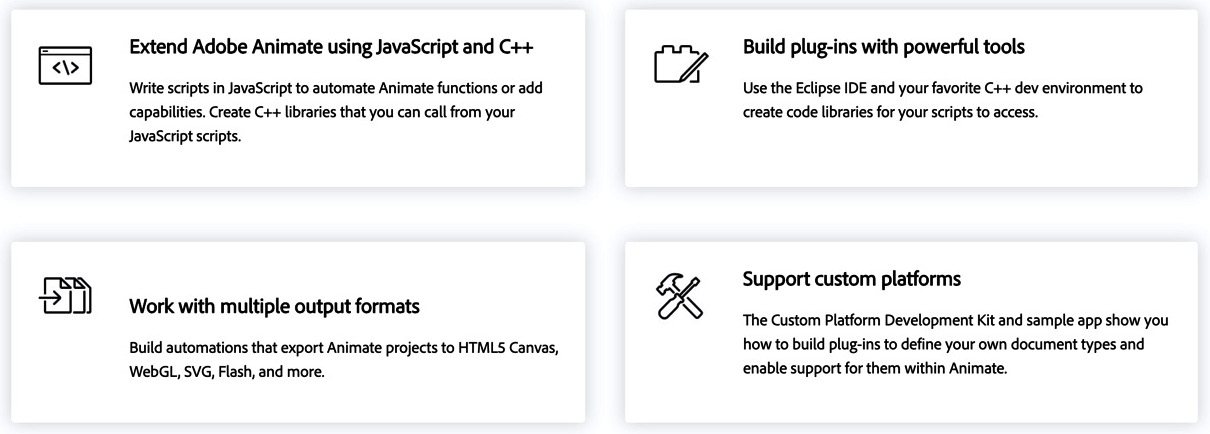
Figure 14.17 – The adobe.io resources for Animate
You can find full documentation along with the actual CPSDK, which can be downloaded and put to use to implement a custom document type and publish workflow.
Note
Creating a new document type for Animate using the CPSDK is not trivial. If you ever decide to undertake such an effort, you should be intimately familiar with the platform you are targeting.
To make use of an extension that leverages the CPSDK, you will need to browse the plugins available for Animate within the Creative Cloud Desktop application:
- The first step in this process is to close Animate completely and open the Creative Cloud Desktop application.
- With the application open, locate the Stock & Marketplace tab along the top and choose the All plugins category.
- We can filter the plugins displayed by selecting the Creative Cloud application we want to find plugins for. Choose Animate and only plugins compatible with Animate will be visible:

Figure 14.18 – Adobe Creative Cloud Marketplace
Not all plugins that you find here use the CPSDK. Some create new panels using JSFL, and others may be components or other workflow tools.
- Once you locate a plugin, all you need to do is click Install and the plugin will be installed onto your computer:

Figure 14.19 – Installing a plugin for Animate
You can also uninstall plugins that were previously installed using this same mechanism. Adobe is moving more and more functionality into the Creative Cloud desktop application from other sources.
You might be wondering what all of these available extensions for Animate can be used for. Here is a short list of some interesting extensions and what they do:
- HTML5 Canvas Audio Component: Adds an audio playback component to the Components panel in HTML5 Canvas documents.
- PixiAnimate: Adds a custom publish workflow targetting PixiJS – a 2D rendering engine for web browsers.
- AMPHTML Ads: Adds the ability to create documents targeting the Google AMP platform.
Once you've installed a plugin, you'll want to use it. One of the reasons we closed Animate before installing a plugin is that Animate will only detect newly installed plugins on startup. If a plugin using the CPSDK is installed, we can now fire Animate back up and create a new document with it.
- From the Home screen in Animate, click on Create New or More Presets and the New Document dialog will appear.
- Click the Advanced category along the top of the dialog in order to choose a new document by document type.
- Scroll down past the PLATFORMS and BETA PLATFORMS groupings and you will find a new header for CUSTOM PLATFORMS. The new document type using the CPSDK can be located there:

Figure 14.20 – Creating a Custom Platform document
- Select the custom document type and click Create to generate a new document that targets the new platform.
Depending upon the platform, certain tools and features may not be supported. This is to be expected and is similar to what we've seen when comparing the native document types in Animate.
When it is time to publish your project, the CPSDK also includes the ability for developers to include their own platform-specific publish settings:

Figure 14.21 – Custom document Publish Settings
Note
Certain custom platform publish workflows may rely on additional processes to be installed and running to function correctly. Keep an eye on the Output panel when using a custom platform document type in case you are prompted to take additional action.
You can also install certain extensions by making use of an extension manager. This is useful when you want to install an extension that isn't available through the Creative Cloud Marketplace – especially in the case of beta extensions such as the LottieFiles for Adobe Animate plugin.
Lottie is an open source, JSON-based, platform-independent, animation-focused file format that can be played back on the web, iOS, Android, Windows, macOS, and more! The LottieFiles extension converts Animate content into a Lottie file and provides a number of additional tools around this process, such as a render graph and the ability to manage your creations.
You can locate and download a beta of the LottieFiles plugin from https://lottiefiles.com/plugins/animate:
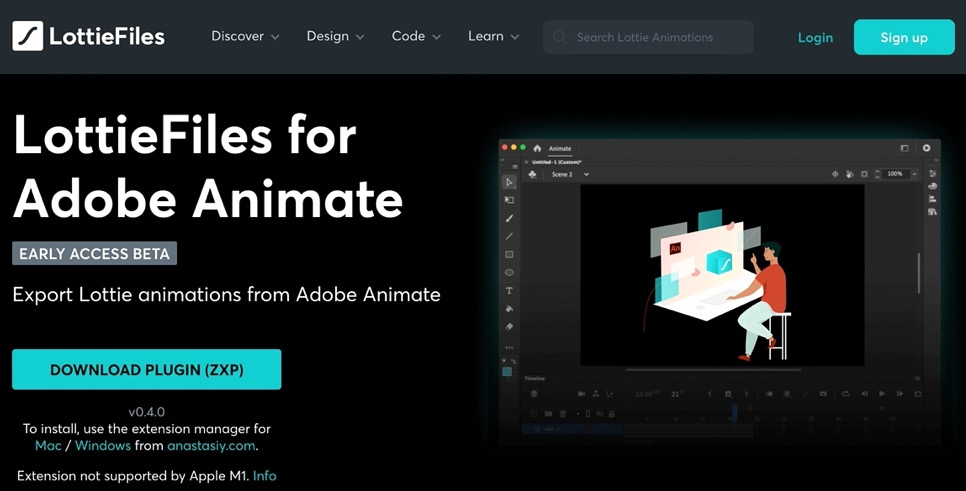
Figure 14.22 – LottieFiles for Adobe Animate plugin
The extension will download as a .zxp file that must be installed through an extension manager. There are a handful of extension managers available for use, but I would recommend the Anastasiy's Extension Manager, which can be acquired from https://install.anastasiy.com/.
Once you install the extension manager, you can use it to install your .zxp file into Animate:
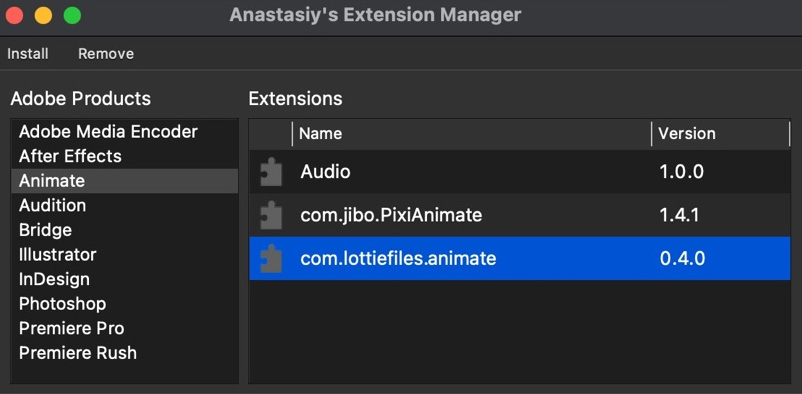
Figure 14.23 – Anastasiy's Extension Manager
With the extension installed, you'll want to be sure to restart Animate if it was open during the installation process. You will find that instead of installing as a custom platform, the extension is accessible as a panel in Animate and works seamlessly with existing Animate content.
To open the LottieFiles panel, choose Window | Extensions | LottieFiles from the application menu:
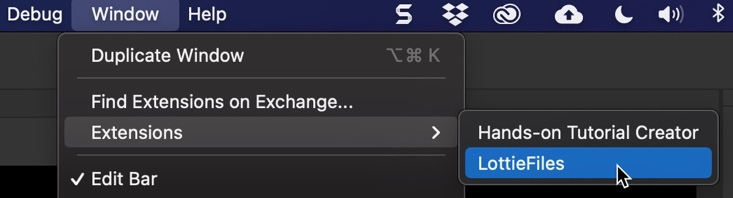
Figure 14.24 – The Animate Extensions menu
With the panel opened, you will need to authenticate with your LottieFiles account. If you do not have an account, it is free to set one up, and the extension will guide you through this simple process.
Tip
You can set up a LottieFiles account at https://lottiefiles.com/ by clicking Sign up in the upper right.
Once authenticated, the LottieFiles panel offers a number of useful tools to preview and generate your LottieFiles content directly from your animated content within Animate:

Figure 14.25 – Making use of the LottieFiles extension in Animate
One of the nice things about this extension is that it does not rely on any custom document type. This means it can be used on a wide variety of content within the application.
Note
Remember that the LottieFiles extension is in beta right now – so, the extension's functionality is somewhat limited within Animate. However, they have a great history of building extensions for After Effects, so things should only improve as work continues.
In this section, we had a look at the CPSDK for Animate and explored how to locate, install, and make use of custom platform plugins and additional third-party extensions by using the Adobe Creative Cloud Marketplace and a separate extension manager. We also had a look at how to make use of LottieFiles – an exciting new extension for Animate!
Summary
In this chapter, we looked at three ways to extend Adobe Animate beyond its default state through the creation of in-app tutorials, the writing of JSFL scripts and the configuring of their associated commands, and the installation and management of plugins, making use of the CPSDK to add new document types, export formats, and other functionality to Animate.
This concludes our journey for now. You should feel confident in using Adobe Animate to design an assortment of creative projects, and I hope you continue to master all aspects of the software as your familiarity with its workflows and platforms continues to grow.