Chapter 10: Advanced Layer Development and Organization
I believe a well-organized workflow is essential to the success of not only your work but also your relationships with others. This must be clear to you at this point in the book! You will likely be called to collaborate with others, and they will truly appreciate your ability to keep things organized and logical. Of course, the same can be said for clients, but to an even greater degree. This will be how they view you professionally. Your ability to master your files quickly and confidently both in their creation and, later, in their adaptation will present you as someone who can consistently get the job done.
In the previous chapter, we reviewed how artboards can offer great benefits when it comes to both organization and presentation. In this chapter, we will be taking a deeper dive into how layers can also be used to keep your documents organized.
To accomplish this, the chapter will be divided into the following main topics:
- Using the Artboards panel to your advantage
- Organizing layers with objects, documents, and artboards in mind
- Using groups, nested groups, and Isolation Mode for improved workflow
Technical requirements
To complete this chapter, you will need the following:
- Adobe Illustrator 2022 (version 26.0 or above).
- High-quality internet access may be required for some situations.
Using the Artboards panel to your advantage
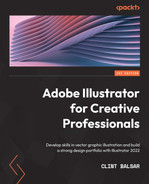
In Chapter 9, Utilizing Multiple Artboards, we talked quite a bit about setting up artboards, as well as adding or removing them and editing them. Now, in this chapter, we are going to look closer at the panel for them. Figure 10.1 shows a document that currently has four artboards:
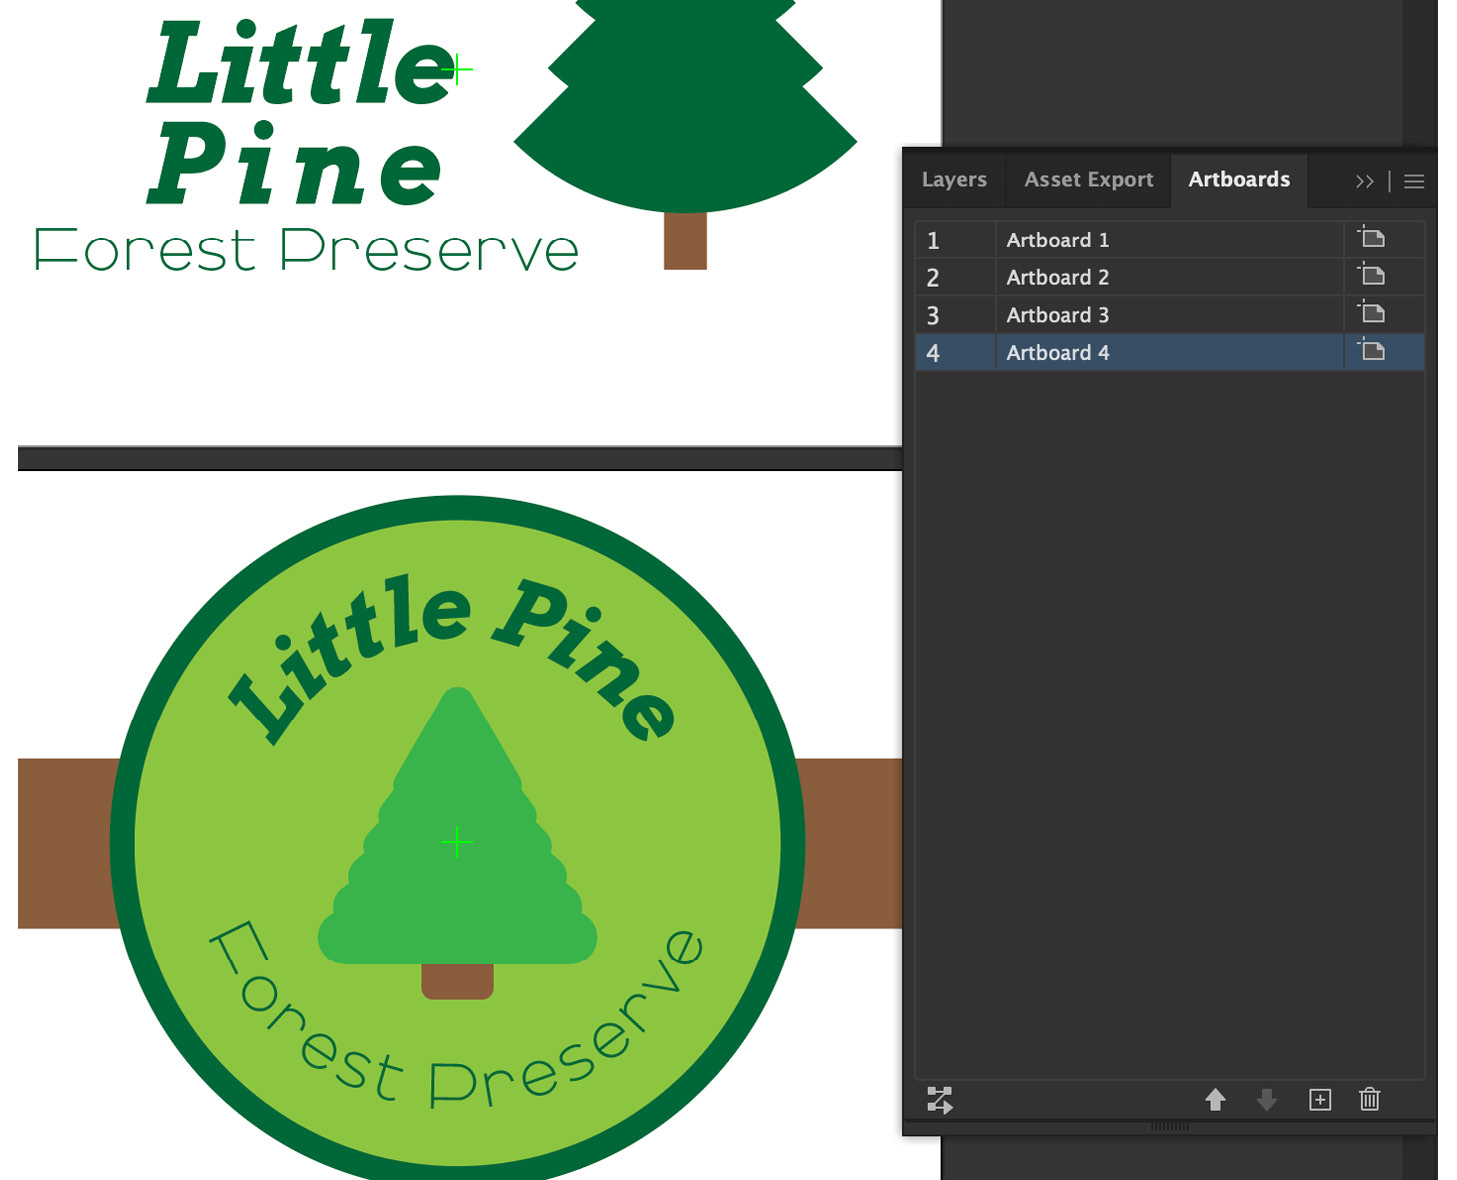
Figure 10.1 – The Artboards panel
To add more artboards, you can click the New Artboard button (which looks like a plus sign inside a square) on the bottom row of the Artboards panel. To remove artboards, you can click the Delete Artboard button (which looks like a trashcan) in the lower-right corner of this panel. To adjust the stacking order of the artboards, you could click the Move Up or Move Down buttons, which are just to the left of the New Artboard button.
As was first presented in Chapter 9, Utilizing Multiple Artboards, in the far lower-left corner of the Artboards panel, you will find the Rearrange All Artboards button. Selecting this button will bring up the dialog box, which allows you to customize the way you would like to arrange the current artboards (see Figure 10.2):

Figure 10.2 – The Rearrange All Artboards dialog box
Another benefit of artboards is the ability to navigate quickly from one to the other. While in the Artboards panel, click on any of the available artboards to make it active. Clicking it a second time will allow you to display the single artboard in the Zoom to Fill view. If you are looking to rename any of the artboards, you can double-click on its current name and then type in the replacement. If you would like to make edits to the artboard, you can also double-click on the Artboard Options button to the right of the name.
In addition, you can go to the top-right Panel Options button to find yet another way to make choices concerning artboards (see Figure 10.3):

Figure 10.3 – Artboard Panel Options menu
You will be offered an additional choice by going to the Panel Options menu – Delete Empty Artboards. This will allow you to remove several artboards at one time if you did not apply any artwork to them.
You can adjust any artboard individually by selecting Artboard Options… from the Panel Options menu. This allows you to develop each board as a separate document with the correct dimensions. For example, you could have one artboard for a letter, one for an envelope, and one for a business card. When using this approach, you can easily compare the size of each. In addition, you will be able to easily print or export each item separately, if needed.
Next, let's talk about the methods you can employ when creating artwork with each of these artboards.
Organizing layers with objects, documents, and artboards in mind
As we discussed in Using the Artboards panel to your advantage section, multiple artboards allow you to have separate documents on each of them and even scale them to the exact size of the document. This allows you to host a variety of output media within one document, such as a business card, letterhead, and envelope design. One of the key benefits of preparing them on separate artboards is the ability to output each one as a separate asset when needed. To output artboards separately, you can use the Export for Screens command. Artboards also allow you to store and present multiple items or concepts within one file. If you do intend to collaborate or present an Illustrator file, then it will be very beneficial to keep everything logically organized.
In this section, we are going to look at how the development of the layers can maintain greater control of your work and result in less confusion and difficulty at a later point. Let's look at what we can do to combine shapes into object groups, place these groups into layers, and then position layers into the appropriate artboards.
In Figure 10.4, you can see that a single layer can hold the artwork for multiple artboards. This single layer has all the artwork, while in Figure 10.5, the image has the artwork hidden:
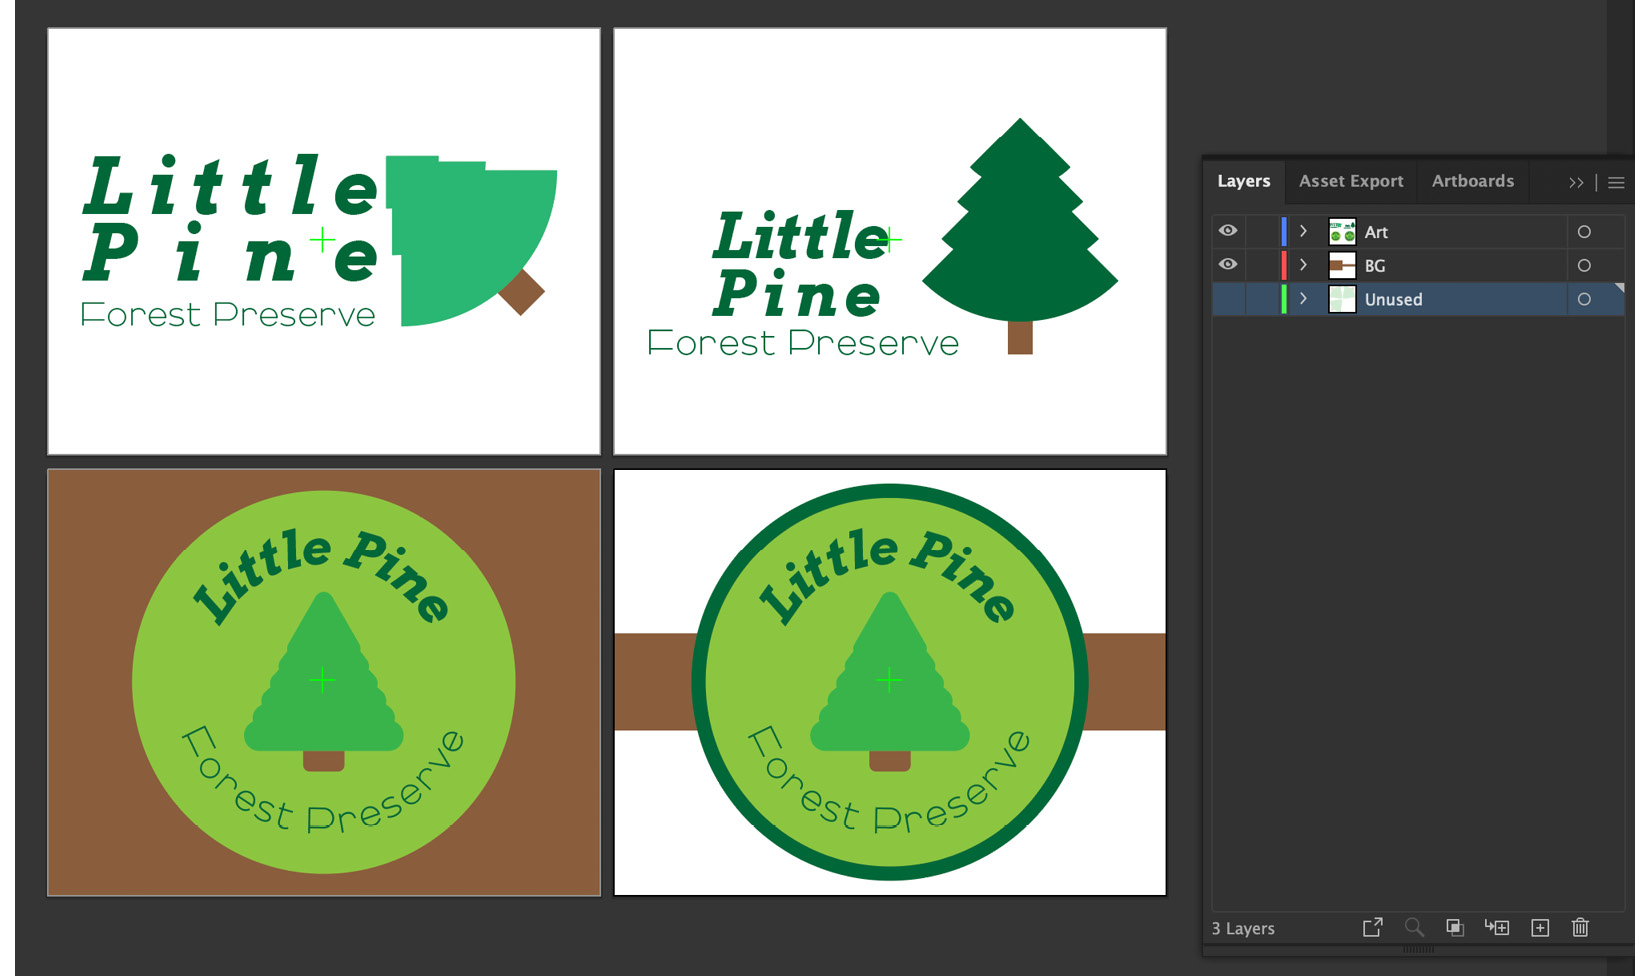
Figure 10.4 – A single layer may hold artwork for several artboards
Notice that with one click, the layer has been hidden on multiple artboards:
Figure 10.5 – All work becomes hidden when clicking the art layer
Although Illustrator allows you to have artwork from several different artboards within one layer, your work will be more organized if you produce your work in multiple layers. You can develop the layers based on the artboard that resides within them (see Figure 10.6):

Figure 10.6 – Creating a layer to hold artwork for each artboard
This will keep you more organized, with each artboard playing the part of a separate document with all its artwork on it.
In the example shown in Figure 10.6, each artboard's artwork was selected, made into a group (Ctrl/Command + G), and then moved to a newly created layer. Follow these steps if you are unfamiliar with this process:
- Open the layer you have the current artwork in by clicking on the arrow to the left of the layer's thumbnail:

Figure 10.7 – Revealing sublayer items
- Select all objects within a piece of artwork and choose Object > Group from the top menu (Ctrl/Command + G). In Figure 10.8, you will see that I have created a group for each shape. So, Artboard 1 in the top-left corner has three groups:

Figure 10.8 – Grouping objects to prepare to move to a new layer
- Shift + click to select multiple groups, and then choose Object > Group from the top menu (Ctrl/Command + G) to collect them into one group (see Figure 10.9):

Figure 10.9 – Using a single group to migrate artwork to a new layer
The process of creating groups nested within a larger grouping is known as sublayers. Sublayers allow you to group details that are then grouped into the larger object.
- Choose Create New Layer from the Layers panel.
- Choose any of the sublayers from your previously created layer and drag them into the newly created one. The result of this action should appear like the Top L layer in Figure 10.10:

Figure 10.10 – Contents migrated into the new layer
- Repeat step 4 for all remaining artwork. In this example, you would end up with four layers that each contains the artwork on their associated artboard (see Figure 10.11):

Figure 10.11 – A layer with sublayers created for each artboard
The flexibility of having layers with content that stays with the artboards, as well as layers that can hold content that crosses over several artboards, is powerful. Both techniques are valuable methods that you can use to your advantage.
Creating a layer that holds common items to apply to all artboards makes it easy to hide those same items all at once. For example, after creating a logo, you apply it to all content in every artboard, but then hide it using Toggles Visibility (the eye icon in the Layers panel). It creates a quick "before/after" for you to view the change.
Making sure your artwork is logically developed within layers by utilizing groups and subgroups may be a challenge at first. But, over time, if you develop the habits of layer organization, you will benefit from better time management and control of your work. Remember as well to manage your layers in relation to the artboards for even greater control. This will become more apparent when we discuss a popular editing technique in the next section.
Using groups, nested groups, and Isolation Mode for improved workflow
Any time you create an item consisting of several objects, those objects can then be selected and combined into one group. In Figure 10.12, you can see that I have selected both the green treetop shape and the brown tree trunk shape (hold Shift while clicking on each):
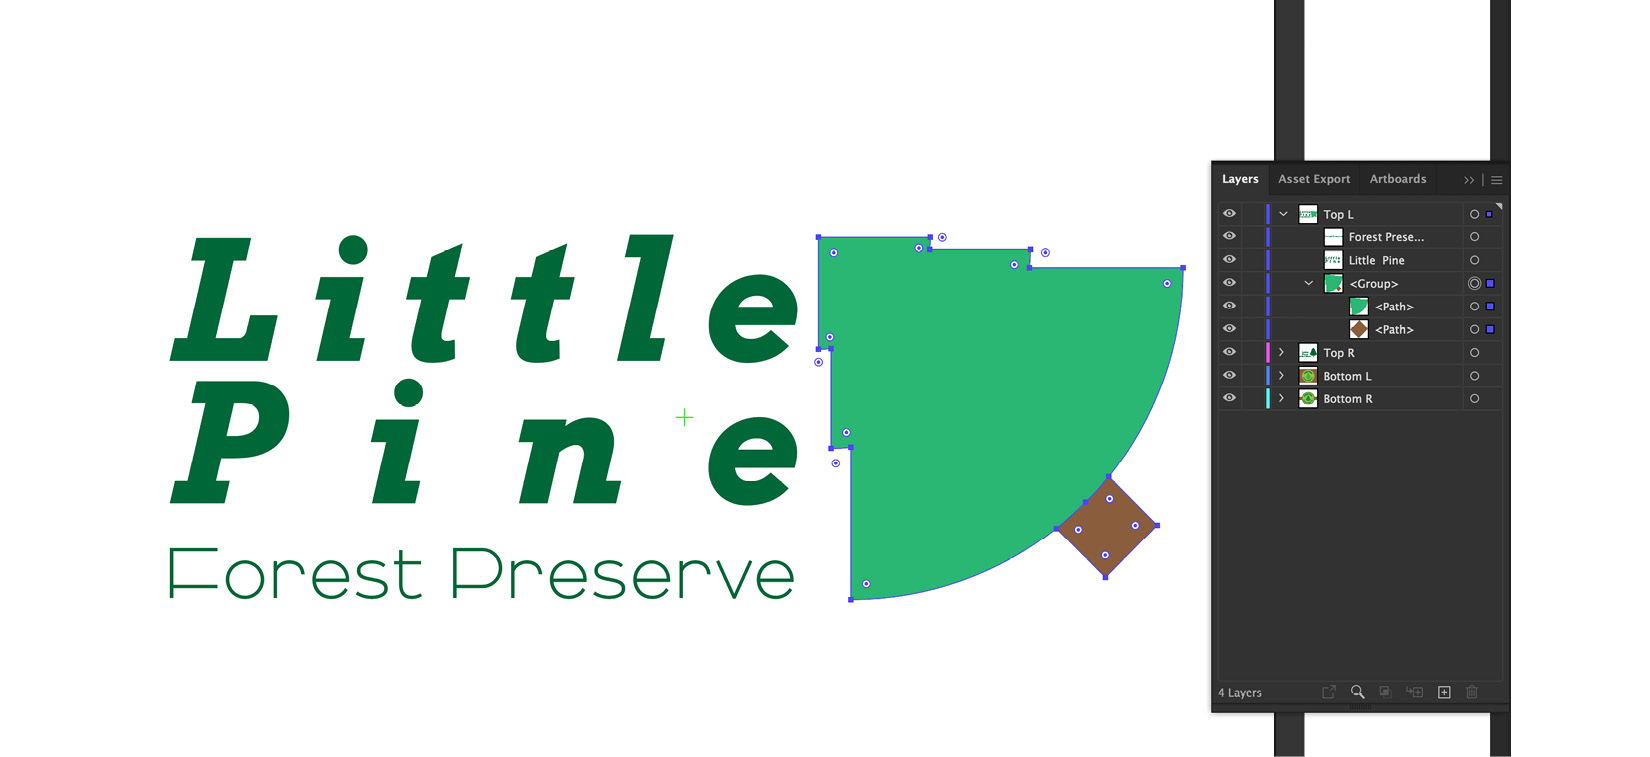
Figure 10.12 – Organizing artwork into a group
After selecting the objects you would like to be combined, navigate to Object > Group (Ctrl/Command + G) in the top menu. This will create a connected relationship between these shapes that makes it easy to perform further adjustments to them. Adjustments such as sizing and position can now be performed as though these objects are a single unit. When needed, the object can also be ungrouped to adjust individual components.
After creating a group, it will appear in the Layers panel as one item labeled <Group>. Just to the left of this label will be a small arrow pointing toward the right. Clicking on this arrow will allow it to rotate downward and reveal the objects included within the group. In this panel, you can now select any individual object within the group and then adjust it independently from the group it belongs to, as shown here:

Figure 10.13 – Selecting an item within a group for editing
To select any object, go to the farthest right column within the Layers panel and then click to select it. In addition, you could change from the Selection Tool to the Direct Selection tool and then click on any object in the group. In Figure 10.14, you can see that the group has been opened to reveal the two objects that make it up; you can also see that one of them (the brown tree trunk) has been selected and then edited:

Figure 10.14 – Editing an object that resides inside a group
The benefits of groups can go even farther when you learn to use more complex nested groups. In Figure 10.15, the design for this layer is collected as a group and is made up of two additional groups that each have multiple objects collected within them:
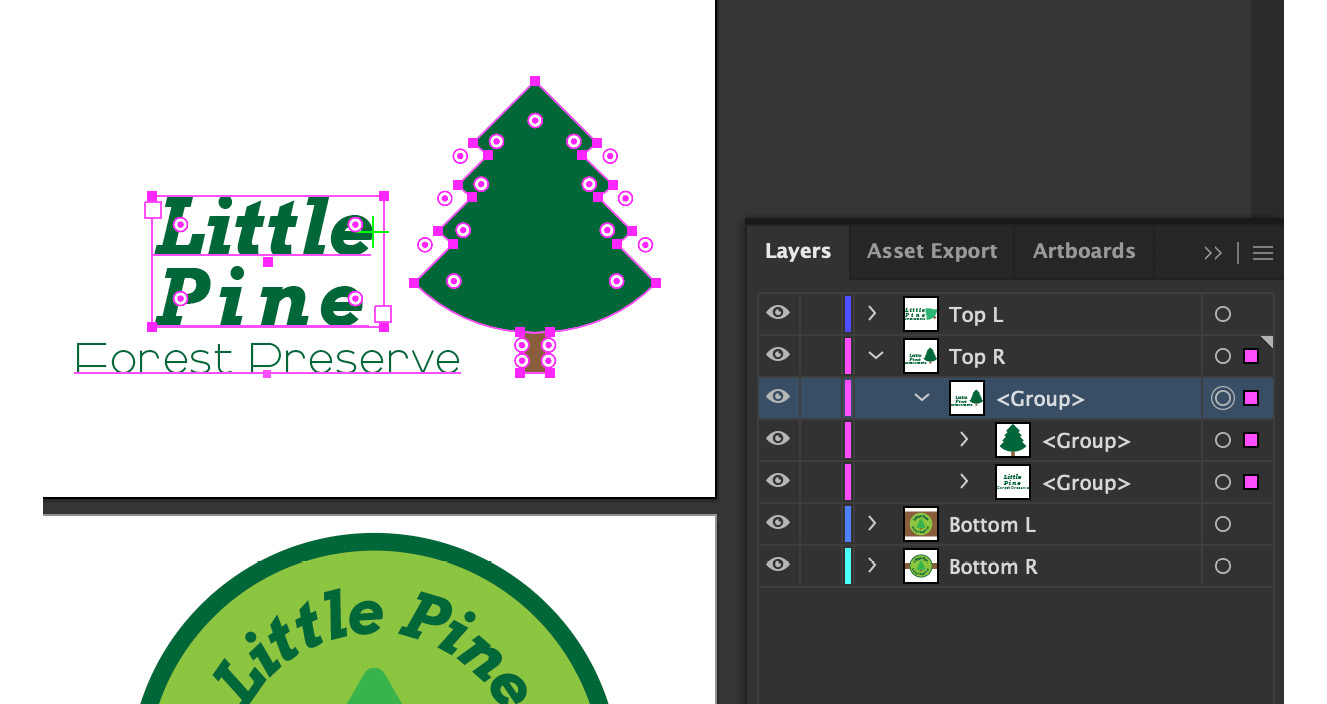
Figure 10.15 – Nested groups
You can separate objects within any group using the Ungroup command. This can be done by first selecting the group you would like to separate, and then navigating to Object > Ungroup (Shift + Ctrl/Command + G) in the top menu.
If you have several objects collected within a group (or within several nested groups, such as Figure 10.16), it may be easier to simply go into Isolation Mode, make the intended changes, and then exit Isolation Mode:

Figure 10.16 – Objects collected in nested groups
Isolation Mode is a method by which you can quickly single out an element that is usually collected with a larger item, such as a group or nested group. To go into Isolation Mode, you need to move your cursor over the intended object inside your artboard and then double-click. This will adjust the view of your workspace and allow you to select each object or group inside the original group with one additional click. In Figure 10.17, I entered Isolation Mode, and then clicked on the group that holds the objects for the tree:

Figure 10.17 – Object selected using Isolation Mode
If I click one more time inside this isolated group, I will be able to select one of the two objects that make up this artwork. At this point, you can now edit the object, just like it was selected using the Direct Selection tool (which we first discussed in Chapter 3, Developing and Organizing Objects).
After making the intended adjustments, you can exit Isolation Mode by double-clicking outside the object or group currently in isolation. Other methods for getting out of Isolation Mode include going to the Isolation Mode bar located at the top of the document's window, right-clicking, and then choosing Exit Isolation Mode from the Panel Options menu. Another option is going to the Layers panel options menu and choosing Exit Isolation Mode (Figure 10.18):

Figure 10.18 – Exiting Isolation Mode within the Layers panel options
I have often found that one of the quickest and simplest methods is to go up to the Isolation Mode bar and double-click on it.
If you are somewhat new to Illustrator, Isolation Mode may have just been that annoying thing that happens when you accidentally double-click on an item. If so, you have undoubtedly worked to exit it as quickly as possible. Now that you now know a bit more about Isolation Mode and its use within the structures of artboards, layers, groups, and subgroups, I'm confident that you will learn to make it one of your primary editing methods.
Summary
In this chapter, we have looked at the structure of the Artboards and Layers panels and discussed several methods for keeping your artwork in order, including working with Isolation Mode. As your work gains maturity and complexity, you will appreciate that you have acquired the habits that allow you to focus more of your time on the things that matter in your work and less on trying to find where part of your work is within the layer structure. Having a consistent workflow and structure will allow you to move into more and more elaborate designs over time. As your skills and confidence grow, so will the quality of your work. To this end, we took a deep dive into the benefits of collecting several objects into a group and the process of creating groups nested within a larger grouping (also known as sublayers).
In the next chapter, we will investigate how you can extend the power of Adobe Illustrator through plugins, and the options and benefits of the Illustrator app for the iPad.