
Chapter 9: Utilizing Multiple Artboards
Imagine the power of keeping an entire client brand design within one file. Illustrator allows you to host several artboards within just one document. It also allows you to deliver multiple items, such as concepts, products, and pages, within a single shared file. Your client or collaborator will be happy that they only have one file to keep track of.
In this chapter, we will look at methods for setting up and controlling multiple artboards. We will also practice adding, subtracting, labeling, and arranging multiple artboards. This chapter is intended to extend the knowledge you have acquired through earlier conversations about artboards in Chapter 2, Prepping for Illustrator. To accomplish this, the chapter will be divided into the following main topics:
- Setting up a document with an appropriate preset or template
- Adding additional artboards
- Labeling, arrangement, and additional options
Technical requirements
To complete this chapter, you will need the following:
- Adobe Illustrator 2022 (version 26.0 or above).
- High-quality internet access may be required for some situations.
Setting up a document with an appropriate preset or template
A great method for saving valuable time is to utilize Adobe Illustrator's capability to host multiple artboards within one document, as well as its ability to save templates with one or more artboards.
If you feel that the project you are currently working on will be a common recurring task, then saving it as a template will be a wise decision. To save even more time, you might choose to search for a third-party template that you can start your work in. Why spend a large portion of your time on measuring out and preparing a template for specific items, such as box flats, when they have been created already? Be sure to check with your printer to see whether they have any templates available for your intended output media.
Next, let's review some ways that you can set up and begin a more advanced project that might require multiple artboards and/or a template.
A New Document screen will be presented after choosing New (Ctrl/Command + N) from the File menu or hitting the New file button on the Start screen when there are no files currently open. On the New Document screen, you will be presented with your first opportunity to create a document that hosts multiple artboards. Figure 9.1 shows a selection of four artboards that will all be in landscape orientation:

Figure 9.1 – Creating a multiple-artboard document
There will be times when you don't want to have all the artboards uniformly sized or when you need assistance from a file that was already created. Let's first address how we can use files that host multiple artboards from outside resources. There are several preinstalled templates, and additional templates are available through Adobe Stock. Most of these offer multiple artboards for varied purposes. By using File > New from Template…, you will be able to open files from the Blank Templates folder installed with Adobe Illustrator.
In Figure 9.2, you can see a template that Illustrator offers you for preparing artwork to fit box flats for production printing:

Figure 9.2 – Blank template files from Illustrator
Having multiple artboards within a single file allows you to have a variety of options with a lot less searching.
Artboards are often used to represent multiple print dimensions, such as a card and envelope combination. This technique may also be used for multiple online sizes, such as website ad banners. In this case, the designer of the template has chosen to rename all the artboards by their pixel size (see Figure 9.3):
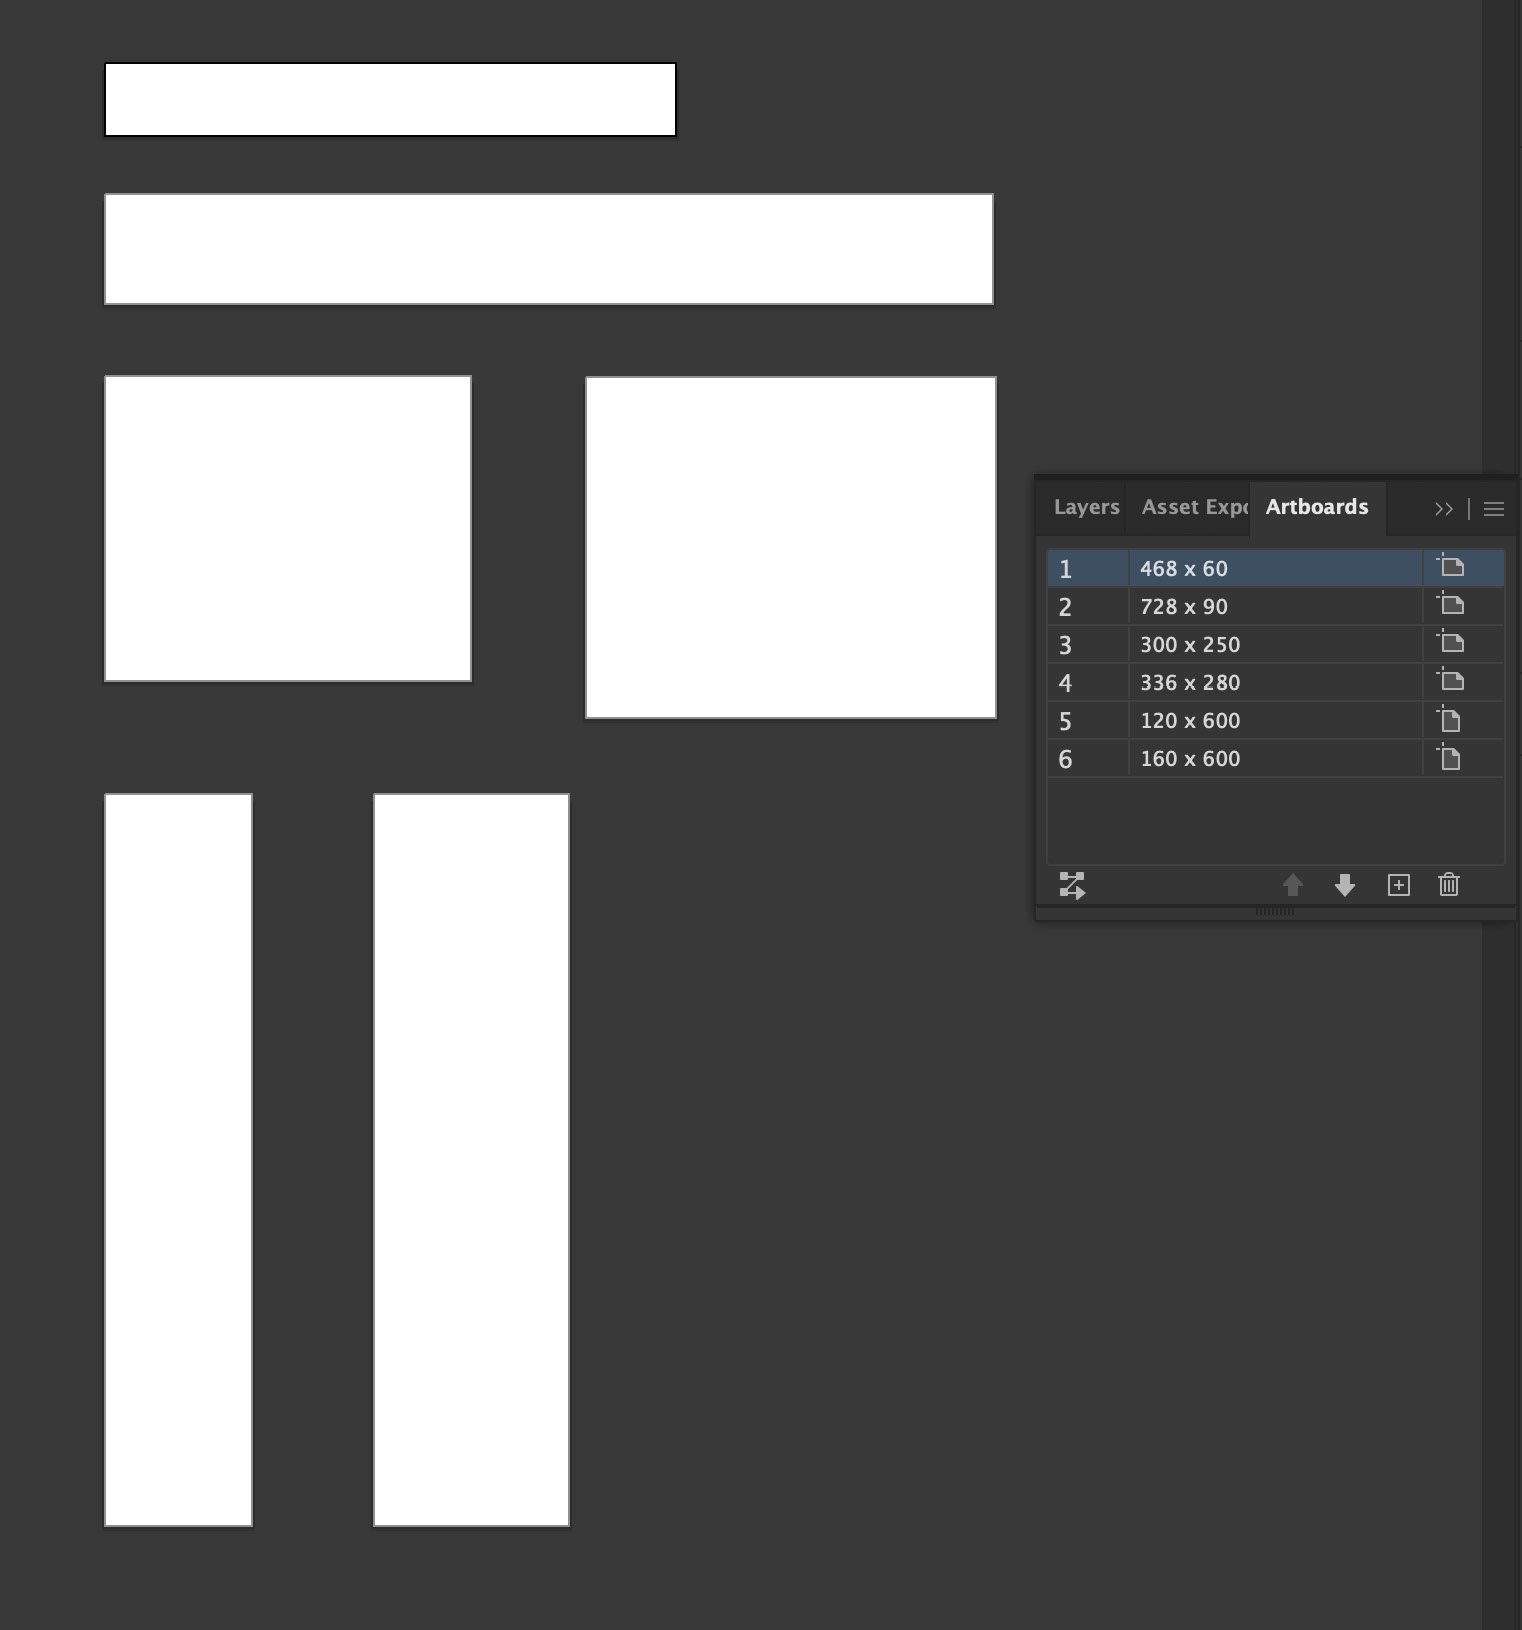
Figure 9.3 – Artboards for sizing within a template
An additional option that is available to you is to save your work as an Illustrator template file. We will start reviewing the methods for customizing artboards in the Adding additional artboards section, but I wanted to first point out that once you have developed a customized layout, it is easy to save it as a template that can be reused time and time again. The steps for developing a custom layout are as follows:
- After setting up a file, go to File > Save as Template….
- The Save screen will automatically open showing the Blank Templates folder. Either choose to save the file there or create a new folder for your templates.
- If you are working on an Apple computer, you might have an additional step. You might get the following dialog box:

Figure 9.4 – Folder access privileges
If that happens, ensure that you are saving in the same folder: Macintosh HD/Applications/Adobe Illustrator CC 2022/Cool Extras /en_US /Templates/Blank Templates.
Check your privileges on your computer for this folder (you can find this in Get Info or by using the Ctrl/Command + I shortcut).
You need the Read & Write permission. Change the folder permissions as follows:
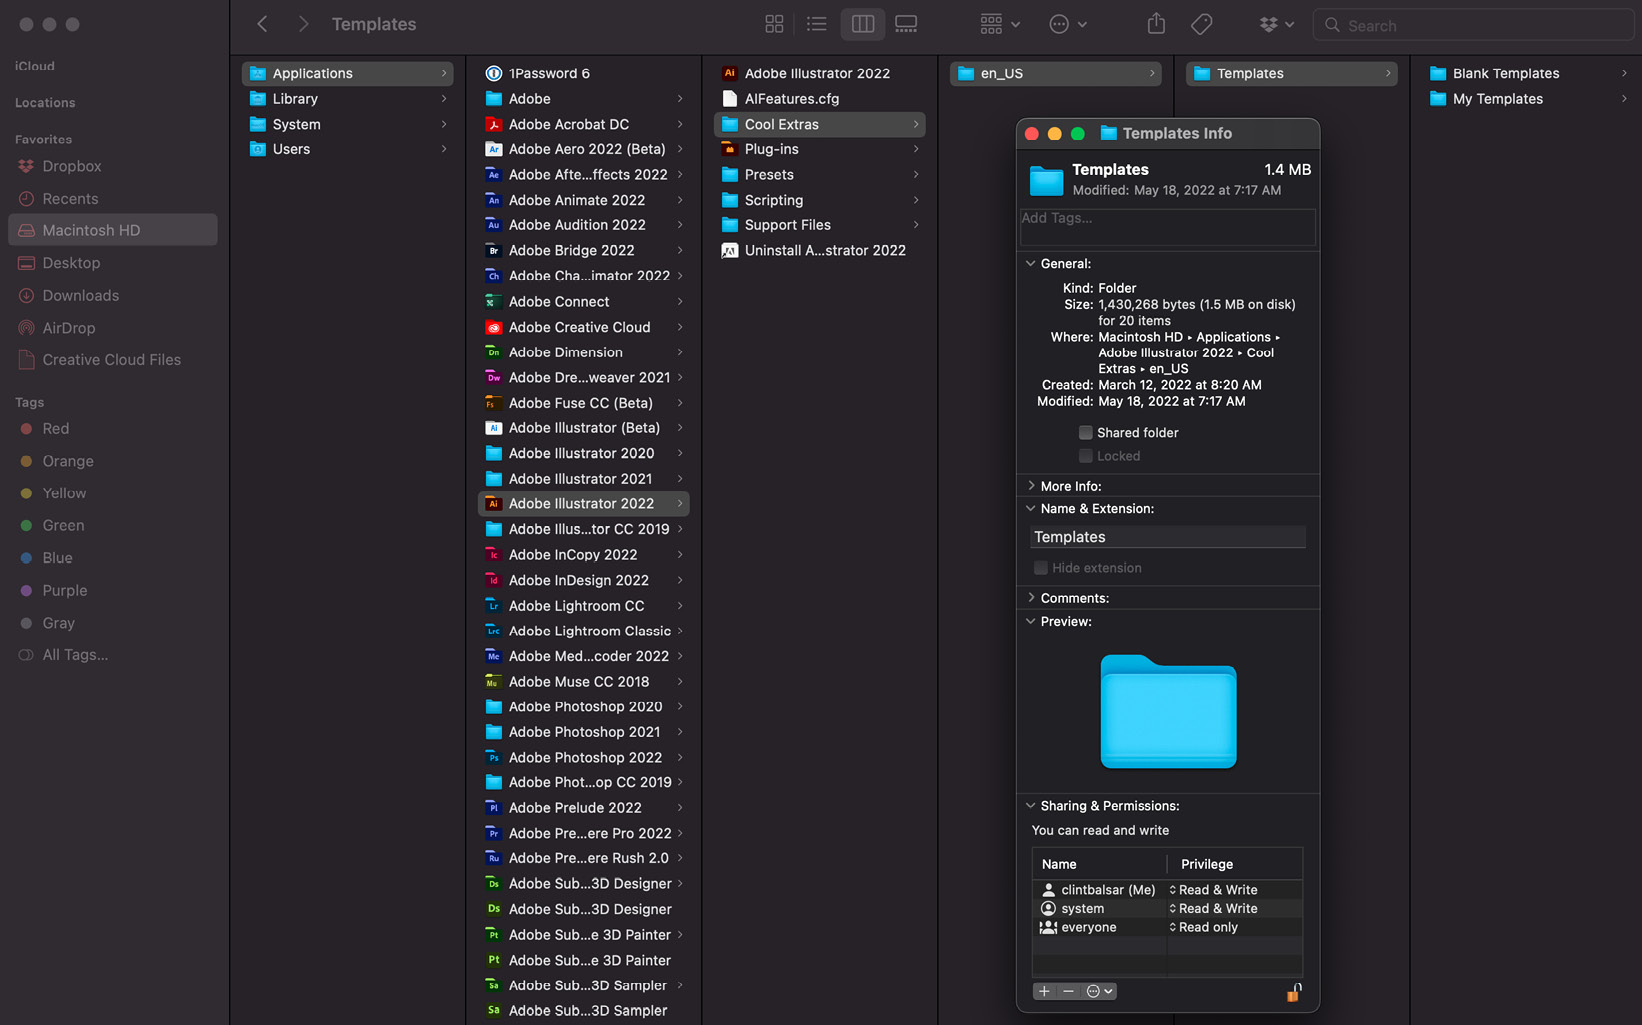
Figure 9.5 – Changing folder permissions
- You will be able to reopen this and any other template using File > New from Template… (see Figure 9.6):
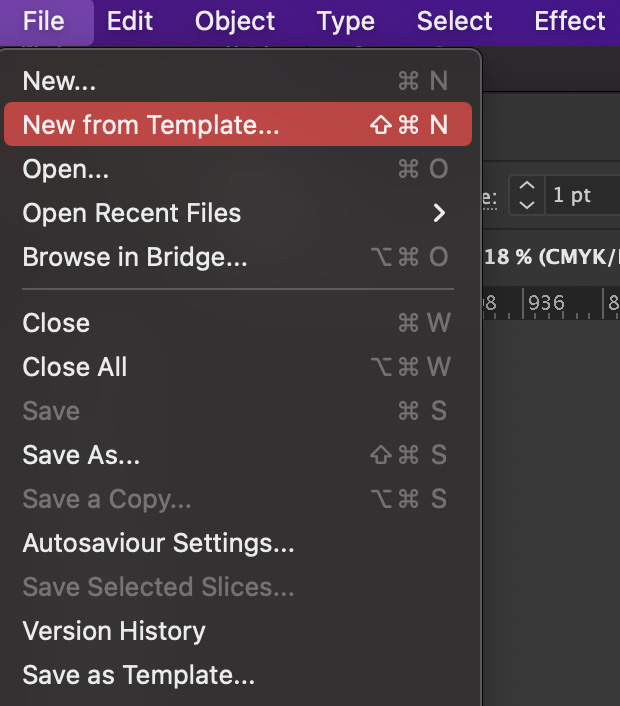
Figure 9.6 – The New from Template command
As we move into the next section, try to keep in mind that the ability to edit the current artboards and add additional artboards is available in any of the file types we have just discussed.
Adding additional artboards
As discussed in previous chapters, Adobe offers you several ways of creating additional artboards. These methods are as follows:
- You can add additional artboards by opening the Artboards window and selecting New Artboard from the Options submenu (see Figure 9.7).
- On the same Artboards window, you can also click the New Artboard button (+ sign) located at the bottom of this panel (see Figure 9.7):

Figure 9.7 – Adding artboards using the Artboards window
- On the Properties panel, select the Edit Artboards button. This will allow you to find the New Artboard button once again.
- On this same Properties panel, there is also the Move artwork with Artboard option. This is only visible after selecting the Edit Artboards button. When checked, you can drag a copy of any artboard by holding Alt/Option while dragging it to a new location (see Figure 9.8):

Figure 9.8 – Editing artboards using the Properties panel
- If Move artwork with Artboard is unchecked, you can now drag any current artboard to a new location to make a blank copy with the same dimensions as the original artboard.
- Also within the Properties panel, you will find the Artboard Options and Rearrange All buttons.
- Another way you can create new artboards or copy and edit current artboards is through the dedicated Artboard tool (Shift + O) located in the toolbar. This will engage the Edit Artboards workspace, just like selecting it from the Properties menu.
- In addition to having the Edit Artboards options available in the Properties panel, you can also find them in the Options Bar located directly below the menu bar at the top of the interface when in the Essentials Classic workspace.
In Figure 9.9, I have illustrated how you could add additional artboards by using the Artboards window, and how to rearrange them using the Rearrange All button. In this case, I chose Grid by Row for Layout, Change to Left-to-Right Layout for Layout Order, and 2 for Columns:

Figure 9.9 – Adding artboards using the Artboards window
Even more important than knowing how to add and arrange artboards is knowing how to customize them. In the next section, we will look at how to rename artboards, adjust their dimensions, and methods for sharing them.
Labeling, arrangement, and additional options
Just as there are multiple methods for creating and copying artboards, there are also several methods for adjusting current ones. To keep this simple, I will refer to the Adding additional artboards section of this chapter.
You have just learned in that section that there are many ways to work with artboards, but the two buttons we will need are the Artboard Options button and the Rearrange All button. The Artboard Options button brings you an options panel that allows you to choose from different preset sizes or enter a new customized size. This panel also offers you another place where you can rename the artboard. You will also be able to delete the artboard from this panel.
If you enter the Edit Artboards workspace, you can also click to select any artboard and then resize it by using its bounding box. If you decide that you need the additional options found within the Artboard Options panel, just double-click on the selected board. See Figure 9.10 for a full list of options within the Artboard Options panel:

Figure 9.10 – The Artboard Options panel
The Rearrange All button gives you options for Layout, Columns, and Spacing.
If you deselect the Move Artwork with Artboard option, your boards will move while leaving your artwork where it is (see Figure 9.11):

Figure 9.11 – The Rearrange All Artboards panel
In addition to these options for adjusting the layout appearance of your artboards, you can also choose to hide them entirely using View > Hide Artboards (Shift + Ctrl/Command + H):

Figure 9.12 – Artboards visible (L) and hidden (R)
As you can see in Figure 9.12, the ability to hide the artboards brings about some unity to a collection of items. This may be beneficial when presenting your work directly from within Adobe Illustrator.
An additional option for either sharing your work to collaborate with a peer or for client review is the Share Document panel located at the top of the graphical user interface (GUI). This requires that the document is first saved to your cloud account. You can then invite others to view and edit the file. You also have the option to allow them to make a copy, share the link with others, and comment. Click the gear icon at the top right to make these additional selections (see Figure 9.13):
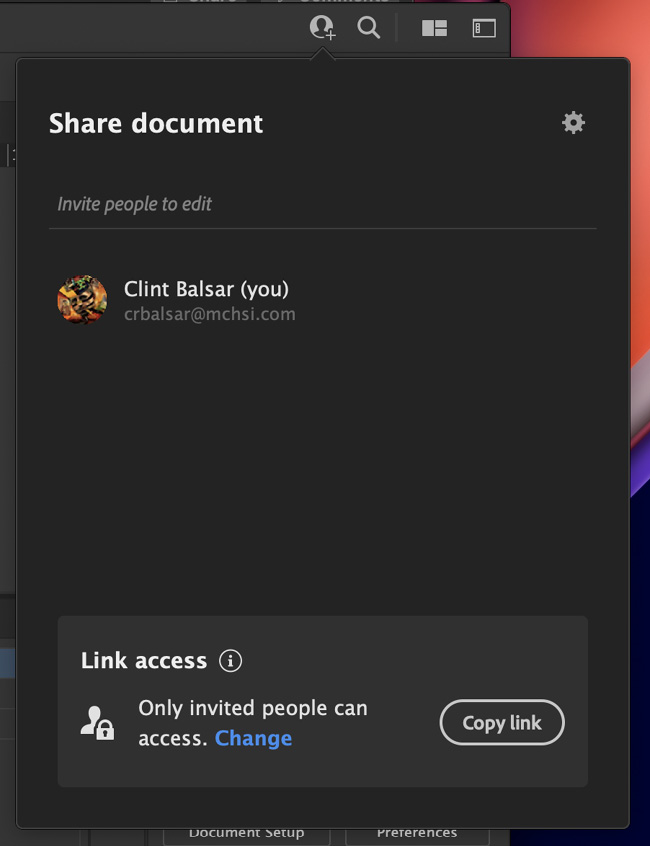
Figure 9.13 – Collaborate with peers or clients
Once invited, the recipient will receive an email notification, as you can see in Figure 9.14, to inform them that they have been invited to work with the file:
Figure 9.14 – Invitation email
The email includes a direct link to the web page of the associated file. When they click the Open button, it will take them to a page that looks similar to Figure 9.15:

Figure 9.15 – Creative Cloud file collaboration
As you can see in Figure 9.15, there is an area for comments (if allowed), file information, and history. It allows them to download the file, open it directly in Illustrator, or share it (if allowed). It also allows them to quickly scroll through the multiple artboards that are hosted within the file.
If you would rather not allow them to have access to edit the file, you could save it as a Portable Document Format (PDF) file. This will make your multiple-artboard file into a PDF file with multiple pages (see Figure 9.16):
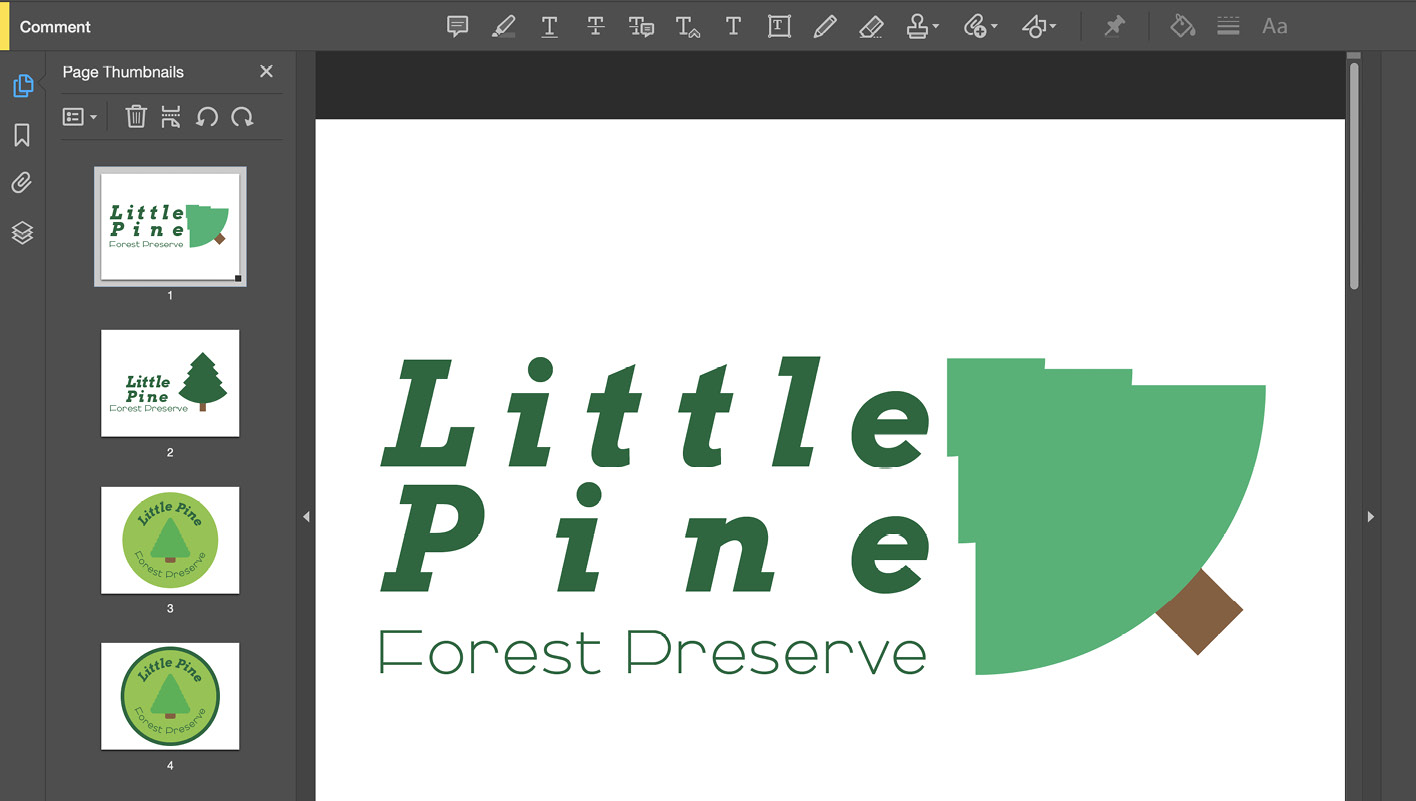
Figure 9.16 – Artboards as multiple pages in a PDF
All these options allow you to reduce the number of project files. The ability to share a single file and still maintain the level of control you choose as the creator of the work is an invaluable tool. This is a huge step forward compared to the early days when a folder would be created for a project and then become bloated with individual files, additional versions, and resources. Cloud-based storage and multiple artboards have simplified the process a great deal.
Summary
As we discussed in Chapter 8, Preparing Artwork for Presentation, staying organized should be a goal you set each time you are developing your work. The use of artboards and their benefits will aid you in doing this. One of the greatest benefits of artboards that I reflect on and celebrate often is their ability to allow you to hold so much related content within a single file. The need to search for content related to a task has been greatly diminished by this tool. In addition, it bolsters your presentation quality when working with colleagues and clients. When collaborating with colleagues, labeling allows you to clarify what each artboard's purpose is and offers several related views that can be accessed through the Artboards panel. When working with clients, you can output the file to a PDF and each artboard is created as a page.
In the next chapter, we are going to get into the advanced capabilities of the Layers panel and focus on your ability to harness these capabilities through good development and management of your layers.