In InDesign, a document is an individual file that contains the layout for a publication—an advertisement, brochure, newsletter, book chapter, or magazine article, for example. When you create a document, you specify fundamental aspects of the publication, such as the page size, margins, and number of columns. These settings can be saved as document presets so you can quickly and consistently create documents with all the same settings.
In this chapter you’ll learn to create, open, close, save, and navigate documents. Once you create a document, you enter the workspace known as the document window. The document window displays the pages of your publication along with a variety of layout and navigational aids. Within the document window, InDesign provides convenient options for navigating through pages, changing the zoom level, and previewing the output. For ease in file management, InDesign allows you to save metadata such as keywords and creator names with documents. You’ll also learn to work within the document window, change the view, preview output, and save metadata.
When you start a new project—such as a newsletter—you create a new document that reflects the finished page size, margins, and number of columns. In addition, you can specify the number of pages and whether the document has facing pages (as in a book). As a starting place, it may be helpful to mock up your publication first, even just by roughing it out with pencil and paper. While all these options can be changed after you create the document, designing pages is easier if you know the specifics up front.
To create a new document:
1. Choose File > New > Document. The New Document dialog box that displays (Figure 9) lets you set up the document.
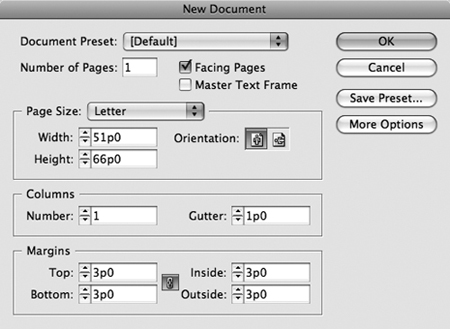
2. Enter a value in the Number of Pages field. You can create documents with up to 9,999 pages.
3. To create a document with two-page spreads as in a book or magazine, check Facing Pages.
4. To automatically place a text frame—a container for text—on the pages, check Master Text Frame. The master text frame will be placed according to the values in the Columns and Margins areas.
Tip
Use the master text frame for publications, such as books, in which text flows continuously from page to page. For magazines and newsletters with multiple stories that may continue on different pages, it’s best to manually thread text frames (see #18).
5. Choose an option from the Page Size menu or enter values in the Width and Height fields. To quickly reverse the Width and Height values, click an Orientation button.
6. In the Columns area, enter the number of columns most of the pages will have in the Number field. Enter the amount of space you want between columns in the Gutter field.
7. In the Margins area, enter values in the Top, Bottom, Left, and Right fields to specify margin guides for pages. If you check Facing Pages, the Left and Right fields change to Inside and Outside. If you want all the margin values to be the same, click the Make All Settings the Same button
![]() between the fields.
between the fields.
8. If a printer asks you to set up bleed or slug areas on pages, click More Options. Specify the size of the areas in the Bleed and Slug fields.
9. Click OK to create the new document.
InDesign creates a new document with the number of pages you specified. Magenta-colored guides on the page indicate margins, and violet-colored guides indicate columns. If you checked Master Text Frame, a text frame (a container for text) is automatically placed within the margin guides; the frame contains the number of columns you specified. Your designs, however, are not constrained by anything you specify for the new document. For example, you can add and remove pages, change the number of columns in any or all of the text frames, and work with the entire page area regardless of the margins.
If you find yourself in the tedious situation of setting up similar documents over and over—for example, if you create new trifold brochures several times a week—you can save all the settings in the New Document dialog box as document presets. You can then select from your document presets in the New Document dialog box. This not only saves you time when creating new documents but it ensures consistency among similar documents. Never again will you wonder about the page size for the book jackets you’re working on or the bleed area for a magazine.
To save document presets:
1. Choose File > New > Document. In the New Document dialog box, specify the Number of Pages, Page Size, Columns, Margins, and all other attributes you want in the preset.
2. Click Save Preset. In the Save Preset dialog box (Figure 10a), type a name for the document preset in the field.
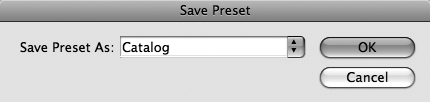
3. Click OK.
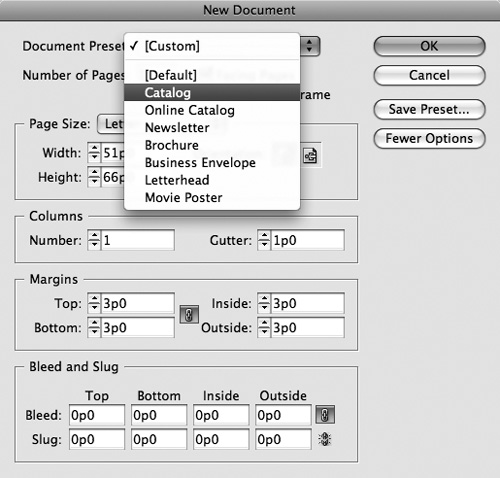
To use a preset, select it from the Document Preset menu (Figure 10b) at the top of the New Document dialog box. All the settings in the dialog box automatically change to those in the preset. You can also choose one of your presets from the Document Preset submenu in the File menu; this automatically opens the New Document dialog box with the preset selected. If you press the Shift key while you choose an option from the Document Preset submenu, you can bypass the New Document dialog box and immediately create a new document.
In addition to creating a document preset using the New Document dialog box, you can also use the Document Presets dialog box (Figure 10c) to create a preset. To open this dialog box, choose File > Document Presets > Define. The dialog box works as follows:
• Presets list: The Presets list shows all your document presets. Click one to see its settings or to edit or delete it.
• Preset Settings area: This scroll box shows all the document specifications for the selected document preset.
• New button: Click New to create a new document preset. The New Document Preset dialog box (similar to the New Document dialog box) displays so you can name and set up the preset.
• Edit button: Click Edit to change the name or specifications of the selected document preset.
• Delete button: Click Delete to remove the selected document presets from the list; you cannot delete [Default].
• Load button: To use saved document presets, click Load and use the Load Document Presets dialog box to navigate to the location where they are stored. Document presets have the file extension “.dcst.”
• Save button: Click Save to export selected document presets. Within a workgroup, it’s a good idea to share presets so you can ensure that you’re all working with the same specifications for similar projects.

The document window is the rectangular space in which the pages of an InDesign layout are displayed. The document window mimics an actual graphic design paste-up board, providing a blank area surrounding pages called the pasteboard and layout aids such as rulers, guides, and grids. Within each document window, you can control the zoom level, the quality of the display, and which layout aids are visible. Most of the time, the document window displays the page or spread you are currently working on. Because it may be helpful to see different pages of a document at the same time (or different zoom levels), you can open multiple windows for the same open document.
Take a look at a standard document window (Figure 11a).
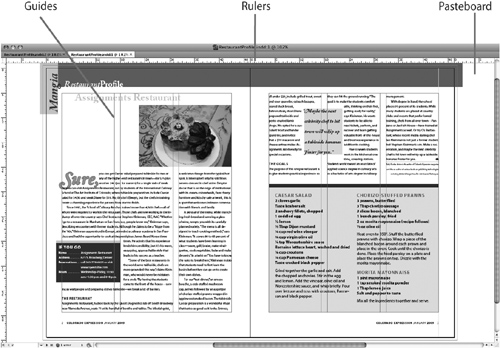
• Rulers display along the top and left side of the document window. The View > Show/Hide Rulers command lets you control whether or not the rulers display.
• A gray pasteboard surrounds each page or spread. Each page or spread has its own pasteboard, which you can use for temporarily storing objects or for creating and formatting objects away from the distractions of the page.
• Different-colored guides and grids may display on the pages depending on the settings in the View > Grids & Guides submenu. Generally, you will see magenta margin guides and violet column guides.
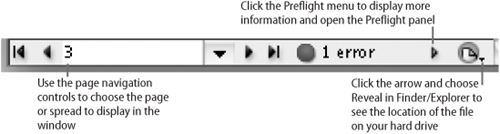
The lower-left corner of the document window provides convenient controls for navigating through documents, reviewing preflight issues, and displaying file information (Figure 11b). The preflight controls flag errors such as overset text or missing graphic files that may prevent the document from printing properly.
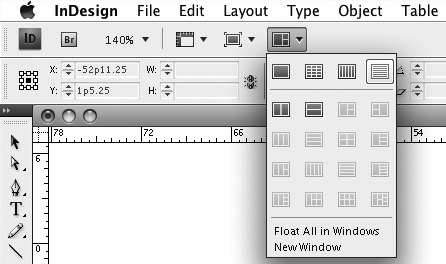
If you are working on a document and want to see a different view of it—for example, to view the first and last page at the same time or to view the same page at 50 percent and 300 percent—you can open another window for the document. To do this, choose Window > Arrange > New Window.
Once you have multiple windows open, whether of a single document or multiple documents, you create a management issue. The bottom of the Window menu lists all the open document windows so you can choose one to display. To help manage the windows, use commands in the Window > Arrange submenu or the Arrange Documents menu on the Application bar (Figure 11c). Point at the icons on the Arrange Documents menu to see what they do.
It’s easy to open files in InDesign—it’s just like opening files in other applications. You can also use Adobe Bridge to open documents. Either way, you are likely to encounter some confusing alerts that you might not be sure how to handle. These alerts may warn you about missing fonts, missing graphic files, and missing profiles—external files that may be required to output the document correctly. Sometimes you can safely bypass these alerts, but other times you really need to pay attention to them.
To open documents:
1. Choose File > Open.
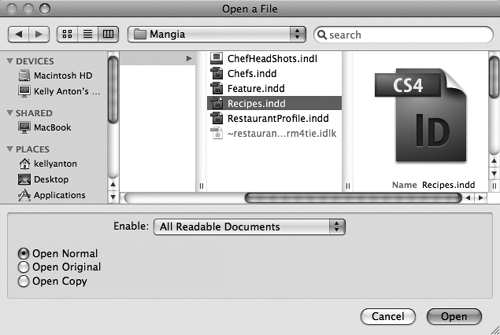
2. Locate and select the InDesign documents you want to open. You can select multiple documents by Command-clicking (Mac OS) or Ctrl-clicking (Windows) the files; Shift-click to select a continuous range of files.
3. At the bottom of the Open a File dialog box (Figure 12a), click Open Normal to simply open the selected documents or copies of selected templates.
Tip
You can also click Open Original to open an InDesign template (rather than a copy of it). Click Open Copy to open a new, unnamed copy of selected documents or templates.
4. Click Open.
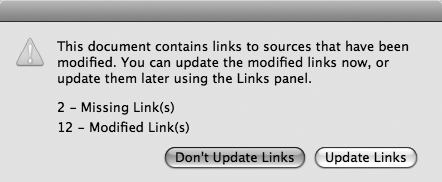
When you import graphics into documents, InDesign keeps track of the location of those graphic files and the last-modified dates and times of those graphics. If you change or move the graphic files, InDesign notifies you when you open the document. If an alert (Figure 12b) reports Missing Links or Modified Links when you open a document, you can click Fix Links Automatically to find and update the graphic files. As with fonts, the original graphic files must be available for proper output. If, however, you’re simply opening the document to edit text, you need not worry about the links. In that case, click Don’t Fix. You can always update the links later using the Links panel (Window menu).
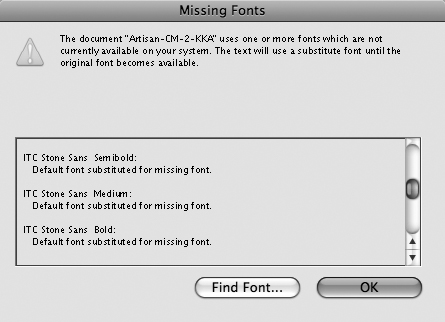
If the document uses fonts that are not active on your system, the Missing Fonts dialog box (Figure 12c) lists those fonts. The best way to handle this problem is to use a font management application—such as Extensis Suitcase Fusion or Linotype FontExplorer X—to activate the fonts listed. Your other option is to click Find Font to display the Find Font dialog box, which lets you replace missing fonts with active fonts and locate font files on your computer. Keep in mind that replacing missing fonts with different fonts can alter the design and cause text to flow differently. You can also bypass the Missing Fonts dialog box by clicking OK. InDesign will substitute a system font until you activate the appropriate fonts.
When you open documents, sometimes you encounter alerts about missing color profiles and missing plug-ins. In general, it’s OK to ignore alerts about missing color profiles. If you’re working in a color-managed environment, however, talk to your systems administrator. If you receive an alert about a missing plug-in, often you can open the document anyway. If the document requires the plug-in, you must obtain and install it to open the document (see #7 for more information).
InDesign automatically saves your work and recovers it even if the program unexpectedly quits. Nonetheless, once you create a new document, it’s a good idea to name and save it so you know where the file is and what it’s called. If you’re designing a template—a predesigned starting place for a new project—you can save a document as a write-protected template. When you open a template, a new, unnamed, and unsaved InDesign document is created.
To save the active document:
• To save a new, unnamed document, choose File > Save or File > Save As. Use the Save As dialog box to specify a name and location for the file.
• To save a copy of the document, choose File > Save a Copy. Use the Save a Copy dialog box to specify a different name or location for the file. The active document remains open; you must open the copy to work on it.
• To save your work in progress, choose File > Save at any time. Unlike some other applications, however, InDesign does not require you to save your work obsessively. Changes are automatically saved to a temporary file with the extension .idlk, which is created in the same folder where the document is saved. If InDesign crashes, changes are restored from this temporary file.
A template is a document that serves as the “skeleton” for a new publication, so it should be as complete as possible. Start by reviewing the document to make sure it includes everything you might need in a template—master pages (preformatted pages), paragraph and character styles (for formatting text), page guides (for positioning objects), colors, and more.
To create a template:
1. Save the document and then choose File > Save As.
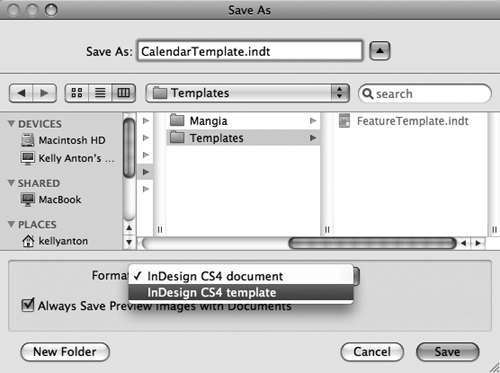
2. In the Save As dialog box (Figure 13), choose InDesign CS4 template from the Format menu (Mac OS) or Save As Type menu (Windows).
3. Specify a location for the file. If the template is for a workgroup, you might store it on a shared server.
4. Type a name for the template in the Save As field. To identify the file as a template, InDesign adds the file extension .indt.
Tip
To quickly create a document from a template, choose File > New > Document from Template or click From Template in the Create New area on the Welcome screen (Help > Welcome Screen). This takes you directly to your Templates folder; you can see the path to this folder at the top of the Adobe Bridge window. Be sure to save your templates in this folder on your hard drive for quick access.
Metadata is information stored with a file that helps you track who created it, who owns the copyright, what it’s for, and what’s in it. Documents with metadata are easier to find, especially when using Adobe Bridge to manage files—for example, you can save keywords with documents and then search for documents containing those keywords. To store metadata with the active document, choose File > File Info.
InDesign offers many ways to navigate within a page or spread and to jump from page to page—so many, in fact, that you’re unlikely to remember them all. The best thing to do is figure out your favorite way to navigate and then memorize it. If you’re a visual person, for example, you may prefer the Pages panel or the Hand tool. If you’re entering edits from hard copy, you may prefer to jump to specific page numbers.
Options for navigating to a specific page number include:
• Press Command+J (Mac OS) or Ctrl+J (Windows) to open the Go to Page dialog box. Type in the page number and press Return/Enter.
• Click the arrow next to the page box to display a list of page numbers to choose from (Figure 14a). You can also select the number in the page box, change it, and press Return/Enter.

• Double-click a page icon in the Pages panel, which displays thumbnail previews of the pages (see #82).
Options for navigating to different pages and spreads include:
• Use the Layout menu commands: First Page, Previous Page, Next Page, Last Page, Next Spread, Previous Spread, Go Back, and Go Forward. The keyboard shortcuts for these options display in the menu (the symbols shown in the shortcuts refer to the Page Up and Page Down keys on your keyboard).
• Use the arrows on either side of the page box in the lower-left corner of the document window (Figure 14b). From left to right, the arrows work as follows: First Page/Spread, Previous Page/Spread, Next Page/Spread, and Last Page/Spread.
Options for scrolling include:
• Scroll bars: Use the scroll bars in the document window.
• Hand tool: Select the Hand tool
![]() in the Tools panel. Click and drag to navigate within a page or between pages and spreads. To use the Hand tool without actually switching tools, press the spacebar for temporary access to it. If the cursor is blinking in text, press Option (Mac OS) or Alt (Windows) along with the spacebar.
in the Tools panel. Click and drag to navigate within a page or between pages and spreads. To use the Hand tool without actually switching tools, press the spacebar for temporary access to it. If the cursor is blinking in text, press Option (Mac OS) or Alt (Windows) along with the spacebar.
• Power zoom: When using the Hand tool, you can “power zoom.” Hold down the mouse button to display a red box that you can drag up and down through the pages (Figure 14c). Use the arrow keys on the keyboard to resize the red box. When you release the mouse button, the document window returns to its original zoom percentage.

To view anything, from a snapshot of an entire document to the curves of an individual character, InDesign lets you adjust the zoom level from 5 percent to 4,000 percent. You can adjust the zoom level—also referred to as magnification or view scale—using a variety of methods. In addition to changing the zoom level, you can control the quality of the display and preview various output options such as bleeds.
Options for adjusting the zoom level include:
• Select the value in the Zoom Level field in the Application bar. Type in a magnification value and press Return/Enter.
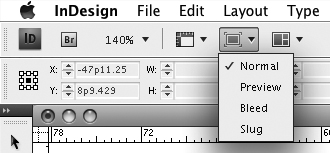
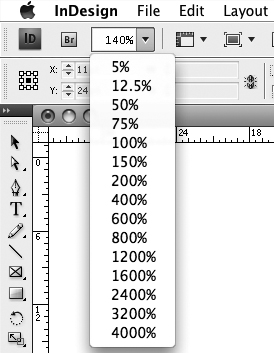
• Click the arrow next to the Zoom Level field to display a menu of zoom percentages to choose from (Figure 15a).
• Choose options from the View menu: Zoom In, Zoom Out, Fit Page in Window, Fit Spread in Window, Actual Size, or Entire Pasteboard. The keyboard commands for these options display in the menu—it’s worthwhile to memorize those you use most.
• Select the Zoom tool
![]() in the Tools panel. Click the Zoom tool on the page to zoom in; each click increases the magnification to the next increment in the Zoom menu (5%, 12.5%, 25%, 50%, 75%, 100%, 150%, etc.). Click and drag to zoom in on a specific area. To zoom out, press the Option key (Mac OS) or Alt key (Windows) while the Zoom tool is selected.
in the Tools panel. Click the Zoom tool on the page to zoom in; each click increases the magnification to the next increment in the Zoom menu (5%, 12.5%, 25%, 50%, 75%, 100%, 150%, etc.). Click and drag to zoom in on a specific area. To zoom out, press the Option key (Mac OS) or Alt key (Windows) while the Zoom tool is selected.
If you feel like pages display too slowly or what you see onscreen looks jagged, you may need to adjust the display quality. You can customize the quality of the display to make it redraw faster or provide more detail. To change the quality, choose an option from the View > Display Performance submenu:
• Fast Display: Specifies 24 dpi screen resolution with no transparency; this view is helpful for users with slower computers who may simply need to edit text.
• Typical Display: Specifies 72 dpi screen resolution with low-resolution transparency; this view balances speed with quality for most layout work.
• High Quality Display: Specifies 144 dpi screen resolution and detailed transparency effects such as drop shadows and feathering; this view is useful for soft proofing—attempting to proof color output onscreen.
You can customize the default display quality in the Display Performance panel in the Preferences dialog box. In addition, if Preserve Object Level Display Settings is checked in the Display Performance submenu (View menu), you can customize the display on an object-by-object basis. To do this, select an object and choose Object > Display Performance. You might, for example, specify High Quality for a specific transparency effect so you can view the text behind it.
The View menu also provides options for previewing final output:
• Overprint Preview: Choose this option to see how spot colors interact with any transparency effects.
• Proof Setup and Proof Colors: Use these options when soft proofing (judging colors onscreen). The success of soft proofing depends largely on the quality of your monitor, whether you are using color management (see #77 for more information), and your experience with printing and production processes.
• Screen Mode: Use options in the Screen Mode submenu to switch among Normal, Preview, Bleed, and Slug modes. Preview mode hides all nonprinting page elements such as guides and hidden characters so you can see how pages will look when printed. The Bleed and Slug modes both hide nonprinting page elements but show objects in the Bleed or Slug area as defined in the New Document or Document Setup dialog box.