Before you can start using Photoshop Elements to edit photos and create projects, you need to import your photos and other media files into one or more catalogs. A catalog is a way to reference files on your computer or other storage device without moving them. Think of a catalog as a database of links to your photos and media files. The catalog links keep track of the photo’s location, file format, attached tags, and date. A catalog can reference all the media you have on your computer or a subset of folders. Typically, users create a single catalog for all the media files on their computer. However, you can create more than one for different purposes, such as one catalog for work-related photos and media files, and another one for personal use.
You create a catalog by starting Photoshop Elements for the first time, and then clicking Yes to the Setup Organizer dialog box, or by using commands—such as From Camera or Card Reader, From Scanner, From Files and Folders, or From Mobile Phone—on the Get Photos and Videos submenu on the File menu. After you have Photoshop Elements create a catalog, you can start to use the Organizer to manage, search, and fix photos and other media files.
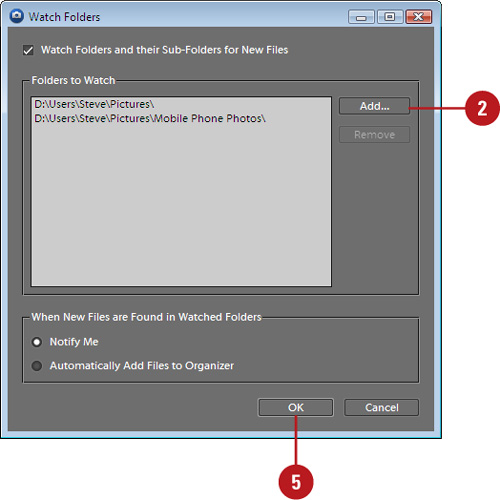
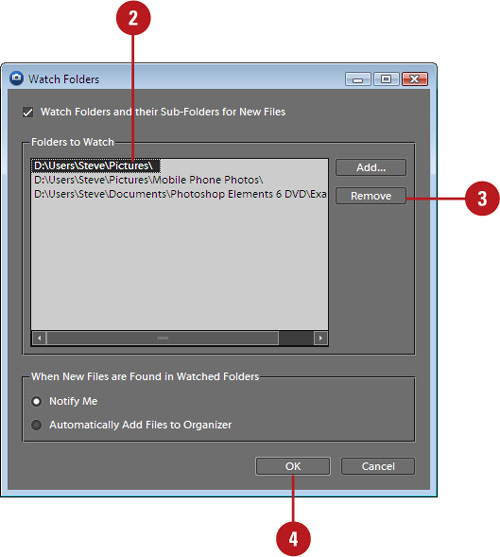
A watched folder is a folder location on your computer that Organizer automatically checks for photos to add to the Organizer workspace. By default, the My Pictures (XP) and the Pictures (Vista) folder is always watched. If you have photos and other media files in other locations, you can add them to the watched folder list. If you no longer want to watch a folder, you can quickly remove it from the list. In addition, you can also set options to watch all sub-folders within a watched folder, and to specify how you want to add new files found in the watch folders, either by notification or automatic.
 In the Organizer, click the File menu, and then click Watch Folders.
 Select the Watch Folders and their Sub-Folders for New Files check box to watch all sub-folders in the specified watch folders.
 Select the Notify Me or Automatically Add Files to Organizer option to specify how you want to add new files found in the watch folders.
 Click OK.
A keyword tag, also known as a tag, is an information label that is attached to photos to make them easier to locate. Some tags are automatically attached to a file when you create it, such as name and size, while custom tags are manually attached by the user. You can create your own custom tags with information important to you and attach multiple tags to the same photo for improved organization. When you import photos that already contain tags, you can specify whether you want to retain, rename, delete or remap them. When you import a new tag from an imported photo, it appears in the Keyword Tags palette, where you can use them with other photos.
- In the Organizer, click the File menu, and then point to Get Photos and Videos.
- Click any of the commands on the submenu to get files.
- Select the options you want, and then click the button to start the import process, such as Get Photos.
If an imported photo included one or more tags, the Import Attached Keyword Tags dialog box appears.

- Select the tags you want to import. If a tag has an asterisk (*), a tag with the same name already exists in the Tags palette.
The tags not selected are removed from the photo during the import process.
 Click OK.
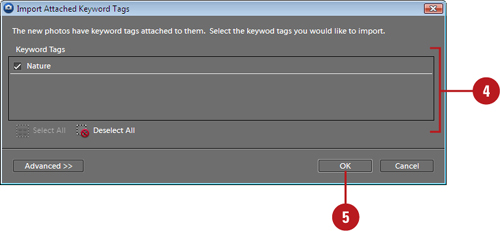
- In the Organizer, click the File menu, and then point to Get Photos and Videos.
- Click any of the commands on the submenu to get files.
- Select the options you want, and then click the button to start the import process, such as Get Photos.
If an imported photo included one or more tags, the Import Attached Keyword Tags dialog box appears.
- Click Advanced.
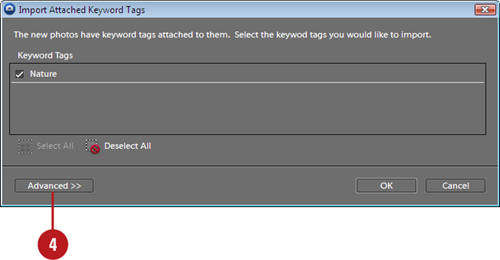
- Select the check box next to the tag names you want to import.
The tags not selected are removed from the photo during the import process.
 To rename a tag, click the button under Import as New Keyword Tag Named, type a name, and then press Enter.
 To map a tag to an existing tag, click the button under Use an Existing Keyword Tag, and then select a tag.
 To clear your changes and return to the Import Attached Keyword Tags dialog box, click Reset to Basic.
 Click OK.
Before you import photos and videos into the Organizer, it’s important to set file import preferences to specify the options you want for the import process. When you get photos from your computer, the files are not copied or moved. The Organizer creates links to them and adds them to the catalog. If you have photo files on your computer that are not already included in the catalog and don’t appear in the Organizer, you can use the Get Photos from Files and Folders dialog box to navigate to the folder location with the files you want and then add them or you can drag them directly from an Explorer window to the Organizer window.
- In the Organizer, click the File menu, and then point to Get Photos and Videos.
- Click From Files and Folders.
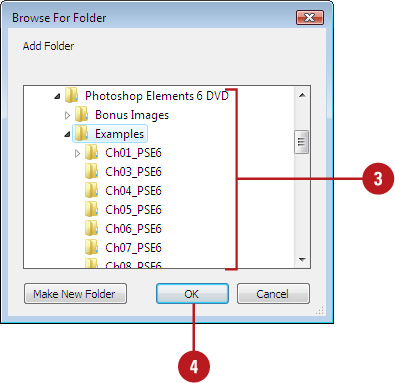
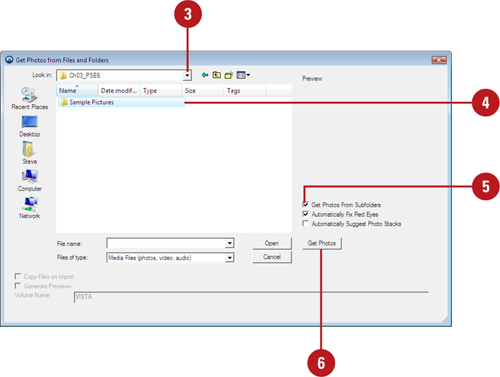
- Navigate to the folder location with the files you want to import into the Organizer.
- Select the folder or the specific photo files you want to import.
- If you want to get photo files from subfolders, select the Get Photos From Subfolders check box.
- Click Get Photos.
Timesaver
Drag the photos from an Explorer window into the Organizer. Depending on the number of photos and the speed of the computer, you might need to wait for the operation to complete.
- In the Organizer, click the Display button on the Shortcuts bar, and then click Folder Location.
- In the folder hierarchy panel, display the folder with the files you want to import.
- Right-click the folder, and then click Add Unmanaged Files to Catalog.
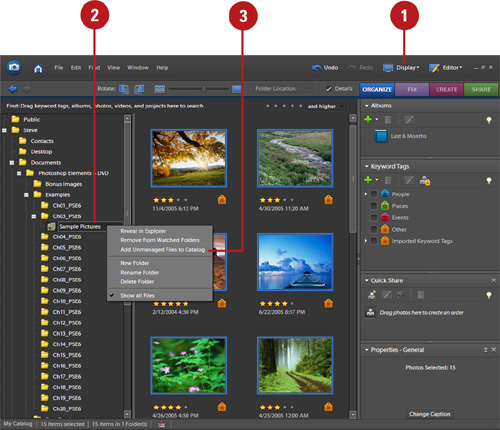
- Click OK.
When files are imported, the folder’s icon changes from an Unmanaged Folder icon to a Managed Folder icon.
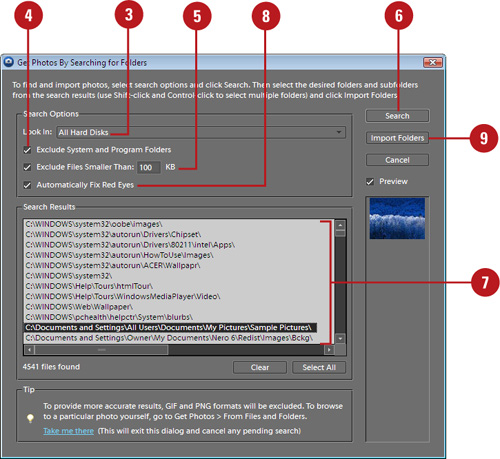
Instead of manually looking for photos and other media files to import into the Organizer, you can have Photoshop Elements search your computer and then automatically import them. You can select options to exclude system and program folders, which typically don’t contain photos, and exclude small files, which typically are not large enough to be photos. These options help speed up the search. As you import files into the Organizer, you can have Photoshop Elements automatically fix red eye on any photos that need it.
- In the Organizer, click the File menu, and then point to Get Photos and Videos.
- Click By Searching.
- Click the Look In list arrow, and then select the location where you want to perform the search.
- Select the Exclude System and Program Folders check box to exclude folders from the search that typically don’t contain photos.
- Select the Exclude Files Smaller Than xxx KB check box to exclude small files that typically are not large enough to be photos.
You can specify the size you want in kilobytes.
- Click Search.
- Select the folders with the photos you want to import. Press Ctrl to select more than one folder.
- Select the Automatically Fix Red Eyes check box to automatically correct red eyes for photos that need it when you import the files.
- Click Import Folders.
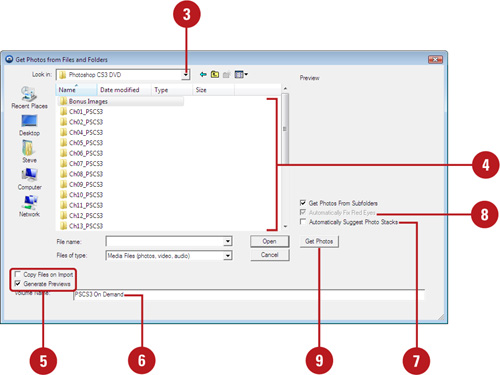
When you get photos from a CD, DVD, or other external device, such as a scanner, digital camera, card reader, or mobile phone, Photoshop Elements first copies the photos to a folder on your computer, and then creates a link to the file. When you get photos from a CD or DVD, you can choose to make full- or low-resolution copies of the files. Full-resolution copies are best for editing, while low-resolution are best for previewing photos and saving disk space.
- In the Organizer, click the File menu, and then point to Get Photos and Videos.
- Click From Files and Folders.
- Navigate to the CD or DVD drive with the files you want to import into the Organizer.
- Select the photos you want to import into the Organizer. Press Ctrl to select more than one photo file.
- Click the Copy files on import option to make full-resolution copies of the photos, or click the Generate previews option to make low-resolution copies of the photos.
- If you’re keeping a master photo offline, type a volume name for the CD or DVD and label the disc to make it easier to find and download the master when needed.
- Select the Automatically Suggest Photo Stacks check box to group visually similar photos together into stacks upon your approval.
- Select the Automatically Fix Red Eyes check box to automatically correct red eyes for photos that need it when you import the files.
- Click Get Photos.
If you have a digital camera attached to your computer with a cable, you can copy photos directly from the camera to a folder on your hard disk and then import them into the Organizer. Many digital cameras store taken images on a card disk, which you can remove from your camera and insert into a card reader attached or built-in to your computer. The card disk works like a removable drive. You can copy photos from the card disk to a folder on your hard disk and then import them into the Organizer. When you download photos from a camera, card reader, or mobile phone, Photoshop Elements uses the Adobe Photo Downloader (APD) dialog box. You can set options to automatically use the APD upon device connection in Camera or Card Reader preferences.
- Connect your camera or insert the card disk into your card reader already attached to your computer.
If the Adobe Photo Downloader dialog box appears, skip to Step 3. The dialog box automatically appears when an option is set in Camera or Card Reader preferences.
- In the Organizer, click the File menu, point to Get Photos and Videos, and then click From Camera or Card Reader.
- Click Browse, and then specify the folder location where you want to import the photos.
- Navigate to the location with the video file you want to import, and then click OK.
- Click the Create Subfolder(s) list arrow, and then select a format or Custom Name to create subfolder names.
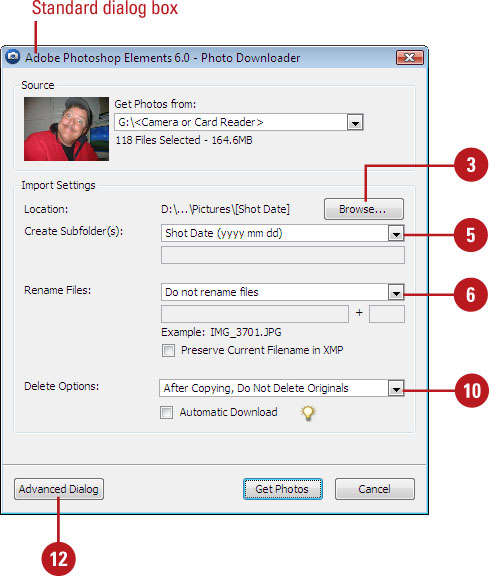
- Click the Rename Files list arrow, and then select a format or Custom Name to rename the files.
- If necessary, type the filename and starting number for renaming filenames with sequential numbers at the end.
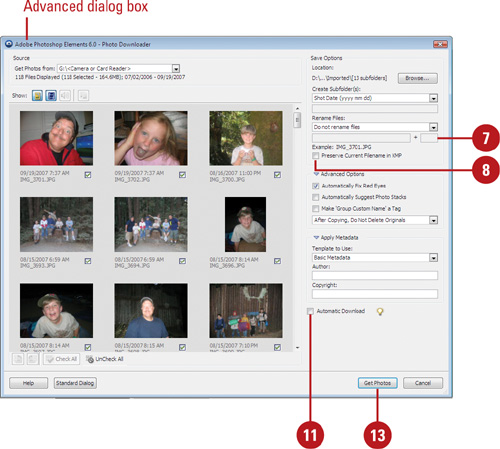
- Select the Preserve Current Filename in XMP to use the current filename as the filename stored in the photo’s metadata.
- Select the Open Organizer When Finished check box to immediately import the photos into the Organizer. When you deselect the check box, the images are imported the next time you start the Organizer.
 Click the Delete Options list arrow, and then select the option you want for deleting photos.
 Select the Automatic Download check box to import photos from the connected device the next time you use it with the settings you’ve selected as the defaults.
 Click Advanced Dialog to expand the dialog box, select individual photos you want to import, and select the advanced options you want for tags and metadata.
 Click Get Photos.
If the photos contain metadata, the Import Attached Tags dialog box appears, where you can specify the options you want.
See Also
See “Setting Camera or Card Reader Preferences” on page 32 for information on setting options to import photos.
If you have a scanner attached to your computer with a cable, you can scan photos directly from the scanner to a folder on your hard disk and then import them into the Organizer. When you get photos from a scanner, you need to follow the scanning instructions provided by the Scanner manufacturer to complete each photo scan. As you import files into the Organizer, you can have Photoshop Elements automatically fix red eye on any photos that need it.
- In the Organizer, click the File menu, and then point to Get Photos and Videos.
- Click From Scanner.
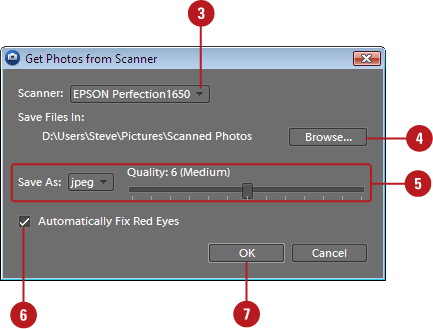
- Click the Scanner list arrow, and then select a scanner attached to your computer or network.
- To select a location for scanner files, click Browse, select a folder, and then click OK.
- Click the Save As list arrow, and then select the file type in which to save scanner files and then set a related quality level, if available.
The higher the quality level, the higher the file size.
- Select the Automatically Fix Red Eyes check box to automatically correct red eyes for photos that need it when you import the files.
- Click OK.
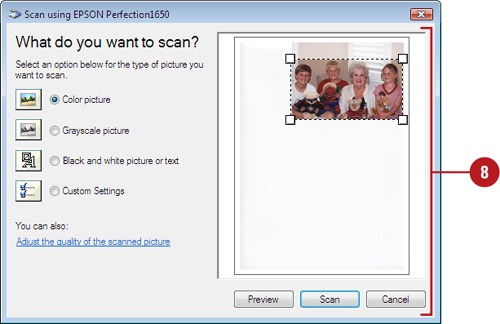
- Select the scanning options you want from the ones available from your scanner, and then scan your photo.
See Also
See “Setting Scanner Preferences” on page 34 for information on setting default options to import photos.
If you have a Nokia phone, Photoshop Elements recognizes the phone when you connect it to your computer with a cable. Instead of using this task, you should use the instructions for Getting Photos from a Camera or Card Reader. For all other mobile phones, you can use the From Mobile Phone command. The first time you import files from your mobile phone, you need to specify a folder on your computer to store the downloaded photos, which Photoshop Elements automatically makes a watch folder, so it’s easier for the Organizer to detect and import mobile photos into the catalog.
- In the Organizer, click the File menu, and then point to Get Photos and Videos.
- Click From Mobile Phone.
On secondary use, Photoshop Elements imports the available photos from the specified folder for mobile phone photos.
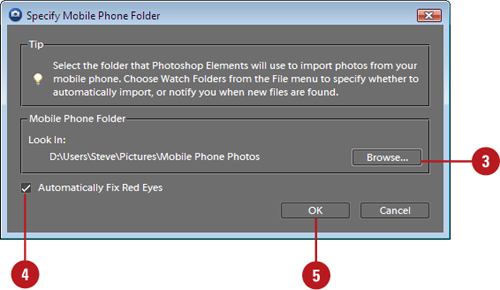
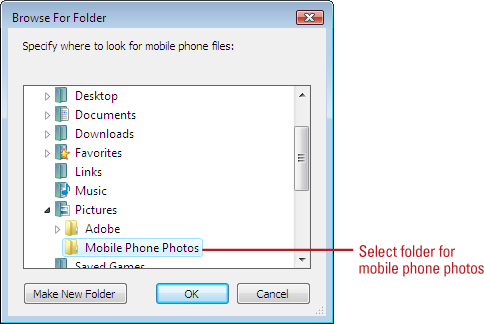
- On first use, click Browse, specify and select the folder location (such as Mobile Phone Photos) where you want to import the photos, and then click OK.
- Select the Automatically Fix Red Eyes check box to automatically correct red eyes for photos that need it when you import the files.
- Click OK.
See Also
See “Getting Photos from a Camera or Card Reader” on page 50 for information on getting photos from a Nokia phone.
See “Setting Mobile Phone Preferences” on page 37 for information on setting options to import photos.
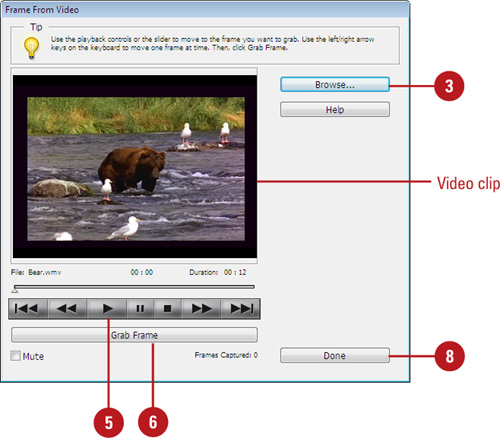
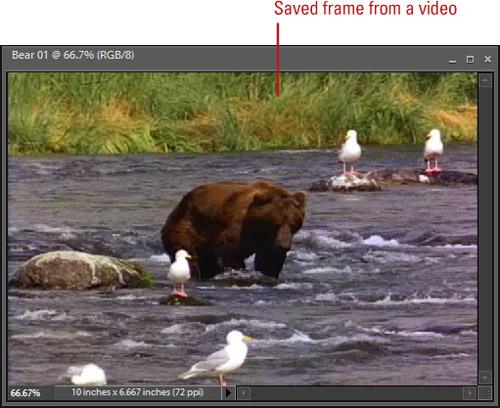
If you have a digital video in a file format that Photoshop Elements can recognize, such as ASF, AVI, MPEG, M1V, and WMV, you can open it in the Editor, play the video in the Frame From Video dialog box and then capture frames as individual photo files. The individual photo files are saved with the name of the video file and a number. For example, videoname01, videoname02, videoname03, etc. In addition to Photoshop Elements, you also need to install the latest version of standard video software, such as QuickTime or Windows Media Player, which you can get for free online at www.apple.com and www.microsoft.com.
- In the Editor, click the File menu, and then point to Import.
- Click Frame From Video.
- Click Browse.
- Navigate to the location with the video file you want to import, select the file, and then click Open.
- Click the Play button to start the video, and then pause the video where you want to capture the frame.
- To capture a frame as the video runs, click the Grab Frame button or press the spacebar.
- Use the forward and backward arrows to display the next screen you want to capture.
- When you’re finished, click Done.
- Click the File menu, and then click Save to save each screen capture file to a folder.
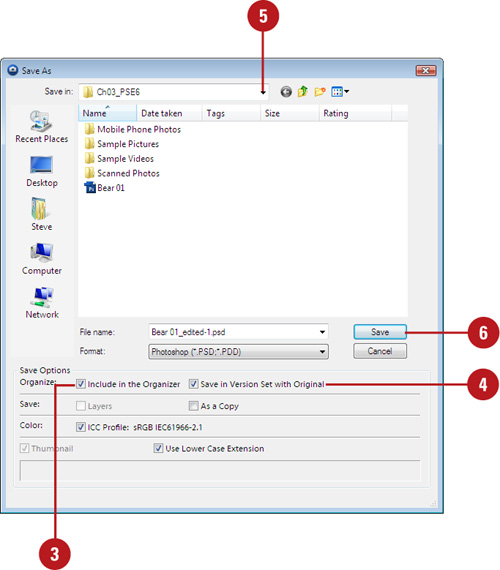
If you open or import a file in the Editor that is not currently included in the catalog, you can add the photo to the Organizer while you save the file in the Editor. All you need to do is select the Include In The Organizer check box in the Save As dialog box while you save the photo. The next time you open the Organizer, the saved photos appears in the catalog for use in the Organizer.
- In the Editor, open or import the photo file you want to add to the Organizer.
- Click the File menu, and then click Save As.
- Select the Include in the Organizer check box.
- Select the Save in Version Set with Original check box to save the current version with the original version.
- Navigate to the folder location where you want to save the photo.
- Click Save.
- If prompted, click OK to save the current version with the original version in a version set.

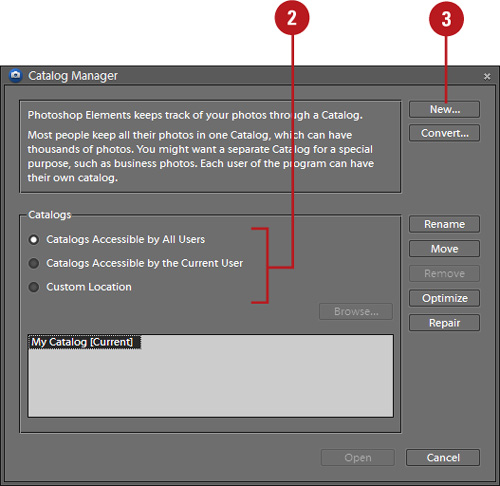
You can create a new catalog or open an existing one by using the Catalog Manager. Typically, users create a single catalog for all the media files on their computer when you start Photoshop Elements for the first time. However, you can create more than one for different purposes, such as one catalog for work-related photos and media files, and another one for personal use. When you create a new catalog, you can create one that is accessible by all users on your computer or just the current user logged on. If you have more than one catalog on your computer, you can switch between them at any time. When you open the Organizer, the last opened catalog appears.
- In the Organizer, click the File menu, and then click Catalog.
- Select one of the catalog options:
Catalogs Accessible by All Users. Creates a catalog for all users.
Catalogs Accessible by the Current User. Creates a catalog for only the current user.
Custom Location. Creates a catalog in the specified location.
- Click New.
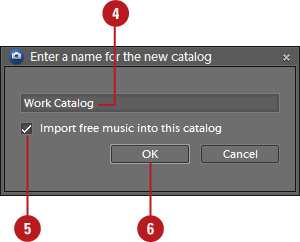
- Type a name for the new catalog.
- Select the Import free music into this catalog check box to include free music.
- Click OK.
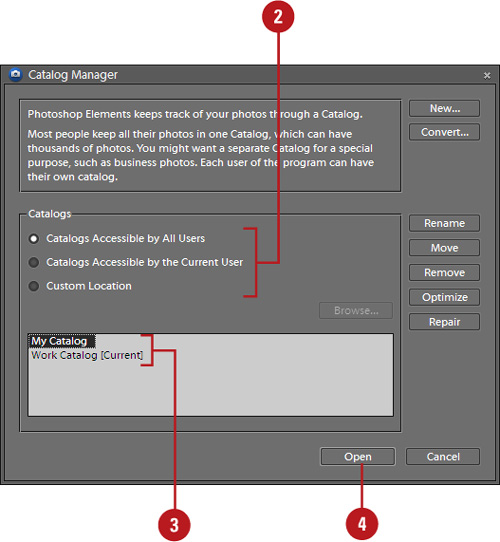
- In the Organizer, click the File menu, and then click Catalog.
- Select one of the catalog options to display the catalog you want to open:
Catalogs Accessible by All Users. Displays catalogs for all users.
Catalogs Accessible by the Current User. Displays catalogs for only the current user.
Custom Location. Displays catalogs in the specified location.
- Select the catalog you want to open from the list.
- Click Open.
The Catalog Manager makes it easy to work with the different catalogs you may have on your computer. In the Catalog Manager, catalogs are organized in different ways: accessible by all users, accessible by the current user, and custom location. When you select one of these options, the catalogs related with the option appear below in the list. After you select a catalog, you can use the buttons in the Catalog Manager to rename, move, remove, optimize (re-builds data for efficiency), and repair (corrects structure errors) it for better use.
- In the Organizer, click the File menu, and then click Catalog.
- Select one of the catalog options:
Catalogs Accessible by All Users. Displays catalogs for all users.
Catalogs Accessible by the Current User. Displays catalogs for only the current user.
Custom Location. Displays catalogs in the specified location.
- Select one of the catalog options:
Rename. Click Rename, type a name, and then click OK.
Move. Click Move, select a catalog option to switch to, and then click OK.
Remove. Click Remove, and then click Yes to confirm.
Optimize. Click Optimize to optimize the catalog, and then click OK upon completion.
Repair. Click Repair to repair the catalog. If no problems, click OK or Repair Anyway.
Convert. Click Convert to convert catalogs with previous versions of Photoshop Elements.
- Click Cancel.

Because the photos and other media files in the Organizer are links to the actual files, if you move the files on your computer, the Organizer will lose the link location and need to reconnect to it. Instead of moving files in an Explorer window, you should move files in the Organizer using the Move command on the File menu. The Move command updates the links in the catalog, so links are not lost.
- In the Organizer, select one or more files you want to move.
- Click the File menu, and then click Move.
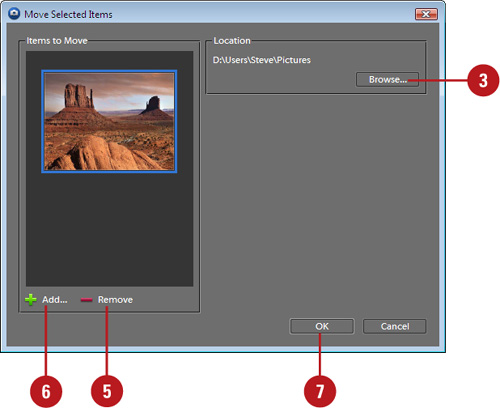
- Click Browse.
- Navigate to the new location for the files, select the folder, and then click OK.
- If you want to remove files from the catalog, select them, and then click the Remove button.
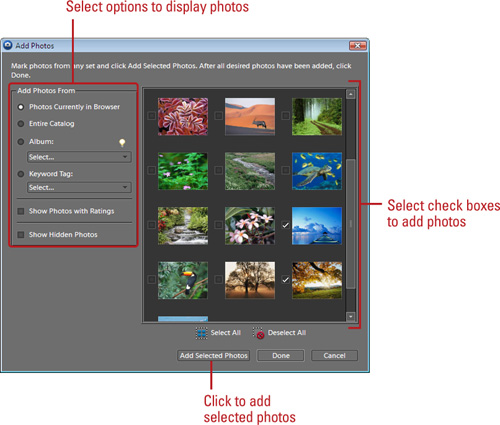
- If you want to add files from the catalog, click the Add button, use the Add Photos dialog box to select the photos you want, click Add Selected Photos, and then click Done.
- Click OK.
Did You Know?
You can duplicate a file in the catalog. In the Organizer (Photo Browser), elect a file you want to duplicate, click the File menu, click Duplicate. The file name is appended with “-copy.”
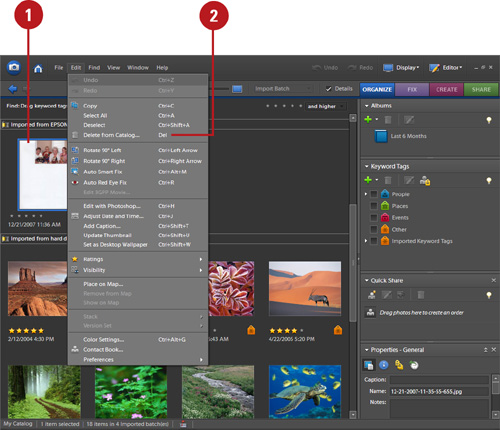
If you no longer use or want to have a file in the catalog, you can delete it. You have the choice to delete the file from the catalog and leave the original file on your computer, or delete them both. When you delete the original file, it’s permanently removed from your computer, which you cannot undo.
- In the Organizer, select one or more files in the Photo Browser or one file in Date view you want to remove.
- Click the Edit menu, and then click Delete from Catalog or Delete Selected Items from Catalog.
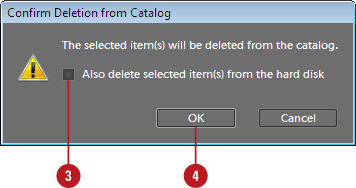
- If you want to delete the files from your computer, select the Also delete selected item(s) from the hard disk check box.
- Click OK.
- If prompted to delete projects, click Yes or No.
Did You Know?
You can rename a file in the catalog. Select a file in the Photo Browser, click the File menu, click Rename, type a name, and then click OK.
You can also rename a batch of files, which renames all the files with the name of the first file and adds a number at the end in successive order. To rename a batch of files, select the files you want to rename in the Photo Browser, click the File menu, click Rename, type a name for the common base, and then click OK.
After you have worked with photos and media files in the Organizer for a while, it’s important to backup the catalog, so you don’t lose any information if you have problems with your computer. You can backup the currently opened catalog to a CD, DVD, or hard drive location. Photoshop Elements uses a wizard to make it easy to perform a backup.
- In the Organizer, open the catalog you want to backup.
If prompted, click Reconnect to locate missing or moved files.
- Click the File menu, and then click Backup Catalog to CD, DVD or Hard Drive.
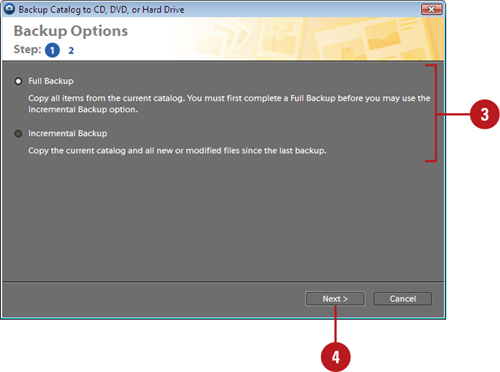
- On first use, click the Full Backup option. If you have already performed a full backup, click the Incremental Backup option.
- Click Next.
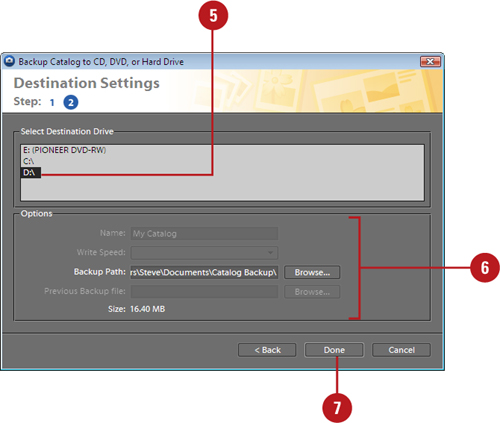
- Select a destination drive.
- Specify any of the following options that apply to the selected destination:
Name. Specify a backup name.
Write Speed. Select a speed to write a CD or DVD.
Backup Path. Click Browse to select a location.
Previous Backup File. Click Browse to select a file.
- Click Done to perform the backup.
- Click OK upon completion.
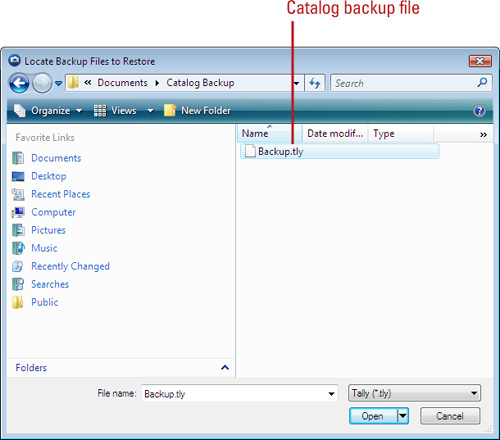
After you have backed up a catalog, you can restore it at any time. Before you can restore a catalog backup, you need to select the backup file with the .tly extension you want to restore from the location where you stored it. You can restore a catalog backup in the original location to replace the current one or in a new location.
- In the Organizer, open the catalog you want to backup.
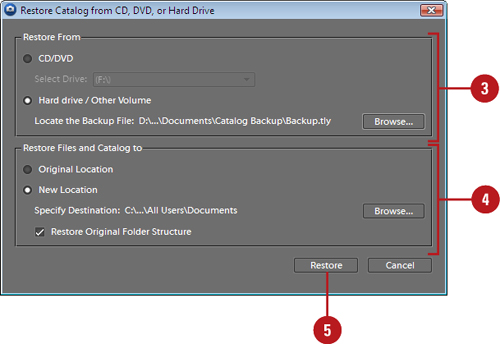
- Click the File menu, and then click Restore Catalog from CD, DVD or Hard Drive.
- Select the location with the backup catalog you want to restore:
CD/DVD. Click the CD/DVD option, click the Select Drive list arrow, and then select a CD or DVD drive.
Hard drive. Click the Hard drive/Other Volume option, click Browse, navigate to the folder with the catalog backup, select the catalog backup file (with the .tly extension), and then click Open.
- Select the location where you want to restore the backup catalog:
Original Location. Click to restore the catalog backup to the original location replacing the current catalog.
New Location. Click to specify a new location to restore the catalog backup. Click Browse to select a folder. Select the Restore Original Folder Structure check box.
- Click Restore.
- Click OK upon completion.