Elongating the Figure using Verticals, Horizontals, and Diagonals
The phrase “from head to toe” is appropriate in discussing the verticals, horizontals, and diagonals in the figure. In this chapter you will learn how to recognize these characteristics in the figure and how to use them to enable you to draw a graceful figure over which the eye will move easily. This is an important characteristic of lifestyle illustration, especially when drawing a figure to show clothing to best effect.
In every pose you will find a combination of verticals, horizontals, and diagonals that you can use to stylize and elongate the figure. Most lifestyle and fashion figures are stylized and elongated because this is accepted as the best way to show off the clothes—on the same tall figures that dominate the catwalk. Having said that, in today’s lifestyle market all sizes and variations are valid and you may not always have to elongate, or only to a very subtle degree. For this reason, I tend not to follow the rigid nine-, ten-, or twelve-head rule in elongating the figure but instead practice a more fluid method.
The verticals, horizontals, and diagonals inherent in the figure are an important feature to recognize and you will find yourself continually referring to and using them throughout the remainder of the book. In the previous chapter we looked at opposition and at how push and pull could be used to create a more dynamic drawing. There we touched on the idea of using the verticals, horizontals, and diagonals to accomplish this goal. In this chapter we take things further forward; you will learn which lines to accentuate, which to push and pull, and which to use selectively, minimally, or eliminate altogether. You will also find that exaggeration is a key element in elongating and stylizing the figure.
The eye usually observes from head to toe when analyzing a figure. Accentuating the vertical lines allows the eye to move quickly through the figure. This can be used as a tool to elongate and stylize the figure as well as anchoring the figure in a given space. (We will discuss the concept of anchoring the figure in more detail in Chapter 5.)
Elongating the figure is best done by focusing on the areas that allow for elongation naturally: primarily the neck, arms, and legs.
Preparation
For this exercise, the following supplies are necessary:
One pad of 18 x 24in (A2) white all-purpose paper or comparable
Charcoal pencils—hard to medium
Kneaded eraser

Directions
Starting from the head, and using the balancing-act method, begin to draw the figure, accentuating the vertical lines and lightening up on the horizontal lines. Consider using selectivity to communicate the horizontal lines or eliminate them altogether.
As you work your way down the figure, concentrate on pushing the verticals of the neck, arms, and legs to elongate them. To elongate an area, just extend the actual line by ⅛ ¼ in or by a few millimeters.
When you are drawing from the neck to the shoulders, allow your line to nudge forward a bit depending on the size of your drawing.
Then, using push to exaggerate the length a bit more, do the same with the upper arm as it reaches the elbow and continue with the forearm before it hits the wrist.
From the waist, begin to elongate the hips and continue with the legs.
Elongate accessories such as a scarf. You can also use these to emphasize movement and to add drama.
It will take time for you to develop the habit of elongating the figure, but eventually it will become second nature.
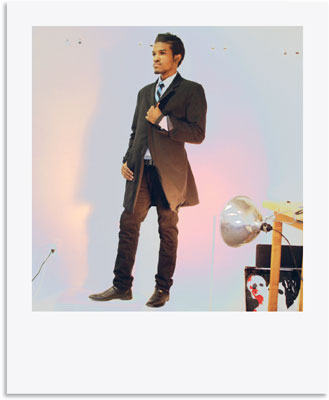
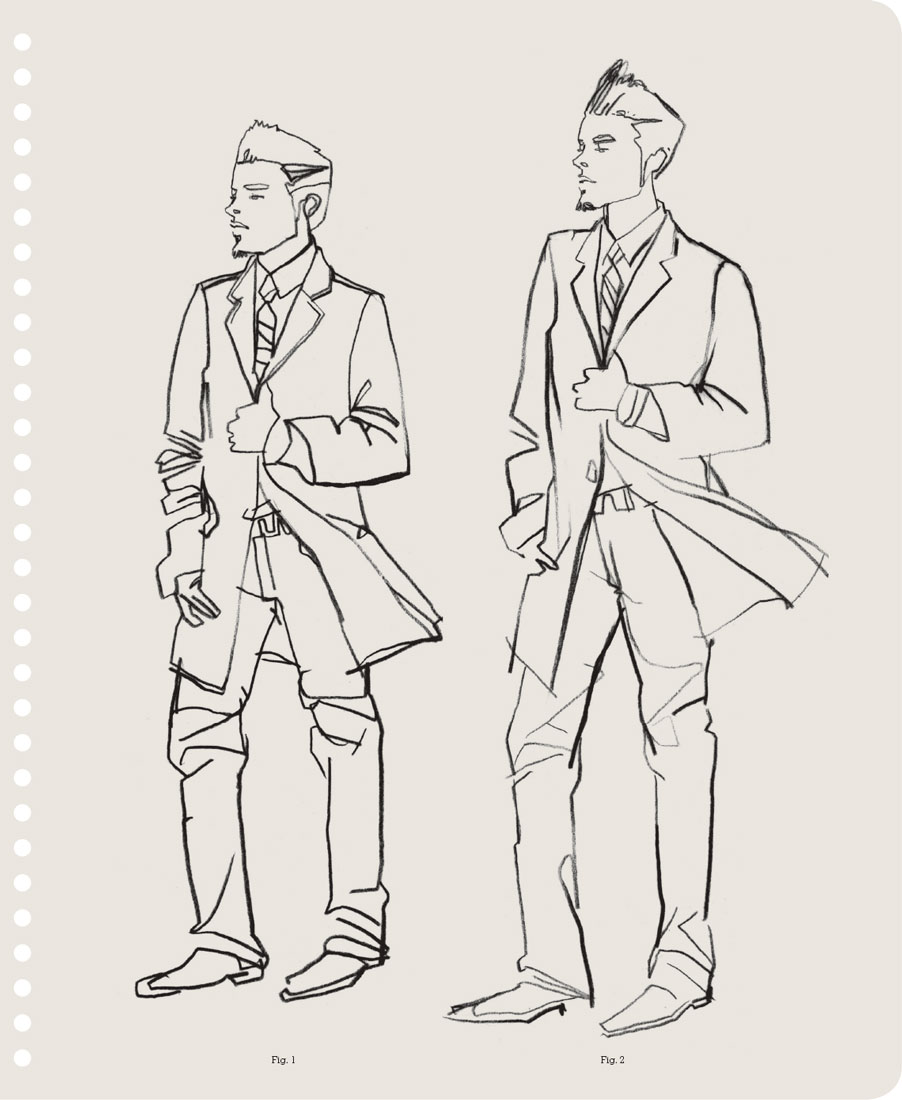
Compare the differences between Figure 1 and Figure 2. The differences are very subtle, but you should notice the following:
Figure 1 is devoid of selectivity. There are many horizontal lines, such as the hair, jawline, and the creases in the fabric at the elbows and knees, and there is no variation between the horizontal and vertical lines. Figure 2, on the other hand, was drawn with selectivity and the idea of accentuating the vertical lines to create a flow through the figure as well as elongating the figure. The importance of the horizontals has been eliminated, while the line of the hair has been pushed and the angle and length of the neck, hips, and legs exaggerated. Opposition has been used to vary the difference between the shoulders and the hemline of the coat and to accentuate movement.
Think of the movement of the eye as it follows along the shape of a figure composed entirely of horizontal lines as compared to one composed solely of vertical lines. In most cases, the eye will move and flow more rapidly through the figure composed entirely of vertical lines as opposed to one of only horizontal lines. Horizontals that are strong in line and shape break up the figure and tend to arrest the eye and stop the flow of movement.
In this exercise, think how your use of line will allow the eye to move over the surface. Continue to practice selectivity, eliminating the horizontals, leaving only those that can be considered as rest stops or areas that will complement the verticals.
Preparation
For this exercise, the following supplies are necessary:
One pad of 18 x 24in (A2) white all-purpose paper or comparable
Charcoal pencils—hard to medium
Kneaded eraser

Directions
Proceed to communicate the figure in line using the balancing act, as in the vertical exercise.
Focus on selecting and eliminating the horizontals, and use a lighter line for those that you do decide to include.
At the same time, continue to accentuate the lines for the verticals while elongating the figure at the neck, arms, and legs.
Begin to push the diagonals to create a more interesting figure, such as in the slant of the head, the shoulders, arms, waist, and hips.
Use vertical or diagonal fluid lines in the clothing whenever possible to give the figure some movement.
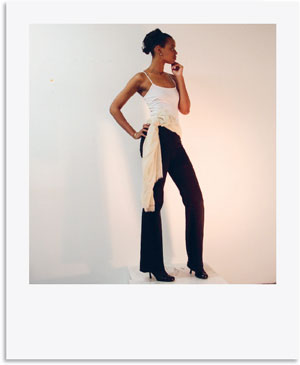
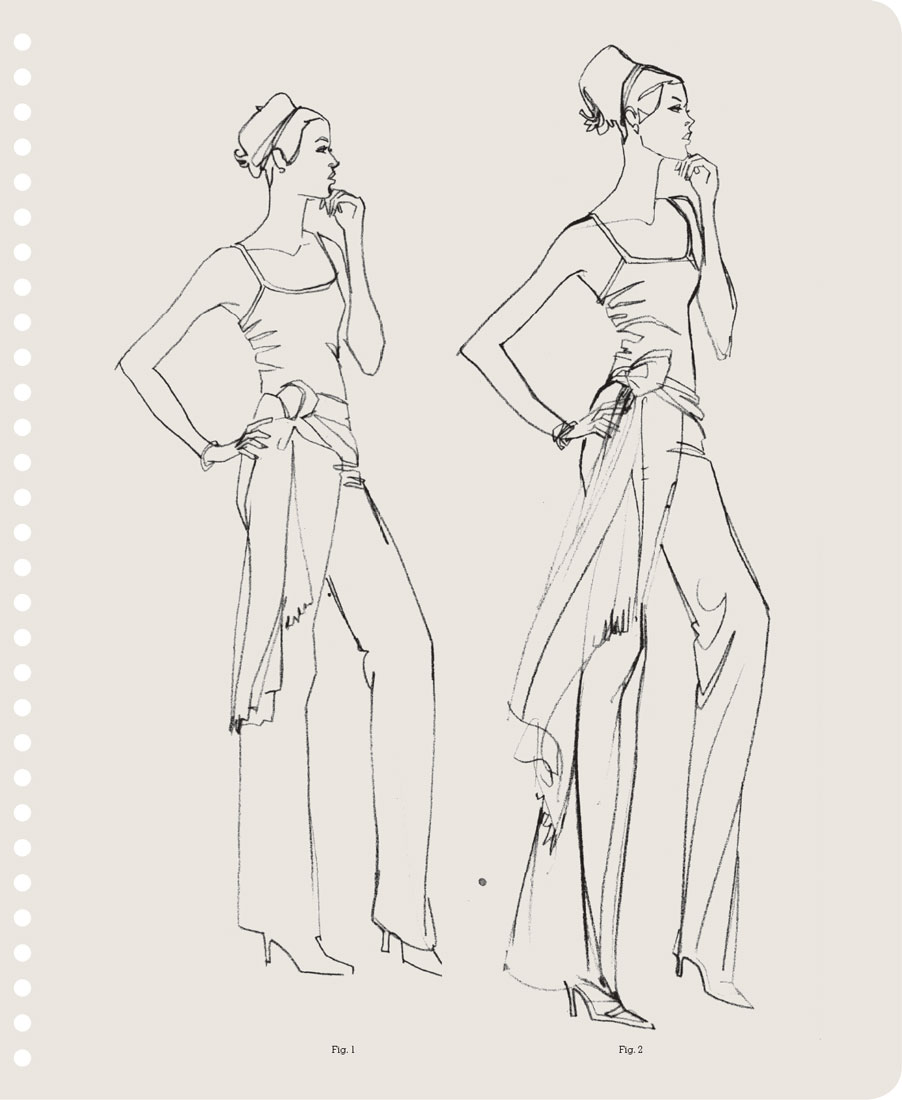
Compare the differences between Figure 1 and Figure 2. Again, you will find these are subtle.
The pose is very straightforward in both Figure 1 and Figure 2, but in Figure 1 the drawing was made without much consideration to observing the verticals and horizontals; the figure looks a bit squat and stiff compared with the exaggerated version in Figure 2.
In Figure 2, opposition was used to select areas of the hairstyle to create a more interesting look. Pushing the slant of the head and lightening up on the features allows for a more attractive face. The neck is also elongated and the diagonals of the scarf are exaggerated. This plays well against the clean lines of the torso. The fold lines at the elbow and wrist have a lighter line quality. The sash at the waist has been angled to complement the diagonals of the shoulders and the diagonal of the hemline has been similarly pushed. The line of the left-hand leg has been exaggerated to complement that of the supporting leg.
As you have probably noticed at this point, diagonals were incorporated into each of the previous exercises. A diagonal is one of the most important elements to incorporate into a drawing. Using the slants and angles of the figure will make your drawing dynamic and create a flow and movement to allow the eye to revolve around the drawing.
Try exaggerating the diagonals in the slant of the shoulders, arms, waist, and hips. These diagonals allow for an interesting composition and play of opposition and exaggeration within the strict vertical of the figure.
Preparation
For this exercise, the following supplies are necessary:
One pad of 18 x 24in (A2) white all-purpose paper or comparable
Charcoal pencils—hard to medium
Kneaded eraser

Directions
Again using the balancing-act method, focus on finding the diagonals in the figure and exaggerate these angles.
Use the verticals to elongate the figure and be selective when it comes to the horizontals.
Give yourself poetic license to push and pull areas of the figure that would create more exaggerated diagonals or verticals and allow this license to also elongate the figure.
Compare the differences between Figure 1 and Figure 2. Note in Figure 2 the exaggeration of the hair, the angle of the eyebrow that follows the hairline, the shoulders, the pushing of the torso in a more diagonal direction, and the waist, sash, legs, and feet.
The apparent simplicity of this watercolor illustration by Mats Gustafson is, upon closer observation, revealed to be a selective series of shapes: the large and small shapes and dark and light values work together to form a sublime composition.


